Let’s consider the example that you have a house near the beach and you want to rent it. The house has 3 rooms of the same type, a shared kitchen and bathroom. You want to rent it, but you’re happy with renting either single rooms or the whole house.
So, what’s the best way to set it up with your booking plugin?
We will need 3 resources and 2 products (one for the room, one for the house).
First of all, we will have to set up our resources. As the house is made of 3 rooms, each of which can be rented individually, we need to create one resource for each room.
So, let’s start with creating the resources first.
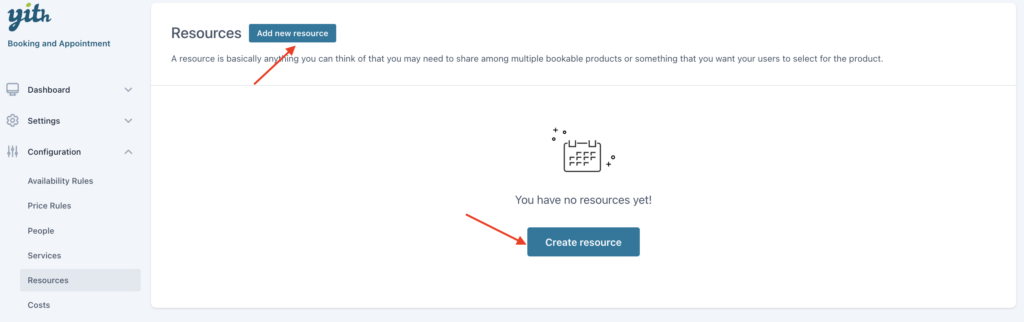
Resources
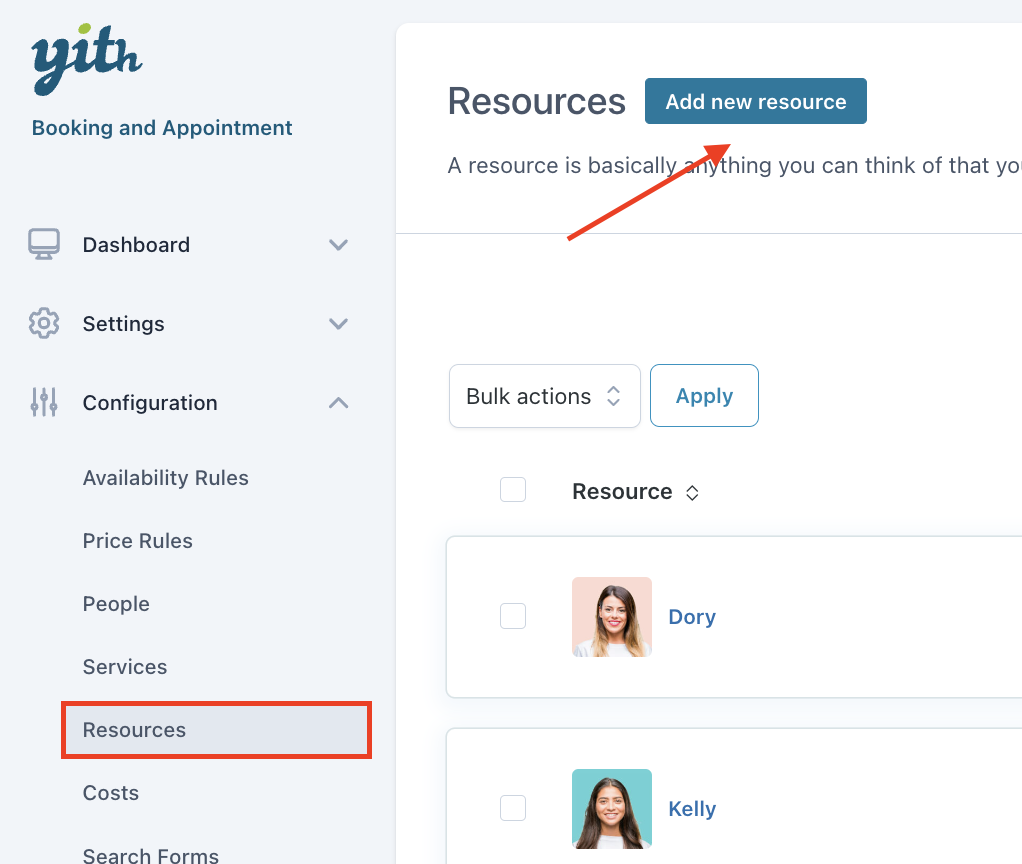
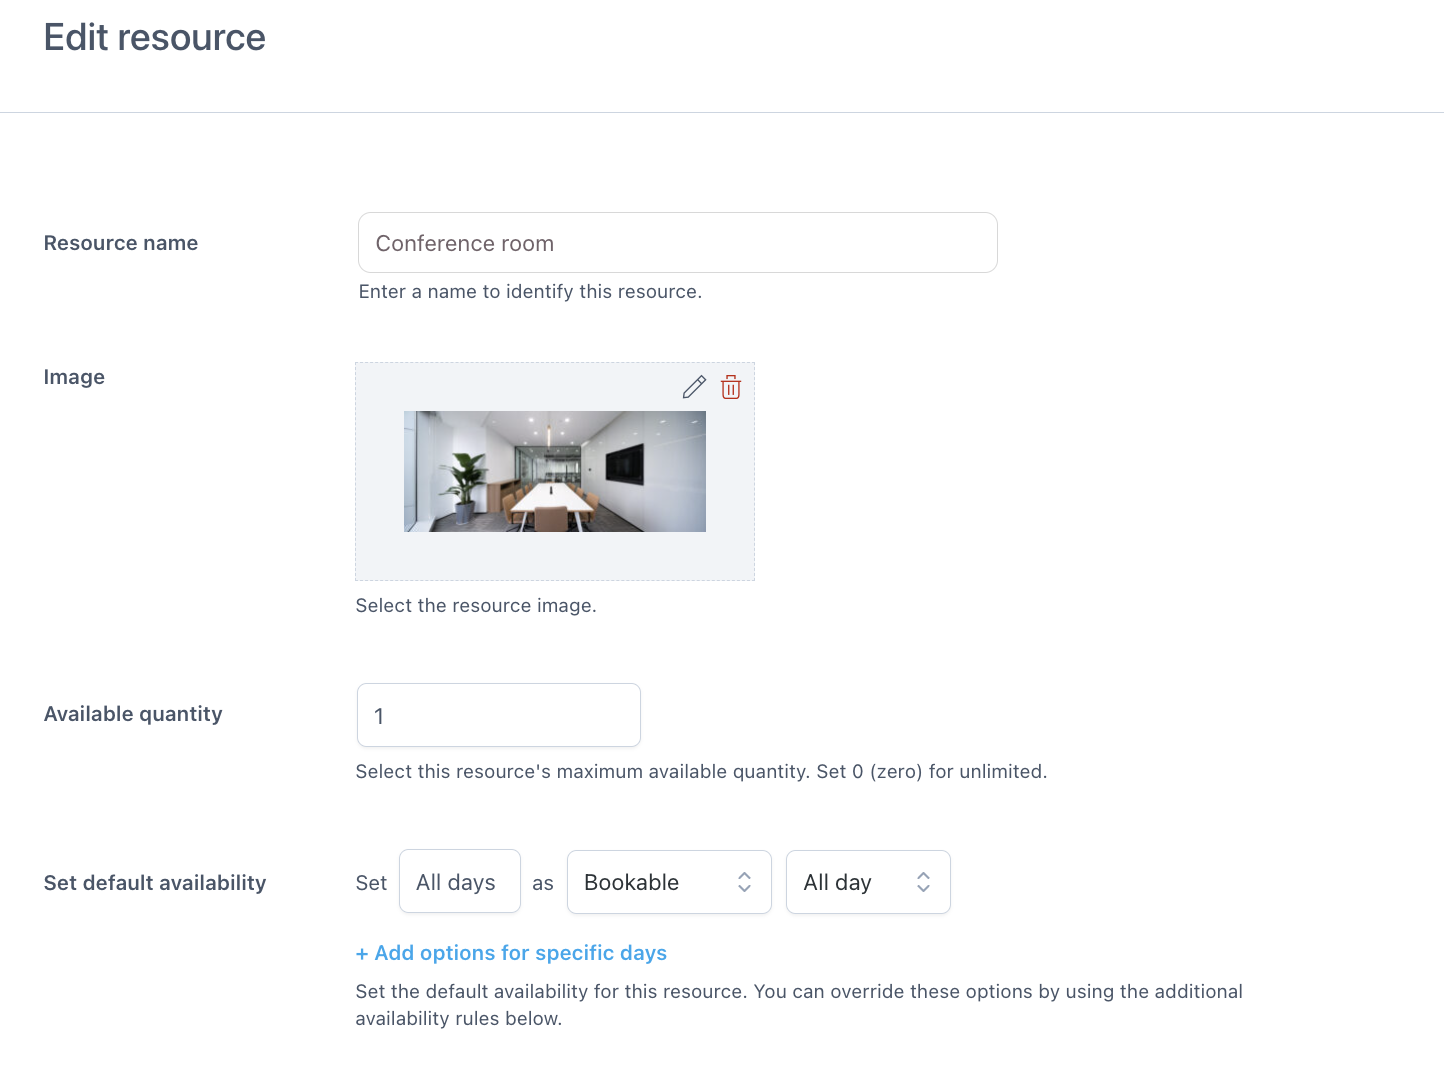
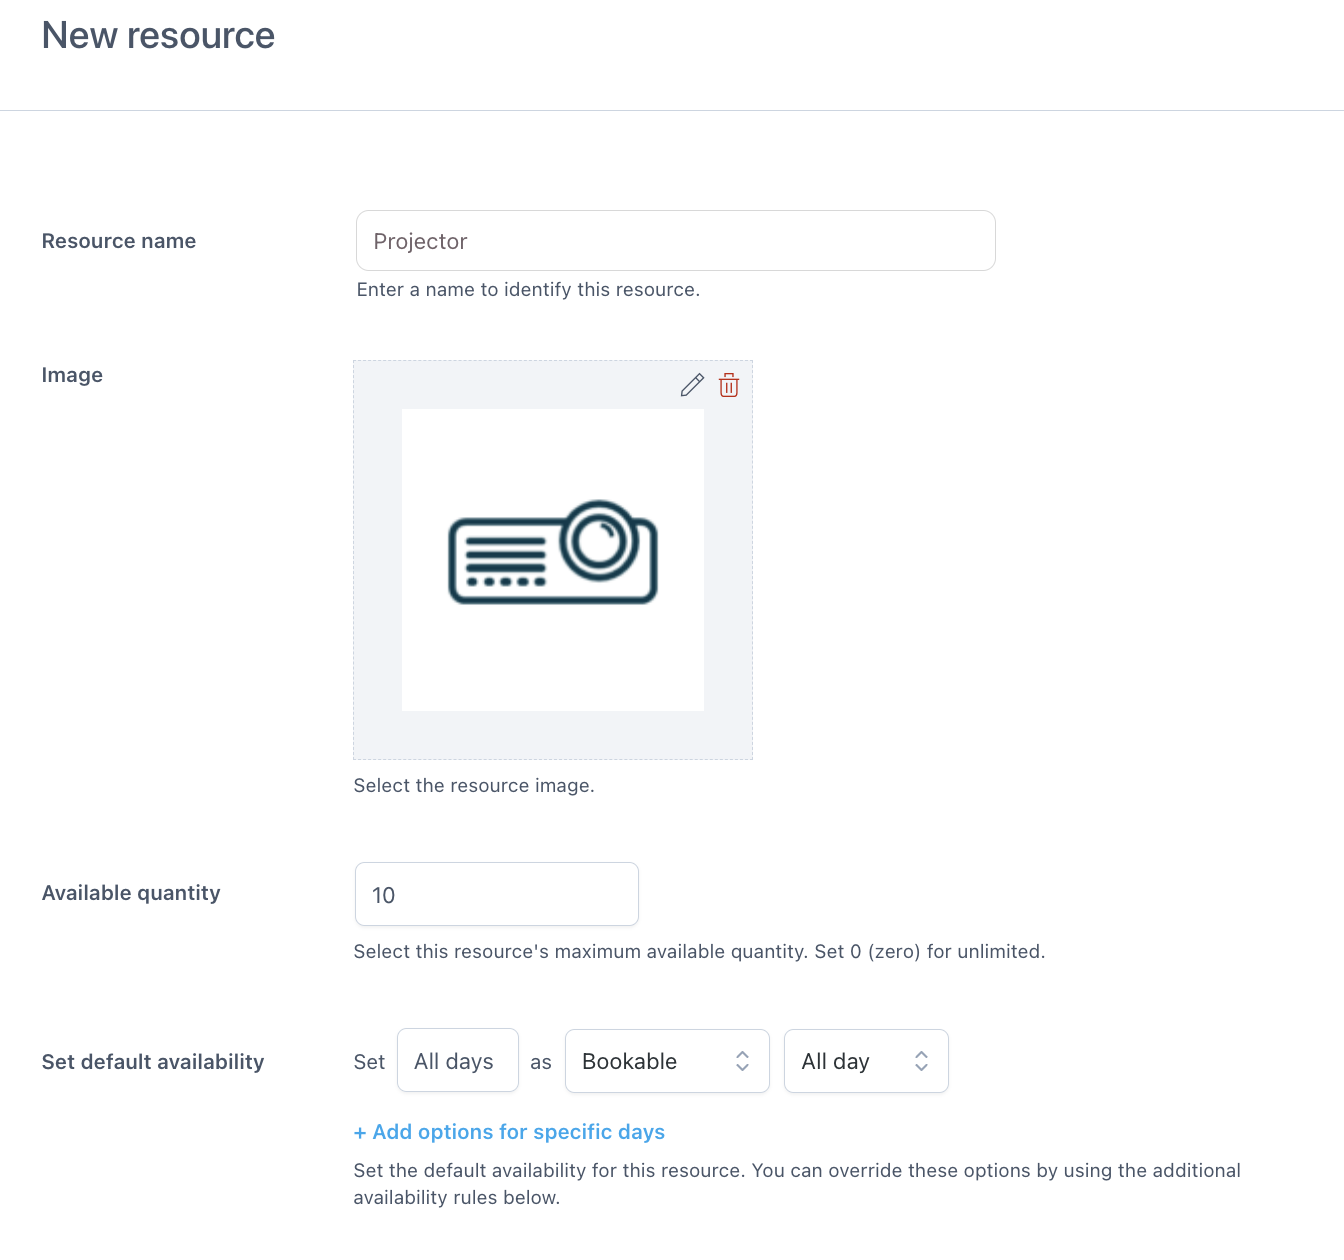
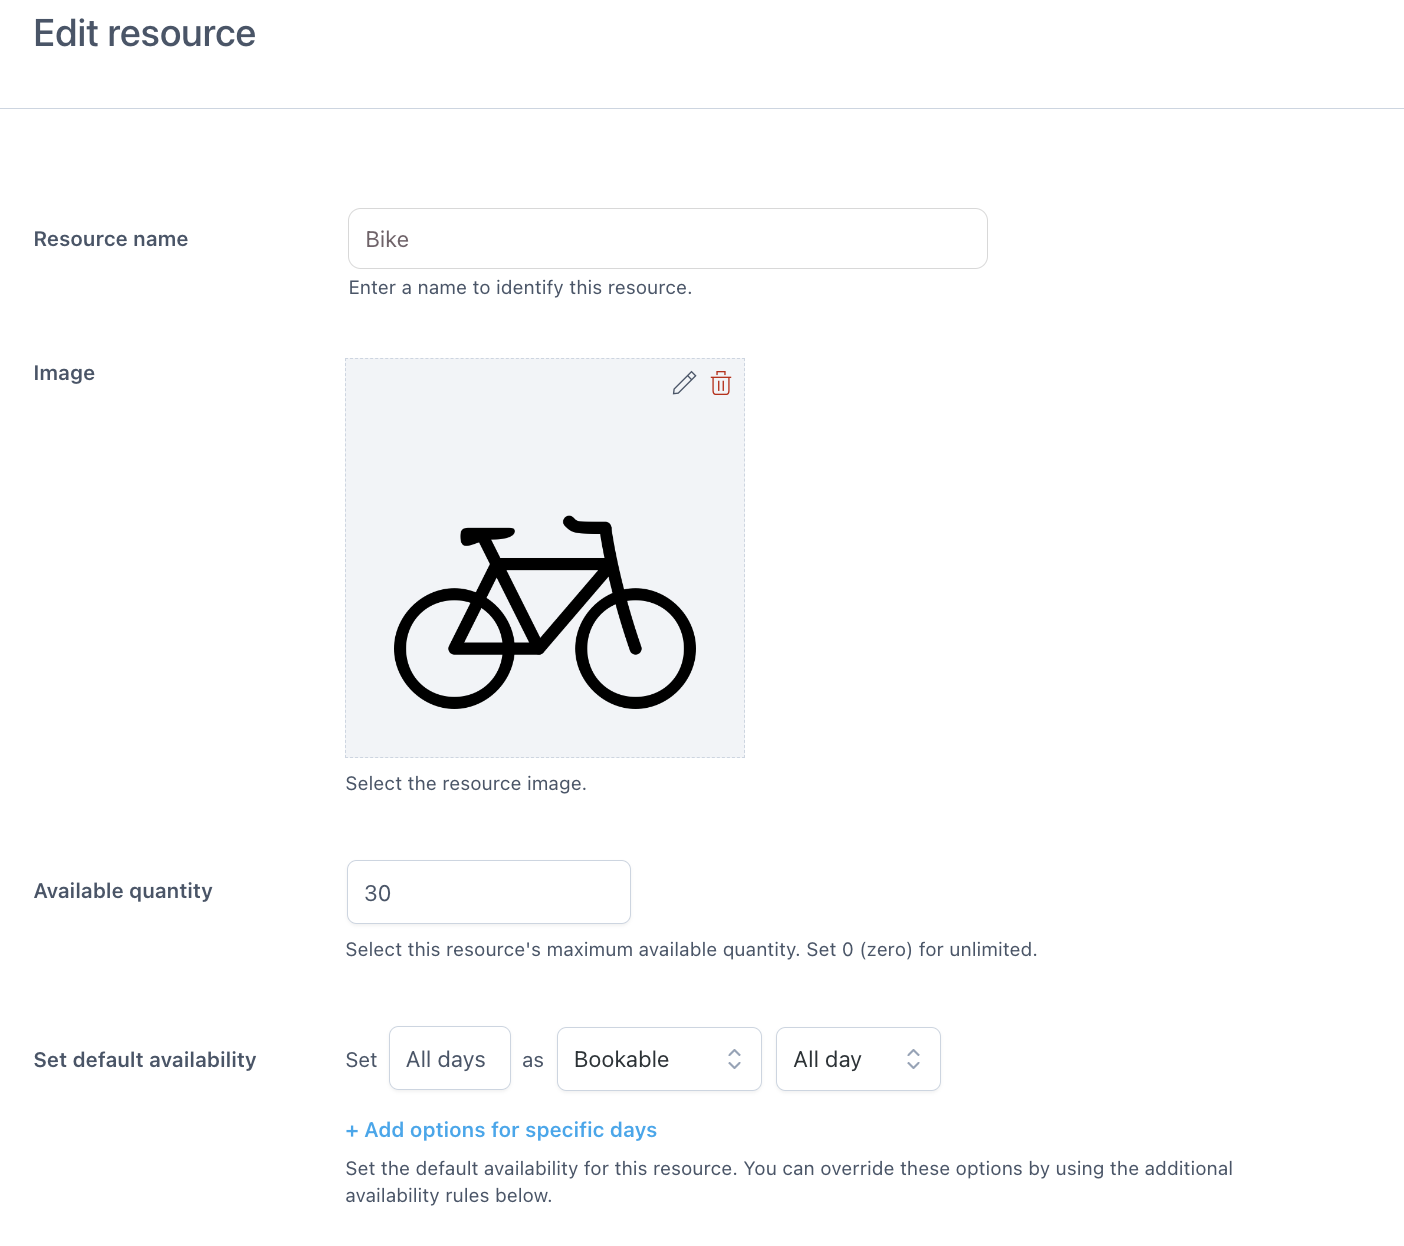
Go to YITH > Booking > Configuration > Resource and create a new resource.

We will call it Room 1, set an image, and set the availability 1.

We will not configure specific availability rules for this resource, because we will do that from the product settings.
Then, save and our resource is ready.
We will repeat the process for the other two rooms, Room 2 and Room 3.

Now, we can configure the two bookable products.
Product 1 – Rent a room
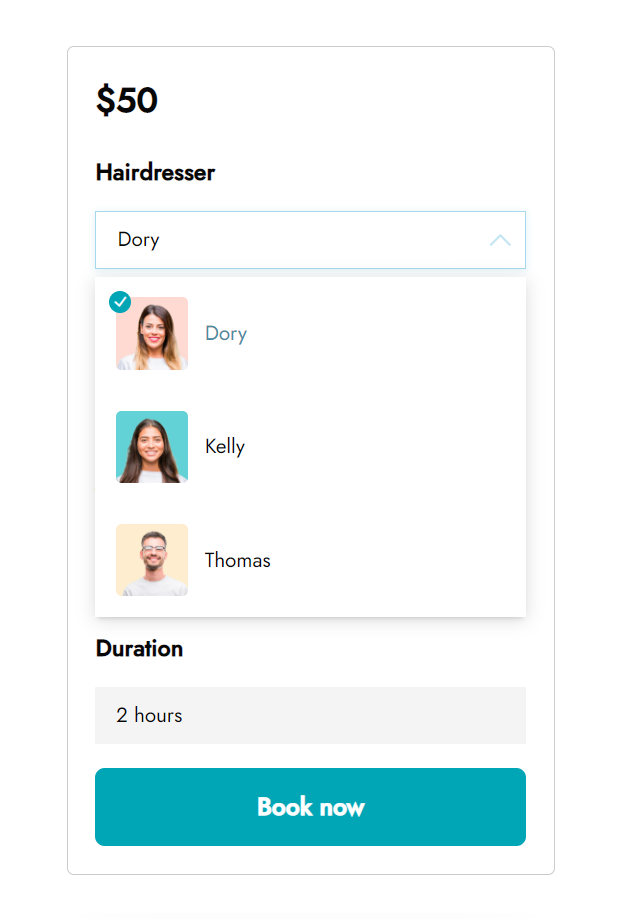
We are creating one product and we will give customers the possibility to select the room they prefer.
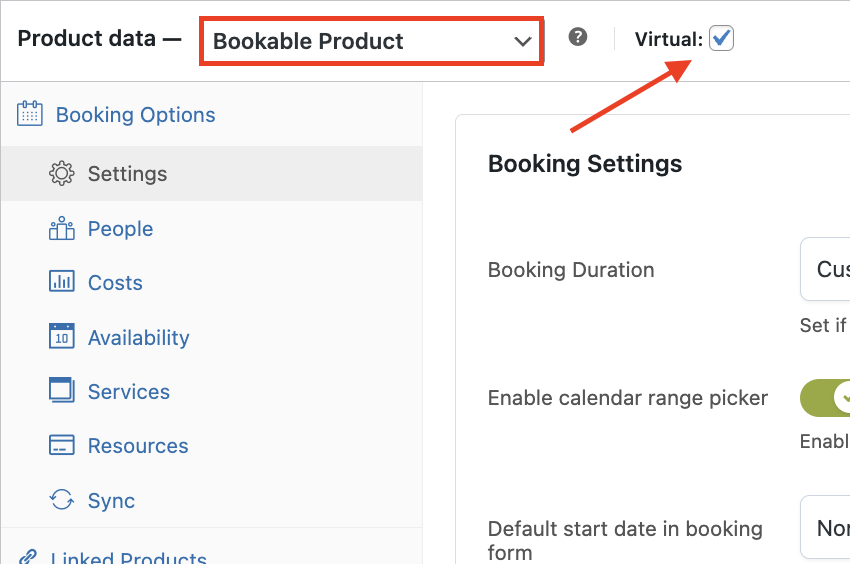
Open the product page, give it a title, then change the product type to “bookable product”.
Step 1 – booking settings
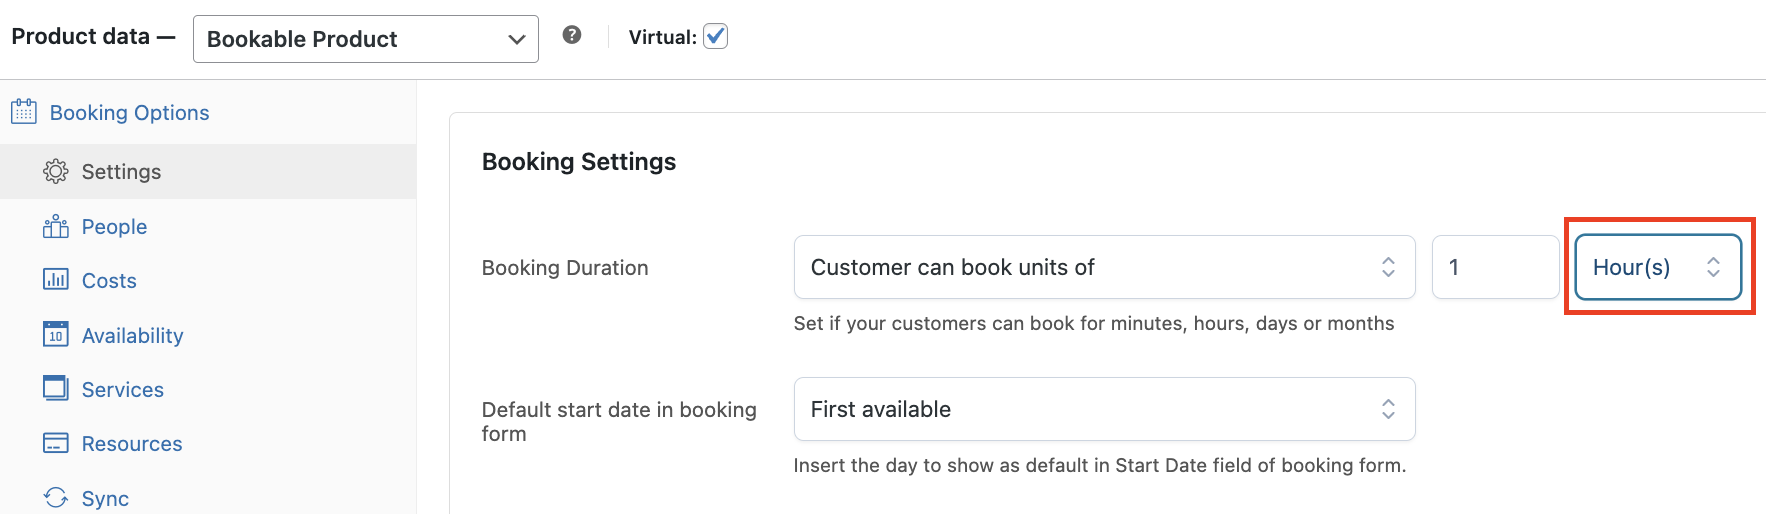
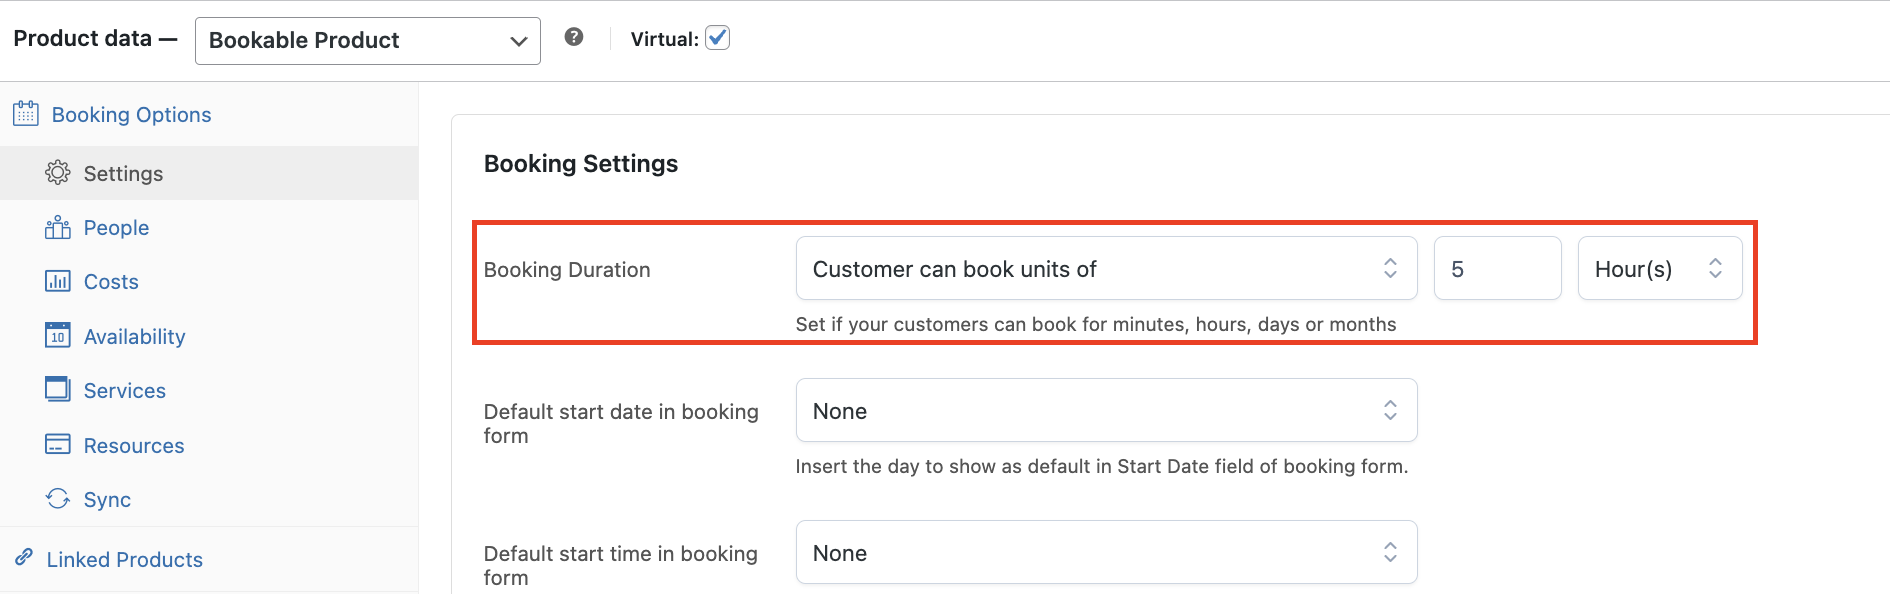
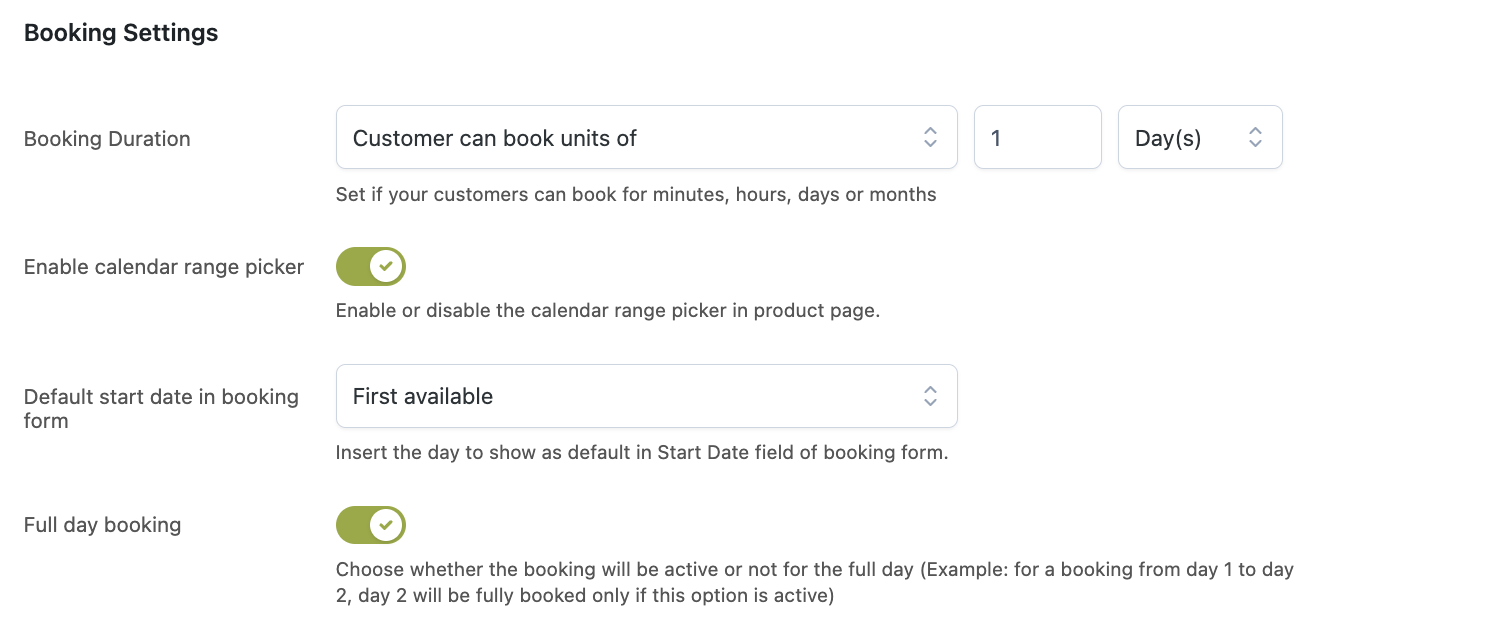
Then, from the Booking options > Settings tab, set the following:
- Booking duration: customers can book units of 1 day.
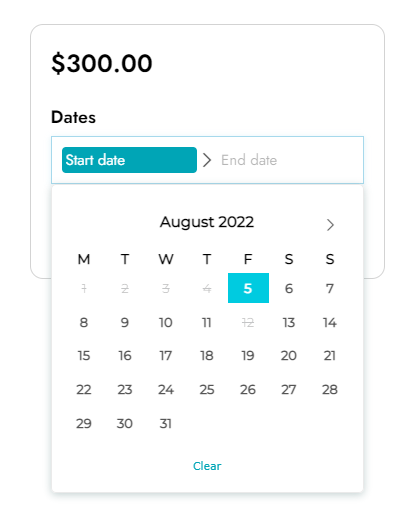
- Enable the calendar range picker.

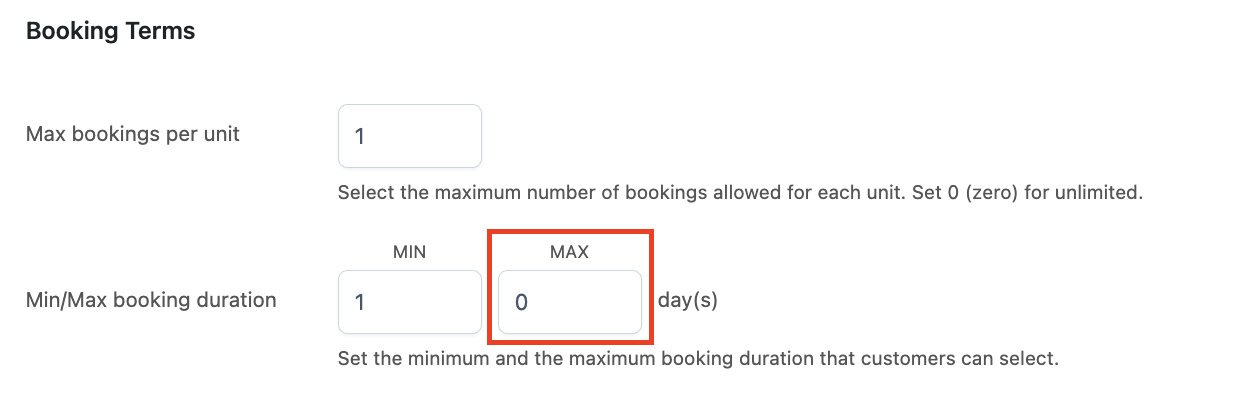
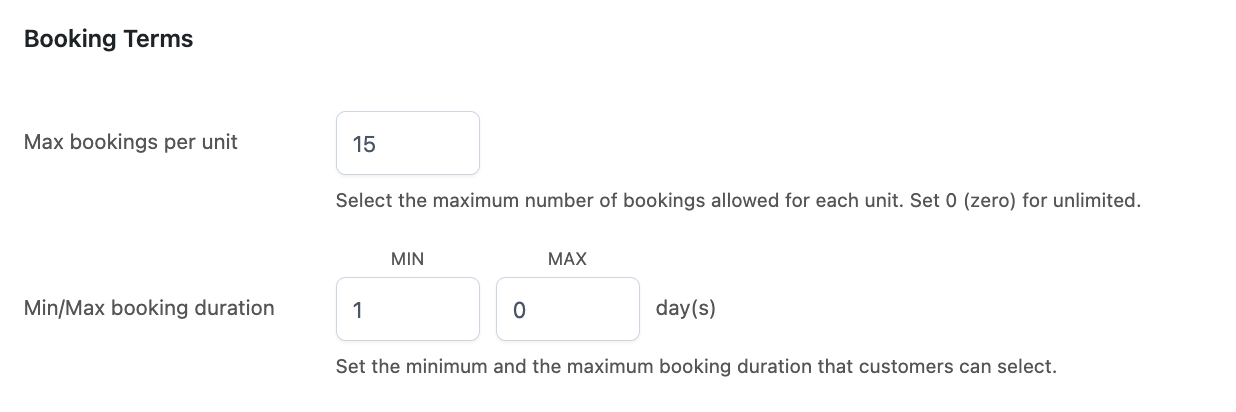
Then, scroll down to the Booking terms section and configure the following:
- Max bookings per unit: 0, which stands for unlimited, as the resources that we will associate will automatically restrict this availability value.
- Minimum booking duration: 1 day (max is 0 for unlimited)
- Min/max advance reservation 1 day and 1 year: so you can get bookings for the following day and not more than 1 in advance
- Check-in at 12 am and check-out at 10 am: to inform customers when they can access and have to leave the room.
- Allow cancellation up to 7 days before the start date.

Step 2 – people
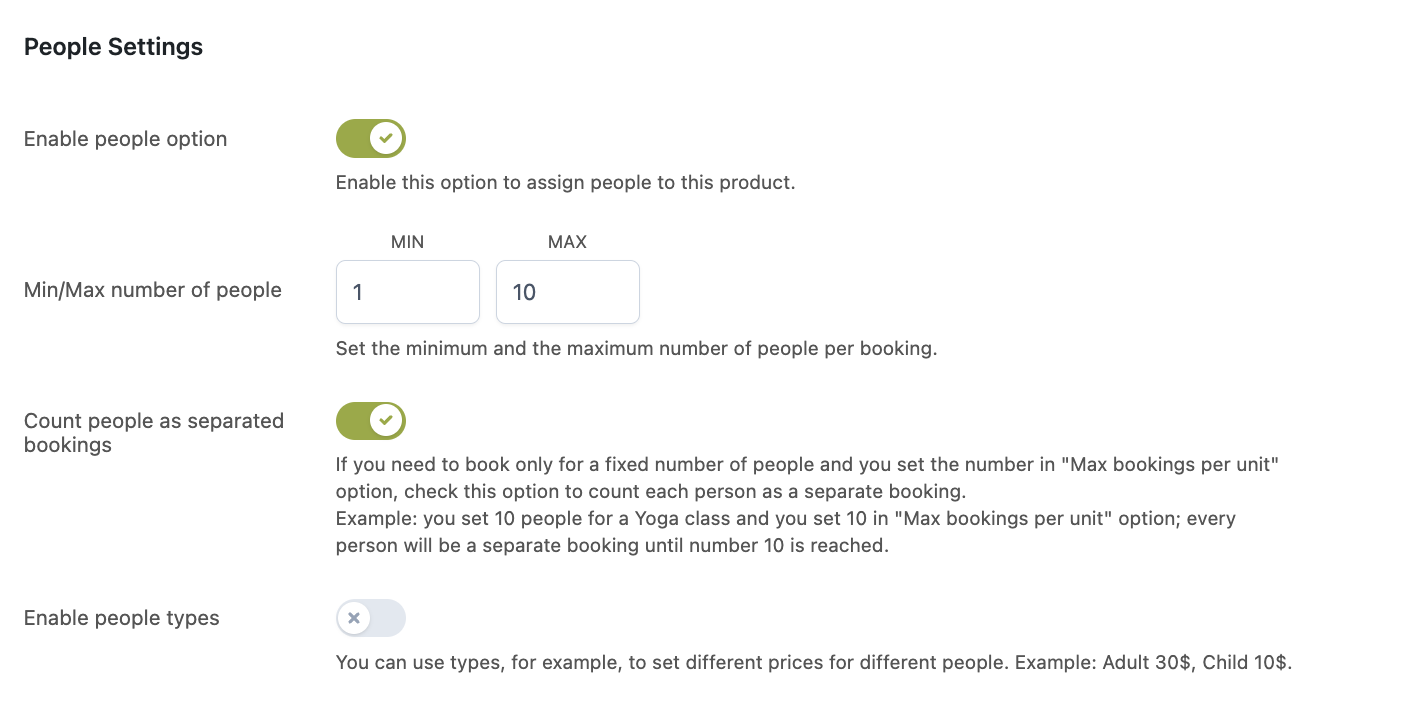
In the People section, we can enable a minimum of 1 person and a maximum of 2 people for this room. Even though we don’t want to charge any price difference based on the people, we will need this enabled to calculate the city tax correctly.

step 3 – costs
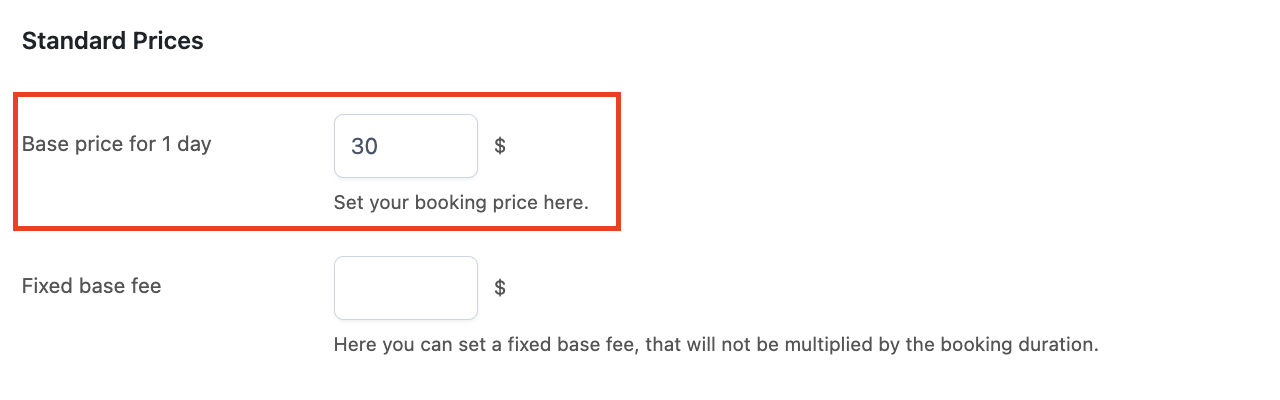
In the Costs section, we will set a base price per day of $90 (the multiply by people option is disabled as we don’t care if it’s one person or two).

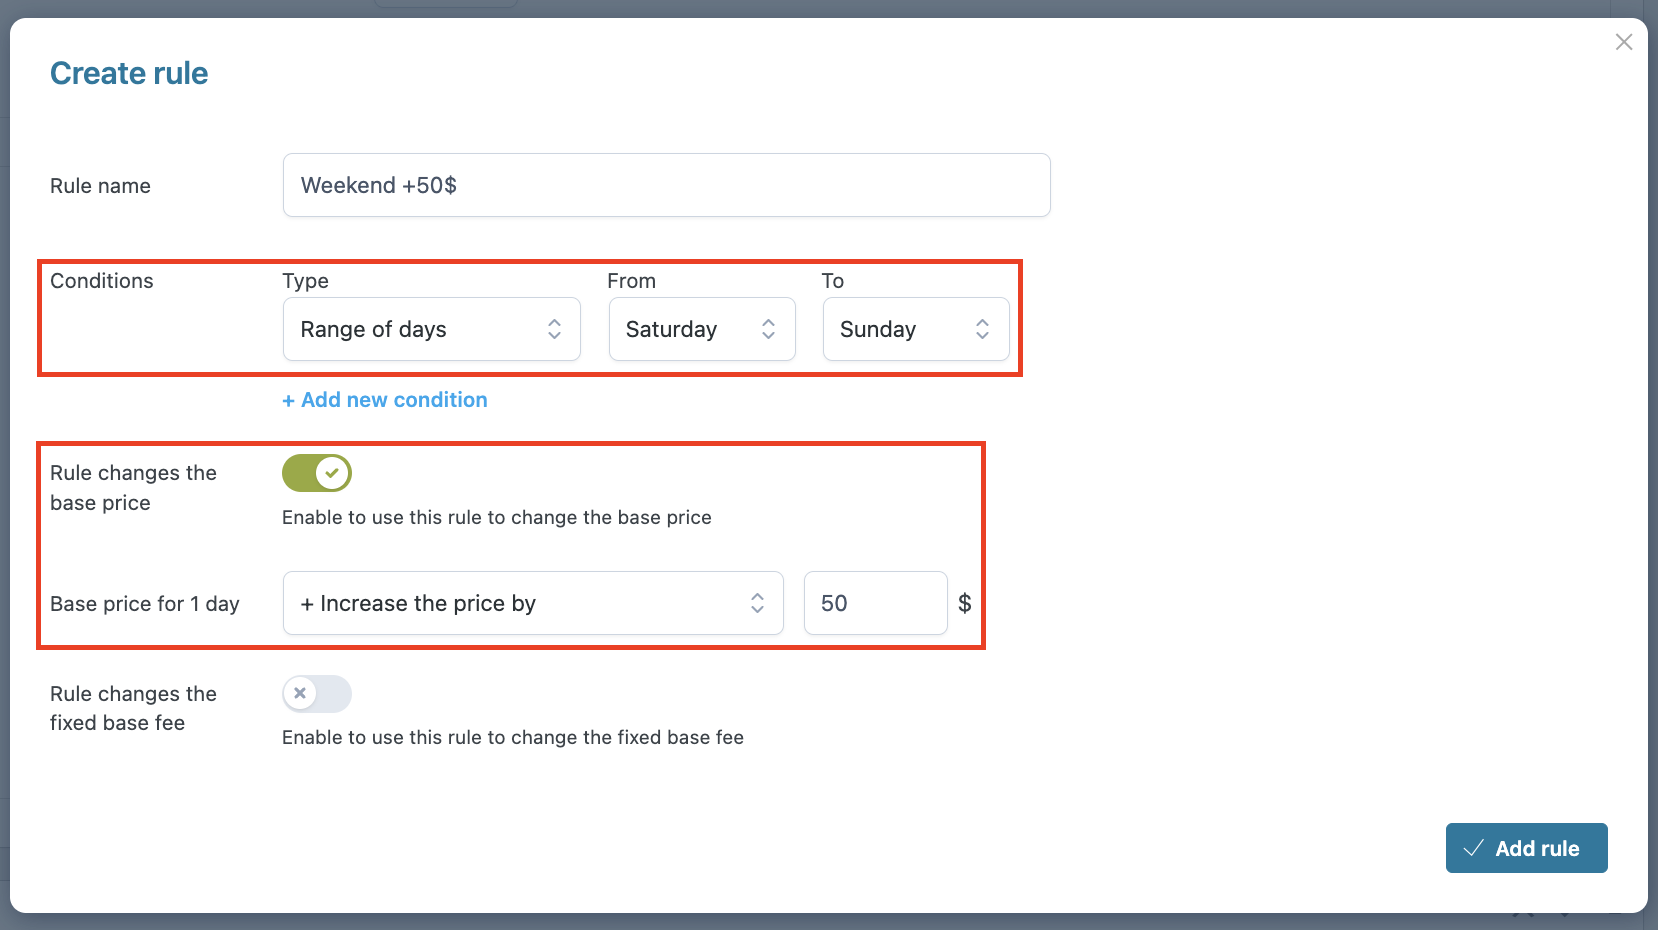
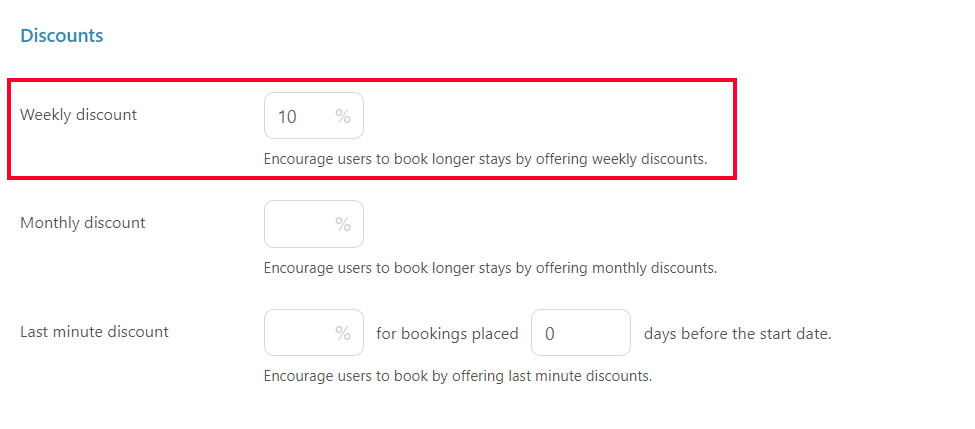
We want to encourage our guests to stay longer, so we offer a 10% discount on a weekly stay:

Finally, we need to charge a city tax of $2.50 per person per day, a fixed cleaning fee of $15 at the end of the stay and a daily cleaning fee of $4.
We can create these costs from the Configuration > Costs tab so they will automatically appear in every product in our site and we can set a price for each product and choose whether to charge them or not.

So, now in the product settings, we can set it up like this:

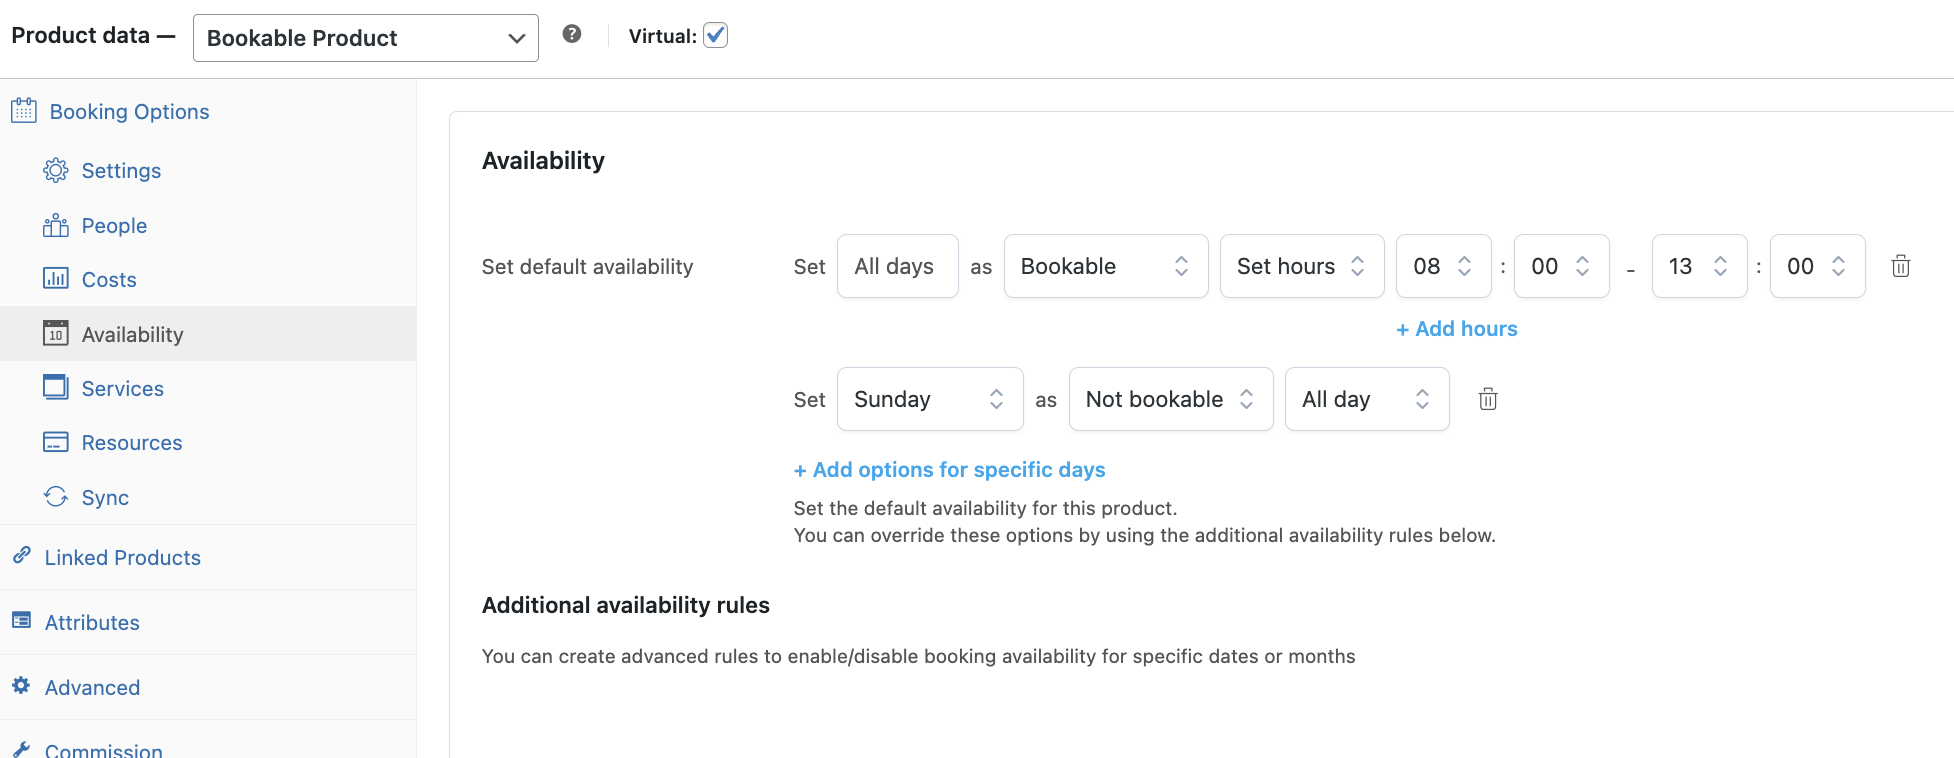
step 4 – availability
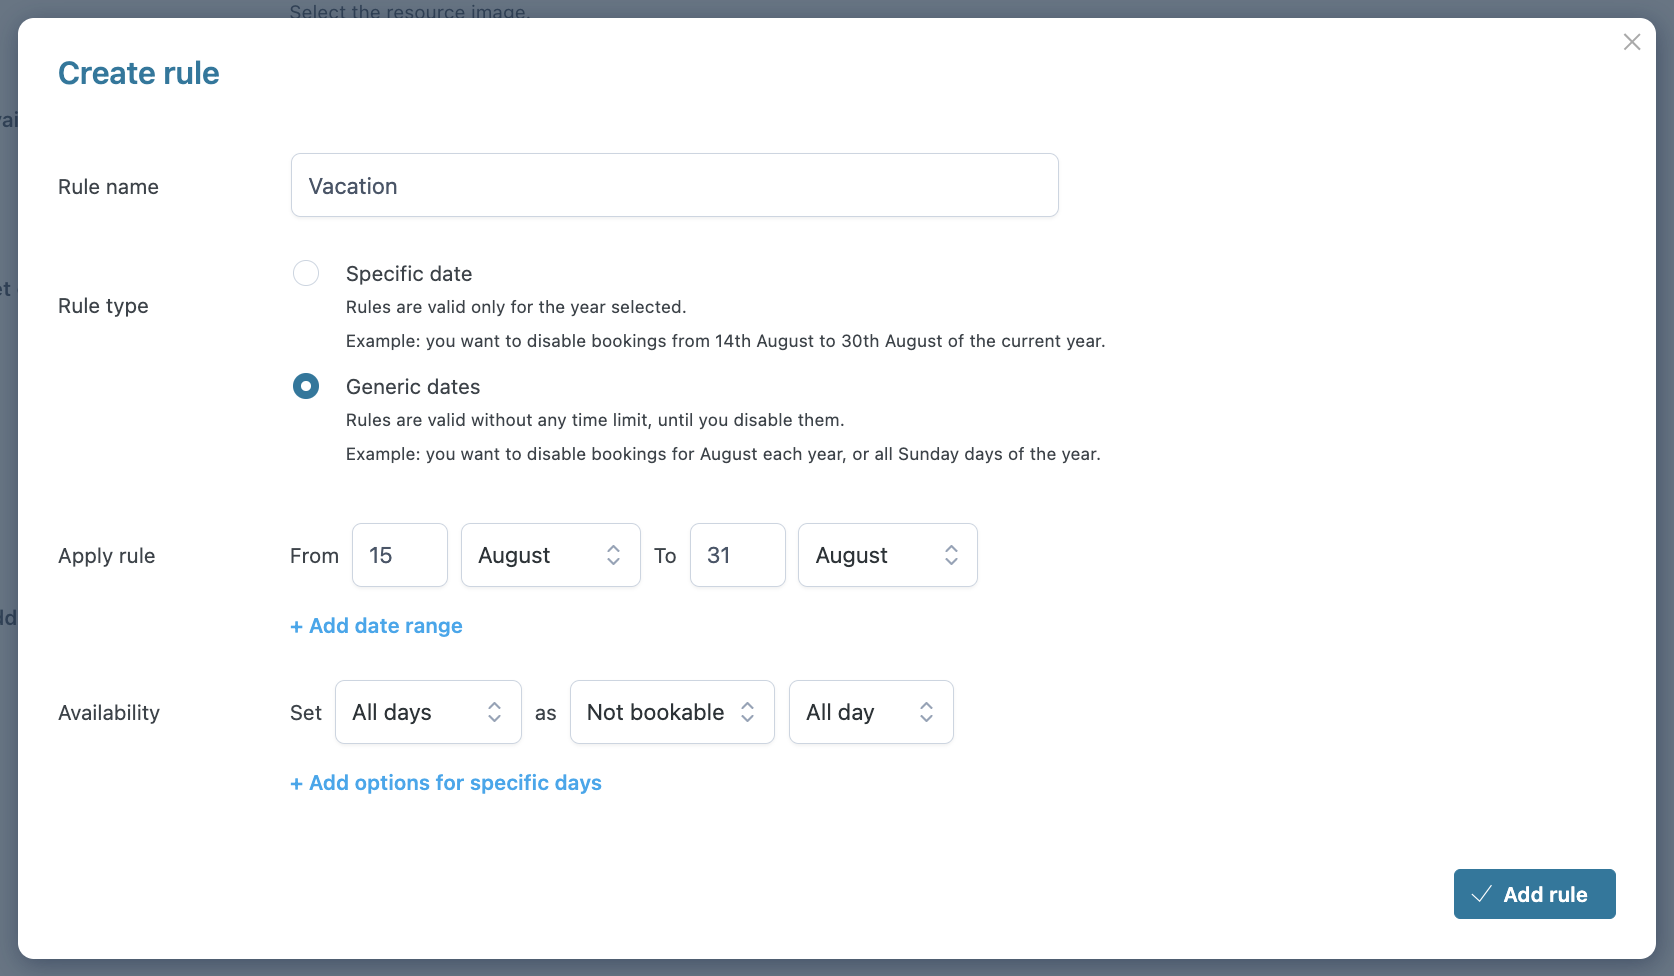
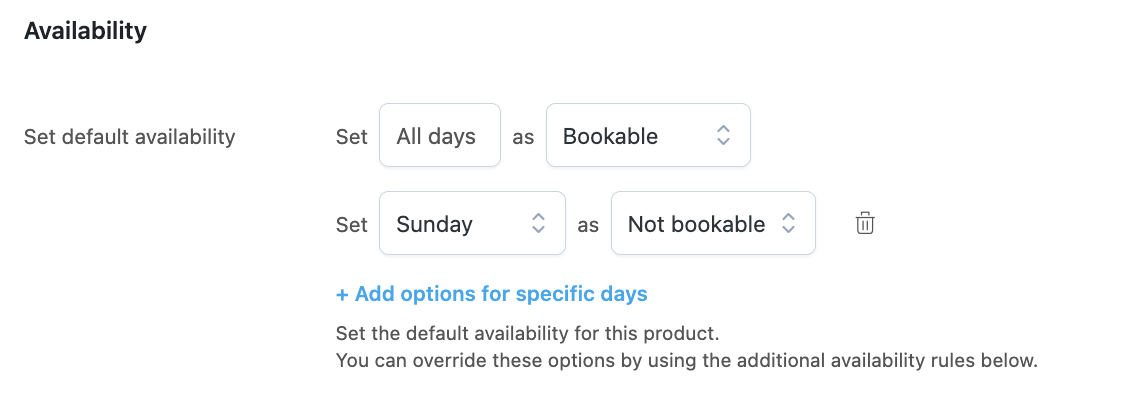
We want to rent the room only in summer, so make it available every day from 15th May to 30 September.
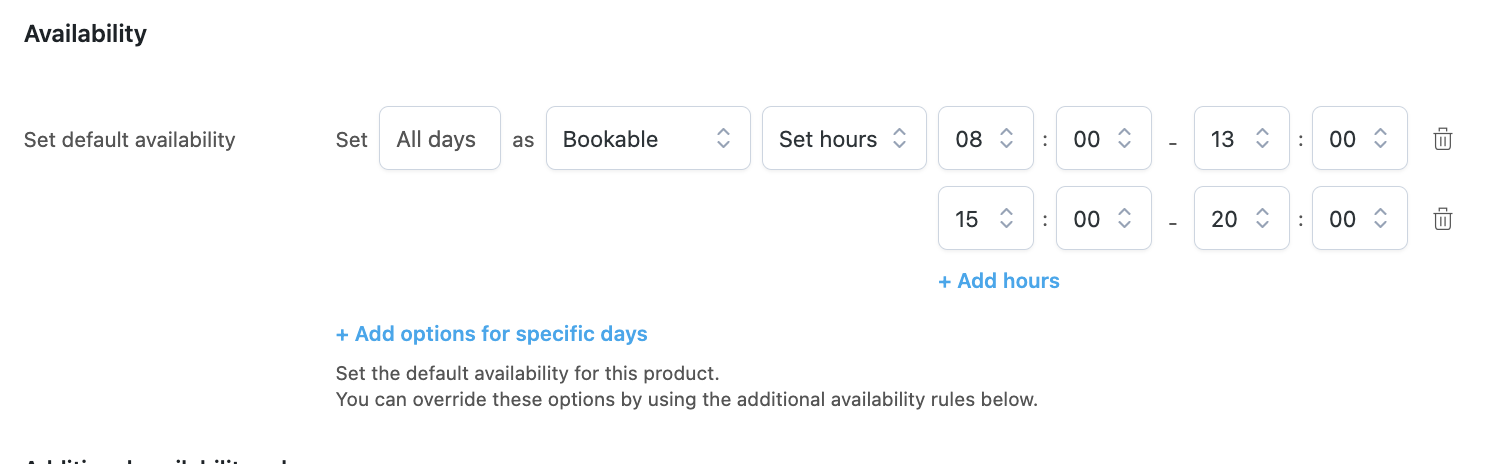
In the Availability section, we can set a default availability of all days as not bookable, as we will override these settings for Summer in an additional rule below, where 15 May to 30 September are set as bookable instead.


Step 5 – resources
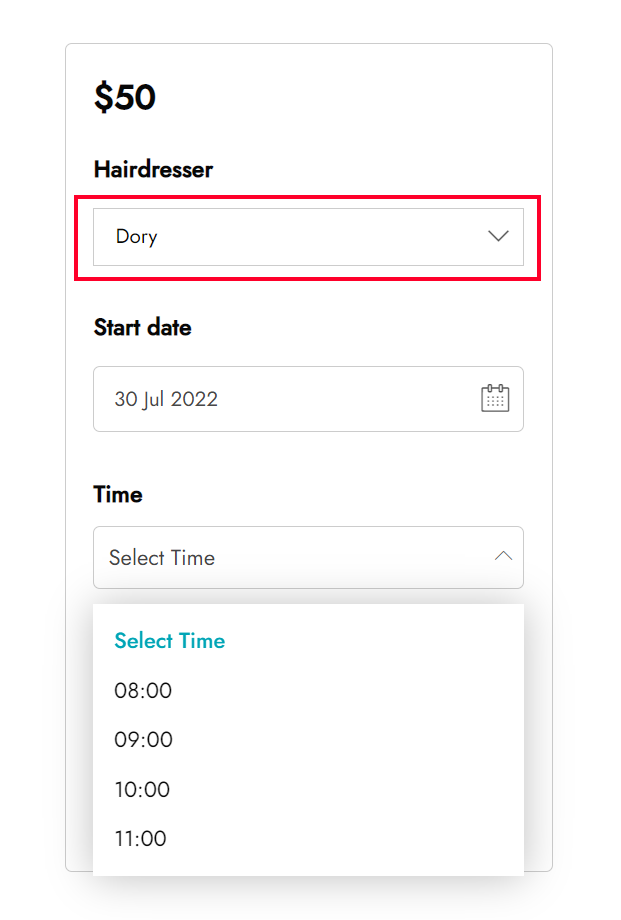
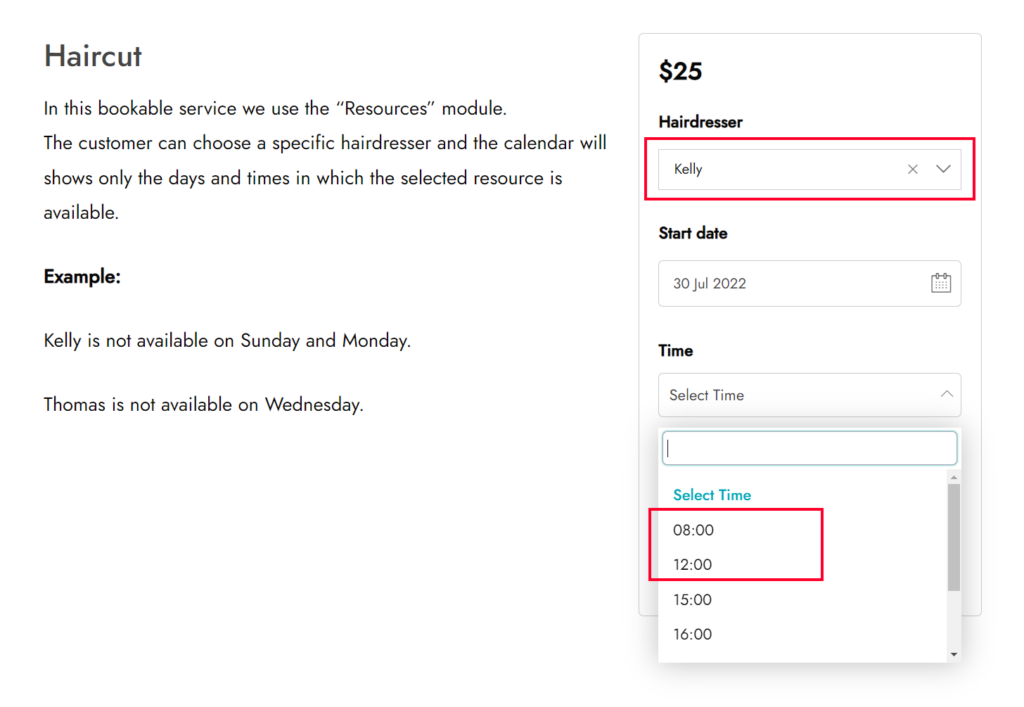
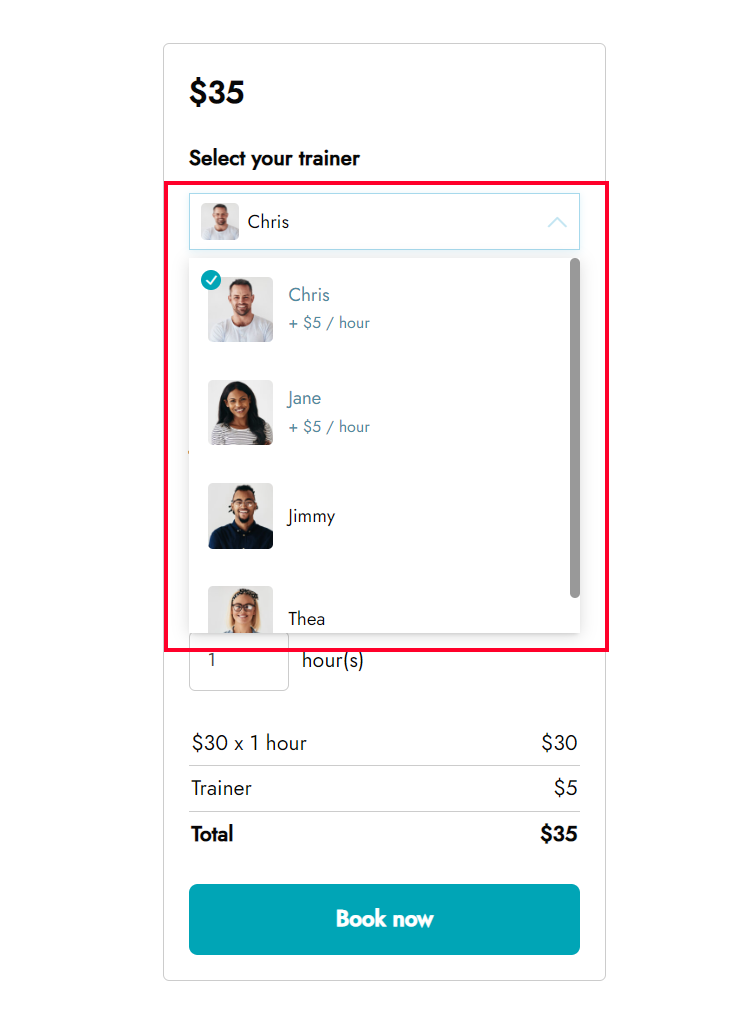
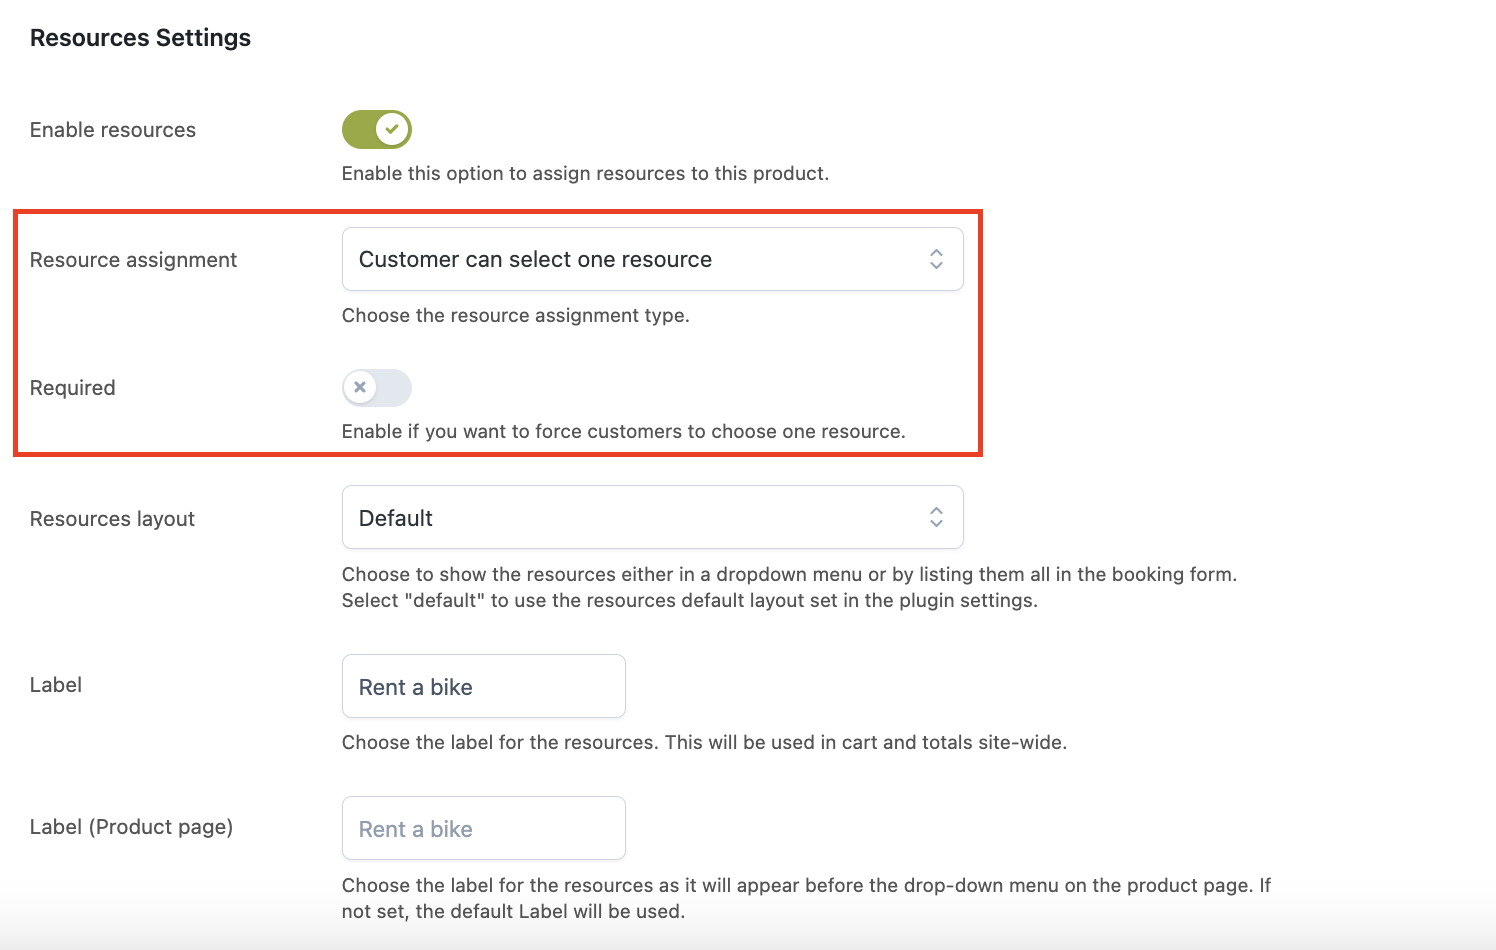
From the Resource tab, we can enable the resources option and set it to Customer can select one resource, so he/she will be able to select one of the 3 rooms that we will add below.
We can also add a custom label to show on the frontend in the costs recap on the product page and in cart and checkout.
It’s important that we set the Required option, to prevent bookings without any resources selected.

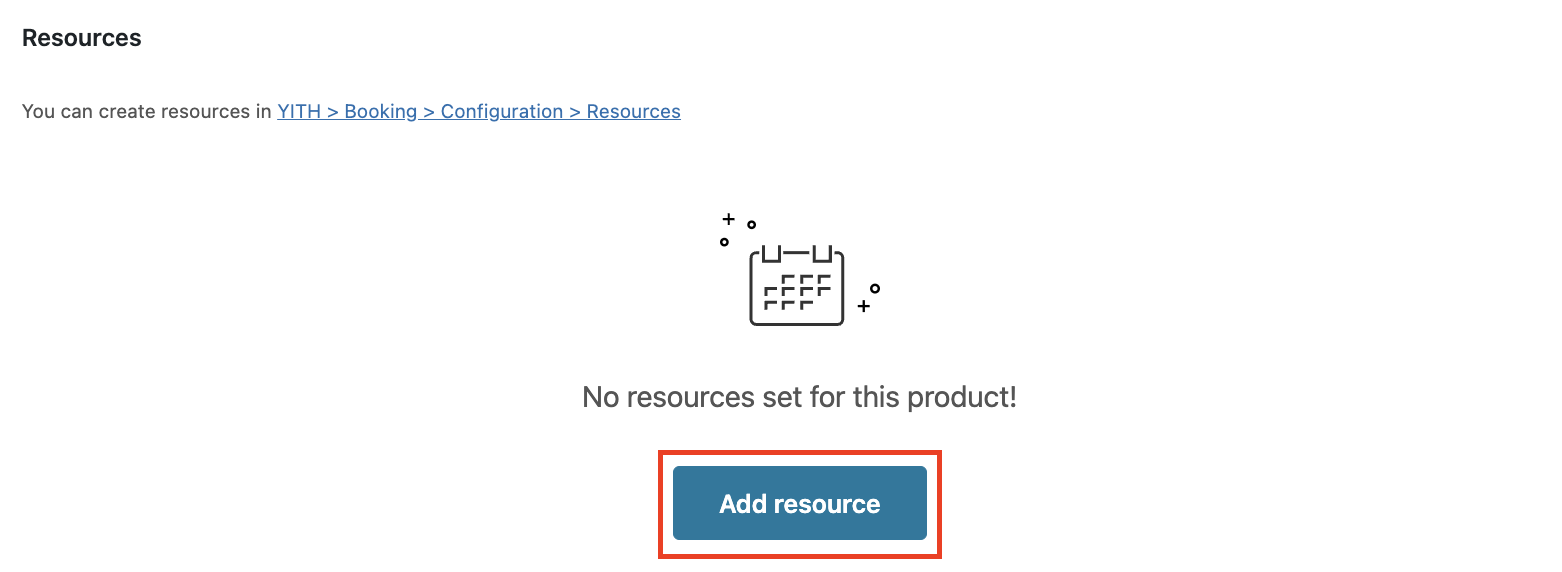
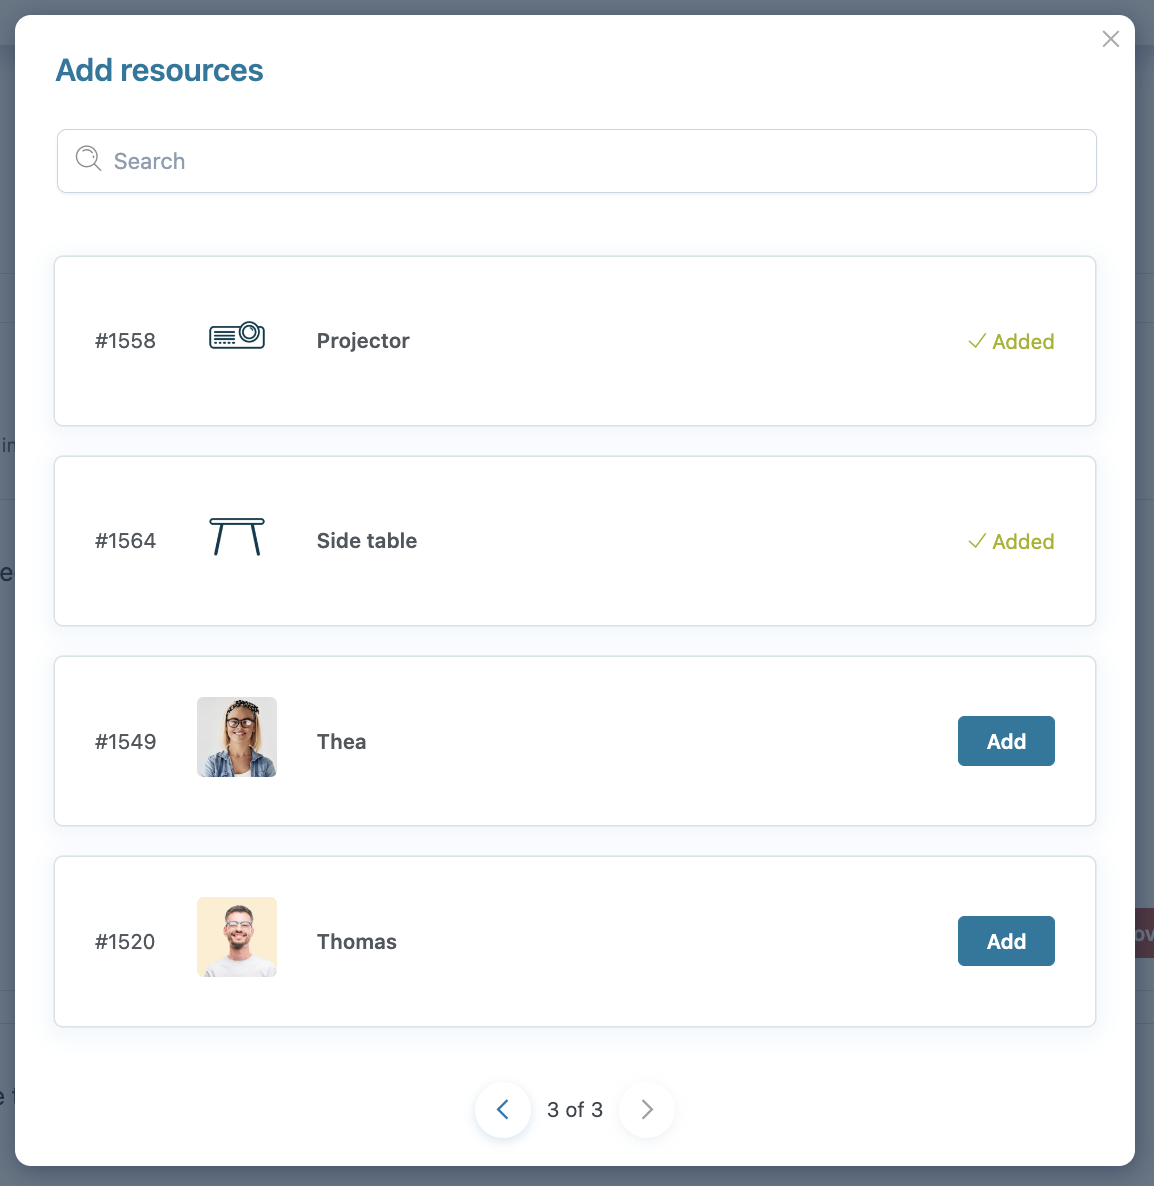
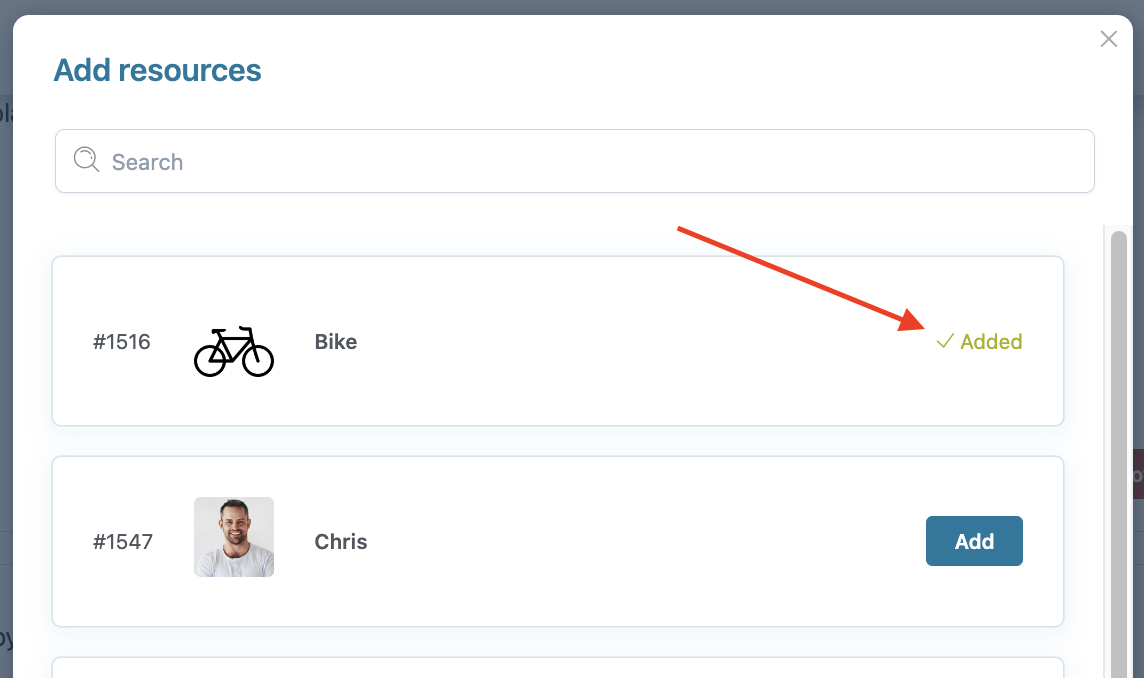
Now, we can add the resources to our product, from the section below, let’s click on Add resource.

A modal window will open where we can select the three rooms:

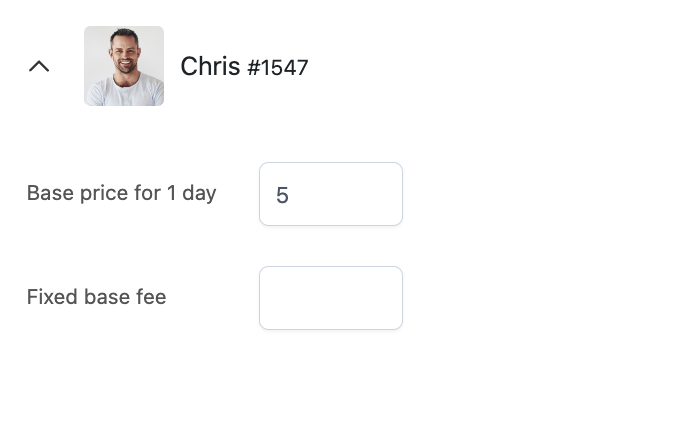
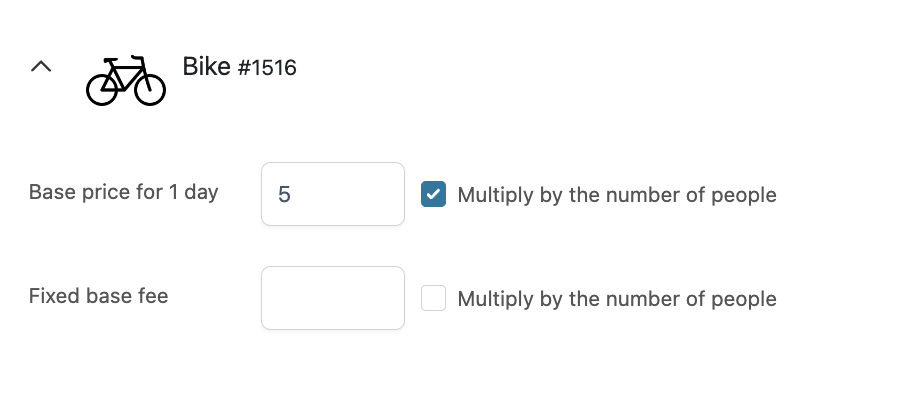
We need to add a +$20 surcharge for Room 2 per night, which has direct access to the beach, so in the resource settings, we will add a $20 cost per day. We will leave other rooms without costs, so the base product price will be charged.

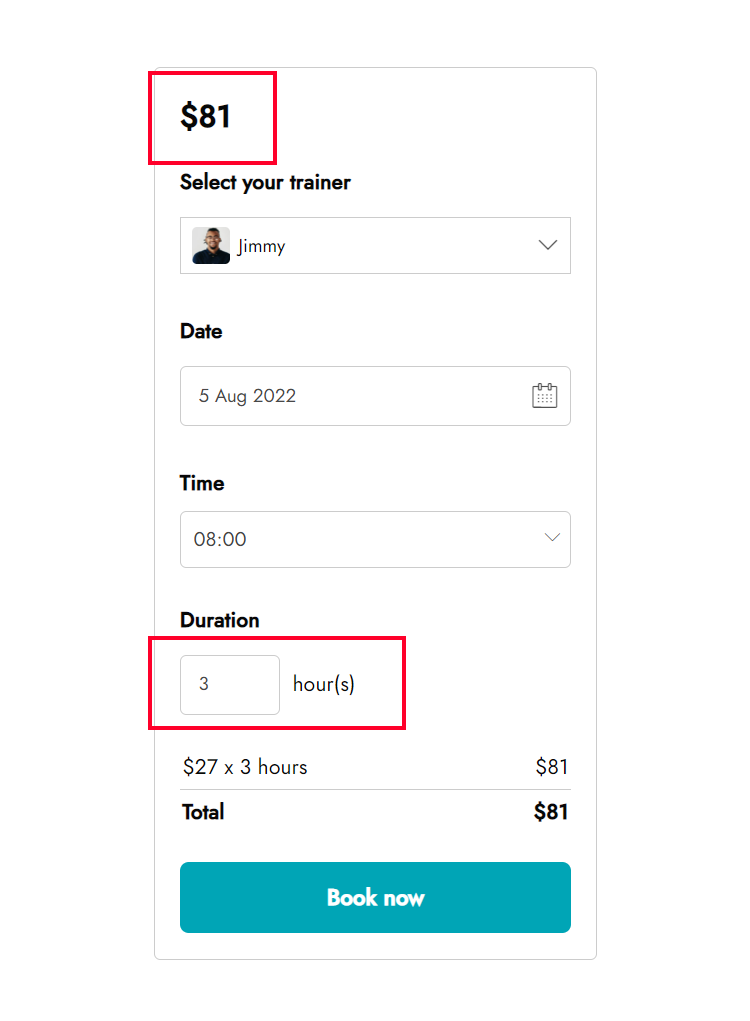
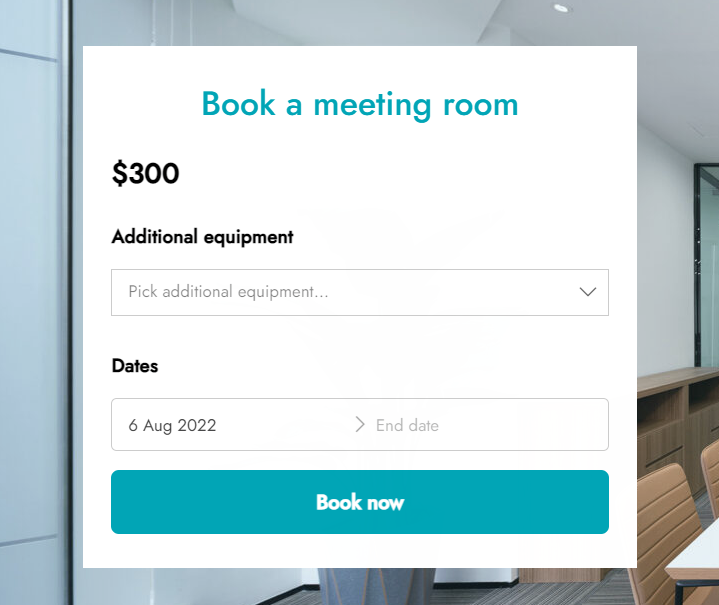
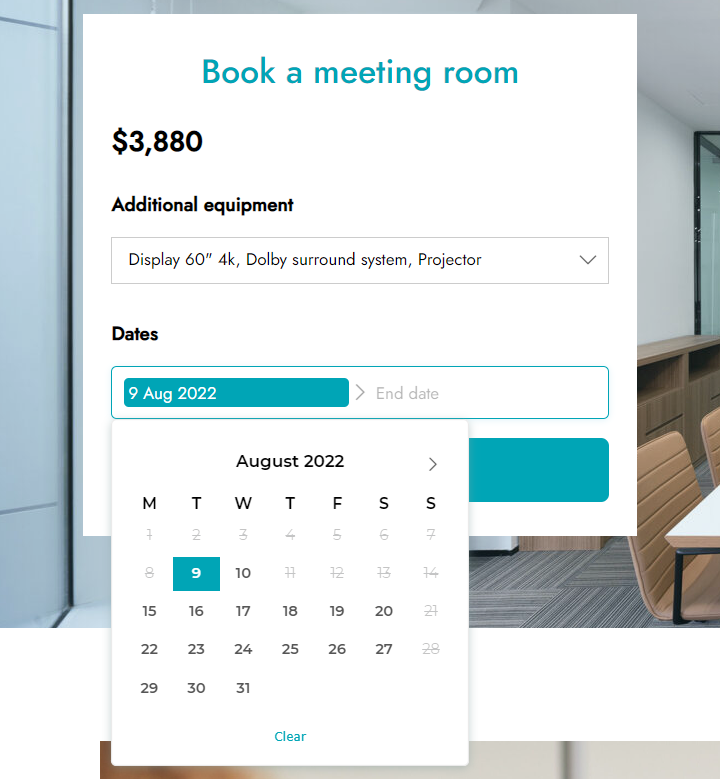
Let’s save the product, and we’ve got our room product, where we can select one of the three rooms available and all the additional costs will be added as well.

Product 2 – Whole house
We can now create the second product, the whole house.
Again, like for the room, we can set the product to bookable product and configure the booking settings as for the Room in step 1.
We will have different settings in the other steps though.
Step 2 – people
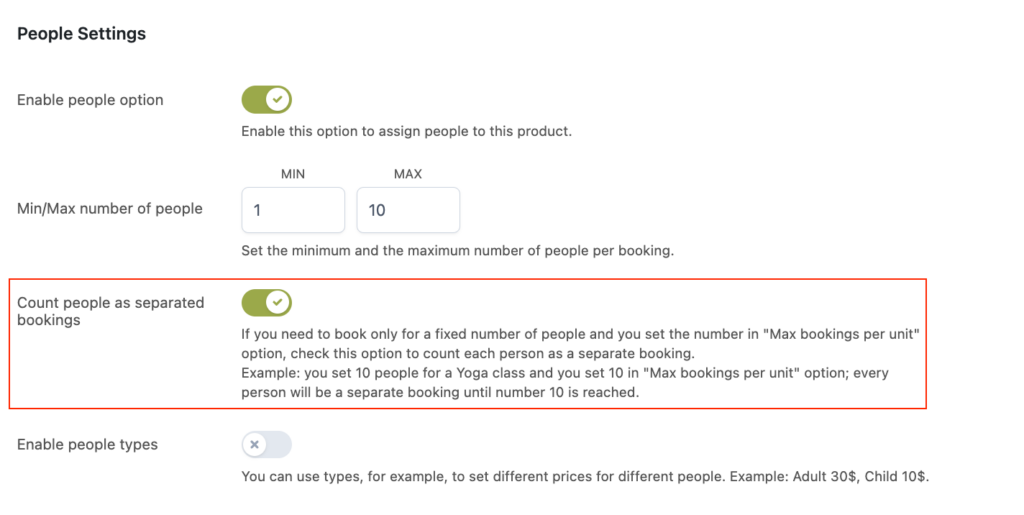
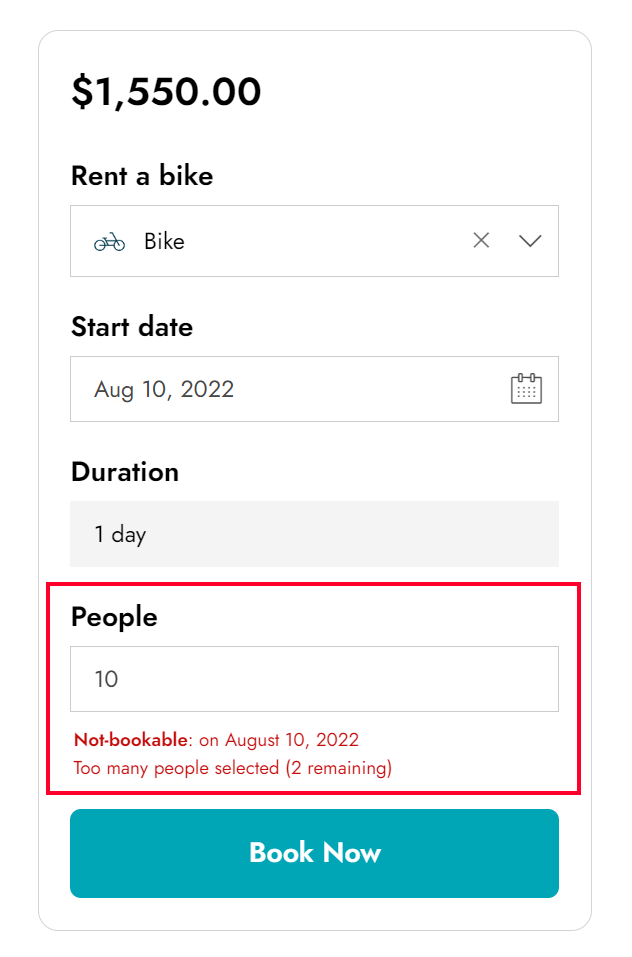
In the People section, we can enable a minimum of 1 person and a maximum of 6 people, because we can have a maximum of 2 guests per room.

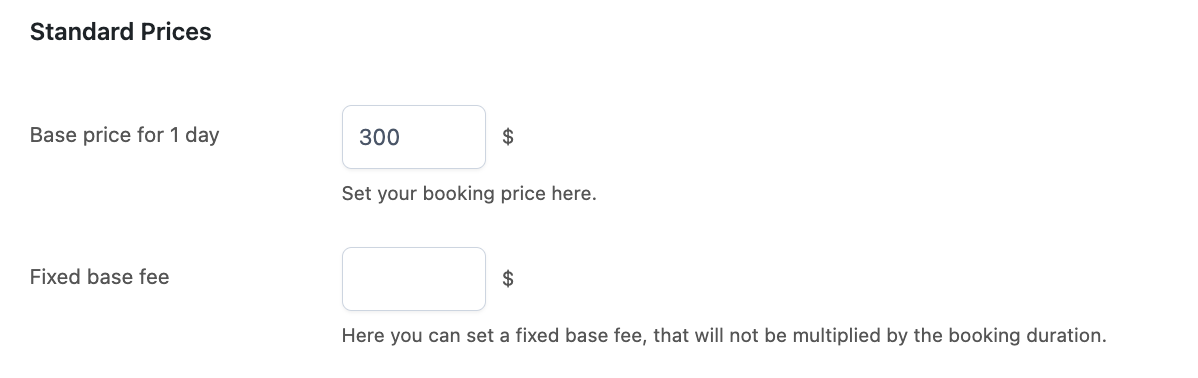
step 3 – costs
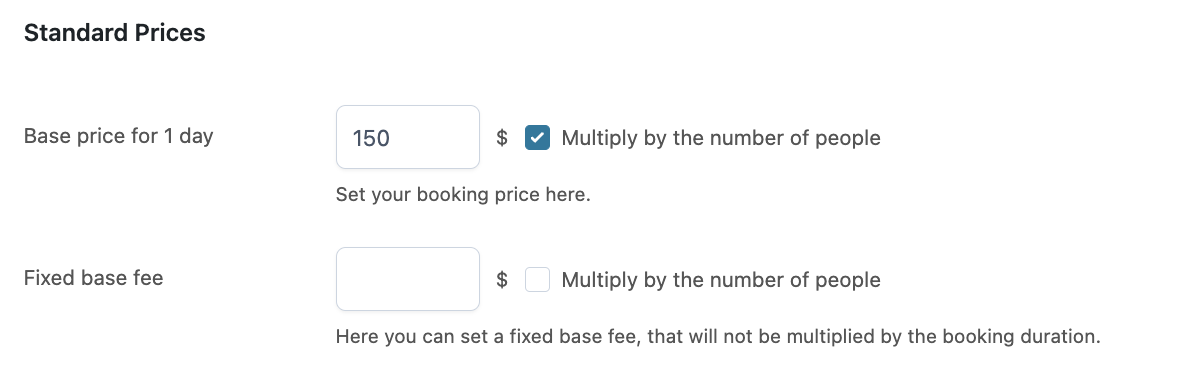
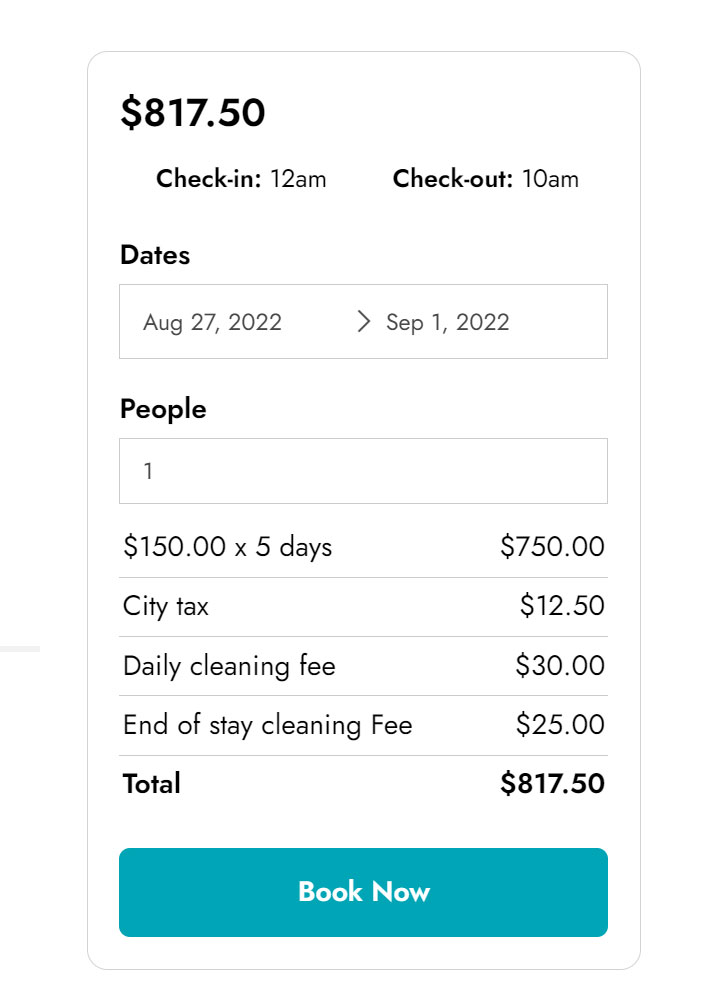
In the Costs section, we will set a base price of $150 per day. Even though we don’t want to charge any price difference based on the people, we will need this enabled to calculate the city tax correctly.

Also, in this case, we want to encourage our guests to stay longer, so we offer a 10% discount on a weekly stay:
Finally, we need to charge a city tax of $2.50 per person per day, a fixed cleaning fee of $25 for the whole house at the end of the stay and a daily cleaning fee of $6.
As we have already created the costs globally, we will be able to find them already in the product, and simply adjust the cost and settings, like this:

step 4 – availability
The availability settings will be the same as the single room, as we want to rent the house only in summer, from 15th May to 30 September.
Step 5 – resources
From the Resource tab, we can enable the resources option and set it to Assign all resources because we need all rooms to be booked with this booking.
We can also add a custom label to show on the frontend in the costs recap on the product page and in cart and checkout.

Now, we can add the resource to our product, from the section below, let’s click on Add resource and let’s add the three rooms.

In this case, as we’ve already set a global price for the whole house, we will not need to increase the price of Room 2, so we’ll not add any extra costs in the resource settings.
Let’s save the product, and we’ve got our house product. We can select the dates and the plugin will automatically assign the three resources and all the related costs to this booking.
Resource availability sync
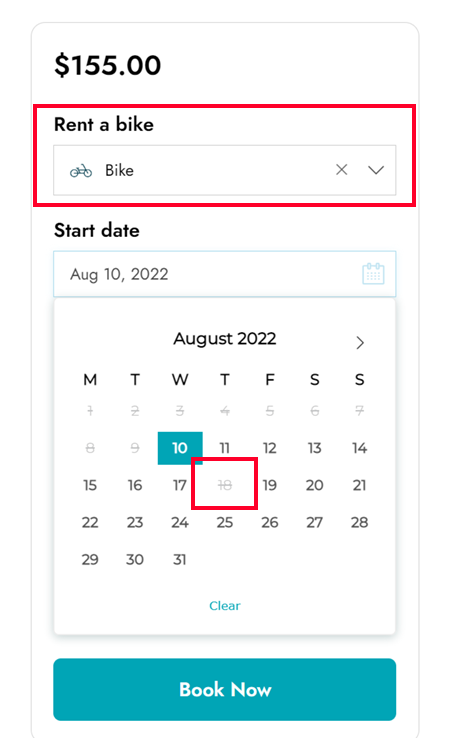
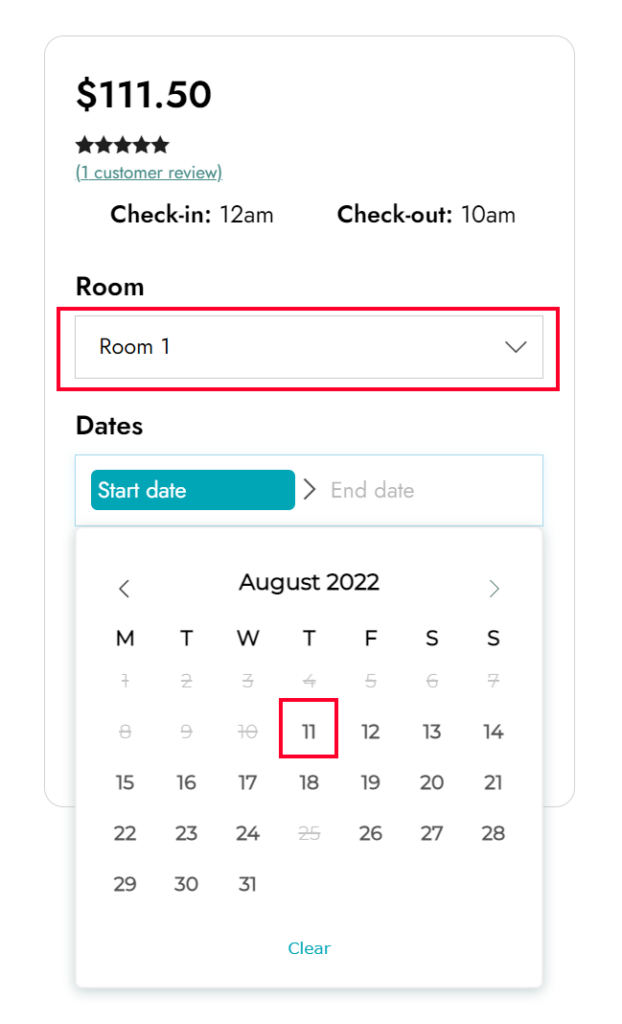
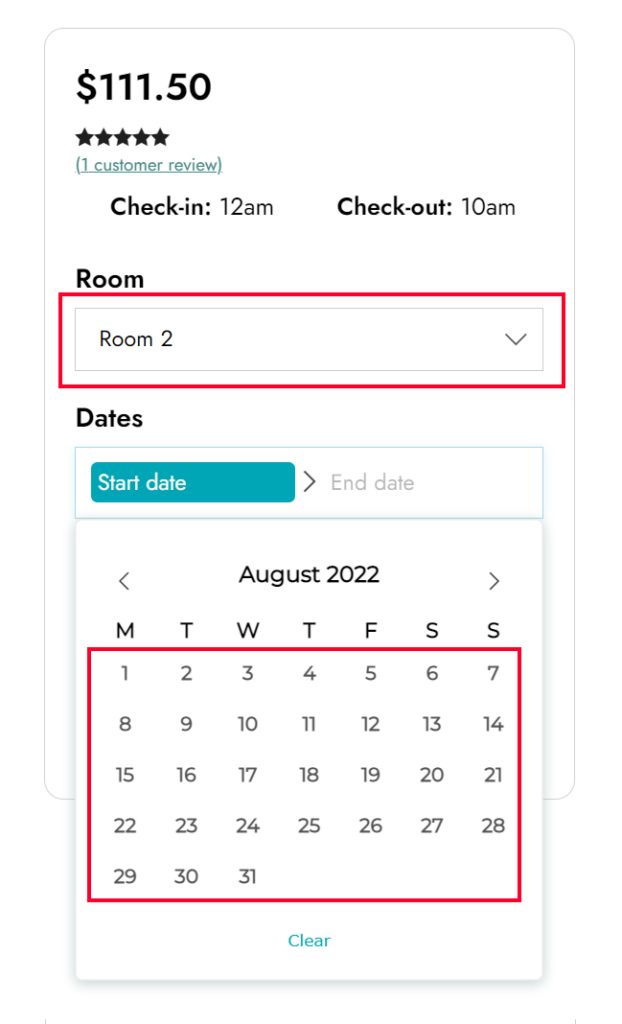
Let’s check the availability of the two products after we book Room 1 from July 31 – August 11.
- Room product availability: this will be different based on the selected room. Room 1 is not available, whereas Room 2 and Room 3 will still be available for those dates.
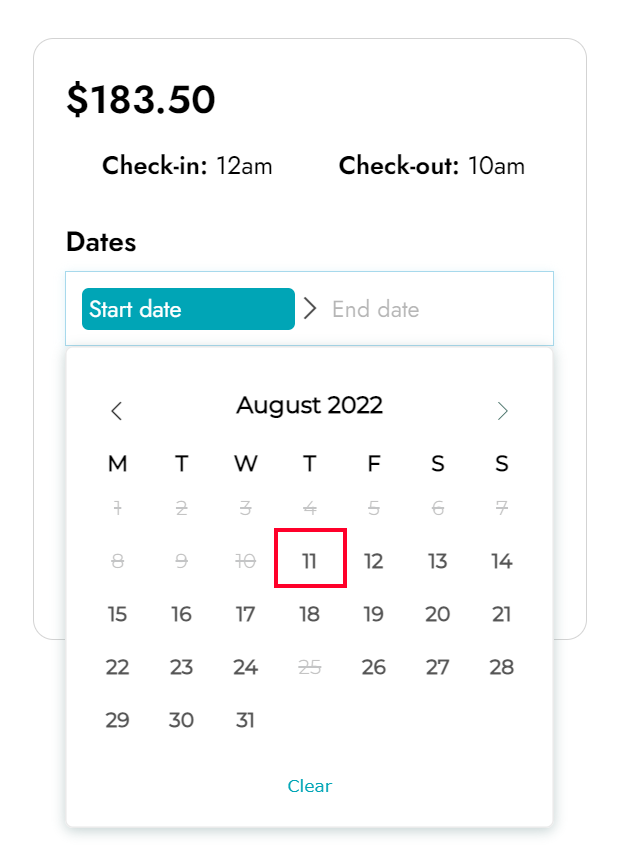
- Whole house availability: the house is no longer available on those days, because it needs all resources to be free to be booked. The first available date is then August 11.
Vice versa, if we book the house from August 12 to 15, though, all resources will be booked, and therefore no room will be available for those days.
Alternative settings for single rooms
In case you want to customize the single rooms, you can consider creating 3 different products, one for each room, so you can have:
- an image gallery for each room
- custom services for each room, like air conditioning, fridge, security lock etc.
- custom people settings, like adding a child with no extra fees
- etc.
In this case, you should create one product for each room and make sure that in the Resources section, you set only 1 room and the assignment to Assign all resources.

The settings of the Whole house product will be the same, though.