The “Hourly bookings” are useful in the following cases:
- Appointments
- Lessons
- Courses
- Bookings whose duration can be configured by hours
You can enable hourly bookings in the “Booking settings” by selecting “hour(s)”.
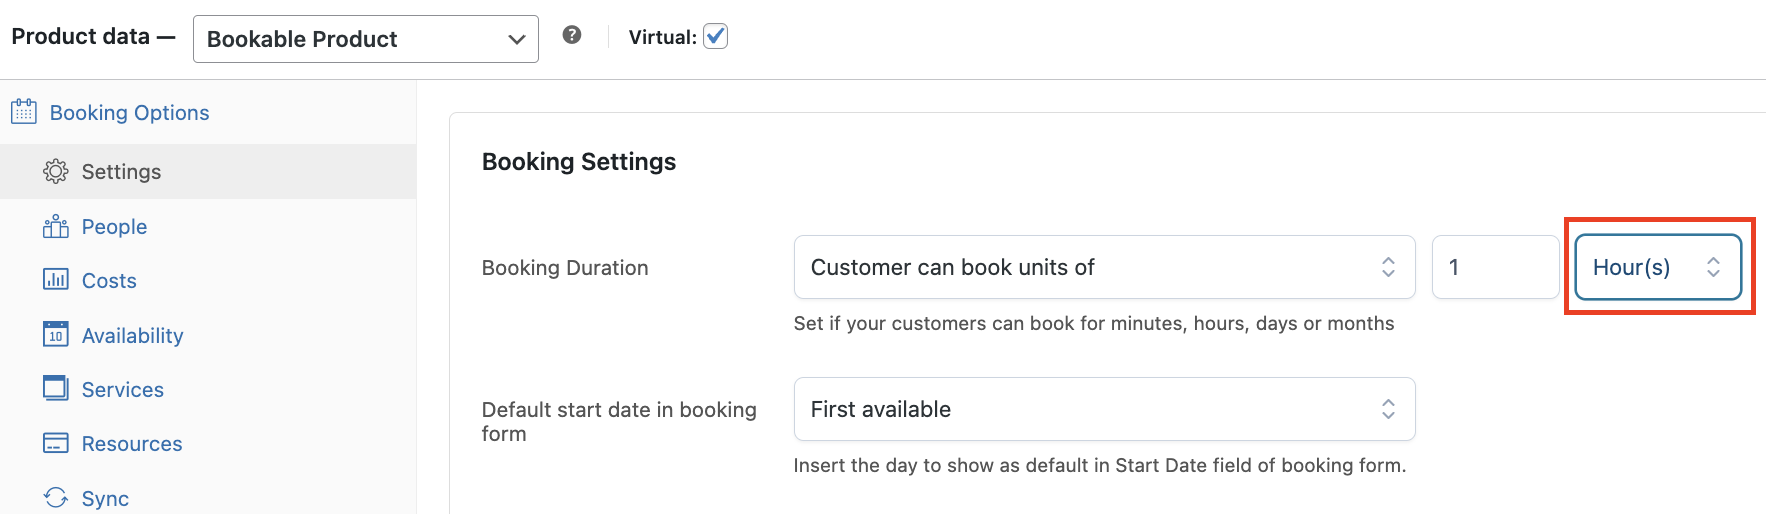
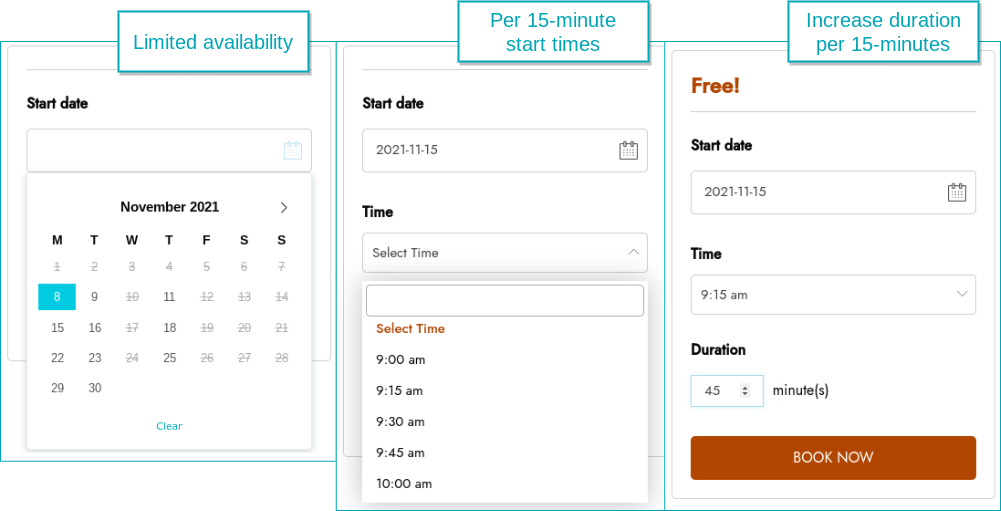
You can choose either ‘fixed units of’ or ‘customer can book units of’. Below we will give 2 examples using each one of the options.
- Example for fixed units of – Restaurant booking
- Example for customer can book units of – Tool rental
example – fixed units of – restaurant booking
We create a bookable product for a restaurant, brunch and dinner, where people can book fixed units of 2 hours. We are closed on Monday mornings and Tuesdays. From 14.30 – 16.00, we have our break. Our daily opening hours are; Brunch from 10.30 – 14.30 and dinner from 16.00 – 22.00.
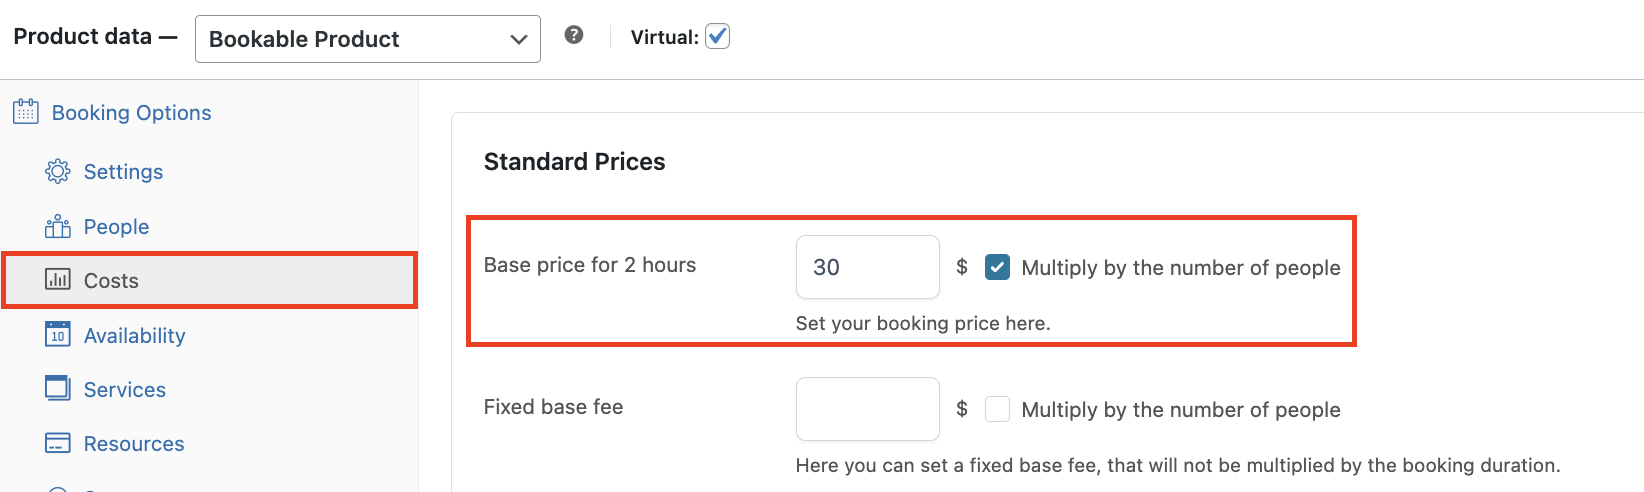
To start off, we set the ‘booking duration’ to “Fixed units of” 2 hour(s). And we set a price of $30 for 2 hours, multiplied by the number of people.
Now we move on to the default booking availability rules.

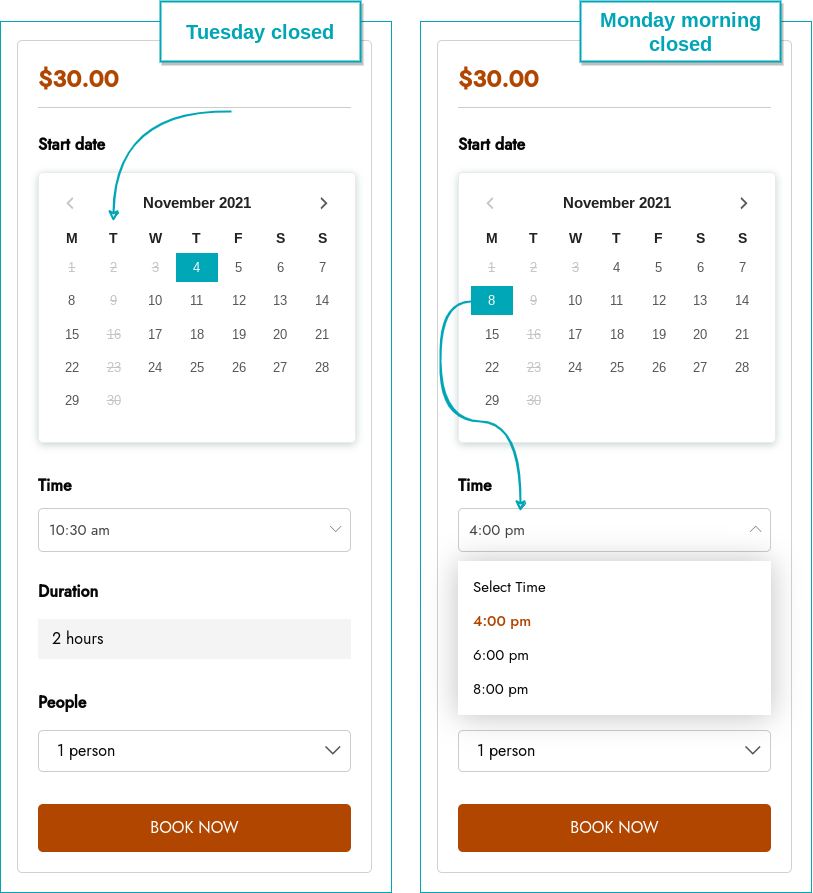
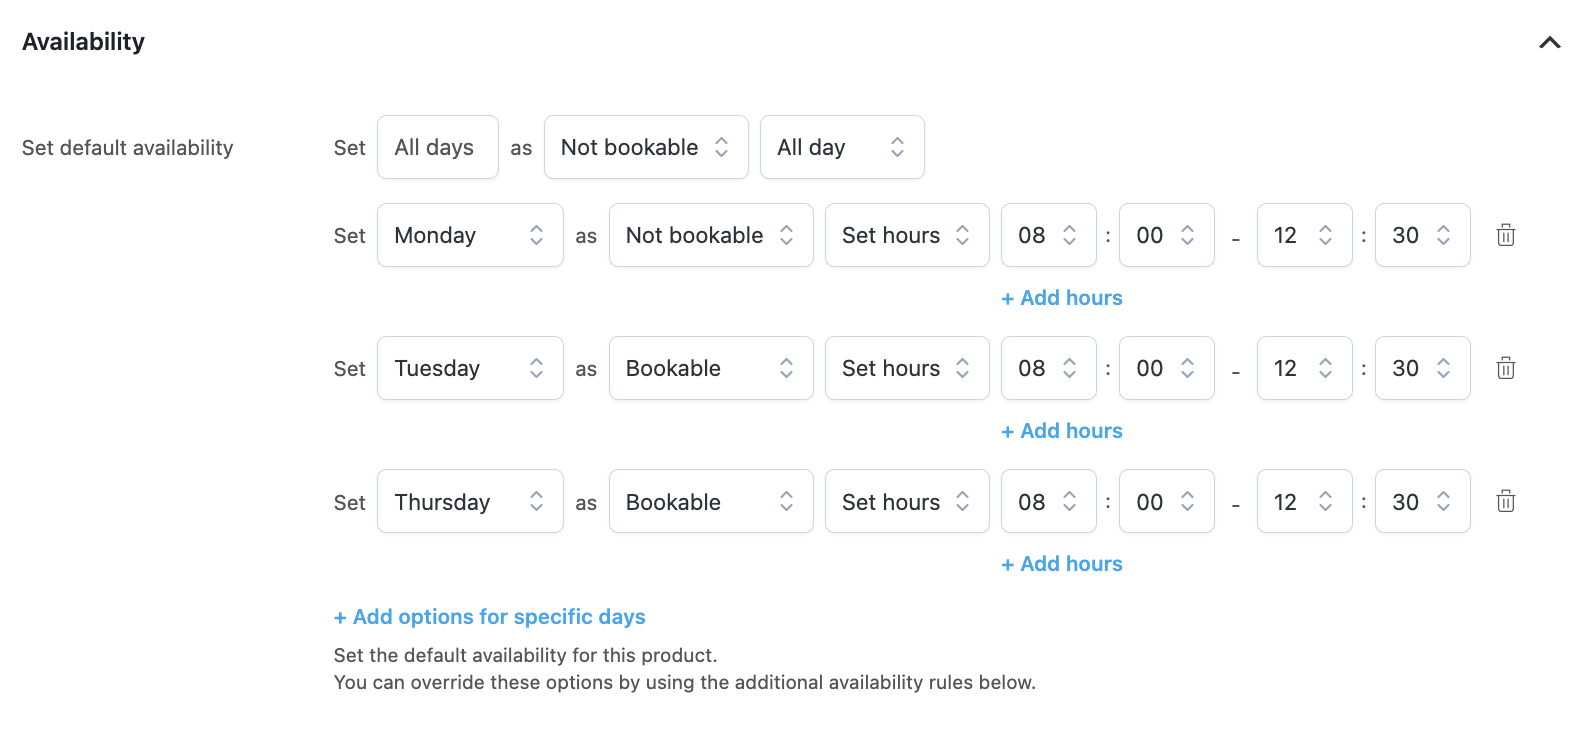
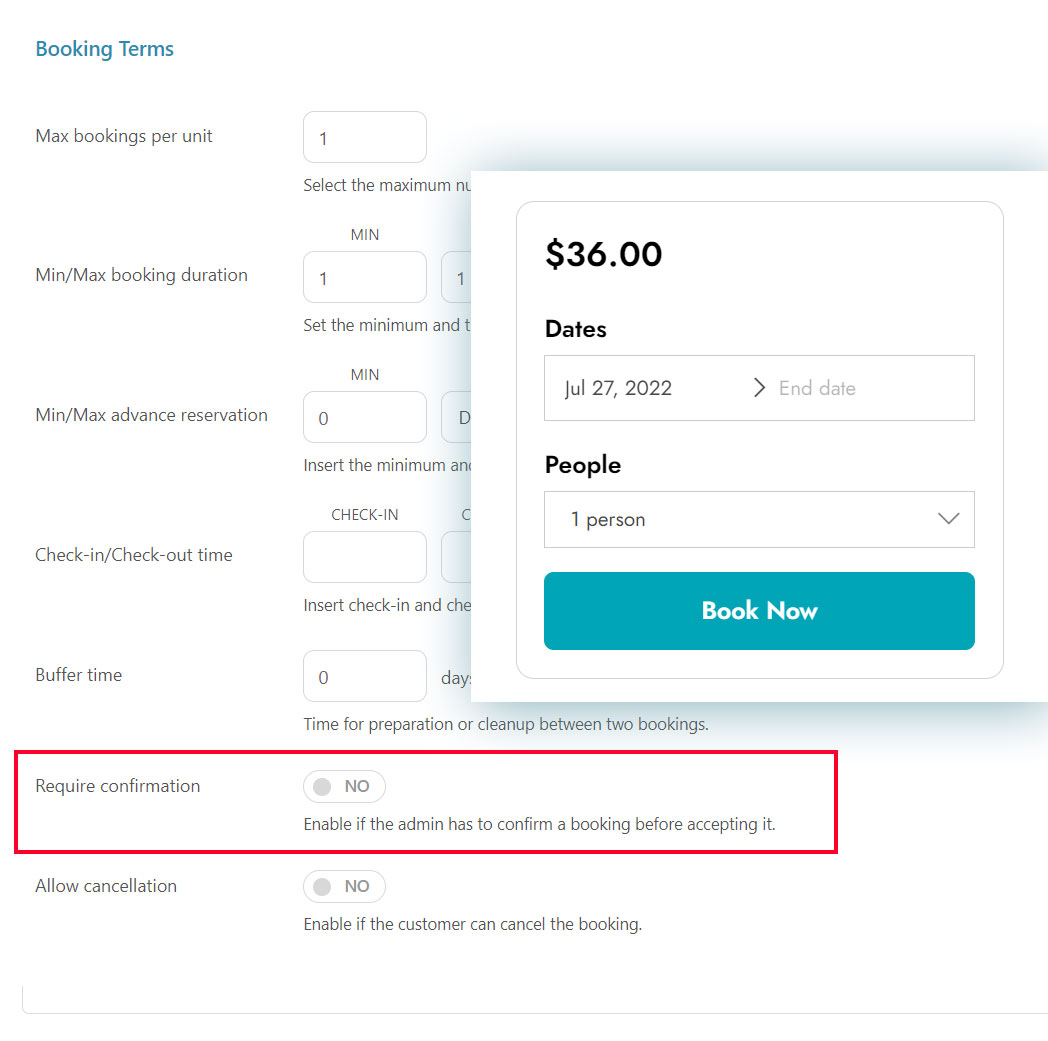
We set all days to “Bookable” and select “Set hours” so we can start applying our default opening hours. Below an example of what the booking form will look like for the customer:

Now that we have set our opening hours, we will use the “+ Add options for specific days” option, to decide our days of closure.

We set Monday to bookable from 16.00 to 22.00 as we are closed for the morning, and we set Tuesday to not bookable all day. These rules you add here will override the default availability rules you set before.
Below an example of what the booking form will look like when the customer wants to select one of these days:
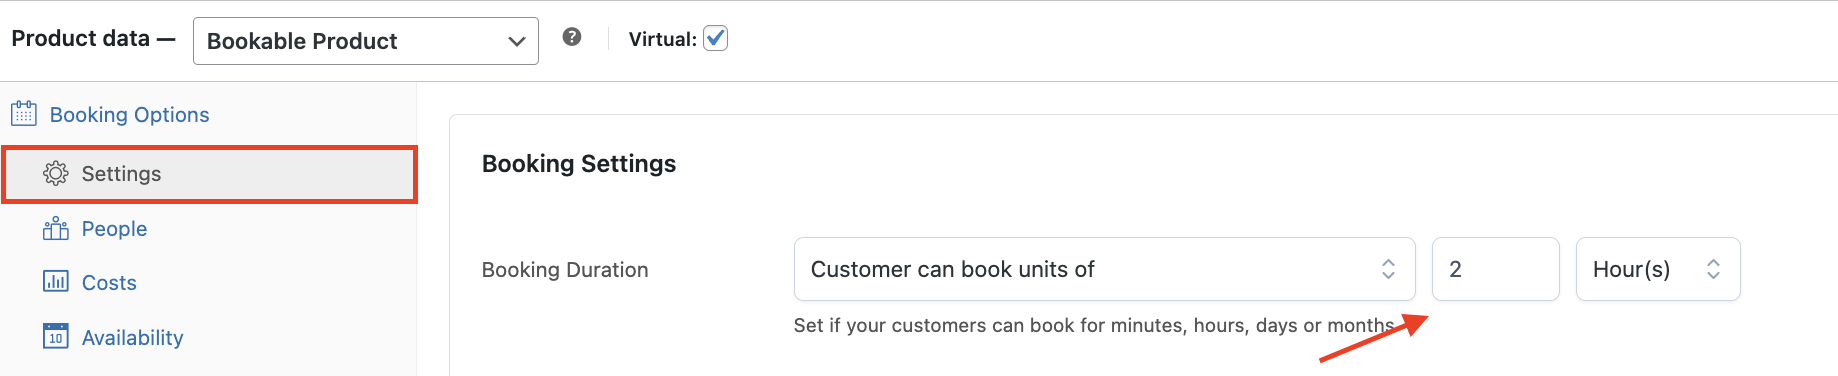
example – Customer can book units of – tool rental
We create a bookable product for a floor cleaning machine rental. People can choose for how many hours they need the product. We are closed on Monday morning and Sunday, and open till late on Fridays. Our daily opening hours are from 06:00 to 17.00 and on Friday until 21.00.

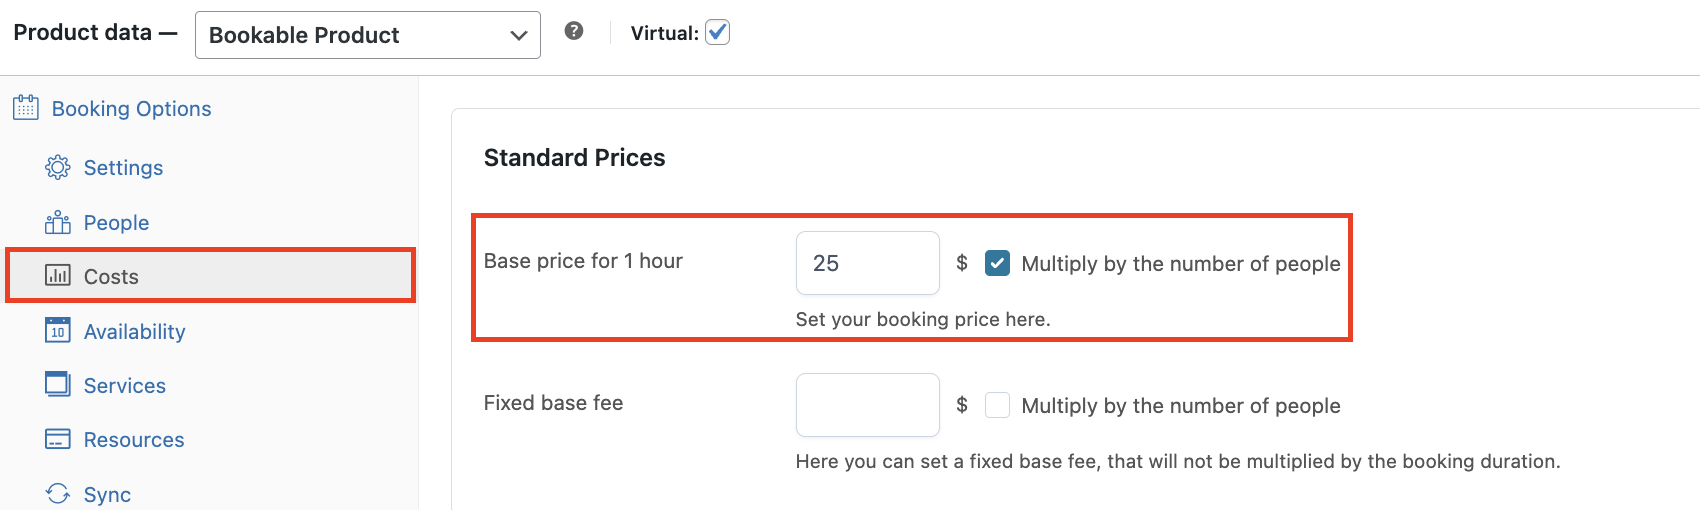
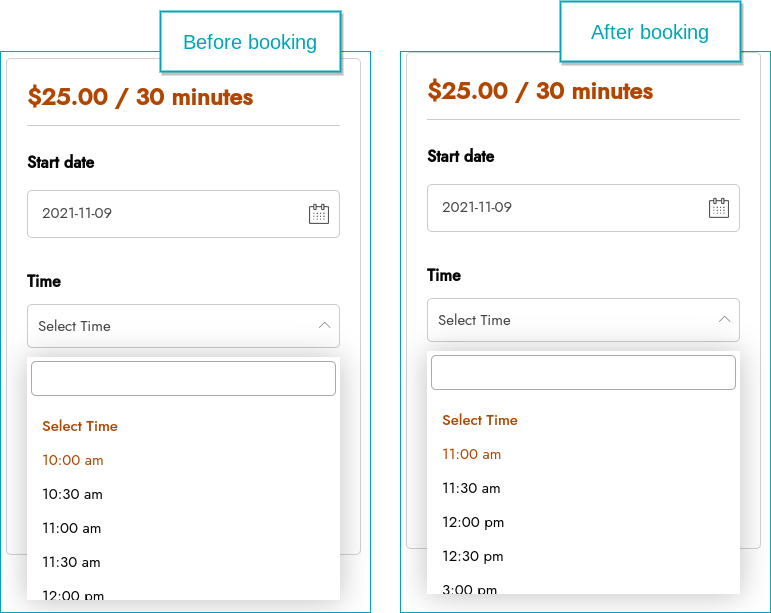
To start off, we set the ‘booking duration’ to “Customer can book units of” 1 hour(s). And we set a price of $25 per hour.
Now we move on to the default booking availability rules.

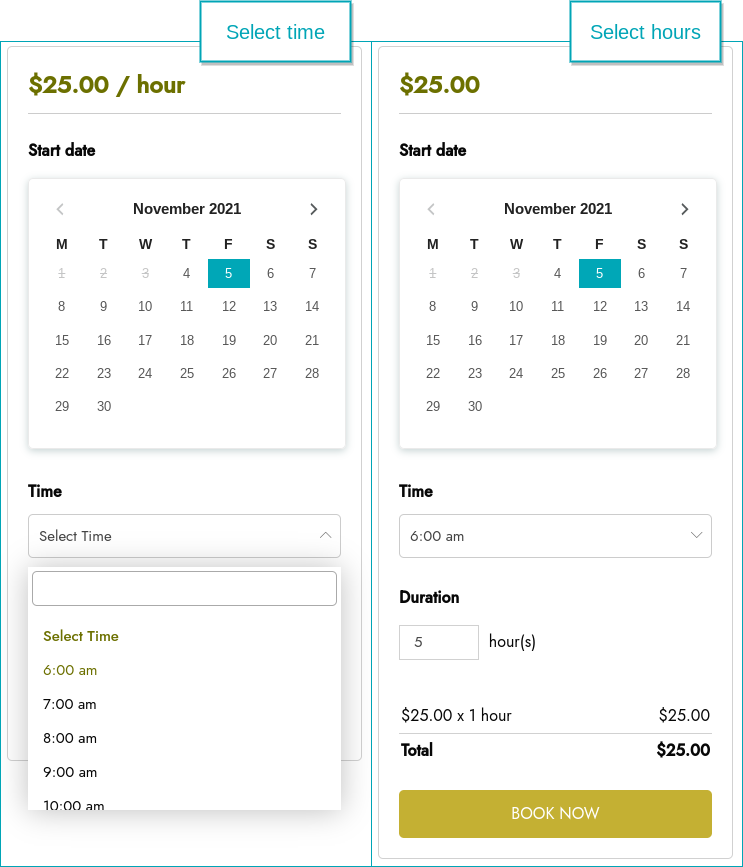
We set all days to “Bookable” and select “Set hours” so we can start applying our default opening hours. Below an example of what the booking form will look like for the customer:
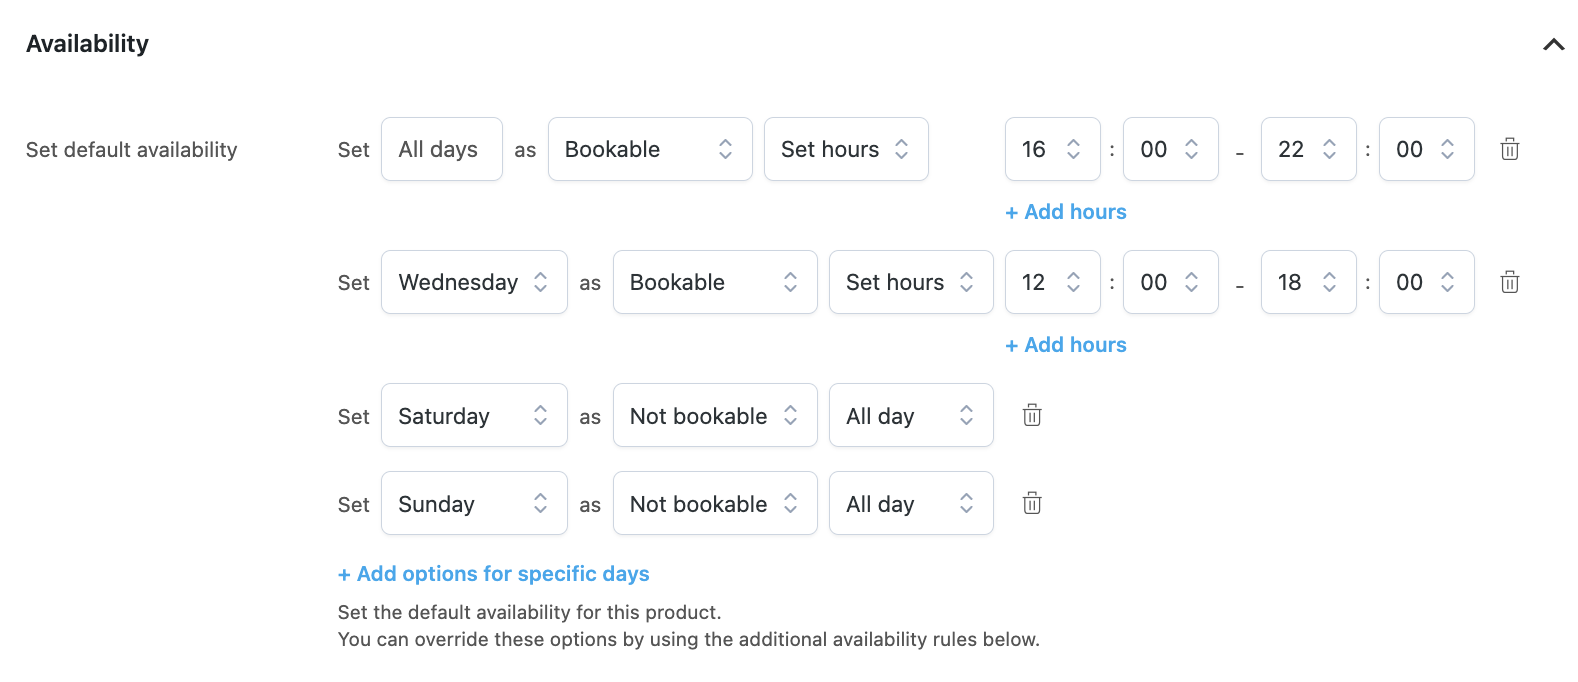
Now that we have set our opening hours, we will use the “+ Add options for specific days” option, to decide our days of closure.
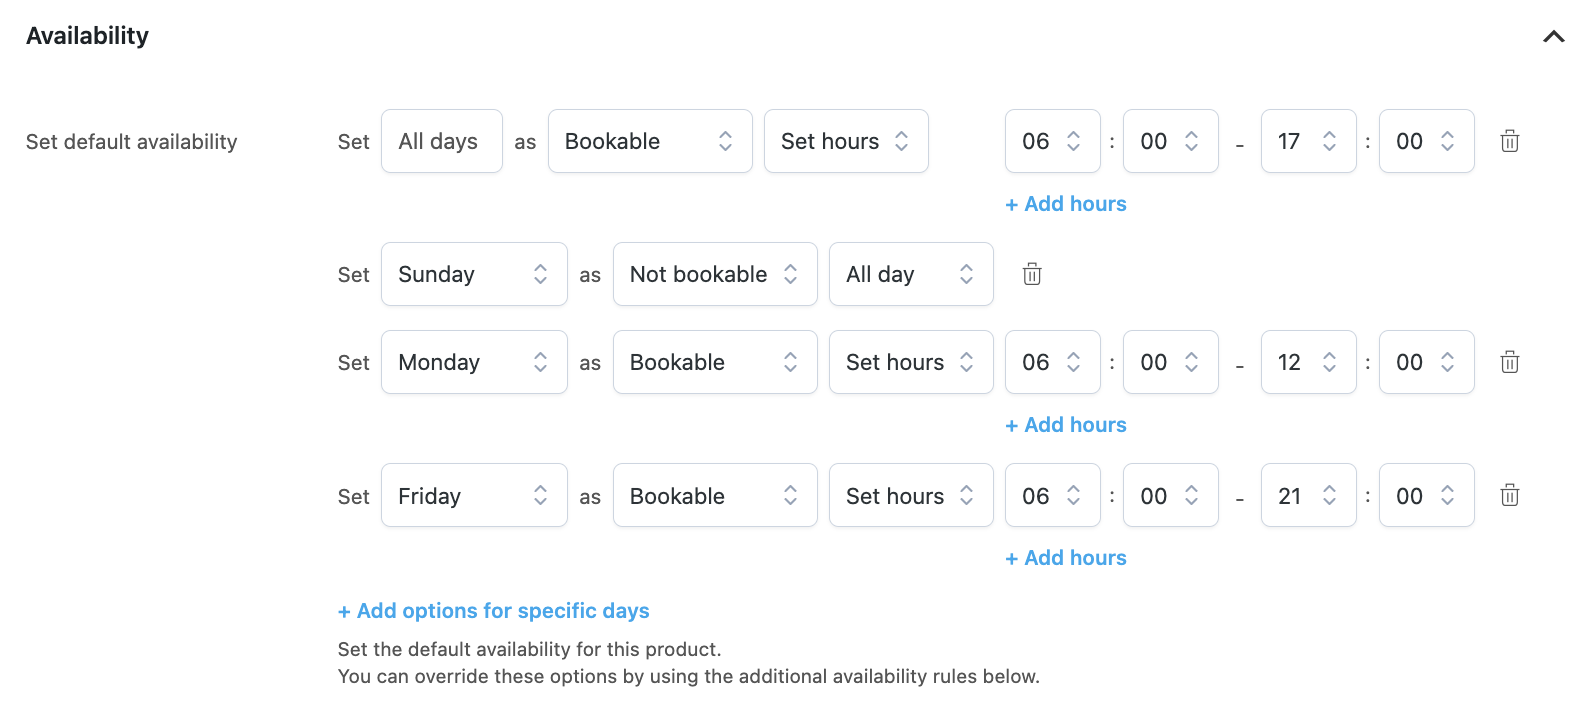
We set Sunday to not bookable all day, we set Monday morning to not bookable from 06:00 to 12:00 as we are closed for the morning. And we set Friday to bookable from 06:00 to 21:00. These rules you add here will override the default availability rules you set before.
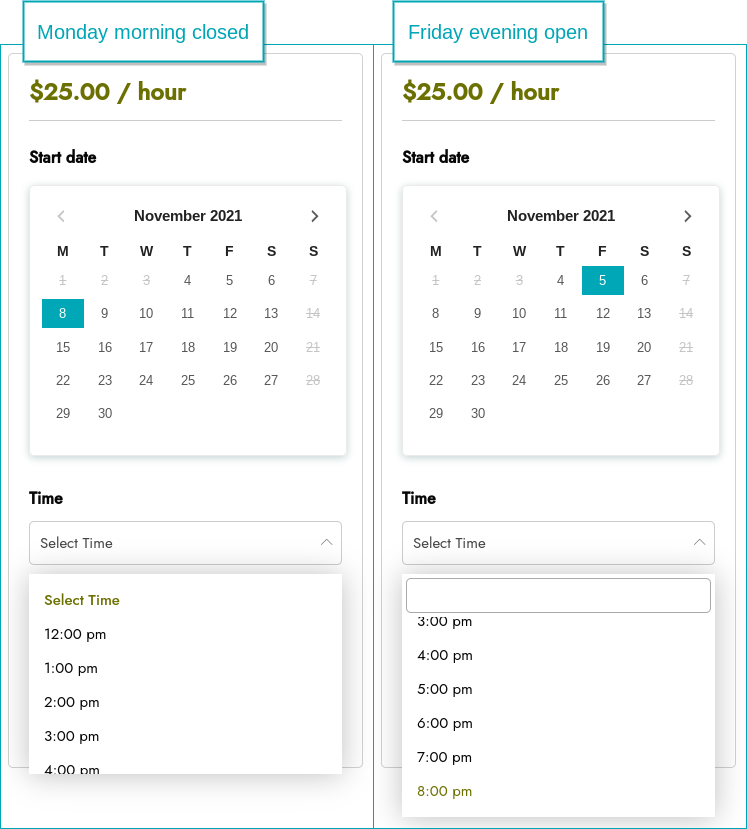
Below an example of what the booking form will look like when the customer wants to select one of these days:
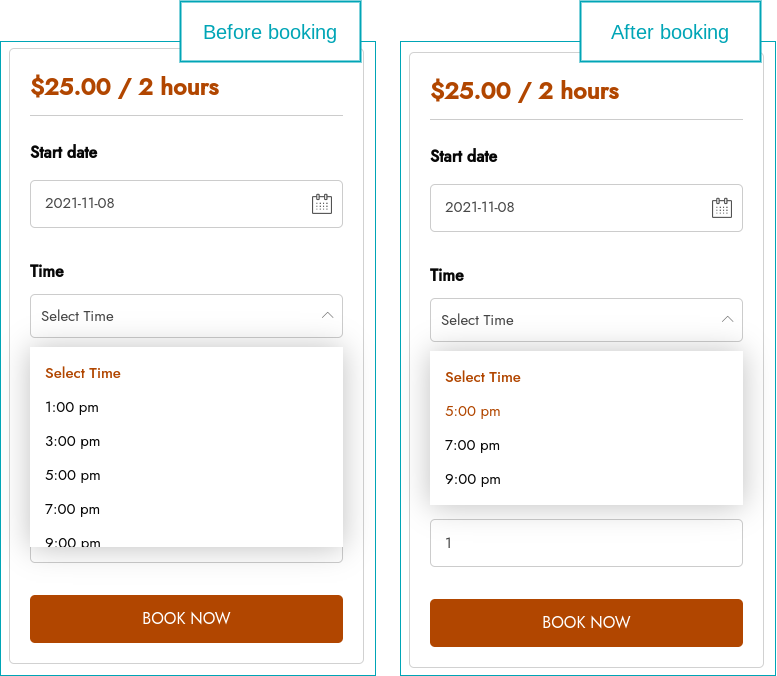
No time available in calendar
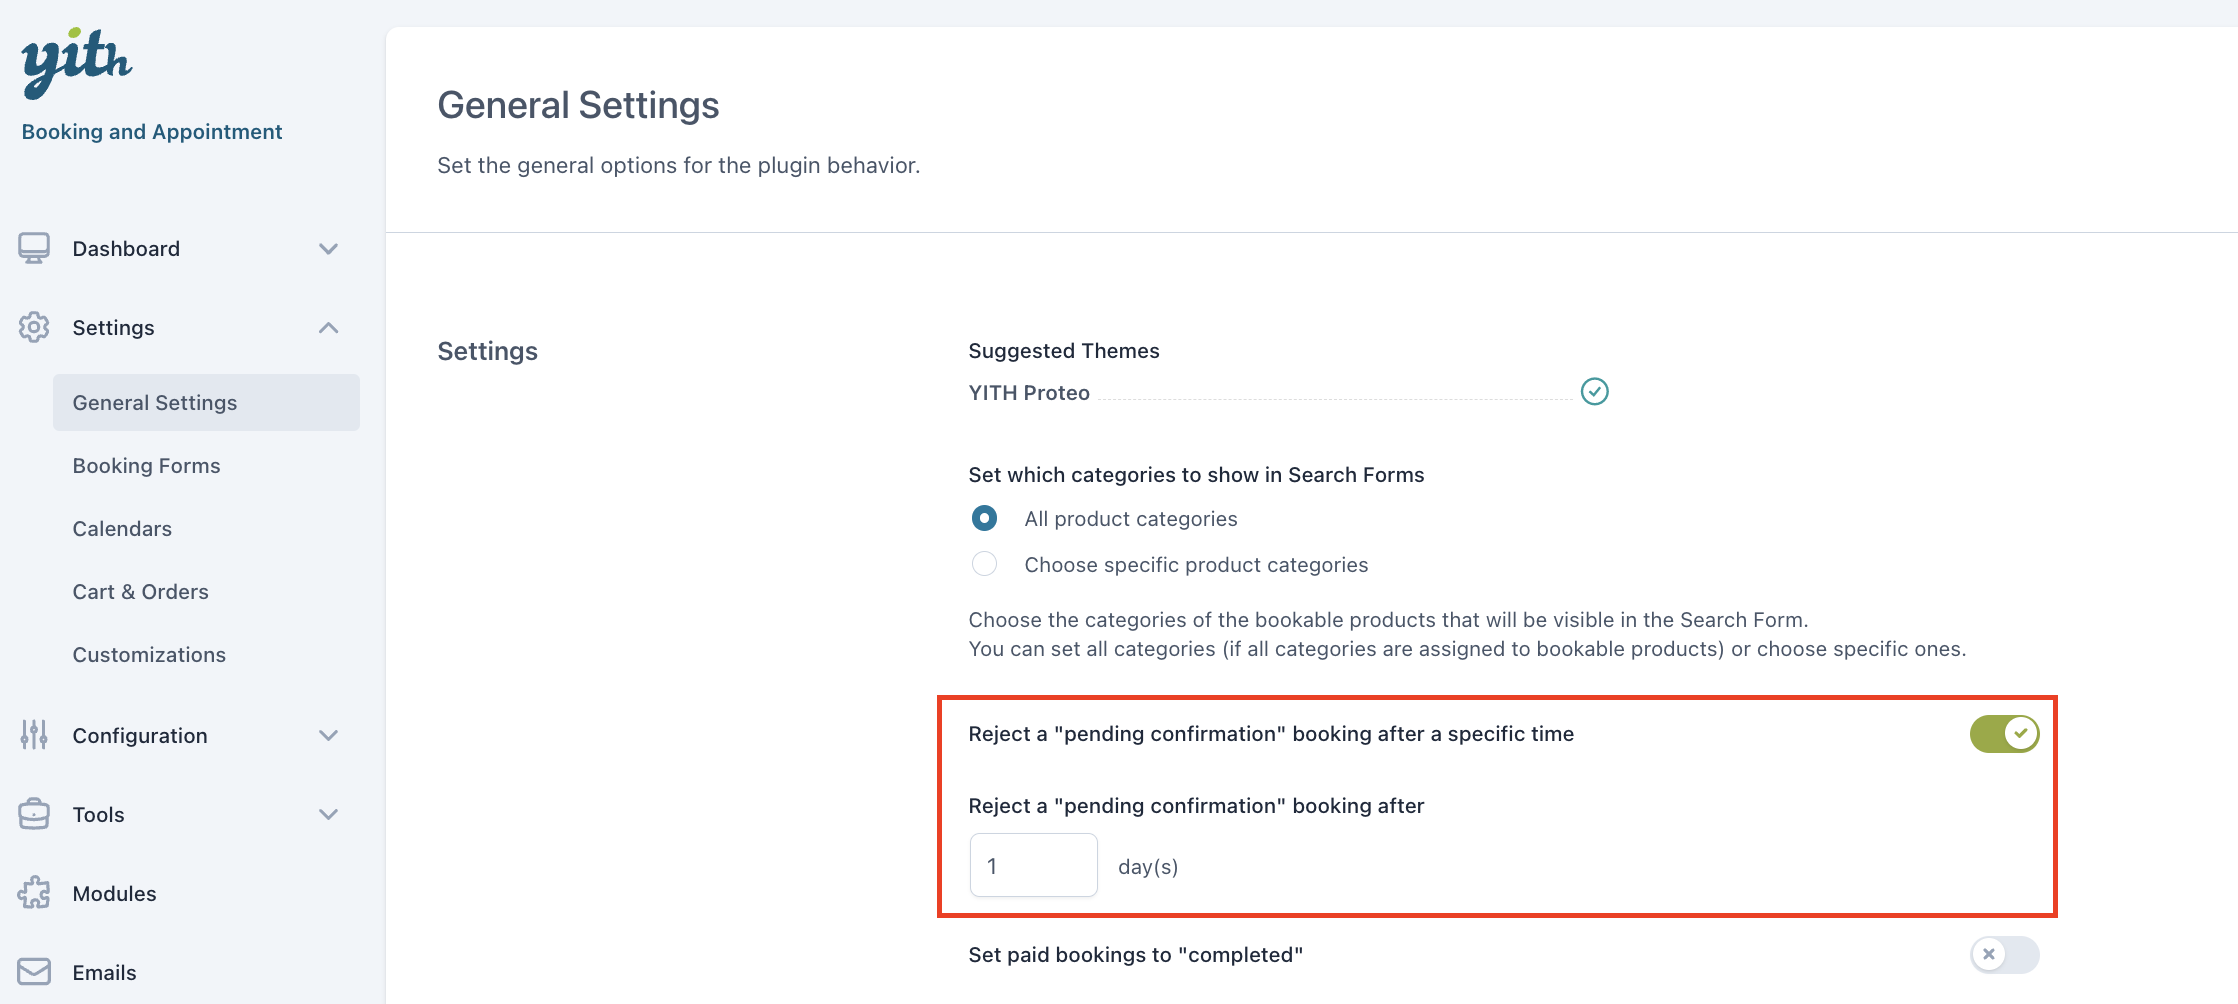
For per-minute bookings, the plugin adds the possibility to disable the complete day, if no time is available. You can do so by enabling the option “Disable day if no time is available“. From YITH > Booking > Settings > “Booking forms”.
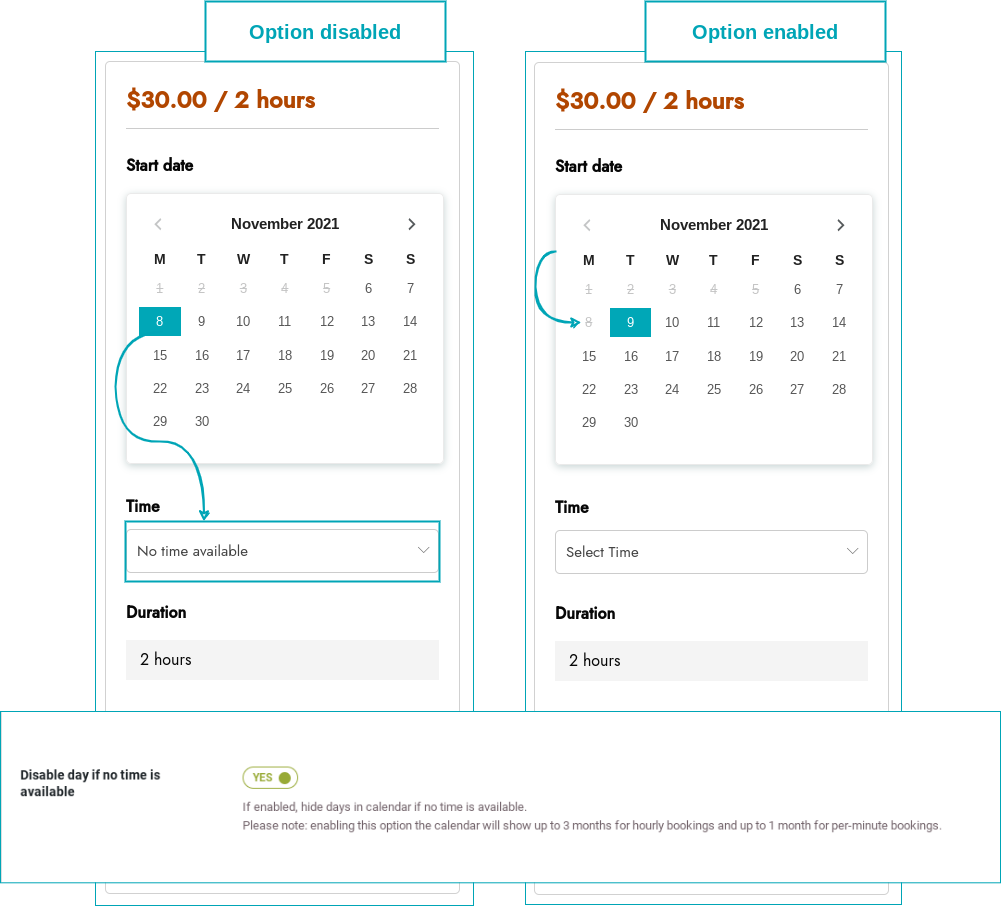
We know that all hours of 8 November are booked, therefore it is no longer possible to book this date. In the example above you can see an example of the “Disable day if no time is available” option disabled and enabled.
In the disabled image, you can see the date as ‘bookable’ but when you click on it you’ll see ‘no time available‘. In the enabled image, you directly see the date as “not bookable”.
Please note: if enabled, the calendar will show up to 1 month.


