Each product or service you want to offer to your customers through a booking system is managed on WooCommerce as a “bookable product”. So, no matter if you want to get bookings for a room, a hotel, guitar lessons, or a medical appointment: the first step is always to create a bookable product.
- Create a new product in Products > Add New
- In the Product Data section, select “Bookable Product” and also check the “Virtual” option if the product is not a physical product that will be shipped. Then you’ll see the “Booking Options” menu:
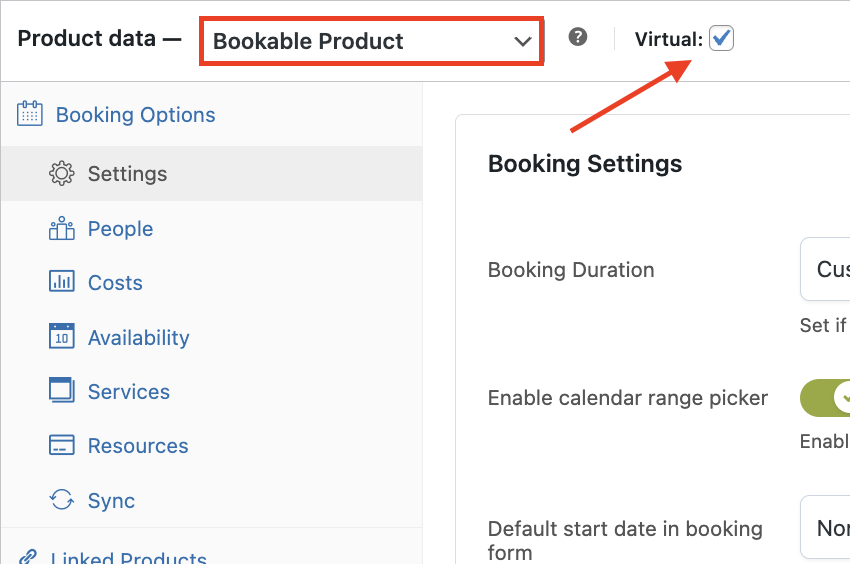
Step 1 – Booking settings
The first section in the Booking Options menu is Settings, it’s where you’ll start configuring the bookable product.
- Set the Booking duration: here you can set if your customers can book for minutes, hours, days or months (e.g.: for an appointment, users usually book for hours or minutes; for a hotel room, they usually book for days, etc.):

- You can enable the calendar range picker so the calendar is shown in the booking form on this product’s page:

- You can also choose the default day to show in the booking form: you can choose to leave the field empty, show the current day, the current day + 1, the first date available, or set a custom date:

- Then you can enable the “Full day booking” option. If you do, a booking from day 1 to day 2, will consider day 2 as fully booked and it will not be available for other customers to be chosen:

- Below, you can set the allowed start day (e.g.: bookings can only start on Mondays) or leave empty if customers can start the booking any day of the week:

- Then you’ll find the Booking Terms section where you can set the maximum number of bookings allowed per unit. For example, if you rent out three rooms in the same house, you can set “3”; if you rent out the entire house in a single booking and you need to prevent multiple bookings in the same period, you should set it as “1”:

- Optional: set a minimum/maximum booking duration (e.g.: you can decide customers need to book the hotel rooms for a minimum of three days). Leave these fields empty if you don’t need to set any limits:

- Optional: set a minimum/maximum advance reservation.

- Optional: set check-in and check-out times. This info will be shown in the booking form:

- Optional: set a buffer time between bookings: this can be useful in case you need time between bookings for the cleaning service to clean the room or simply a pause before the next booking begins:

- You can enable the “Require confirmation” option if you want to get booking requests and confirm each request manually:

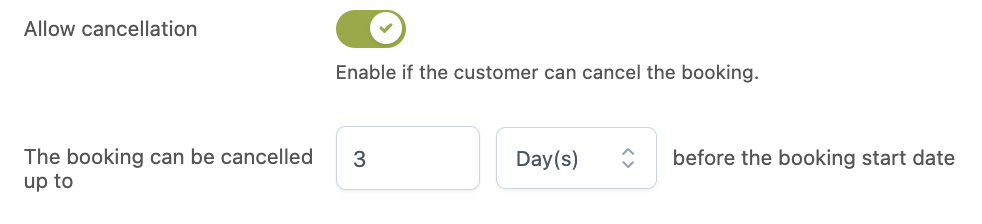
- And you can also enable the “Allow cancellation” option if you want to allow customers to cancel their bookings. If this option is enabled, you can set a time limit, e.g.: the user can cancel a booking up to 3 days before the booking start date.
- The last section, Google Maps, allows you to enter an address for the bookable product after setting your Google Maps API key and only if the Google Maps module has been enabled. By doing this, you can add a map with the location on the product page using the related shortcode:

Step 2 – People settings (available only if the “People” module is enabled)
In the People section, you can set all the options related to the people types.
- First, you have to enable the option to assign people to the product:

- Once enabled, you can set a minimum and a maximum number of people per booking. For example, if you rent out an apartment with two rooms, you can set a minimum of 1 person and a maximum of 8 people:

- You can then enable the “Count people as separated bookings” option if you need to have only a fixed number of people per booking and count each person as a separate booking. This option is useful if you have limited availability for the bookable product, for example, you only have 10 bikes and you need to update the available quantity according to the bookings received:

- You can also enable people types if you want to enable some for this specific product; keep in mind people types are created in the plugin configuration panel first:

- By enabling people types, a People Types section will appear where you can enable the people types you want to show in this product and, for each of them, you can set the min/max number of people per booking (e.g.: you can set a maximum of 2 children per booking). You can also set the price for each person, this will override the base price set for the product (e.g.: the base price is $100/day per person but you can override this just for students and give them a special price of $50/day):

Step 3 – Costs
In the Costs section, you can set all the options related to the bookable product’s costs.
- First, you’ll see the Standard Prices options where you can set the base price for the product (per hour/day/week/month: this depends on the booking duration you set before) and decide if you want to multiply the base price by the number of people or not. For example, you can rent out an apartment with a fixed price of $100/day, no matter how many guests are included in the booking, or set a price of $100/day to be multiplied by the number of guests:

- If the “Multiply by the number of people” option is not checked, you can set an optional extra price for additional people. For example, you can set a fixed price of $100/day for the first two guests and then an extra $20/day for each additional guest:

- You can also set an optional fee to charge and choose if you want to multiply that fee by the number of people or not. For example, you can create a $5 individual tax fee that all guests must pay or just a single fee to charge for the entire booking, no matter how many guests are included in the booking, like this:

- In the Discounts section you can set a special last-minute discount for users booking a specific number of days before the booking start date:

- In the Extra Costs section, you can set a price for the global costs that were previously created in the plugin panel or create new costs for this specific product. For example, you can add a mandatory $10 cleaning fee to each booking or check the people and/or duration options in case you want to multiply the cost:

- The last section, Advanced Price Rules, allows you to create all kinds of rules to automatically change the price of the product’s base price or fee. For example, you can increase prices during the high season (e.g.: +10% during August and September) and decrease them during the low season. You can also increase the price on Sundays or during holidays, or even set a 35% discount on all bookings for this product during Black Friday:

Step 4 – Availability
In the Availability section, you can set all the options related to the bookable product’s availability.
- First, you can set the default availability. You can just leave the product as available all days and for the entire day or set a specific availability for days or hours:

For example, if you have a doctor’s office you can set it as not available for appointments on Saturdays or Sundays. If you have an apartment that can be booked per day but you want to use it every Monday, you can set all Mondays as “Not bookable”:

- You can then create advanced availability rules: you can use the rules to enable/disable the booking availability on specific dates or months. For example, a doctor’s office will be closed for holidays for the whole month of August, so you can create a rule to set August as “Not bookable”:

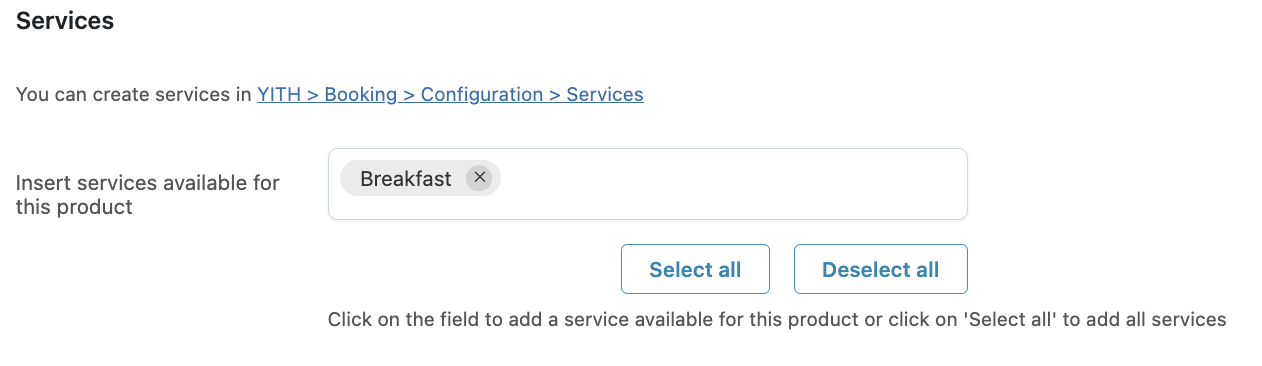
Step 5 – Services (available only if the “Services” module is enabled)
- In the Services section, you can add any service you created previously in the plugin panel. Since you set the services price and settings while creating them, here you only need to add them to the bookable product:
Step 6 – Resources (available only if the “Resources” module is enabled)
In the Resources section, you can set all the options related to the resources.
- To do that, first you need to enable the option to assign resources to the product:

- Then, you can choose how to assign the resources: you can have customers select only one resource or multiple resources, or you can automatically assign one available resource or all resources.

- Below, you can set your own label for the resources:

- In case you selected the option to have customers select one resource, you can make that resource mandatory or not:

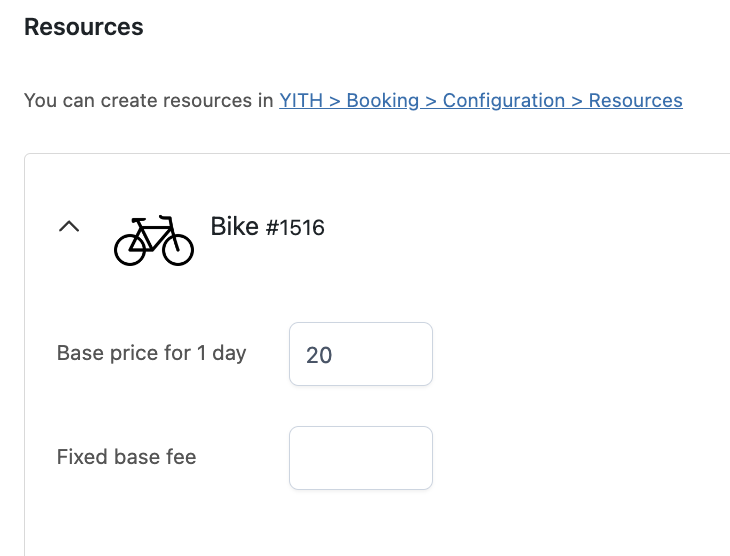
- In the section below, you can click on the “Add resource” button to choose which resources to assign to this product:

- And for each resource added, you can set the price and an optional fee:
 Resources will then be shown in the booking form like this:

Final step
Now you can finish setting up the product by adding a short description, an image to identify the product and publish it. This is the same process used to create a simple product on WooCommerce!