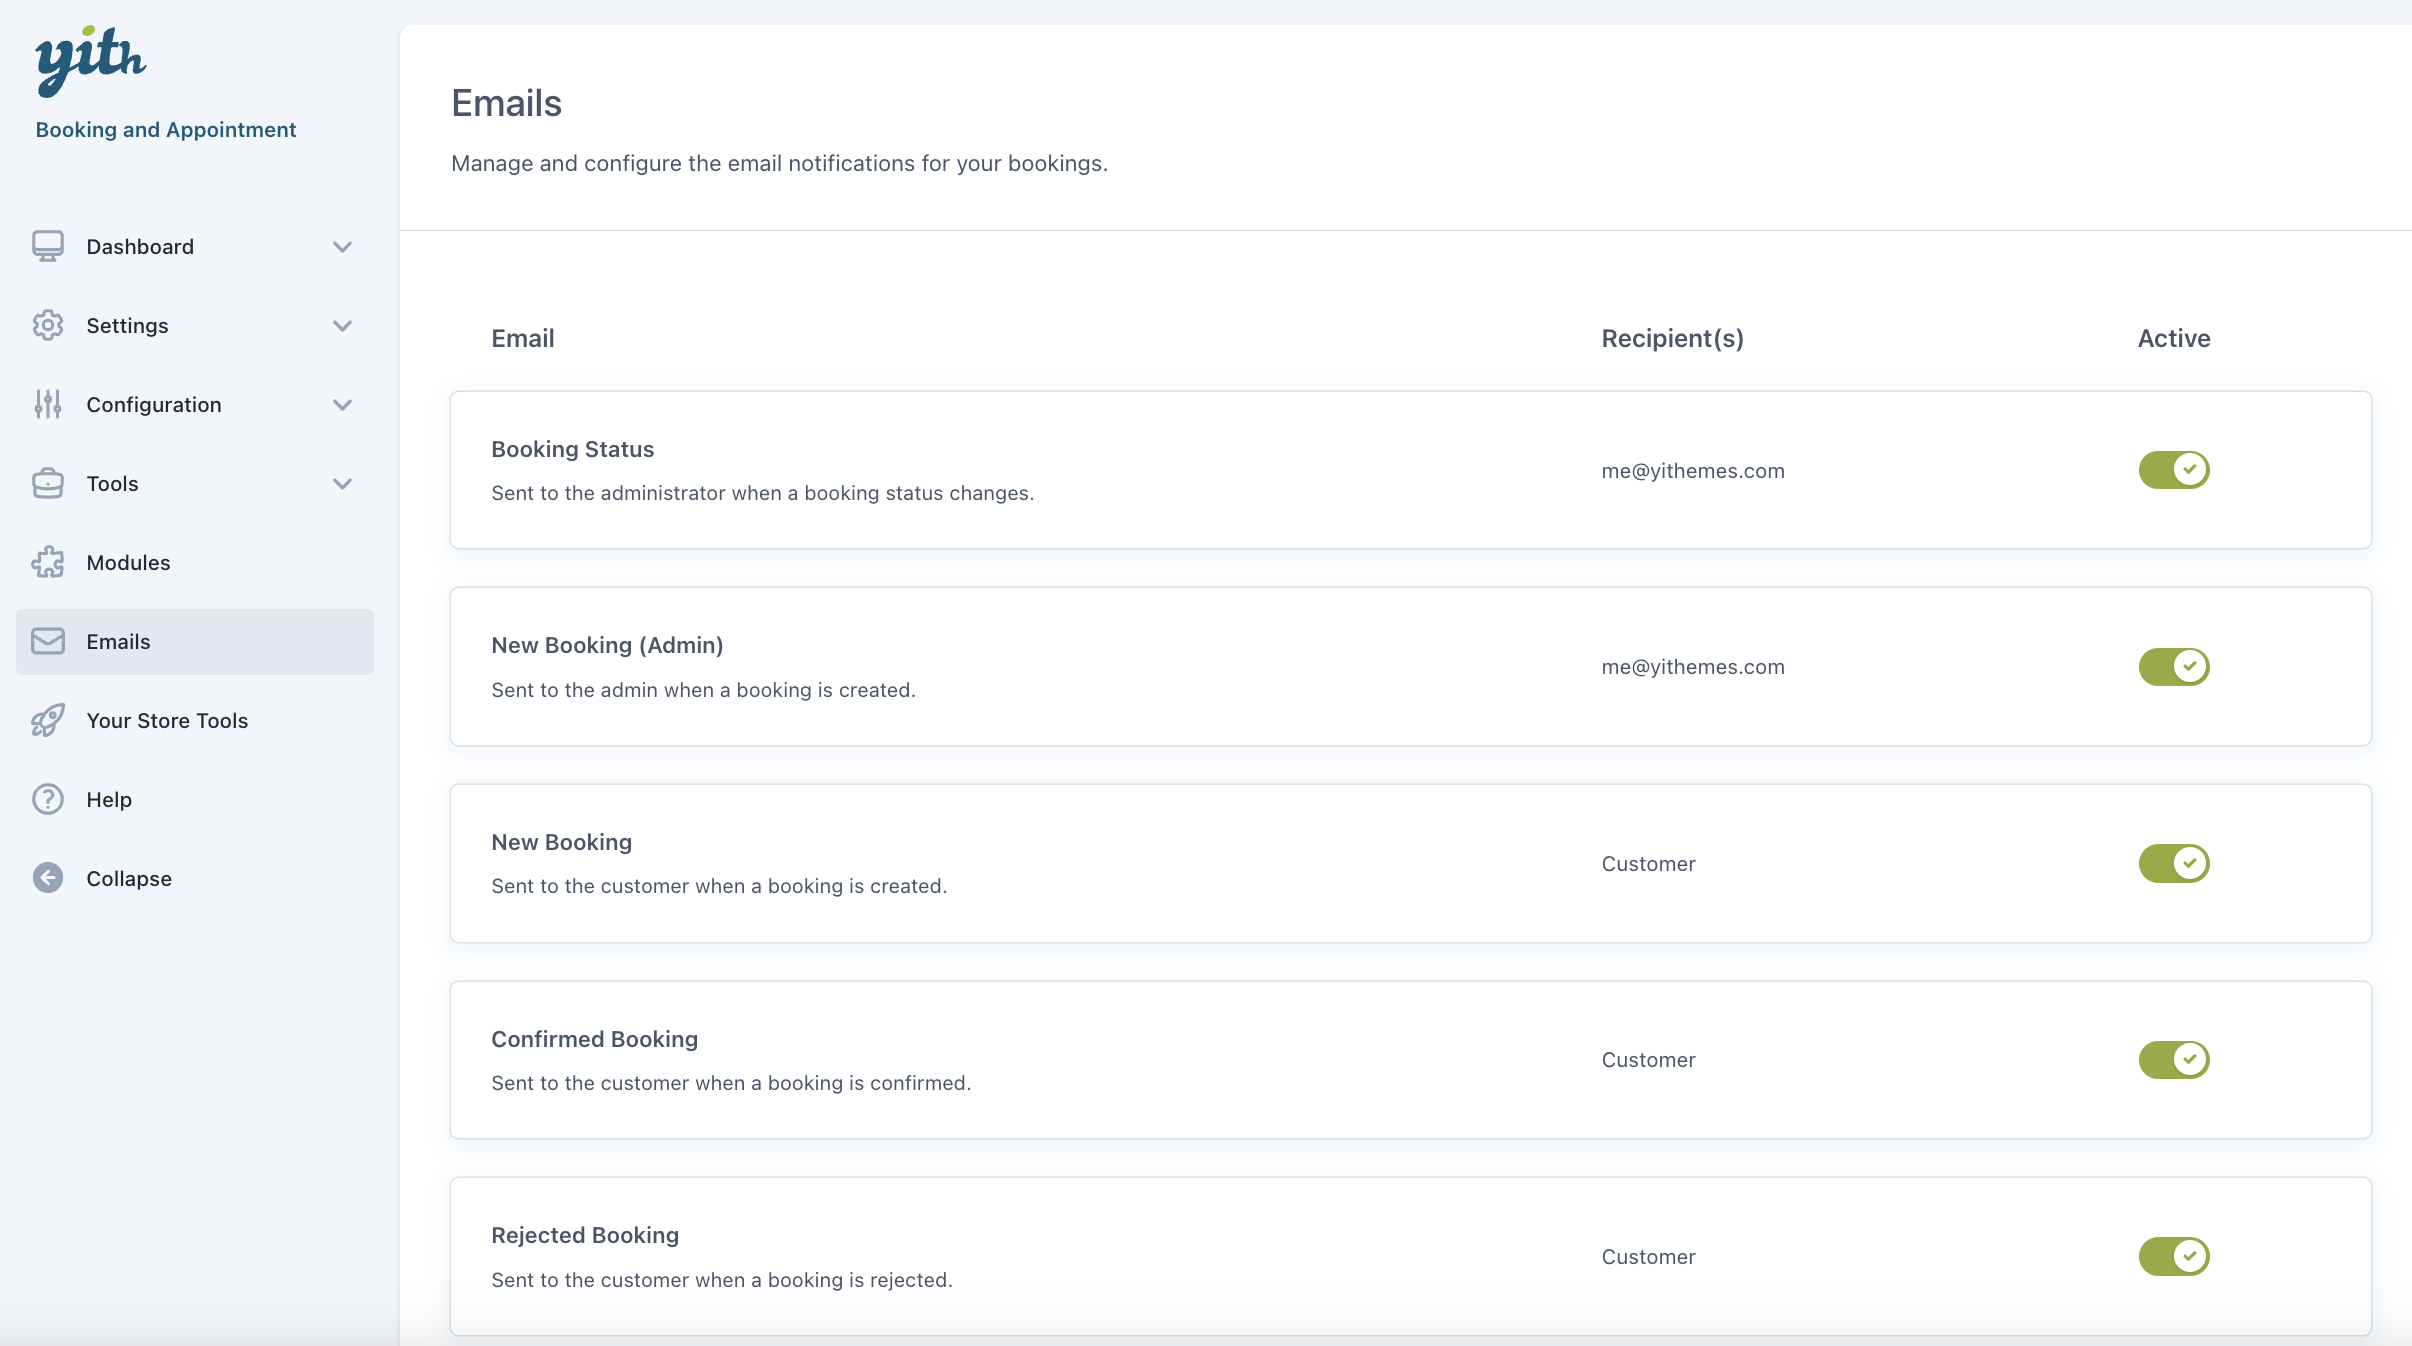
From Booking > Emails, you can enable/disable each email sent by YITH Booking.
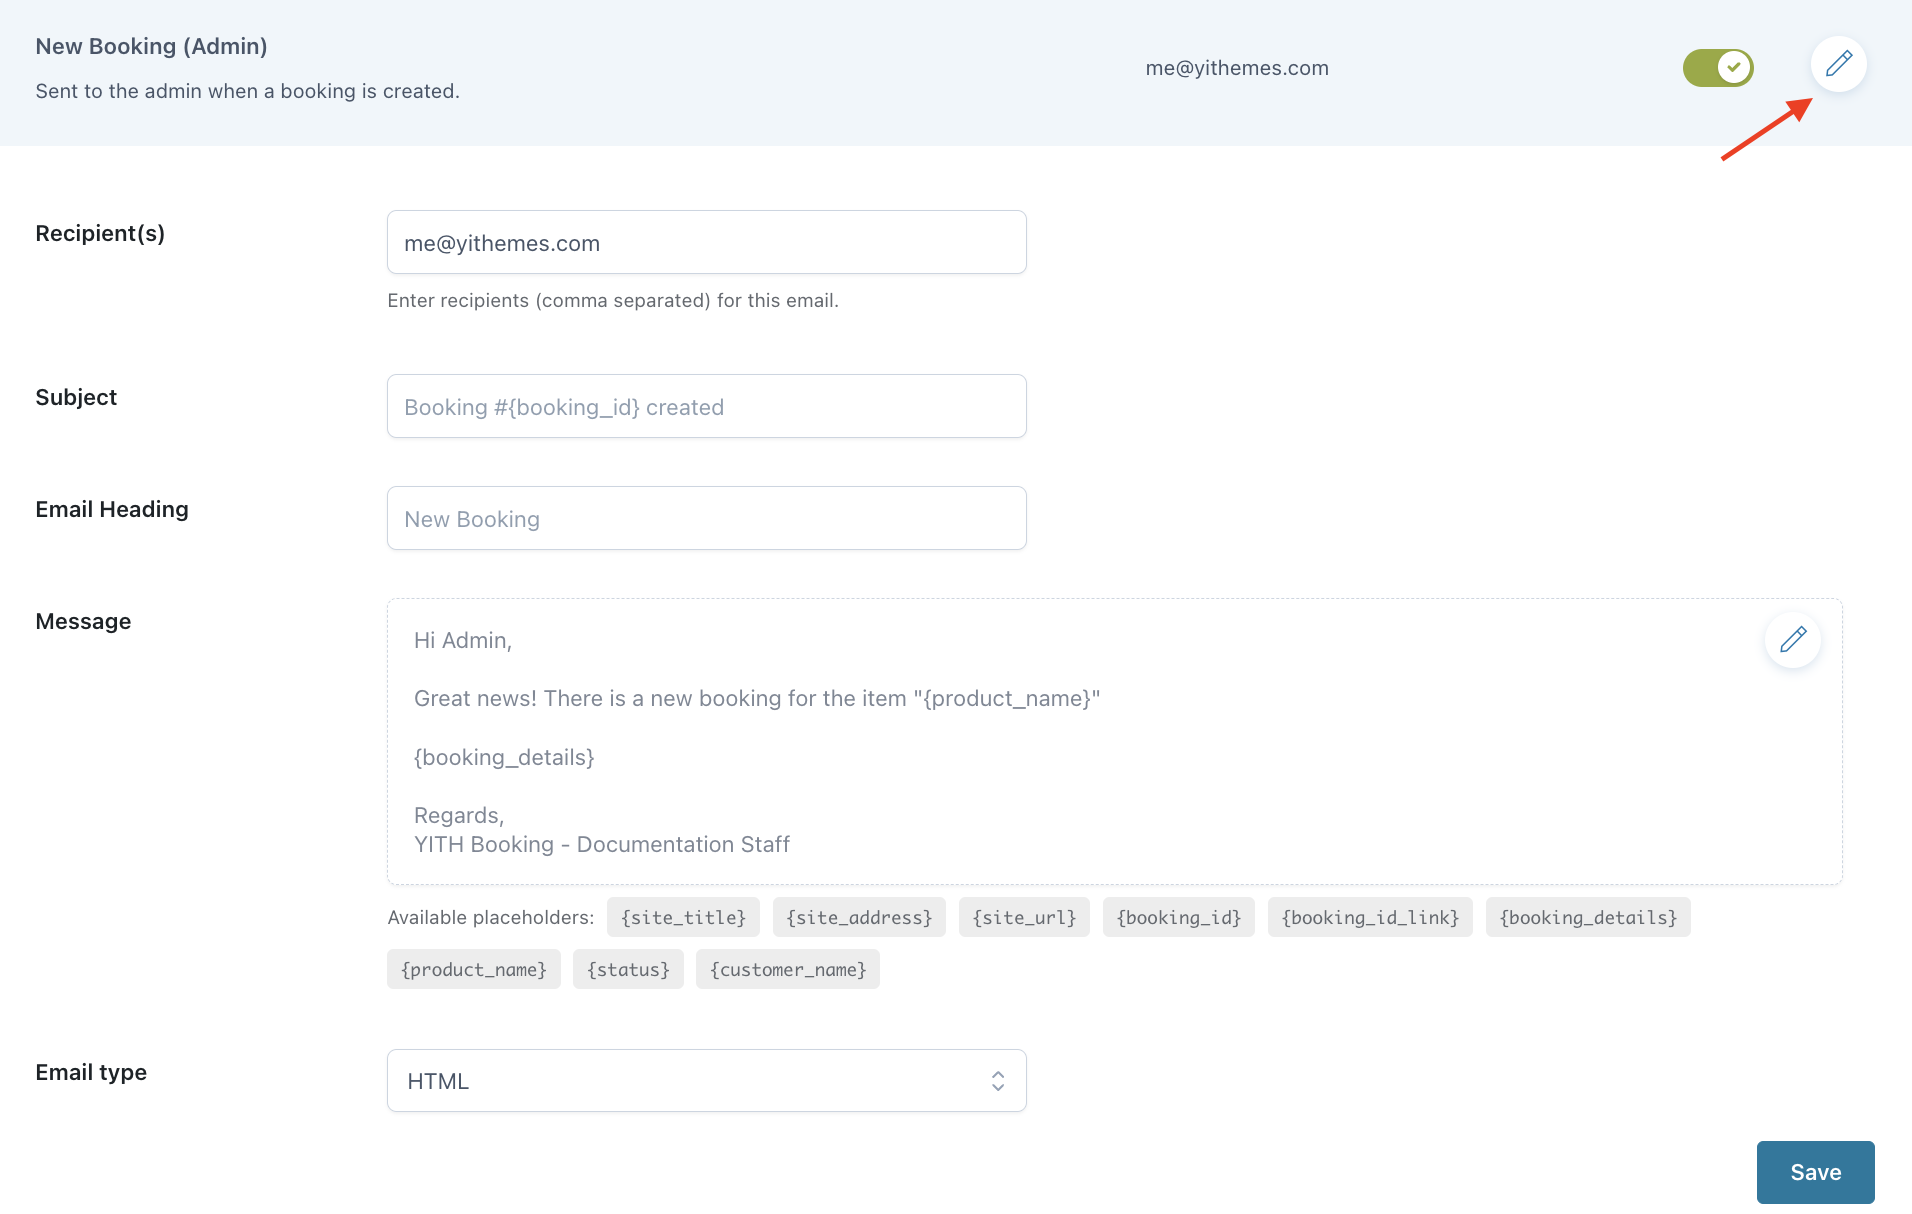
You can also override the default settings, simply by opening the specific email you want to change.
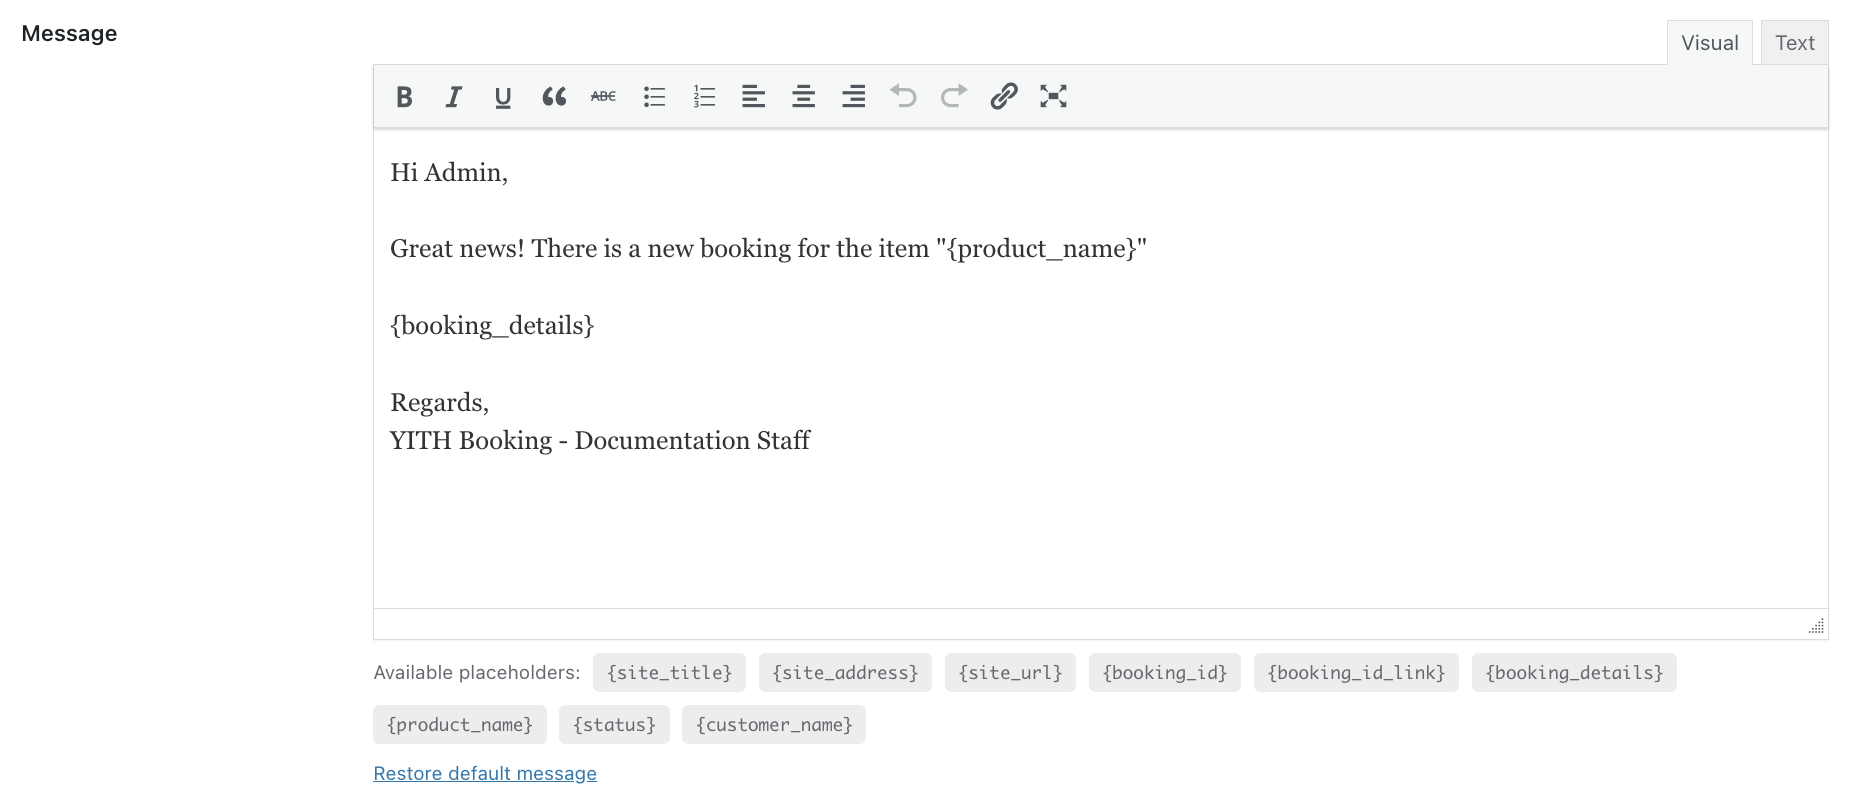
Concerning the message, you can use the available placeholders and also customize the message content by taking advantage of the built-in editor which is accessible by clicking on the pencil icon.
To restore the default message, just click on the related link.
Booking emails include the iCal event so that Gmail shows the event in the email, if you set the email type as “Multipart/alternative”.
Below you can find a list of all the available emails:
Booking Status: this email is sent to the administrator when the status of a booking changes;
New Booking (Admin): this email is sent to the administrator when a booking is created;
New Booking: this email is sent to the customer when a booking is created;
Confirmed Booking: this email is sent to the customer when a booking with a request for confirmation is confirmed;
Rejected Booking: this email is sent to the customer when a booking with a request for confirmation is rejected;
Cancelled Booking: this email is sent to the customer when a booking is cancelled;
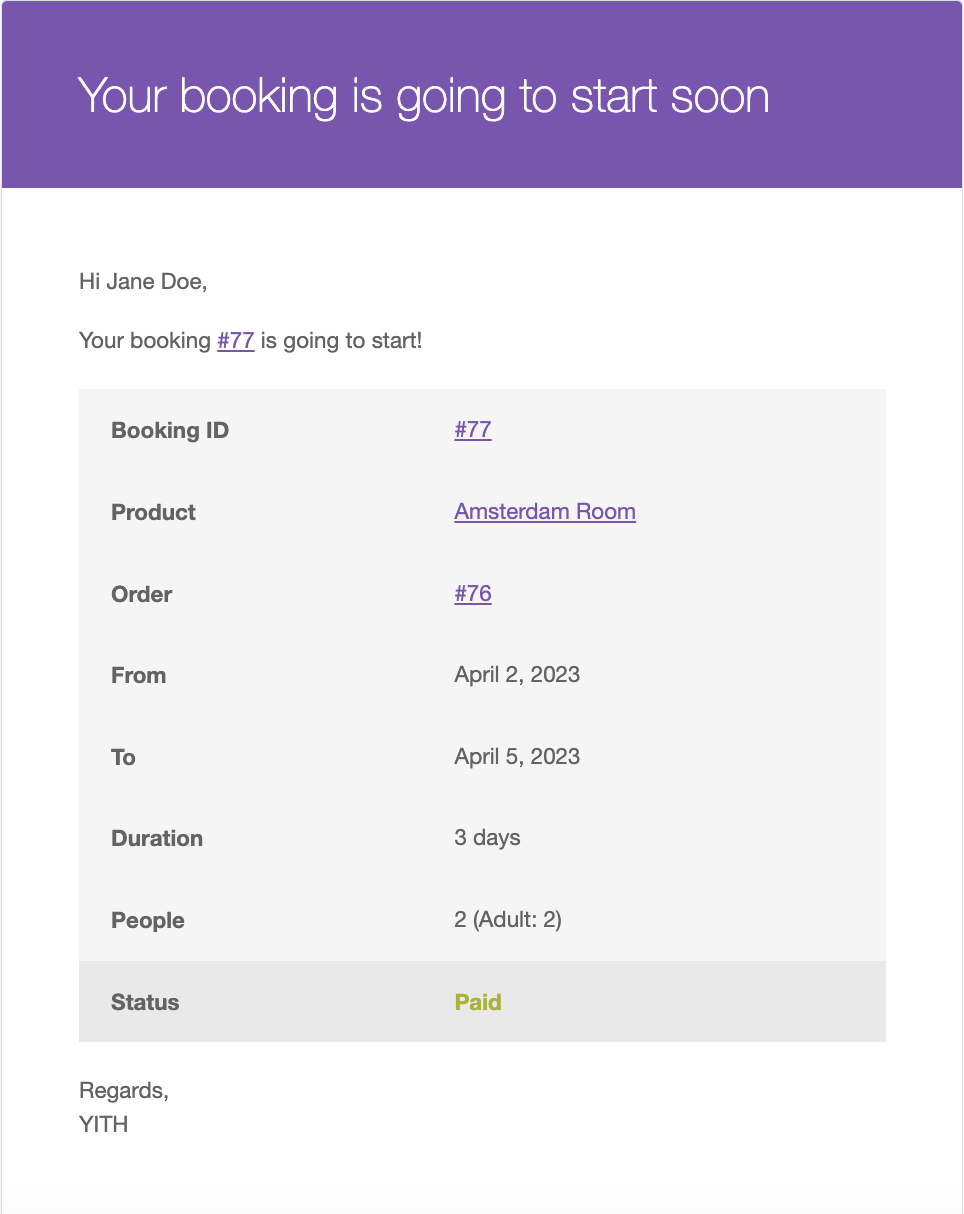
Paid Booking: this email is sent to the customer when a booking is paid;
Completed Booking: this email is sent to the customer when a booking is completed;
Customer Booking Note: this email is sent to the customer when the admin adds a note to the booking;
Booking notification before start date: this email is sent to the customer XX days before the booking start date;
Booking notification after start date: this email is sent to the customer XX days after the booking start date;
Booking notification before end date: this email is sent to the customer XX days before the booking end date;
Booking notification after end date: this email is sent to the customer XX days after the booking end date.
All the booking notifications emails include the option to select the booking status/statuses that will trigger the email sending. If a customer creates a booking after the days range you have configured, the email will be sent a few minutes after the booking creation.
Example: you want to send the email 7 days before the start date. Today is March 15 and a customer creates a booking that will start on March 20, therefore, 5 days before the start date. In this case, they will receive the booking notification email today.
The plugin includes 2 widgets and 4 blocks to print the bookable product and search forms anywhere on your website.
1. Bookable product — widget and block
The ‘Bookable product’ widget and block allow you to print a list of bookable products.
You can manage the selection of products shown by type:
Newest
Hand picked products
Product categories
Top rated
You can also decide the number of columns and rows you want to show in the block.
This block inherits the style options from the theme that you are using.
2. Booking form — block only
With the ‘Booking form’ block, you will be able to print a form for one specific product, so it can be displayed on any page on your site (not just the product page). In this way, the customer can select the dates and add the product to the cart in a few clicks.
Search for “Booking form” among the blocks.
Then, you will be able to select a product (you can type the product name) from the Block settings on the right-hand side.
The block includes also the following options:
Show title: show the product name
Title heading tag: you can select the style of the title
Show rating: this shows the product rating
Show meta: enable to show the meta section, containing SKU, categories and tags.
Use full-width button: enable it if you want the booking Add to cart button to use the full width of the block.
Style options are included as well, so you can customize:
Text color
Background color
Padding (px)
Border color
Border style: solid, dashed, dotted
Border thickness (px)
Border radius
3. Bookable product form — widget and block
This block or widget can be used to print the bookable form of the current product. This has to be used on a product page or in a template that will be rendered on the product page.
You can enable/disable the following options:
Show rating
Use full-width button
Use compact view on mobile
Additionally, you can also edit the style options:
Text color
Background color
Padding (px)
Border color
Border style: solid, dashed, dotted
Border thickness (px)
Border radius
4. Search form – block only
With the ‘Search form’ block, you will be able to print a search form on any page on your site.
The block includes the following options:
Select the search form: here you can choose the search form to print among those you have previously created.
Below you will find the available shortcode options in the plugin. The links will take you to the page where you’ll find the shortcode and a case of use.
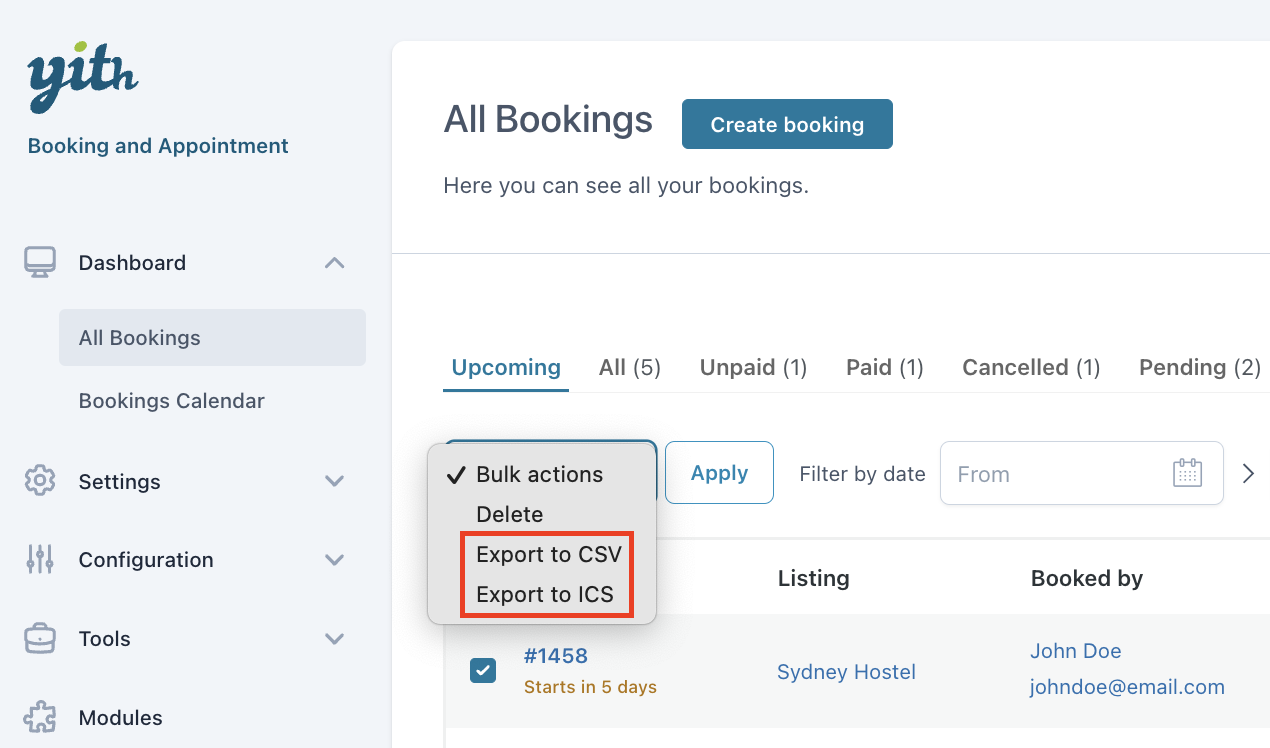
From YITH > Booking > Dashboard > All bookings > “Create booking” you can manually add new bookings
Note: this is to create a “booking”, not to create the “booking product” itself.
You can decide to link the booking to an existing user, or a guest user. Search the booking product you want to use, add the dates, and, if enabled, the number of people, resources, services, etc.
Note: When creating a booking, all the dates included must be available and consecutive. For example, users can’t book any product or service from October 1st to October 10th if the 5th and 6th have been already booked by another customer.
Below you will see the totals of the booking, and the button to create the booking.
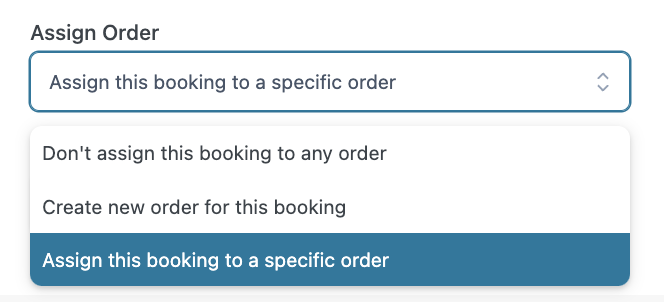
The “Assign to order” option lets you decide whether to link the booking to an order or not:
Don’t assign this booking to any order: the booking will be created without a linked order.
Assign this booking to a specific order: a new field will appear where you can add the specific order number.
Create new order for this booking: Booking will create a new booking and a new order. After creating both of them, you’ll be redirected to the “edit order” page to see the result.
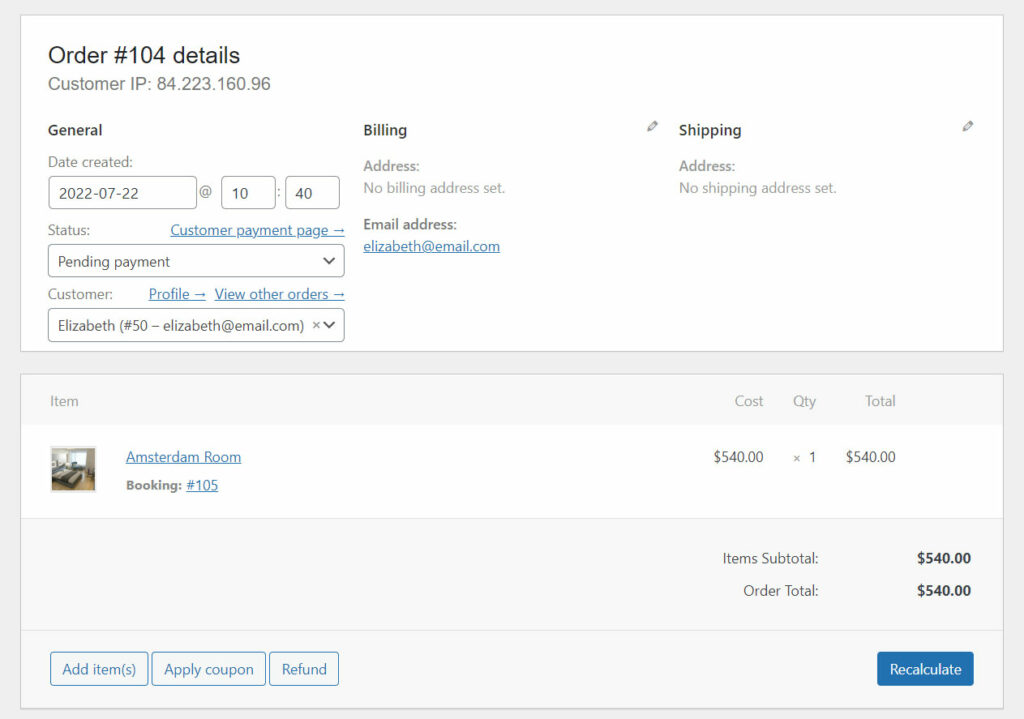
This is the only way to add a ‘booking product‘, to an order. You cannot add a booking product to the order from the ‘edit order’ page.
Be careful if you choose to associate an already existing order. This could cause issues with invoice management.