In YITH > Request a Quote > Quote Requests, you can see an overview of all quote requests.
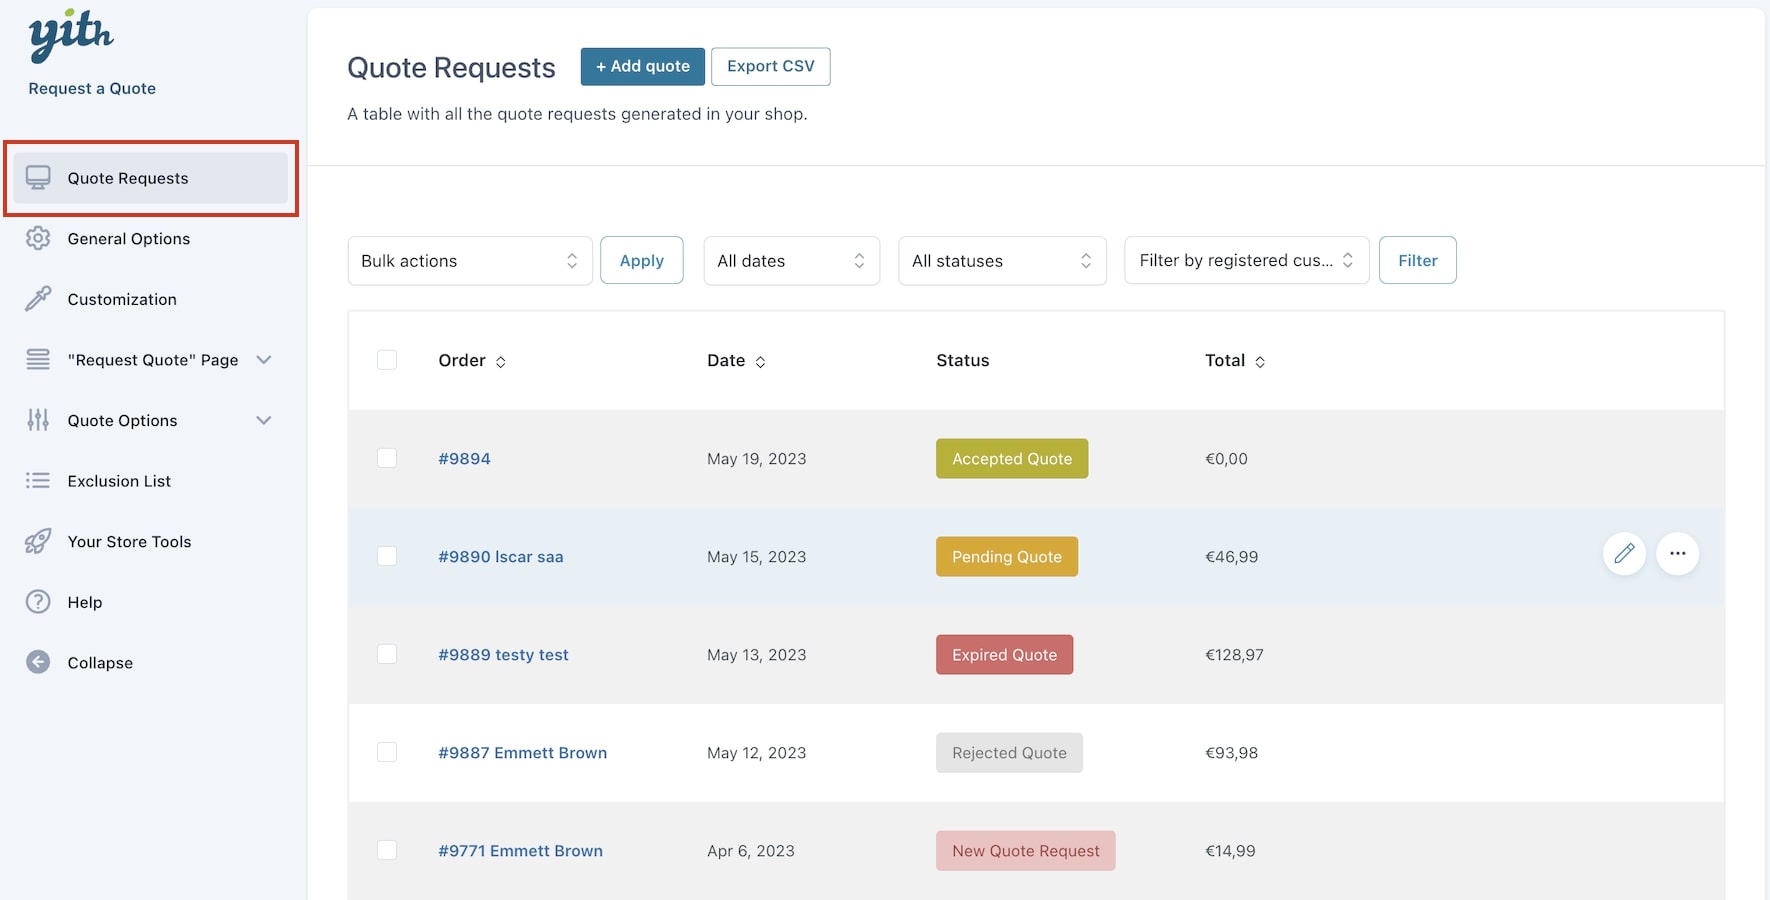
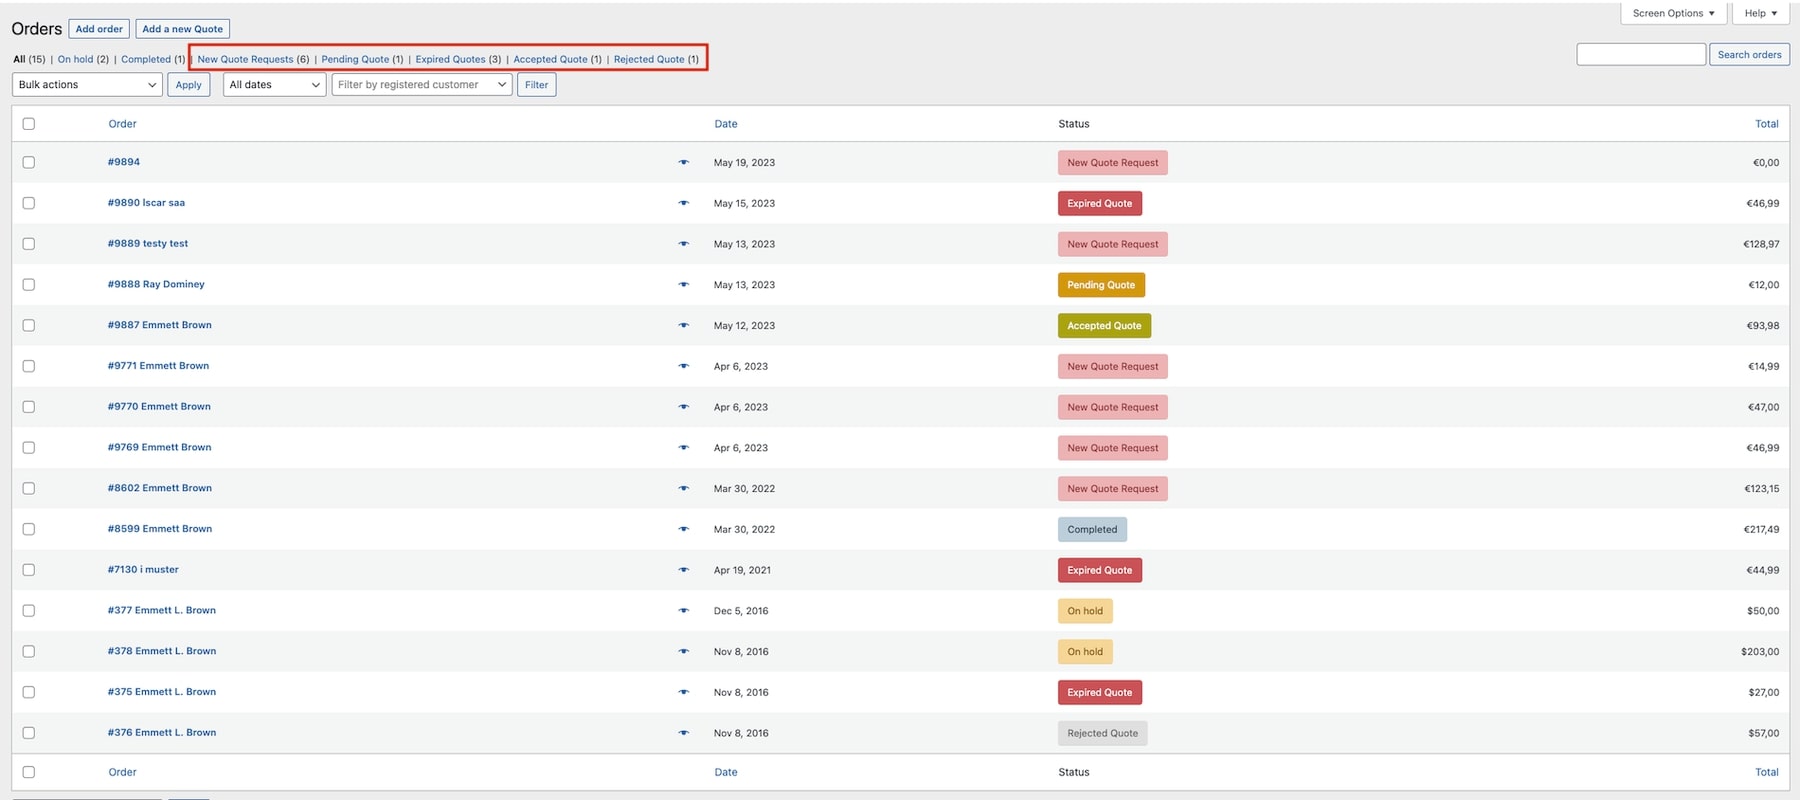
Here, you will see all the quote requests received. Requests will be also visible on WooCommerce > Orders page in dedicated tabs as shown below.
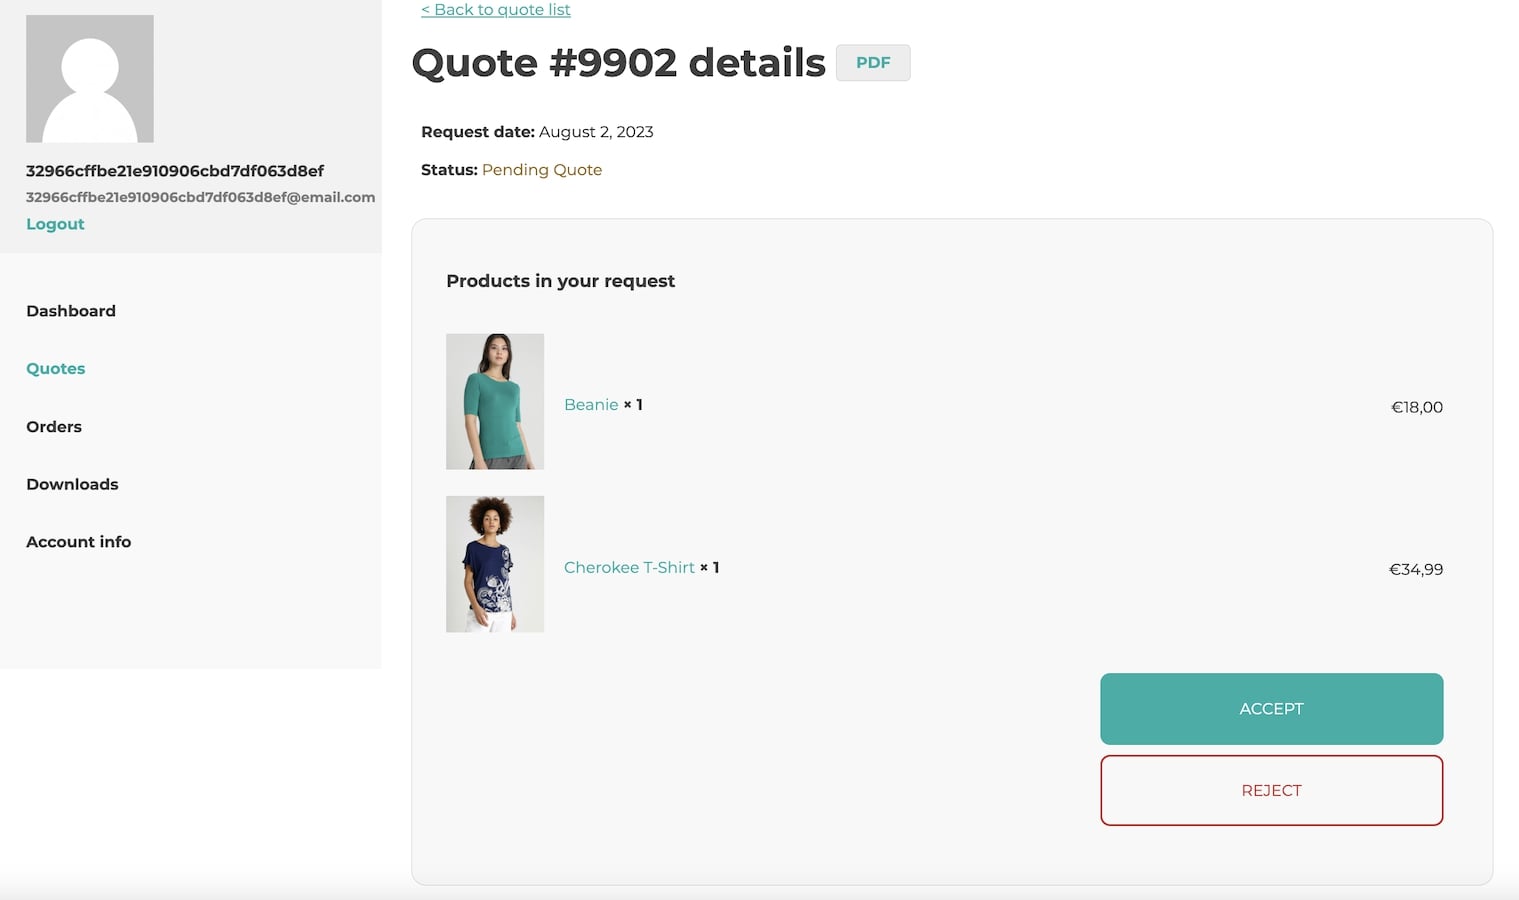
You can quickly see the status of each quote:
- New quote request
- Pending quote
- Expired quote
- Accepted quote
- Rejected quote
When clicking on any quote, you will be redirected to the specific quote detail page.
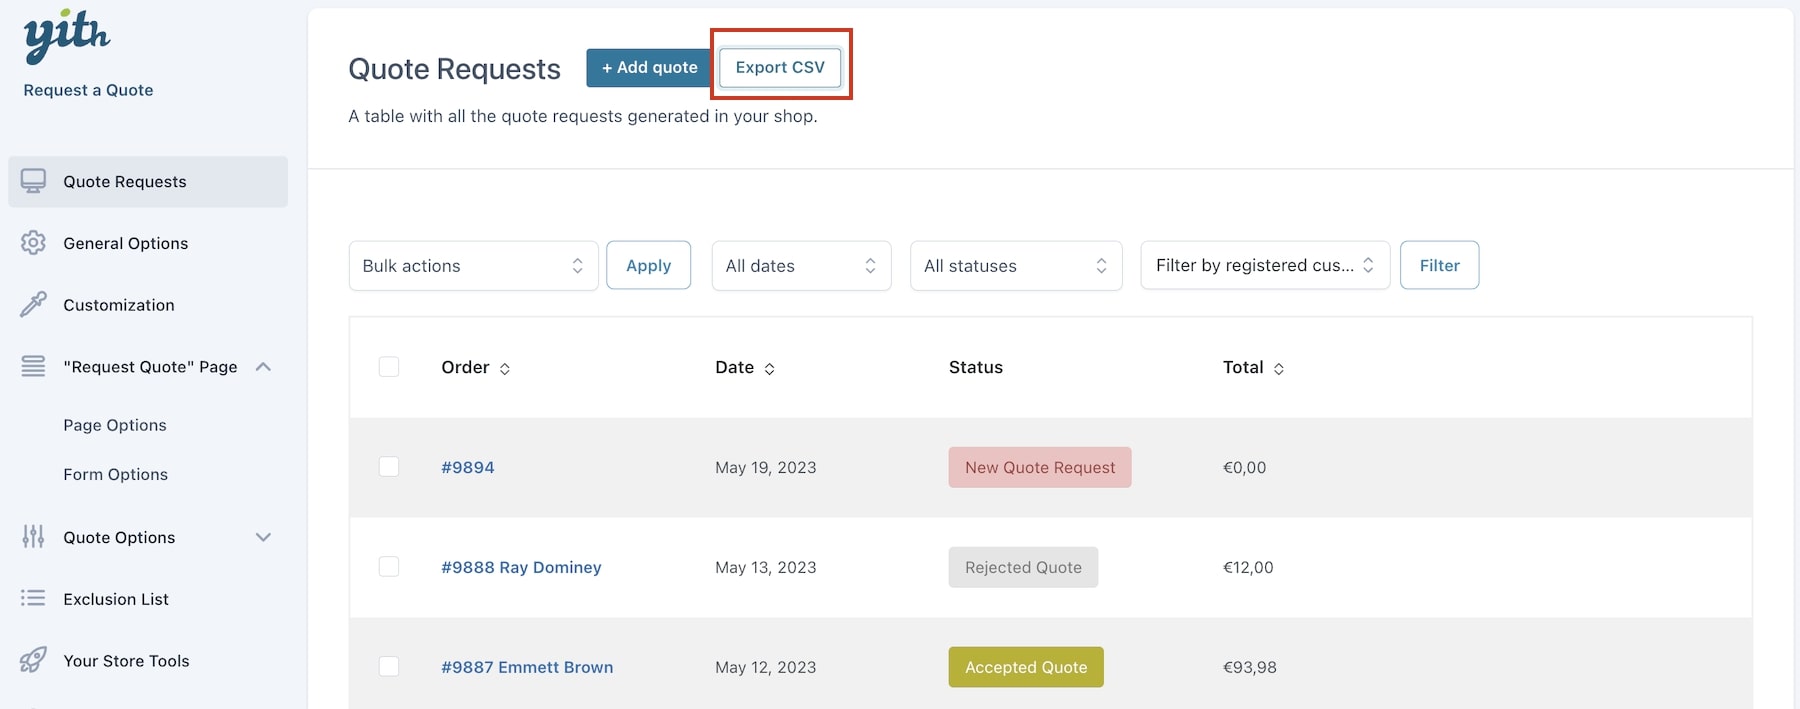
Export CSV quote
It is possible to export the complete list of requests, in a CSV file. Simply by clicking on the “Export CSV” button. The file shows data like quote ID, quote number, expiration date, customer details, shipping and billing address, etc.
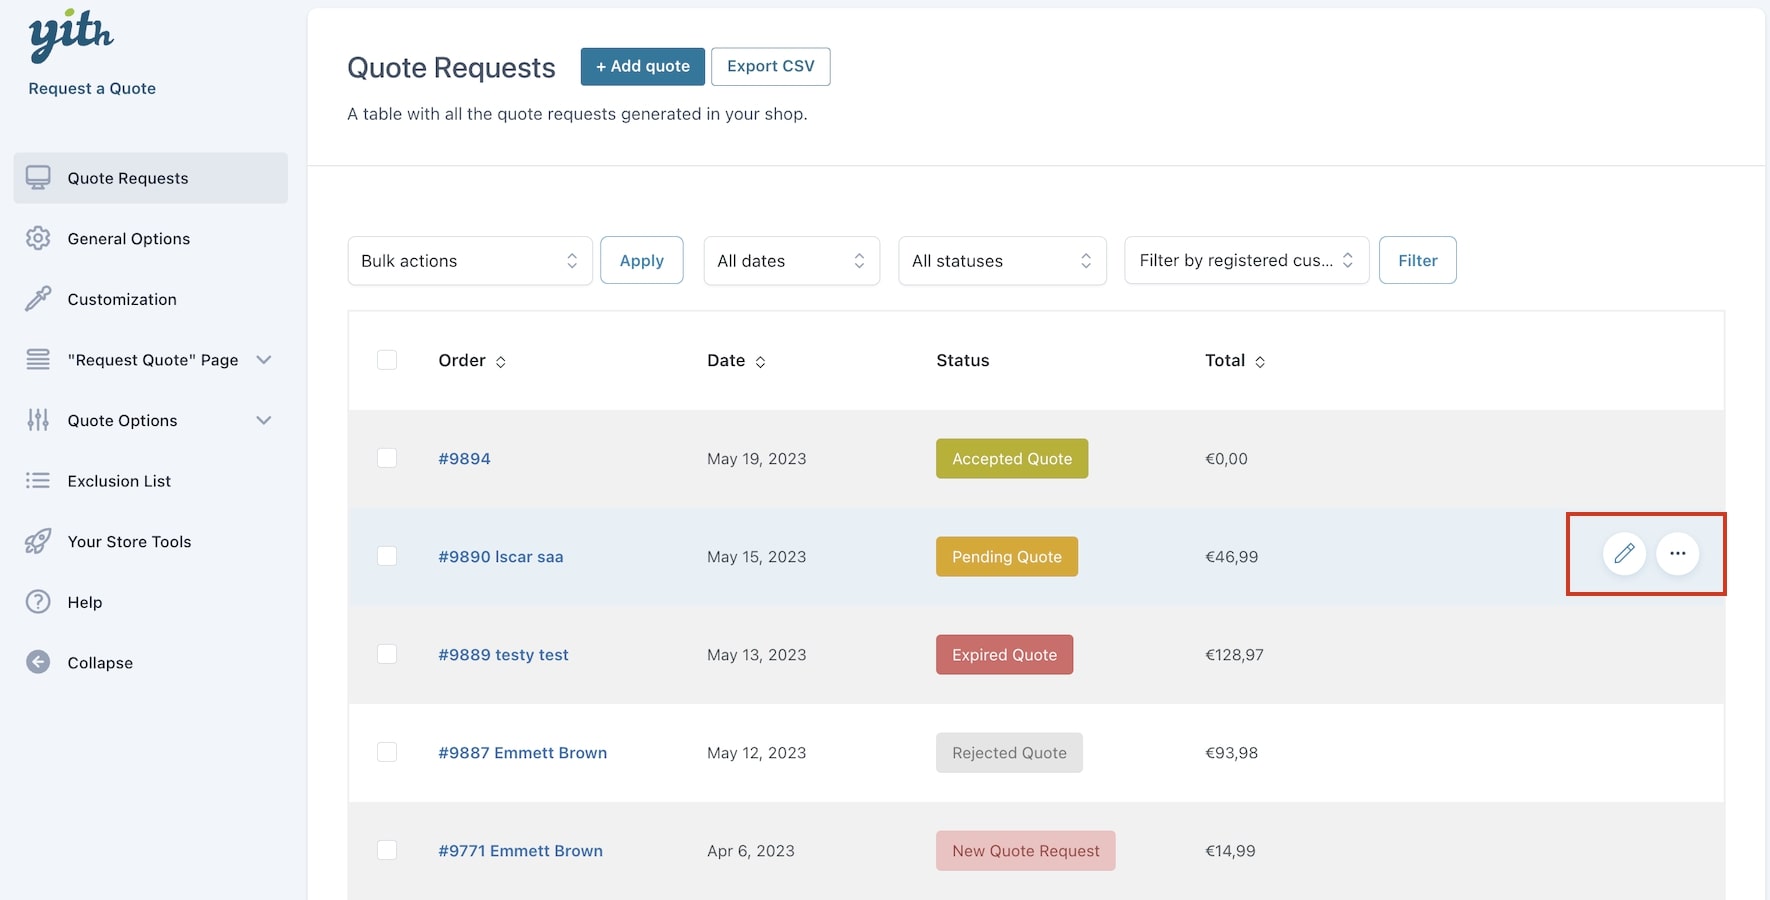
Quote actions
You can edit each individual quote or change its status by hovering the mouse over the quote request and using the quote actions options.
Bulk actions
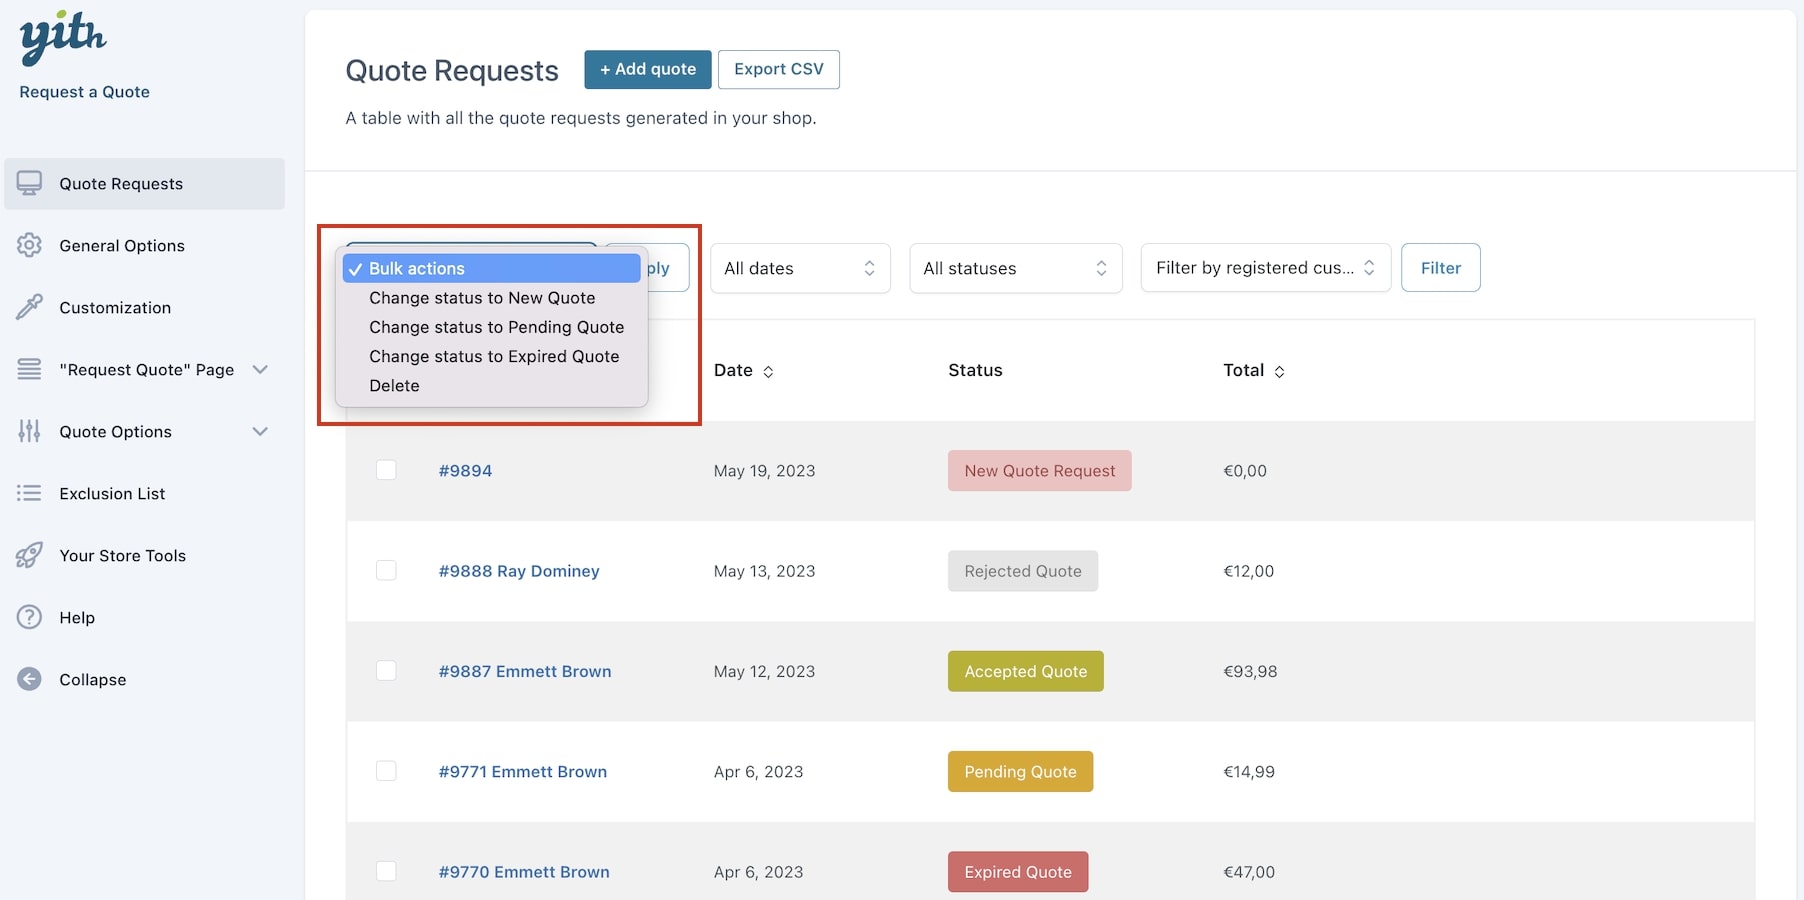
Through the bulk actions, you can easily change the status of the quote requests you have received. You can also filter by date, status, and customers via the related options.
Add quote button
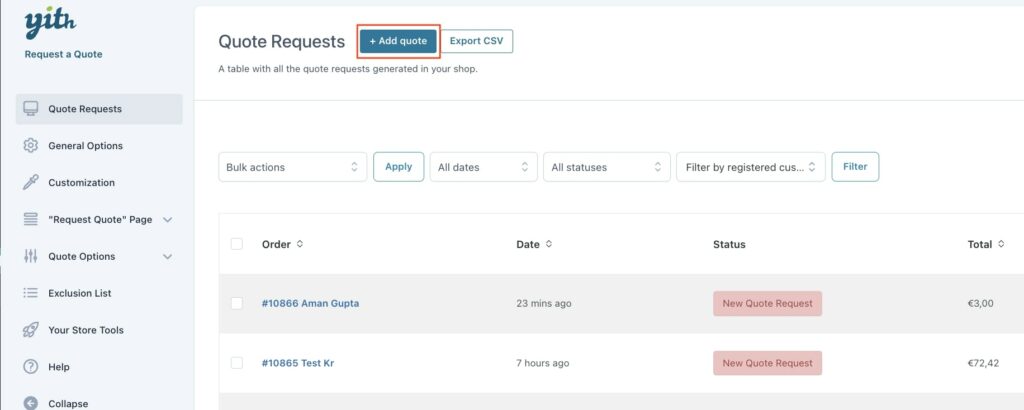
You can also create a new quote by clicking on the Add quote button. To learn how to create a quote manually from the backend, please refer to this guide.