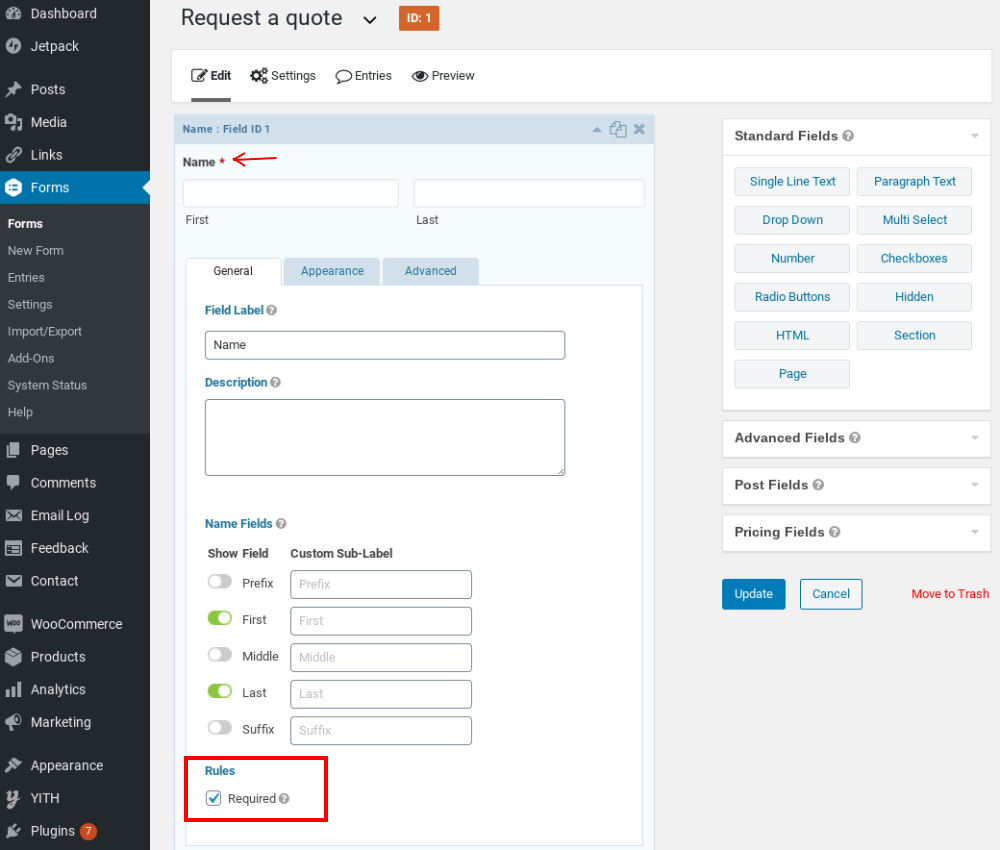
By selecting the Default form, you can set up many advanced fields and request various types of information from your users.
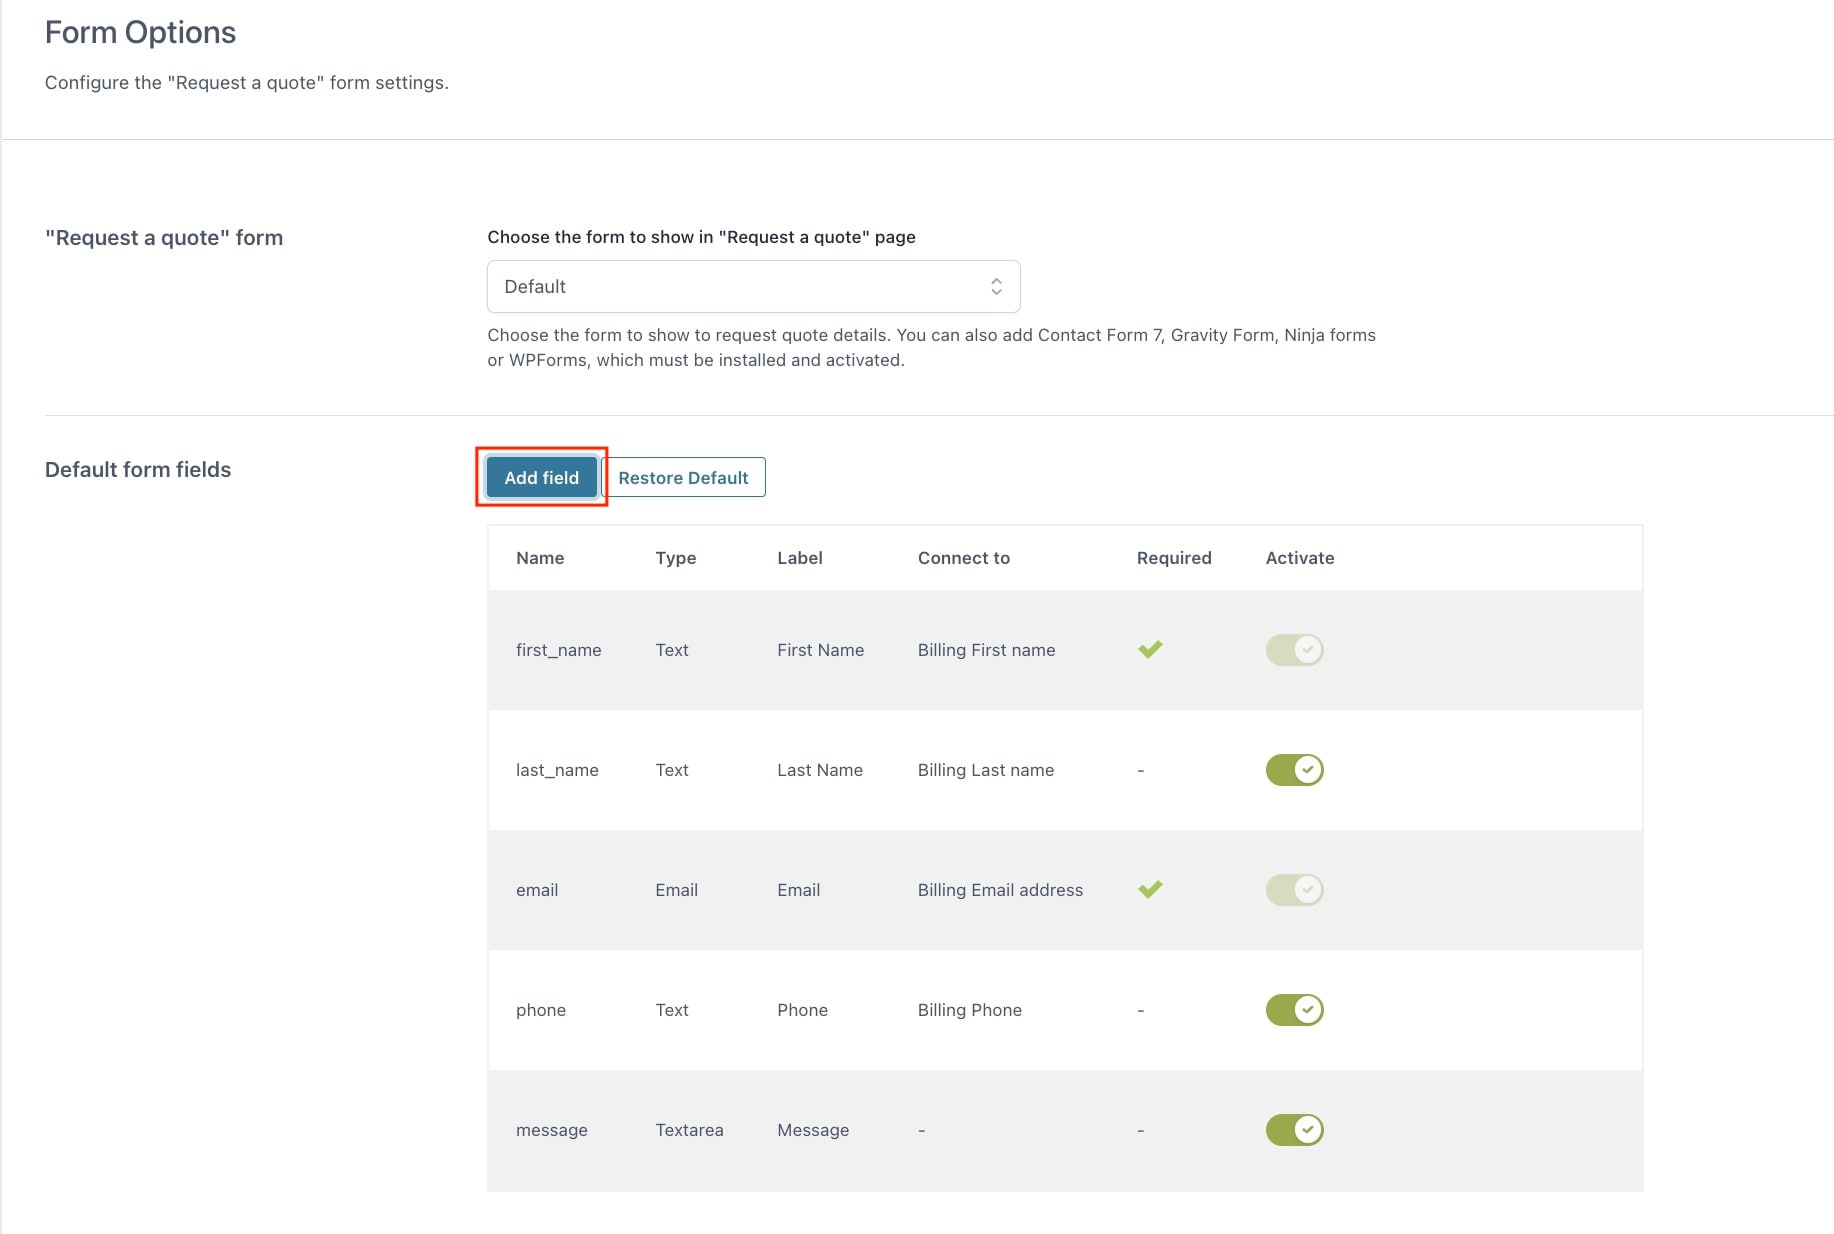
To create a new field, click on Add field and configure the options included in the popup.

- Name: this is how the field name will show in the backend; it must be a single word (any spaces you enter will be changed to underscores).
- Type: select a field type; depending on your choice, the options for fields will adjust:
- Text: a text input field
- Email: email field
- Phone: only digits are permitted in this field; it contains a validation check.
- Textarea: a longer text can be entered here.
- Radio: users can select only a single option from those you provide.
- Checkbox: users can either select or deselect this choice.
- Select: users can select one of the choices from a drop-down list.
- Country: users can select a country from the list of all available ones.
- State: user can select a state or region. Once the Country field is filled in and a country is chosen, the list of accessible states/regions for that specific country will be displayed automatically.
- Upload: users can upload files. You can restrict the types of file formats and extensions that may be uploaded.
- Multi select: users can select one or multiple options from those you provide.
- Date: users can select a date (set the date picker options in “Default form options”).
- Time: user can select the time (set the format in “Default form options”).
- Acceptance: you can include a checkbox for a “Privacy Policy” that customers need to agree to before submitting their request. It supports the shortcodes [terms] and [privacy_policy].
- Heading: add a heading line among your fields to enhance the appearance of your advanced form.
- Class: enter your custom CSS rules to edit the style of the field.
- Label: enter the field name as it will be displayed on the frontend.
- Label class: enter your CSS rules to edit the style of the field label.
- Placeholder: enter the placeholder text to show in the field box. This will help your users understand how to use this field.
- Position: you can select First, Last or Wide. Choosing First will position the field on the left side, Last will position it on the right, and Wide will allow the field to occupy the entire width of the form.
- Options: this field, which is limited to certain types, allows you to input the options that your users can select from.
- ID: (state field) select if the state depends on the shipping or billing country.
- Allowed extensions: (upload field) you can specify a list of permitted file extensions. Separate the values with a comma, or if you prefer to allow any file type, leave it blank.
- Max file size (MB): (upload field) enter a maximum size allowed for the uploaded files. If you want to allow files of any size, leave this field empty.
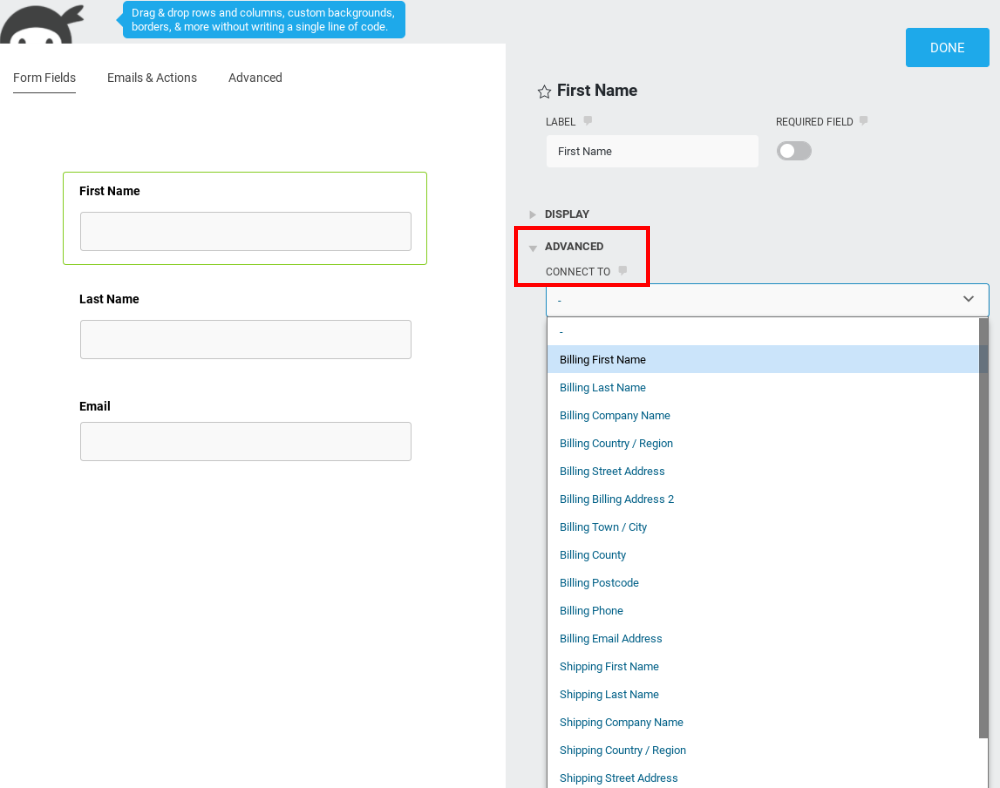
- Connect to: an essential option, as it allows you to align the fields of the quote request form with those of the checkout process. This ensures that the information provided by your users in the quote request will automatically fill in the corresponding fields on the order and checkout pages if they decide to finalize their purchase.
Please, note: in order for this field to function correctly, you must choose the option to Override shipping and billing info in the quote details. You are free to select any field from WooCommerce::
- billing_first_name
- billing_last_name
- billing_company
- billing_country
- billing_address_1
- billing_address_2
- billing_city
- billing_state
- billing_postcode
- billing_phone
- billing_email
- shipping_first_name
- shipping_last_name
- shipping_company
- shipping_country
- shipping_address_1
- shipping_address_2
- shipping_city
- shipping_state
- shipping_postcode
- Validation: choose from three validation options for your fields:
- Phone: checks if every character inputted is a digit
- Email: checks whether an email address follows the correct format ([email protected])
- File: checks whether the file’s extension and size correspond to the criteria set by the administrator.
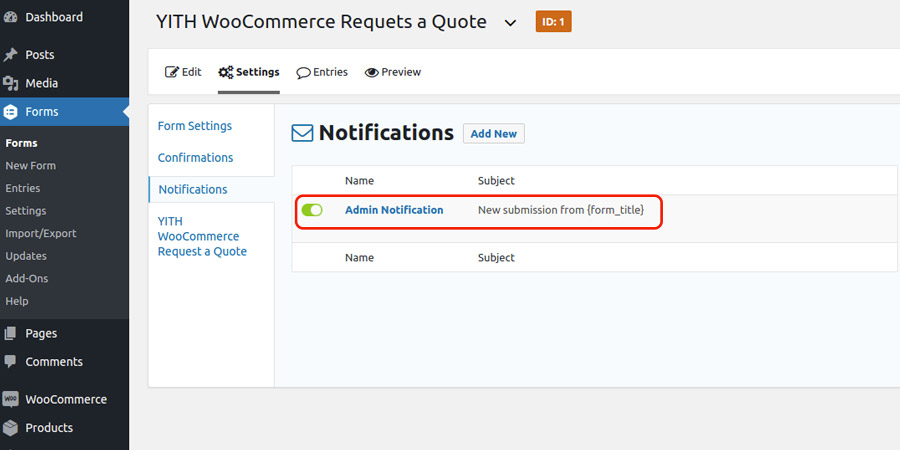
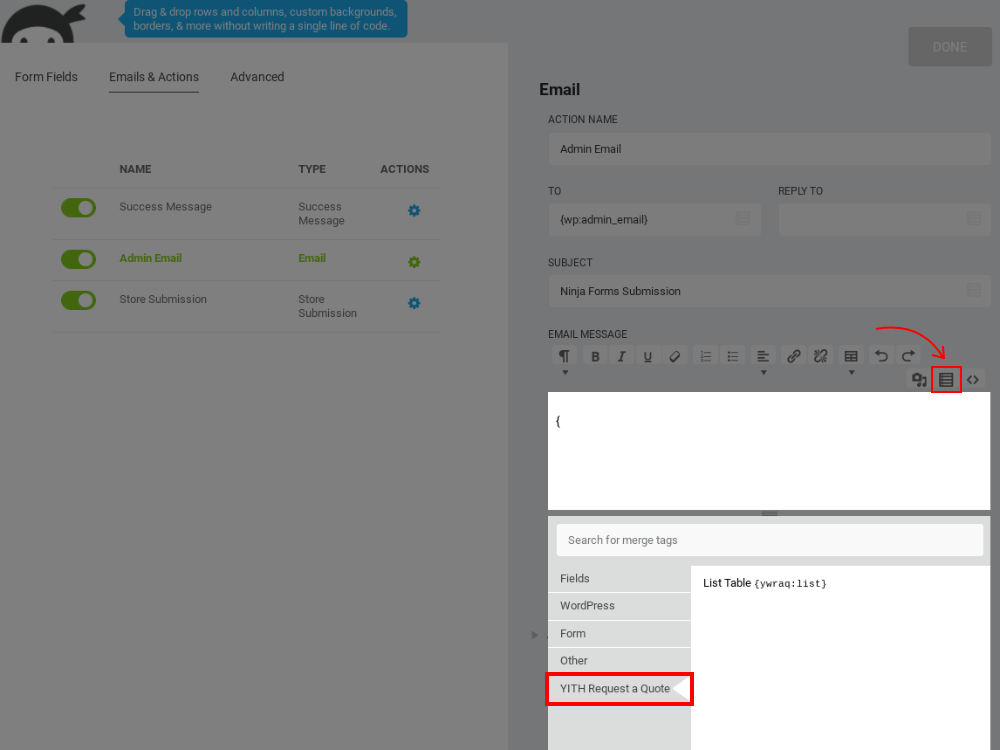
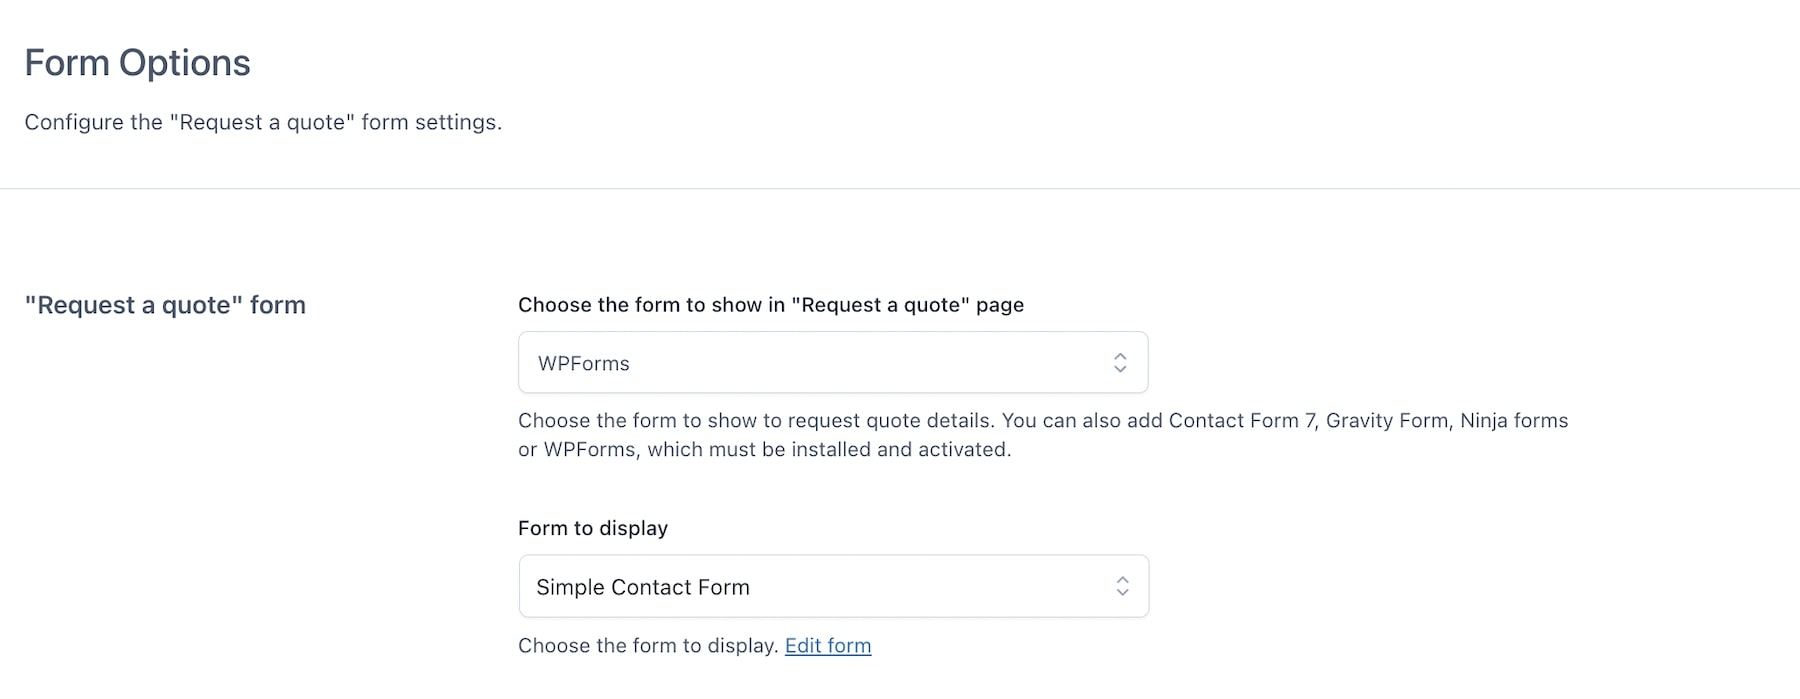
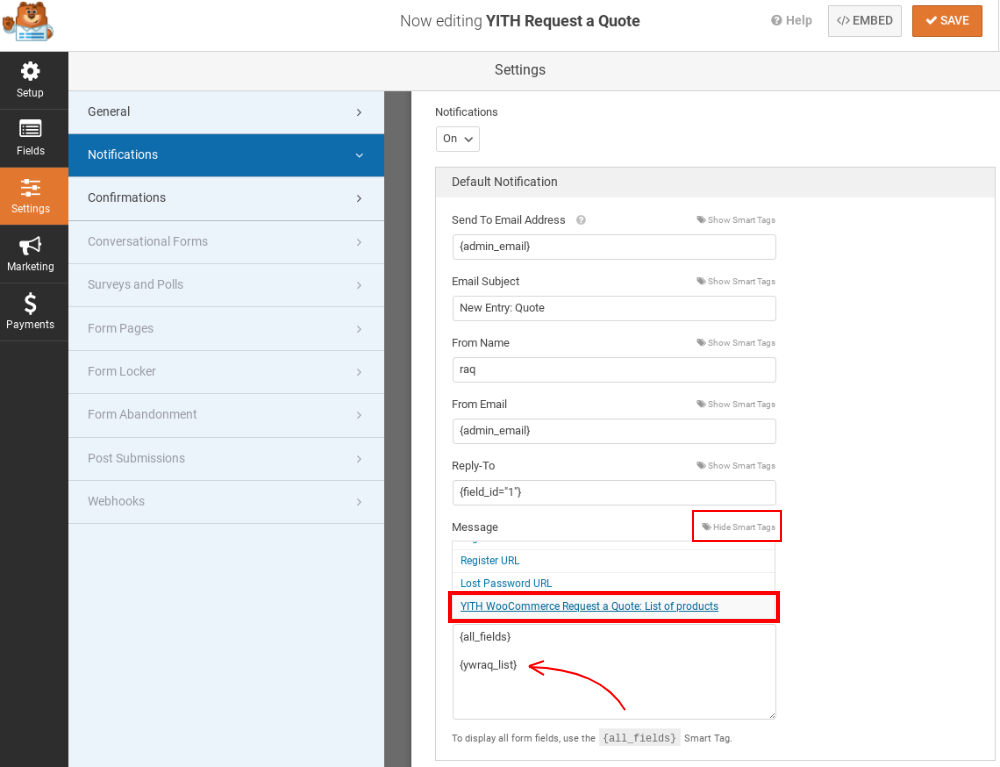
Edit Request a Quote email
By selecting the default form, you will have the option to modify the email content that is sent to the admin each time a new quote request is submitted. You can adjust the settings under WooCommerce > Settings > Emails > Email to request a quote. For further information about this email, please refer to this page.
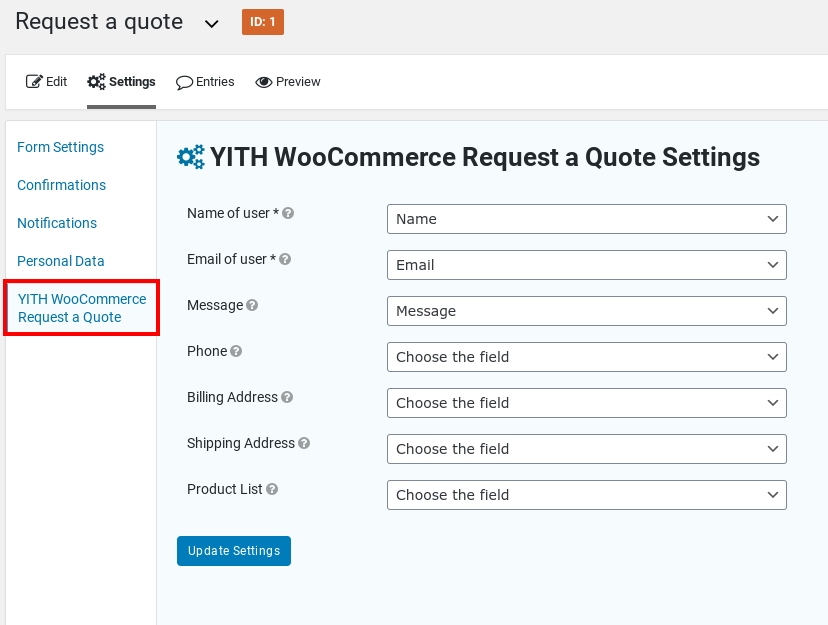
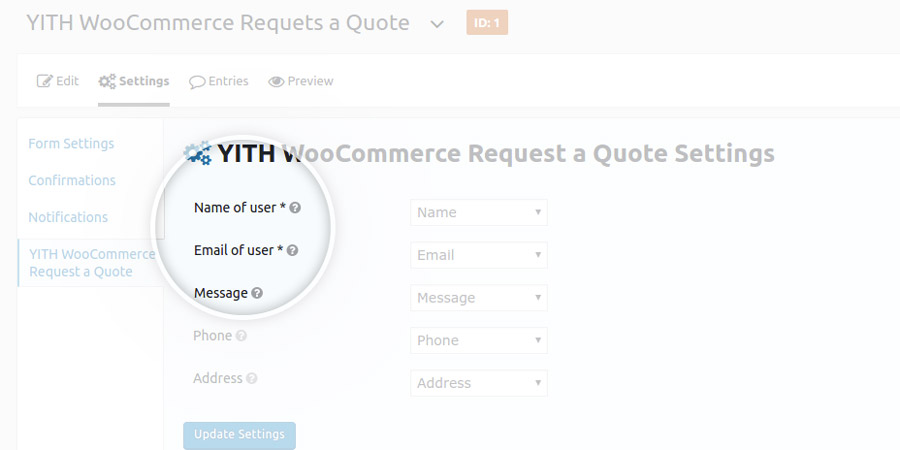
Default form fields
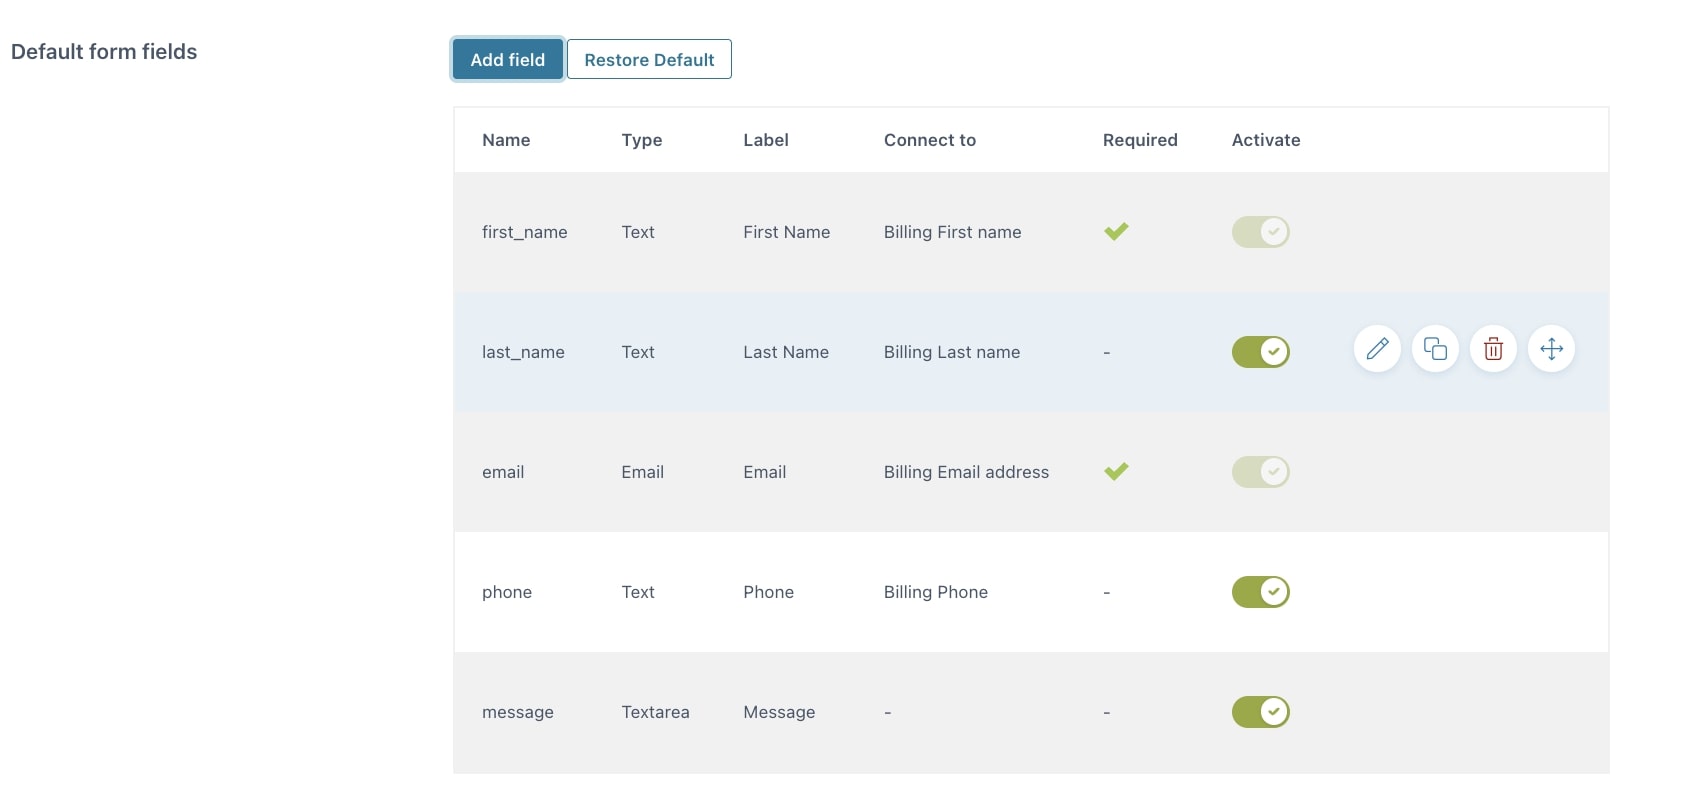
All fields will be displayed in the Default form fields section, where you can toggle each field on or off, with the exception of the first name and email, as these are mandatory for sending emails to users who submit a quote request. Within this section, you also have the option to edit, duplicate, or delete each individual field, as well as arrange them through drag and drop.
Default form options
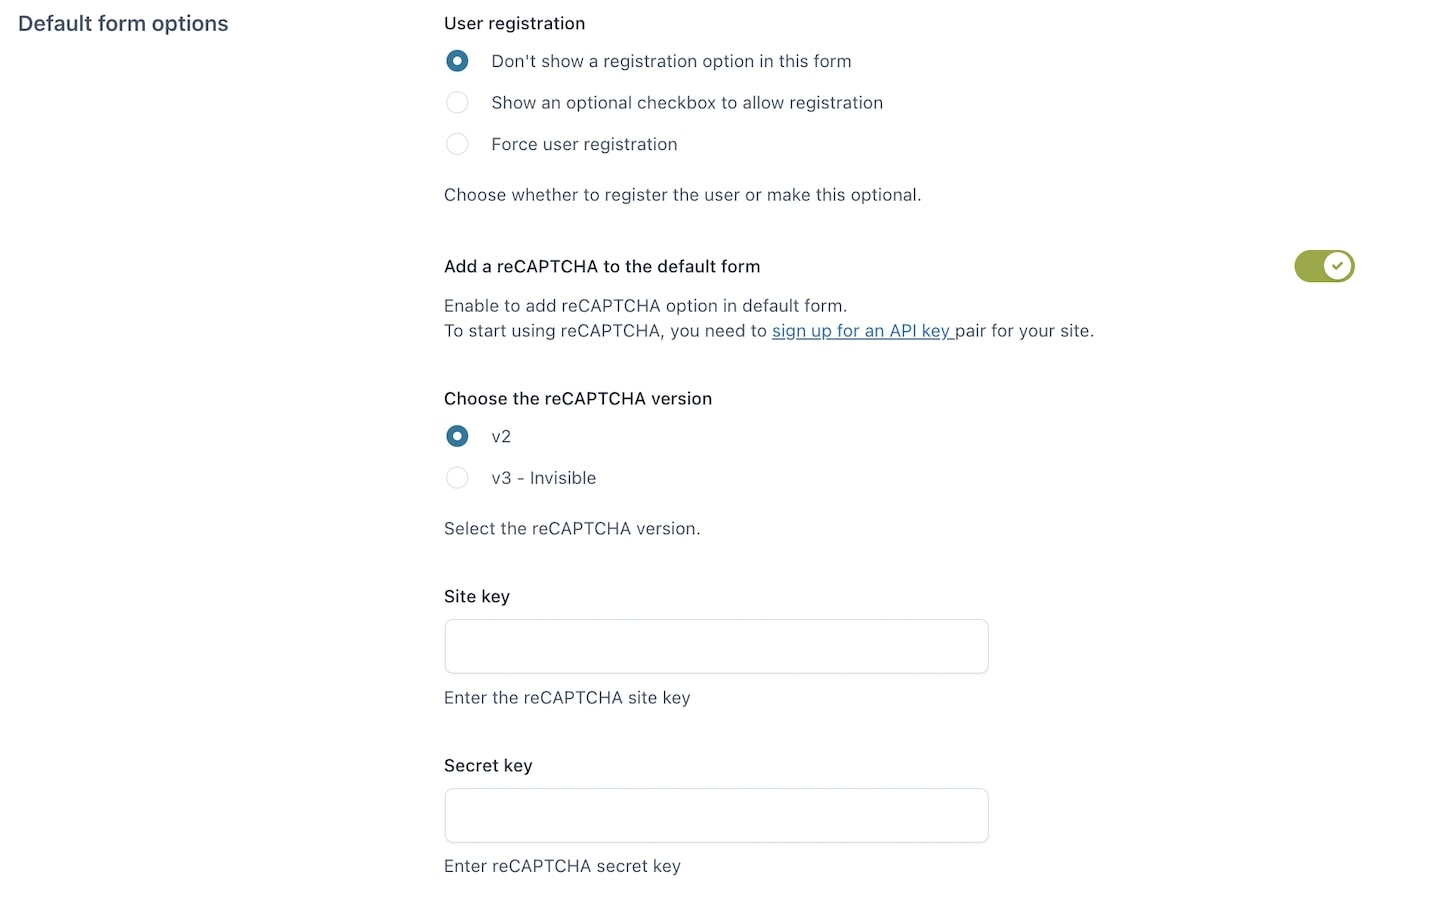
- User registration: offer your users the choice to continue as guests, to register an account optionally, or to require registration when submitting a quote request.
- Add a reCAPTCHA to the default form: get quote requests from genuine users, and requests from bots will not be accepted. Refer to this page for all the necessary installation details.
- Choose the reCAPTCHA version: choose the version by selecting from v2 and v3.
- Site key: enter the reCAPTCHA site key.
- Secret key: enter the reCAPTCHA secret key.
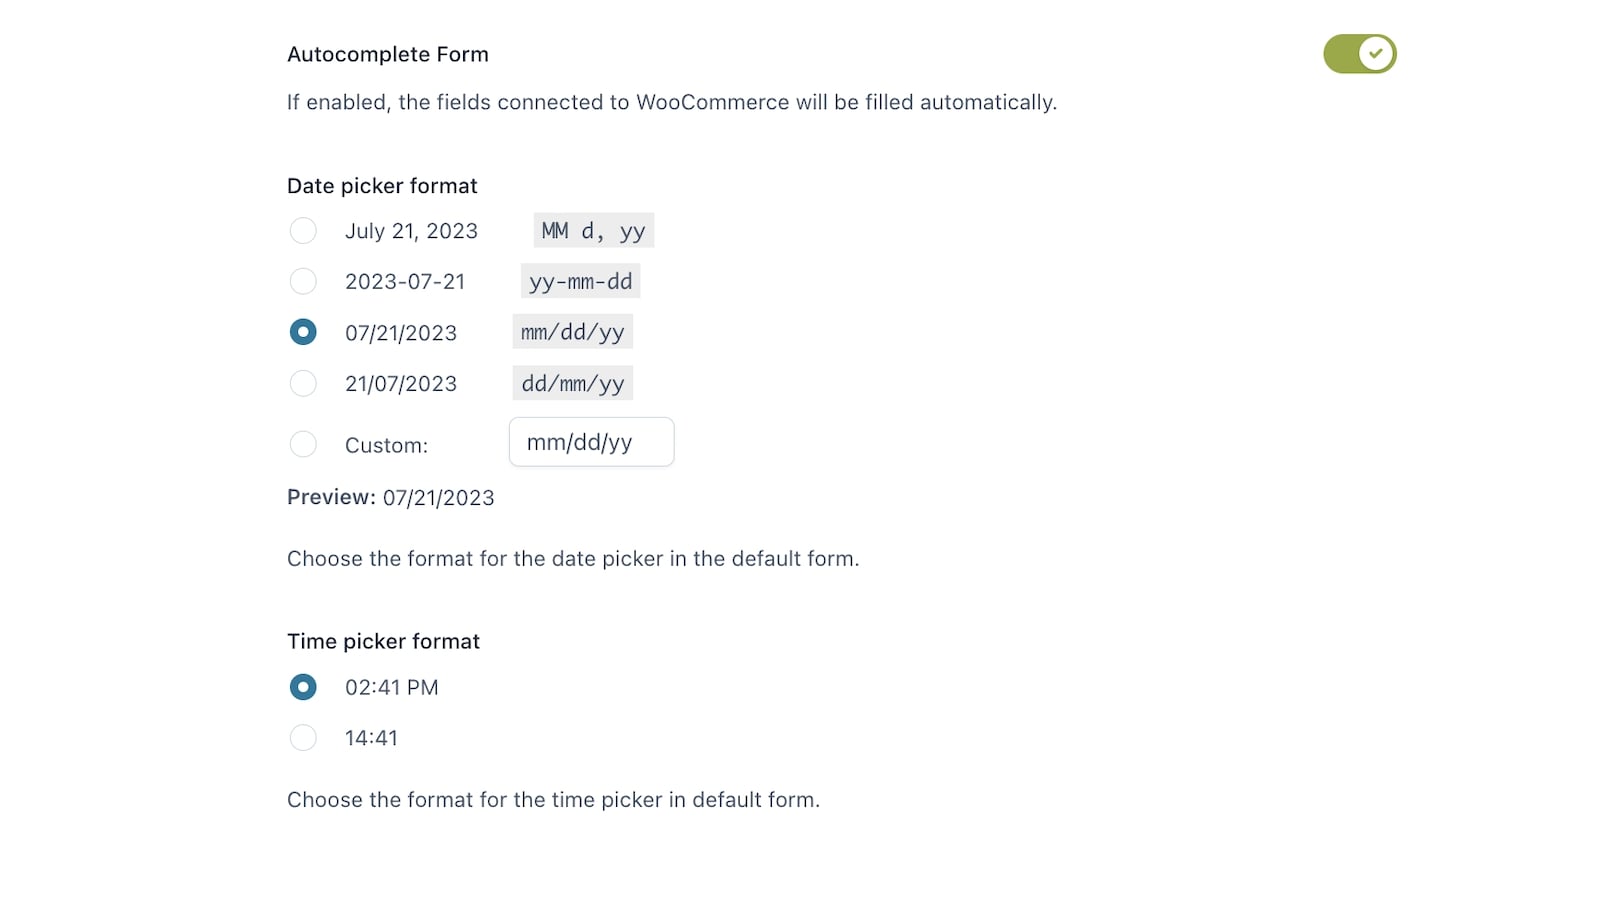
- Autocomplete form: the fields associated with WooCommerce will be populated automatically.
- Date picker format: choose the format for the date picker.
- Time picker format: choose either the 12-hour format or the 24-hour format.