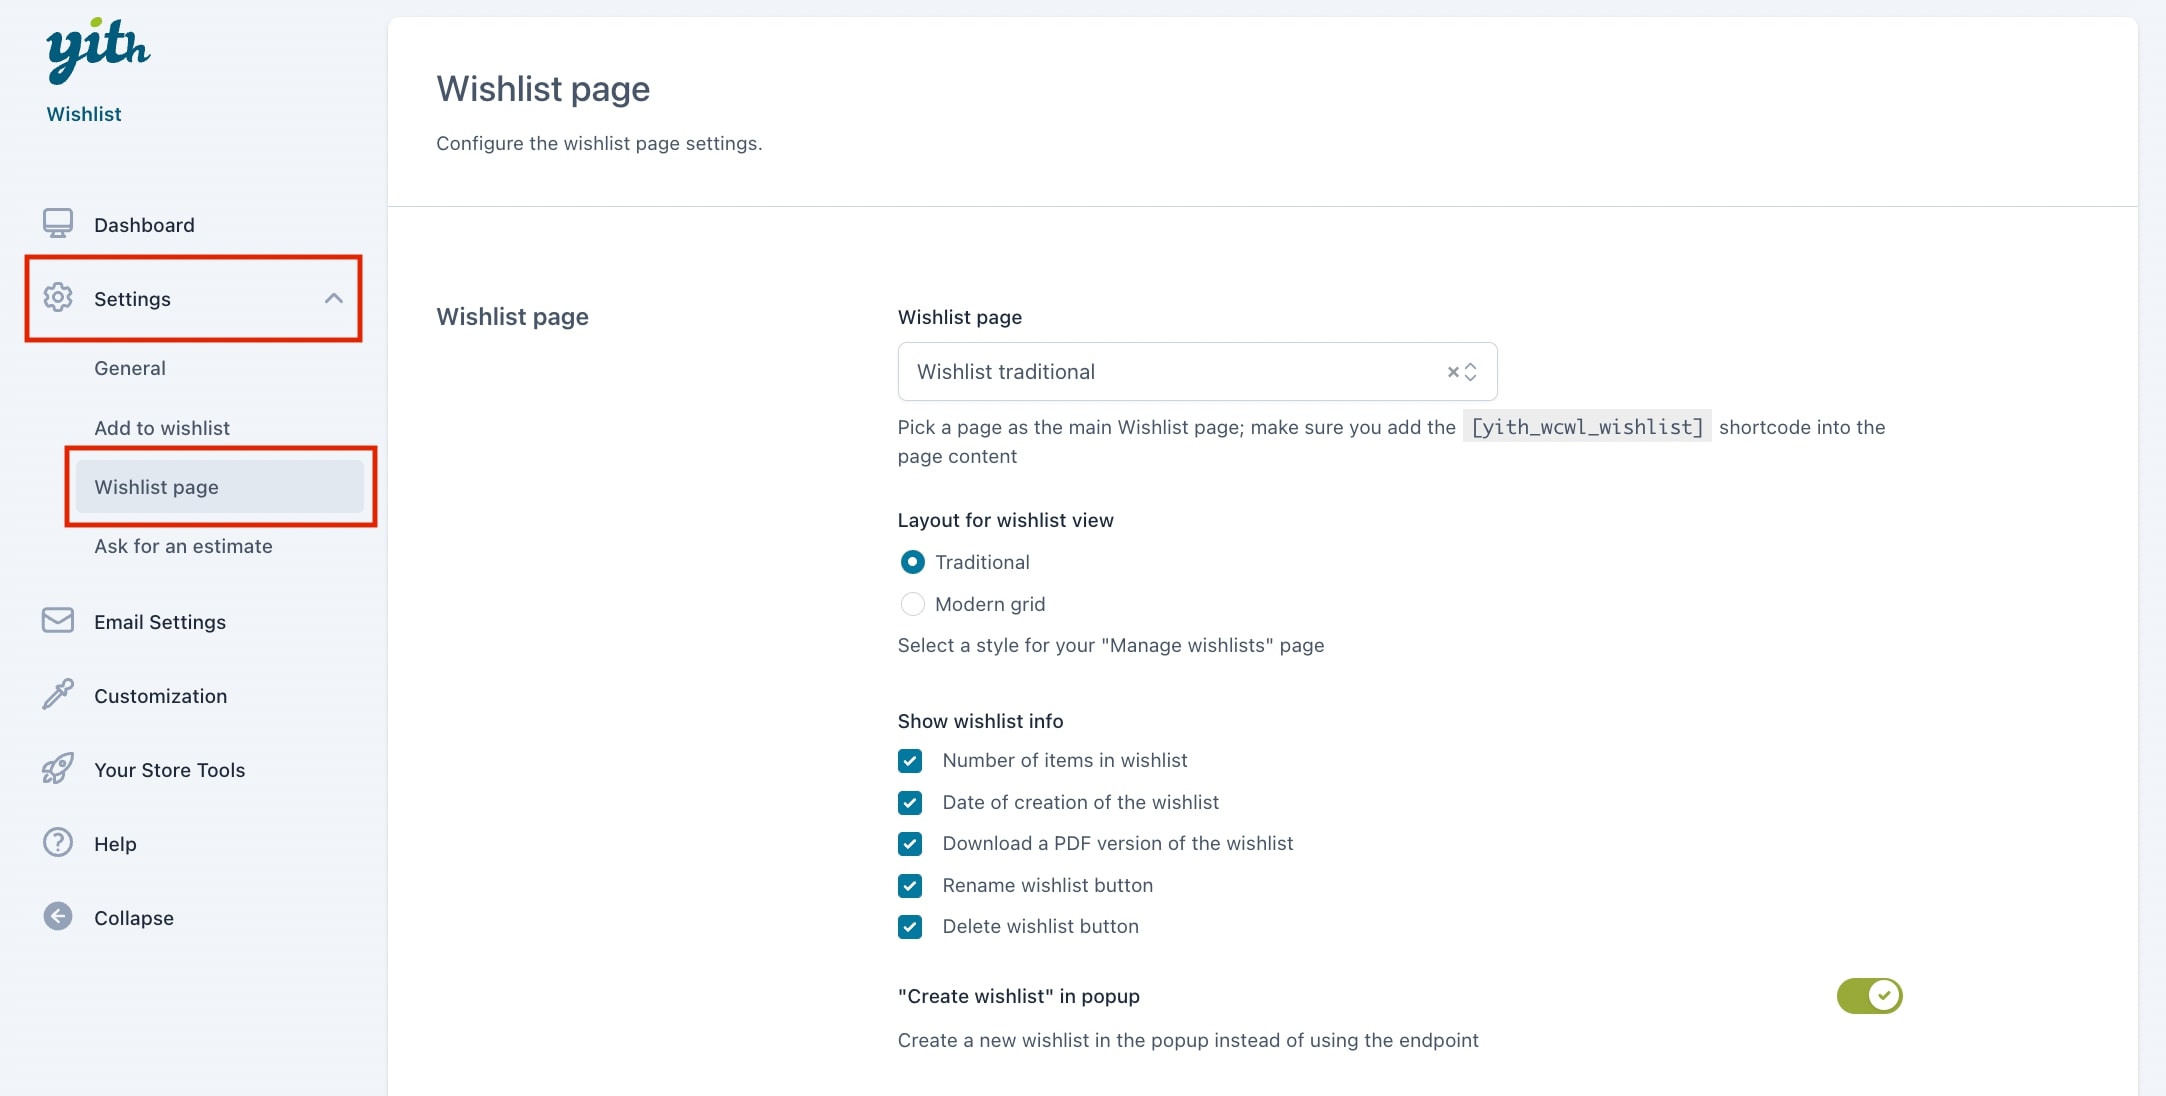
From the Settings > Wishlist page tab you will be able to configure the settings related with the Wishlist page and the Wishlist detail page.
In this post, we’ll review the Wishlist page section, where you can configure options related to the page displaying all wishlists created by the user.
Please, note: multiple wishlists can be created only if the Multi-wishlist feature is enabled from the plugin general settings, as explained here. If disabled, the wishlist page and wishlist detail page settings will apply to the default wishlist.
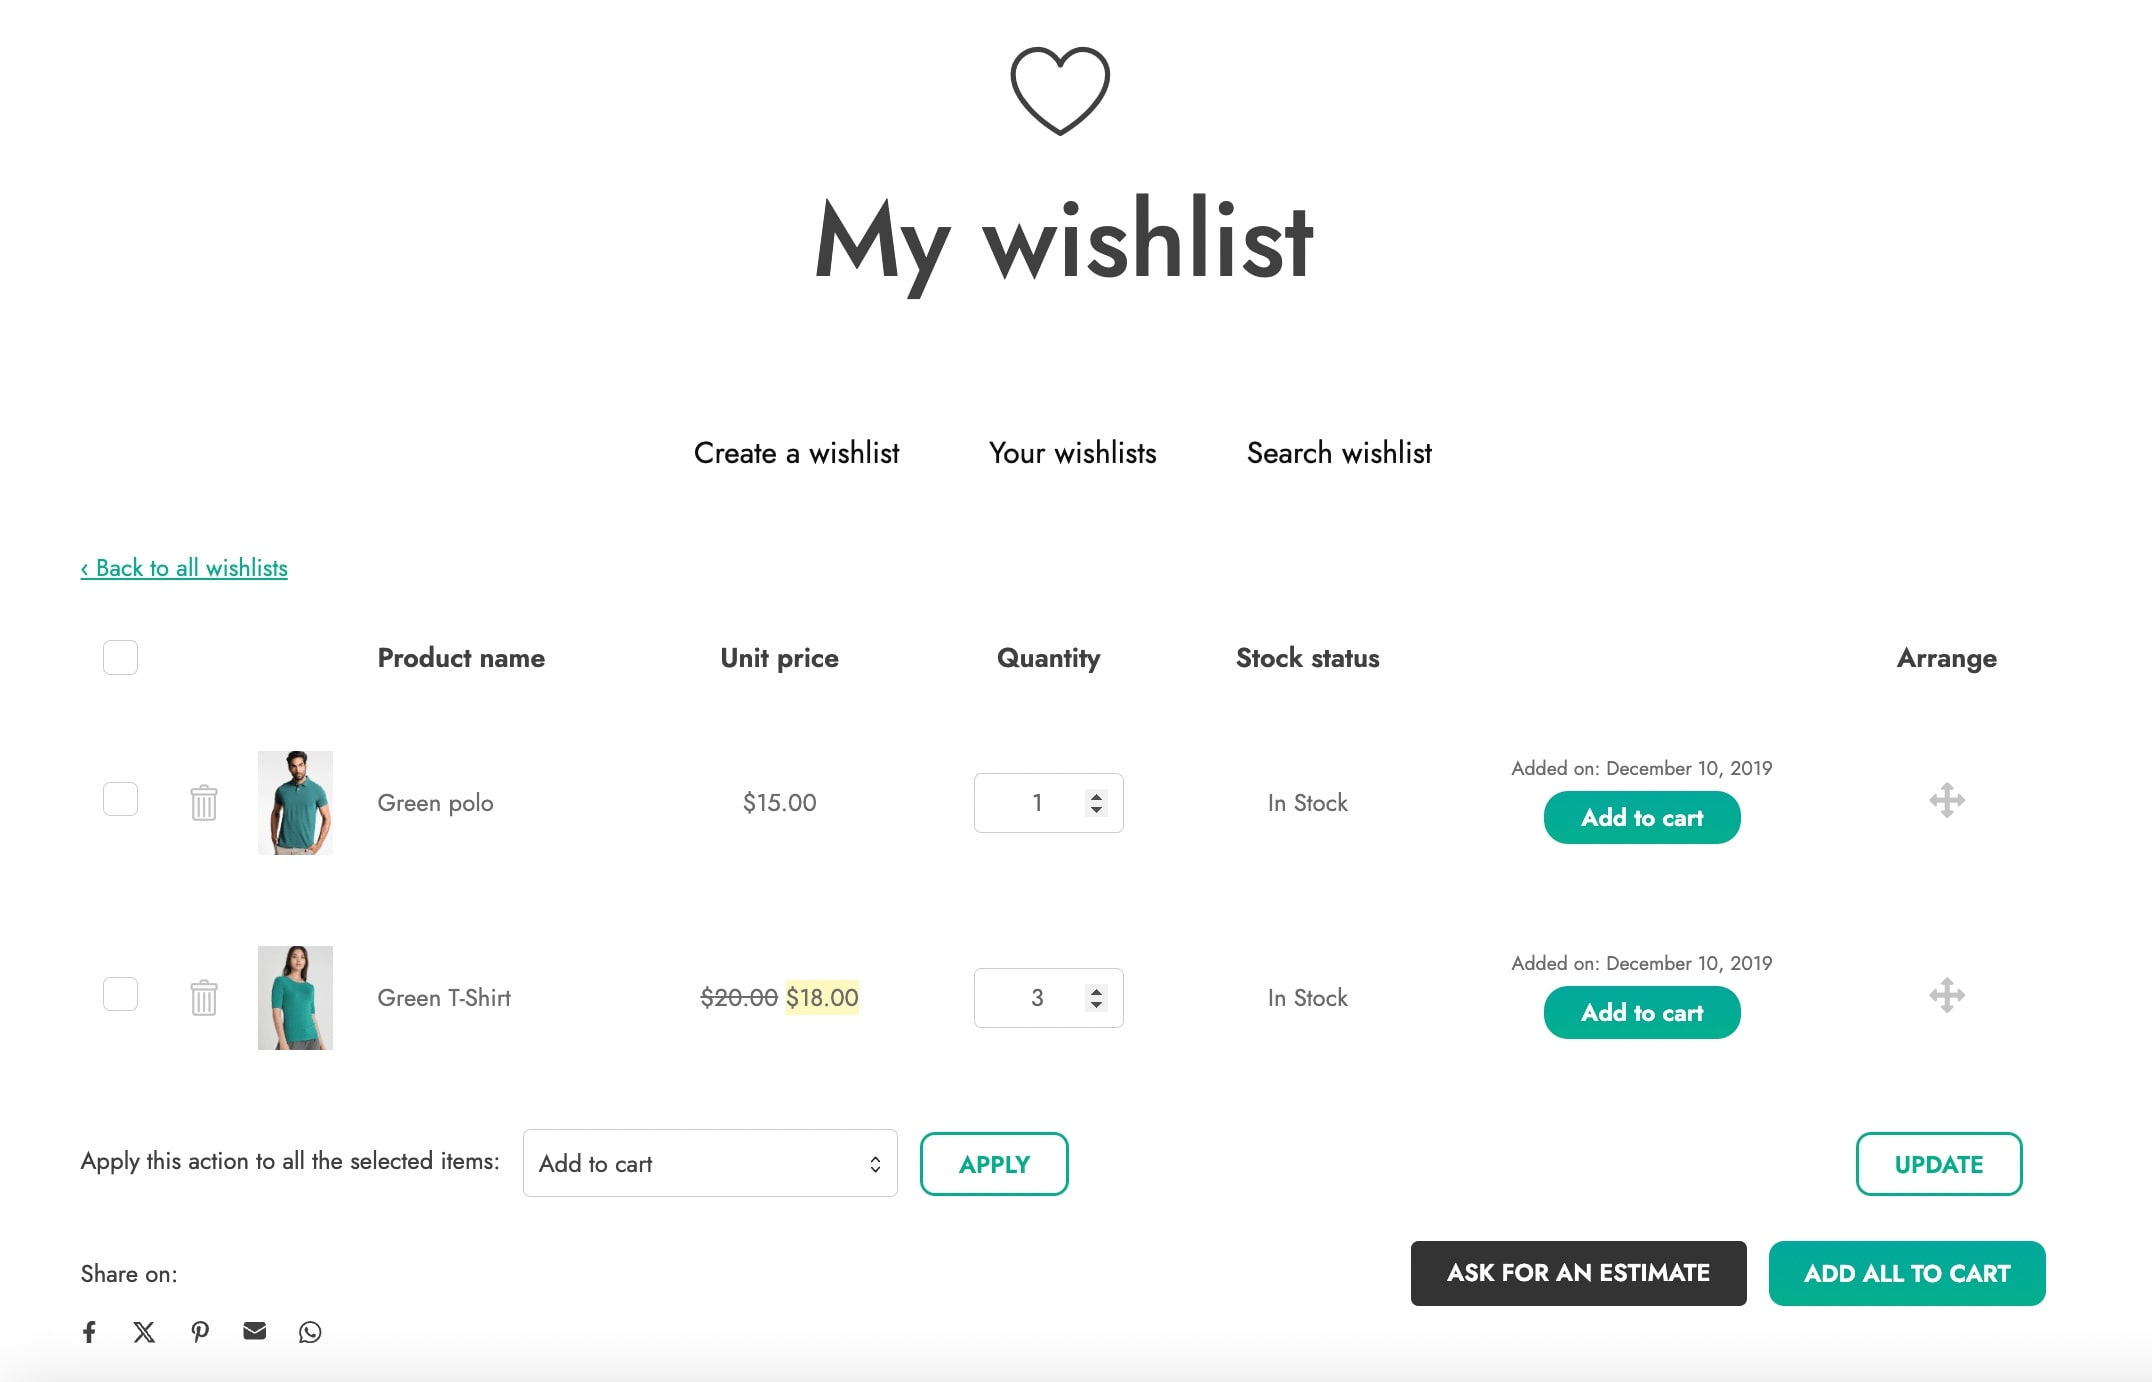
- Wishlist page: pick which page will be the main Wishlist page. For correct functioning, after enabling the plugin, a default “Wishlist” page is generated on WordPress: it includes the “[yith_wcwl_wishlist]” shortcode that provides the insertion of the table of all products added to the wishlist.
With this option you can show the wishlist on any page of your site, different from the one selected by default.
Please note: the page you choose to use as a Wishlist page must necessarily include the “[yith_wcwl_wishlist]” shortcode. In case you have issues to display the wishlist page, regenerate the permalinks.
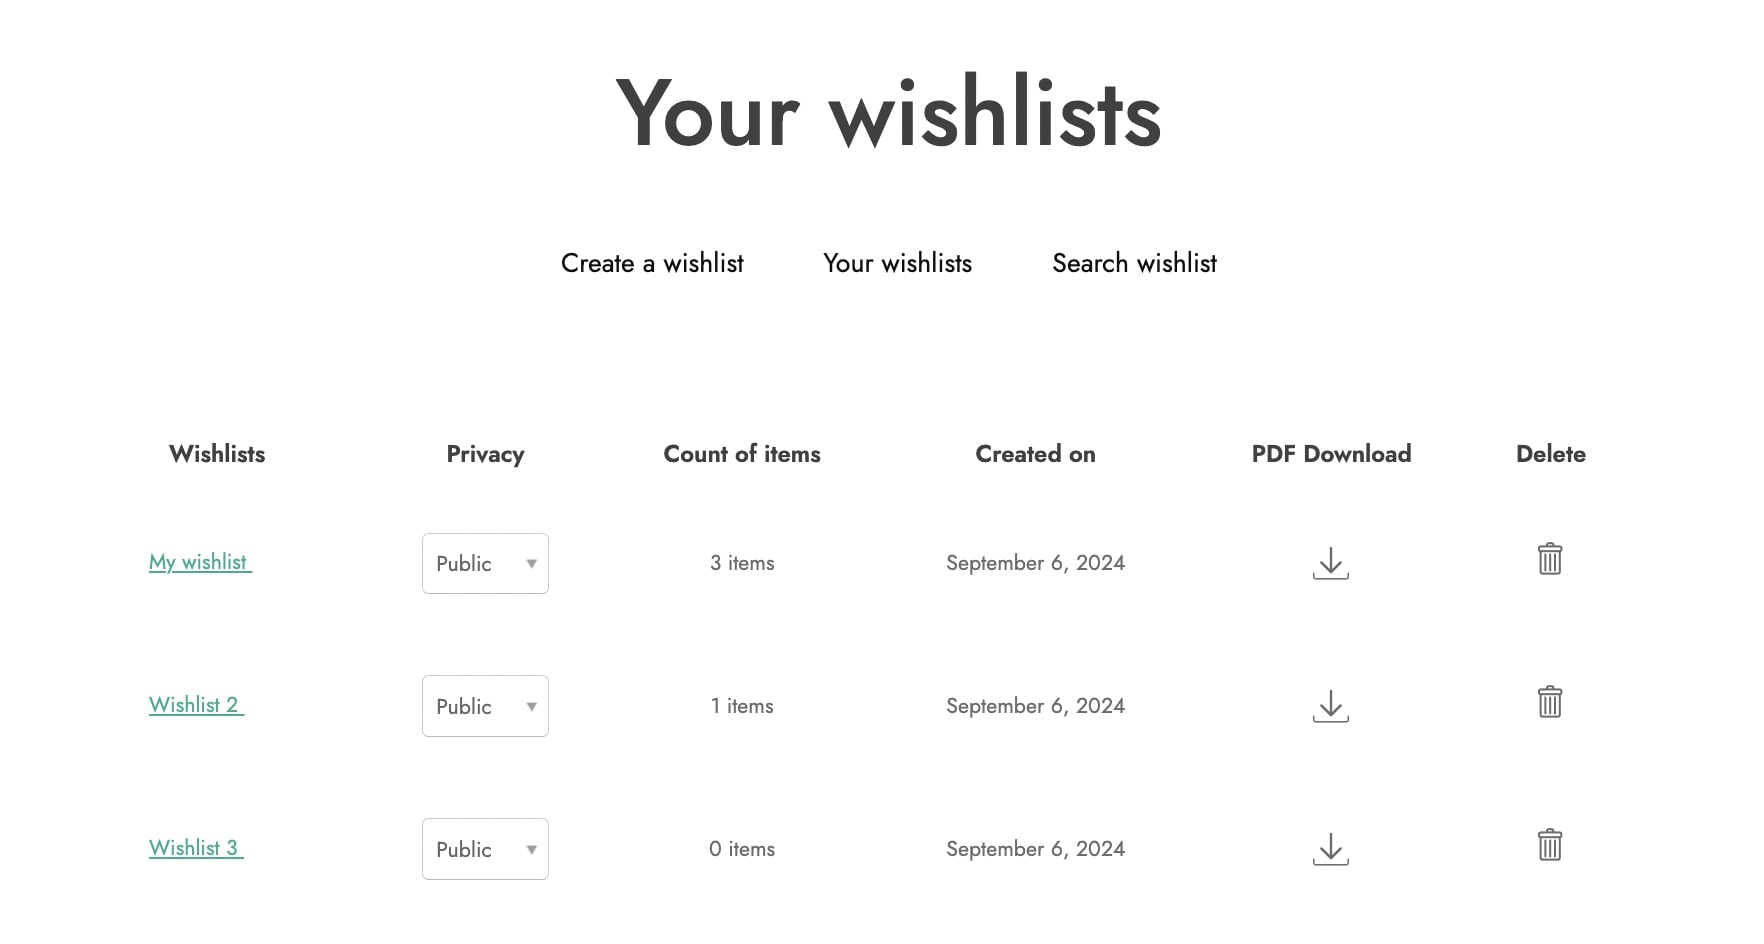
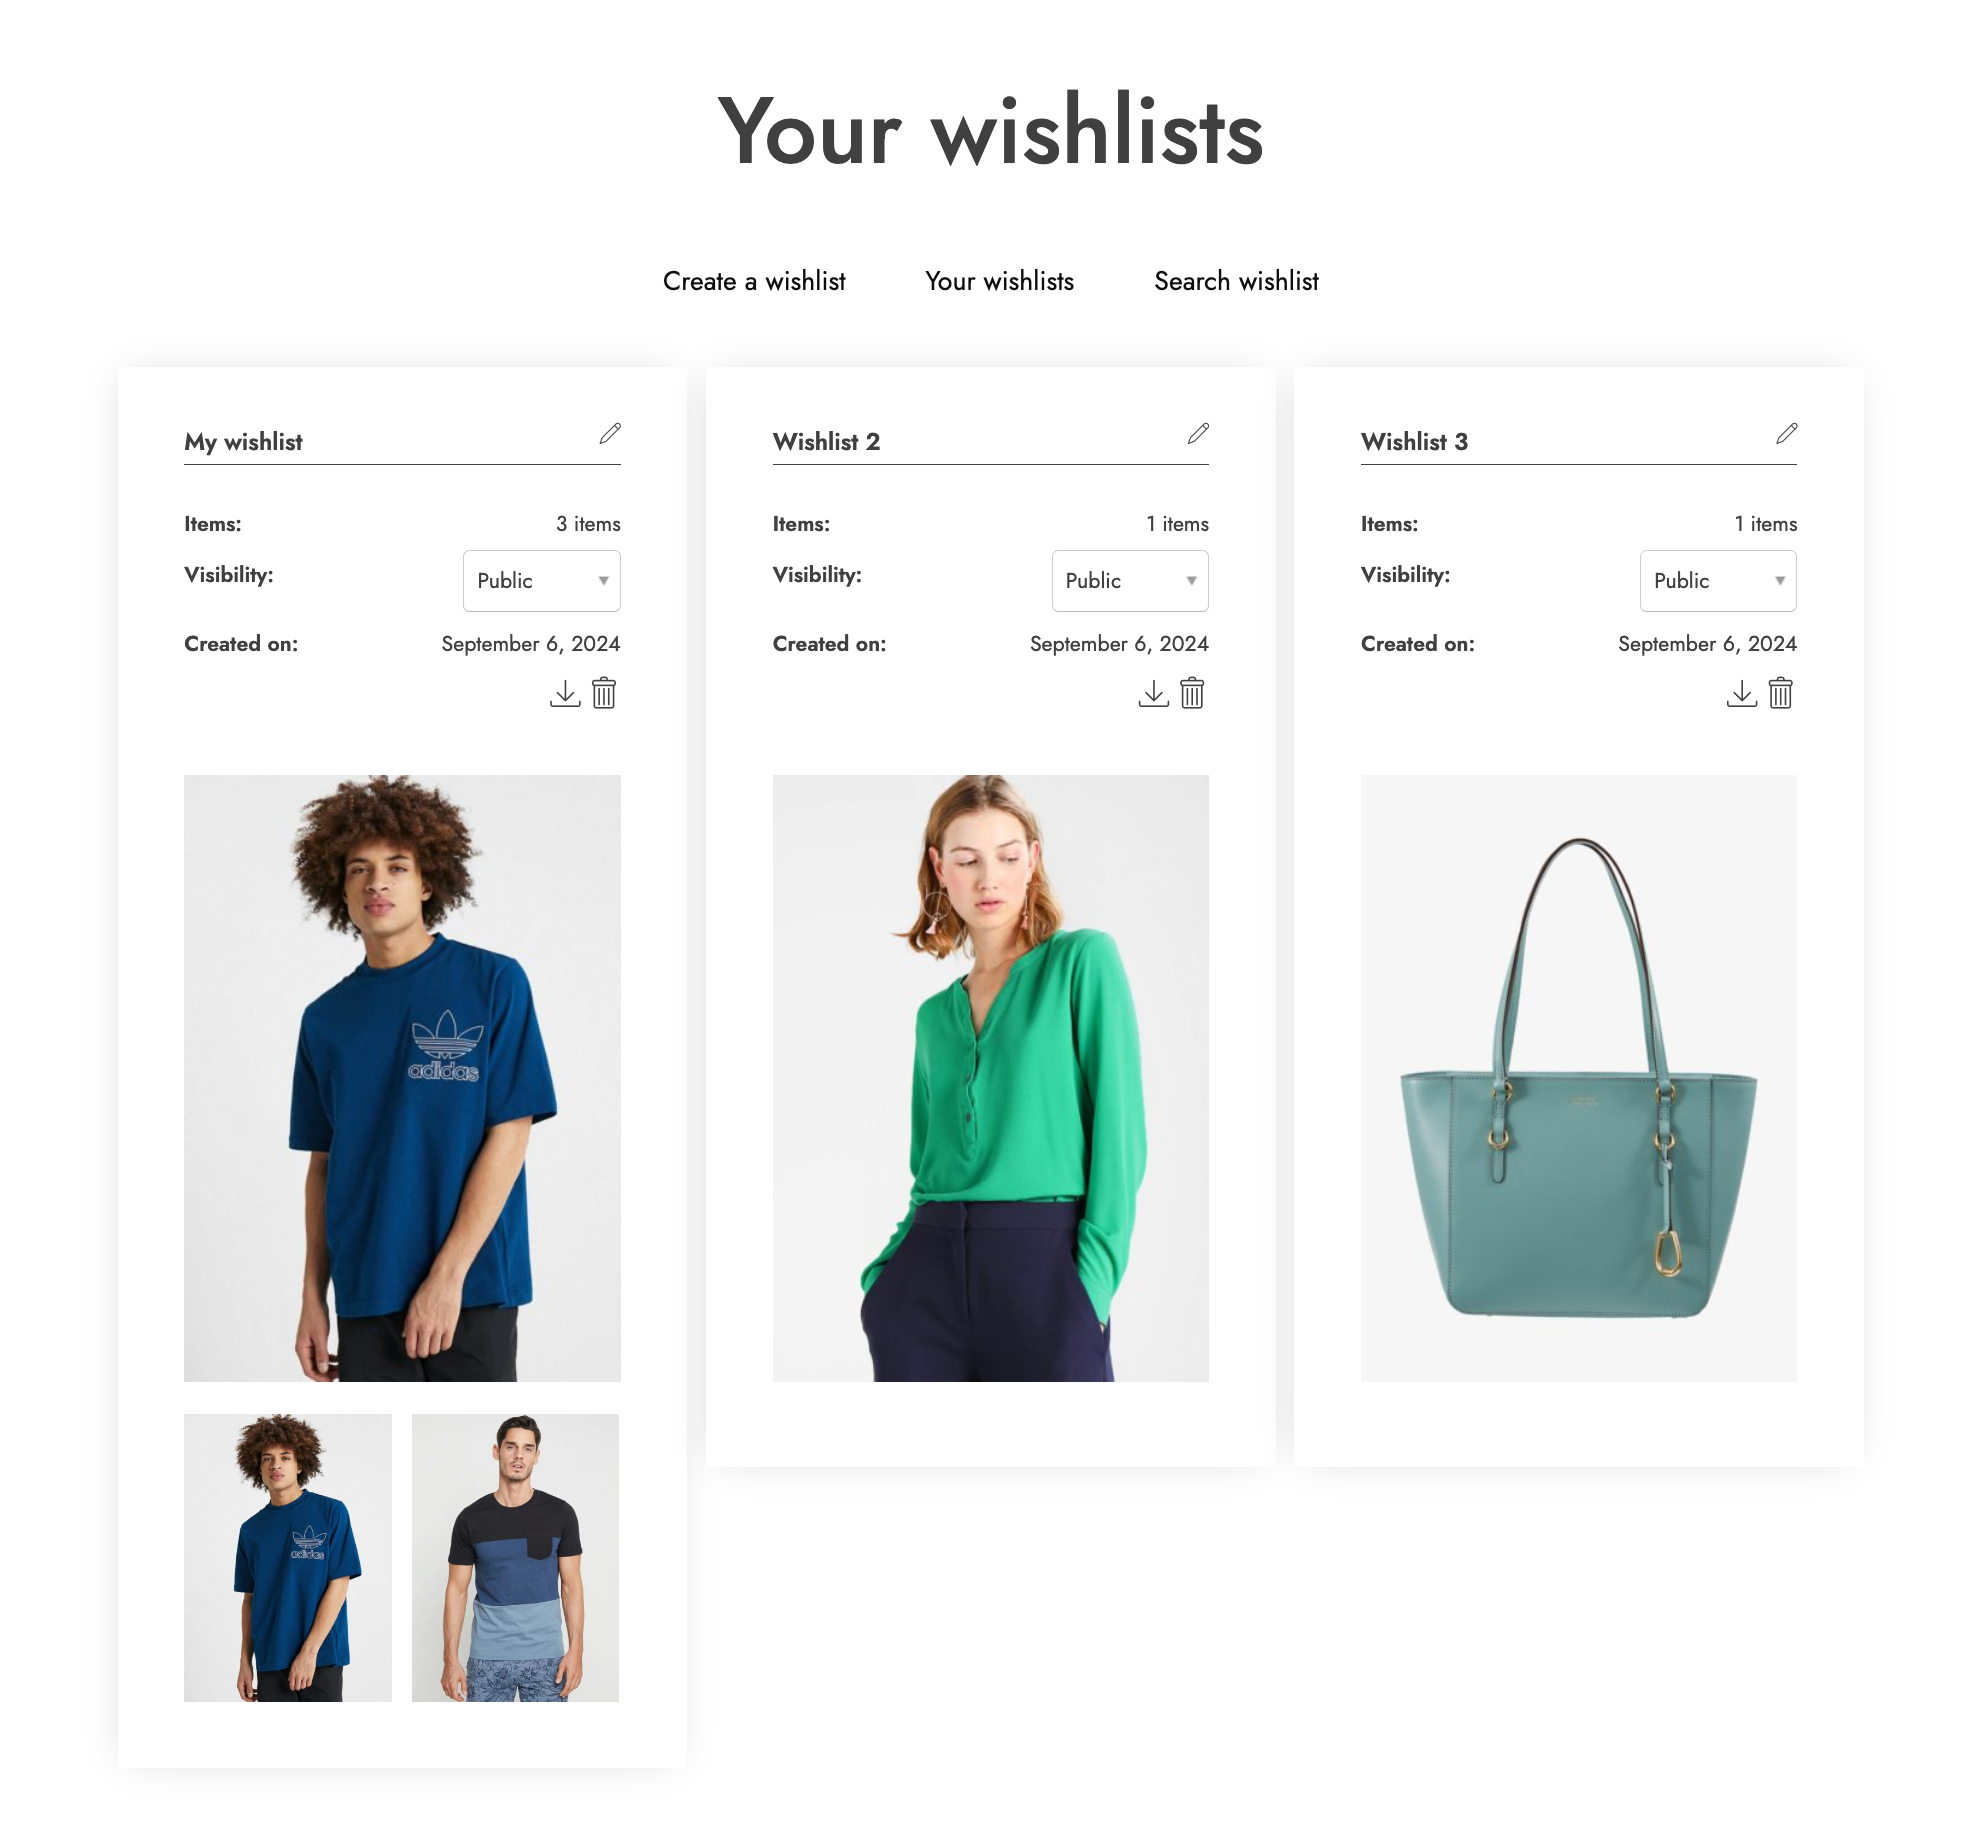
- Layout for wishlist view: select the style option to display the page to manage your wishlists. You can choose between Traditional or Modern:
- Show wishlist info: allows you to select the data to show on the wishlists. The options are:
- number of items in wishlist
- date of creation of the wishlist
- download PDF version of the wishlist
- rename wishlist button
- delete wishlist button
- Create wishlist in popup: you can let your users create a new wishlist directly in the popup rather than using the endpoint.

Now we can move to the next step, which is to configure the Wishlist detail page.