View Product Page

Wishlists

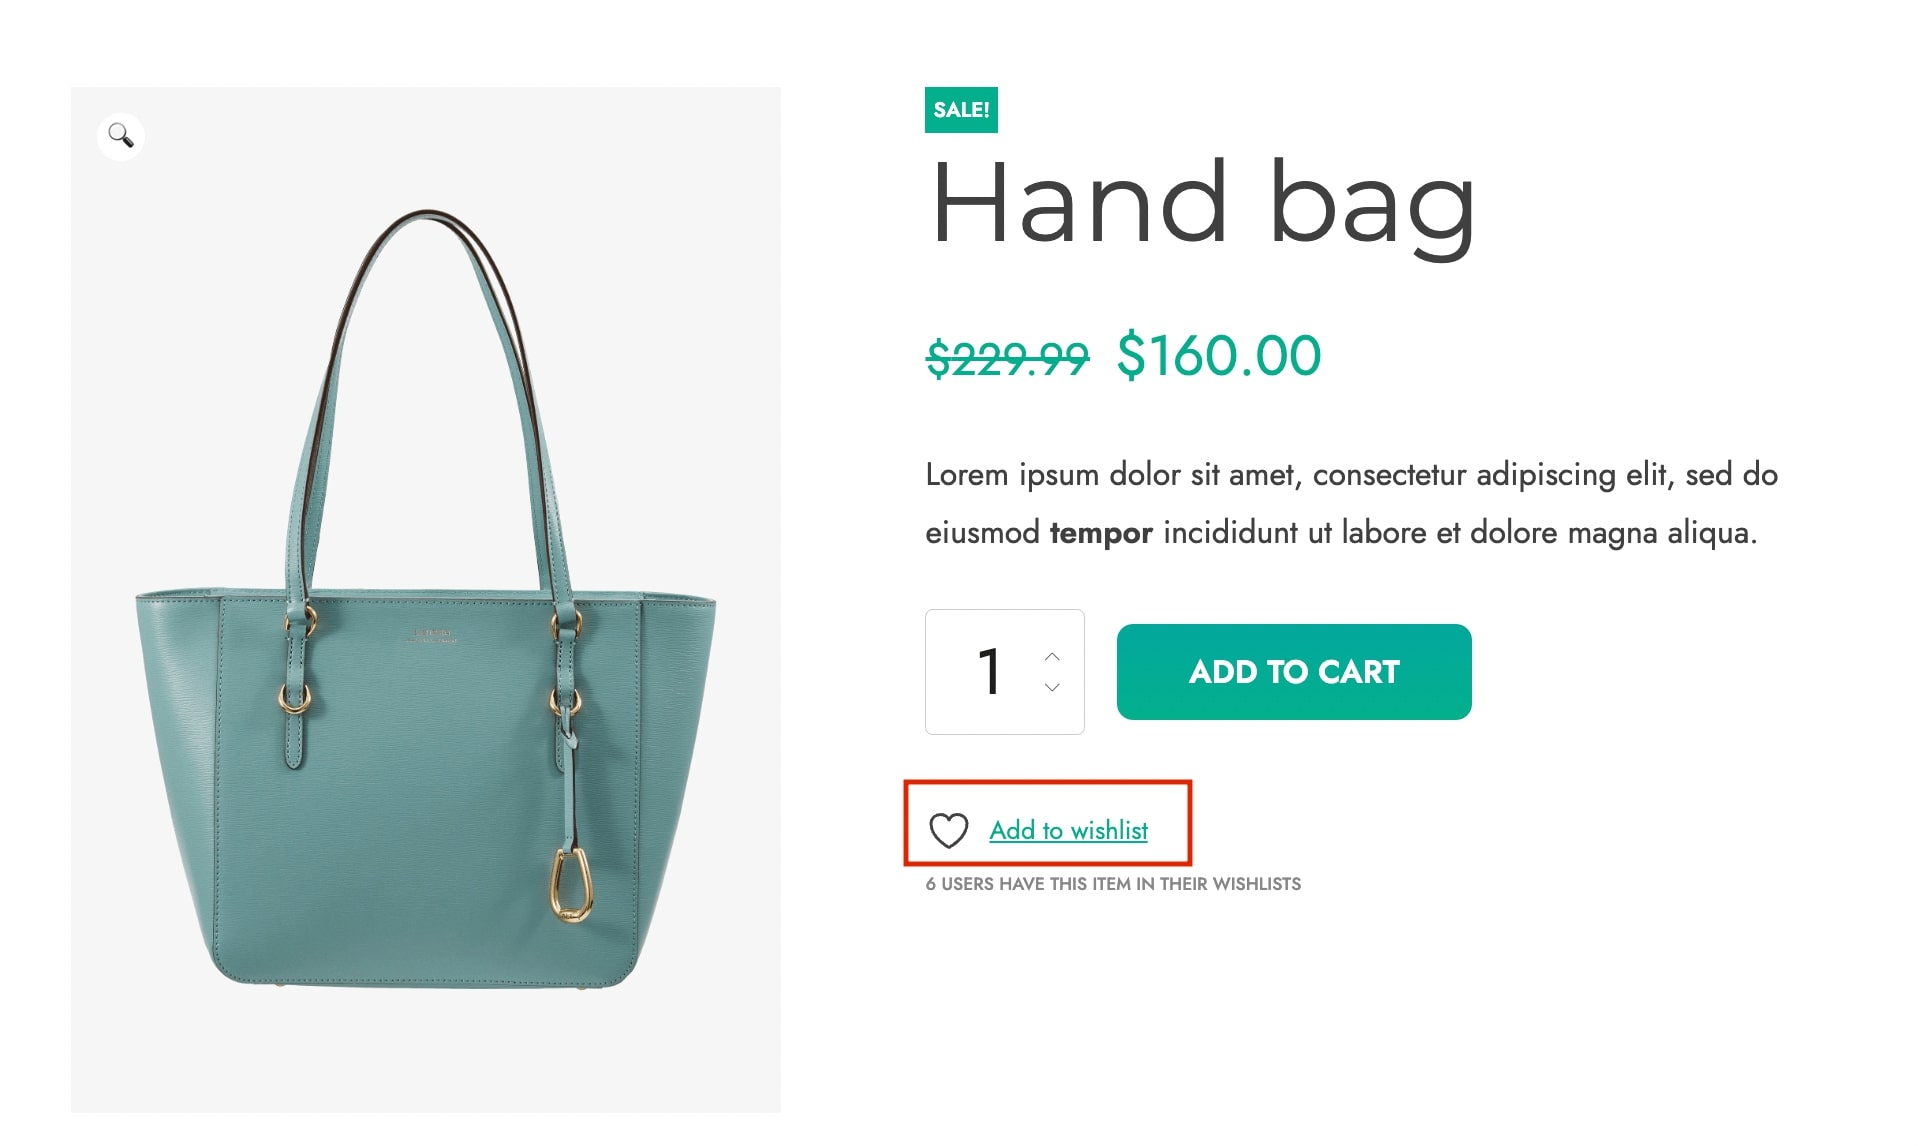
Once you enable it, the plugin adds an Add to wishlist button right inside all product detail pages of your shop through which users can create their wishlists.

Wishlist link button in product page

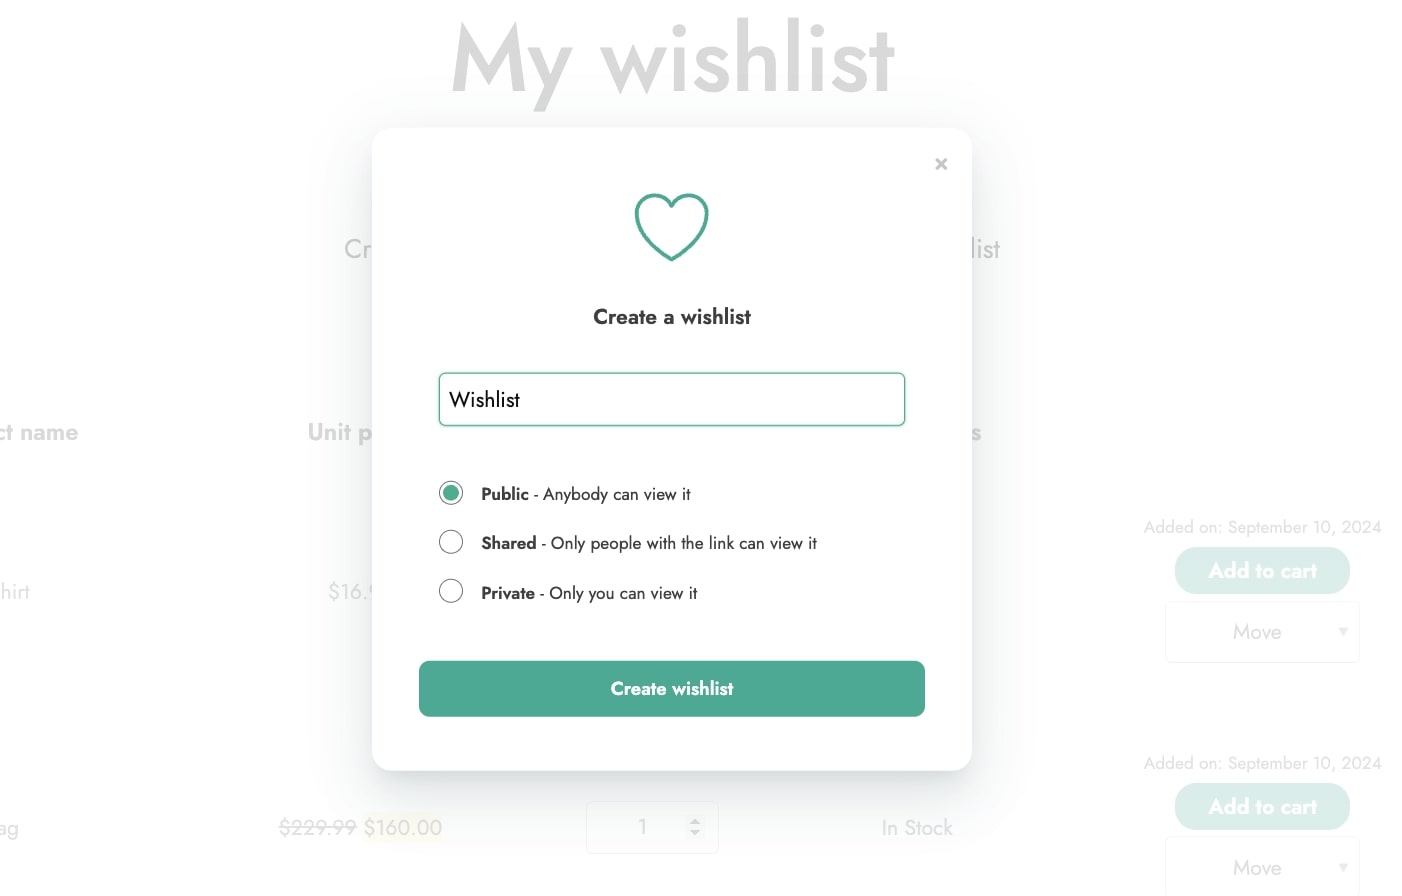
When you first install the plugin, a default wishlist will be created (under the “My wishlist” name). The default wishlist is the one users use in case the “multi-wishlist” functionality hasn’t been enabled.

You can configure the name give to the default wishlist from the Wishlist page section in Customization > Labels. Click here to read more about it.

Each wishlist created in the site is registered right inside the Wishlists section of the plugin Dashboard tab.

Wishlists in dashboard

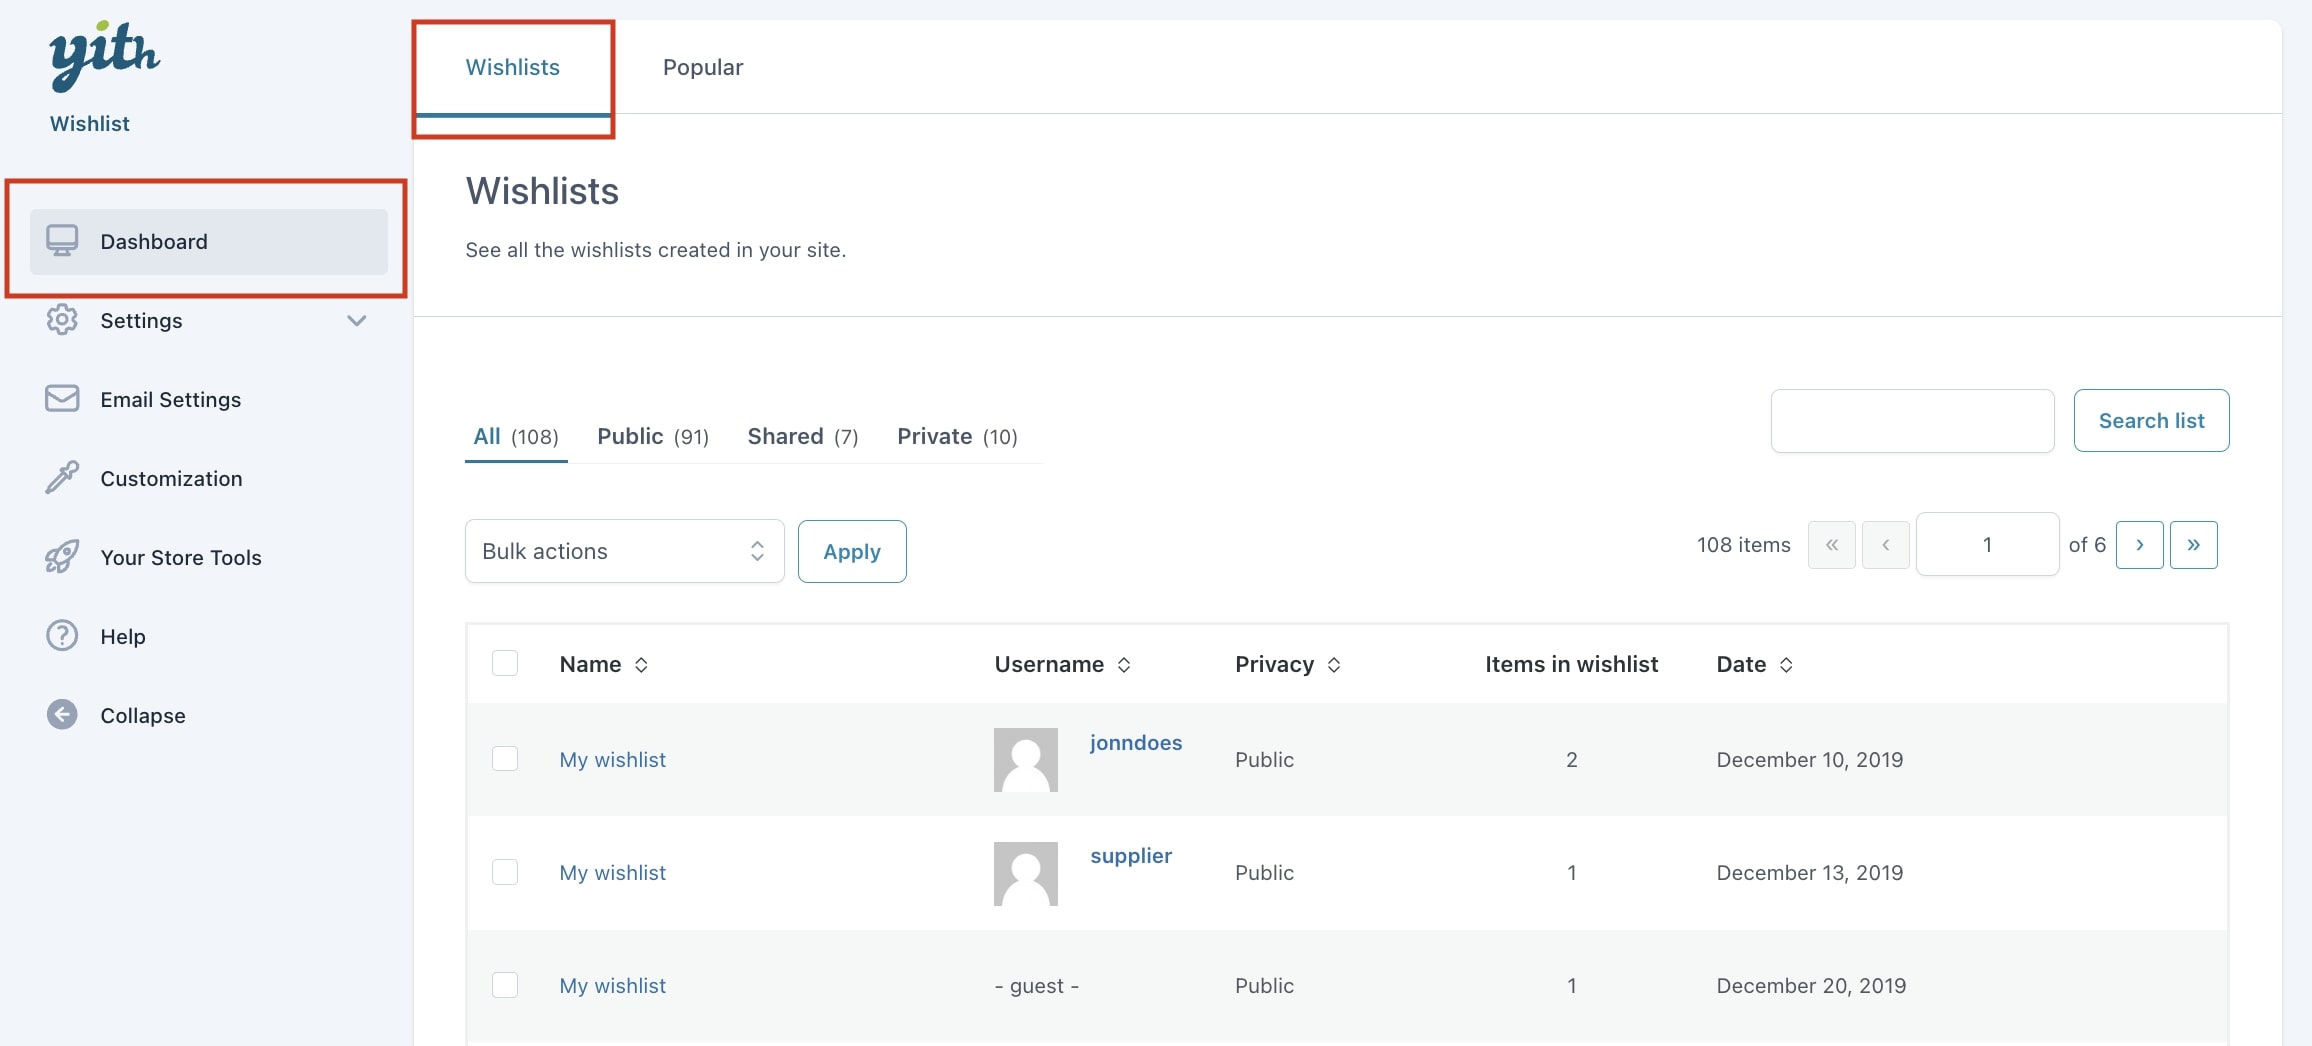
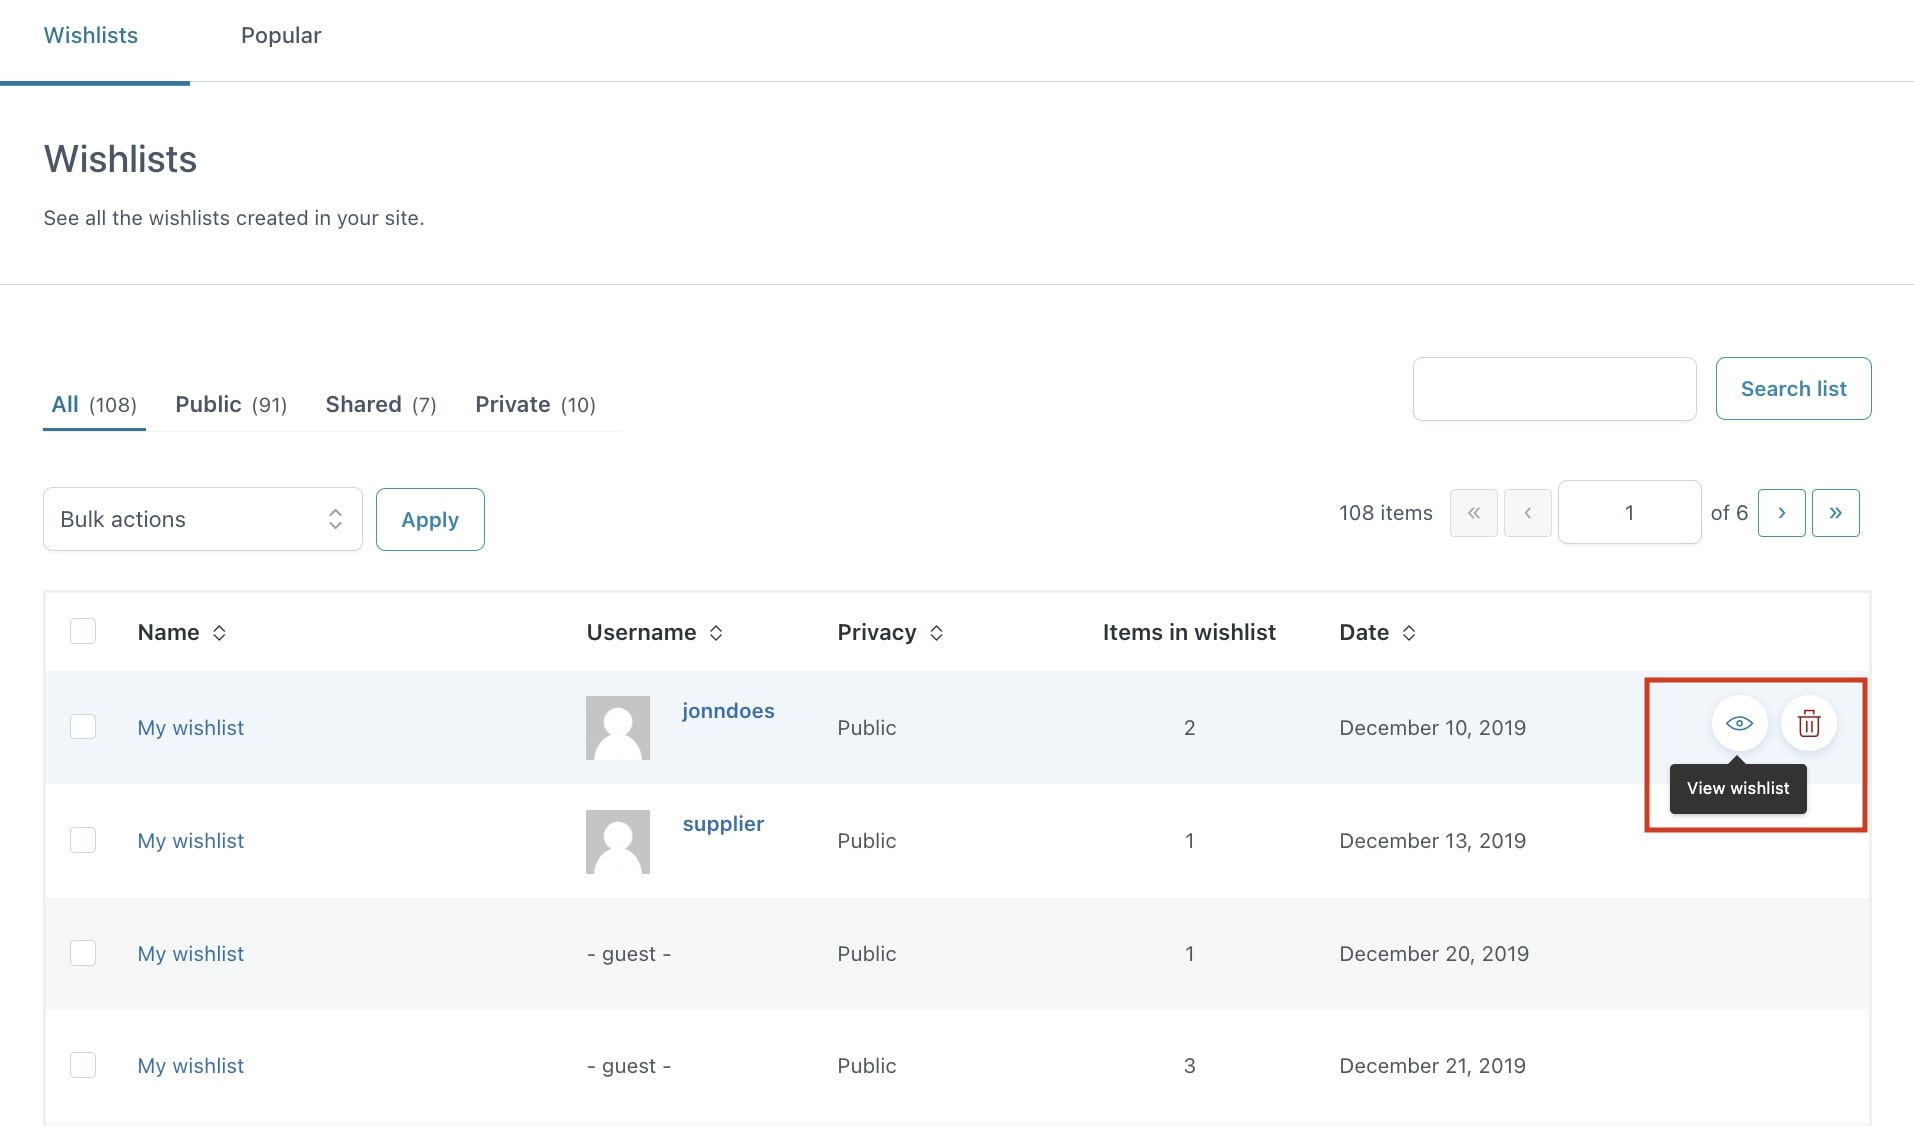
Click on the View wishlist icon to have access to the selected wishlist detail.

View wishlist button

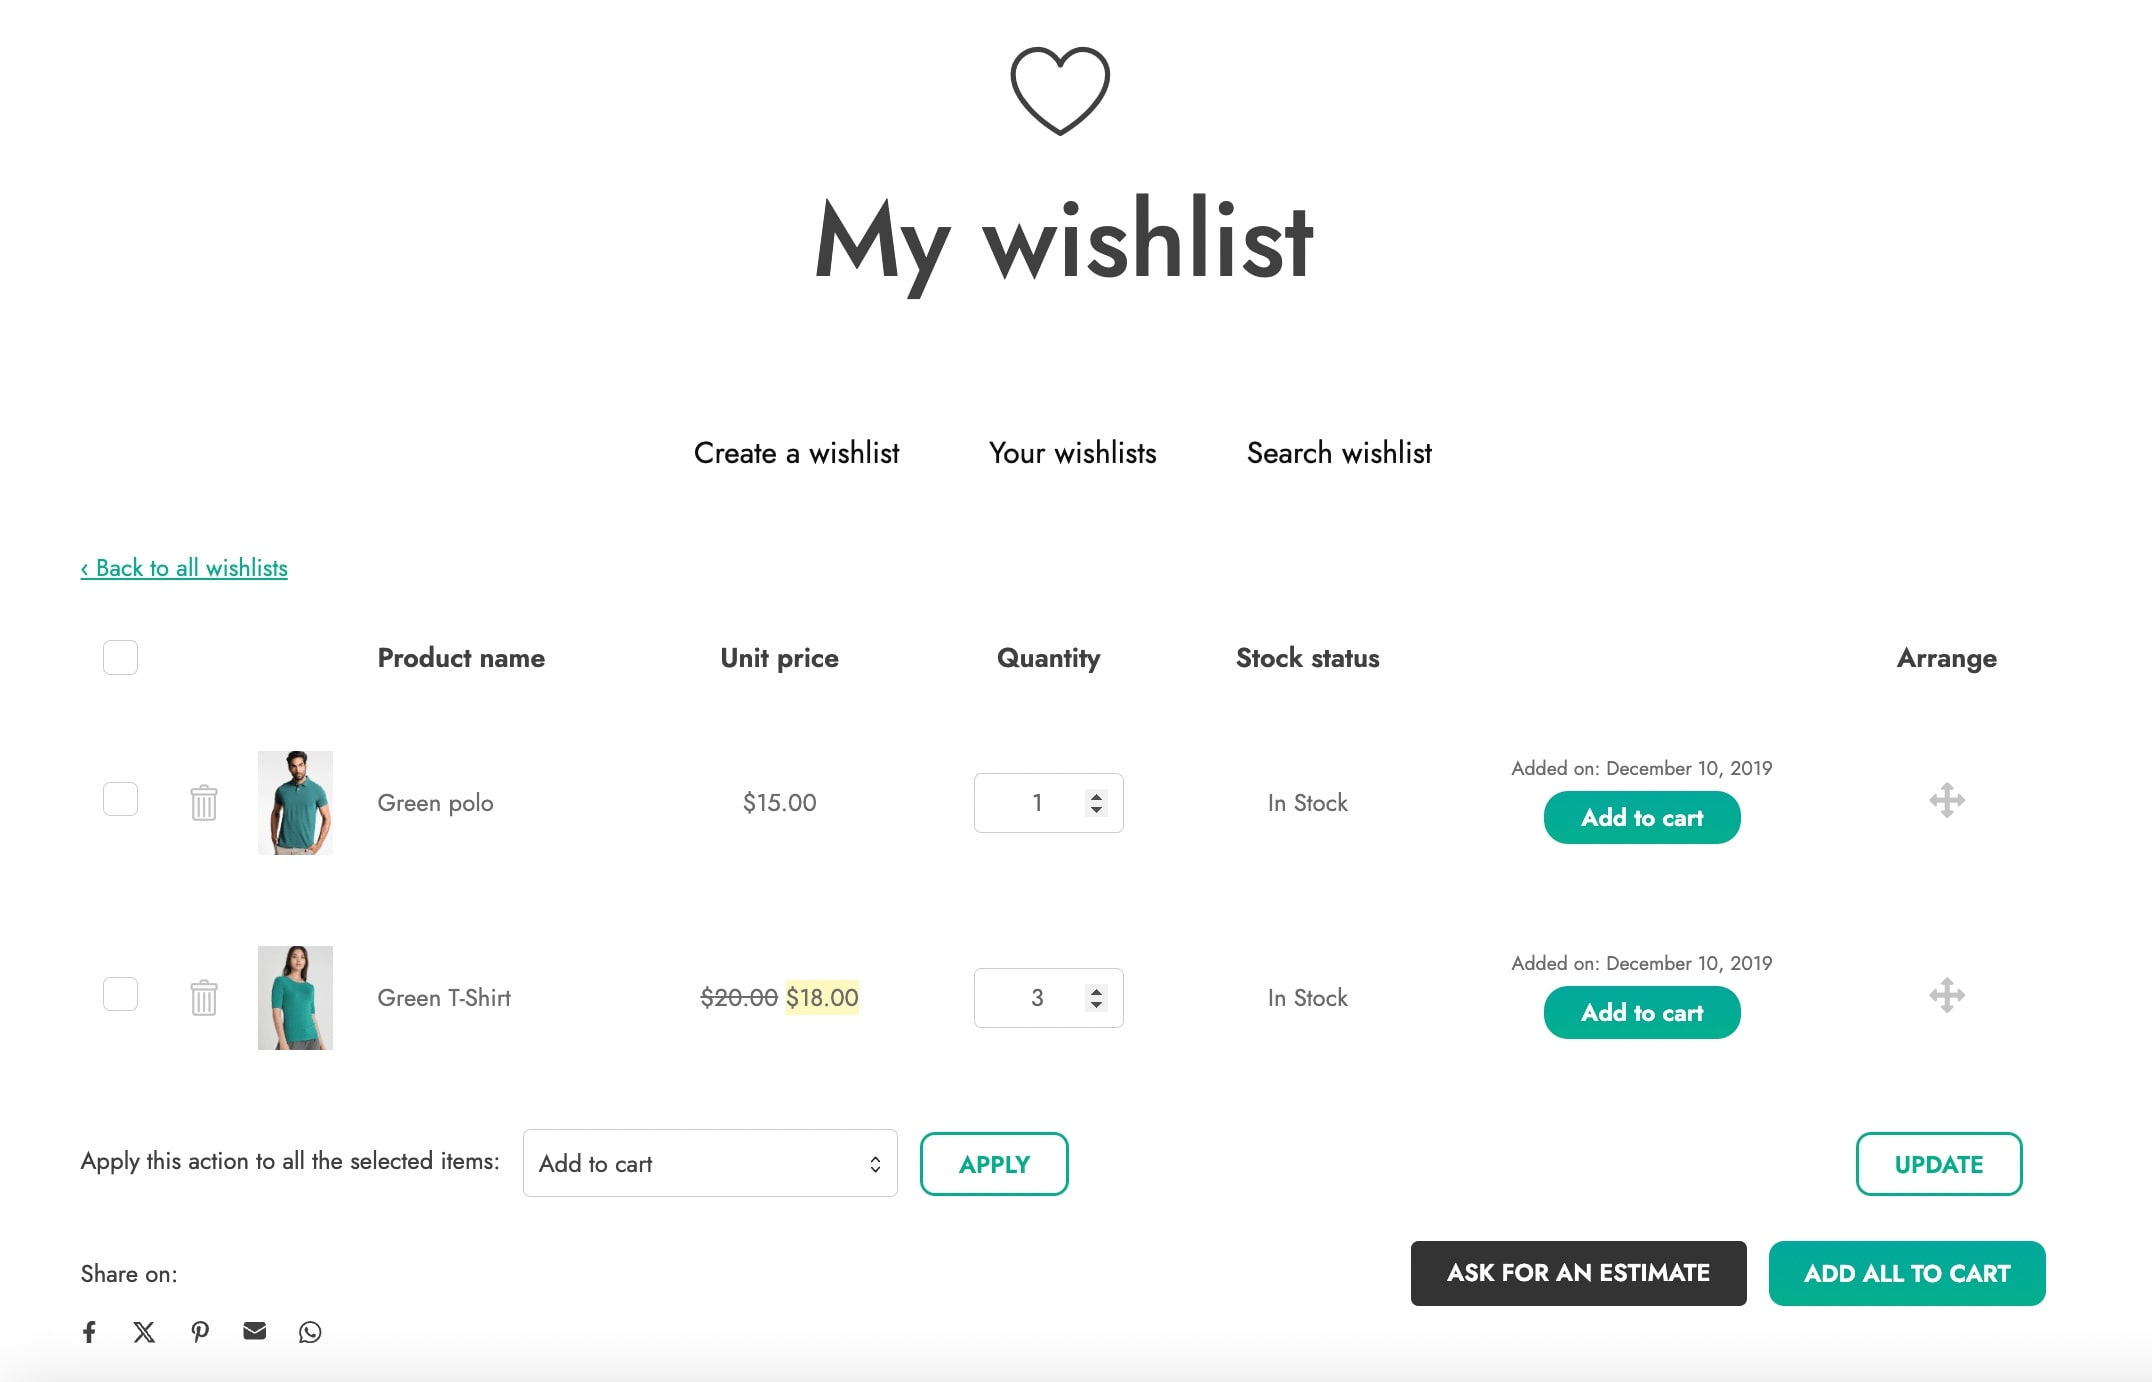
Once you click on it, you will be redirected to the wishlist page:

View wishlist page example

Wishlist status

You can assign a status among “public”, “shared”, “private” to each wishlist. The differences between statuses are in the visibility they give to the wishlist.

Wishlist statuses
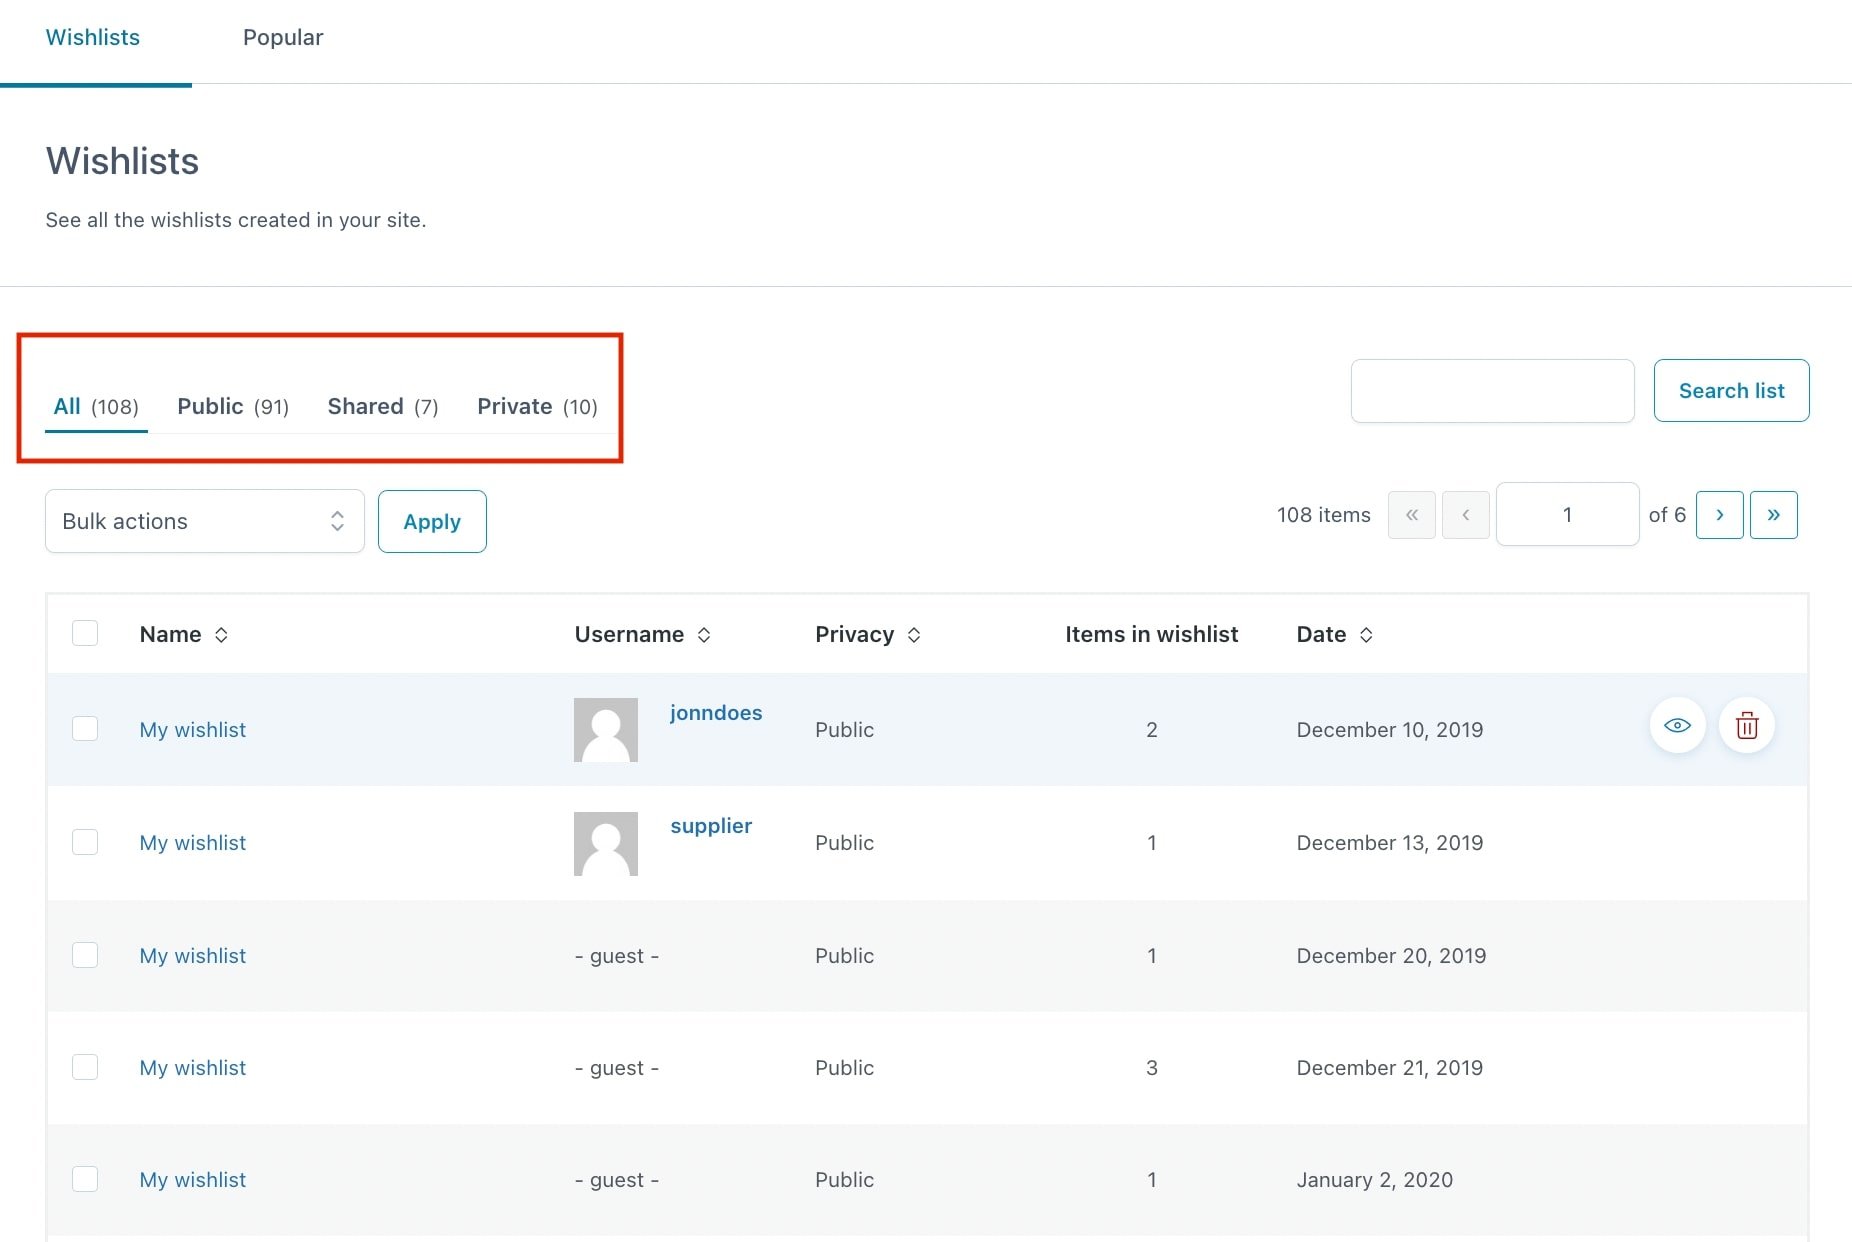
  • “Public”: the wishlist is accessible to everyone, therefore it is shown as a result in the search form in case the user’s name or email address of the wishlist owner has been typed
  • “Shared”: the wishlist can be shown only to the owner and to users who were given the direct link to the wishlist detail page. It is not shown in the search form.
  • “Private”: the wishlist is available only to its owner and site administrator. If a non-owner user tries to visit private wishlists, the plugin will return a 404 page.
Create a new wishlist

Users can edit the selected status from the Privacy section from the list of wishlists:

Wishlist privacy

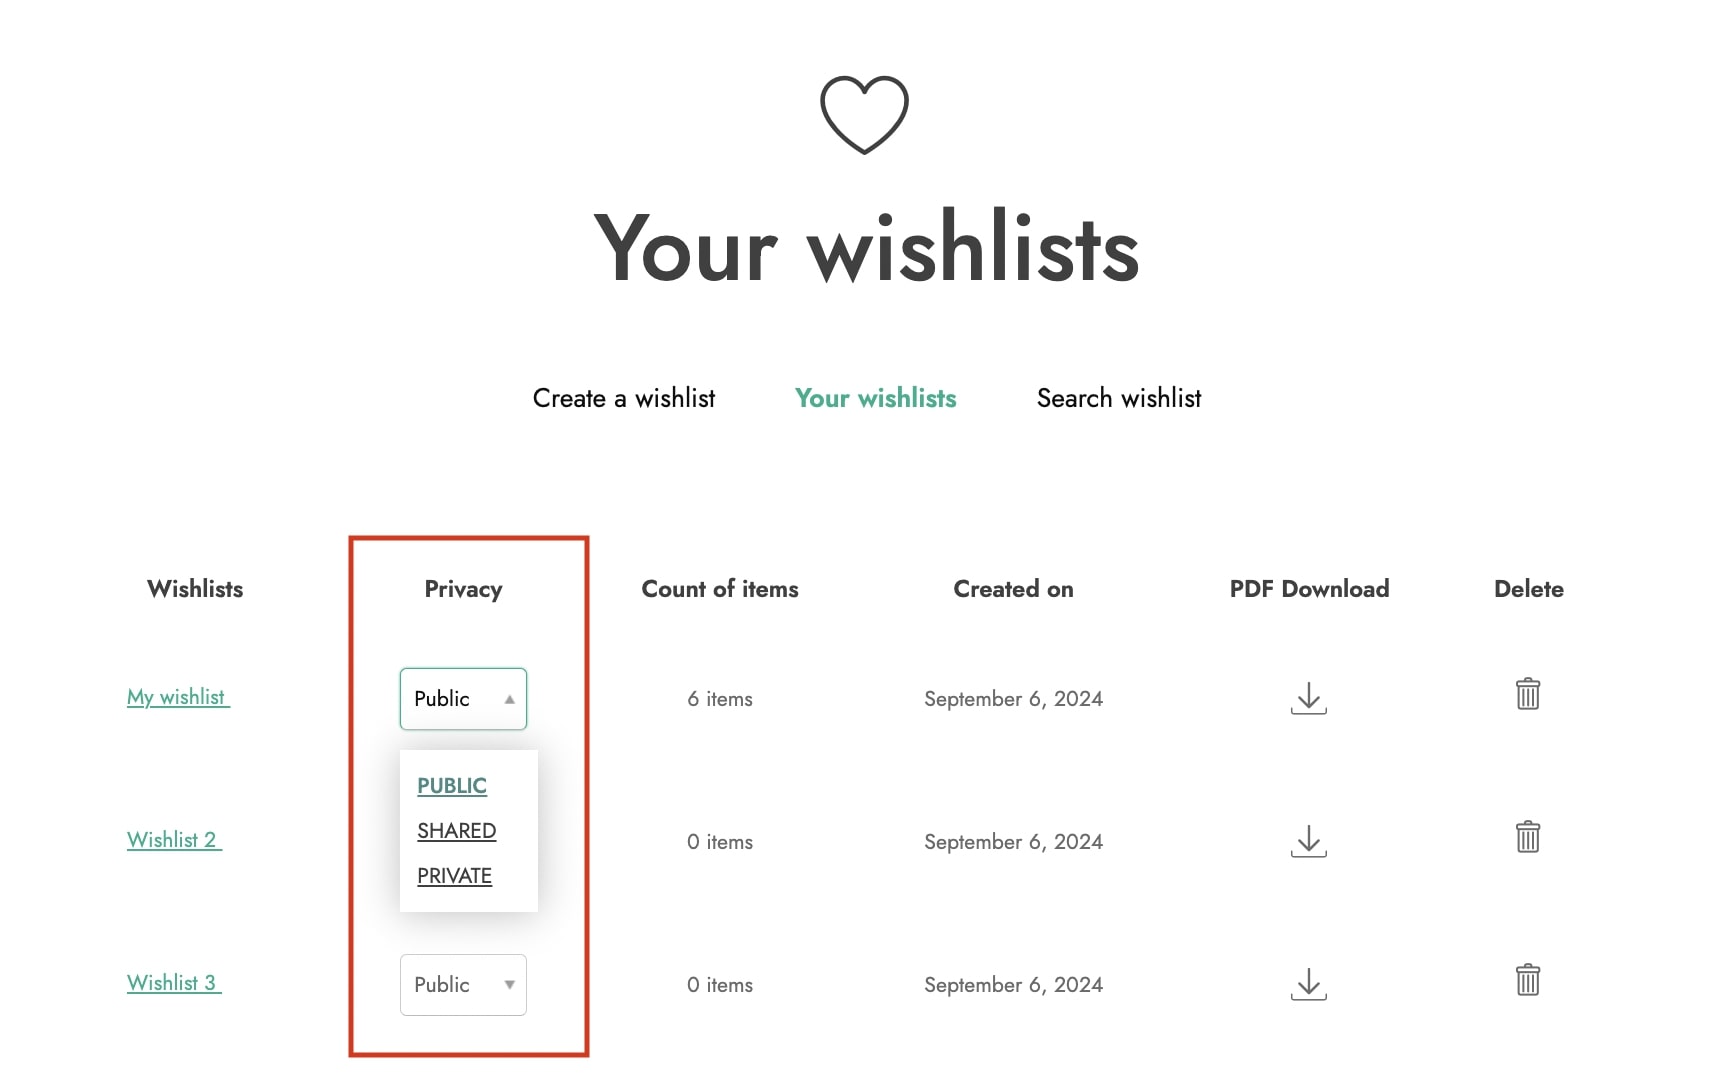
If multi wishlist is disabled, the status of the default wishlist will be “public” and it cannot be changed.

Popular products

All products included in at least one of the wishlists active on the site are inserted in a dedicated list available in the “Popular” section of the plugin settings dashboard.

Popular products tab

You can see the following information for each product in the list:

  • Number of wishlists where the product is included (wishlist count).
  • When the last promotional email was sent.
  • List of users who have added the product to at least one of their wishlists. (1)
  • Create a promotional email. (2)
  • Option to export users. (3)

Promotional email

For each product in the table, you can send a promotional email in one of the following modalities:

  • Simultaneously to all users who added the product to their wishlist;
Create promotion button
  • Or you can send it to a specific user. First, click on the icon to view the list of user that added the product to their wishlist:
View users that added a popular product to their wishlist

Then select which single user you wish to send the promotional e-mail:

Create a single user promotion

How to customize the promotional email content

By clicking on Create promotion, you will have the possibility to set your promotional email choosing from HTML or Text and customizing the main content. You can use the following placeholders:

{user_name} {user_email} {user_first_name} {user_last_name} {product_image} {product_name} {product_price} {coupon_code} {coupon_amount} {add_to_cart_url}

About the {coupon_code} and {coupon_amount} placeholders, it will print out the code and the amount of the coupon that you select in the “Coupon” section immediately below:

Edit the promotional e-mail

Export users

Export users that added the product to their wishlist

With the Export users option you are able to export all users that have added that specific product to their wishlist, in CSV format. You will see the user ID, Users email, first name, and last name.