From the Wishlist detail page settings available in Wishlist page tab, you can:
- Decide which info to show in the wishlist page table
- Configure “Add to cart” options from the wishlist page
- Set up wishlist sharing options
Let’s go over each one:
What to show in the wishlist table
The plugin makes available a list of options to let you decide what you want to show in the wishlist table. These options are:
- Product variations selected by the user (example: size or color)
- Product price
- Product stock (show if the product is available or not)
- Date on which the product was added to the wishlist
- Add to cart option for each product
- Icon to remove the product from the wishlist – to the left of the product
- Button to remove the product from the wishlist – to the right of the product

“Add to cart” options from the wishlist page
The site admin can choose what happens after the user adds a product to the cart from the wishlist.

The options are:
- Redirect to cart: redirect to cart page if Add to cart button is clicked in the wishlist page
- Remove if added to the cart”: remove the product from the wishlist if it has been added to the cart
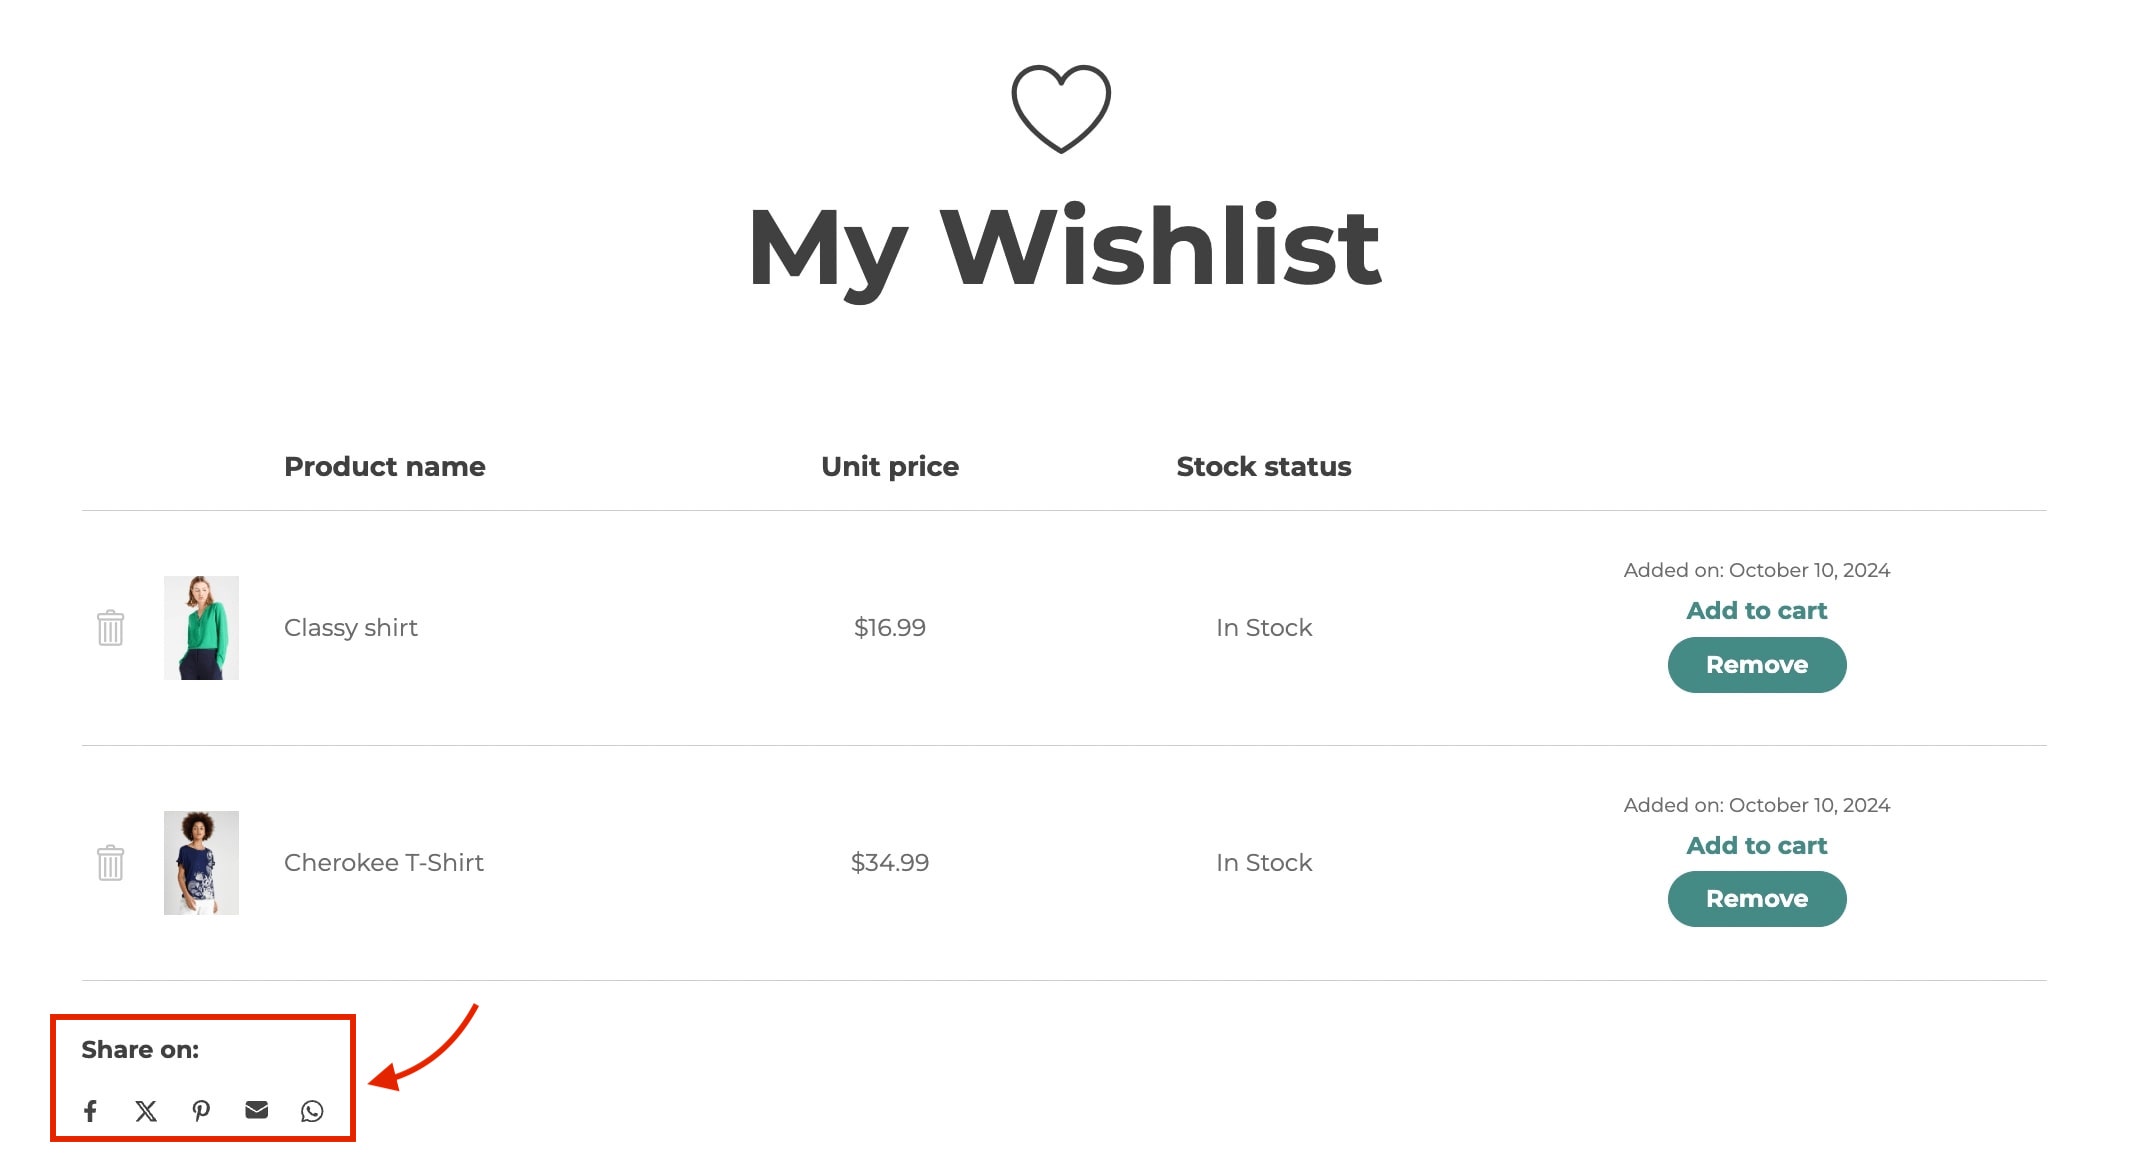
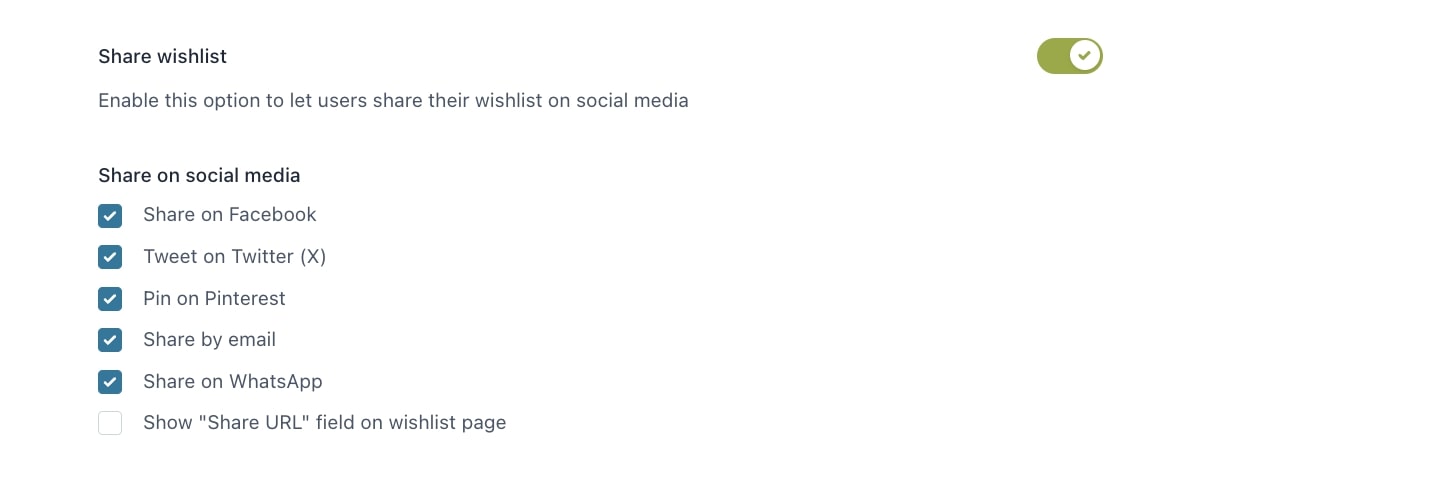
Share wishlist
If you enable the Share wishlist option, you will be able to select the socials in which users can share their wishlist.
Depending on your selection, the socials will show in the wishlist page like in the example below: