By enabling the Ask for an estimate button, users will be able to ask the administrator for the final price of the products added to the Wishlist. The administrator receives an email with a link to the concerned wishlist asking for an estimate.
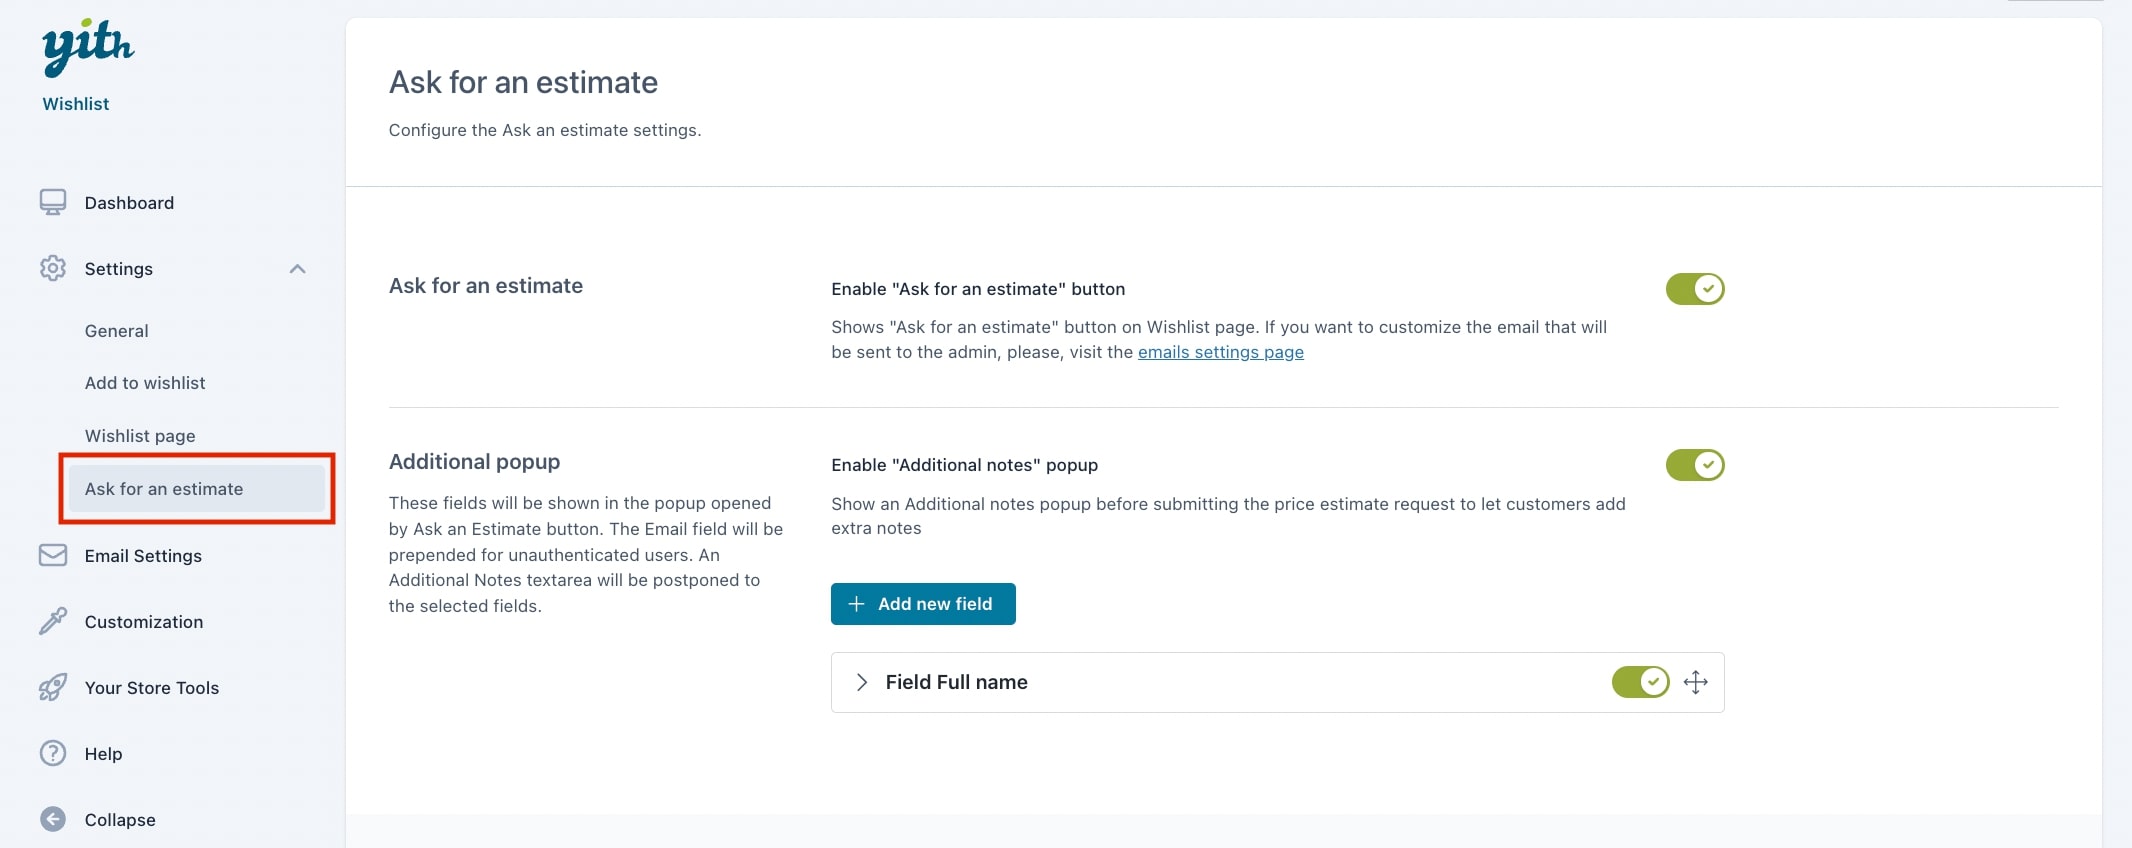
To give users the possibility to add some notes to the request to be sent, enable the Show additional notes popup option.
The plugin automatically shows the email field to unregistered users. Other fields can be added through the button Add new field. We will analyze later how to set these fields.
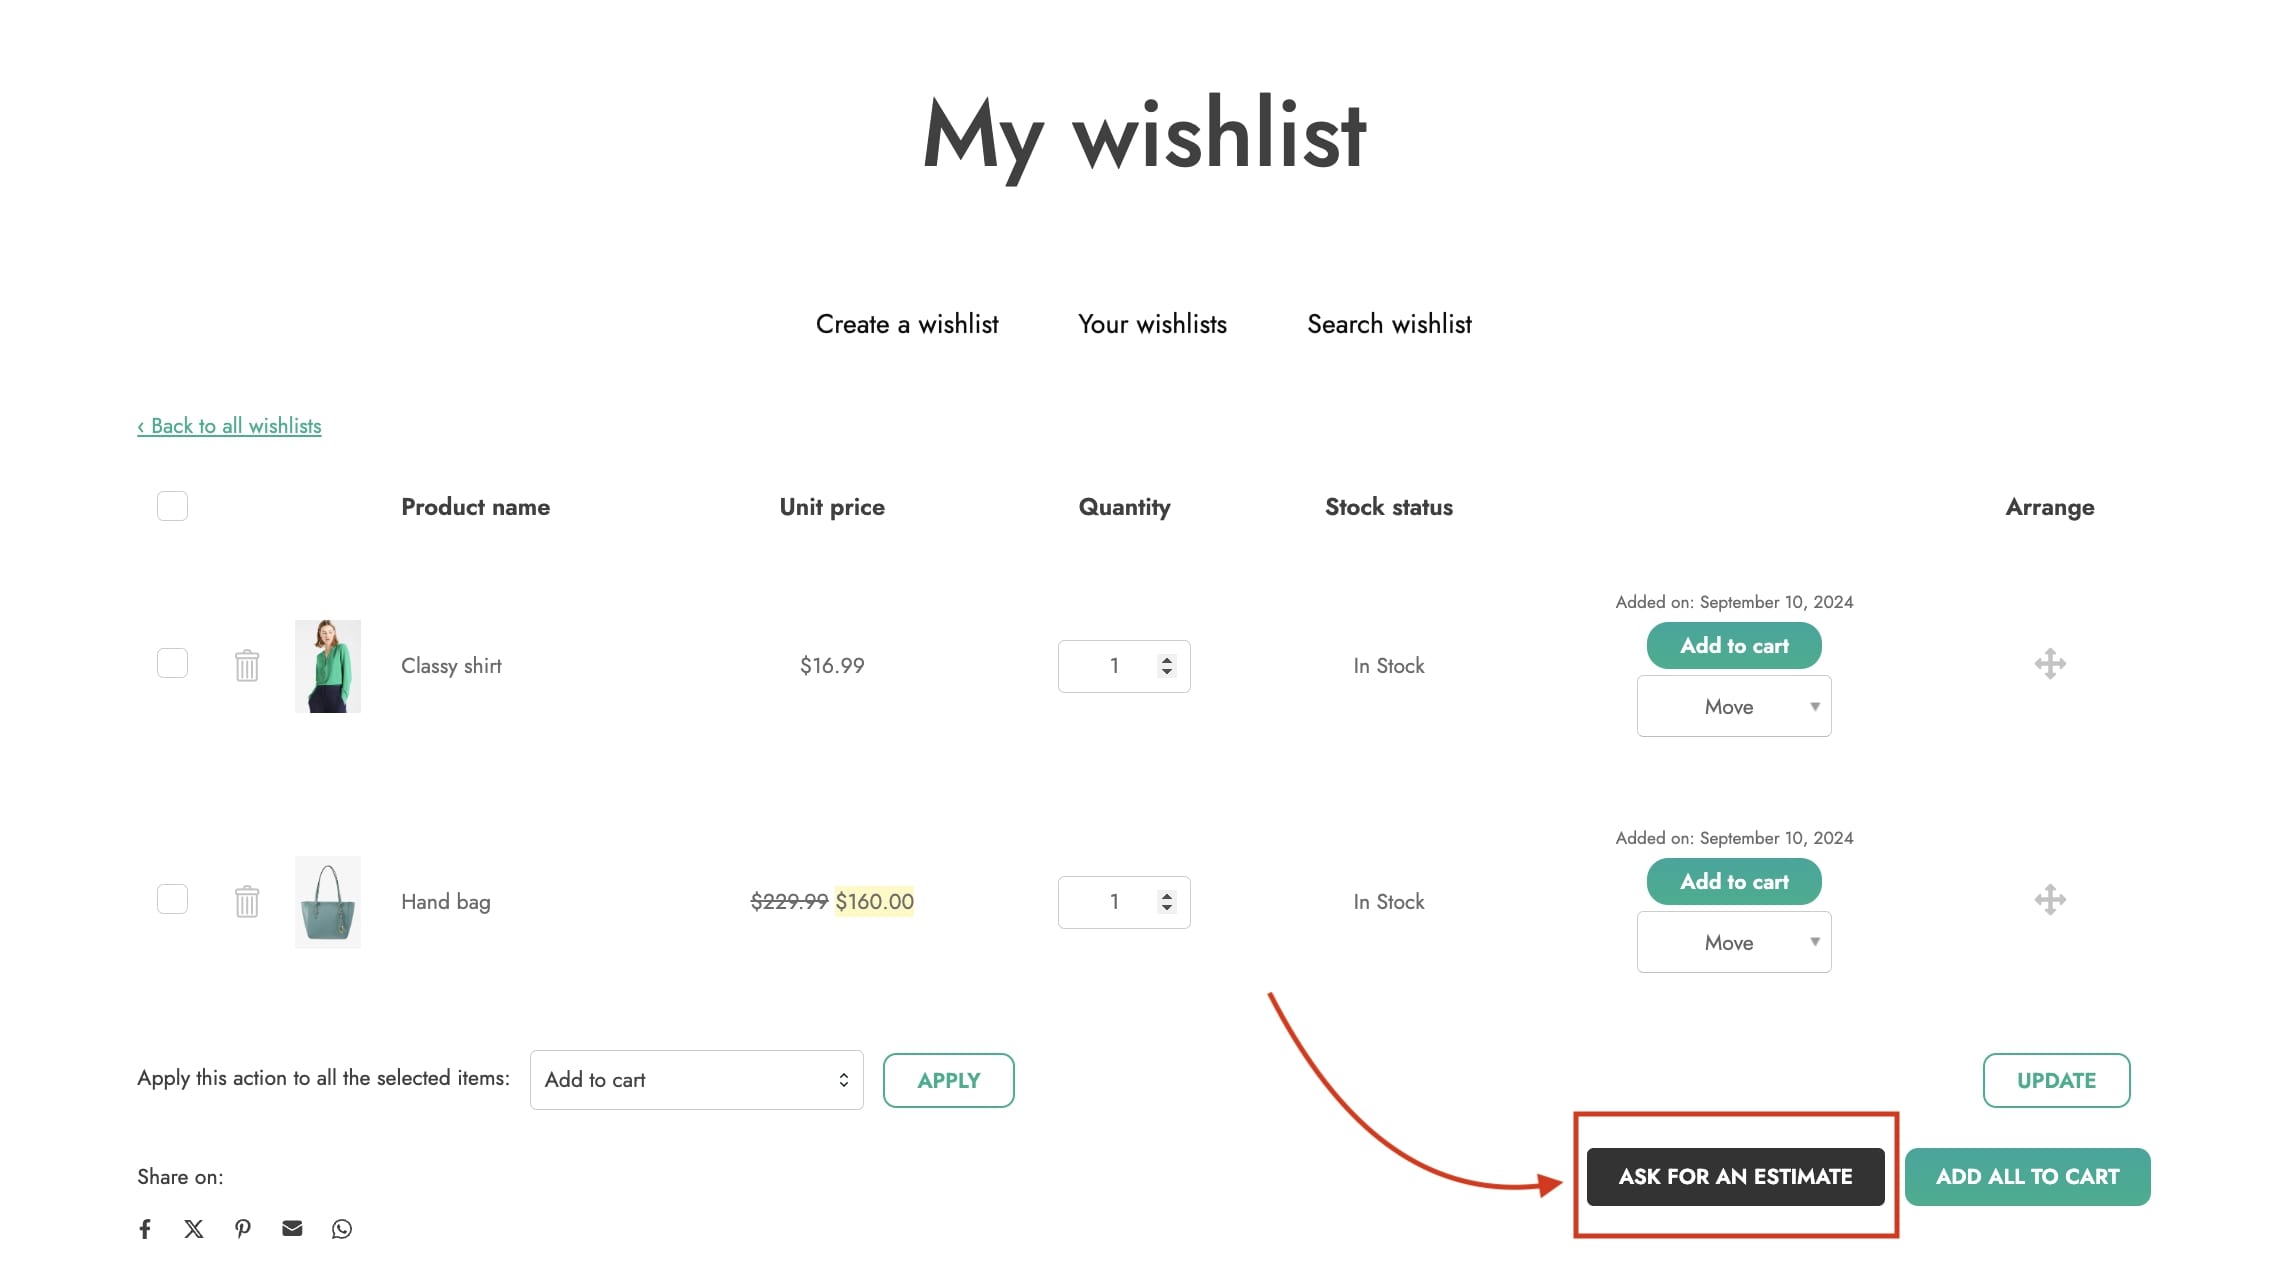
The popup will show after users click on Ask for an estimate on the wishlist page.
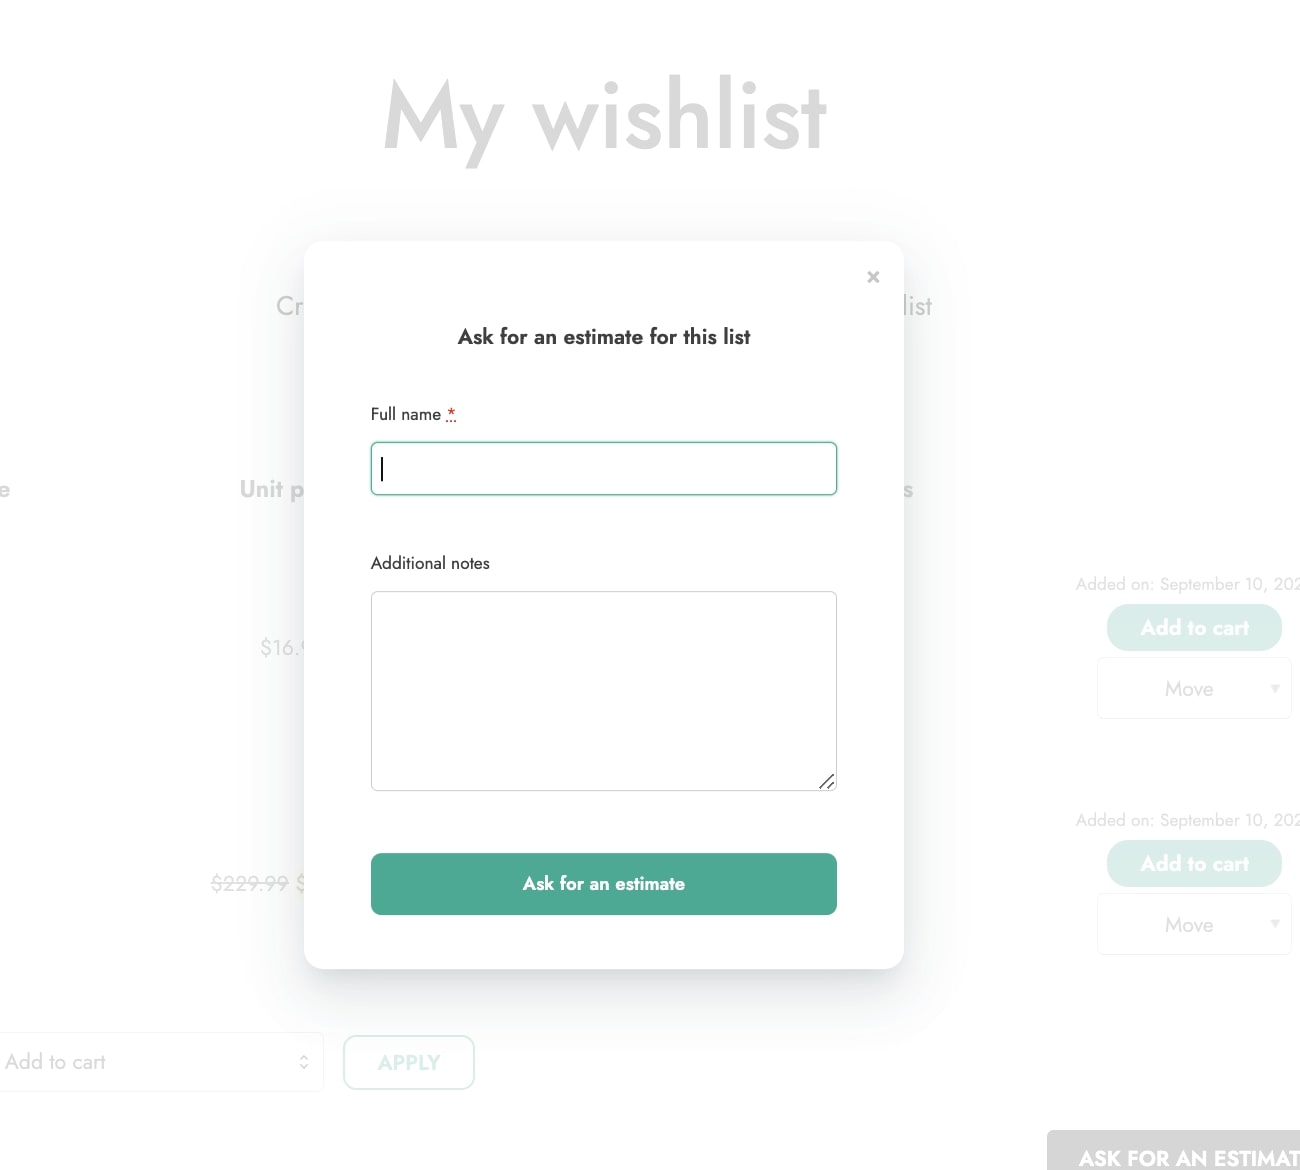
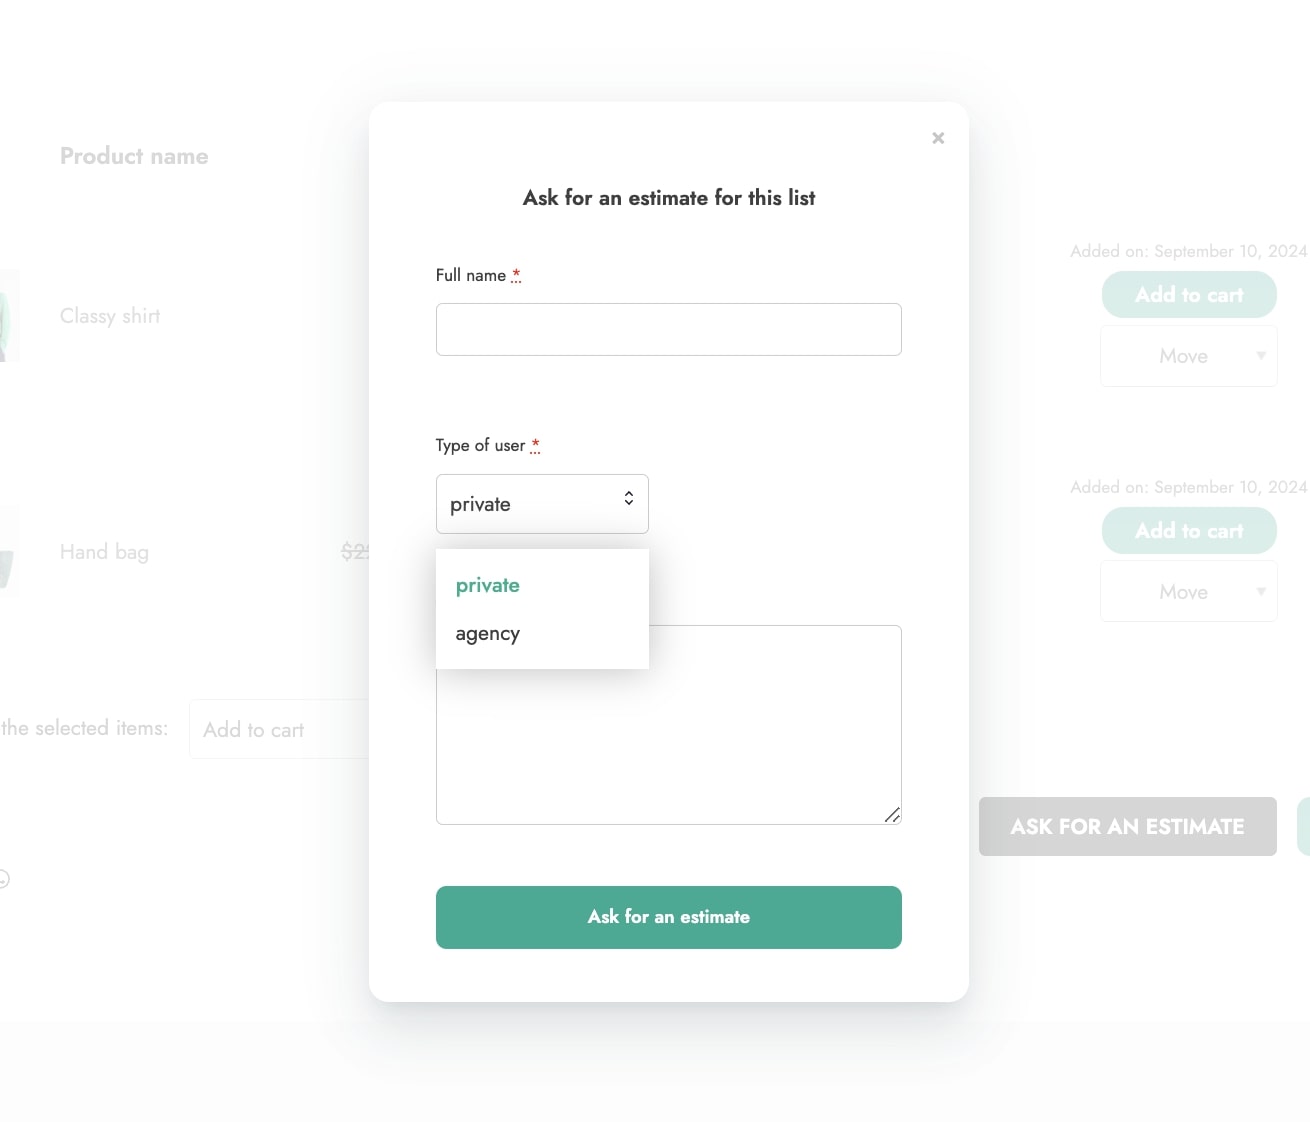
According to the fields configured, the popup will look like this
How to set additional fields
Let’s analyze the options available in the settings of the additional fields that will show in the popup.
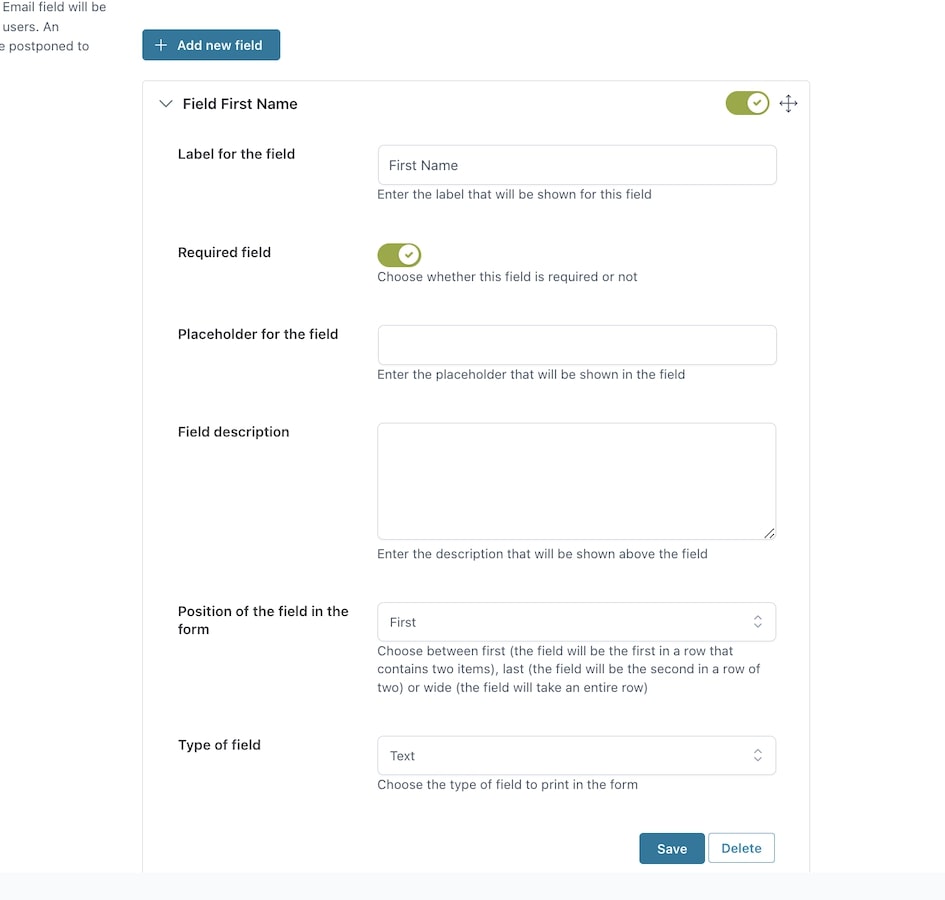
- Label for the field: insert the name of the field you want to show
- Required field: enable if you want the field to be required. Leave it disabled to show it as optional
- Placeholder for the field: enter the placeholder to show in the field
- Field description: type here the description of the field
- Position of the field in the form: choose from three different positions: first (this will show the field as first), last (this will show the field as last when two or more available), wide (this will show the field in the whole row).
- Type of field: choose the type of field from Text, Email, Phone, URL, Number, Date, Textarea, Radio, Checkbox, and Select.
If choosing Select and Radio, a new entry (Enter options for the field) will appear to let you enter the options to be shown in the dropdown.
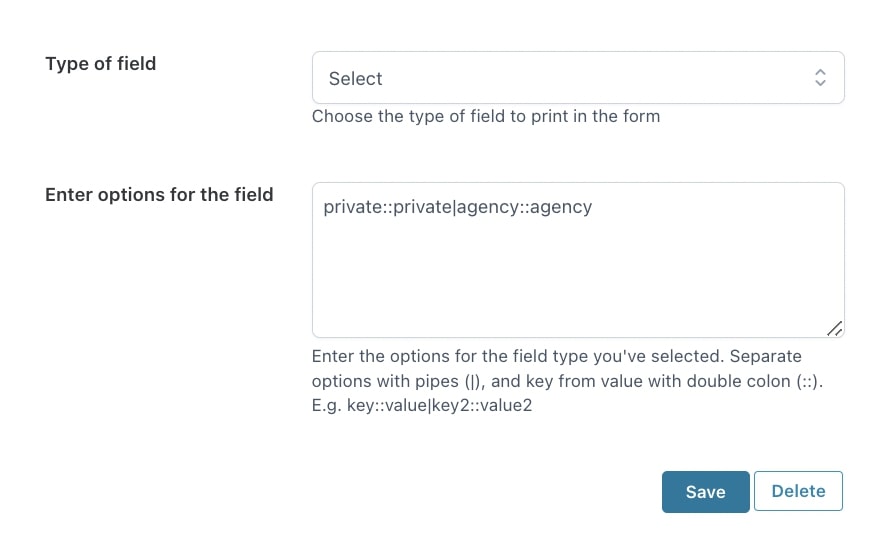
Here is an example of how the Select field looks like in the frontend:
You can see how to manage and customize the “ask for an estimate” email options in the Email settings.
