From the Customization tab you can configure the style and labels for the plugin options. In this post we’re going to see how to customize the labels for:
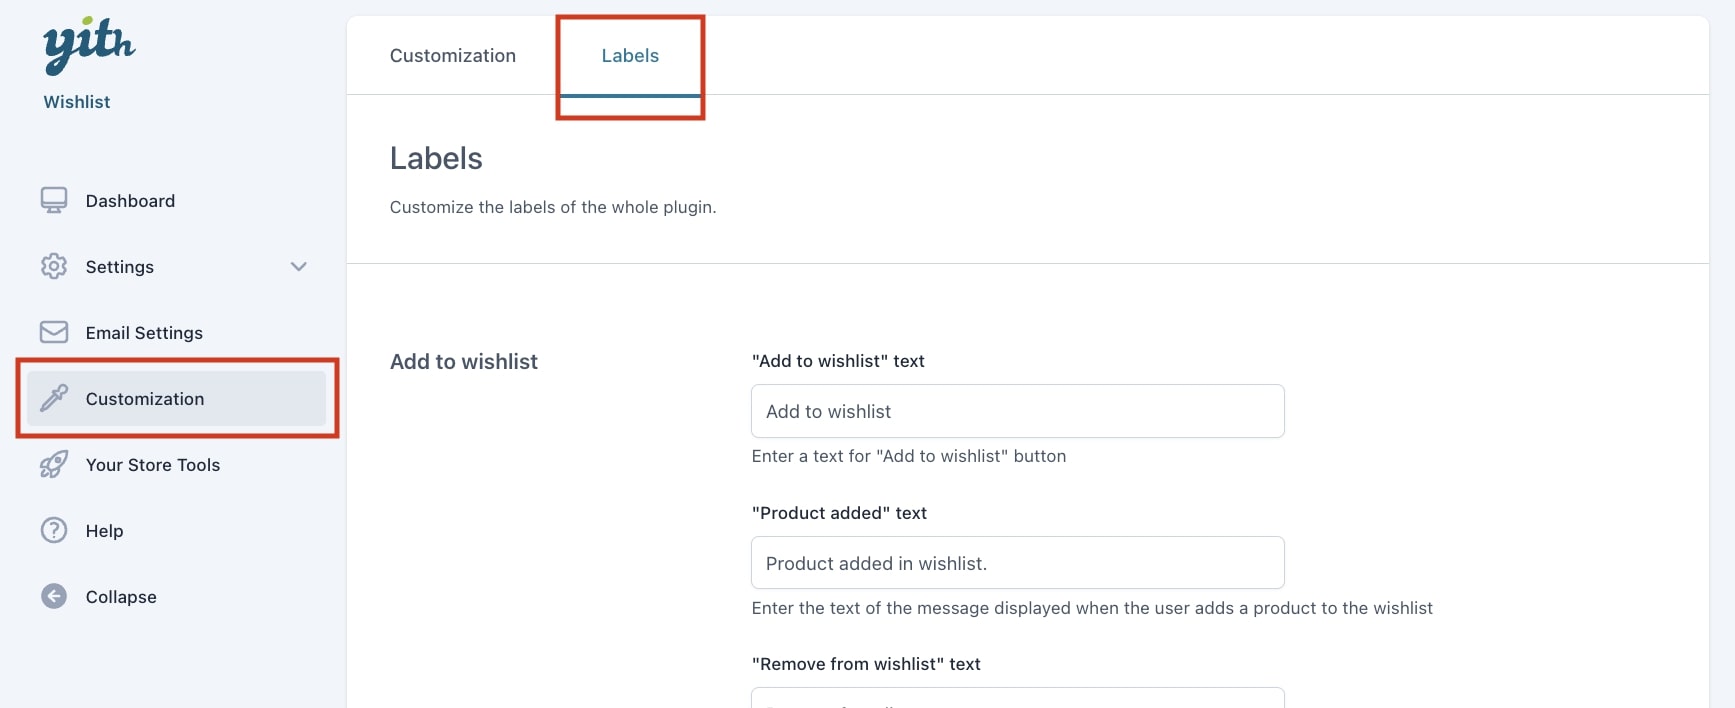
Add to wishlist
From this section you can set the labels related to when a user adds, moves or removes a product from the wishlist
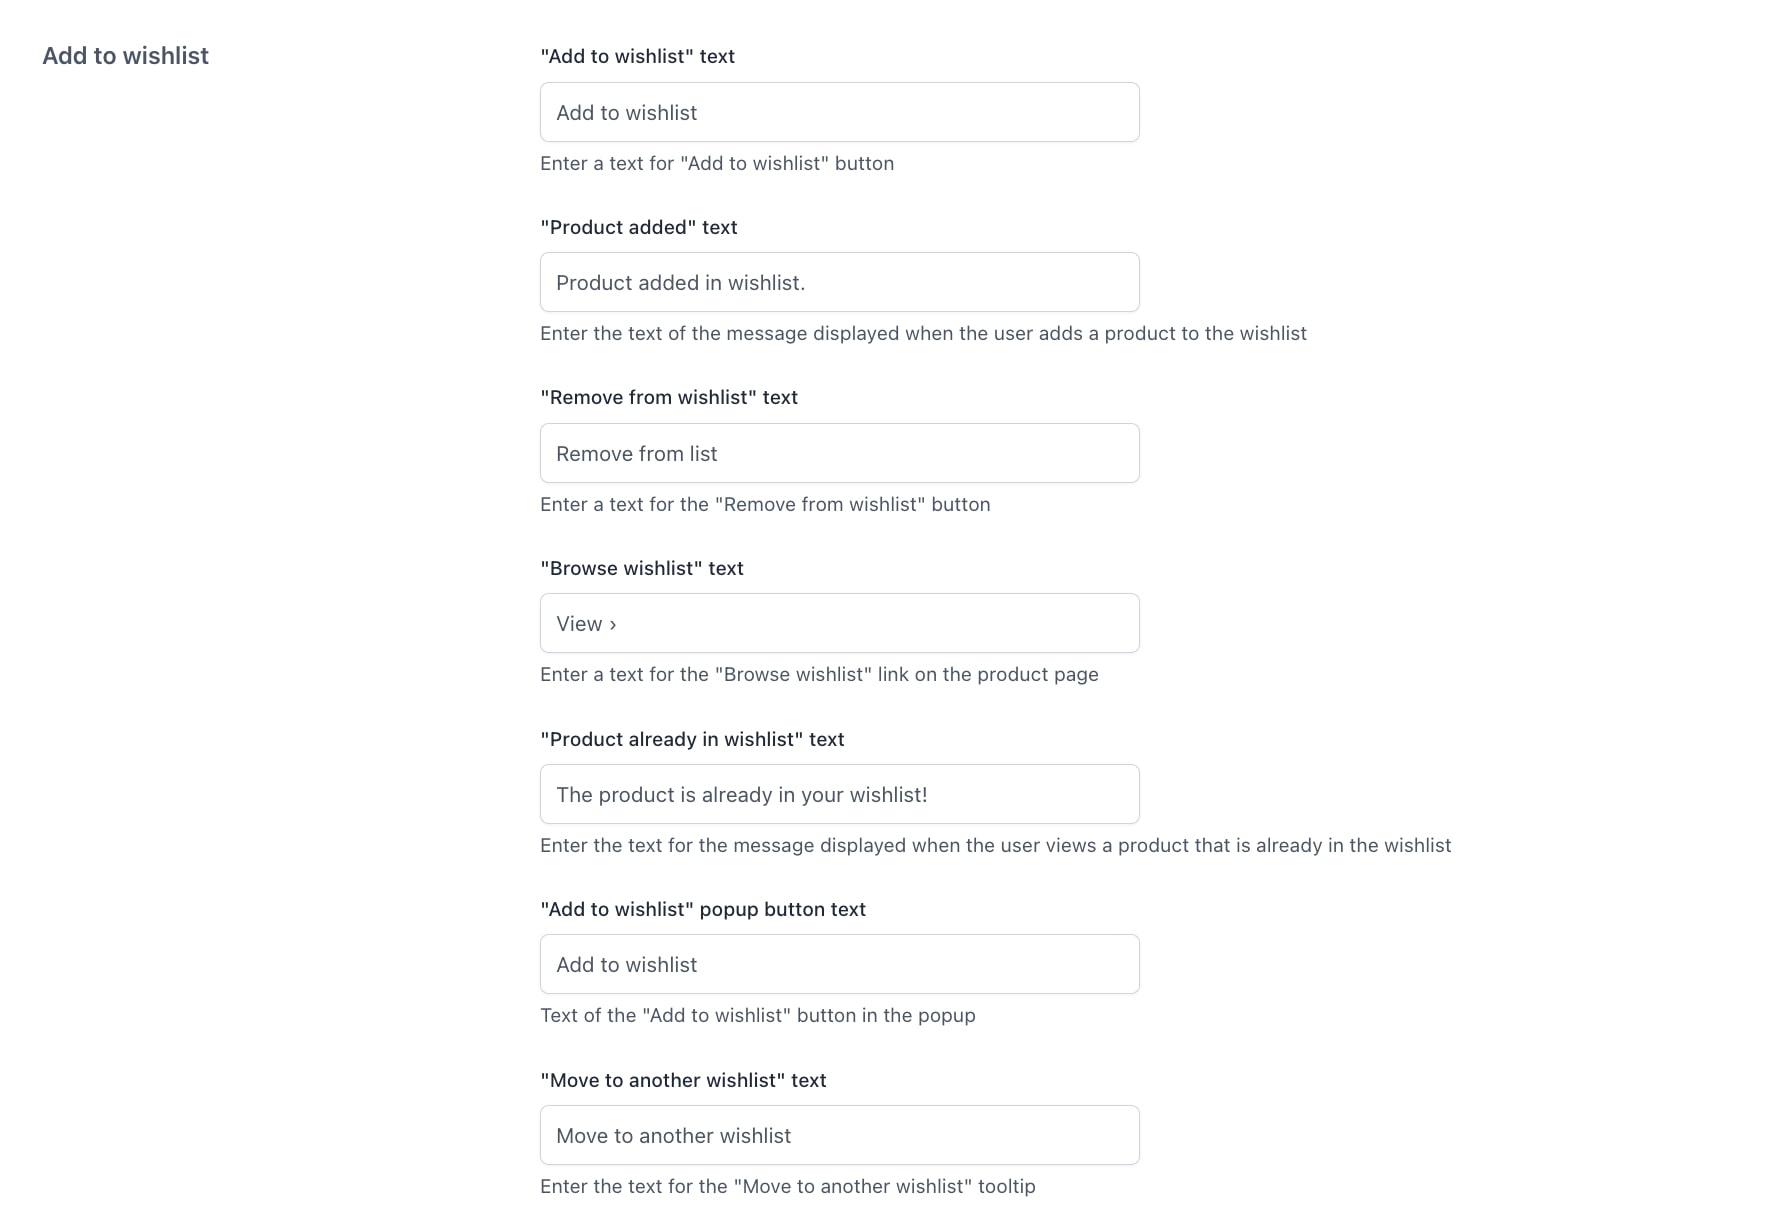
- Add to wishlist” text: used to customize the button text
- “Product added” text: to customize the text shown when a product has been added to a wishlist
- “Remove from wishlist” text: customize the text to remove a product from the wishlist.
- “Browse wishlist” text: to customize the text of the Browse wishlist link
- “Product already in wishlist” text: customize the text shown to users when they are viewing a product already added to their wishlist
- “Add to wishlist” popup button text: to customize the button shown in the popup
- “Move to another wishlist” text: to customize the text for the tooltip to move the product from one wishlist to another
Wishlist page
From this section you can customize the labels from the wishlist page options
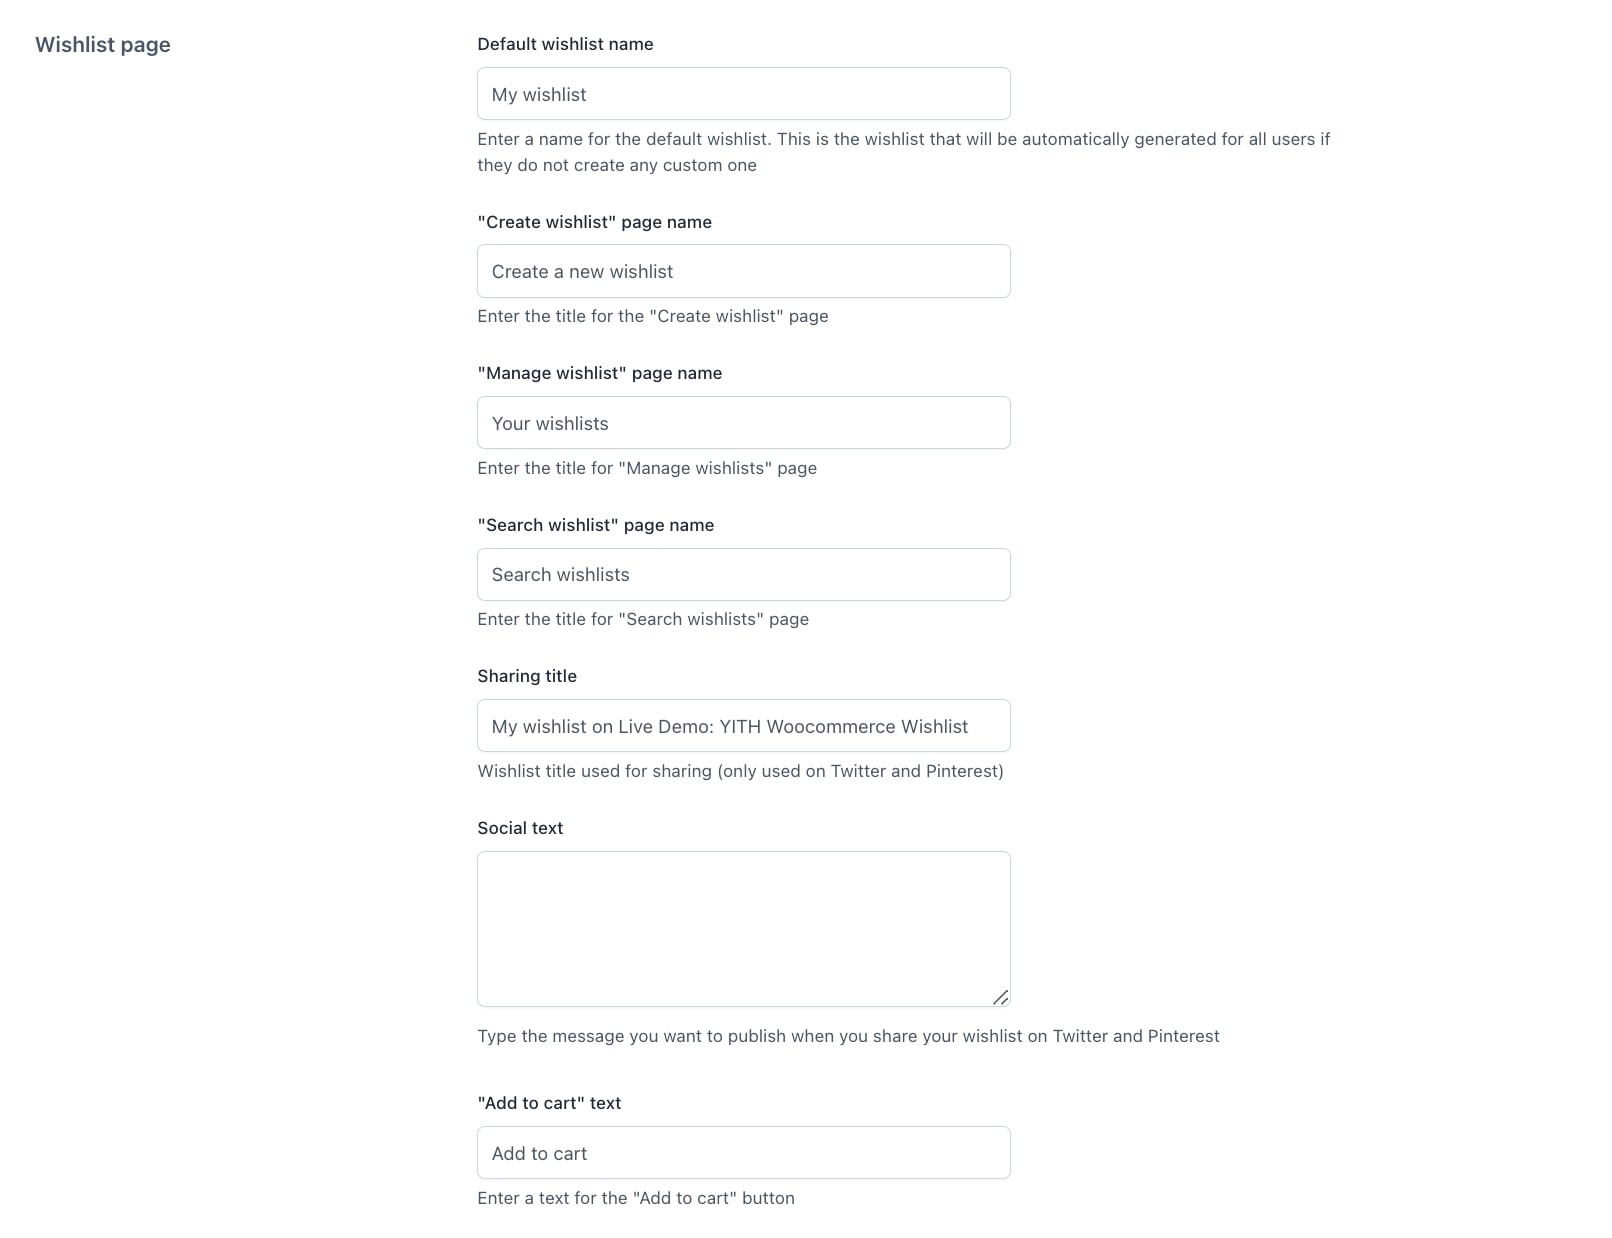
- Default wishlist title: default title of the wishlist page if users do not enter a new one
- “Create wishlist” page name: the title that will be used for Create wishlist page
- “Manage wishlist” page name: the title that will be used for Manage wishlist page
- “Search wishlist” page name: the title that will be used for Search wishlist page
- “Add to cart” text: text for the Add to cart button in the table included in the wishlist page
- Sharing title: the title of the wishlist when you share it in Twitter (X) and Pinterest
- Social text: write the message that is published when sharing the wishlist in Twitter (X) and Pinterest
- “Add to cart” text: the text for the “Add to cart” button in the wishlist
Multi-wishlist
From this section you can set the texts related to when unlogged users try to use the multi-wishlist options.

Please, keep in mind that this section appears only if you have enabled the multi-wishlist feature only for authenticated users. You can refer to this page for more information about it.
Ask for an estimate
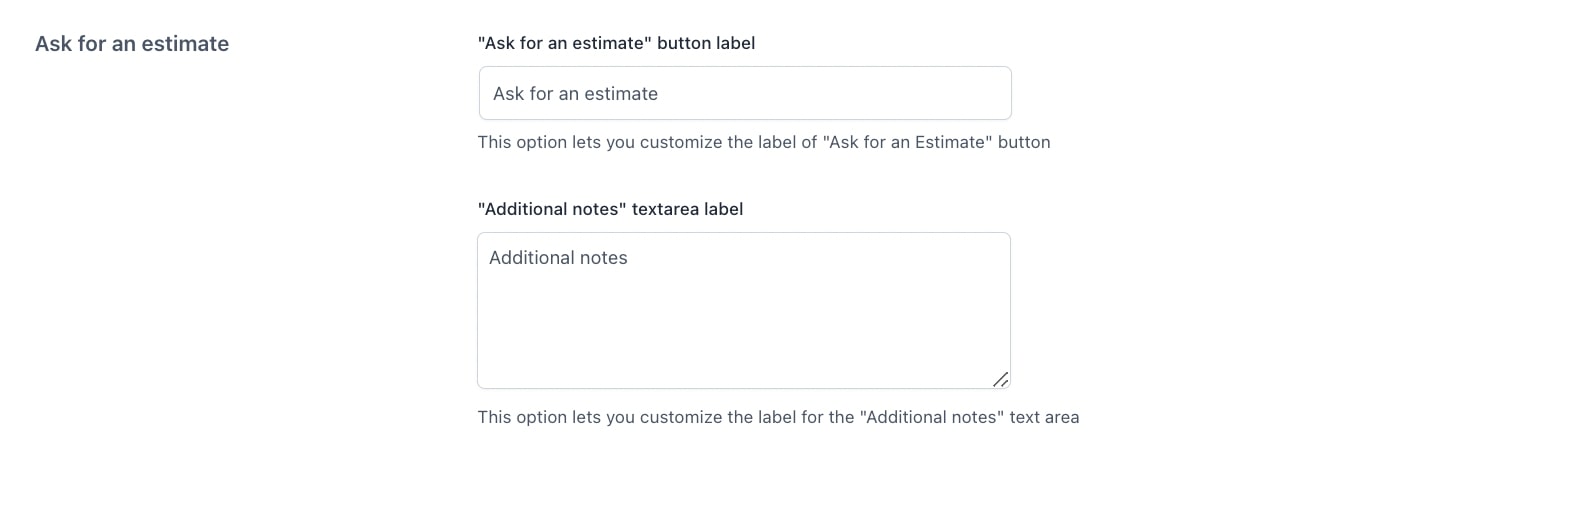
- “Ask for an estimate” button label: customize the title for the “ask for an estimate” button
- “Additional notes” textarea label: customize the tittle for the “Additional notes” area


