Step 1. Creating a subscription product
First step, we’ll go to the Products page to create a product box that we wish to sell as a subscription. Once we select the ‘subscription box’ option, two new tabs under ‘subscription options’ will appear.
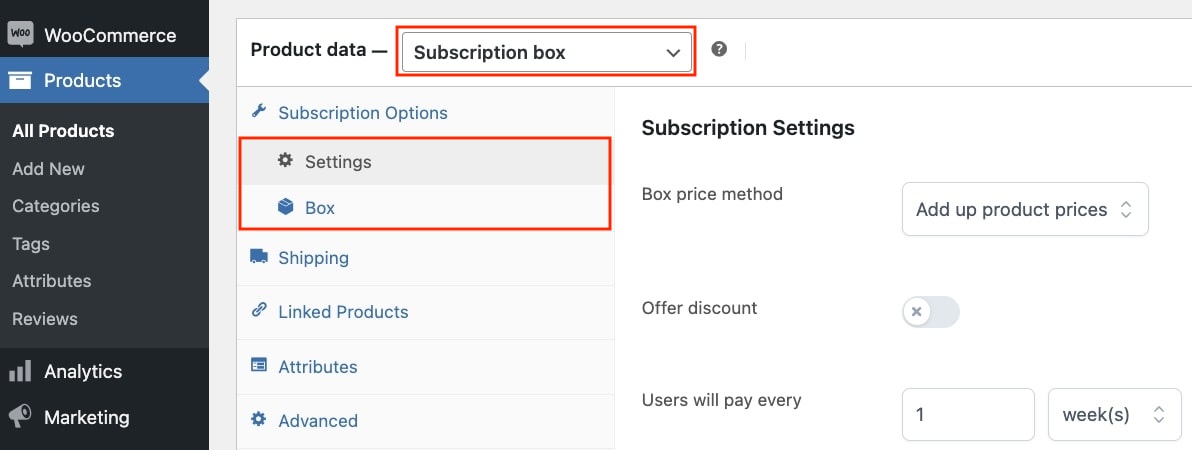
Note: the Subscription box module should be enabled from the plugin settings > Modules to have this new product type.
Step 2. Subscription settings
In this step we will focus on the subscription settings of the box.
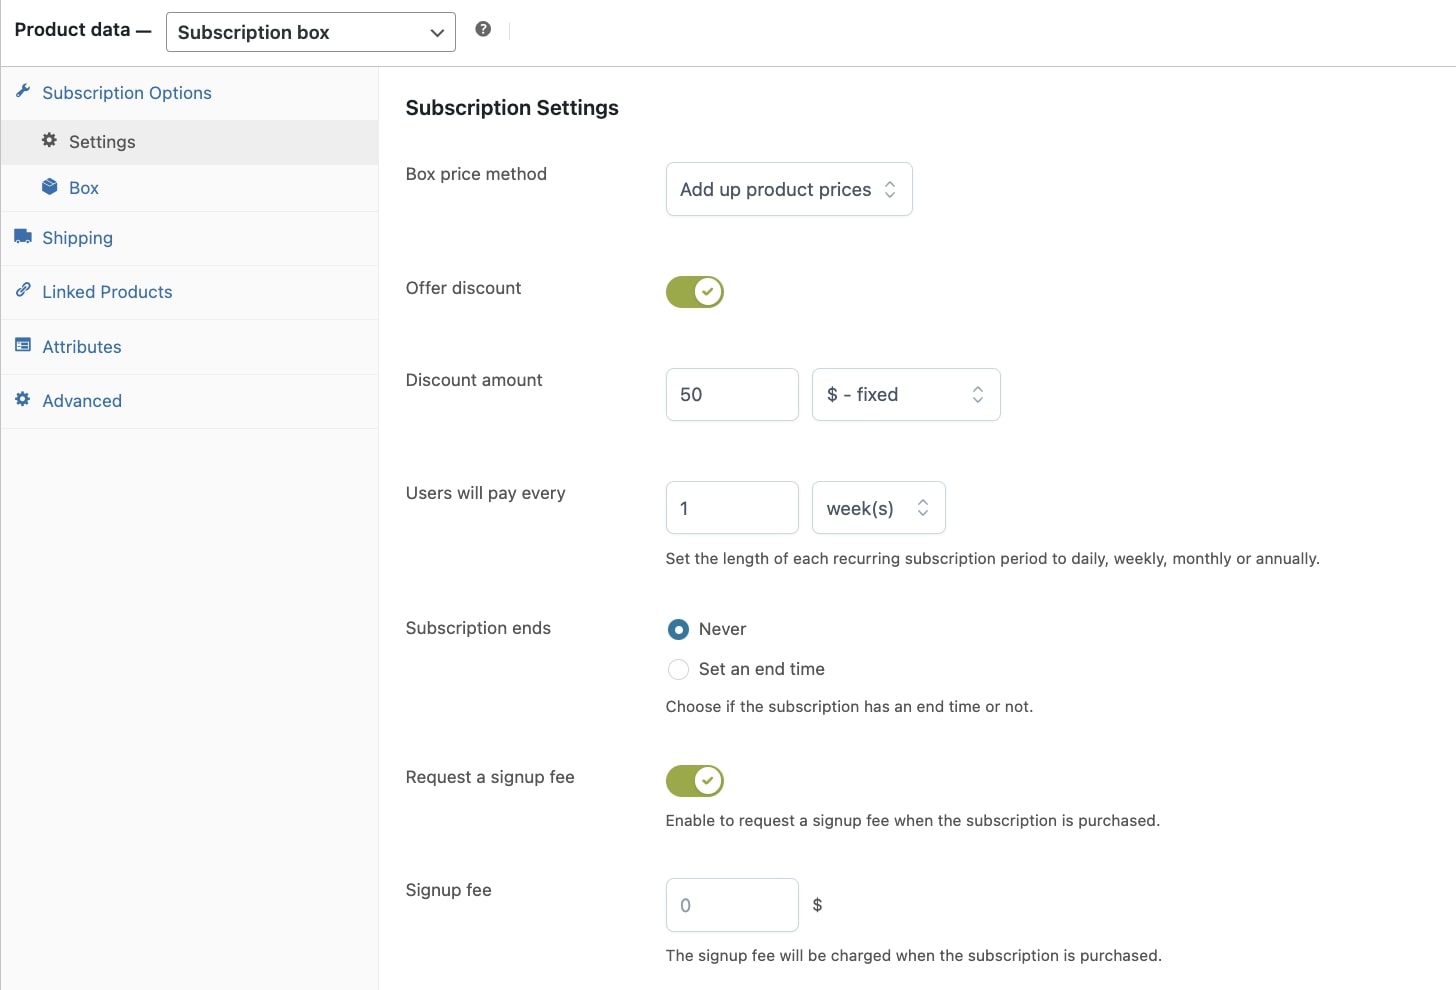
- Box price method: define the price of the box; you would be able to use the product prices or set a fixed price for the total.
- Offer discount: by enabling this option, you can offer a fixed or percentage discount for the box.
- Users will pay every: xx days, weeks, months, years.
- Subscription ends: decide if the subscription will have an end date or not.
- Request a signup fee: this is an extra fee that users have to pay when purchasing the subscription.
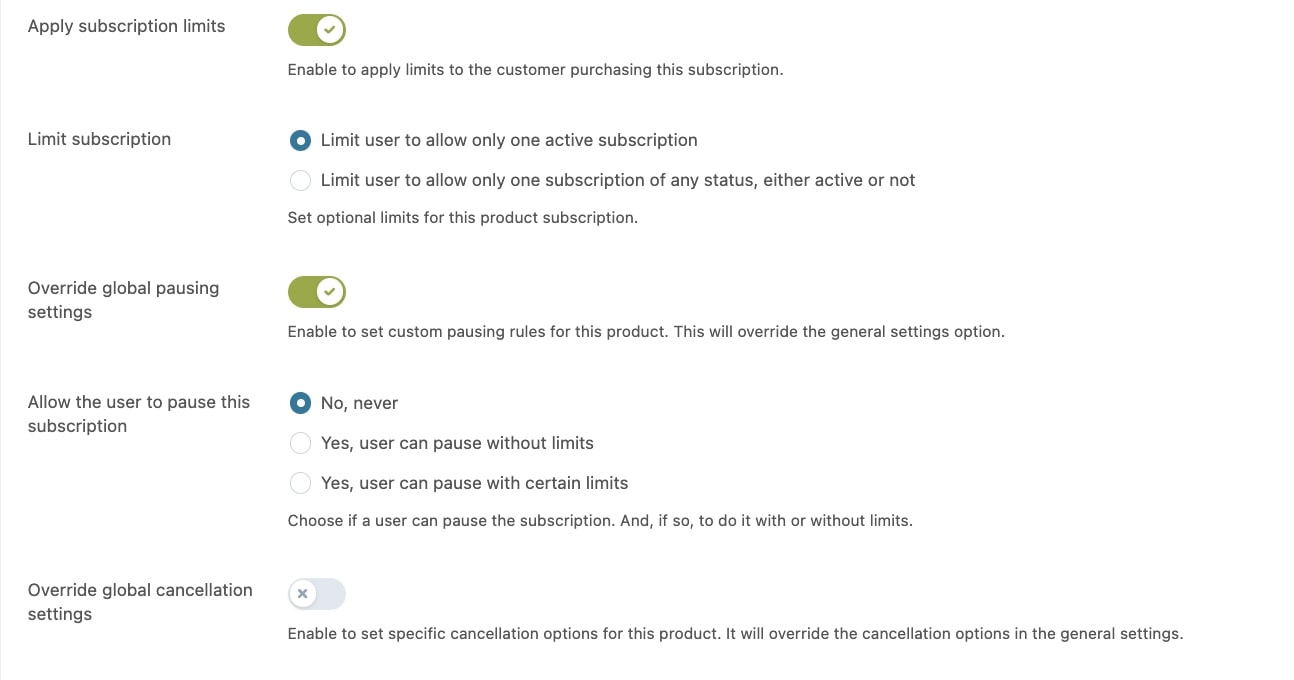
- Apply subscription limits: Decide if the user can purchase multiple subscriptions for the same product or if there is a limit:
- Limit user to allow only one active subscription: While the subscription for this product is still active, the user cannot purchase the same subscription again. Once the subscription is cancelled/ended the user can purchase it again.
- Limit user to allow only one subscription of any status, either active or not: The user will never be able to purchase this subscription product again, regardless of the active/inactive state. If users wish to activate the subscription again, they can use the ‘re-subscribe’ button in My account page.
- Override global pausing settings: set more specific pausing rules for this product:
- No never: No pausing option available for this product.
- Yes, user can pause without limits: The user can pause and reactivate the subscription without limitations.
- Yes, user can pause with certain limits: Decide how many times the user can pause, and the duration in days of pausing period.
- Override global cancellation settings: Override the general cancellation settings, to make it more specific for this product:
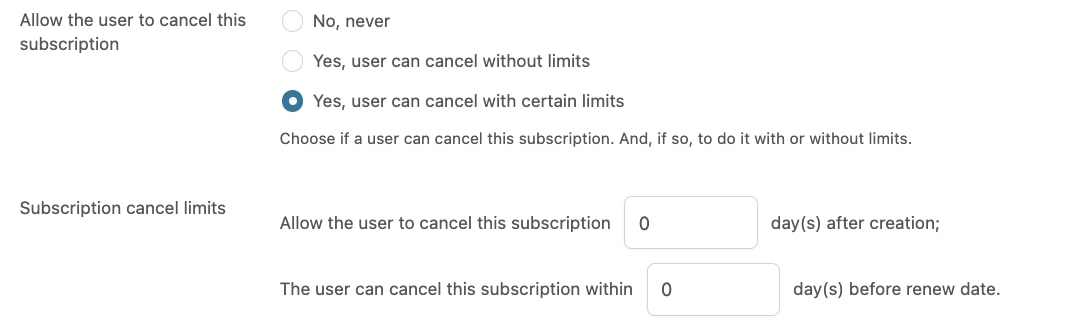
- No, never
- Yes, user can cancel without limits
- Yes, user can cancel with certain limits: the users can cancel the subscription xx day after the creation of the subscription and within xx days before the renewal.
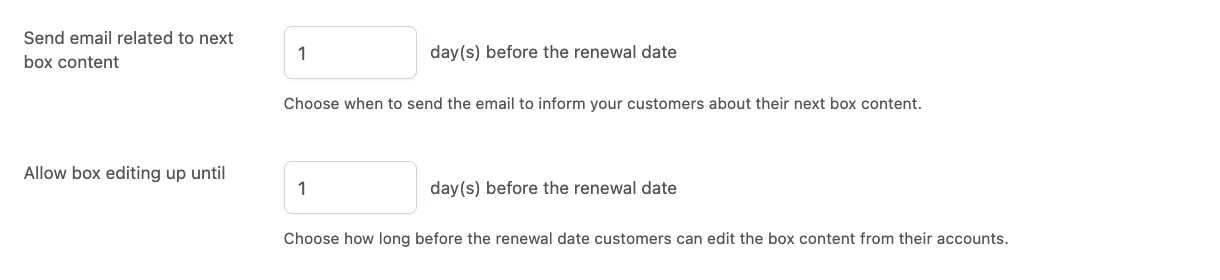
- Send email related to next box content: there will be a dedicated email to users of a subscription box so you can send an email xx days before the renewal date.
- Allow box editing up until: you can set how many days before the renewal date the users will be able to edit the products that are part of the subscription box.
Note: this option will be only available if you have enabled the ”Allow customers to edit box content” option from plugin settings Subscription box > Subscription box edition.
Step 3. Delivery schedules
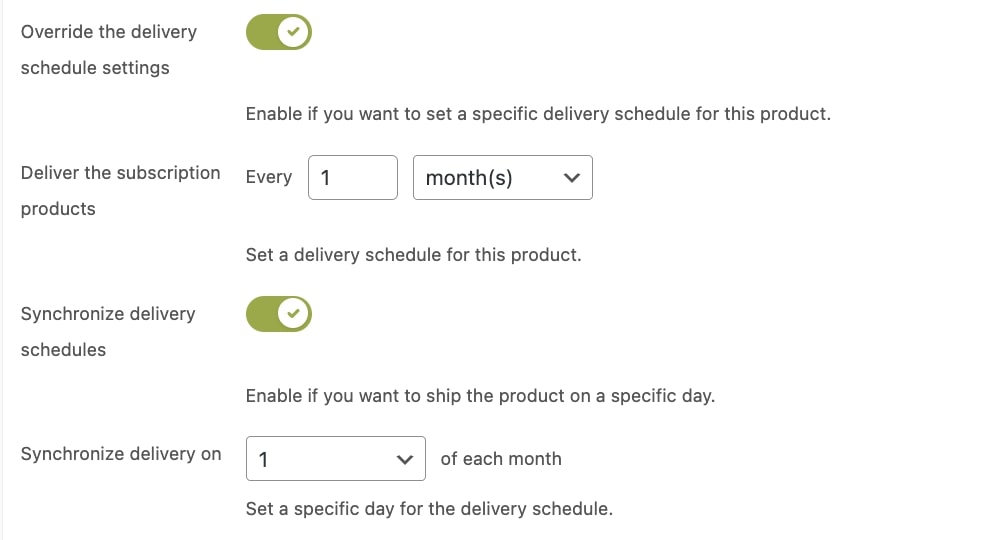
From the product settings you will be able to override also the delivery schedules options for this subscription and synchronize, if necessary, all deliveries on the same day.
Just make sure you have first enabled the Delivery schedules from the section Modules.
Then, go back to the product settings and click on Override the delivery schedule settings if you want this product to have a different configuration. Please, refer to the Delivery Schedules sections on this page for more information about the configuration.
Once your users start subscribing products with specific delivery schedule options, you will be able to manage the deliveries from the section Delivery Schedules in the plugin panel. Please, refer to this page for more details.
Step 4. Box creation
In this step we can determine the products that can be added, some extra rules as well as a step by step system to add the products to the subscription box.
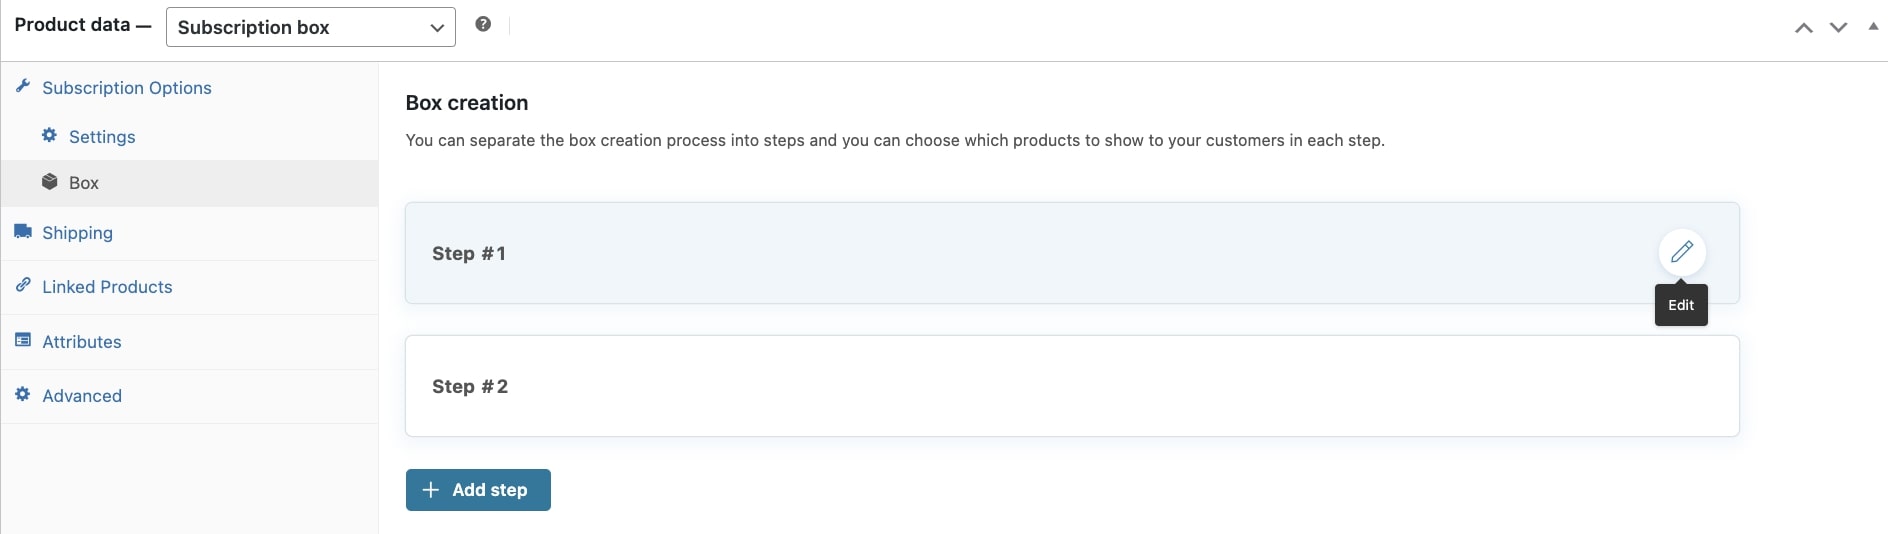
The plugin creates a ”Step 1” box by default, click ”Edit” to open the options. You can create as many steps as needed.
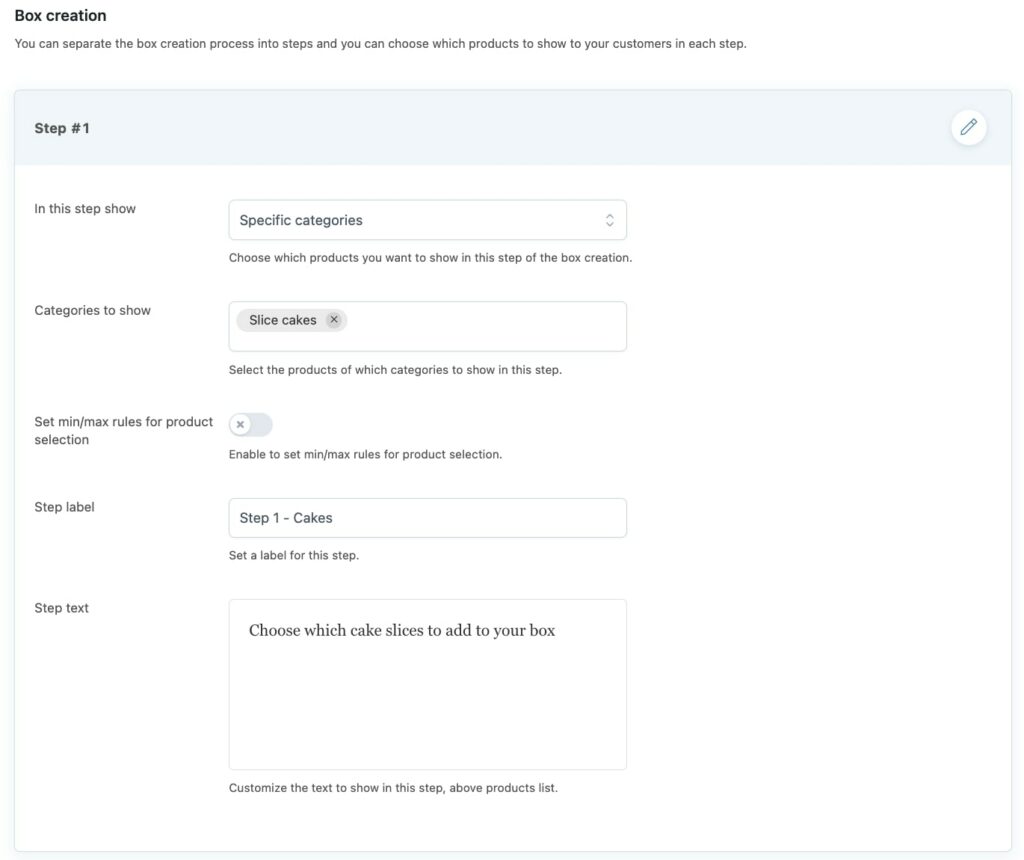
- In this step show: determine what products will be shown in this step ”All products”, ”Specific products” or ”Specific categories”.
- Set min/max rules for product selection: set the min/max number of products as well as the maximum units of the same products that can be added.
- Step label: each step can have a label to show above the product listing.
- Step text: set the the text to show in this step below the step label text.

- Set min/max values for the box: Set the min/max amount required to either go to checkout or go further with any other step created.
User view
Let’s take a look at the appearance of the product page and the product box listing page.
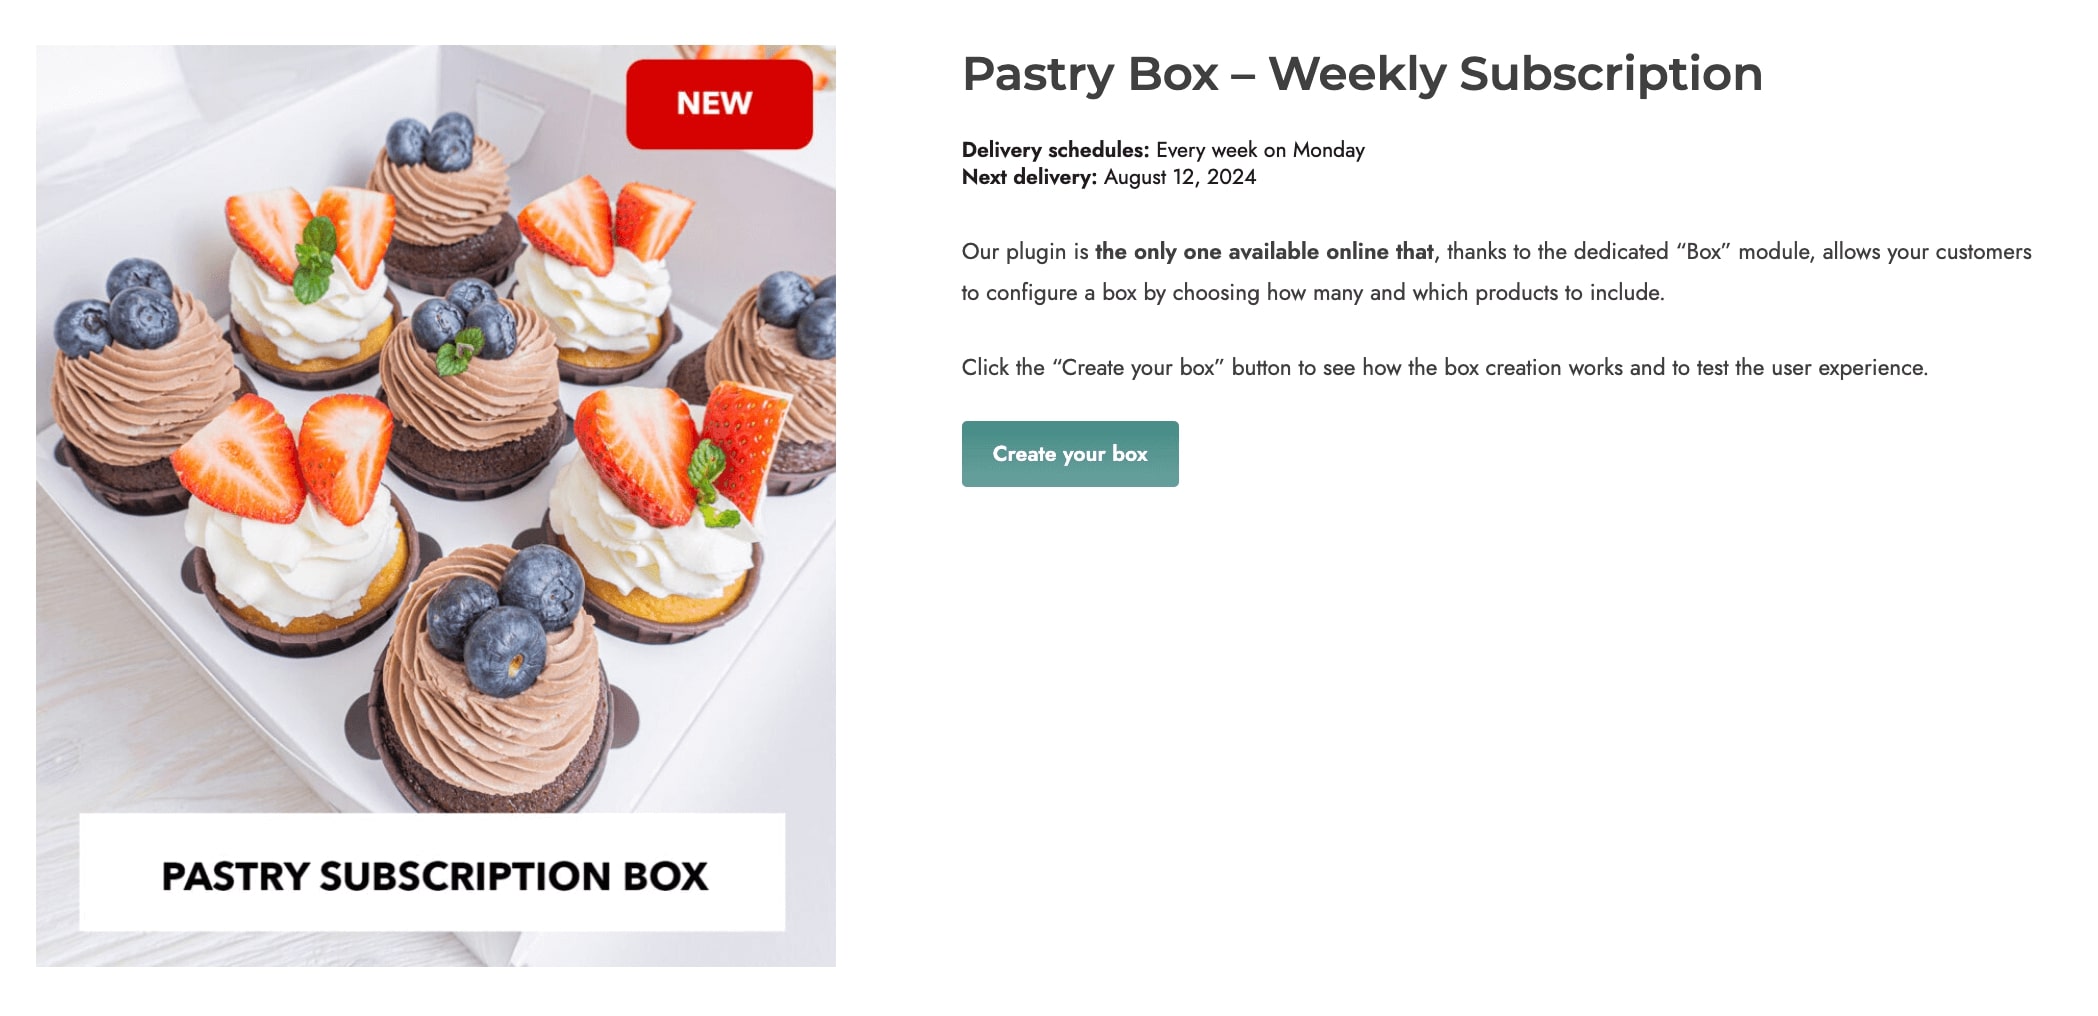
When the product is published a regular WooCommerce product page is created, the users will need to click ”Create your box” button to be redirected to the box configuration page.
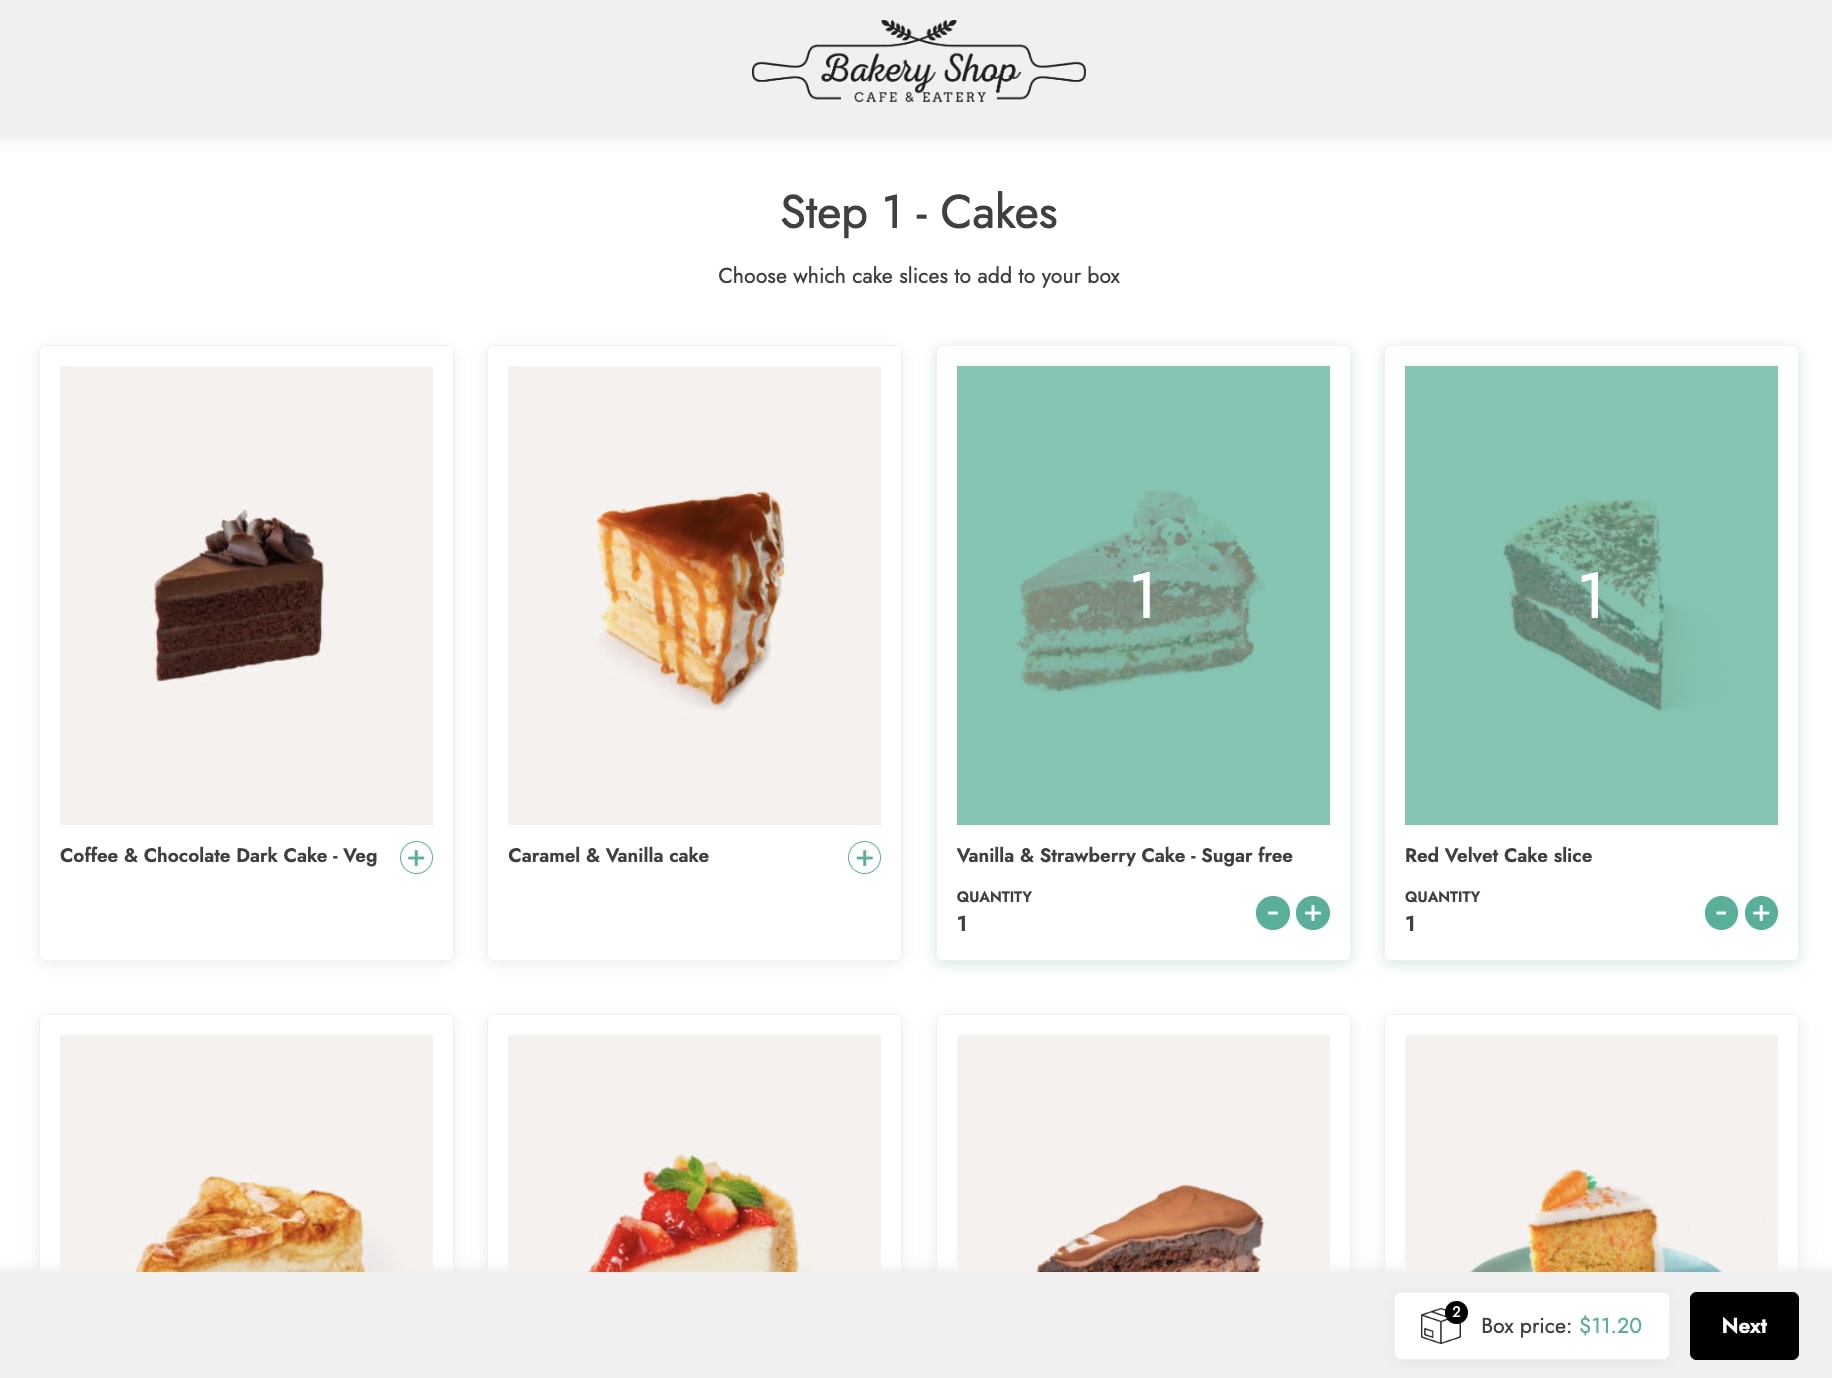
This would be how the product listing page look like, in which the users can edit the quantity of the products added to the cart.
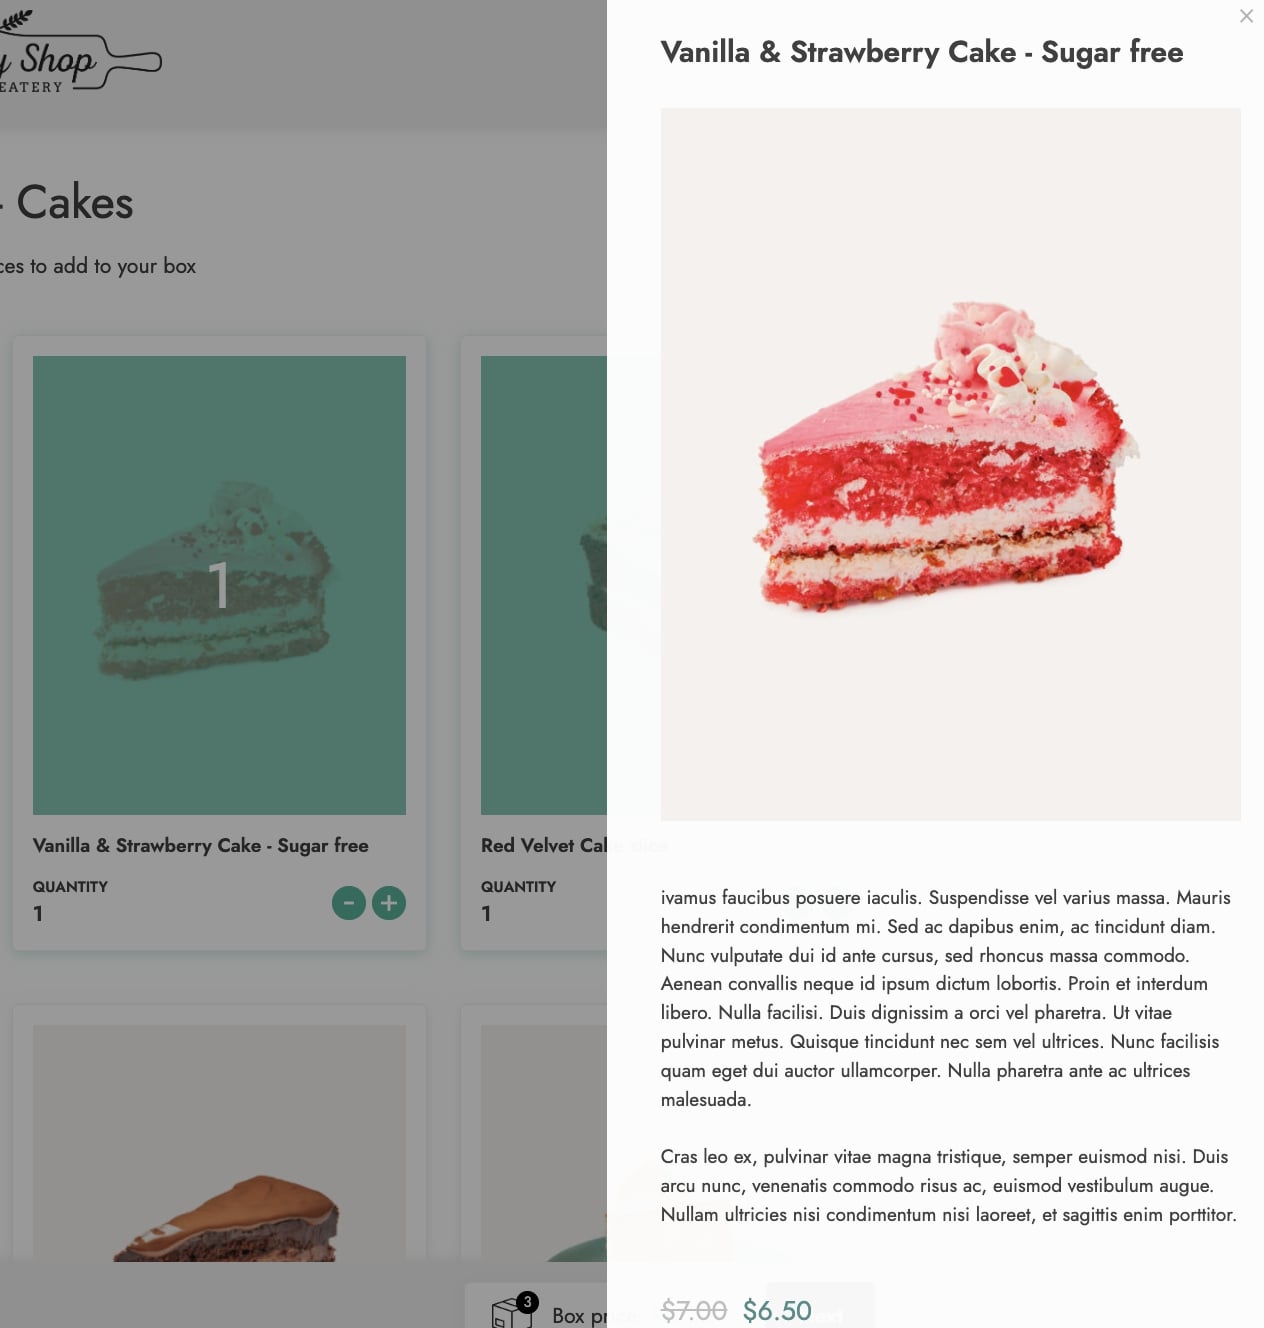
By clicking the product image or product name there will be a quick view window with the description, the buttons to edit the quantity, the price and any discount if applies.
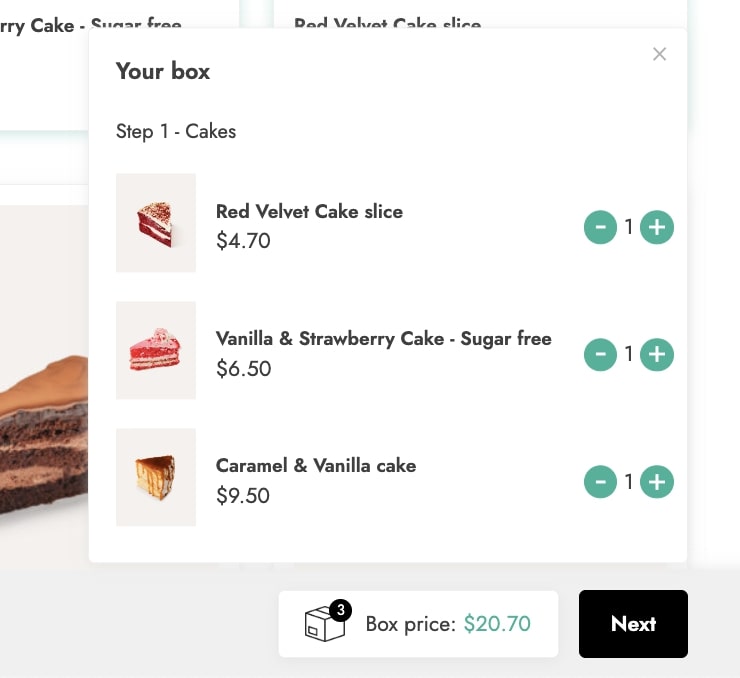
There will also be a mini cart that will display the products added, price as well as the buttons for editing the quantity and the “Edit step” button to move back to the previous step if you want to apply any changes.

If any minimum value rule has been set, a message in the mini-cart footer informing the user will be displayed.
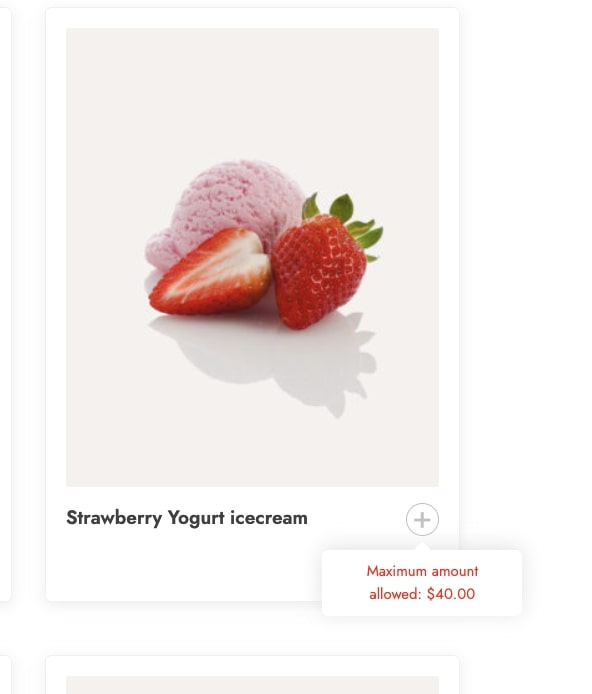
But if a maximum value rule was set, the users would not be able to add more products, the button will be grayed out and a message will be prompted.
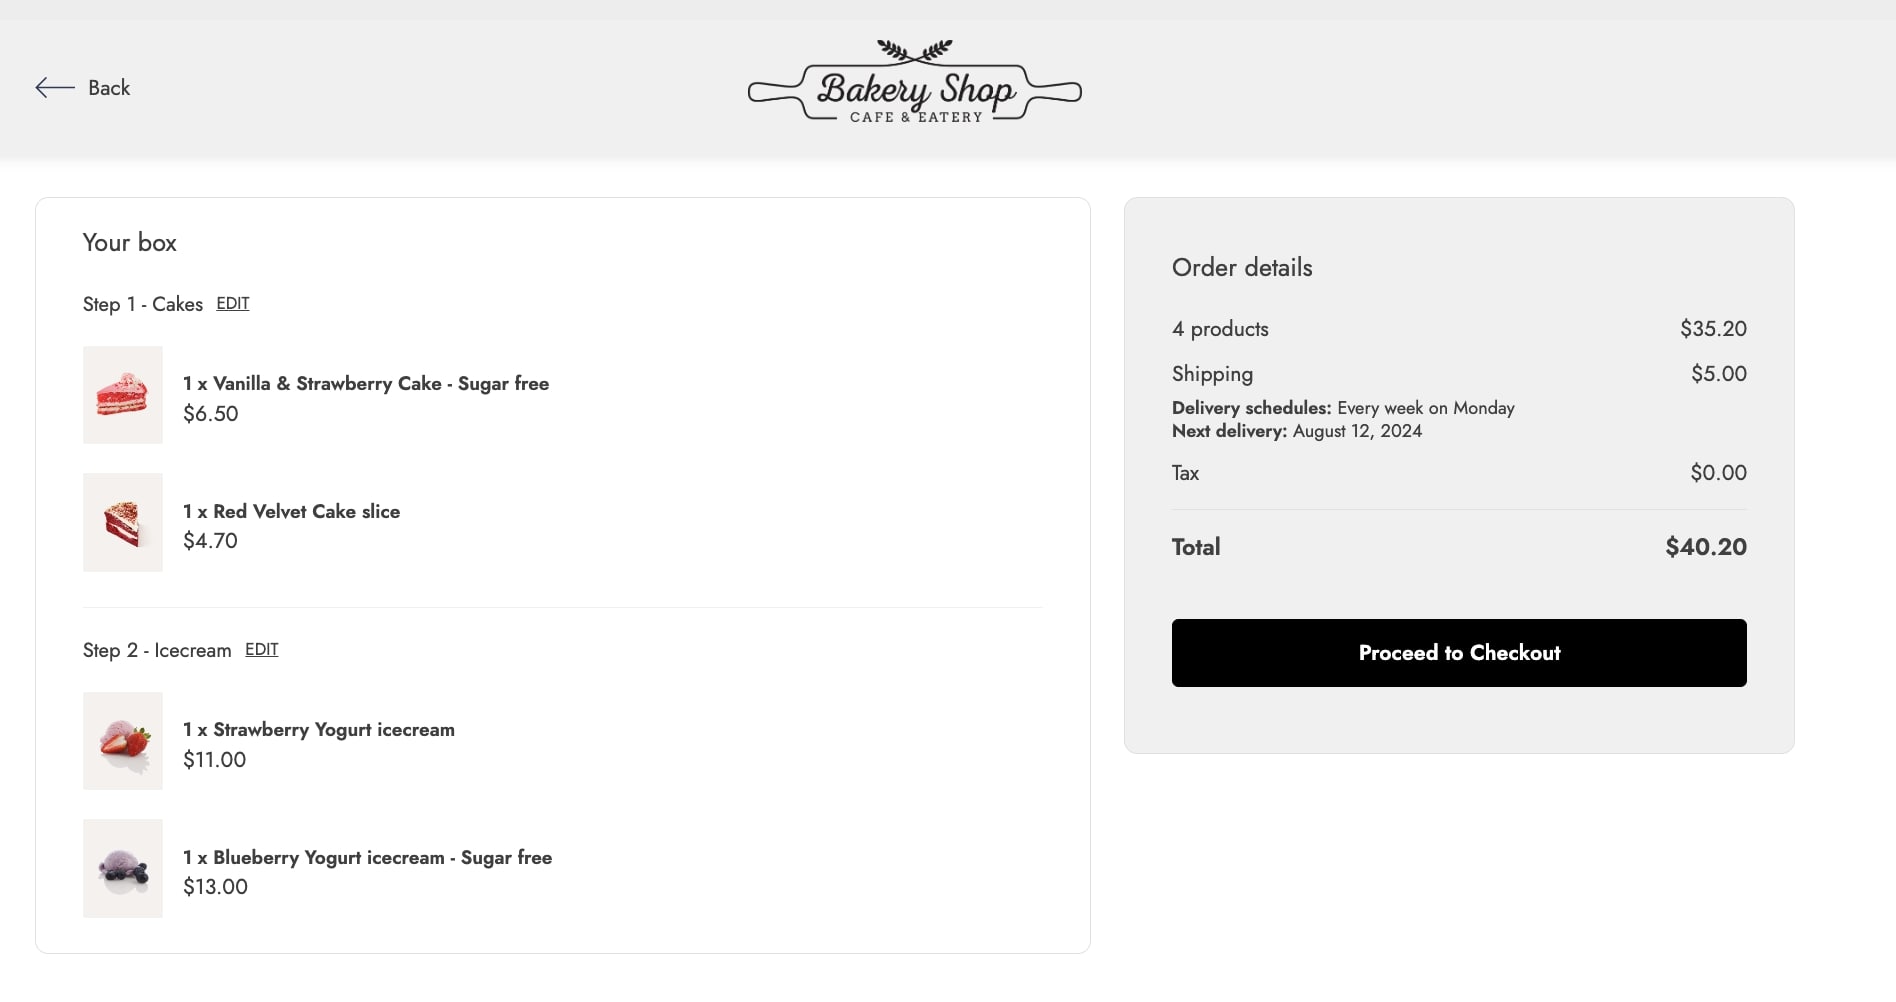
Once the users reach the cart they would be able to change the products previously added by clicking the ”edit’‘ button, this will take them back to the corresponding product listing page so users can change the products selection.
Note: this is a dedicated cart that will not use the default WooCommerce cart (if you have items in the cart, these will not be mixed with the box, it’s a separate process).
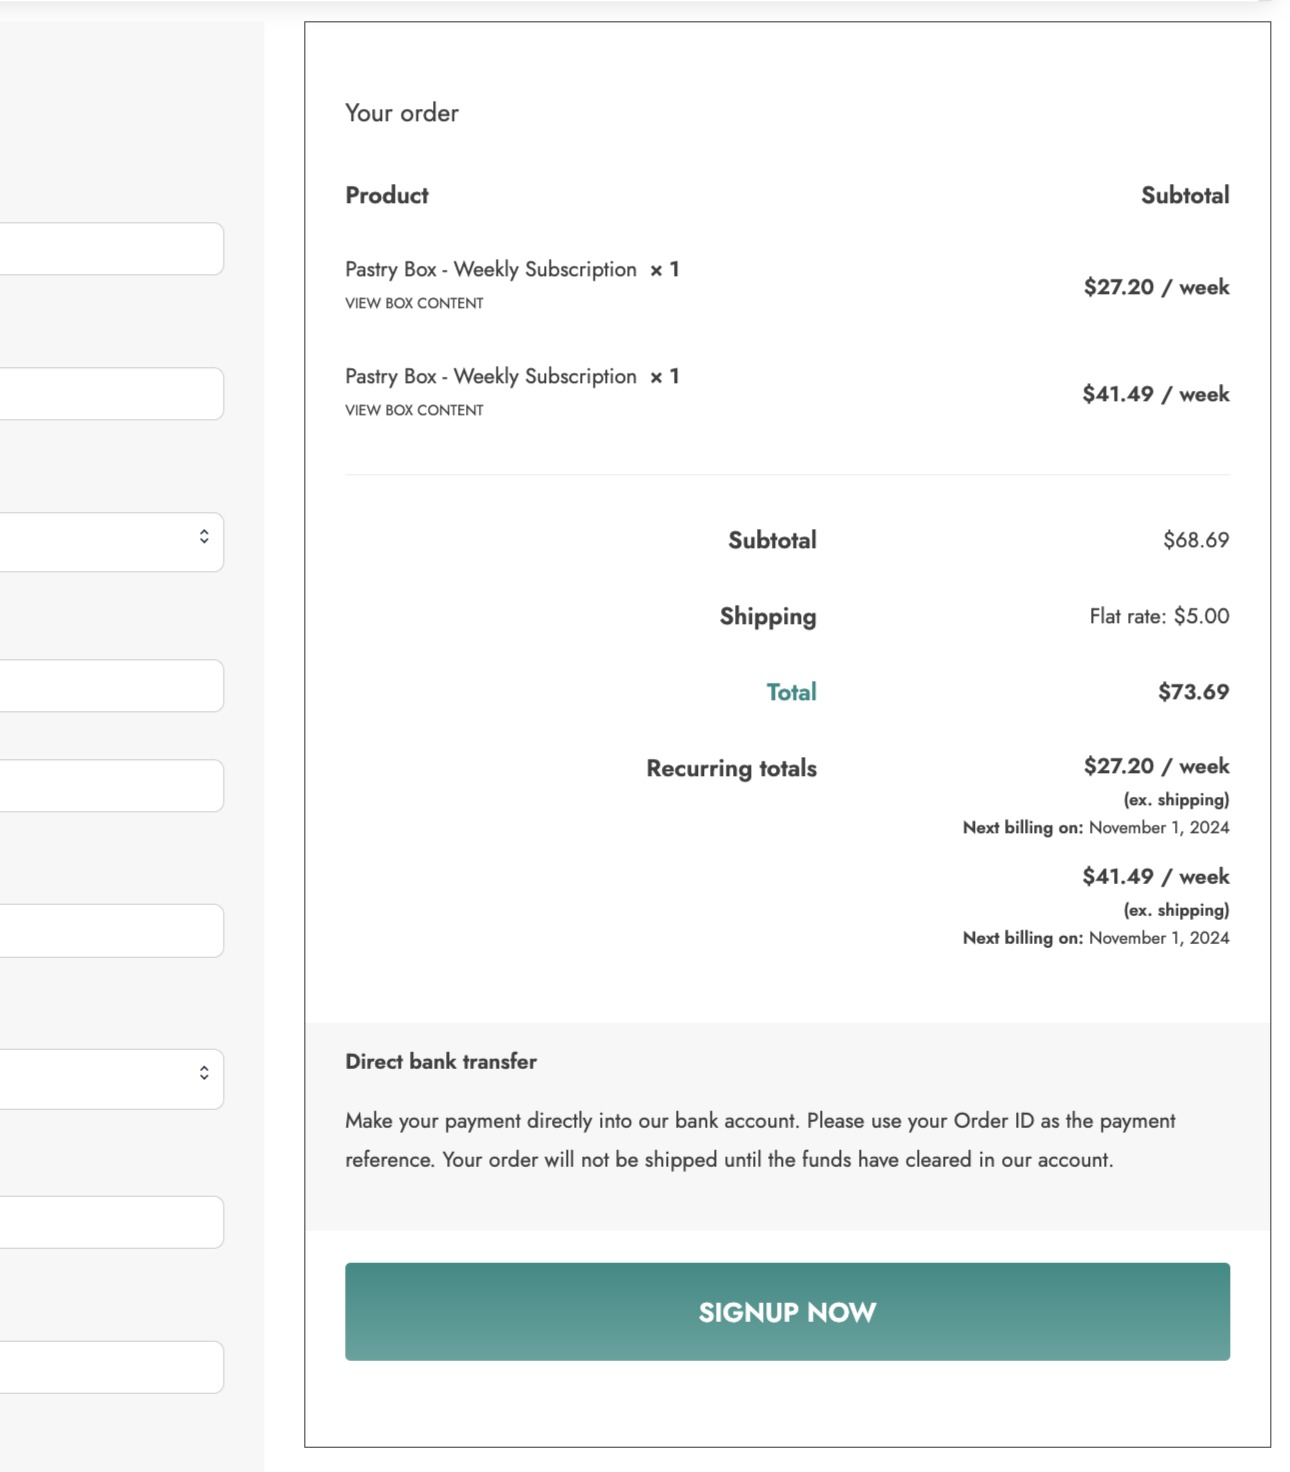
It is possible to purchase several boxes in a single order. In order to do so, the user must click on the button “Proceed to checkout” and then return to the shop and create the next box. Once all the boxes have been added, the user can proceed to complete the order.
Checkout with multiple subscription boxes
Once your customers have completed the checkout, they will be able to see their next box shipping from My Account, and edit the content of the next box if this option has been enabled. For more details about what they can do from My account page, please, refer to this page.