YITH Account Funds allows all users to have a virtual wallet on your site. They can make a deposit, so the deposited amount can be used as credit for purchases on the site.
The integration with YITH Account Funds allows you to issue vendors’ payouts into their digital wallet.
Additionally, if you also install YITH PayPal Payouts, your vendors can request a payment of their store credit into their PayPal account.
On this page, we’ll go through the following topics.
To enable YITH Account Funds as a gateway and credit vendors’ commissions to their virtual wallet on your site, you just have to make sure that both plugins are installed and enabled from the Plugins page.
Now, if you want to pay commissions to vendors automatically during the checkout through YITH Account Funds, go to the Commissions Settings section, and select it as default payment.
This is the gateway that will be used by default for automatic payments of vendors commissions. Yet, you can also pay the commissions manually through Account Funds as explained here.
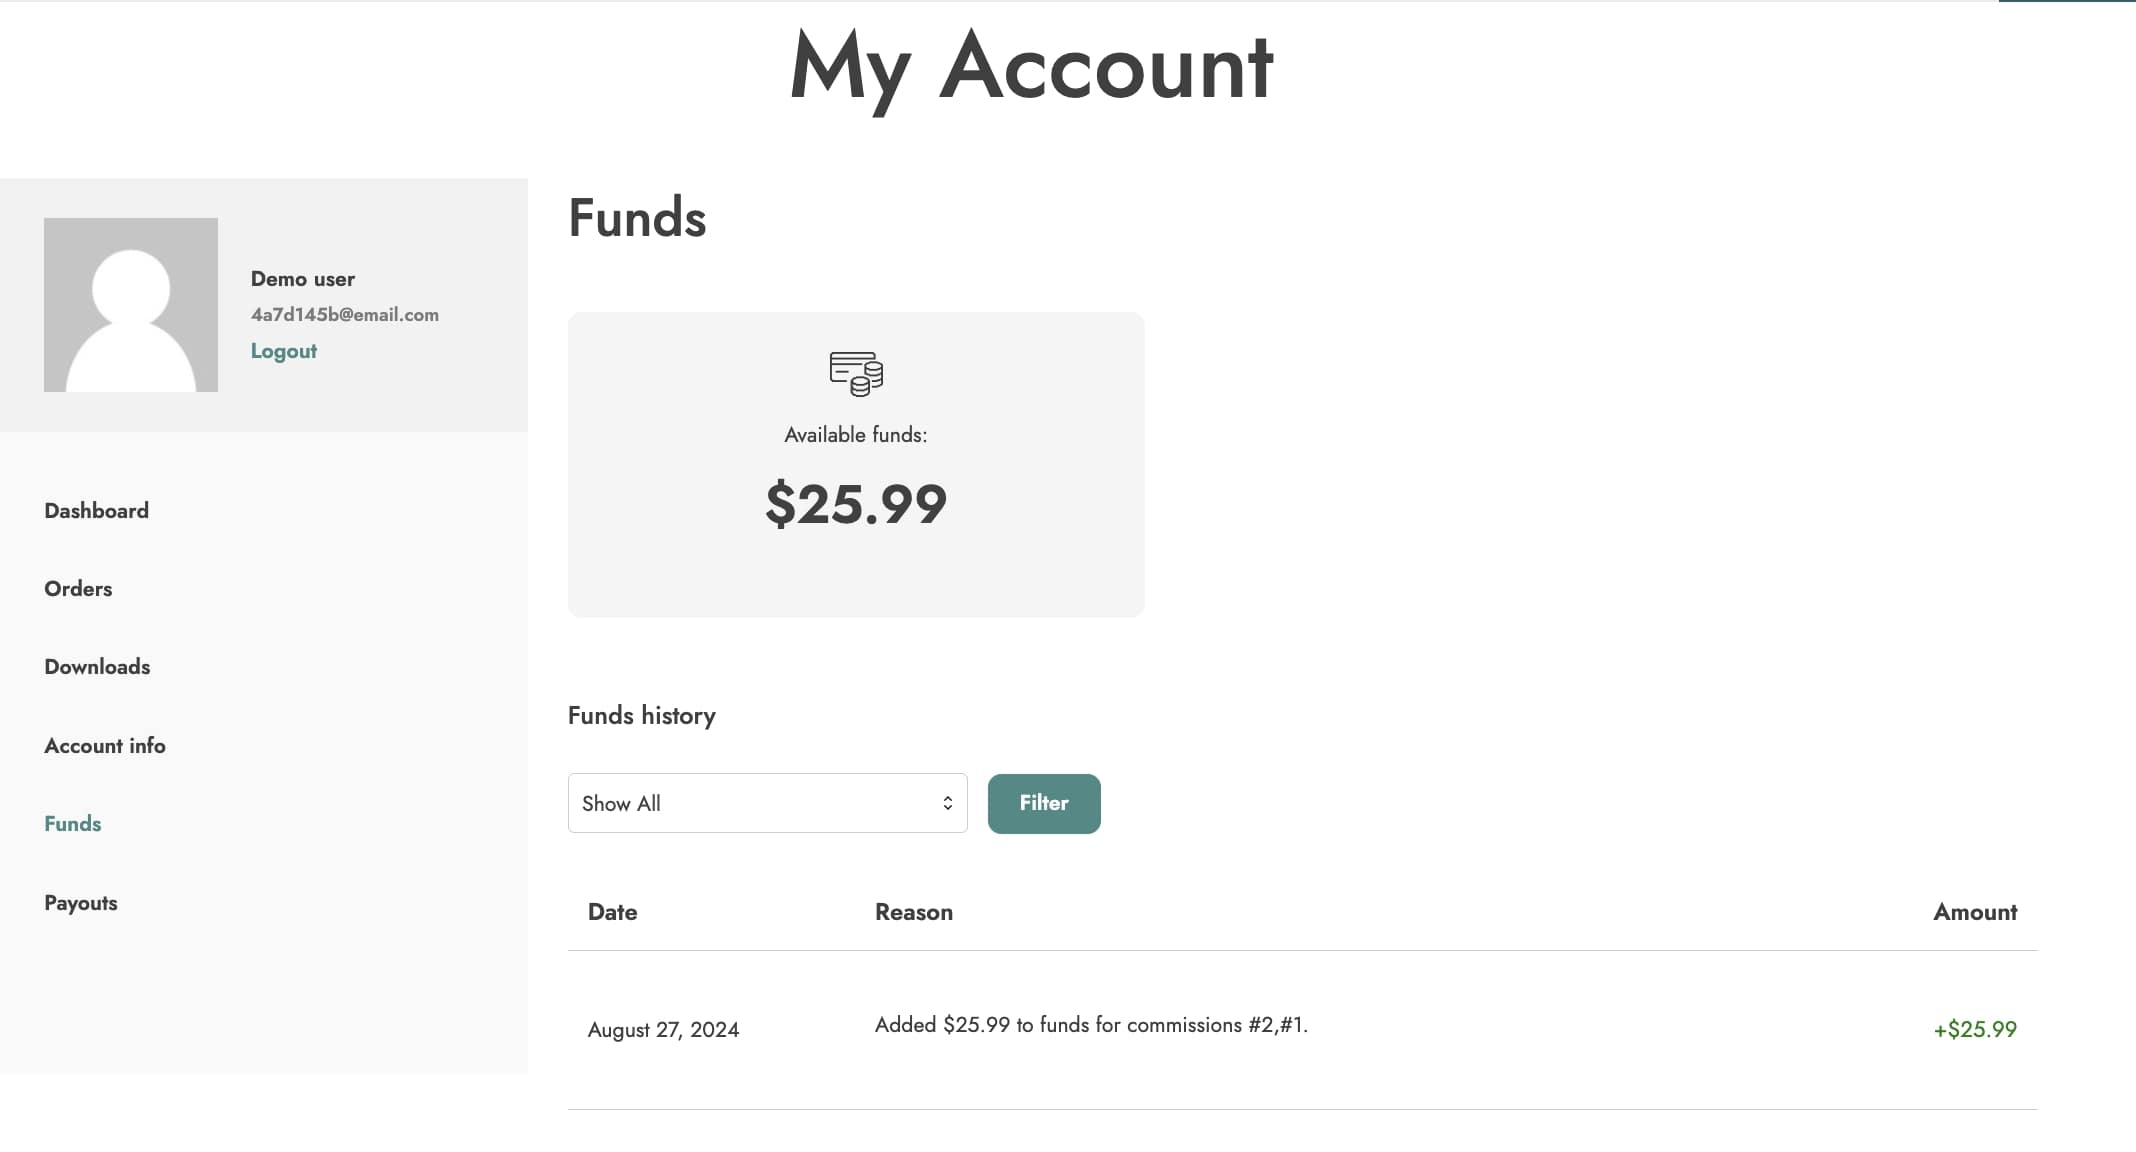
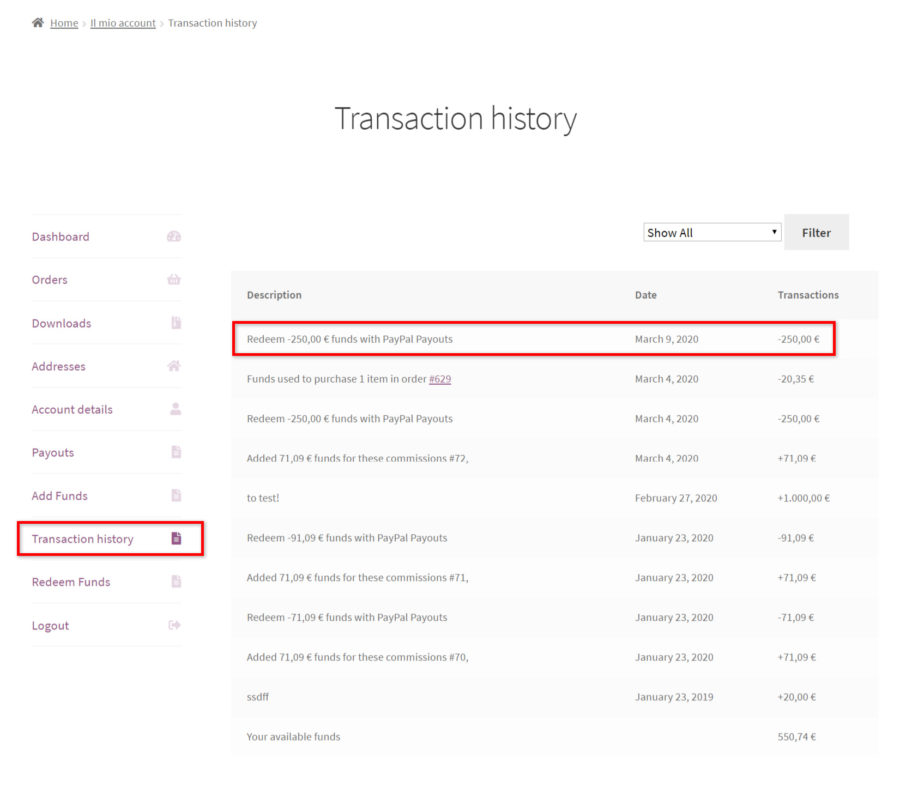
The vendor will be able to see a report of all payments in My Account > Funds history.
For more details about the configuration of YITH Account Funds, please, refer to the full documentation here.
2. Extra options for vendors
When using Multi Vendor and Account funds, you will be able to enable the dedicated module available in YITH > Account Funds > Modules. This module has to be enabled if you want the vendors to manage and redeem their funds.
2.1 Vendors & funds settings
After enabling the module YITH Multi Vendor/Marketplace, a new section is added to the plugin panel. Here, you can find all the options related to vendor permission and redeem settings.
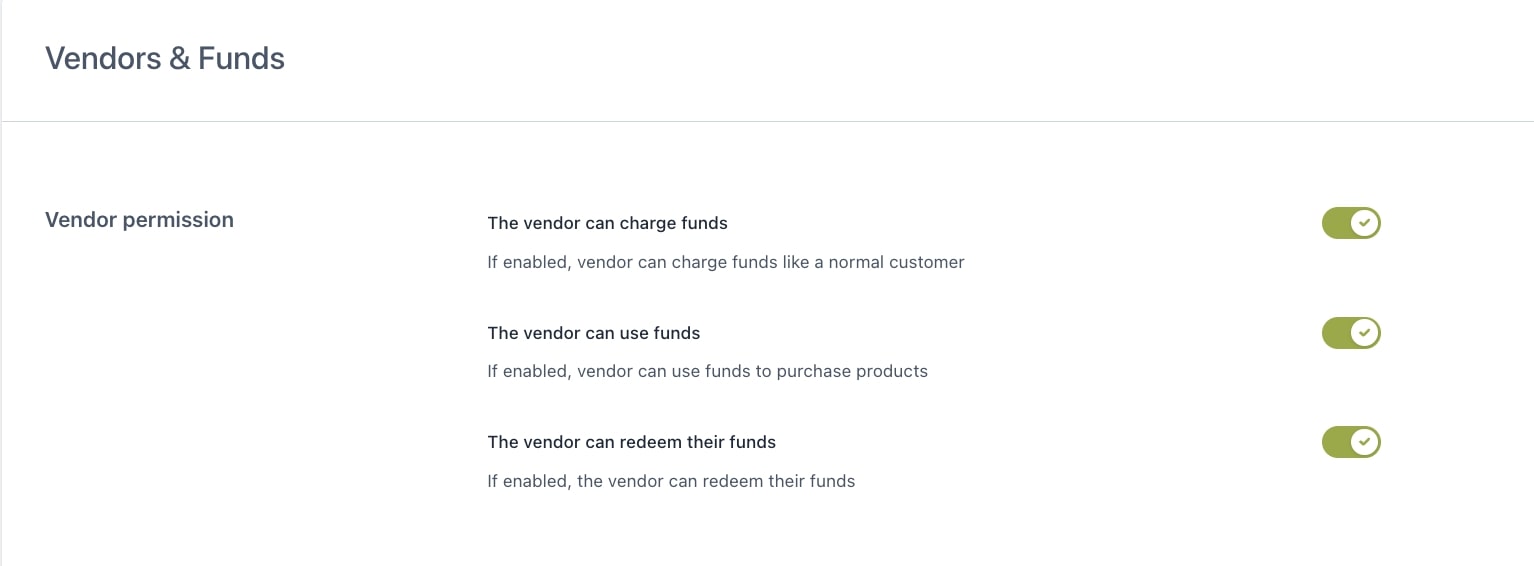
Vendor permission
The vendor can charge funds: this option allows your vendors to deposit funds in their online wallets like any other customer.
The vendor can use funds: this option allows your vendors to use their funds to purchase products from your shop.
The vendor can redeem their funds: (available ONLY if you are also using YITH PayPal Payouts for WooCommerce) this option allows your vendors to request the payment of their funds through a payout.
2.2 Redeem funds with PayPal Payouts
The second section, instead, allows you to configure how vendors can Redeem their collected funds.
Please, note that this specific option requires an additional plugin to be installed, so you’ll need all the three plugins below:
Why should I use this combination of plugins instead of using only YITH PayPal Payouts?
If you want to reduce the number of transactions via PayPal and any possible issues with them or with expensive fees.
If you want to incentivate your vendors to purchase from your store using their credit, so you both can save on transaction fees.
In this section, you can set up the redeeming option either as a manual or an automatic process.
Minimum funds to redeem: set the minimum balance necessary for a vendor to redeem funds.
Maximum funds to redeem: set the maximum amount of funds that can be redeemed in a transaction, or leave it empty to disable this restriction.
Now you can choose whether to redeem them automatically or manually.
2.2.1 Automatic payment
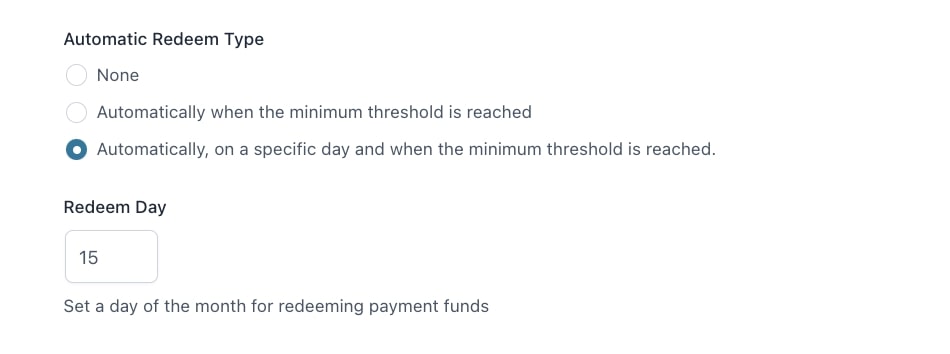
Automatic Redeem Type: this option allows you to let vendors be paid automatically instead of submitting a payment request every time.
None: select this if you want to keep the automatic feature disabled. Make sure you select the option Manual redeem below to let your vendors submit a request at any time from My Account page (see below).
Automatically when the minimum threshold is reached: this way you can issue automatic payments as soon as the minimum amount set above is reached.
Automatically, on a specific day and when the minimum threshold is reached: this way you can issue automatic payments on the 1st of the month (or any other day you set) but only for vendors’ accounts that have reached the minimum amount set above. Vendors can however submit a payment request manually if the ‘Manual redeem’ option below is enabled.
Redeem Day: choose the day on which issue the automatic payment, i.e. enter 1 to issue payments automatically on the first of every month.
All transactions will be visible to the vendor in My Account > Transaction history.
2.2.2 Manual redemption
Alternatively or in addition to the automatic payment, you can also let vendors redeem their available funds manually on request. In YITH > Account Funds > Vendors & Funds, these are the options that you have to configure:
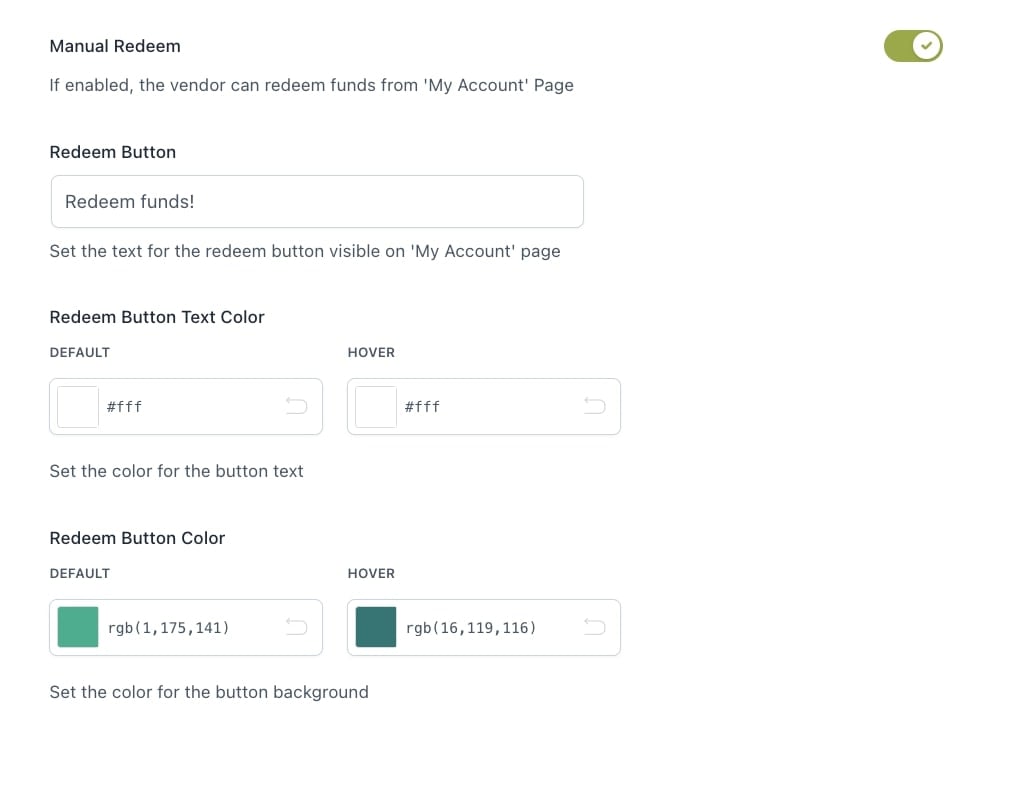
Manual Redeem: enable this option if you want to allow also manual redemption and submit a request from My Account. By enabling this option, you will also be able to customize the button text and colour.
Redeem Button: customize the label of the button shown in My Account here.
Redeem Button Text Color
Redeem Button Color
If you enable this option, your vendors will be able to see a dedicated section in My Account > Redeem funds, from where they can submit a request and be paid immediately.
They can enter a custom amount (between the minimum and maximum allowed if you’ve set up these values in the settings) and as soon as they send the request the payment will be processed through the gateway that you’ve selected (only YITH PayPal Payouts available at the moment).
If the vendor enter a value not matching the ones configured, a notice will show.
The payment will be recorded in the Transaction history.
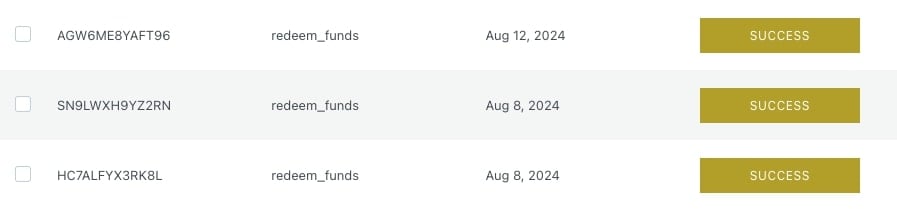
The transaction status will be available in My Account > Payouts and the admin can check the transaction in PayPal Payouts > Payouts List > Details.
For more details about the configuration of YITH PayPal Payouts, please, refer to the full documentation here.
By using YITH WooCommerce Ajax Search, you can add a search bar to your website, which will allow users to search via AJAX for specific content in your website, searching through posts, pages, and products.
The integration between these two plugins allows users to enter the vendor’s name and instantly get a list of their products. To do that, all you need to do is install the plugin and activate it.
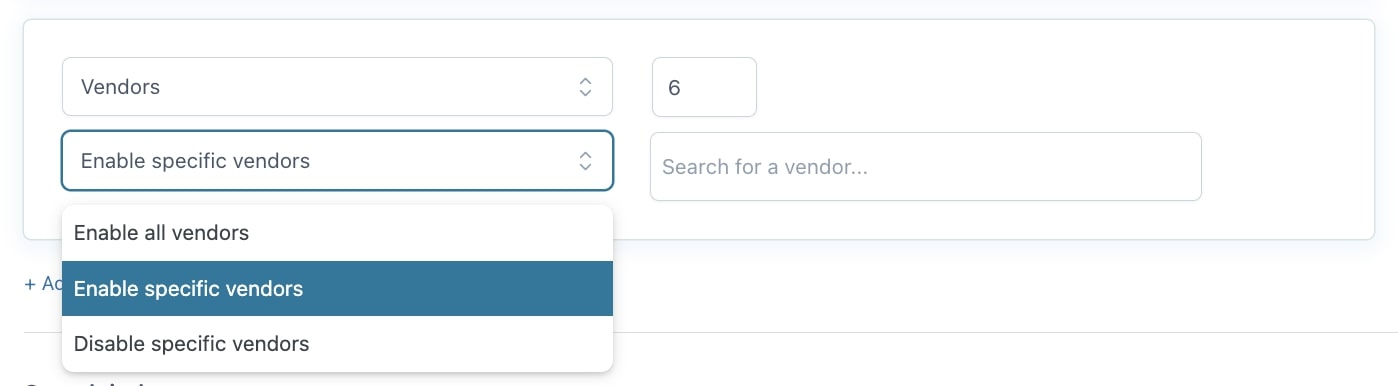
Then, go to YITH > Ajax Search > Search fields. Here, you can choose to extend the search to all your vendors or enable/disable specific vendors.
Please note: after enabling brands, it is necessary to rebuild the index.
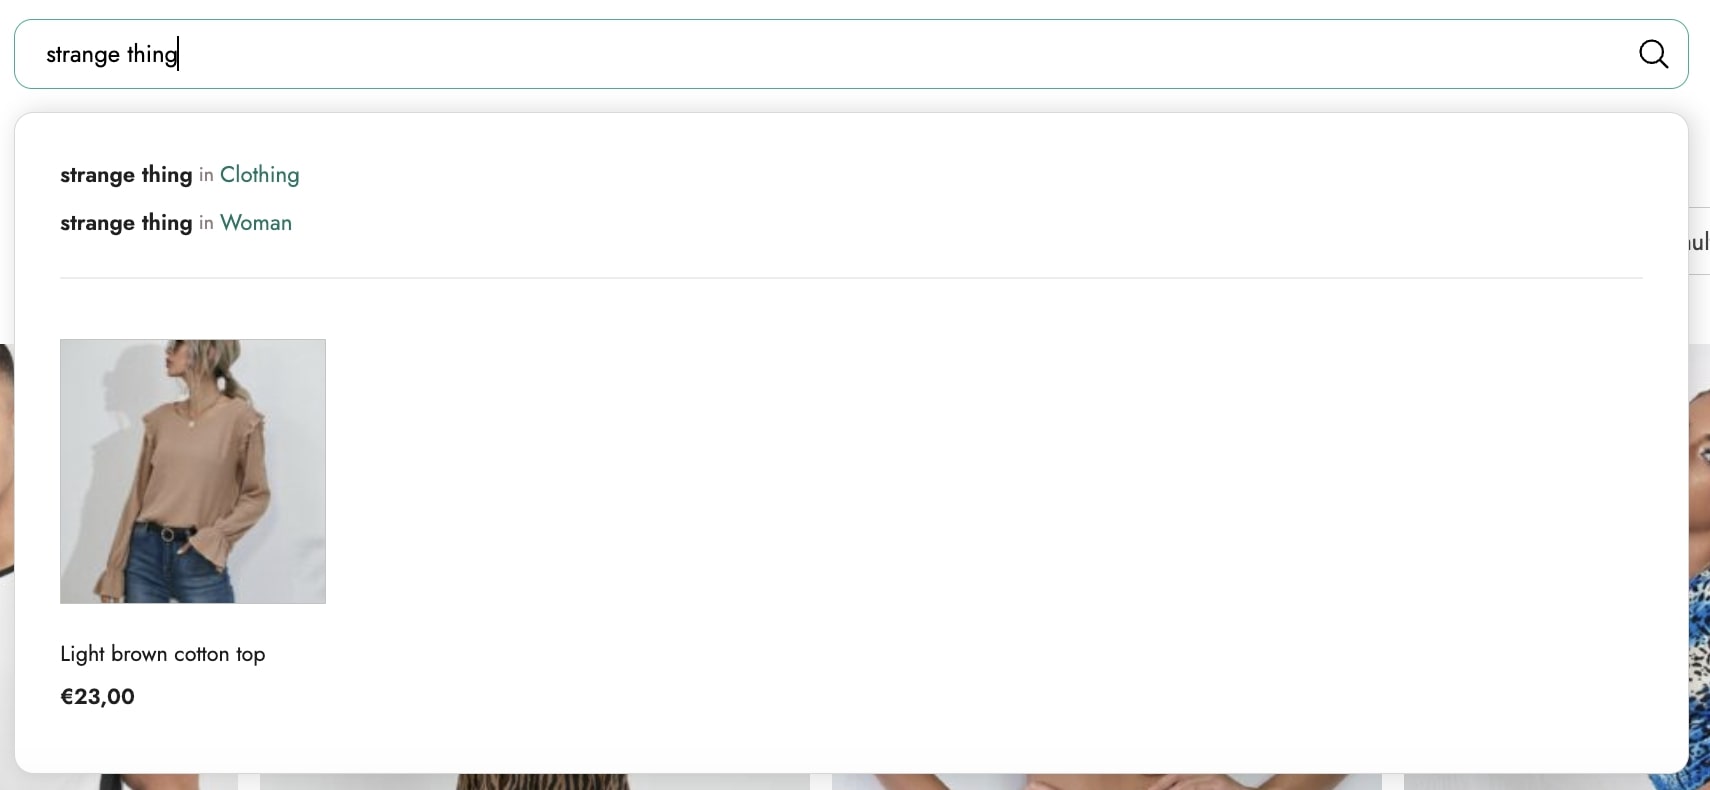
Now, if you start typing the name of a vendor, the plugin will automatically show this vendor’s products.
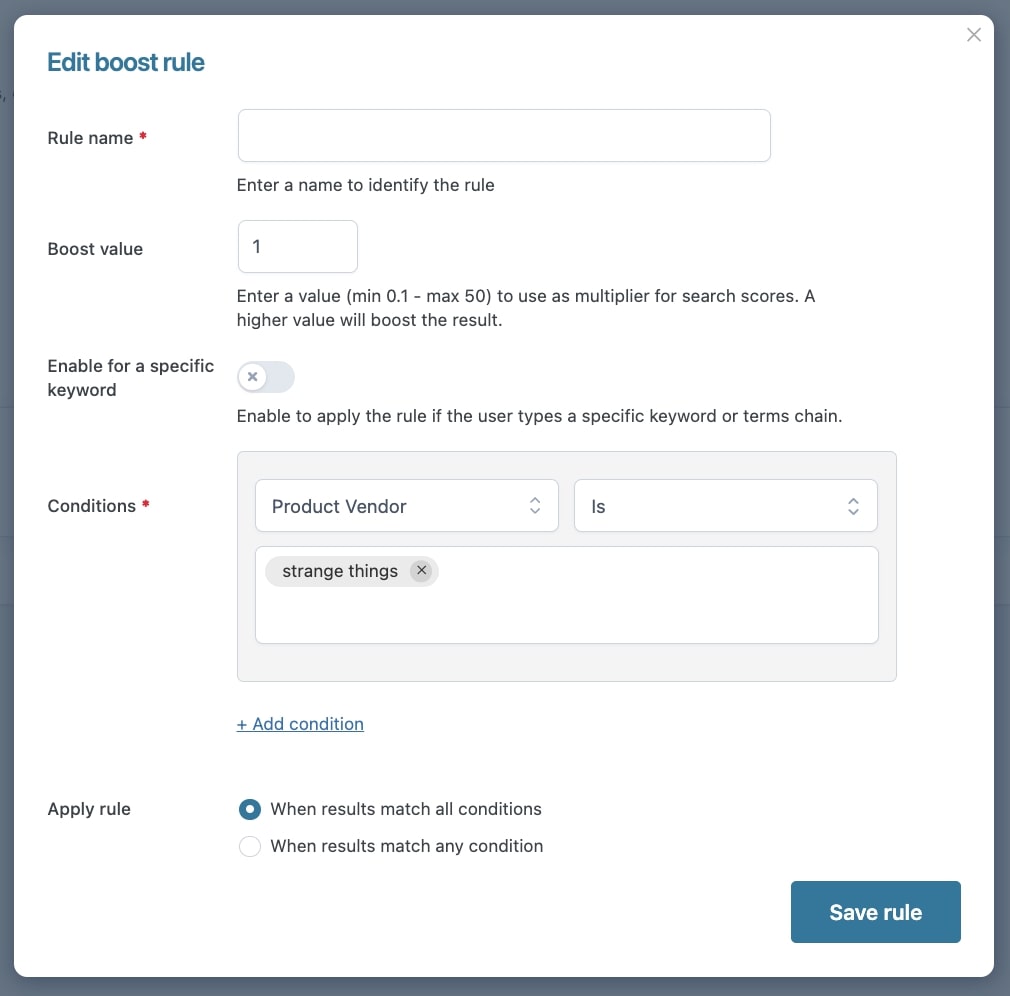
Moreover, when creating boost rules, you will find a new entry among the conditions that will allow you to increase the visibility of products of specific vendors.
With YITH WooCommerce Auctions you will be able to create an auction store and let also your vendors create and manage their own auctions. They will be able to create auction products manage:
price
backup price
required amount for a rise
auction duration
auction rescheduling option
If combined also with YITH Frontend Manager plugin, your vendors will be able to create and edit an auction product from the frontend dashboard.
For more details about how to use YITH Auctions, please, refer to the official documentation.
YITH Badge Management allows you to create custom badges for your products where you can show discounts, labels etc.
If used with YITH Multi Vendor also your vendors will be able to create their own badges and apply them to their own products.
After installing and activating YITH Badge Management, just make sure you enable the option Create and manage badges for their products in YITH > Multi Vendor > Vendors > Vendors Permissions.
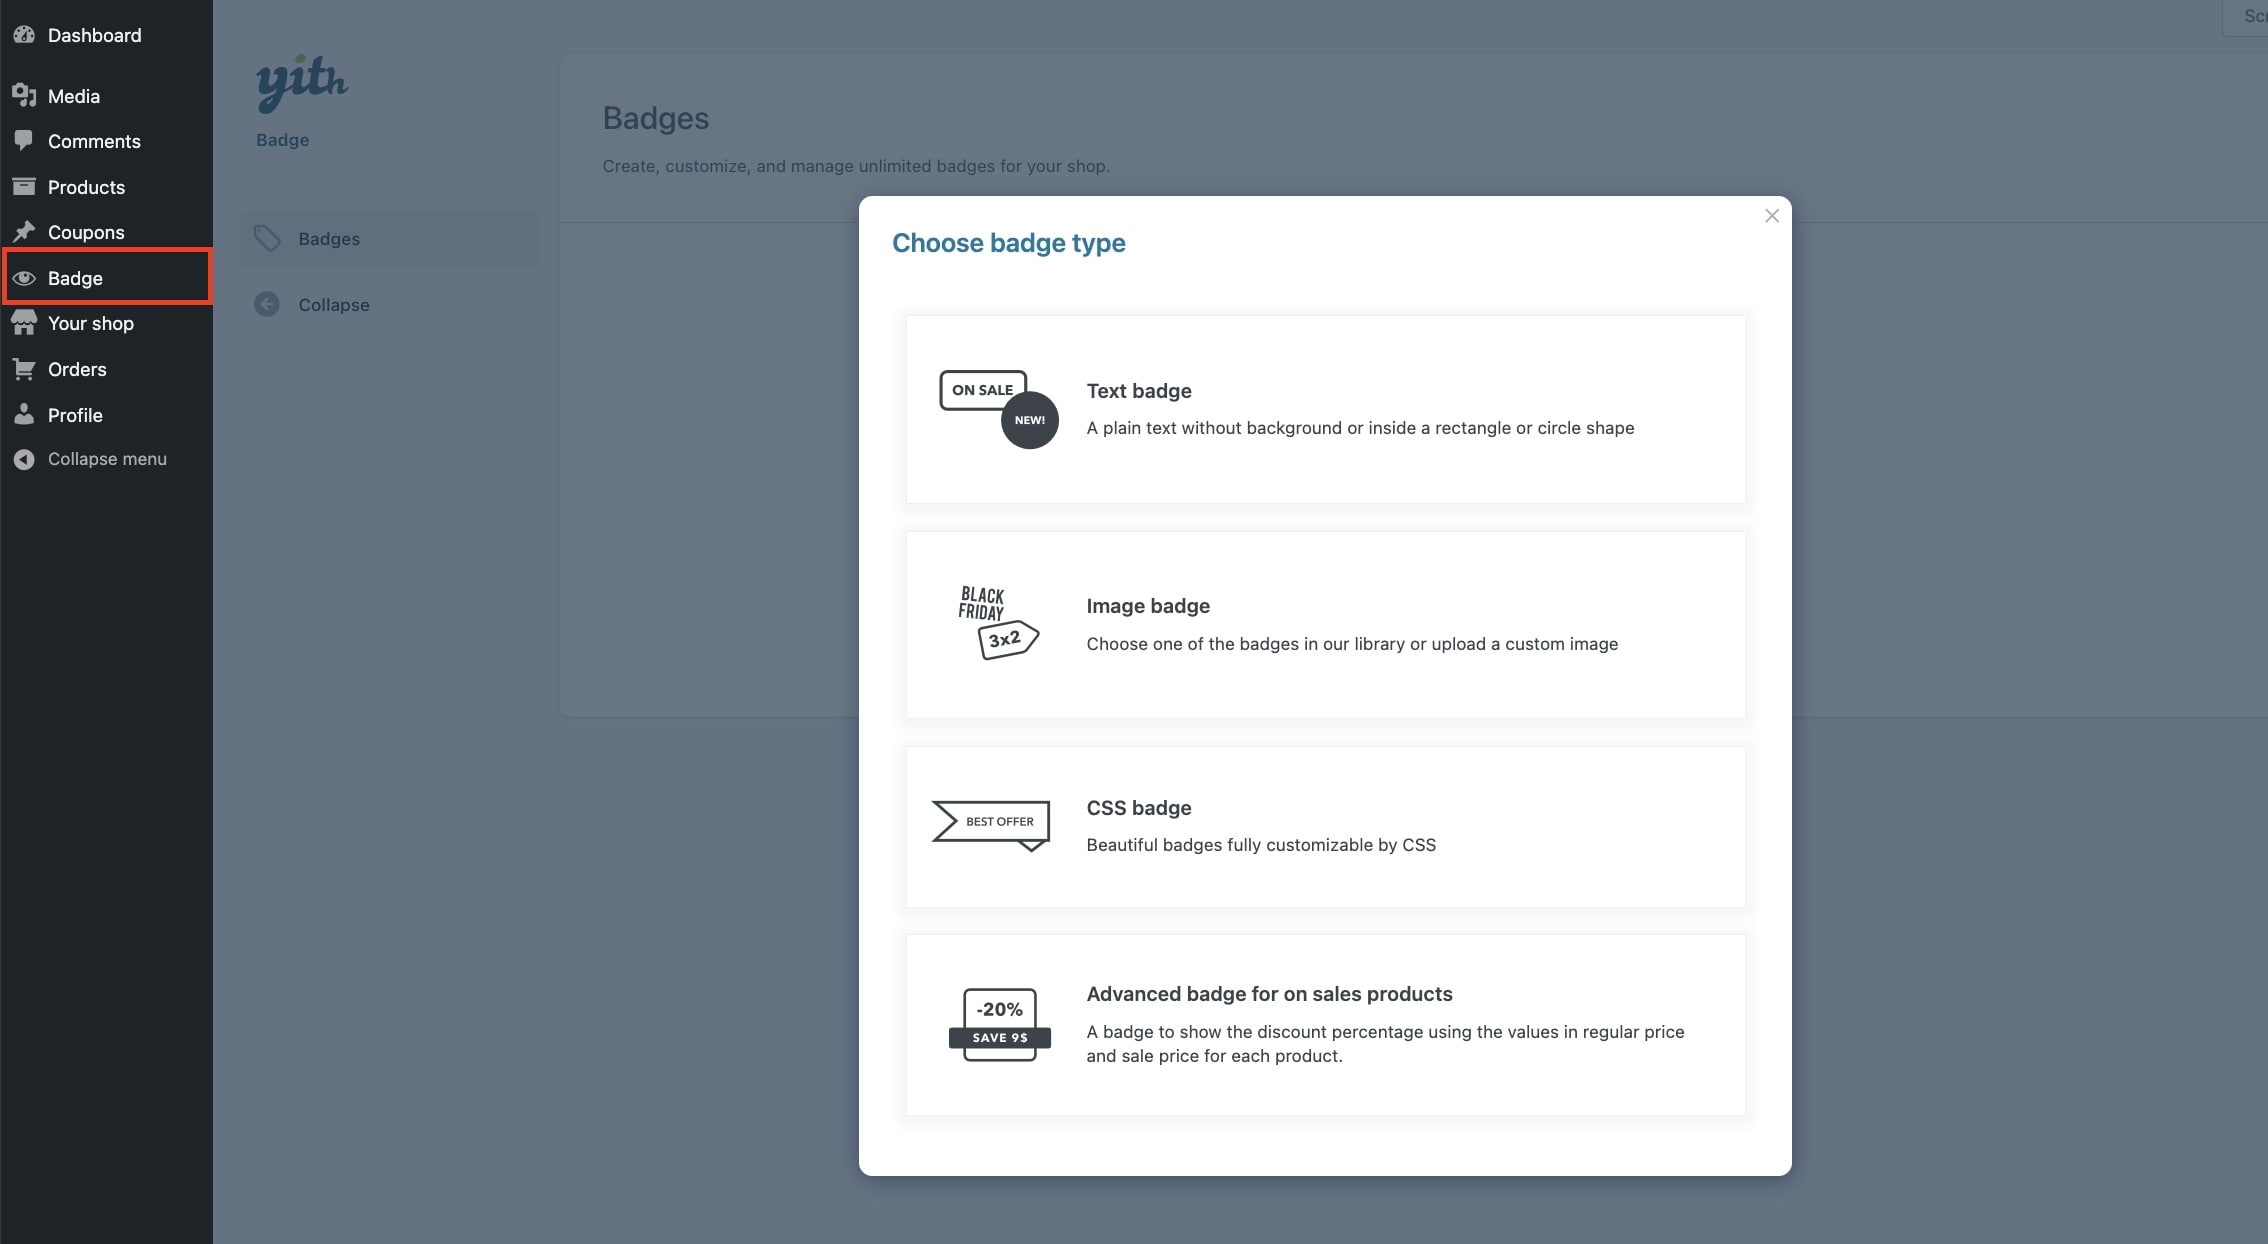
Now, your vendors can see a Badges menu in their dashboard to create and manage the badges for their products.
For more details about YITH Badge Management and how to set up a badge, please, refer to the plugin documentation.
YITH Booking and Appointment for WooCommerce allows an advanced management of a booking system for the products of your shop. Once you have configured the prices, services, and availability, the plugin will automatically manage the product depending on the user choice.
By using the plugin in combination with YITH Booking for WooCommerce, vendors can create and sell bookable products in their shop and manage their bookings.
Specifically, vendors can:
create and manage their own bookable products
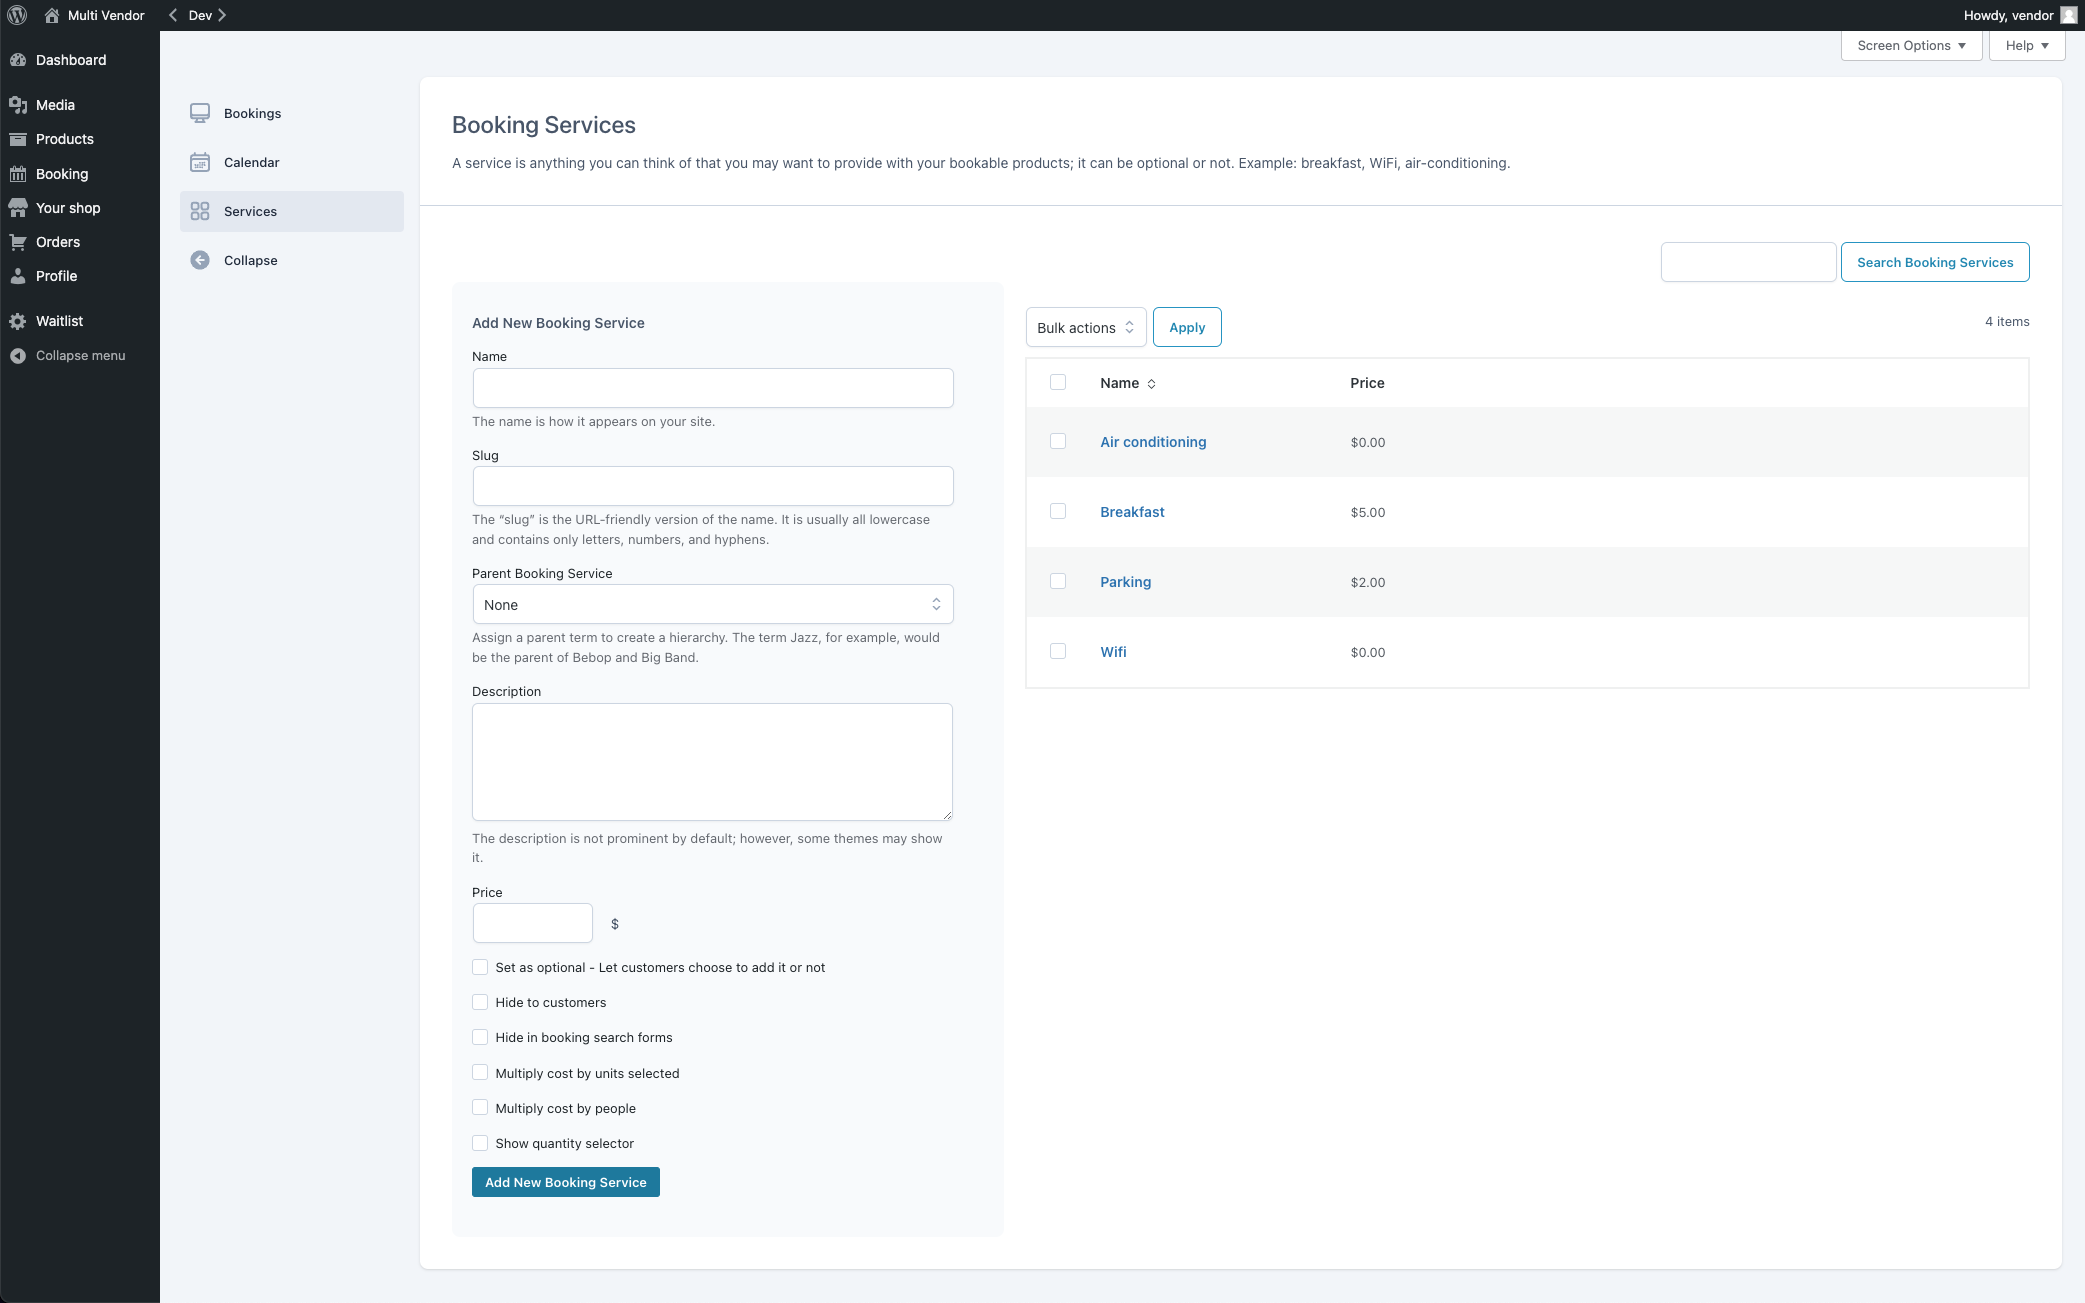
create Booking Services that can be associated to his/her bookable products only
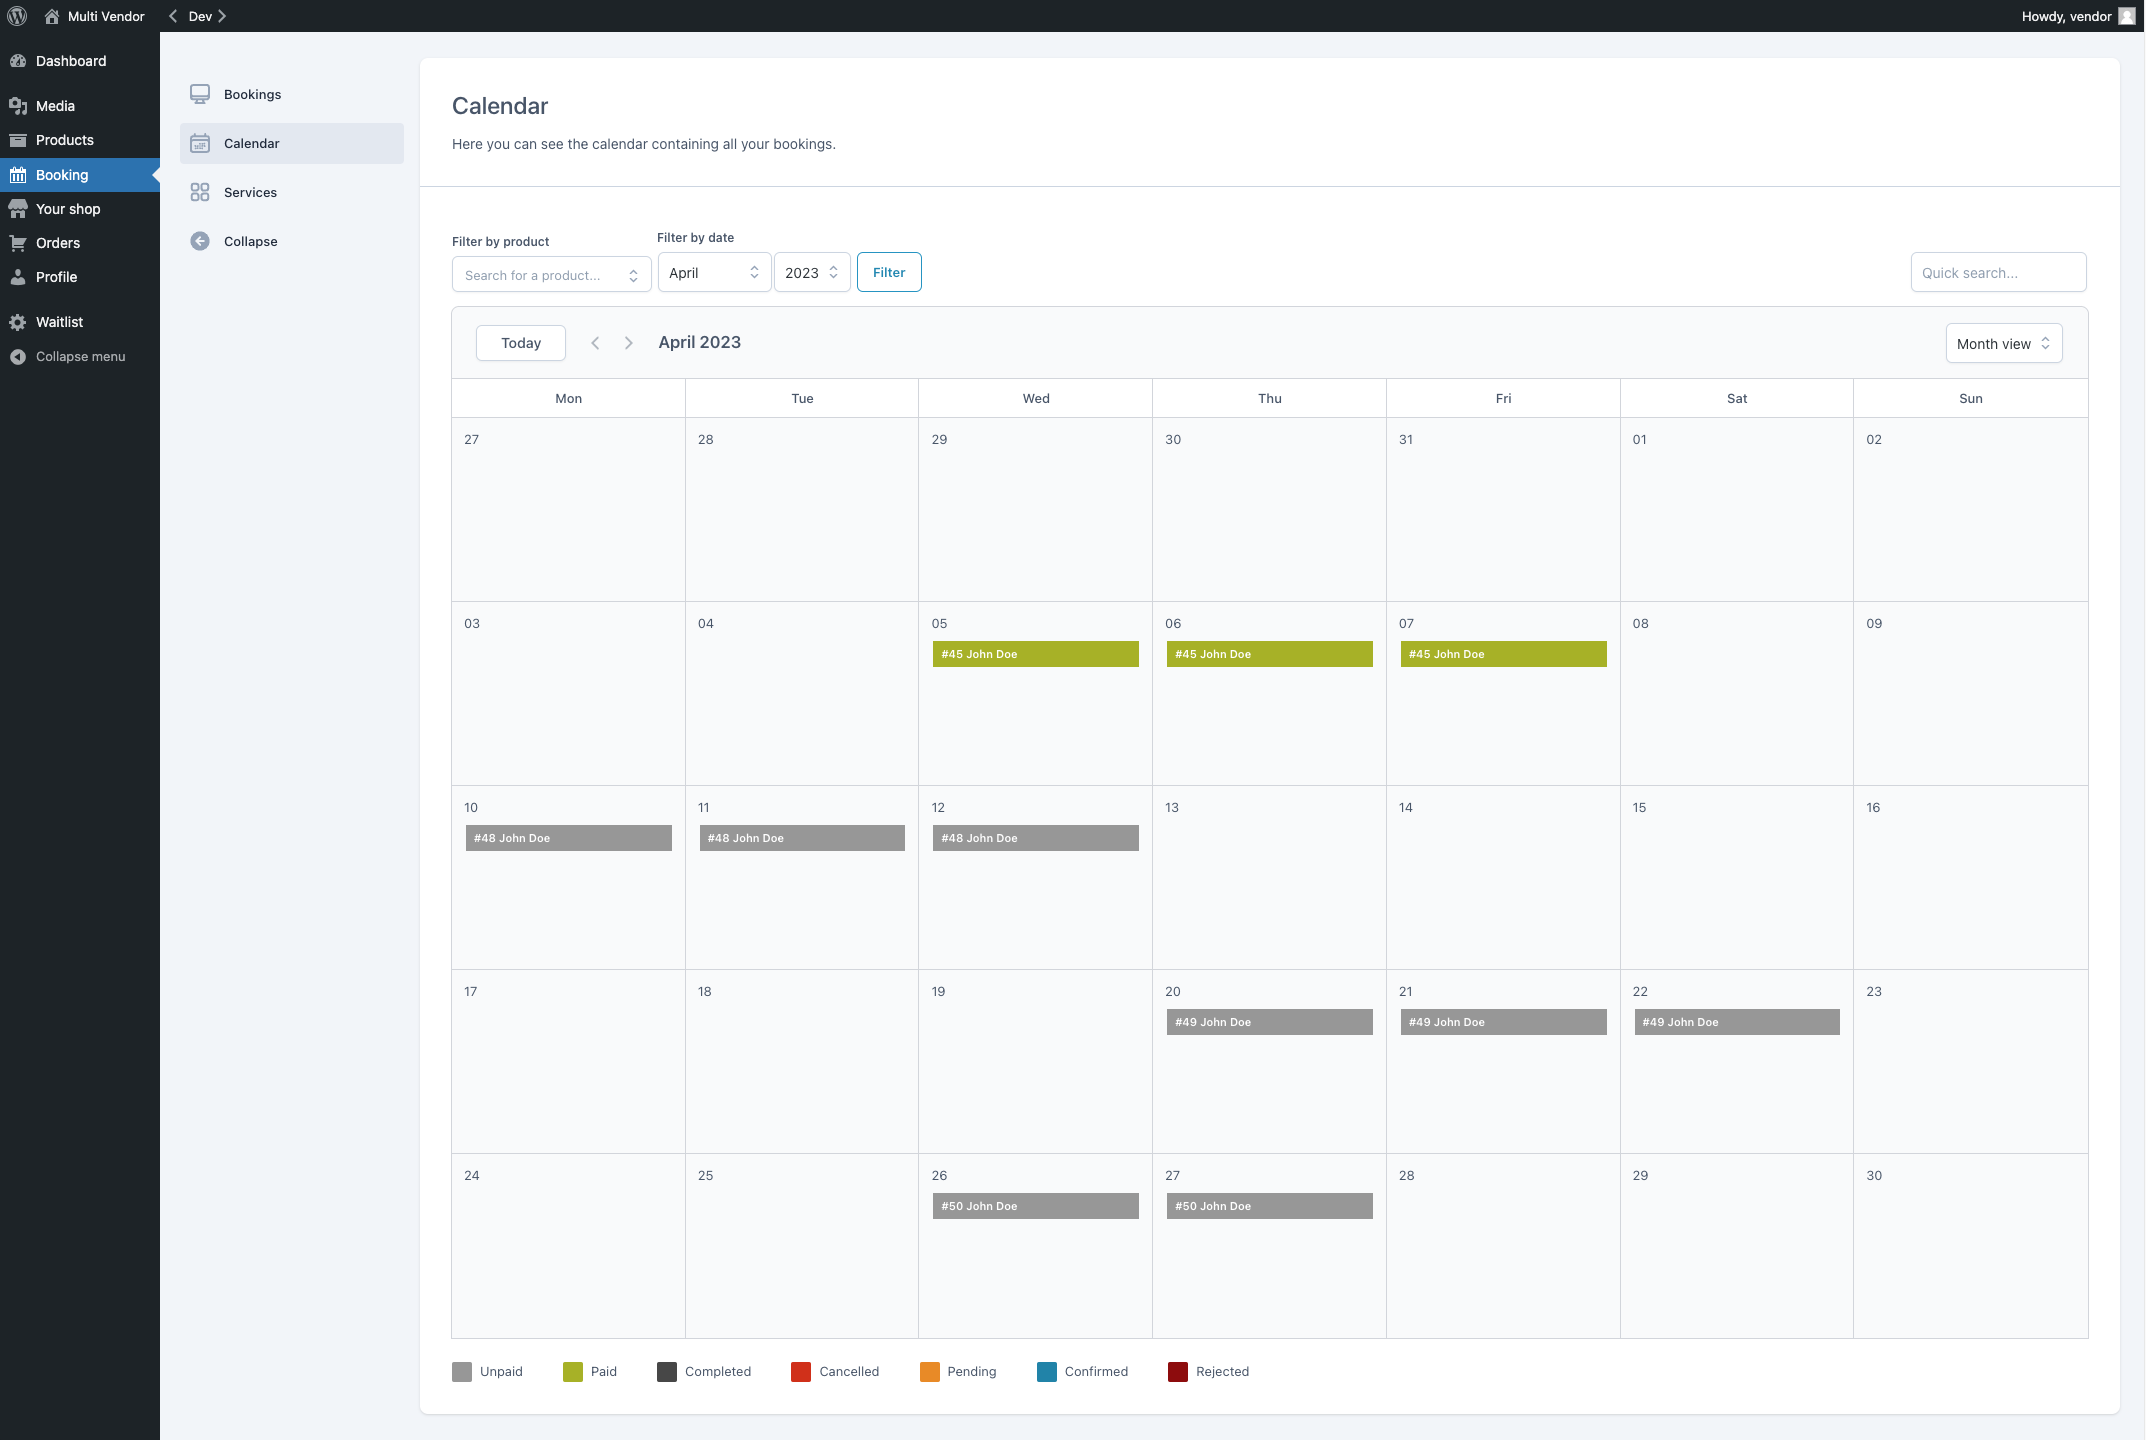
see a calendar with their own bookings only
see a list with their own bookings only
edit their own bookings (for example, edit the dates, change the status etc.)
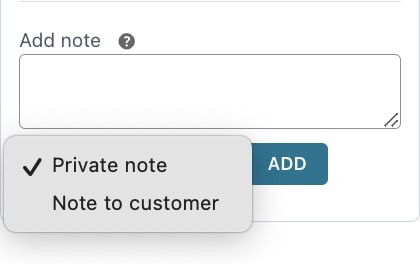
add notes inside any of their own bookings (the notes can either be private or visible to the customer as well)
use the People types created by the admin (globally)
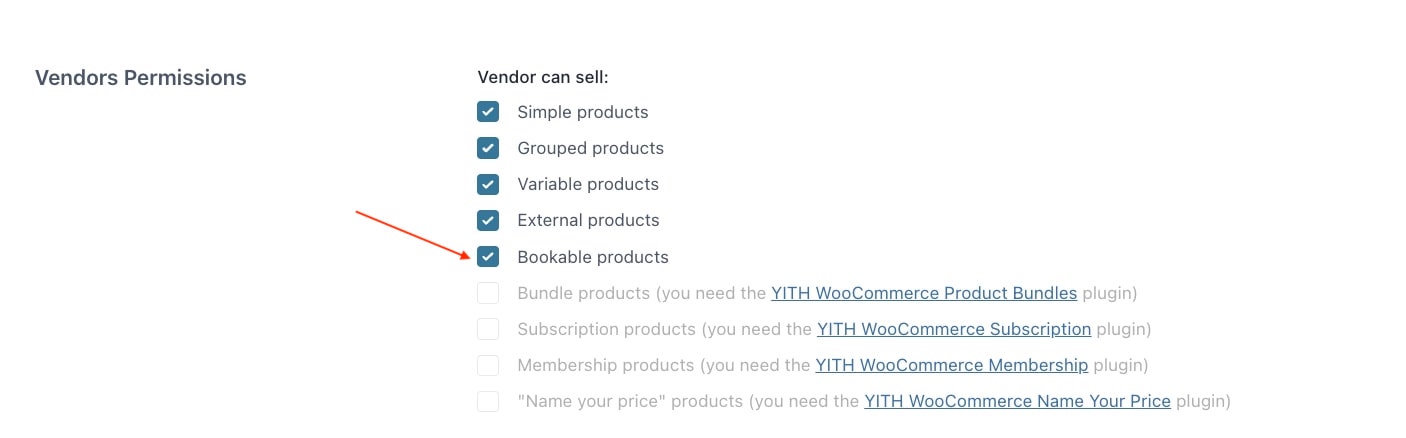
To enable all these features, activate both plugins, go toYITH > Multi Vendor > Vendors > Vendors Permissions and select Bookable products in the option Vendor can sell.
Now, each vendor can create and sell bookable products.
Each vendor can have access only to the bookings registered for their products.
Vendors can create and manage Booking Services and People as separate entities. Please, see below for more details.
Bookings page
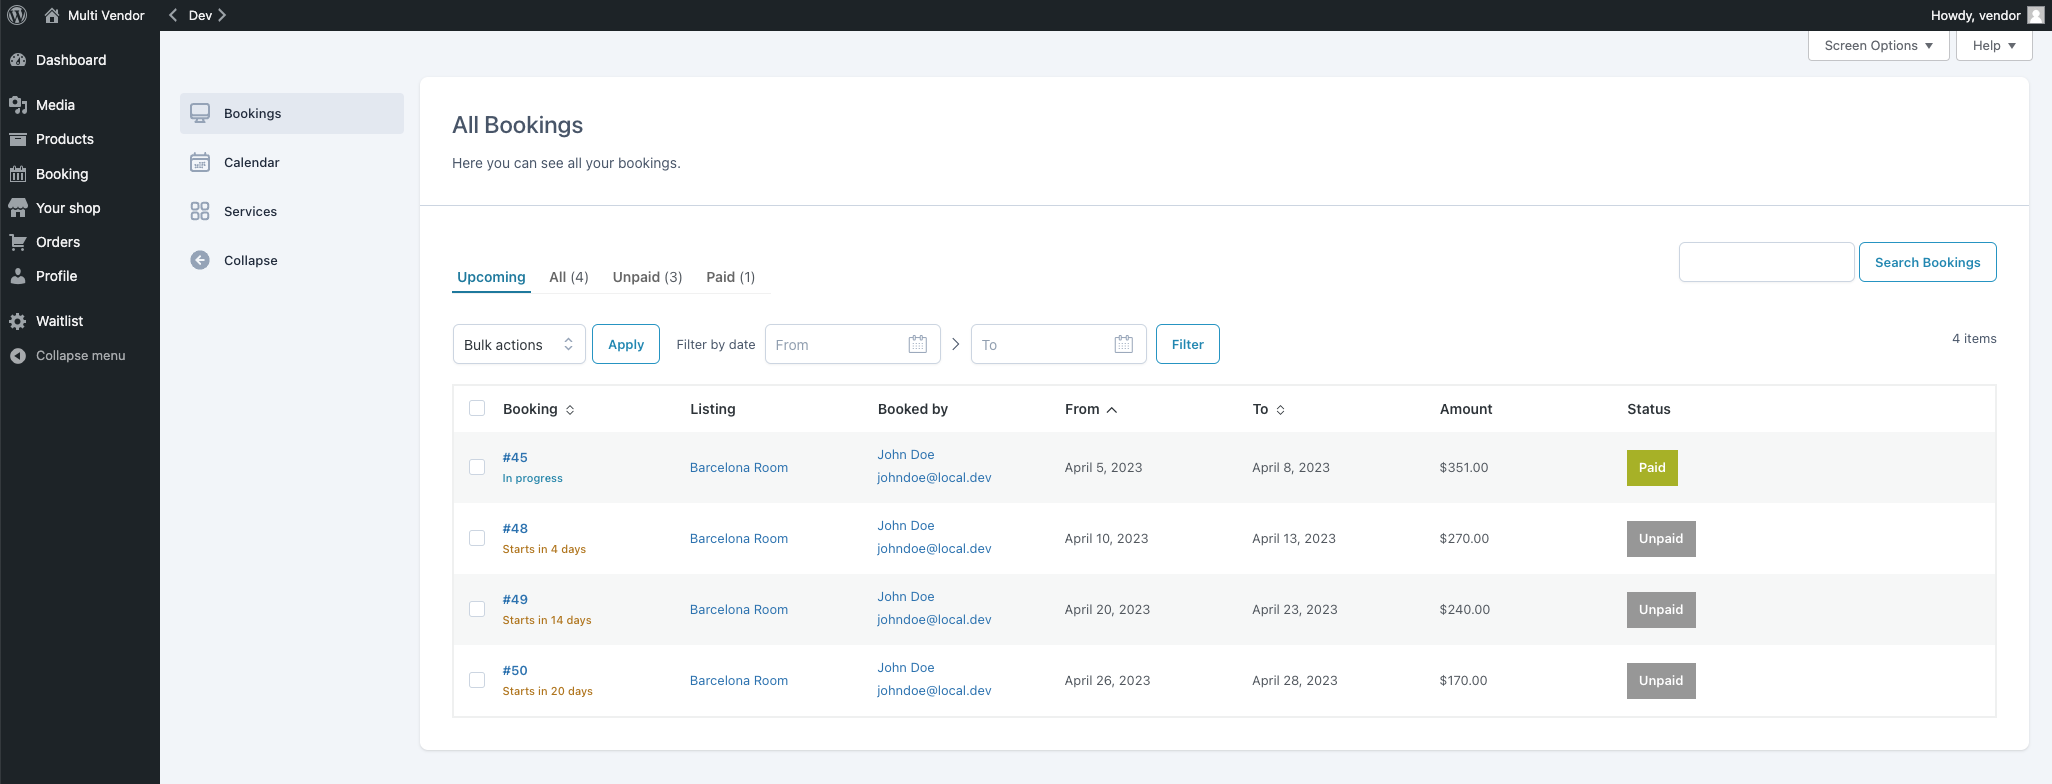
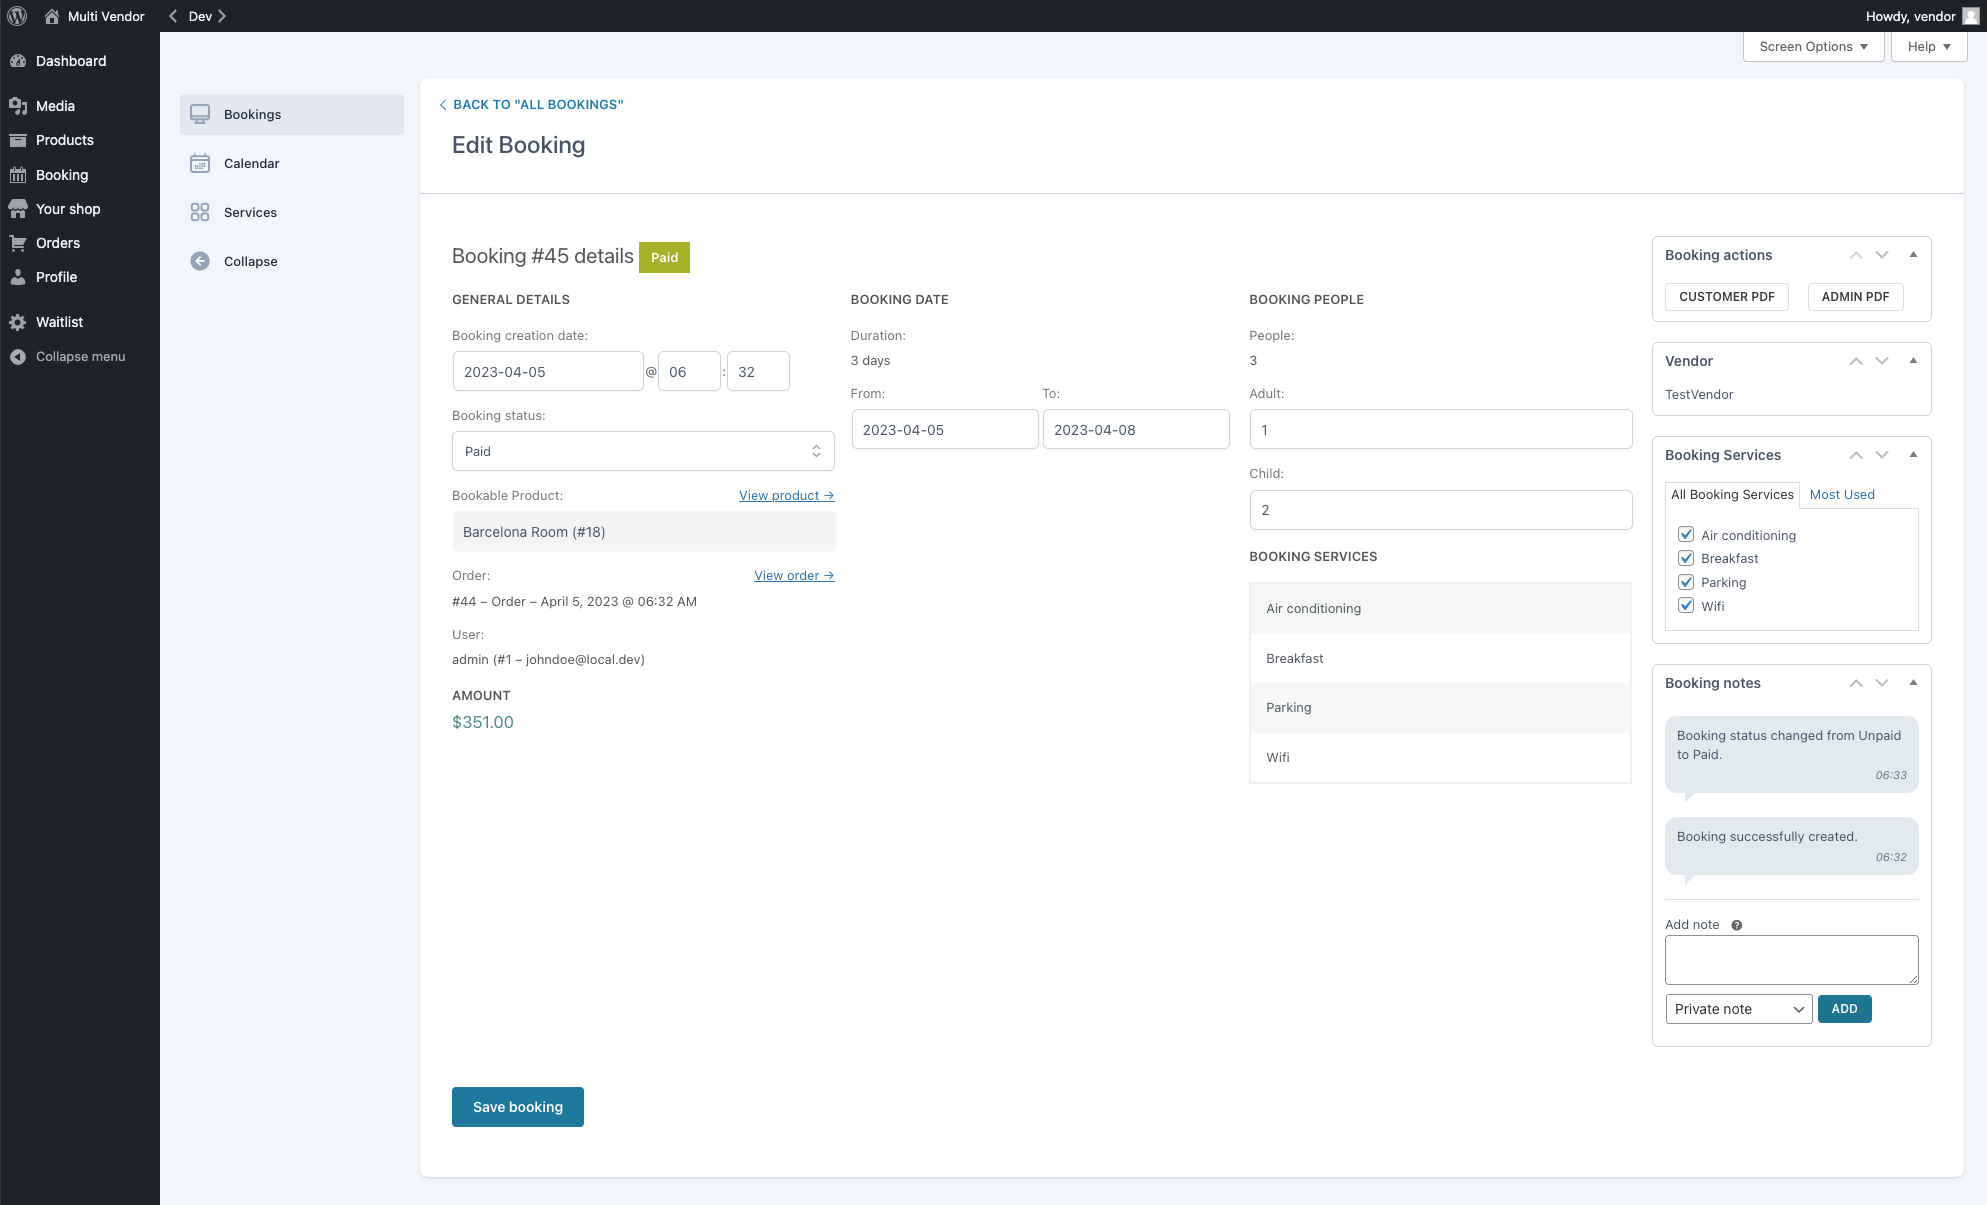
Every vendor will be able to check all his/her bookings from Booking > All bookings, this is how it will appear:
Edit booking details:
Notes on the booking:
Vendor Calendar
Every vendor will be able to see all his/her bookings in a calendar as well, available in Booking > Calendar. This is how it looks like:
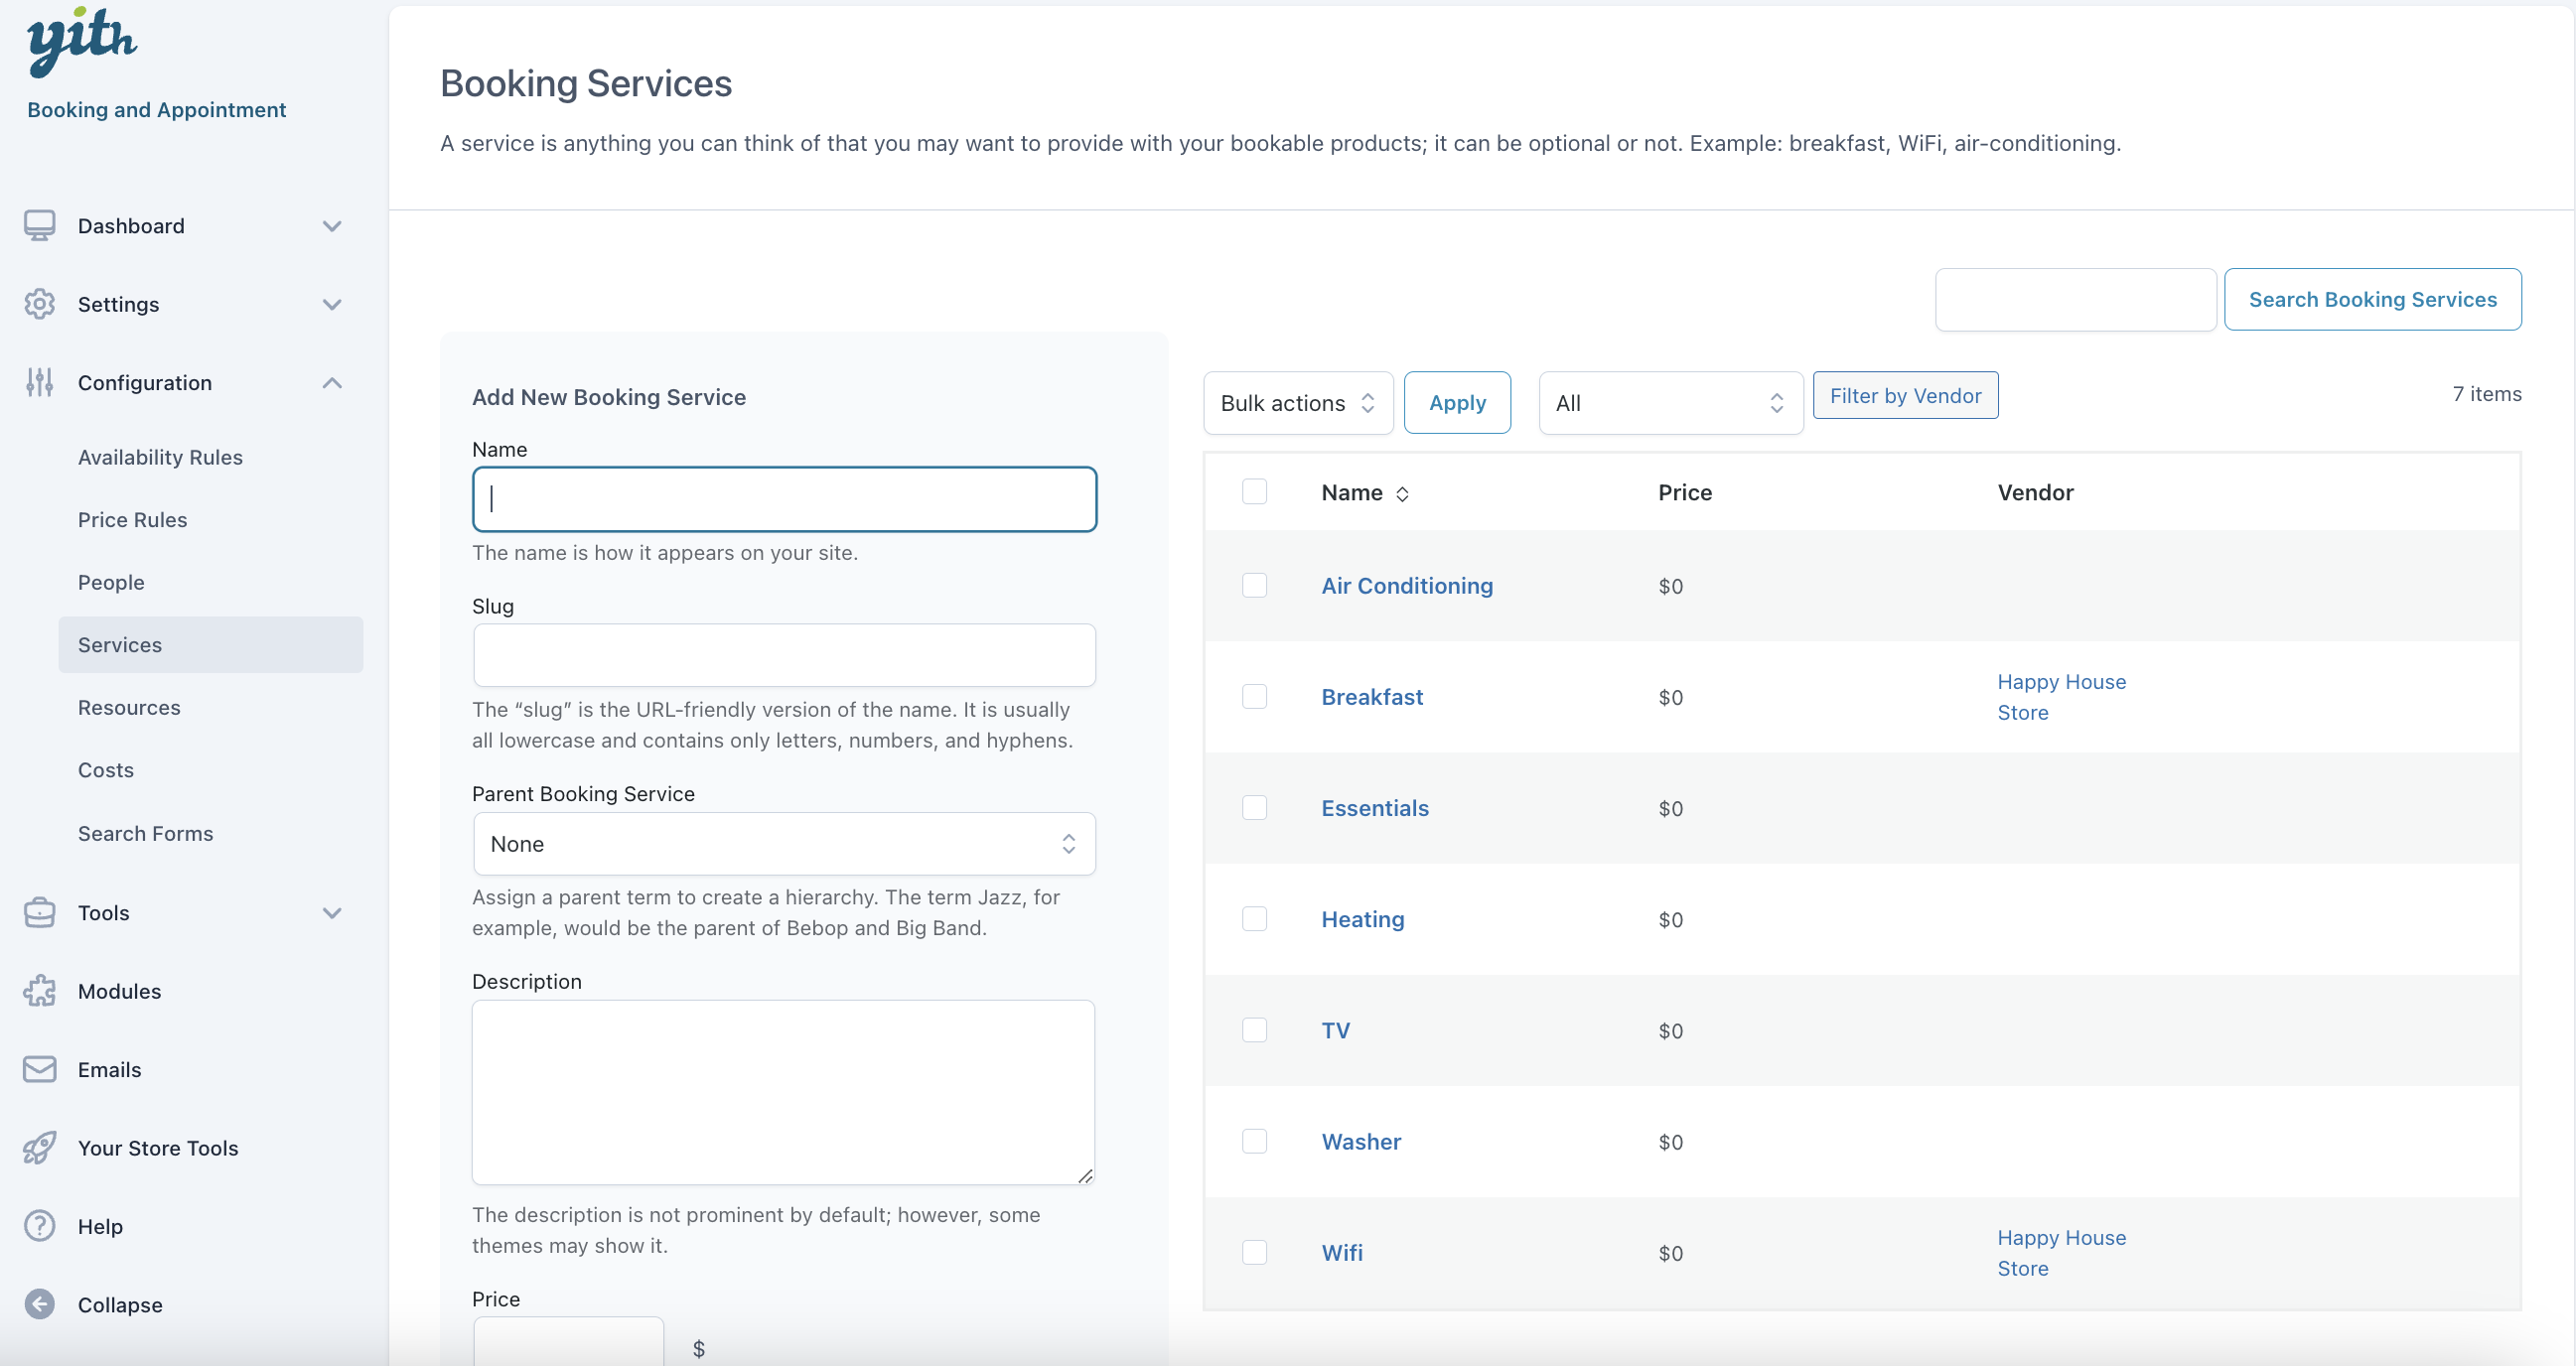
Services
The vendors can’t view nor use the services created by the super admin.
The vendors can apply the services they have created to their own products only.
Different vendors can create a service with the same name.
The super admin has access to the complete list of all services created in the shop. For each service, the name of the vendor who has created it will be highlighted.
People
The vendors can’t create new people types for their bookable products. They can use only those made available by the super admin in the product settings.
For more details about YITH Booking setup, please refer to the plugin documentation.
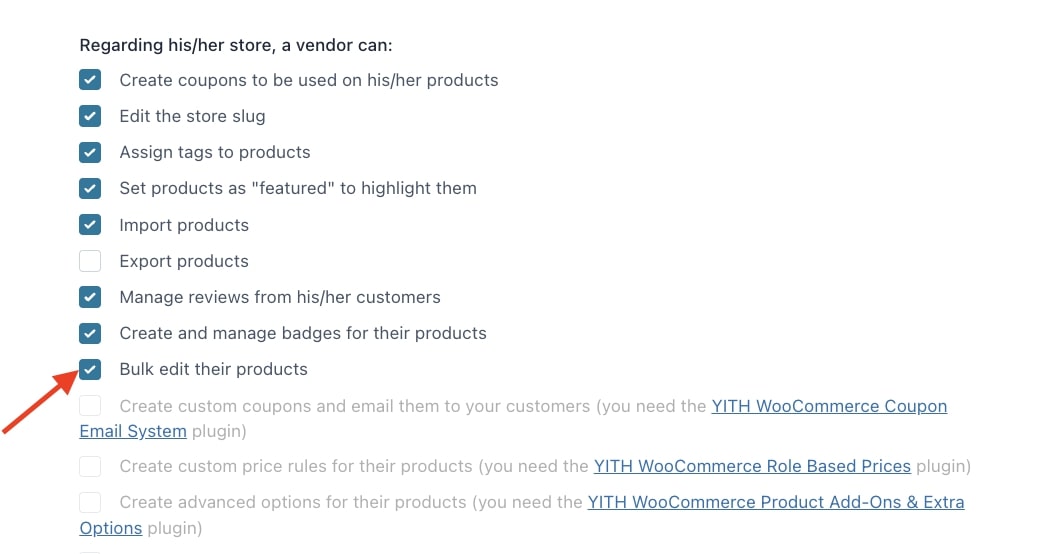
YITH Bulk Product Editing allows you to edit multiple products of your store in one go. The integration with Multi Vendor allows also your vendor to bulk edit their own products.
To enable the integration between the two plugins, first of all, make sure you install and activate the Bulk Product Editing plugin and then select the option Bulk edit their products in YITH > Multi Vendor > Vendors > Vendors Permissions.
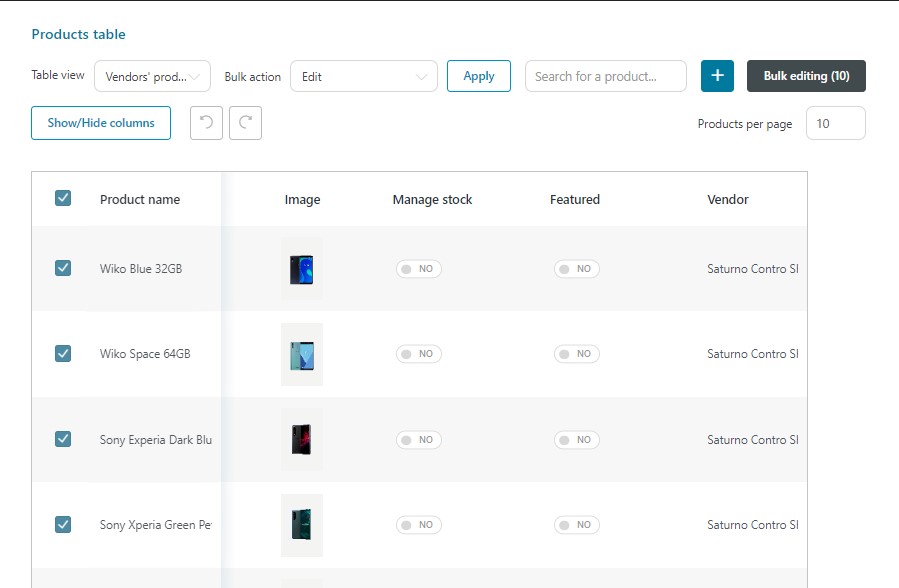
Now, your vendors will be able to see a Bulk product editing menu in their dashboard from where they can apply changes to their products.
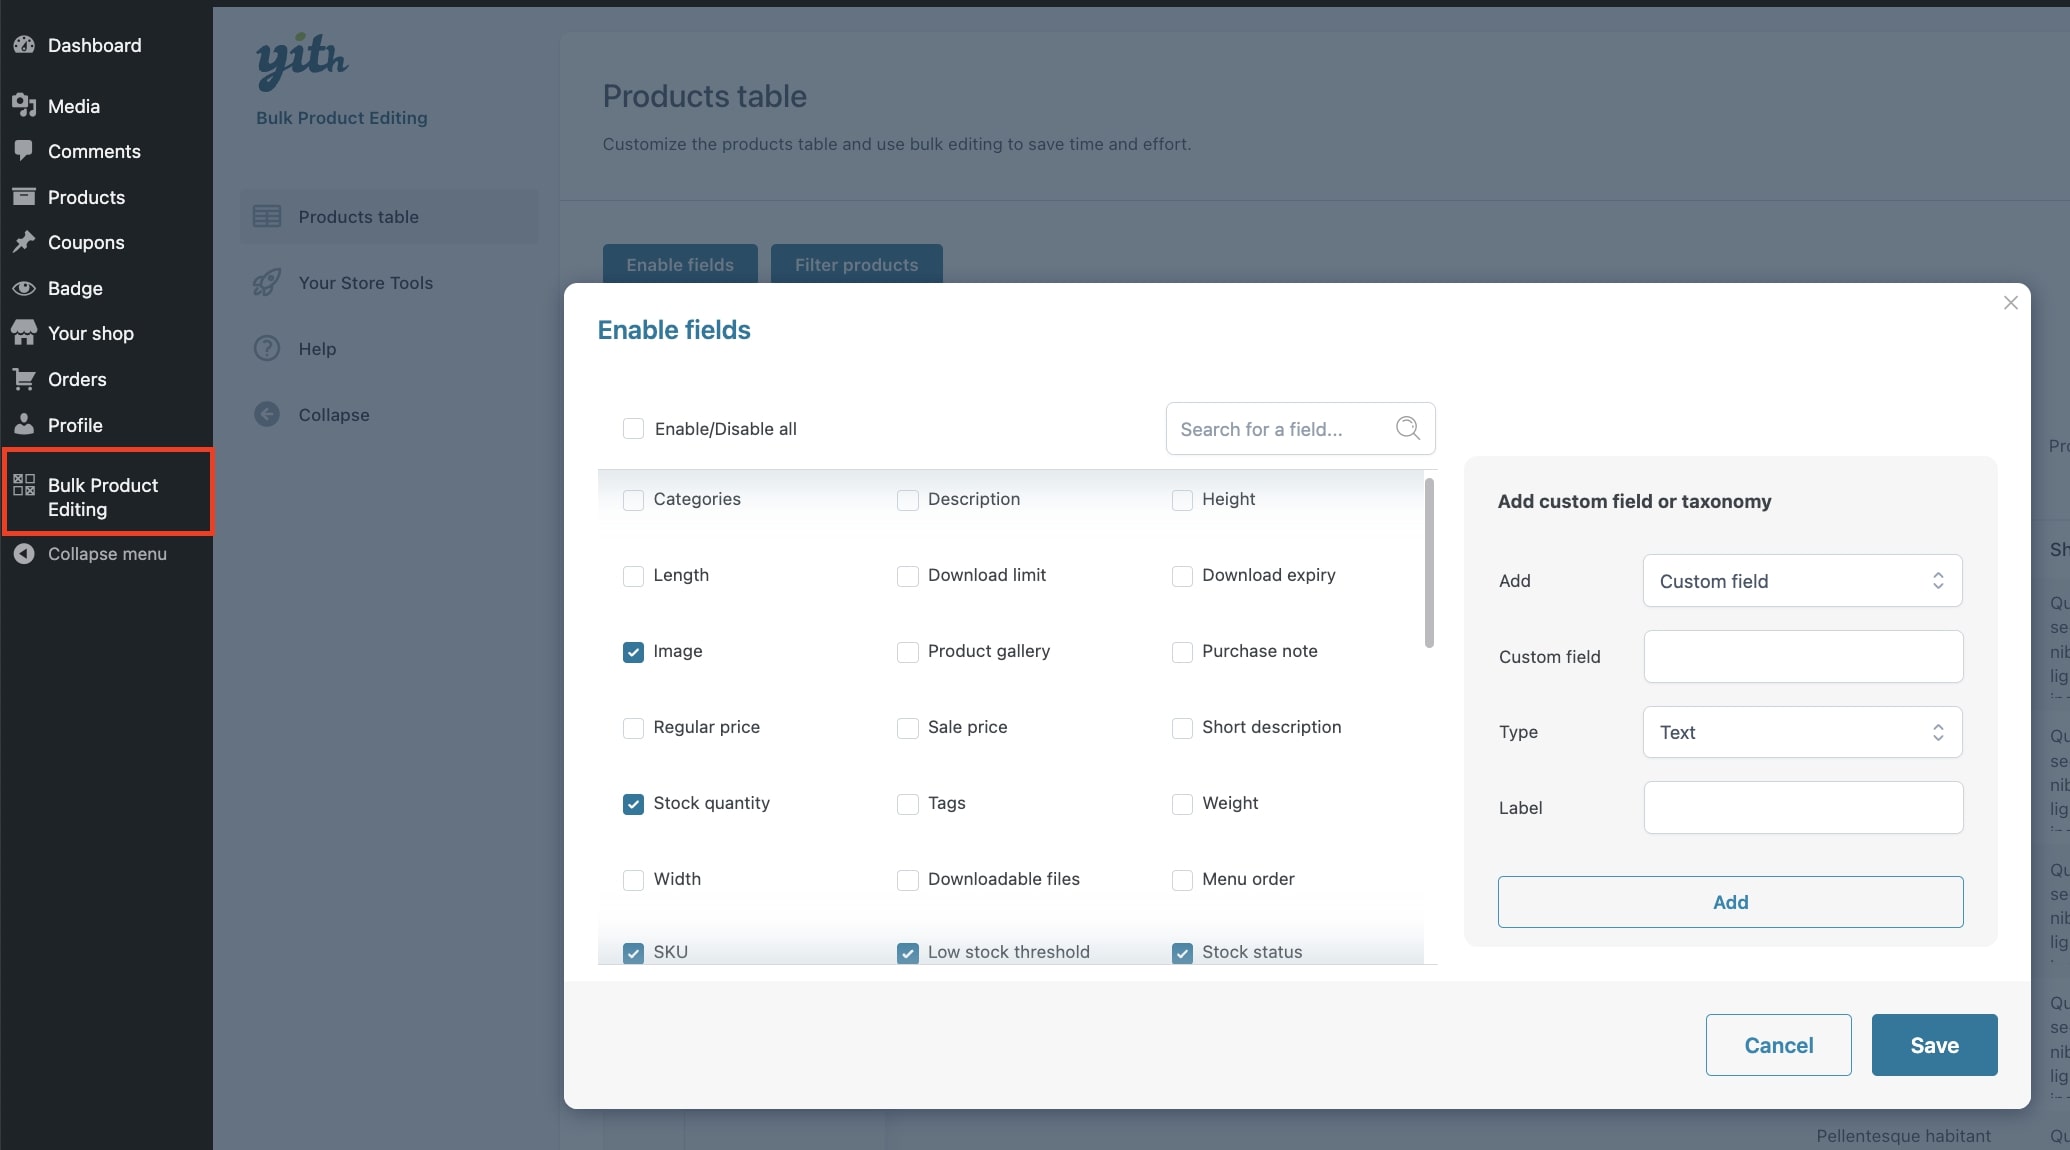
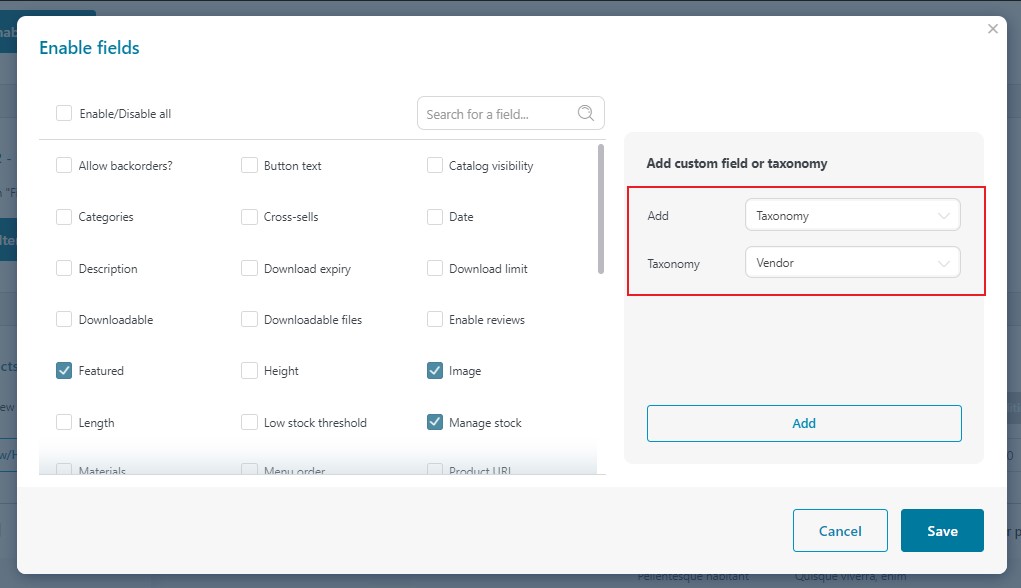
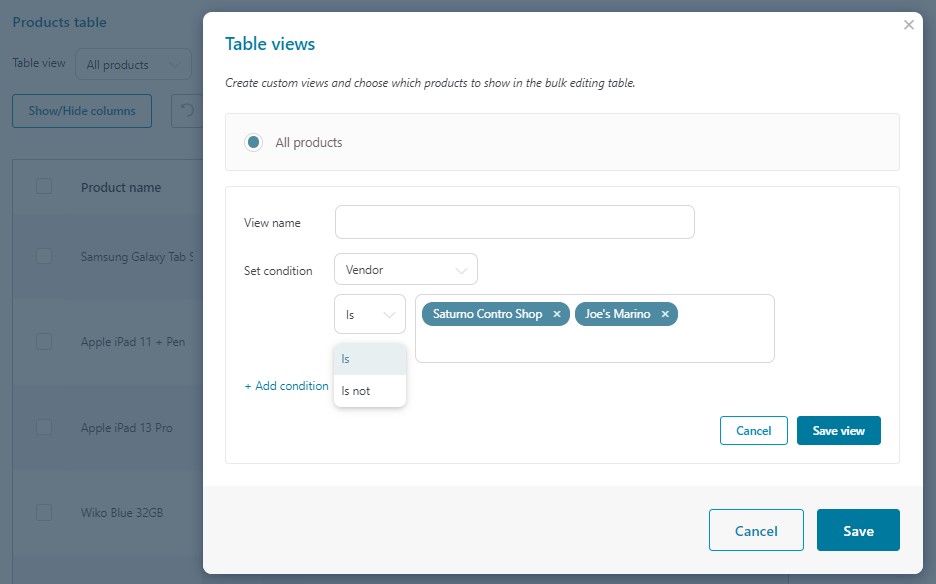
Additionally, the admin will be able to filter products by vendor and bulk edit only his/her products if necessary. To do this, you first need to add the custom taxonomy Vendor from the Enable fields popup.
After clicking on the Add button first then on Save, create a table view as described here, and select Vendor to set the condition. Choose Is or Is not and search for the vendor/s whose products you need to bulk edit.
Now save the view and start bulk editing the products.
YITH Catalog Mode allows turning your e-commerce store into a product catalog without sales enabled. The integration with YITH Multi Vendor allows also your store vendors to configure the catalog functionality for their own products.
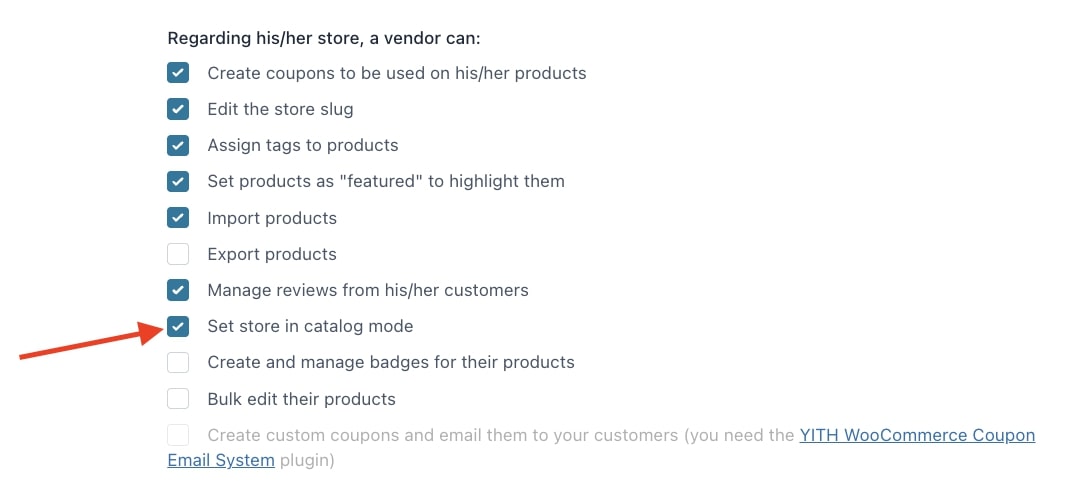
First of all, install and activate both plugins, then, go to YITH > Multi Vendor > Vendors > Vendors Permissions and select Set the store in catalog mode in the option Regarding his/her store, a vendor can.
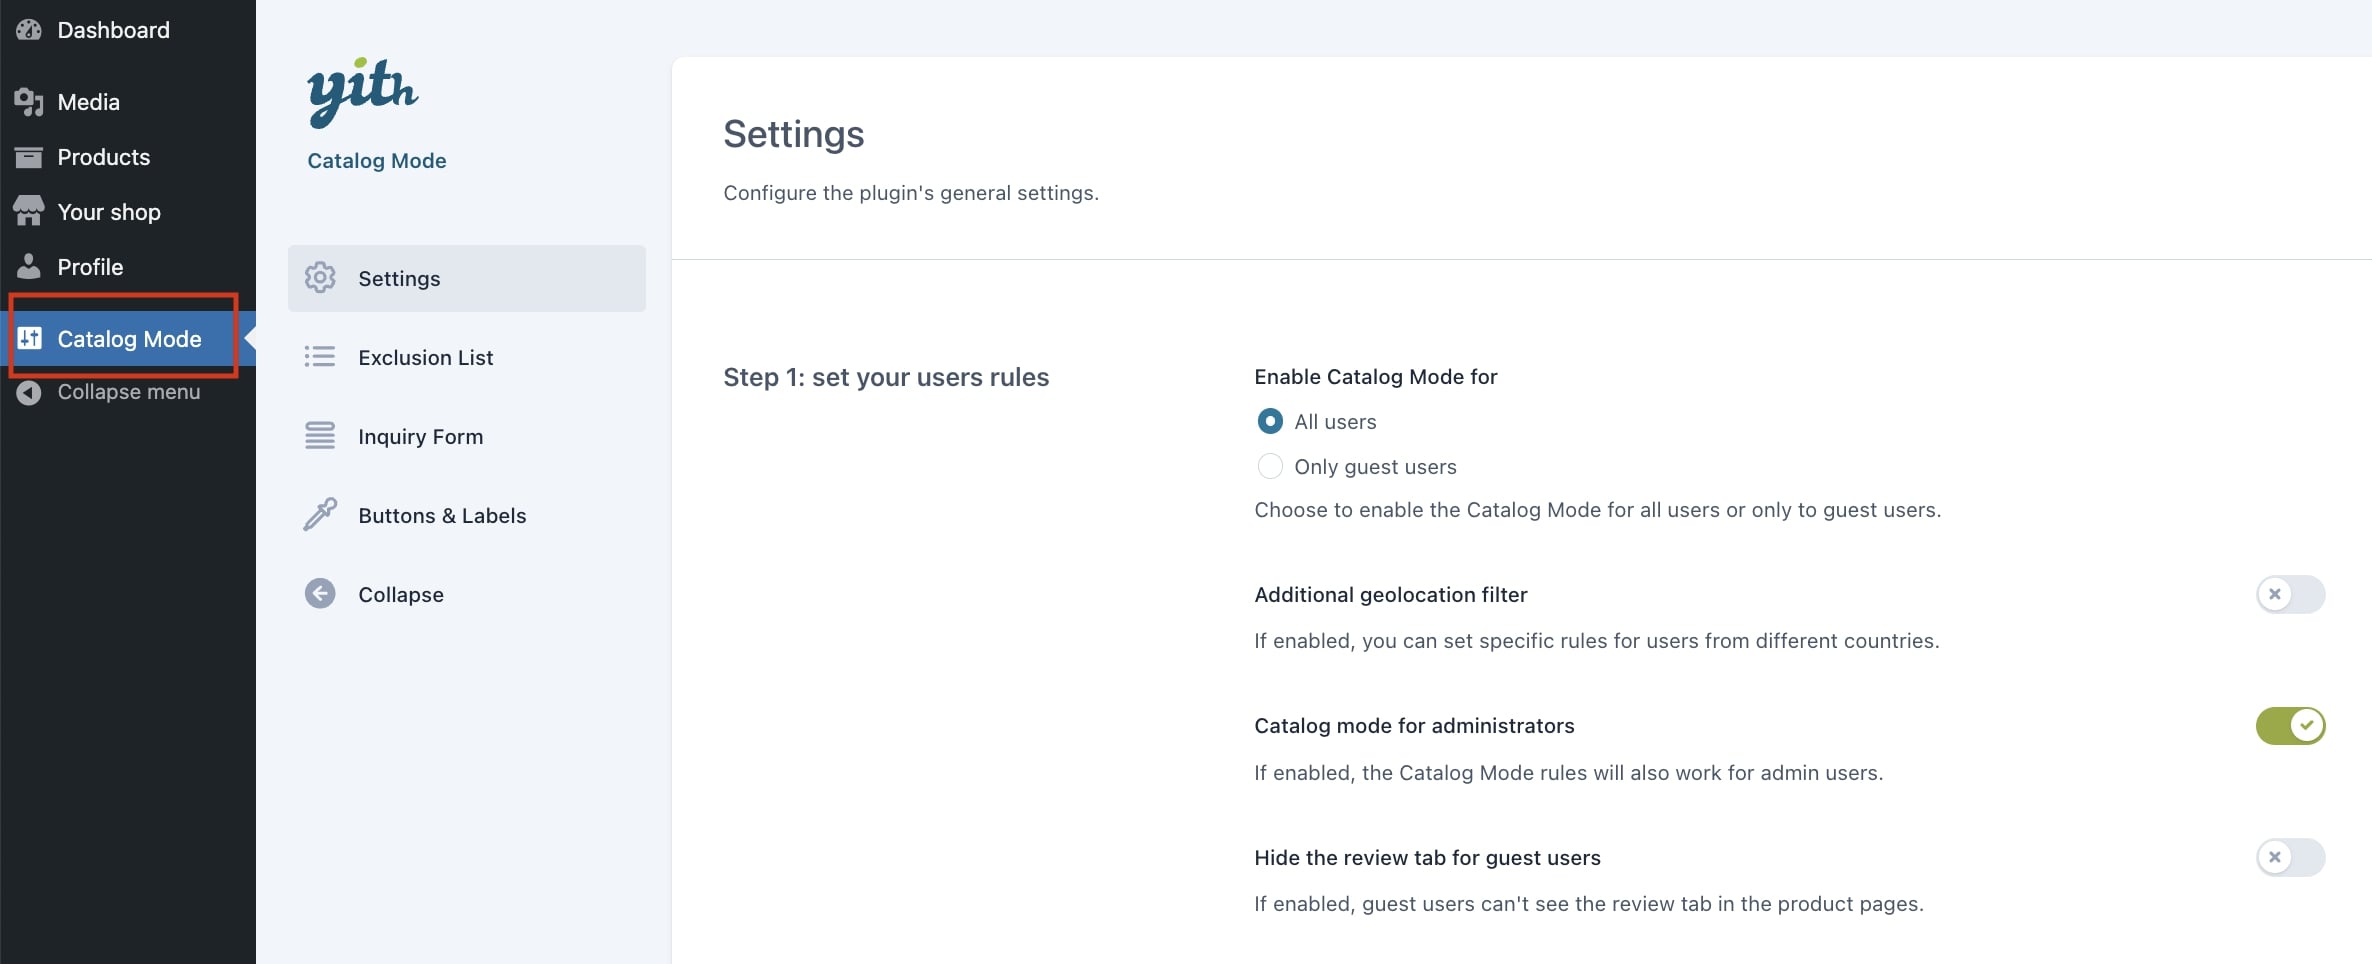
Now, your vendors will be able to see a dedicated menu item with all the catalog mode settings. These will apply to their store and products only.
They will be able to set up not only the general settings, but also the exclusion list, the inquiry form and the buttons.
The options are the same as for the admin, but with the only difference that they apply only to the store of the vendor who is editing them.
Admin extra options
The integration will also enable a few extra options for the admin, who will be able to control and override the Catalog mode settings for all vendors or just selected ones if needed.
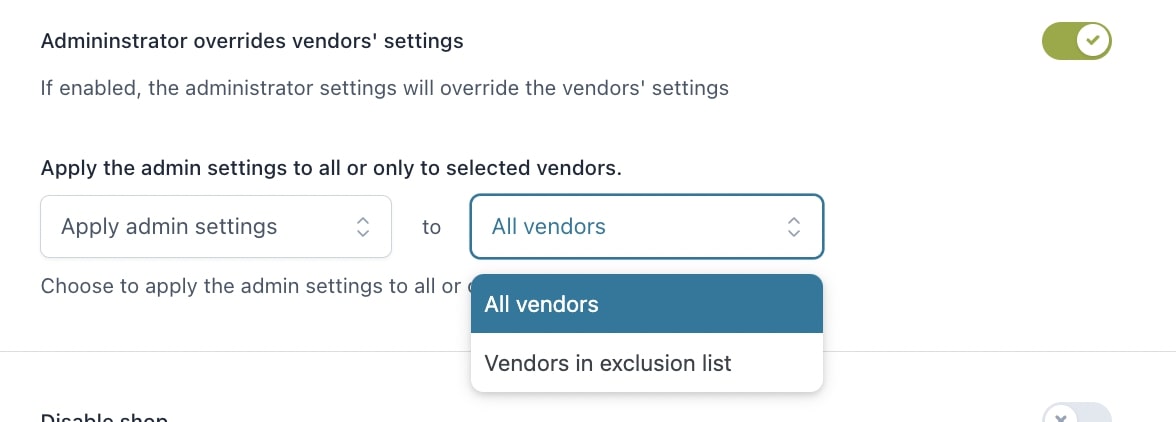
In YITH > Catalog Mode > Settings, the admin will be able to see the Administrator overrides vendors’ settings option:
So, if enabled the admin will be able to choose whether to apply the admin settings to all vendors or just vendors in the exclusion list.
If on the other hand, you want the admin settings to override the ones of all vendors except for a few ones, you set it up to Not apply to Vendors in exclusion list, as you can see below.
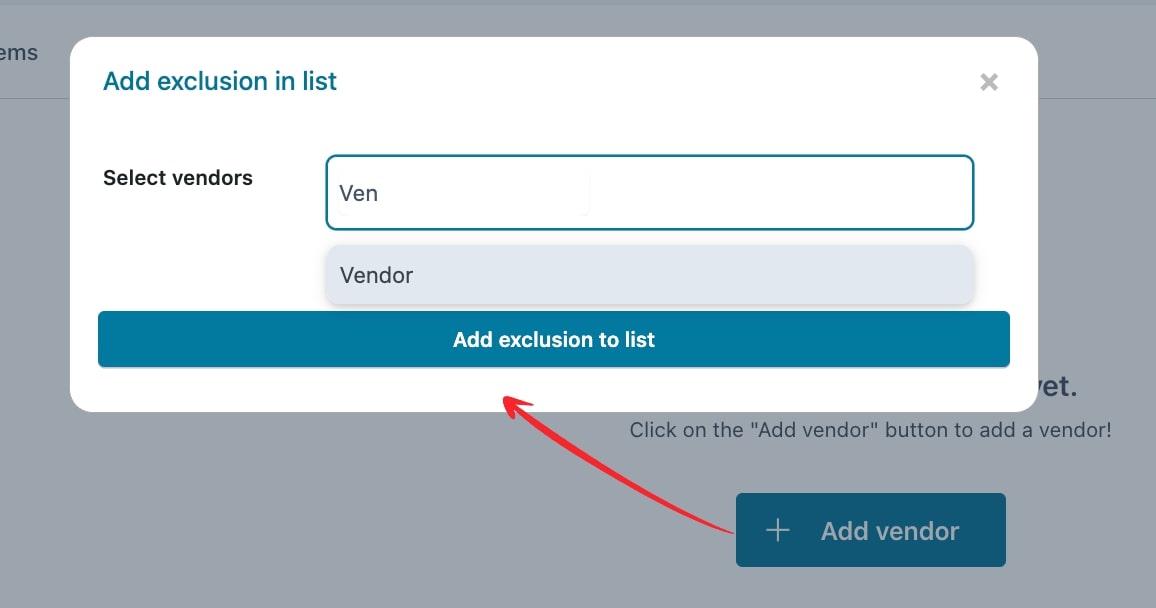
If you select to apply or not apply the settings only to vendors in the exclusion list, you will have to add the vendors through the extra tab that will appear in Exclusion list > List of vendors.
To add a new vendor, just click on the “Add vendor” button and search by their store name:
For further details about YITH WooCommerce Catalog Mode settings, please refer to the official documentation.
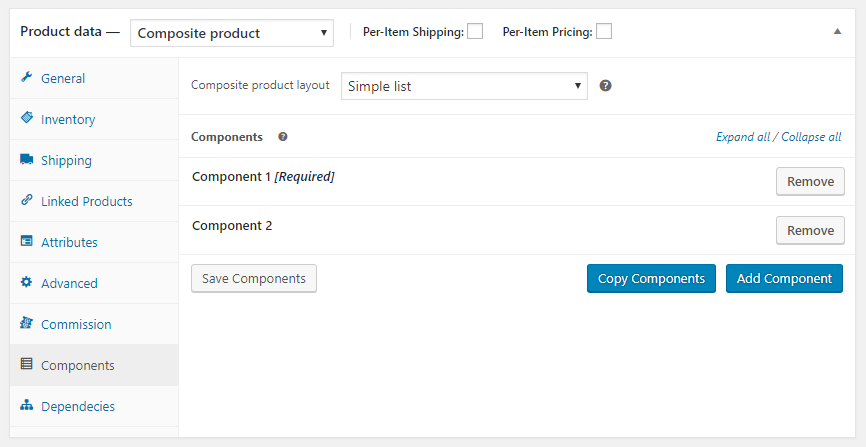
YITH WooCommerce Composite Products allows you to let your customers compose their final product and choose as components other products of your shop. The integration with YITH Multi Vendor allows also vendors to create their own composite products.
Just make sure you install and activate both plugins and the “Composite product” type will also be available to your vendors.
For more information on how to add a composite product, check the full documentation here.


