From this section, you will be able to set up the Vendor registration page with all its options.
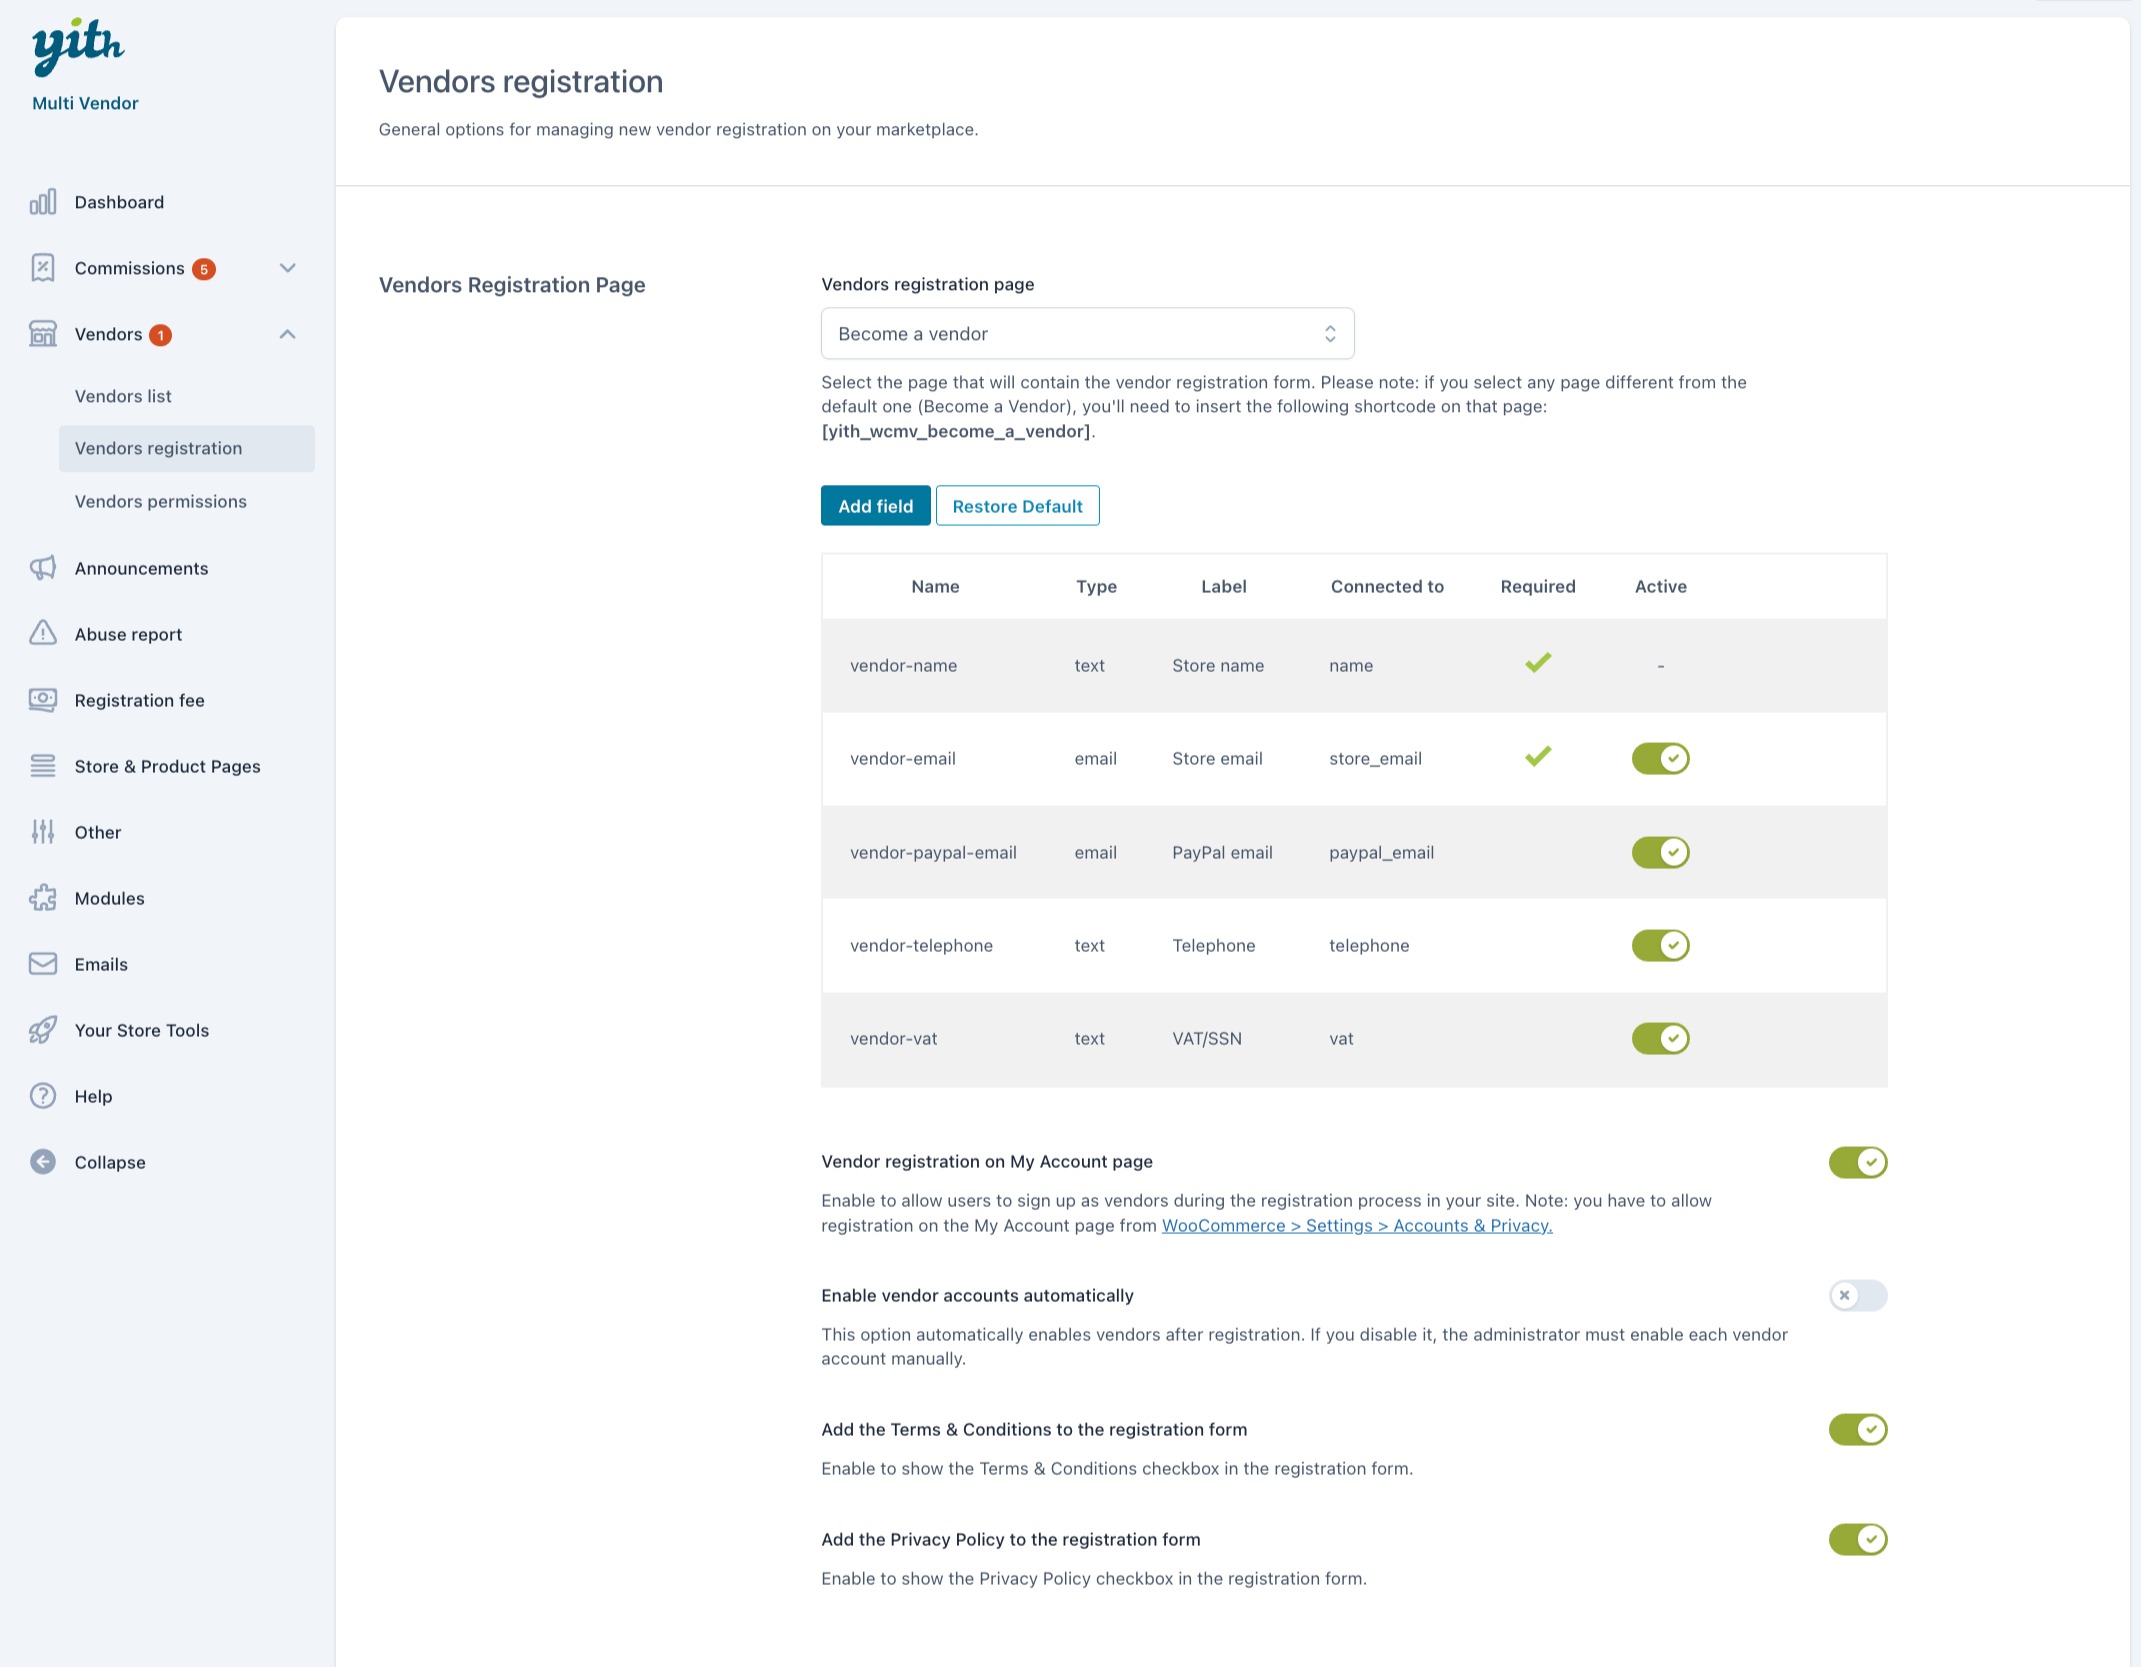
Vendor registration page: select the page that will contain the vendor registration form. Please note: if you select any page different from the default one [Become a Vendor], you’ll need to insert the following shortcode on that page: [yith_wcmv_become_a_vendor].

Registration fields
Registration fields: here you can enable/disable the default fields of the registration form, but you can also add new ones.
To add a new field, click on Add field: this will open a modal window, where you can set up all the following options.

- Name: this is the name of the field, the one you will see in the registration form list on this page and it’s a mandatory field.
- Type:
- Text
- Phone
- Textarea
- Radio
- Checkbox
- Select
- Multiselect
- Country
- State
- Label: this is the name of the field as displayed to users on the frontend.
- Class: add here one or more CSS classes, separated with commas, to customize this field.
- Placeholder: enter here the placeholder text for this field. (available only for Text, Email, Phone, Textarea, Select, Multiselect types).
- Connect to: select one of the default fields here if you want to connect this field to one of the default ones visible in the vendor’s profile page.
- Options: here you can enter the various select options (this is only visible for Radio, Select and Multiselect types): add the name as displayed on the frontend in the label and set a value.

- Position: choose whether the field will appear on the left side (first), right side (last) or will cover the entire width of the form (wide).
- Required: choose whether to make this field is a mandatory field.
Let’s see more options related to this page:
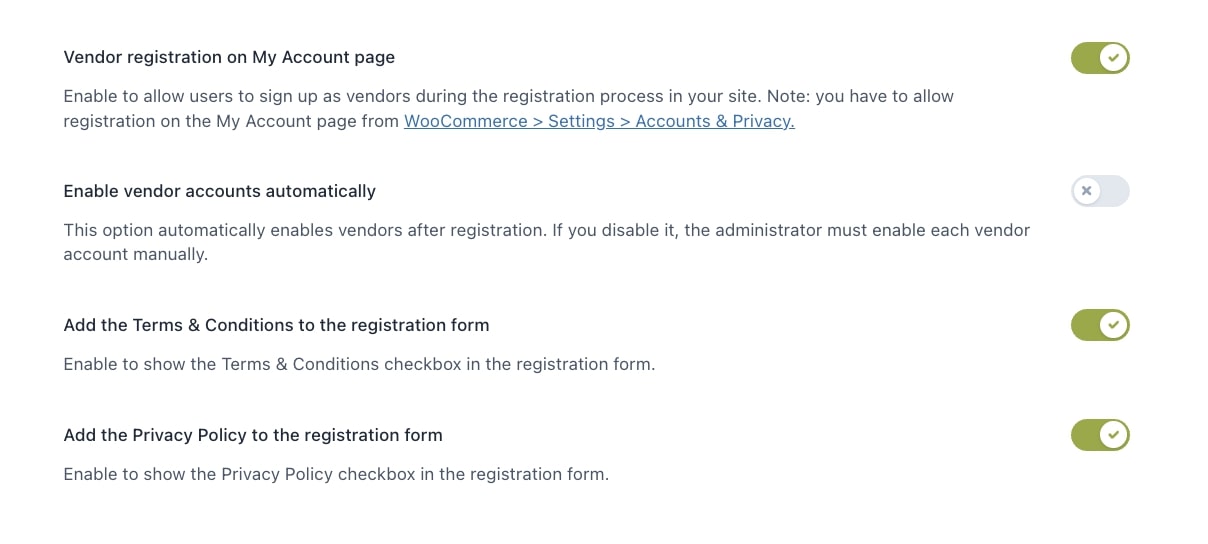
Vendor registration on My Account page: enable to allow users to sign up as vendors during the registration process in your site.
Note: you have to allow registration on the My Account page from WooCommerce > Settings > Accounts & Privacy.
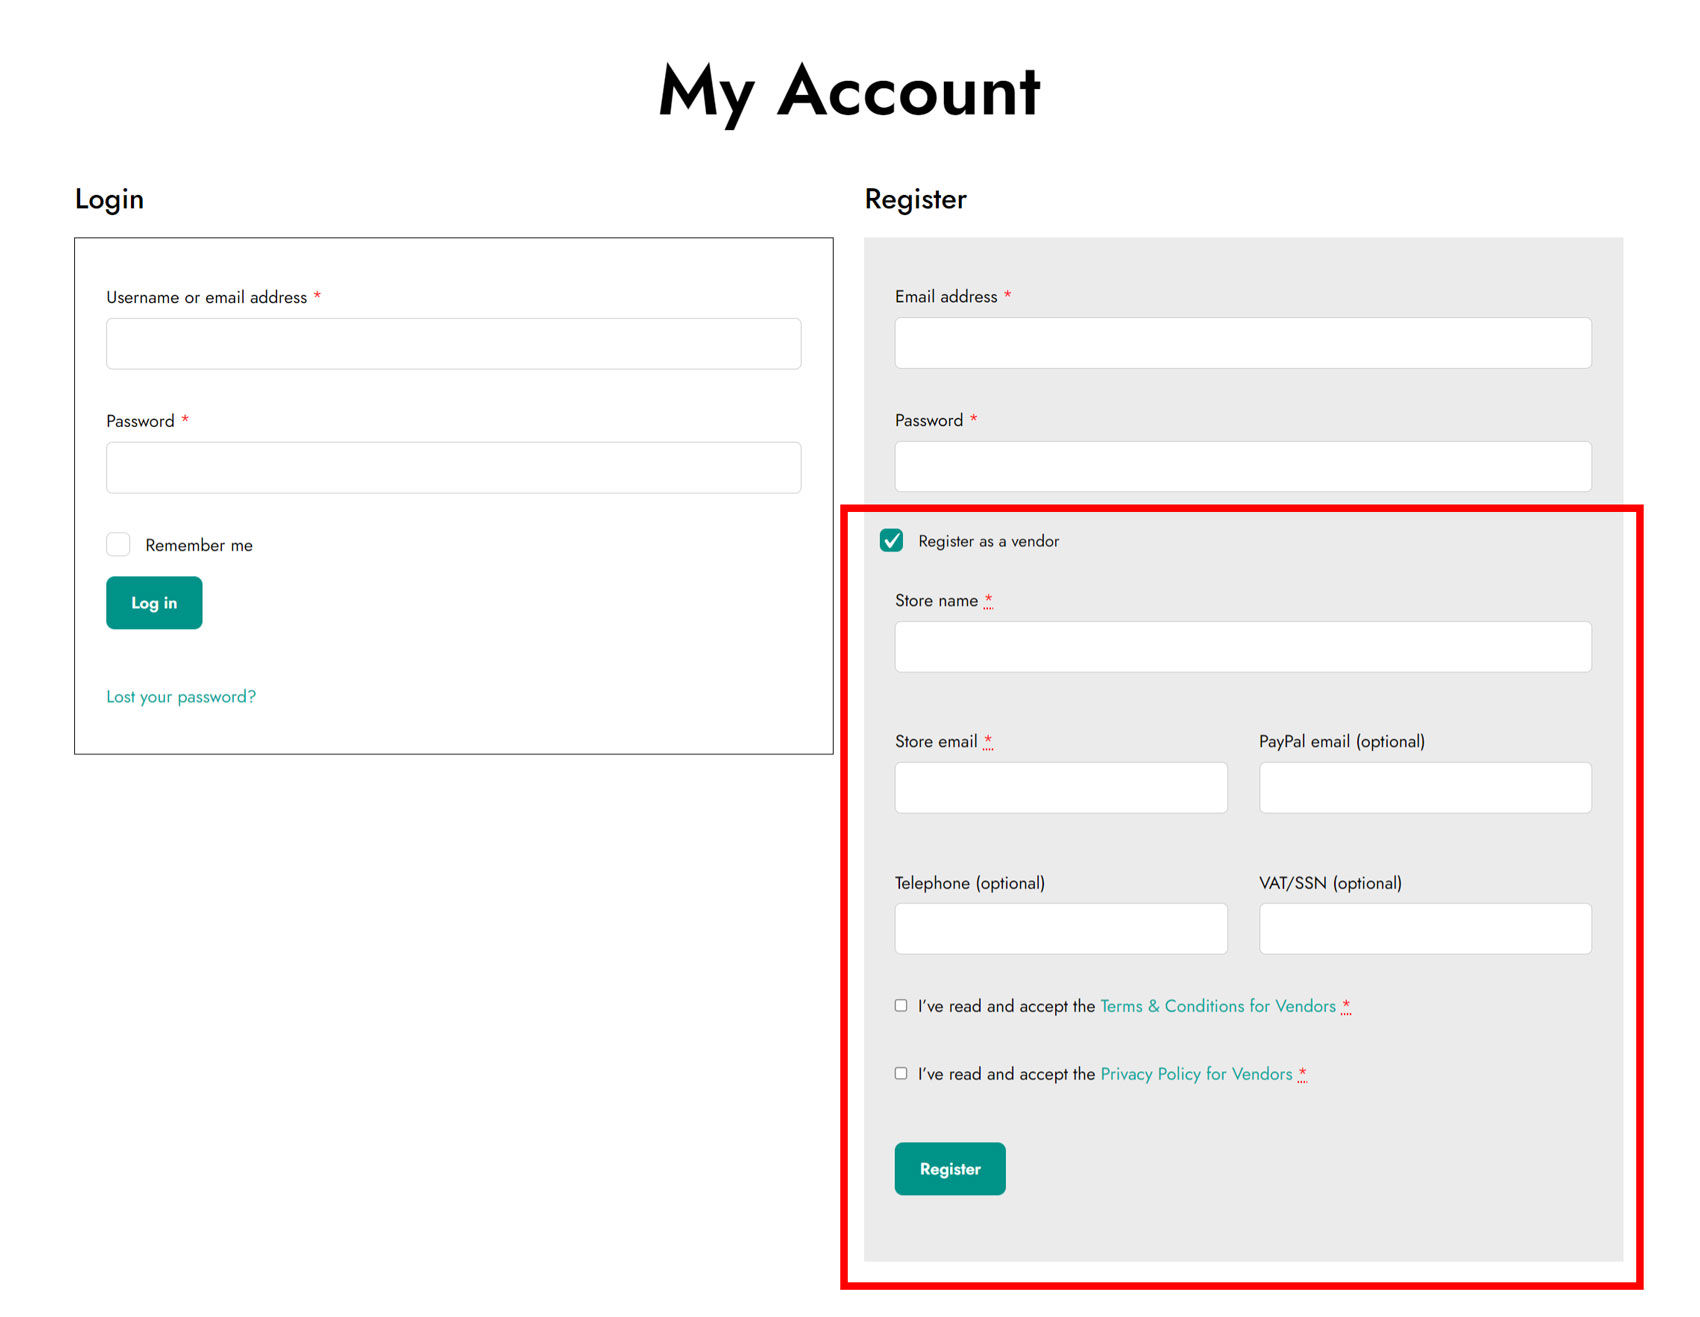
By clicking on the “Register as a vendor” checkbox, the vendor registration form will be displayed, as in the following screenshot.
Enable vendor accounts automatically: this option automatically enables vendors after registration. If you disable it, the administrator must enable each vendor account manually.
Add the Terms & Conditions to the registration form: enable to show he Terms & Conditions checkboxes in the registration form.
Add the Privacy Policy to the registration form: enable to show the Privacy Policy checkbox in the registration form.