From the Vendors section in the plugin settings, you will find multiple subsections to manage your vendors. The first one is the Vendors list, so a page where you can find all vendors registered and add new ones.
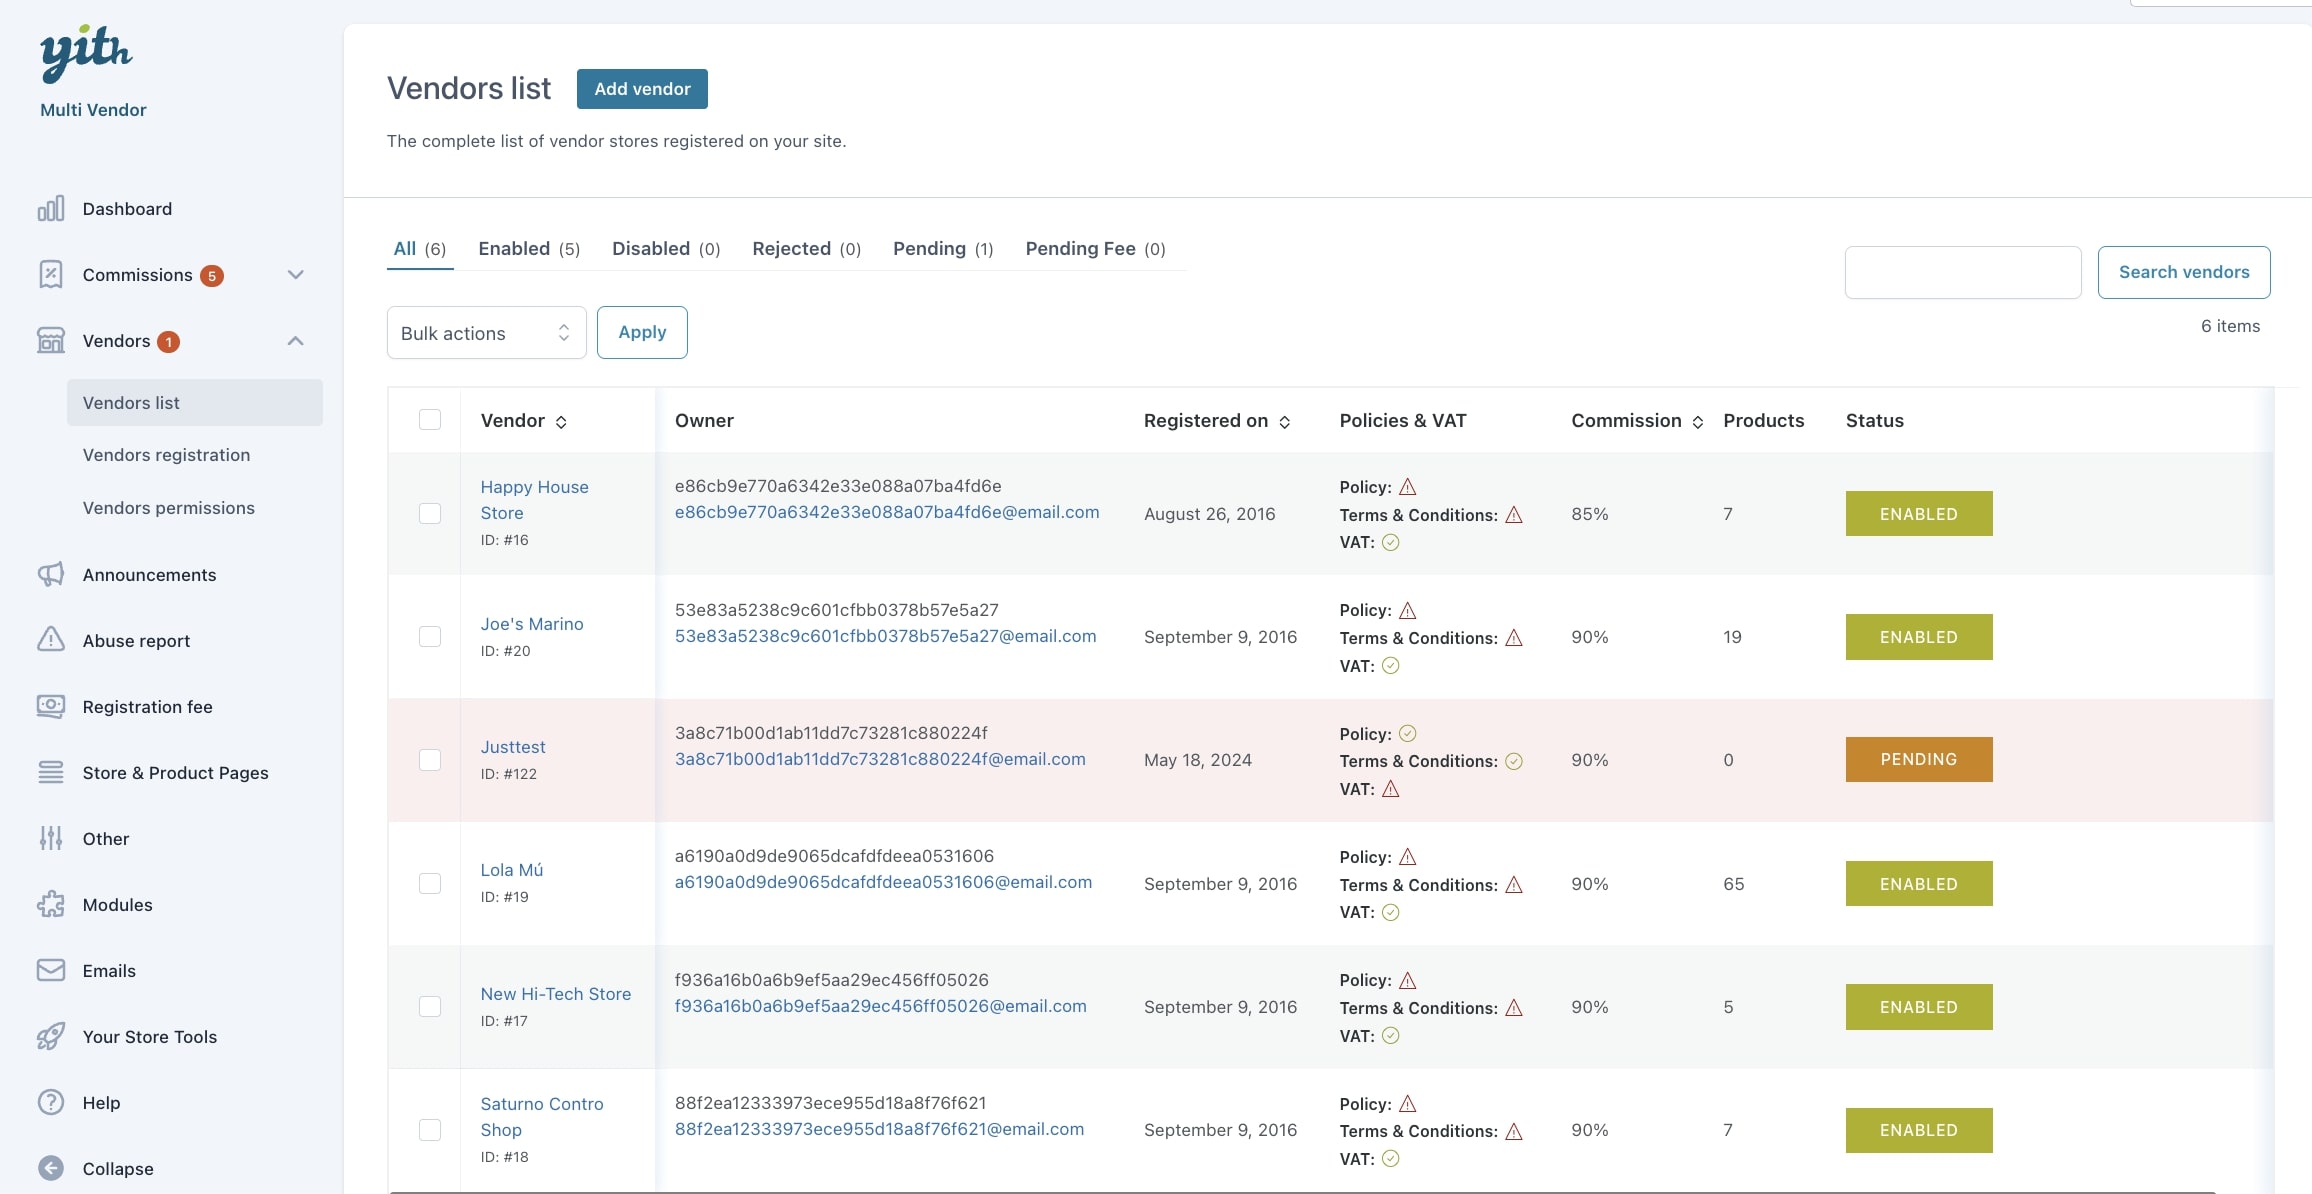
From this page you can also add a new vendor and edit the current ones.
Add a new vendor
The entire process of creating a vendor will be managed through a wizard in steps. Click on the + Add vendor button.
Step 1 – Account info

From this view, you can choose the user who is responsible for the store. You can either select an existing user or directly create a new user profile from this page.
Step 2 – Store info
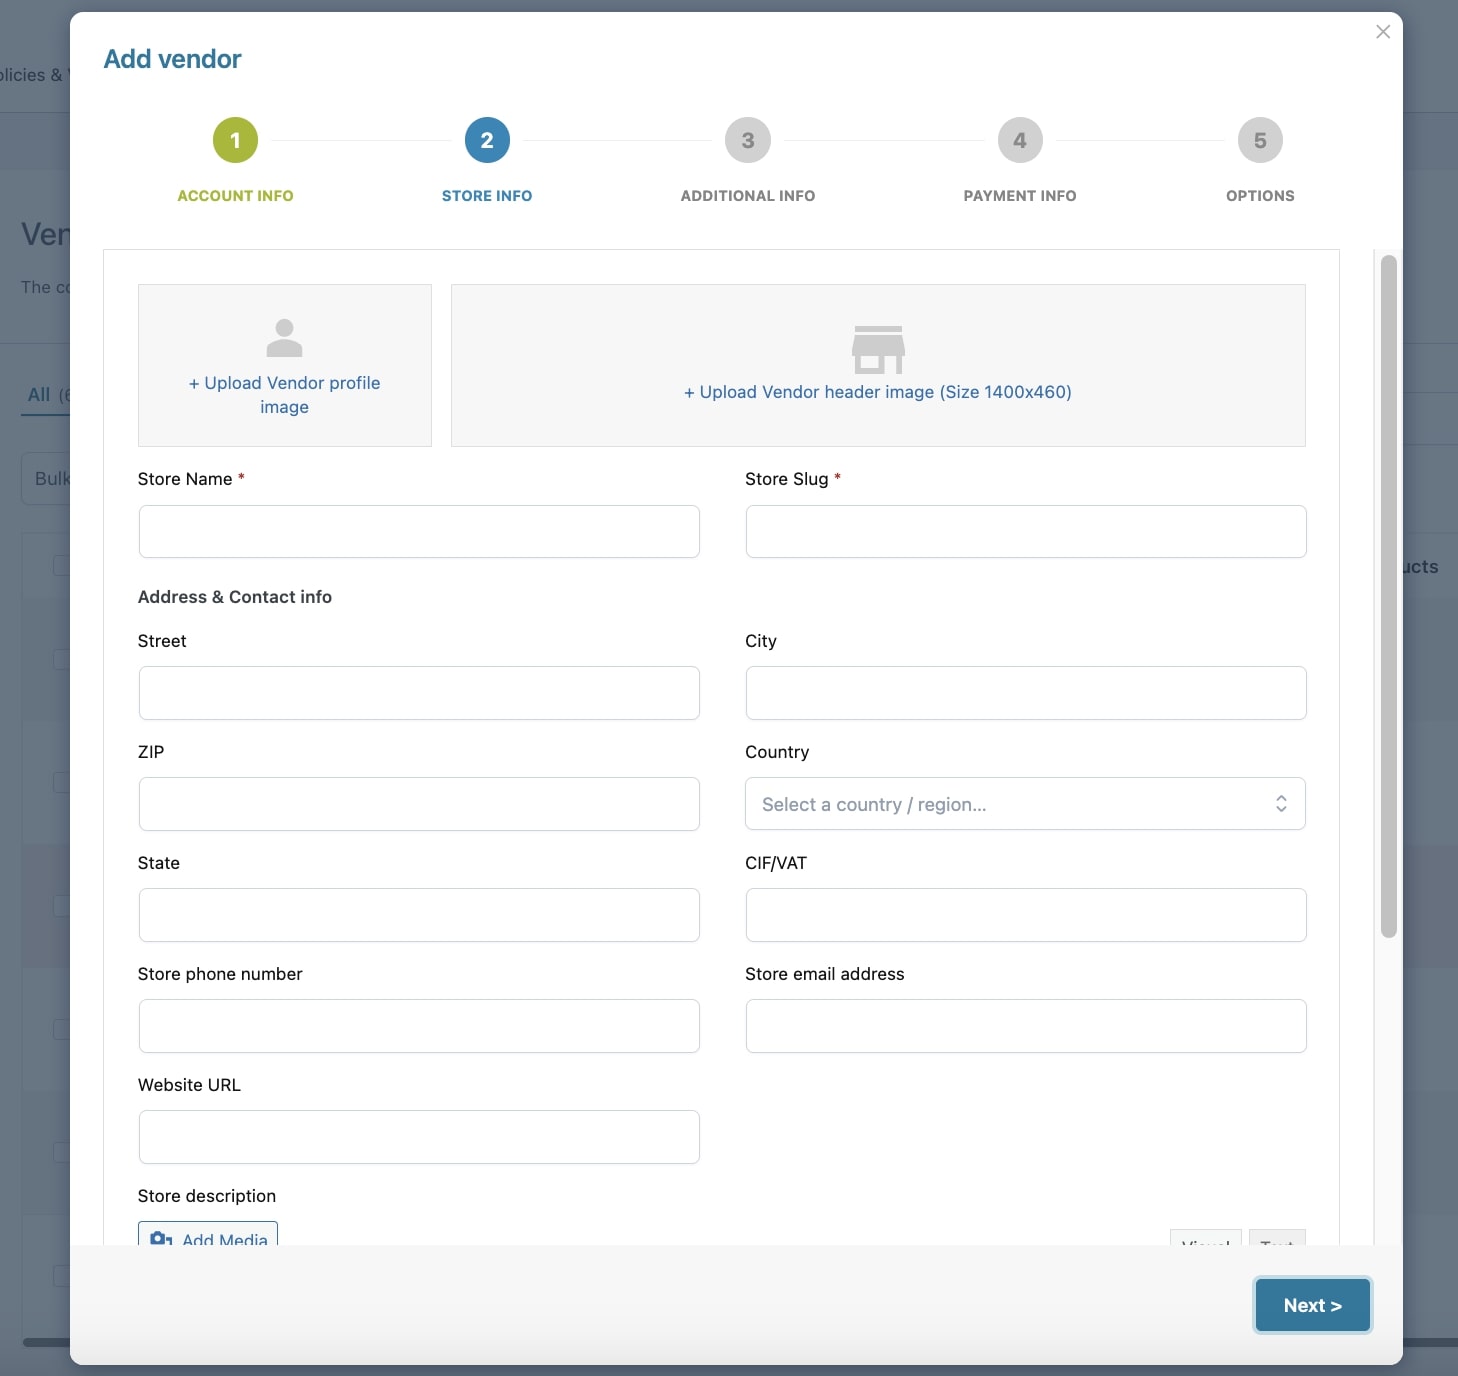
Here you can add all the vendor store info:
- vendor profile image / logo (in the following image, it’s the logo over the header image)
- vendor header image
- store name
- store slug
- address and contact info
- VAT number
- phone number
- store email address
- store description
- company legal notes
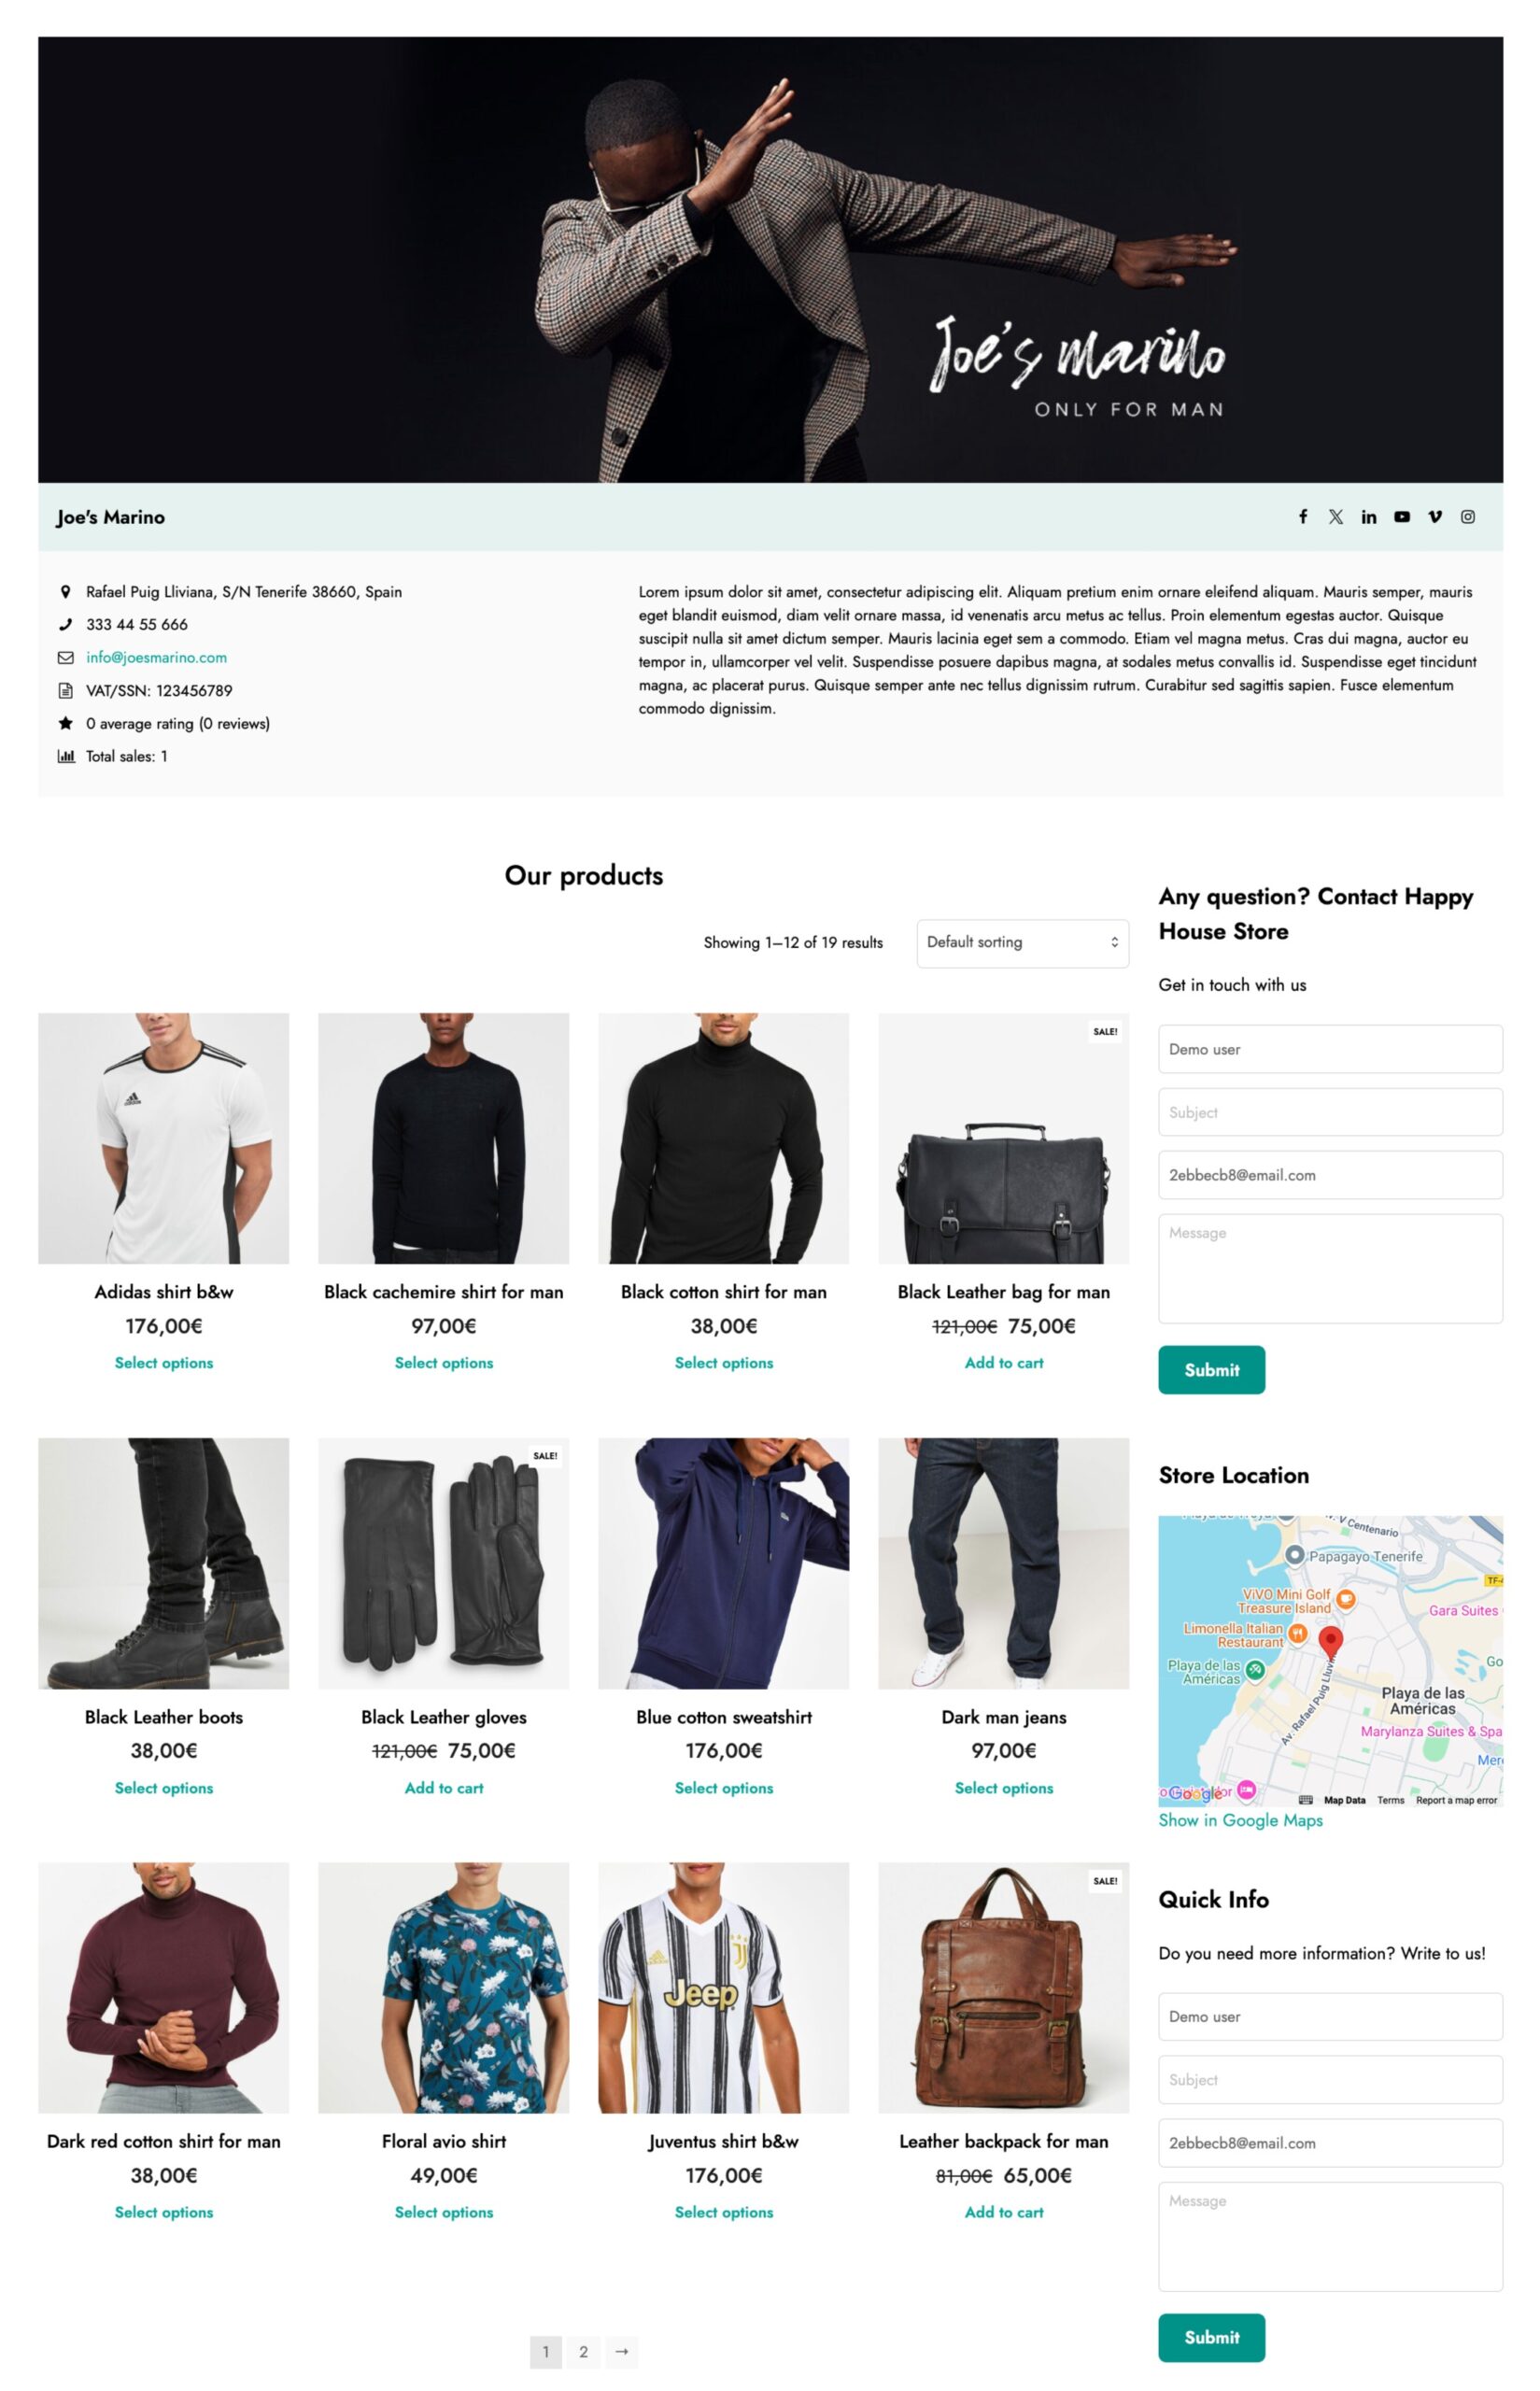
This is an example of how a vendor’s store page looks like:
Step 3 – Additional info

Here you can add the vendor’s social info:
- X
- YouTube
- Vimeo
- Flickr
- Behance
- Tripadvisor
Step 4 – Payment info

Here you can enter the vendor’s payment info that will be available in the vendor’s details.
- Account name
- IBAN
- SWIFT / BIC
- PayPal email
Step 5 – Options

Here you can override some of the general options related to this specific vendor.
Commission base: choose whether to use the default commission rate (that you can set up from the → Commissions settings page) or set a custom one for this vendor.
For example, you may want to override the default commission settings that is set to 80% and make sure that this vendor gets a 50%.
Status: select the status for the vendor. Available options are:
- Enabled
- Disabled
- Rejected
- Pending
- Pending fee (only if you have enabled the Vendor registration fee module)
Skip admin review: enable this option to allow this vendor to publish new products without the admin’s review. This option overrides the default one set on the → Vendors permissions page.
Allow vendor to set featured products: enable this option to allow this vendor to manage featured products and set some of their products as featured.
Edit a vendor’s account details
Once your vendor is created you can edit some of the details at any time by simply clicking on the pencil icon.
Additionally, you can also see a new Staff tab, where you see all the staff members added by the vendor to their shop. The admin cannot change these settings, but the vendor can do that from the Vendor staff module.
