View Product Page

General settings

Before creating your composite products, go to the tab General and enable the option Enable plugin features. This will allow you to proceed with the product configuration described on this page.

General settings

Through the option AJAX variation threshold, you can define the variation count threshold, after which WooCommerce will load the selected variations via Ajax to prevent the page from overloading.

Finally, if you don’t want to show the quantity of the composite product from the order table, enable the option Remove composite product quantity from order table.

Creating a composite product

In order to create a composite type of product, all you need to do is to create your product (just like you regularly would).

Now, moving down in the “Product Data” section, you can choose “Composite Product” from the drop down menu:

Create a composite product

At the moment of the selection of the composite type of product, two options are going to be added in the upper area of the tab: “Per-item Shipping” and “Per-item Pricing”:

Per-item shipping and pricing

The “”Per-item shipping” option allows you to calculate the shipping costs based on the shipping properties (weight and size) of each component, otherwise (by deselecting it) the “Shipping” tab is going to be displayed, where you can specify the details for the whole lot.

Similarly “Per-item Pricing” allows you to add the price of each single component chosen by the user to the listing price. By deselecting it, only the price of the composite product is going to be used.

Types of product layout

In order to configure the component of your composite products, you need to browse the “Components” tab in the Product Data selection.

Components section

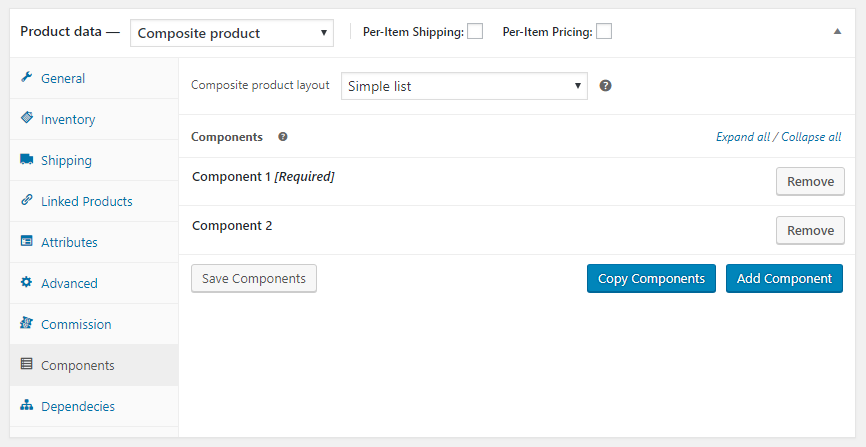
The first customization option is the layout choice selection for your composite product, you can choose from three layouts: “Simple List”, “Accordion List” and “Steps”.

This is how a “Simple list” layout will appear:

Simple List

This is how an “Accordion List” layout will appear:

Accordion List

This is how a “Steps” layout will appear:

Steps

Types of components selection

By clicking on “Add Component” you will be able to start adding the products that will compose your composite product. Here you will find the customization options:

How to add components

This plugin allows you to enter a name and description for each component. Now from “Selection Type” you can choose the range of products the customer will be able to pick from, displayed by:

  • Products – You can individually choose the products you wish to show customers in a specific component.
  • Categories – You can enter one or more categories in order to display all of the products of each one of them.
  • Tags – You can enter one or more tags that will help display each related product.

Now you can choose how to sort the selected products from:

Sort components
  • Default sorting (custom ordering + name
  • Popularity (sales)
  • Average rating
  • Sort by date
  • Sort by price

Sort by price example

Sort by price example

Component Selection Style

After entering the products related to the chosen component, you can choose how to display them in “Option Selection Style”, choosing from: “Dropdown”, “Product thumbnails” and “Radio Button”:

Selection type

Here is what a “Dropdown” style will look like:

Dropdown style

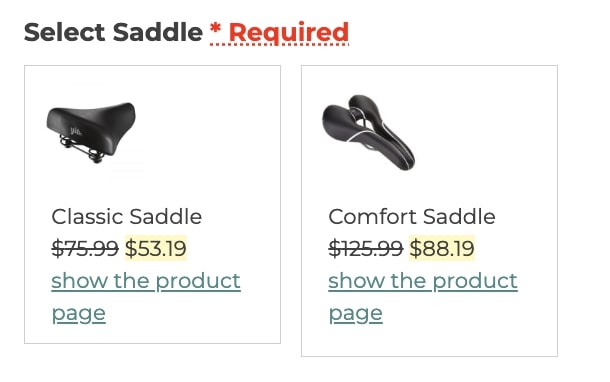
Here is what a “Product Thumbnails” style will look like:

Thumbnails style

Here is what a “Radio button” style will look like:

Radio button style

Quantity and discounts

This plugin allows you to set a minimum and maximum purchase quantity for each component, over and under which the purchase will not be allowed.

Set minimum and maximum quantity

It’s also possible to set up a percentage discount for each component (this option only works if “Per-item pricing” is active):

Discount on component - example

By activating the “Apply discount to sale price” option, the discount is going to be applied to the discounted price, not the listing price.

Required and Exclusive Component

The final two options for the components of a composite product are:

Exclusive component
  • Required – Makes the selection of a specific component mandatory in order to be able to purchase it.
  • Required componentsExclusive selection – The product selected in a specific component cannot be selected in other components of the same product.

Creating a dependency

This plugin allows you to create a net of dependencies in order to push the customer towards specific purchases in specific situations.

From the Dependencies tab, clicking on “Add dependence” you can create your first dependence:

How to create a dependency

Once created, we can assign it a name and a description and specify how the components are going to interact with each other:

Dependency configuration

You will be able to choose between two actions for each component: “IF” means that specific component status will be the cause of the following actions, while “DO” means that the specified action will be the resulting effect.

So, as you can see from the screen, if you want to set a specific choice made on the first component to affect the choice of the last one without affecting the middle component, you will need to insert the IF variable in the first one, DO (nothing) in the second one and DO (Force selection to) in the third one.

The following statuses can execute an IF:

  • No action – The dependency is inactive.
  • No product is selected – In case no product is selected, the dependency is active.
  • Any product is selected – In case any product is selected for a specific component, the dependency is active.
  • Selection is – If one of the following products is selected (which you will specify in the additional displayed field), then the dependency is active.
  • Selection is not – If none of the following products is selected (which you will specify in the additional displayed field), then the dependency is active.

Many actions can be triggered by these effects, specifically, those related to DO:

  • Nothing – Do nothing.
  • Force selection to – Force selection of a specific product towards a specific component.
  • Exclude – Forbids the choice of a specific product for a certain component.
  • Hide component – Hides a specific component.

Let’s take another look at the example screenshot:

Force selection option

In this example, once 3 components are present, it’s necessary for the selection of a specific product for the first one to bring the following consequences:

  • Nothing for the second component.
  • Forcing the selection of a specific product for the third component.

So, an IF filter was created in the first component, bearing the “Selection is” status and its related product, a DO filter bearing the action “Nothing” for the second component and a DO filter with the “Force Selection” action for the third one, specifying the chosen product.

Copy components

If you want to apply the components of a product to another one, without having to configure them again from scratch, you can clone the components thanks to the in-built Copy components feature.

In the product settings, go to Components tab and click the button Copy components to start the cloning process.

Copy components

This will open a popup window, where you can select either all the components or just some of them:

Copy components

You will be able to apply the components to one or more composite products of your shop.

Please, note that you have to set up the destination products as composite products before being able to clone the component settings.

Destination products

And choose whether to simply add the components to the product or to replace any existing components in the destination products.

Select method

YITH WooCommerce Multi Vendor

With YITH Multi Vendor you can turn your e-commerce store into a marketplace (a multi-vendor platform) like Amazon or Etsy. Turn your e-commerce store into a marketplace (a multi-vendor platform) and earn commissions on orders generated by your vendors.

Just make sure you install and activate both plugins and the “Composite product” type will also be available to your vendors.

composite mv settings

For more information on how to add a composite product, check the full documentation here.