BH Subscription plugin supports several automatic payment methods that allow you to automatically charge the customer when a recurring payment is due.
Important: the payment method selected at checkout cannot be changed later on. To do so, the customer will have to stop the current subscription and start a new one.
Supported gateways:
- PayPal Payments (included in the BH eCommerce plan)
- Stripe Payments (included in the BH eCommerce plan)
- YITH WooCommerce Account Funds
- WooCommerce Amazon Pay
- WooCommerce Payments
- RedSys gateway
If you don’t use any of the supported gateways, your customers will have to manually pay for the subscription renewal. Read more about manual renewal payments →
PayPal Payments by Bluehost
Bluehost PayPal Payments for WooCommerce plugin will give you the functionality to receive PayPal and Credit Card payments on your store. This adds a smooth checkout for the customer and can easily give a big boost in sales.
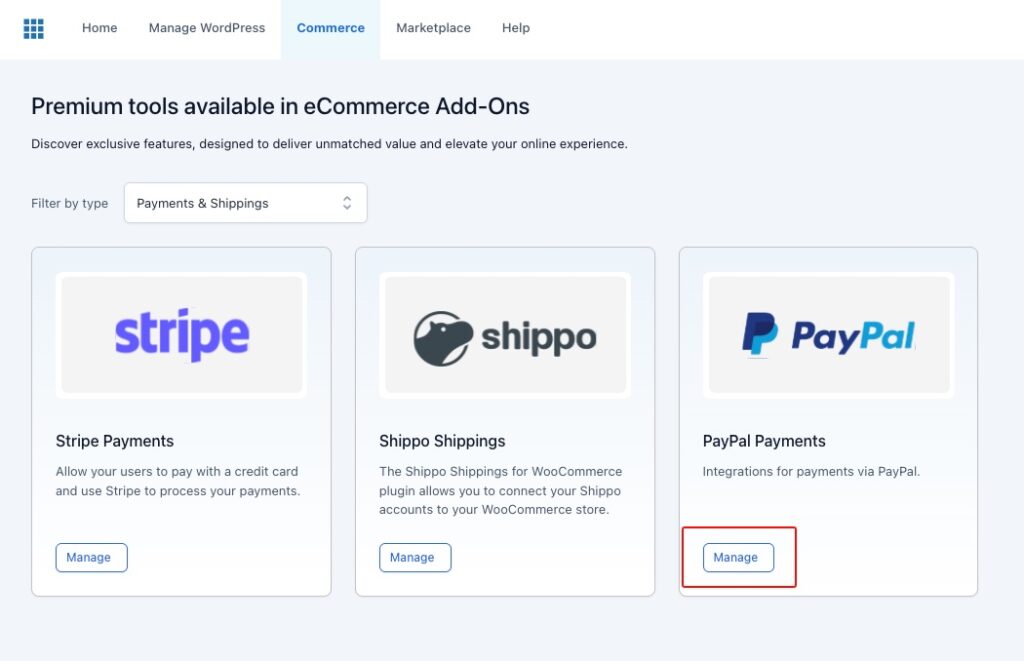
Go to Bluehost > Commerce > PayPal Payments and click on the “Manage” button to open the plugin panel.
1. Connect PayPal account
In the Settings tab, enable the Bluehost PayPal Payments plugin (1). You can use this toggle to disable the gateway at anytime if needed.
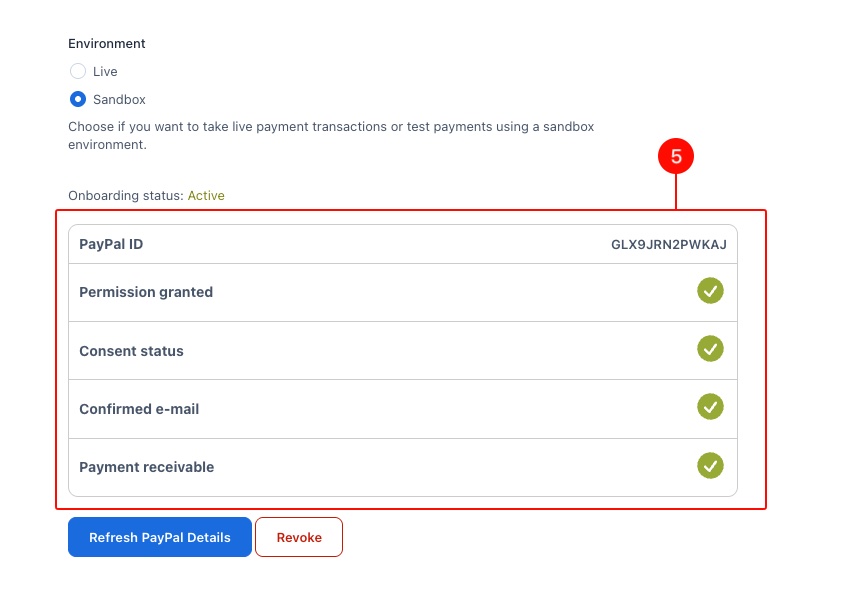
Now choose if you want to use the plugin in a Live or Sandbox environment (2). We always recommend starting with Sandbox to set it up and test the entire system, and switch to Live only when everything works as expected and start collecting real payments.
Then, click on the “Connect with PayPal” button (3).

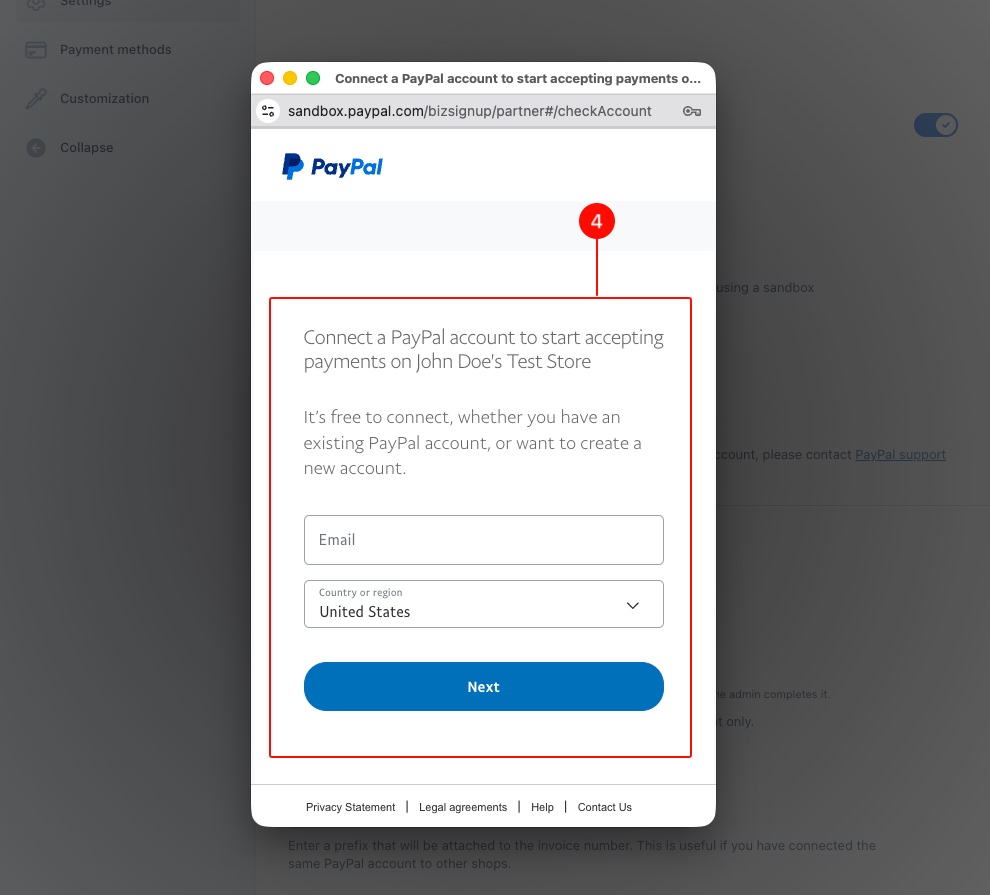
This will open a new window (4) where you can enter your credentials and connect to your PayPal account.
Alternatively, you can create a PayPal business account from this screen as well.
When the account is successfully connected, you will see this section (5), and you will be able to go on with the plugin configuration.
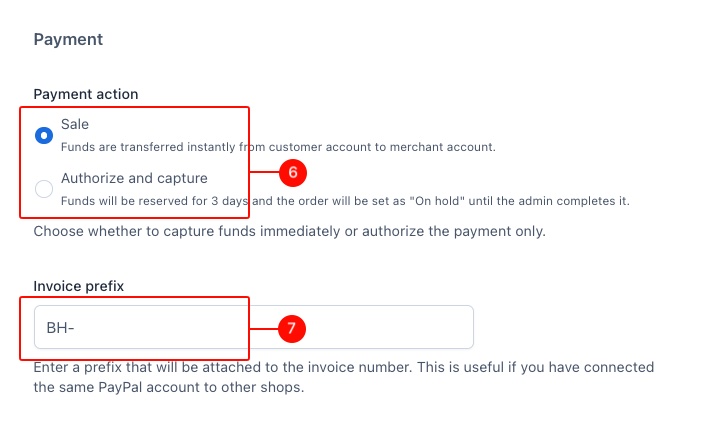
Select the Payment action (6): you can either select Sale (this means that funds are transferred directly from the customer account to the merchant account) or Authorize and Capture (funds are reserved for three days, the order is set to on hold until it is completed by the admin).
Set the prefix for your invoices (7). If you have a PayPal account connected to multiple shops, this prefix will help you immediately spot which shop the payment is associated to.
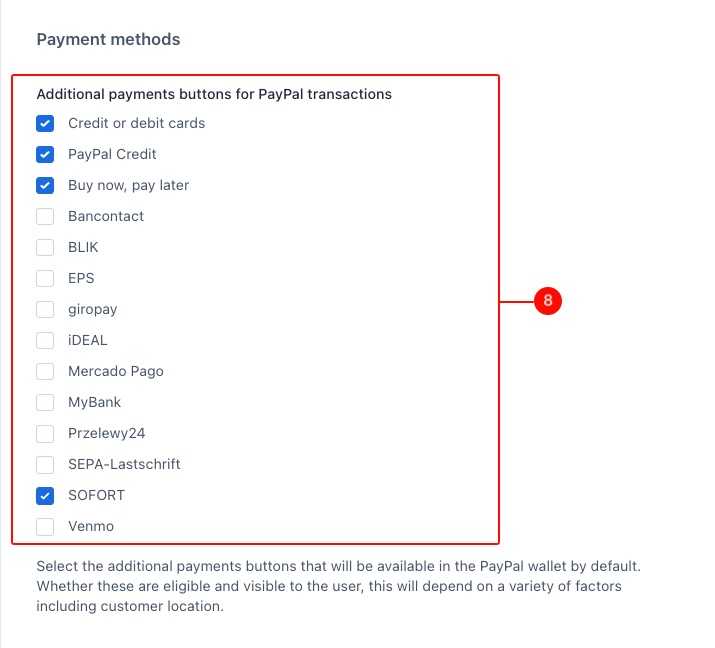
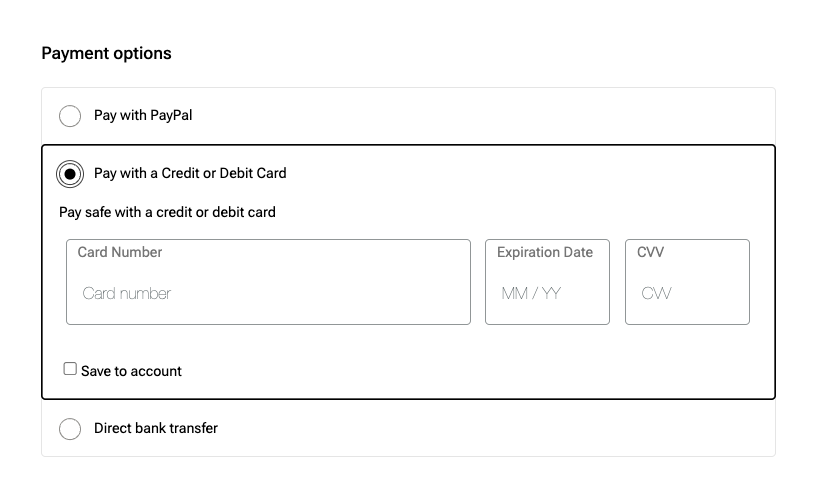
2. Payment methods and custom credit card
Now go to the Payment methods tab. Here you can first select the additional payment methods offered by PayPal checkout (8).
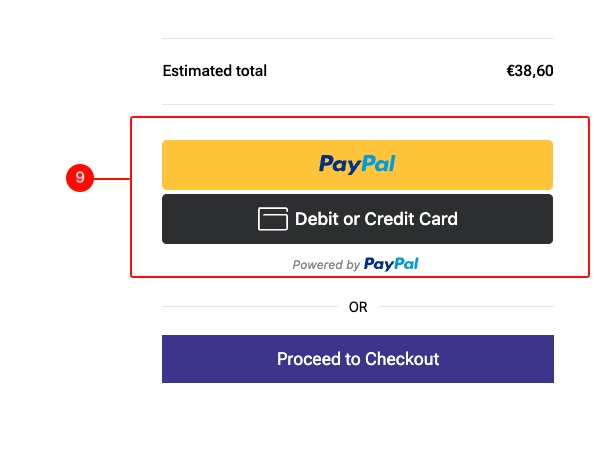
If you enable multiple methods, more buttons will be displayed below the default PayPal button (9) at checkout.
Credit Card Payment Options
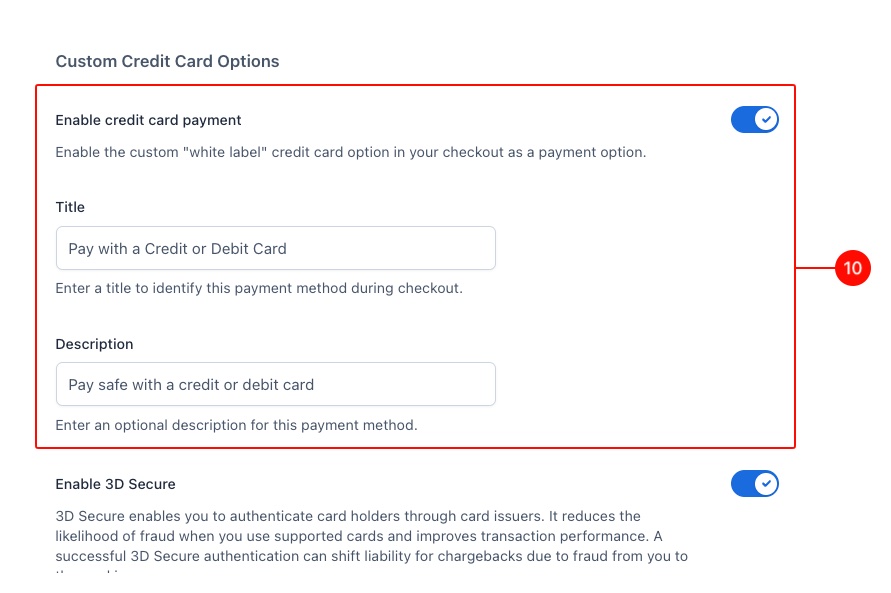
From the Custom Credit Card Options, you can set up a credit card payment option that is automatically displayed on the Checkout page as a separate payment method and does not show any connection to PayPal.
Scroll down to the option to enable it (10) and enter title and description as yo uwant them to appear on the Checkout page.
This is the result:
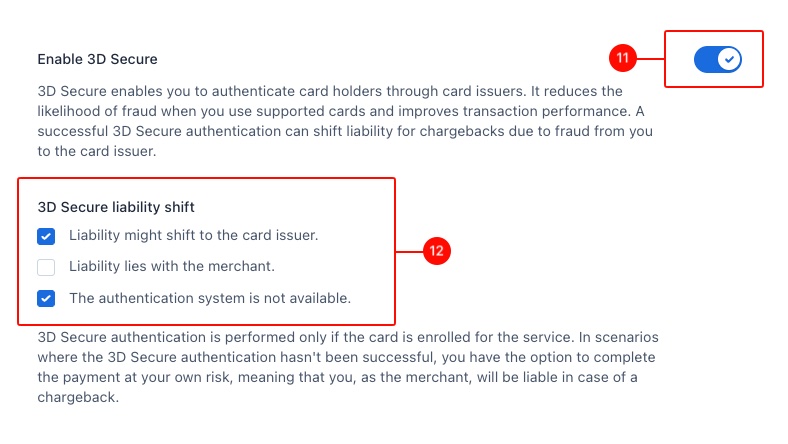
We also recommend enabling the 3D Secure option (11), and choose how to manage liability shift (12): the gateway allows you to shift the liability to the card issuer or keep it with you (merchant) if the 3D Secure authentication succeeds, or leave you (merchant) the possibility to complete the payment at your own risk if the 3D Secure authentication fails.
3. Google Pay & Apple Pay
Finally, you can optionally enable also Google Pay and Apple Pay to ensure a smoother payment experience for your customers.
Just enable the Google Pay option (13) and everything will work automatically: if your users have a payment method saved in their Google wallet, they will automatically see the Google Pay option at cart/checkout.

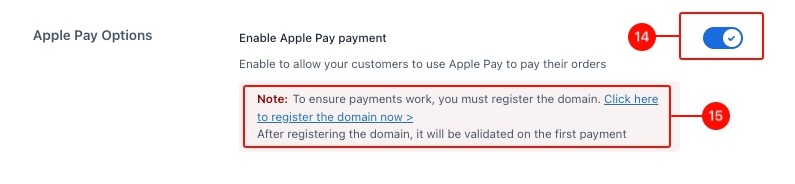
The same applies to Apple Pay (14). However, you must first register the domain on the connected PayPal account through the link available in the plugin panel (15) and follow PayPal instruction. Then the domain will be validated on the first payment.
This is how these payment methods appear on the Cart page:

4. Customization
From the Customization tab you can adjust the appearance of the PayPal button and select which pages payment buttons should appear on.
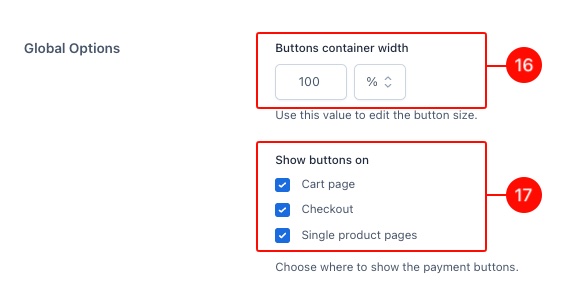
In the Global options section, you can define options that apply to all payment buttons.
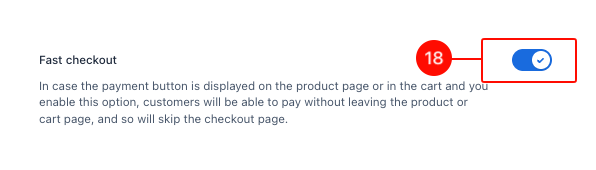
Use the Buttons container width in case you need to resize the buttons (16). Then, choose the pages where the buttons should appear, you show them in the Cart, Checkout and Single product pages (17).
Allow the Fast Checkout if you sell digital goods (18). If a PayPal button is added on the Cart page and/or on the Single product page, this feature will enable customers to pay for the product directly from those pages, bypassing the regular Checkout page.
Then, customize the single buttons.
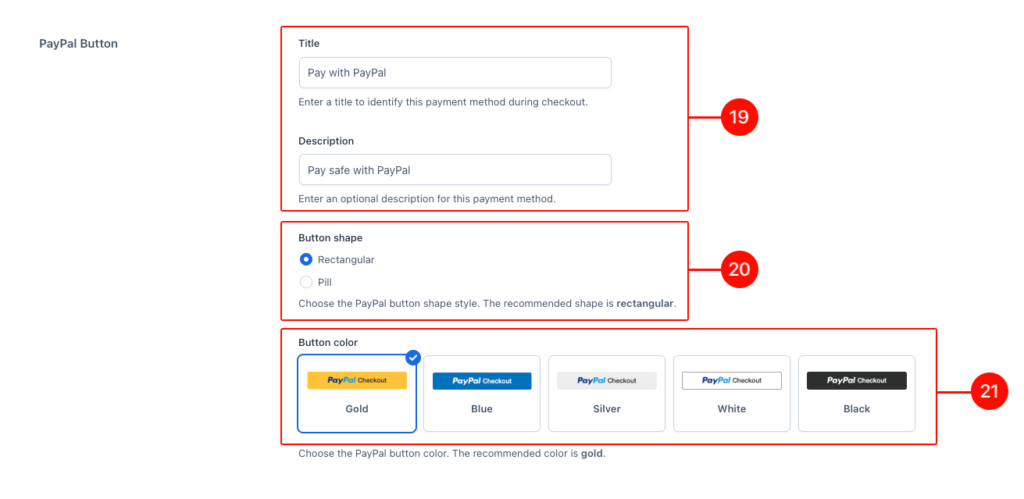
Start with the PayPal button: set title and description (19), and choose the shape (20) and color (21) for it.
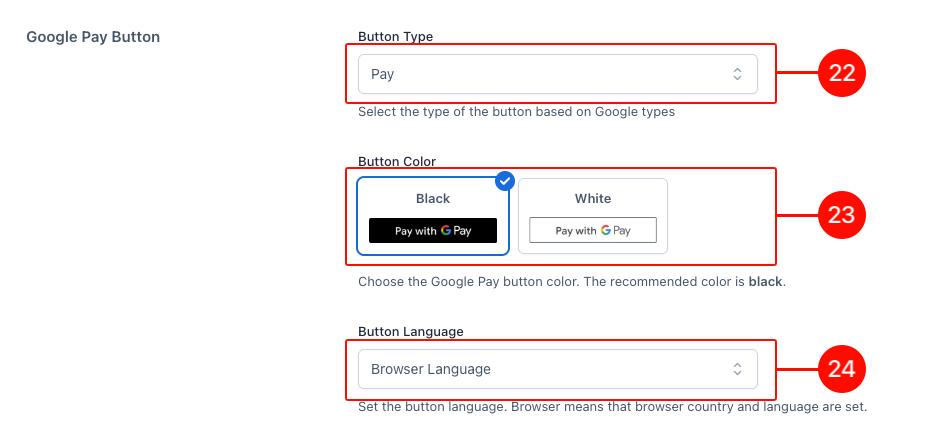
If enabled, customize the Google Pay button. Choose the button type (for example, you can choose to show “Book”, “Donate” or “Subscribe”, just to mention a few) (22), the style (23), and whether the button language (24) should be the browser language or a specific one of your choice.
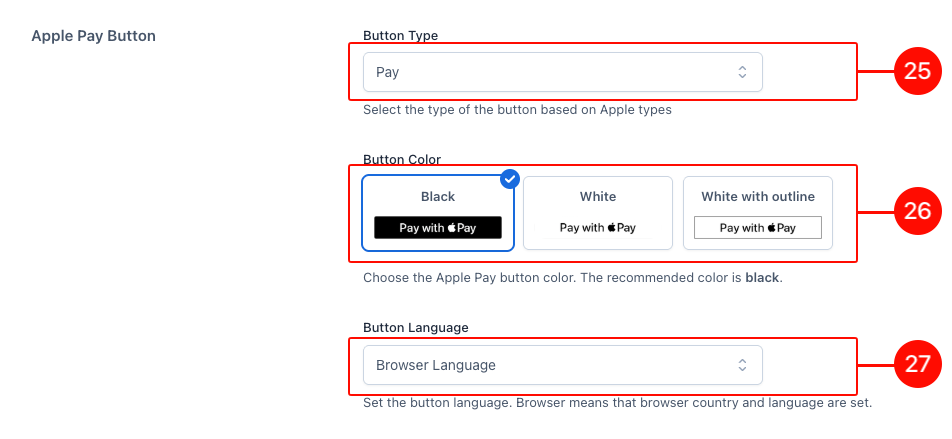
If enabled, customize the Apple Pay button. Choose the button type (for example, you can choose to show “Book”, “Donate” or “Subscribe”) (25), the style (26), and whether the button language (27) should be the browser language or a specific one of your choice.
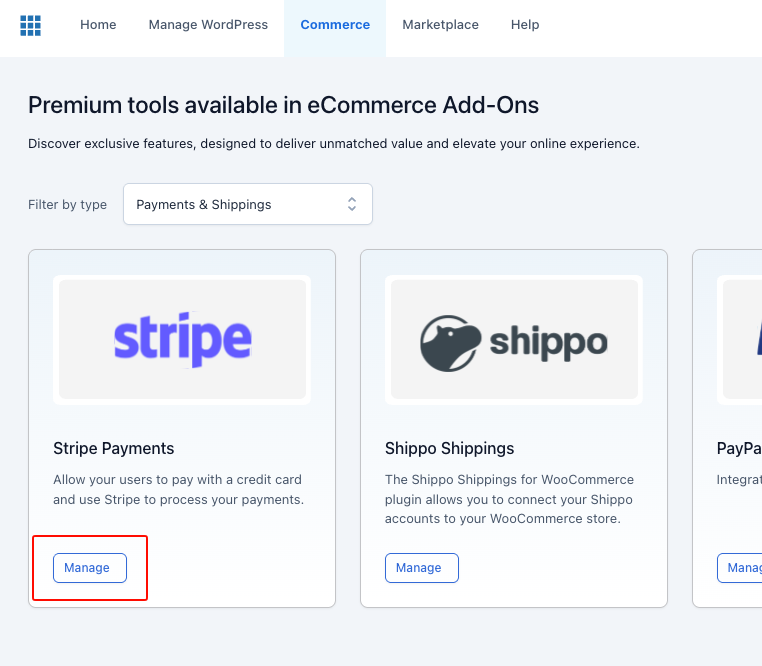
Stripe Payments by Bluehost
Stripe Payments plugin allows you to collect payments from your customers through Stripe, and guarantee this way security and reliability for online card payments.
Go to Bluehost > Commerce > Stripe Payments and click on the “Manage” button to open the plugin panel.
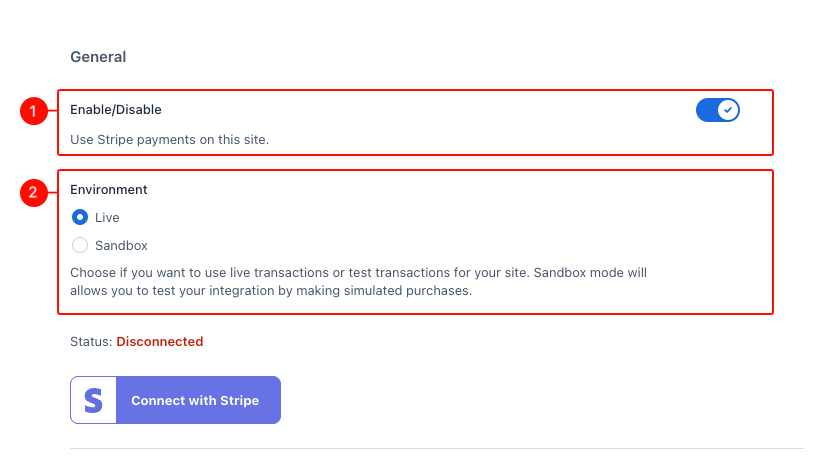
Connect the gateway
1. Once, you’re in the plugin settings, you’ll see the Enable/Disable option automatically enabled (1): leave it as is. You can use this toggle to disable the gateway at any time in the future.
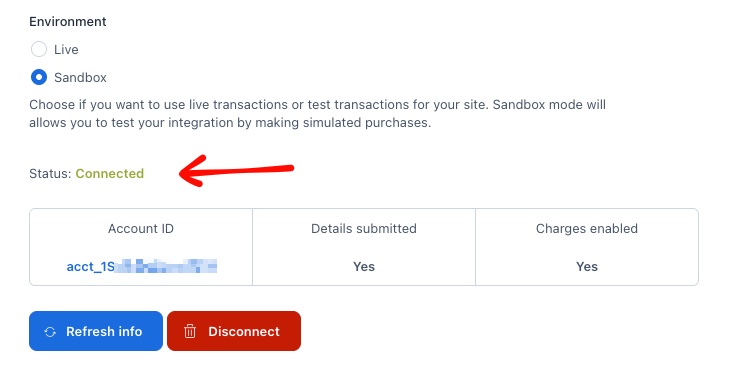
2. Then select the environment (2) you want to use: we recommend testing it first on a Sandbox environment, and only if everything works as expected, switch to Live and take live payments.
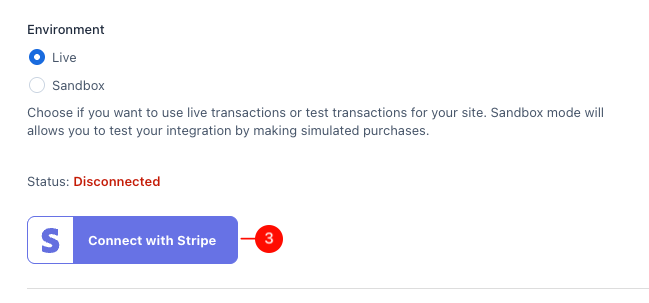
3. Now it’s time to connect your Stripe account. Click on the “Connect Stripe” button (3).
If you already have a Stripe account, you can simply enter your email address and password. If not, you can create an account directly from this screen.
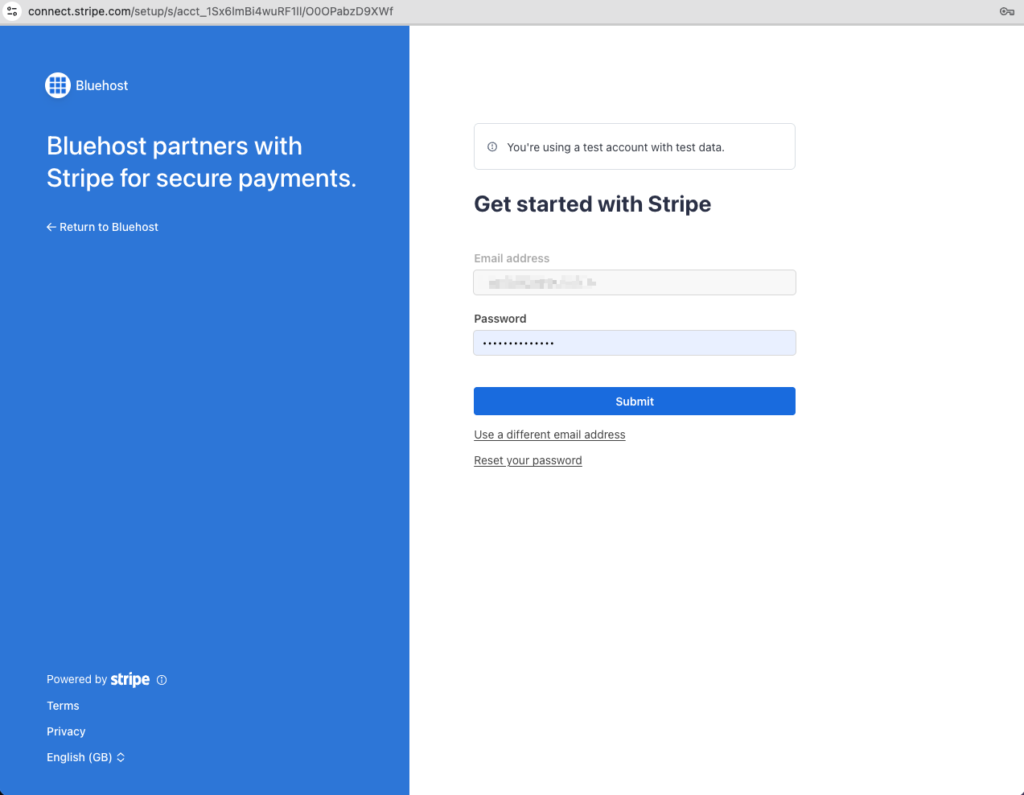
You’ll be asked to set up a two-step authentication to access your Stripe account, and then complete a guided step-by-step account configuration, including the backup code, business and personal details, and linked bank account.
Once completed, your account will be connected and you will be ready to collect payments.
4. Now you can go on with the the last option and choose the Capture method (4).
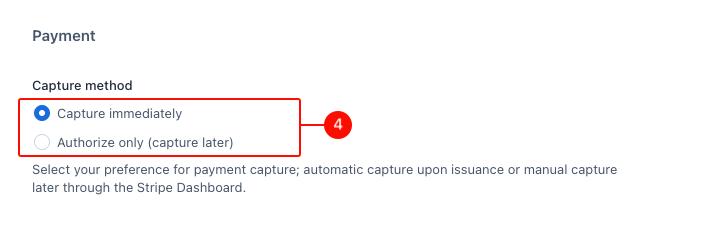
- Choose Capture immediately if you want your customers to be immediately charged during the checkout.
- Choose Authorize only (capture later) if you want that your customers can enter their payment details in the checkout and charge them at a later stage from Stripe dashboard. This does not apply to renewal orders created by BH Subscriptions, as these will be automatically charged on the due date.
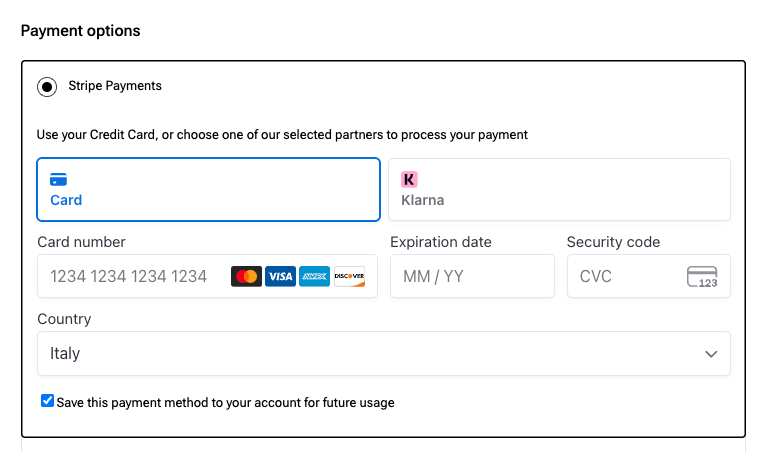
5. Now you’re ready to collect payments. Let’s try it out at checkout, where you will see the Stripe Payments box among the selectable payment methods.
Your customers will be able to complete the payment form and pay.