The plugin includes 4 shortcodes that you can use to print your vendors’ info anywhere on your site. Three of them also have an equivalent block with the same settings. Let’s see them all in detail.
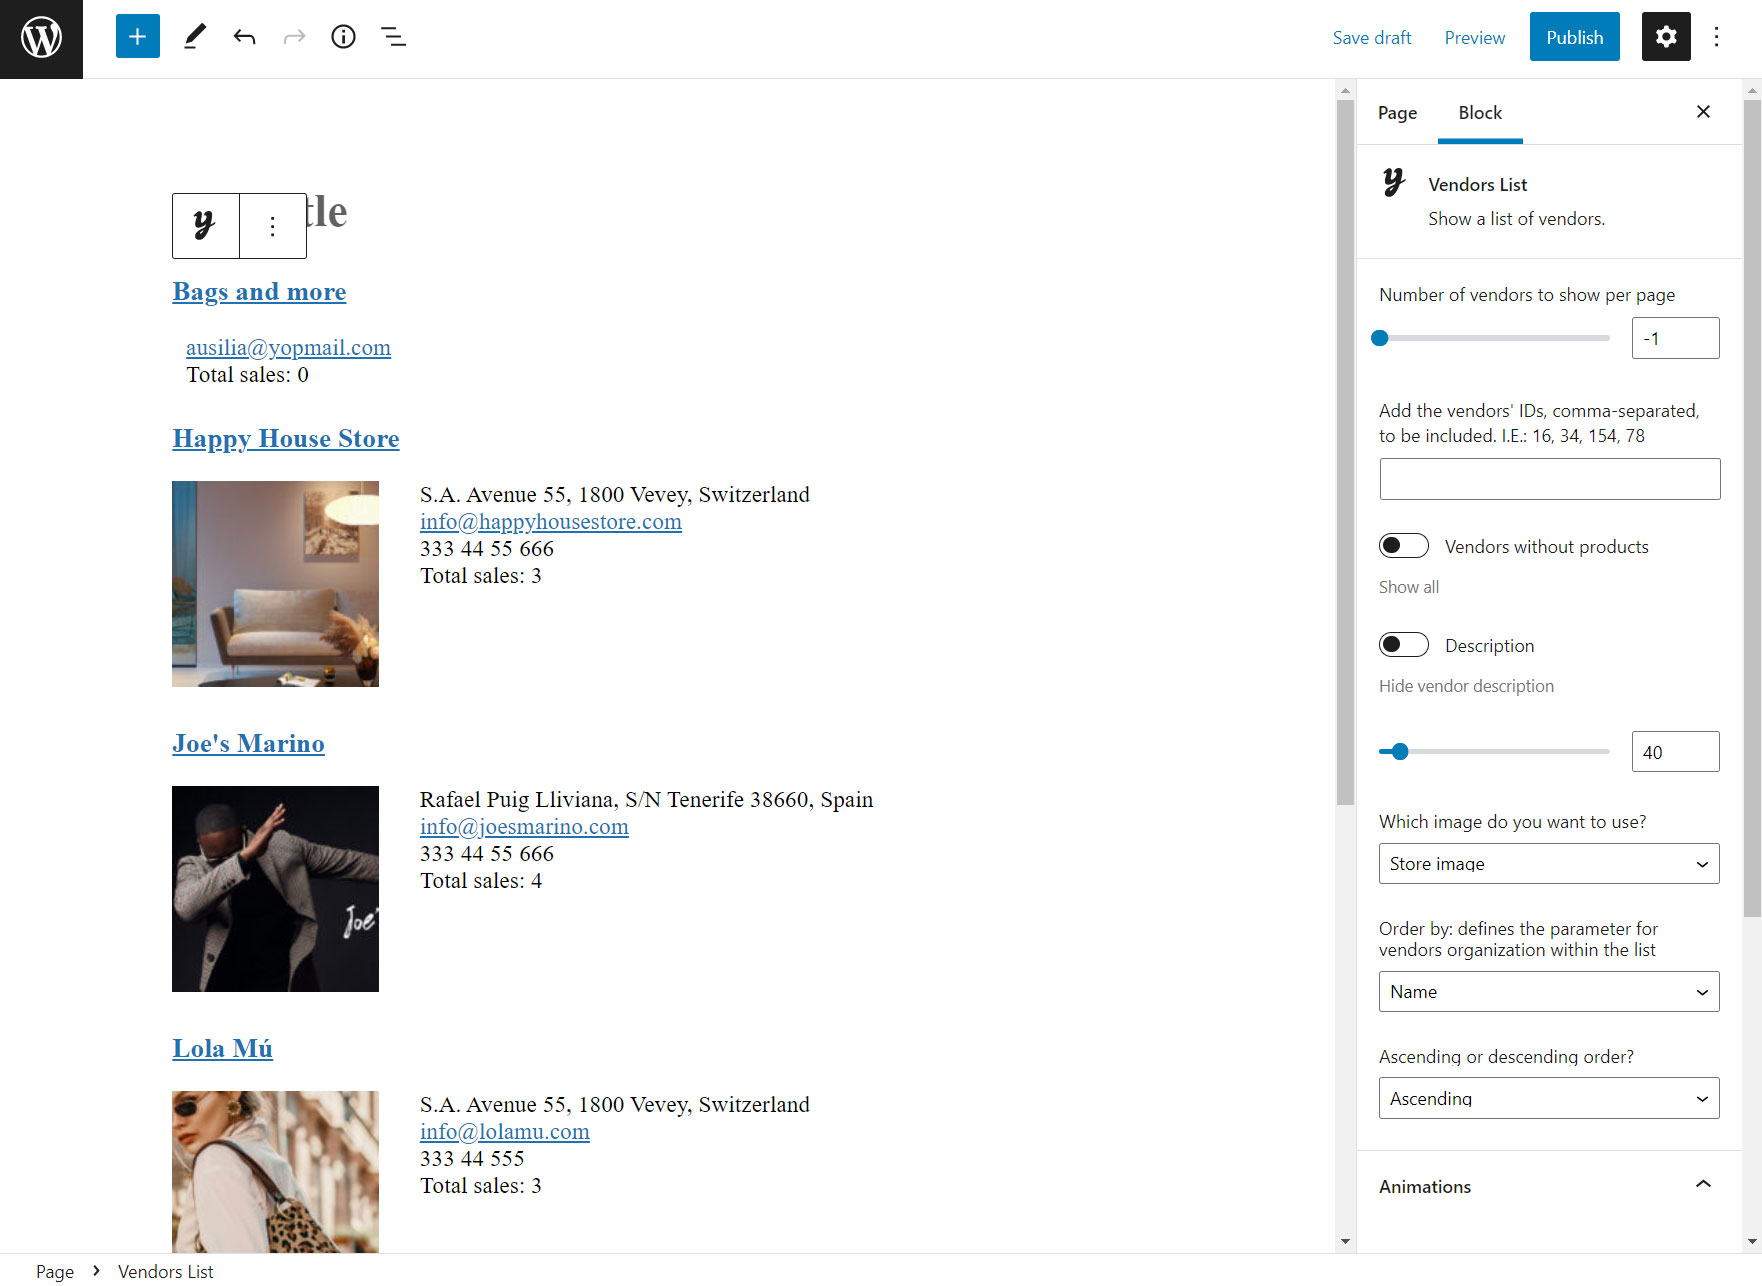
Add this shortcode into your page to show the complete list of your vendors in the pages of your site. The shortcode supports the following attributes:
per_page: it lets you paginate the list if you add a maximum number of vendors per page. If you want to show them all, just type the default value -1.
hide_no_products_vendor: hide the vendors without products (default: false).
show_description: add the vendor description for each vendor (default: false).
description_lenght: number of description characters to display (if enabled) (Default: 40).
vendor_image: [store/gravatar] allows selecting the image type to combine to vendor’s profile. You can choose between the default one (the store picture) or the gravatar connected to vendor’s email address (gravatar). (Default: store).
order_by: [name/slug/description] defines the parameter for vendors organization within the list. Note: for this arg, the allowed values are ‘name’, ‘slug’, ‘term_group’, ‘term_id’, ‘id’, ‘description’. (Default: name).
order: [asc/desc] ascending or descending order. Allowed value: ASC or DSC (Default: ASC).
include: it allows show only selected vendors, by simply typing their vendor ID. Separate vendors with commas if you want to show more than one.
This shortcode has an equivalent block with the same settings.
Vendors list block
2. Become a vendor
[yith_wcmv_become_a_vendor]
This shortcode allows adding the vendor registration form anywhere on your site. This form will automatically get the fields that you’ve set up in the → Vendors registration settings.
Make sure you add this shortcode onto the page that you’ve selected as Vendor registration page in the → Vendor registration settings.
If you prefer your users to register as vendors when they register as users, please, make sure you enable the Vendor registration on My Account page option, again from the → Vendor registration settings.
This shortcode has an equivalent block.
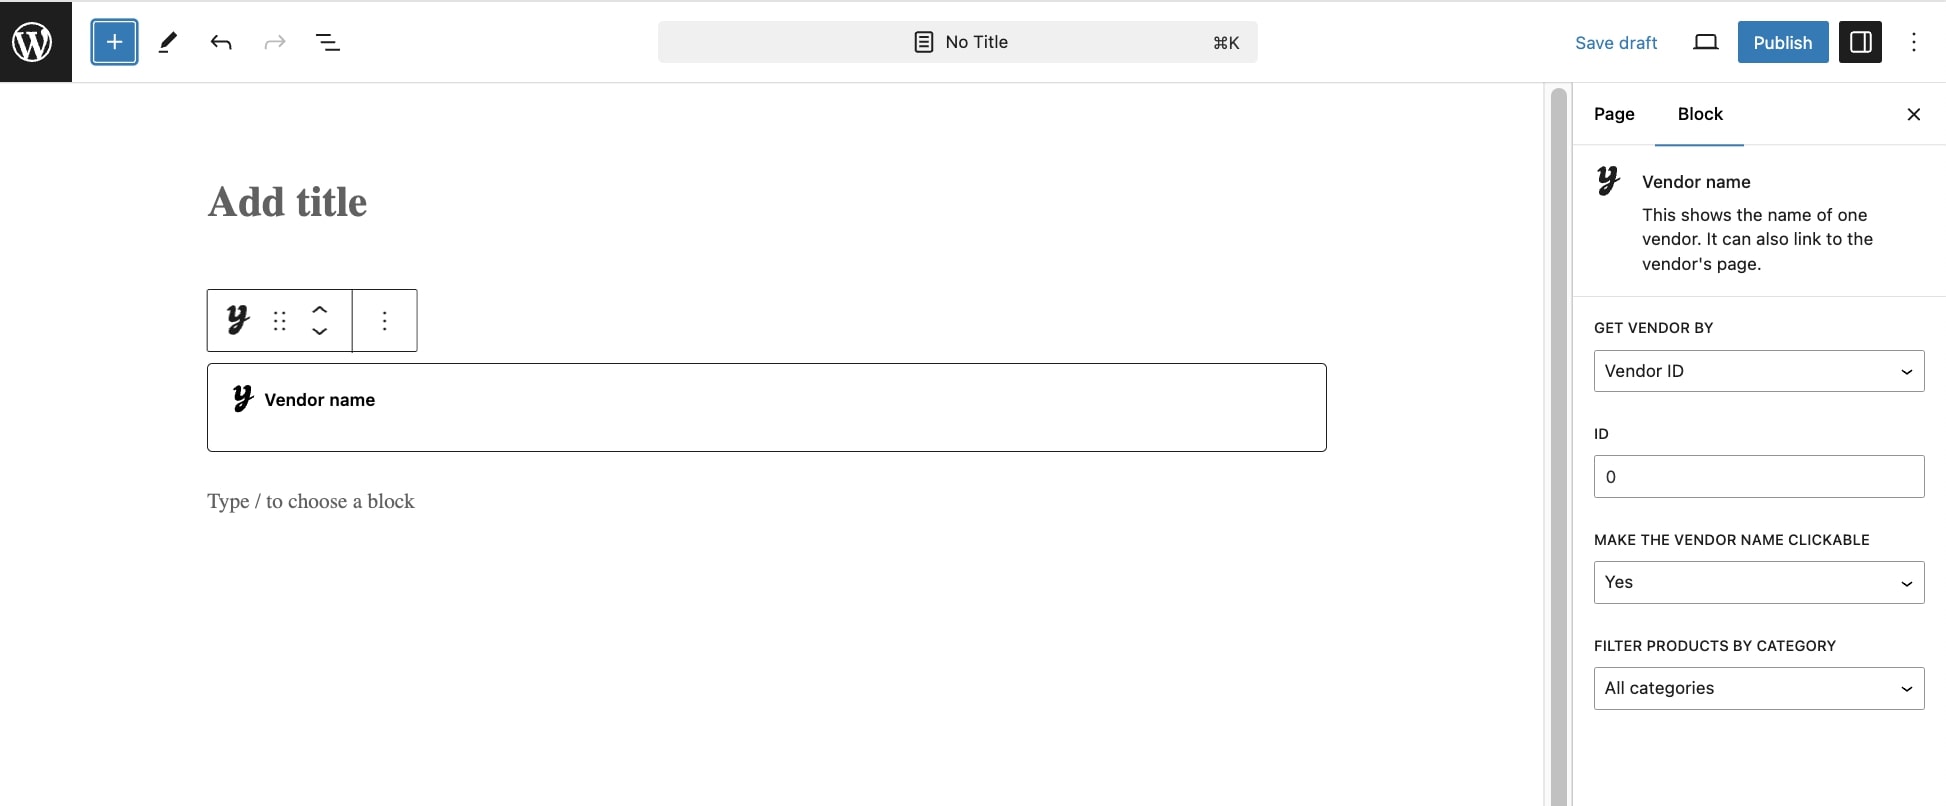
3. Vendor name
[yith_wcmv_vendor_name]
With this shortcode you can print the vendor’s name and make it either available as simple text or as a link.
This shortocde accepts 3 attributes:
show_by: you can show the vendor name for a product, a vendor or a user (default: vendor)
value: the vendor ID, the product ID or the user ID (default: 0)
type: you can show a clickable vendor name or not. Use link to make the vendor name clickable, otherwise text (default: link).
This shortcode has an equivalent block with the same settings.
4. Vendor store header
[yith_wcmv_vendor_store_header]
This block allows printing all vendor information, which can be useful if you need to customize the vendor page template.
5. Products by vendor ID
[yith_wcmv_vendor_products vendor_id=""]
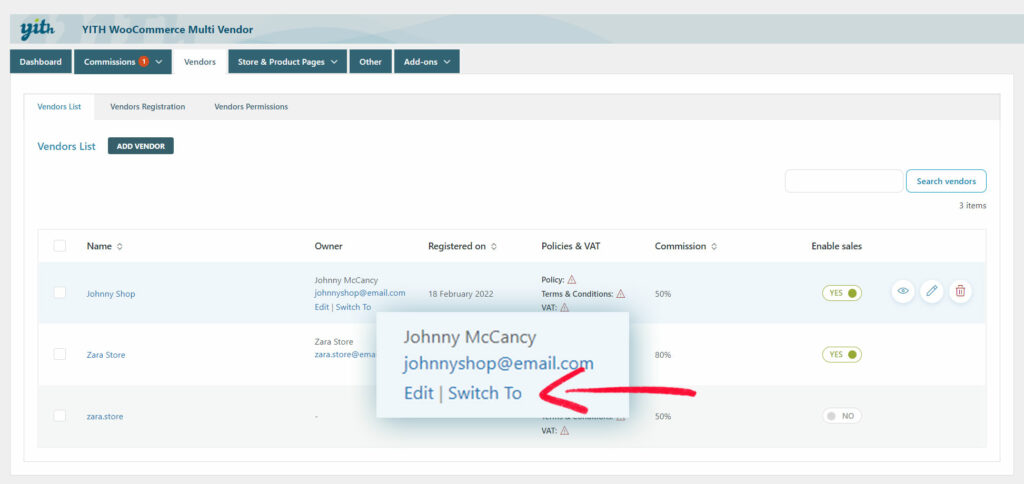
This shortcodeallows showing products by vendor ID, so, you can show only the products of one or more specific vendors. You can find the vendor ID in the Vendors List table: make sure the vendor ID column has been enabled from the Screen options. For more details, please, refer to this page.
You can use the following attributes, categorized in two groups.
Display Product Attributes
limit -> The number of products to show. Use the default -1 value to show all products.
columns –> The number of columns to show. Default: 4.
paginate –> Paginate products. To be used in combination with limit. Default: false. Set to true to paginate.
orderby –> Sorts the products shown by the selected option. One or more options can be entered by adding both slugs with a space between them. Available option: date (the date when the product was published).
id –> The ID of one or more selected products to show.
menu_order –> The Menu Order, if set (lower numbers show first).
popularity –> The number of purchases.
rand –> Randomly order the products on page load (may not work with sites that use caching, as it could save a specific order).
rating –> The average product rating.
title –> The product title. This is the default orderby mode.
skus –> Comma-separated list of product SKUs.
category – >Comma-separated list of category slugs.
tag –> Comma-separated list of tag slugs.
order –> States whether the product order is ascending (ASC) or descending (DESC), using the method set in orderby. Default: ASC.
class –> Adds an HTML wrapper class so you can modify the specific output with custom CSS.
on_sale –> Retrieves on sale products. Not to be used in conjunction with best_selling or top_rated.
best_selling –> Retrieves the best selling products. Not to be used in conjunction with on_sale or top_rated.
top_rated –> Retrieves top-rated products. Not to be used in conjunction with on_sale or best_selling.
Content Product Attributes
attribute –> Retrieves products using the specified attribute slug.
terms –> Comma-separated list of attribute terms to be used with attribute.
terms_operator –> Operator to compare attribute terms. Available option: AND (it will show products from all of the chosen attributes); IN (it will show products with the chosen attribute. Default: terms_operator value; NOT IN (it will show products that are not in the chosen attributes).
tag_operator –> Operator to compare tags. Available options are: AND (it will show products from all of the chosen tags); IN (it will show products with the chosen tags. Default: tag_operator value); NOT IN (it will show products that are not in the chosen tags).
visibility –> It shows products based on the selected visibility. Available options are: visible (products visible on shop and search results. Default: visibility option; catalog (products visible on the shop only, but not search results); search (products visible in search results only, but not on the shop); hidden (products that are hidden from both shop and search, accessible only by direct URL); featured (products that are marked as Featured Products).
category –> Retrieves products using the specified category slug.
tag –> Retrieves products using the specified tag slug.
cat_operator –> Operator to compare category terms. Available options: AND (it will show products that belong to all of the chosen categories); IN (it will show products within the chosen category. Default: cat_operator value); NOT IN (it will show products that are not in the chosen category).
ids – > It will show products based on a comma-separated list of Post IDs.
skus – > It will show products based on a comma-separated list of SKUs.
Please note – If the product is not showing, make sure it is not set to Hidden in the Catalog Visibility.
Special Product Attributes
These attributes cannot be used with the “Content Product Attributes” listed above, as they will likely cause conflict and not display. You should only use one of the following special attributes.
best_selling –> It will show your best selling products. Set to: true.
on_sale –> It will show your on-sale products. Set to: true.
The plugin includes the following widgets that you can use in any widget area or sidebar.
YITH Vendor List
The widget “YITH Vendor List” shows a list with all vendors in your shop and each vendor name links to the related store page.
You can also adjust the following options.
Title: widget name
Hide this widget on vendor page: this option allows you to hide the widget from the vendor’s store page.
Show the vendor’s products quantity: show the number of products associated to the vendor, next to the vendor’s name.
Hide vendors with no products: this option allows you to hide vendors that do not have any products from this list.
YITH Vendor Contact Form
The “YITH Vendor Contact Form” widget adds a contact form which users can use to send a request to site administrator and to vendor.
“Name” and “Email” fields will automatically be populated with the user’s name and email if logged in.
You can also adjust the following options and labels:
Title: add a title for this widget Description: add a description for this widget that will appear below the title. Submit button label text: customize the text of the “Submit” button.
Hide from guests: this option allows you to hide the widget from unlogged users, so only logged-in users will see it.
This widget will show only if you add it to a sidebar or widget area that appears on a vendor’s store page or a vendor’s product page, but you can further choose whether to show it on both of them or not with the options below.
Show on the vendor’s store page: this allows you to show the contact form only on the vendors store page and hide it from other pages of the shop.
Show on the single product page: this allows you to show the contact form on all vendor’s product pages, if added in a sidebar or widget area that appears there. If you are viewing a product that does not belong to any vendor, the form will not appear.
Send a copy to website owner: this allows sending a copy of the email with the user’s message to the administrator.
YITH Vendor Store Location
The widget “YITH Vendor Store Location” adds a box in the sidebar or widget area with a map (displayed through Google Maps) showing the location of the vendor. You do not have to add any further information, because the map will be automatically generated according to the address added by the vendor in the Store settings.
Please, note that even if added in a store sidebar, this widget will show only if the sidebar is displayed on a vendor’s store page.
As required by Google, support to displaying integrated maps is limited if no API KEY is specified. For this reason, if you have a Google account, we suggest you enter the API KEY required into the Google Maps API Key option in YITH > Store & Product Pages > Store Page.
YITH Account Funds allows all users to have a virtual wallet on your site. They can make a deposit, so the deposited amount can be used as credit for purchases on the site.
The integration with YITH Account Funds allows you to issue vendors’ payouts into their digital wallet.
Additionally, if you also install YITH PayPal Payouts, your vendors can request a payment of their store credit into their PayPal account.
On this page, we’ll go through the following topics.
To enable YITH Account Funds as a gateway and credit vendors’ commissions to their virtual wallet on your site, you just have to make sure that both plugins are installed and enabled from the Plugins page.
Now, if you want to pay commissions to vendors automatically during the checkout through YITH Account Funds, go to the Commissions Settings section, and select it as default payment.
This is the gateway that will be used by default for automatic payments of vendors commissions. Yet, you can also pay the commissions manually through Account Funds as explained here.
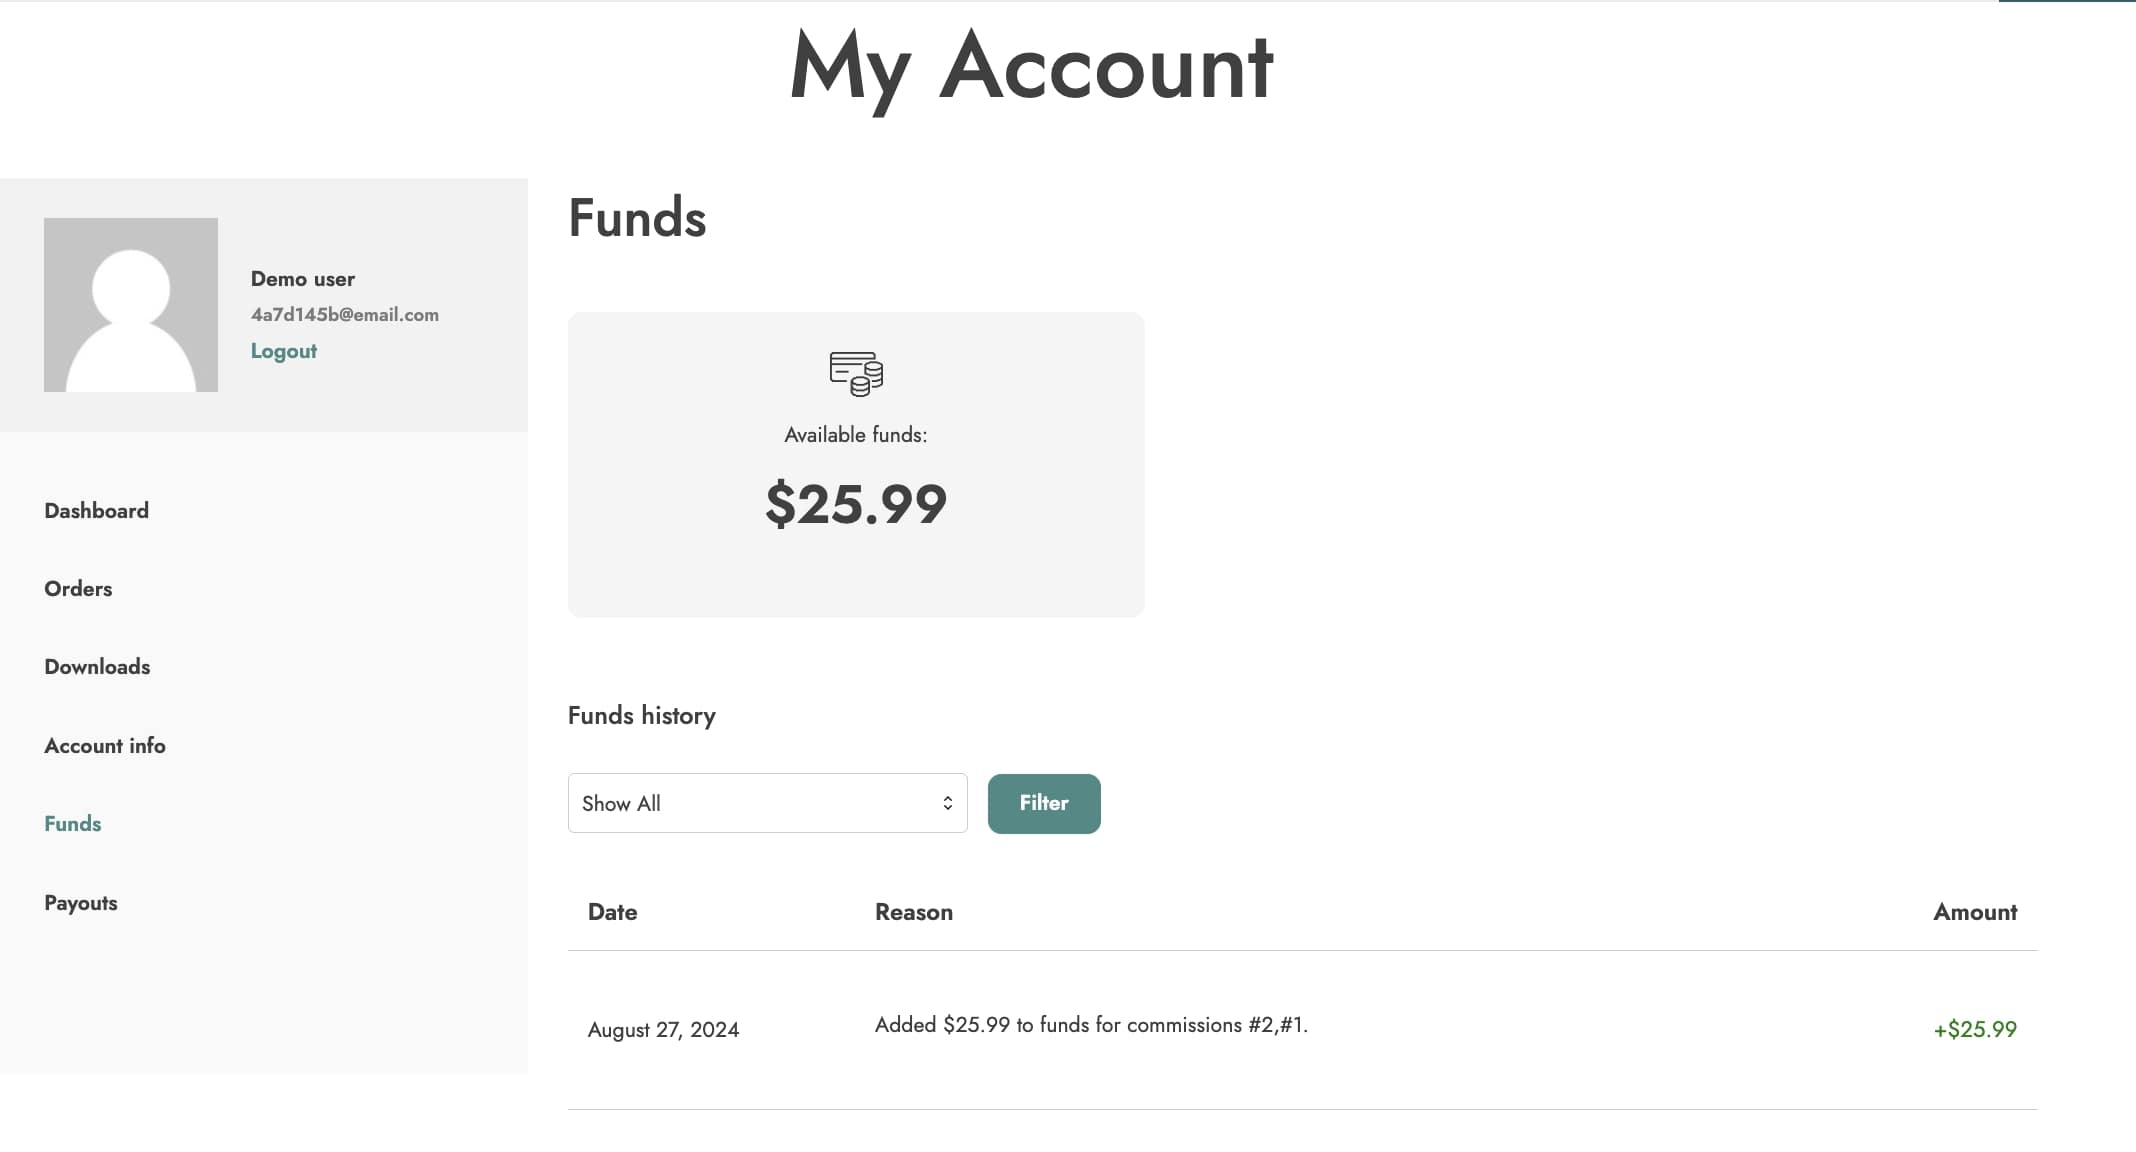
The vendor will be able to see a report of all payments in My Account > Funds history.
For more details about the configuration of YITH Account Funds, please, refer to the full documentation here.
2. Extra options for vendors
When using Multi Vendor and Account funds, you will be able to enable the dedicated module available in YITH > Account Funds > Modules. This module has to be enabled if you want the vendors to manage and redeem their funds.
2.1 Vendors & funds settings
After enabling the module YITH Multi Vendor/Marketplace, a new section is added to the plugin panel. Here, you can find all the options related to vendor permission and redeem settings.
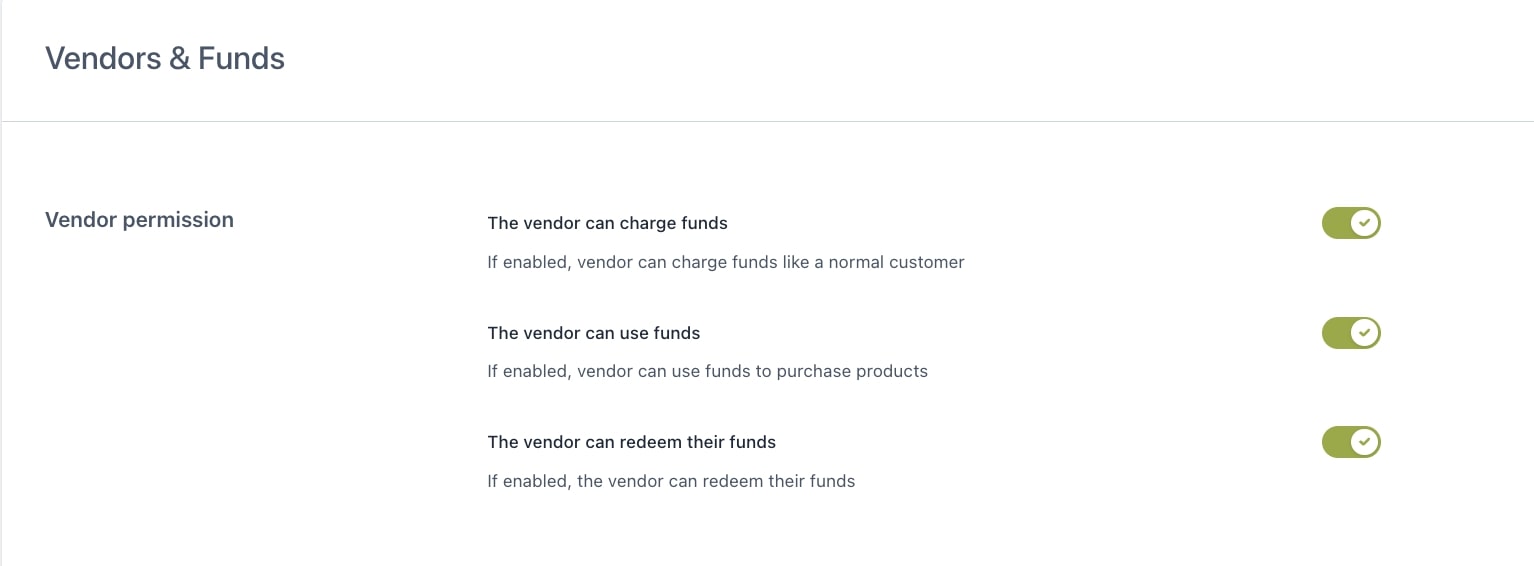
Vendor permission
The vendor can charge funds: this option allows your vendors to deposit funds in their online wallets like any other customer.
The vendor can use funds: this option allows your vendors to use their funds to purchase products from your shop.
The vendor can redeem their funds: (available ONLY if you are also using YITH PayPal Payouts for WooCommerce) this option allows your vendors to request the payment of their funds through a payout.
2.2 Redeem funds with PayPal Payouts
The second section, instead, allows you to configure how vendors can Redeem their collected funds.
Please, note that this specific option requires an additional plugin to be installed, so you’ll need all the three plugins below:
Why should I use this combination of plugins instead of using only YITH PayPal Payouts?
If you want to reduce the number of transactions via PayPal and any possible issues with them or with expensive fees.
If you want to incentivate your vendors to purchase from your store using their credit, so you both can save on transaction fees.
In this section, you can set up the redeeming option either as a manual or an automatic process.
Minimum funds to redeem: set the minimum balance necessary for a vendor to redeem funds.
Maximum funds to redeem: set the maximum amount of funds that can be redeemed in a transaction, or leave it empty to disable this restriction.
Now you can choose whether to redeem them automatically or manually.
2.2.1 Automatic payment
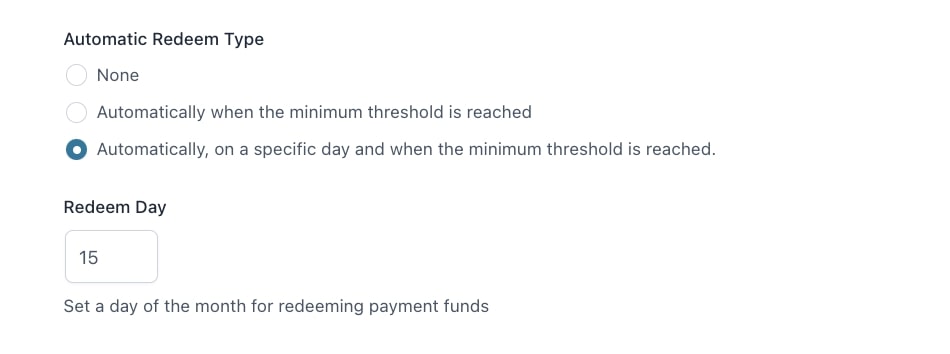
Automatic Redeem Type: this option allows you to let vendors be paid automatically instead of submitting a payment request every time.
None: select this if you want to keep the automatic feature disabled. Make sure you select the option Manual redeem below to let your vendors submit a request at any time from My Account page (see below).
Automatically when the minimum threshold is reached: this way you can issue automatic payments as soon as the minimum amount set above is reached.
Automatically, on a specific day and when the minimum threshold is reached: this way you can issue automatic payments on the 1st of the month (or any other day you set) but only for vendors’ accounts that have reached the minimum amount set above. Vendors can however submit a payment request manually if the ‘Manual redeem’ option below is enabled.
Redeem Day: choose the day on which issue the automatic payment, i.e. enter 1 to issue payments automatically on the first of every month.
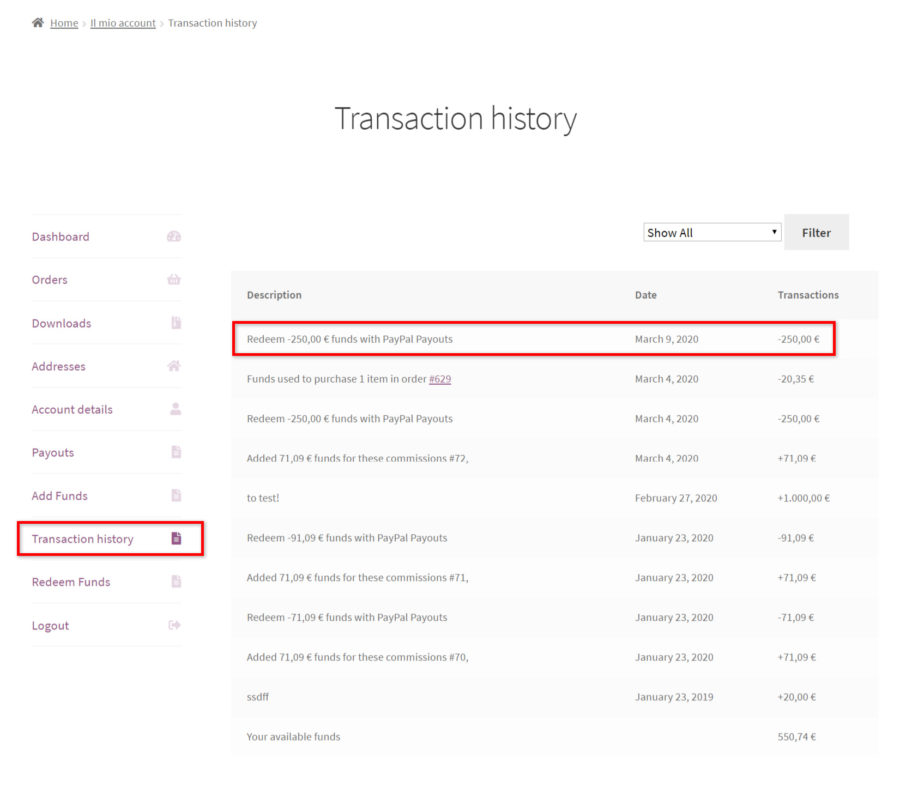
All transactions will be visible to the vendor in My Account > Transaction history.
2.2.2 Manual redemption
Alternatively or in addition to the automatic payment, you can also let vendors redeem their available funds manually on request. In YITH > Account Funds > Vendors & Funds, these are the options that you have to configure:
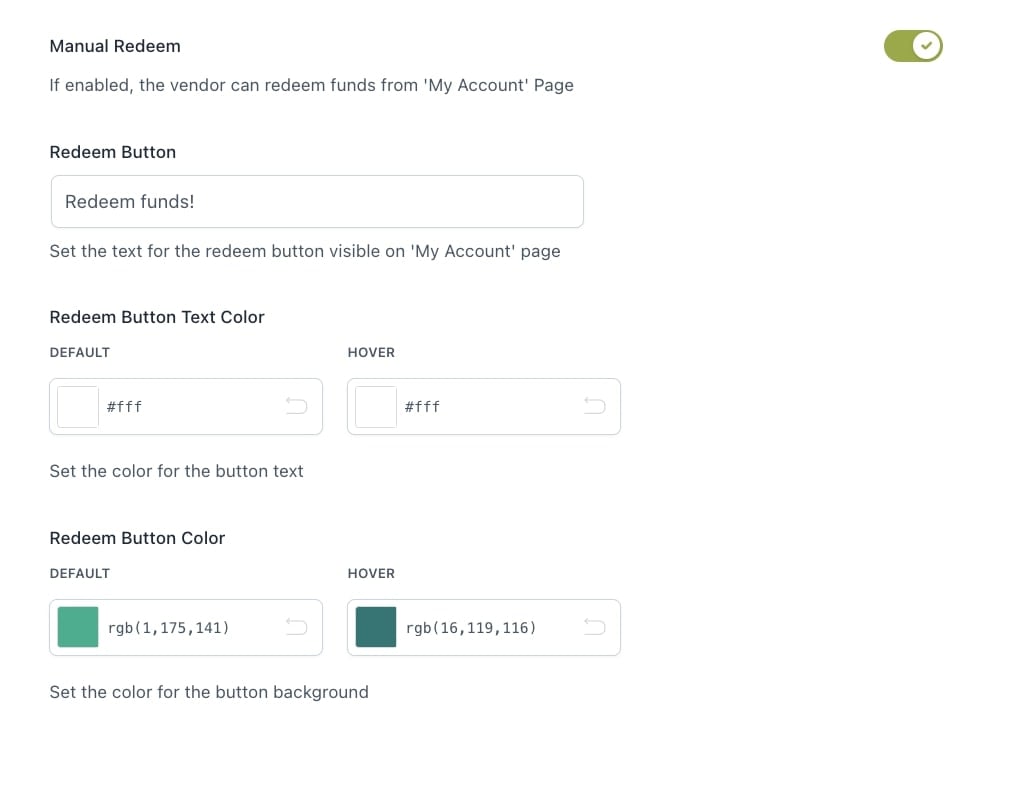
Manual Redeem: enable this option if you want to allow also manual redemption and submit a request from My Account. By enabling this option, you will also be able to customize the button text and colour.
Redeem Button: customize the label of the button shown in My Account here.
Redeem Button Text Color
Redeem Button Color
If you enable this option, your vendors will be able to see a dedicated section in My Account > Redeem funds, from where they can submit a request and be paid immediately.
They can enter a custom amount (between the minimum and maximum allowed if you’ve set up these values in the settings) and as soon as they send the request the payment will be processed through the gateway that you’ve selected (only YITH PayPal Payouts available at the moment).
If the vendor enter a value not matching the ones configured, a notice will show.
The payment will be recorded in the Transaction history.
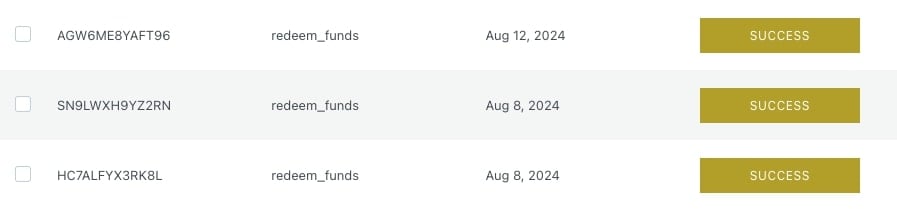
The transaction status will be available in My Account > Payouts and the admin can check the transaction in PayPal Payouts > Payouts List > Details.
For more details about the configuration of YITH PayPal Payouts, please, refer to the full documentation here.
To start using it, make sure that both plugins are installed and activated.
Then, go to the plugin settings under YITH > Multi Vendor > Commissions > Gateways, where you can find all the available gateways for your vendors’ payouts, and enable YITH PayPal Payouts after configuring it on your shop as explained on this page.
Now, if you want to pay vendors commissions automatically, go to the Commissions Settings section, and select PayPal Payouts as default payment gateway.
This is the gateway that will be used by default for automatic payments of vendors commissions. Yet, you can also pay the commissions manually through PayPal Payouts as explained here.
Exclude vendors’ products from Payouts commissions
If you want to avoid that vendors’ products are included in the total calculation of your store’s receivers commissions, we suggest you enable the following option from YITH > PayPal Payouts > General settings > Multi Vendor Settings.
Suppose you get an order with 2 products. Product A belongs to vendor A and costs €60, product B does not belong to any vendor and costs €40, so the total order is worth €100. In addition to this, you have set one receiver with a 50% commission.
If the option is disabled, your receiver will get €50.
If the option is enabled, product A is excluded, so the receiver will get €20, which is 50% of product B price only.
If you want to read more about PayPal Payouts configuration settings, please, refer to the official plugin documentation.
Notifications
When a payout is made, PayPal sends a notification to both the sender and the receiver. You can customize the email subject and content from YITH PayPal Payouts > Notifications. To show the vendor commission and order IDs in the content of the email, you can use the placeholder ´{commission_ids} and {order_id}.
The integration with YITH Stripe Connect for WooCommerce allows the admin to split the price of one or more products between the vendor and the admin immediately after the checkout and based on the commission rate that you’ve agreed with them.
First of all, make sure you’ve installed and enabled YITH Stripe Connect for WooCommerce from Plugins menu.
Configure it as explained on the page Connect admin account from the official plugin documentation.
Then, go to YITH > Multi Vendor > Commissions > Gateways and enable YITH Stripe Connect to activate this service for your vendors.
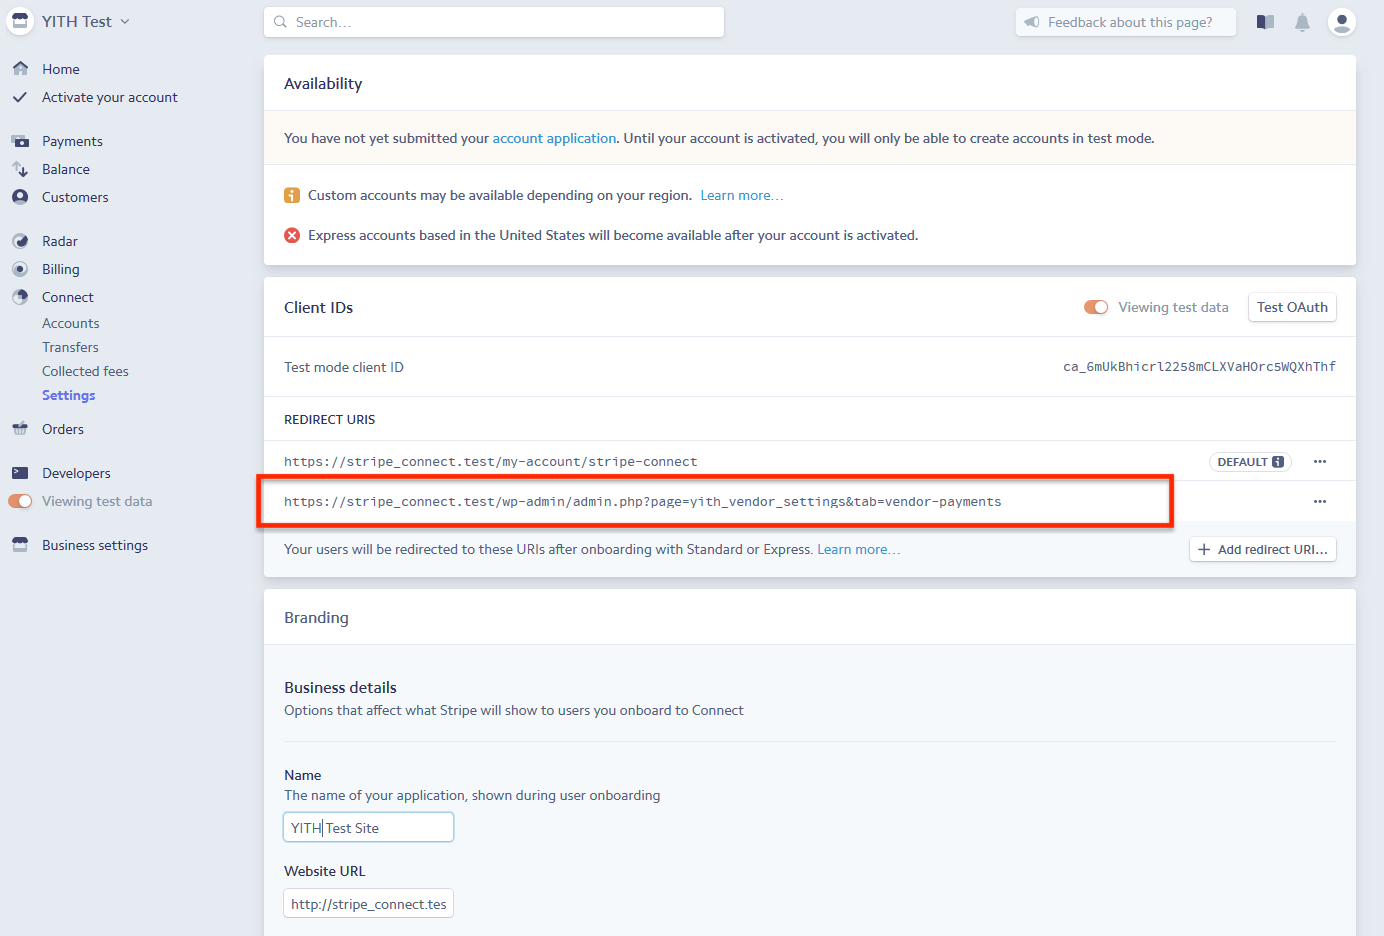
Make sure you set the redirect URI in your Stripe account. A warning message in the plugin settings panel will remind you about this and will show you the right address to add. It will look like this:
The URI that you have to add to make Multi Vendor work correctly is not Stripe default URI, but an additional one. This means that if you remove the default one, the button Connect Stripe in My Account page will not work. Make sure, then, you do not remove it.
Now, go back to the Commissions Settings section, and select Stripe Connect as the default payment gateway for vendors payouts during the checkout.
This is the gateway that will be used by default for automatic payments of vendors commissions. Yet, you can also pay the commissions manually throughStripe Connect as explained here.
How do payments on checkout work?
Stripe provides a detailed description of what the whole process is about. You will find this explained in the plugin options panel in YITH > Multi Vendor > Commissions > Gateways and can refer to Stripe official page for further details.
Send Money to vendor on payment completed When creating charges on your platform and separately creating a transfer, the platform can earn money by allocating less of the charge amount to the destination Stripe account, as in the above code example. Assuming that represents a delivery service transaction, with a charge to the customer of $100, a transfer of $20 to the delivery person, and a transfer of $70 to the restaurant:
The charge amount less the Stripe fees is added to the platform account’s pending balance
When the platform’s available balance is sufficient (at least $90), the transfers can be made, reducing the platform’s available balance by the specified amounts and increasing both connected account’s available balances by that same amount
The platform retains an additional $6.80 ($100.00 – $70.00 – $20.00 – $3.20, assuming standard U.S. Stripe fees).
Fees for the payment of commissions are charged to the admin. Please, refer to this page to learn more about transaction fees.
Payments on the backend
If, for any reason, the payment of vendor commissions fails, or if there is no default payment gateway enabled, you’ll be able to use any of the supported payment methods to pay the vendor commissions manually from the Commissions list page.
Manual payment in bulk
Single commission payment
If you have unpaid commissions, this may depend on three main reasons:
You haven’t enabled the Pay vendors commissions during checkout or have not selected any gateway in it.
Your account balance was not sufficient to pay all commissions.
Your vendors haven’t activated their Stripe account yet.
Let’s see how to solve the latter issue below.
If a vendor has not activated Stripe yet
Because of Stripe policy, every vendor has to explicitly authorize Stripe to be credited any payment to his/her account.
Note: this action can only be performed by the vendor and there is no way for the admin to do this on his/her behalf.
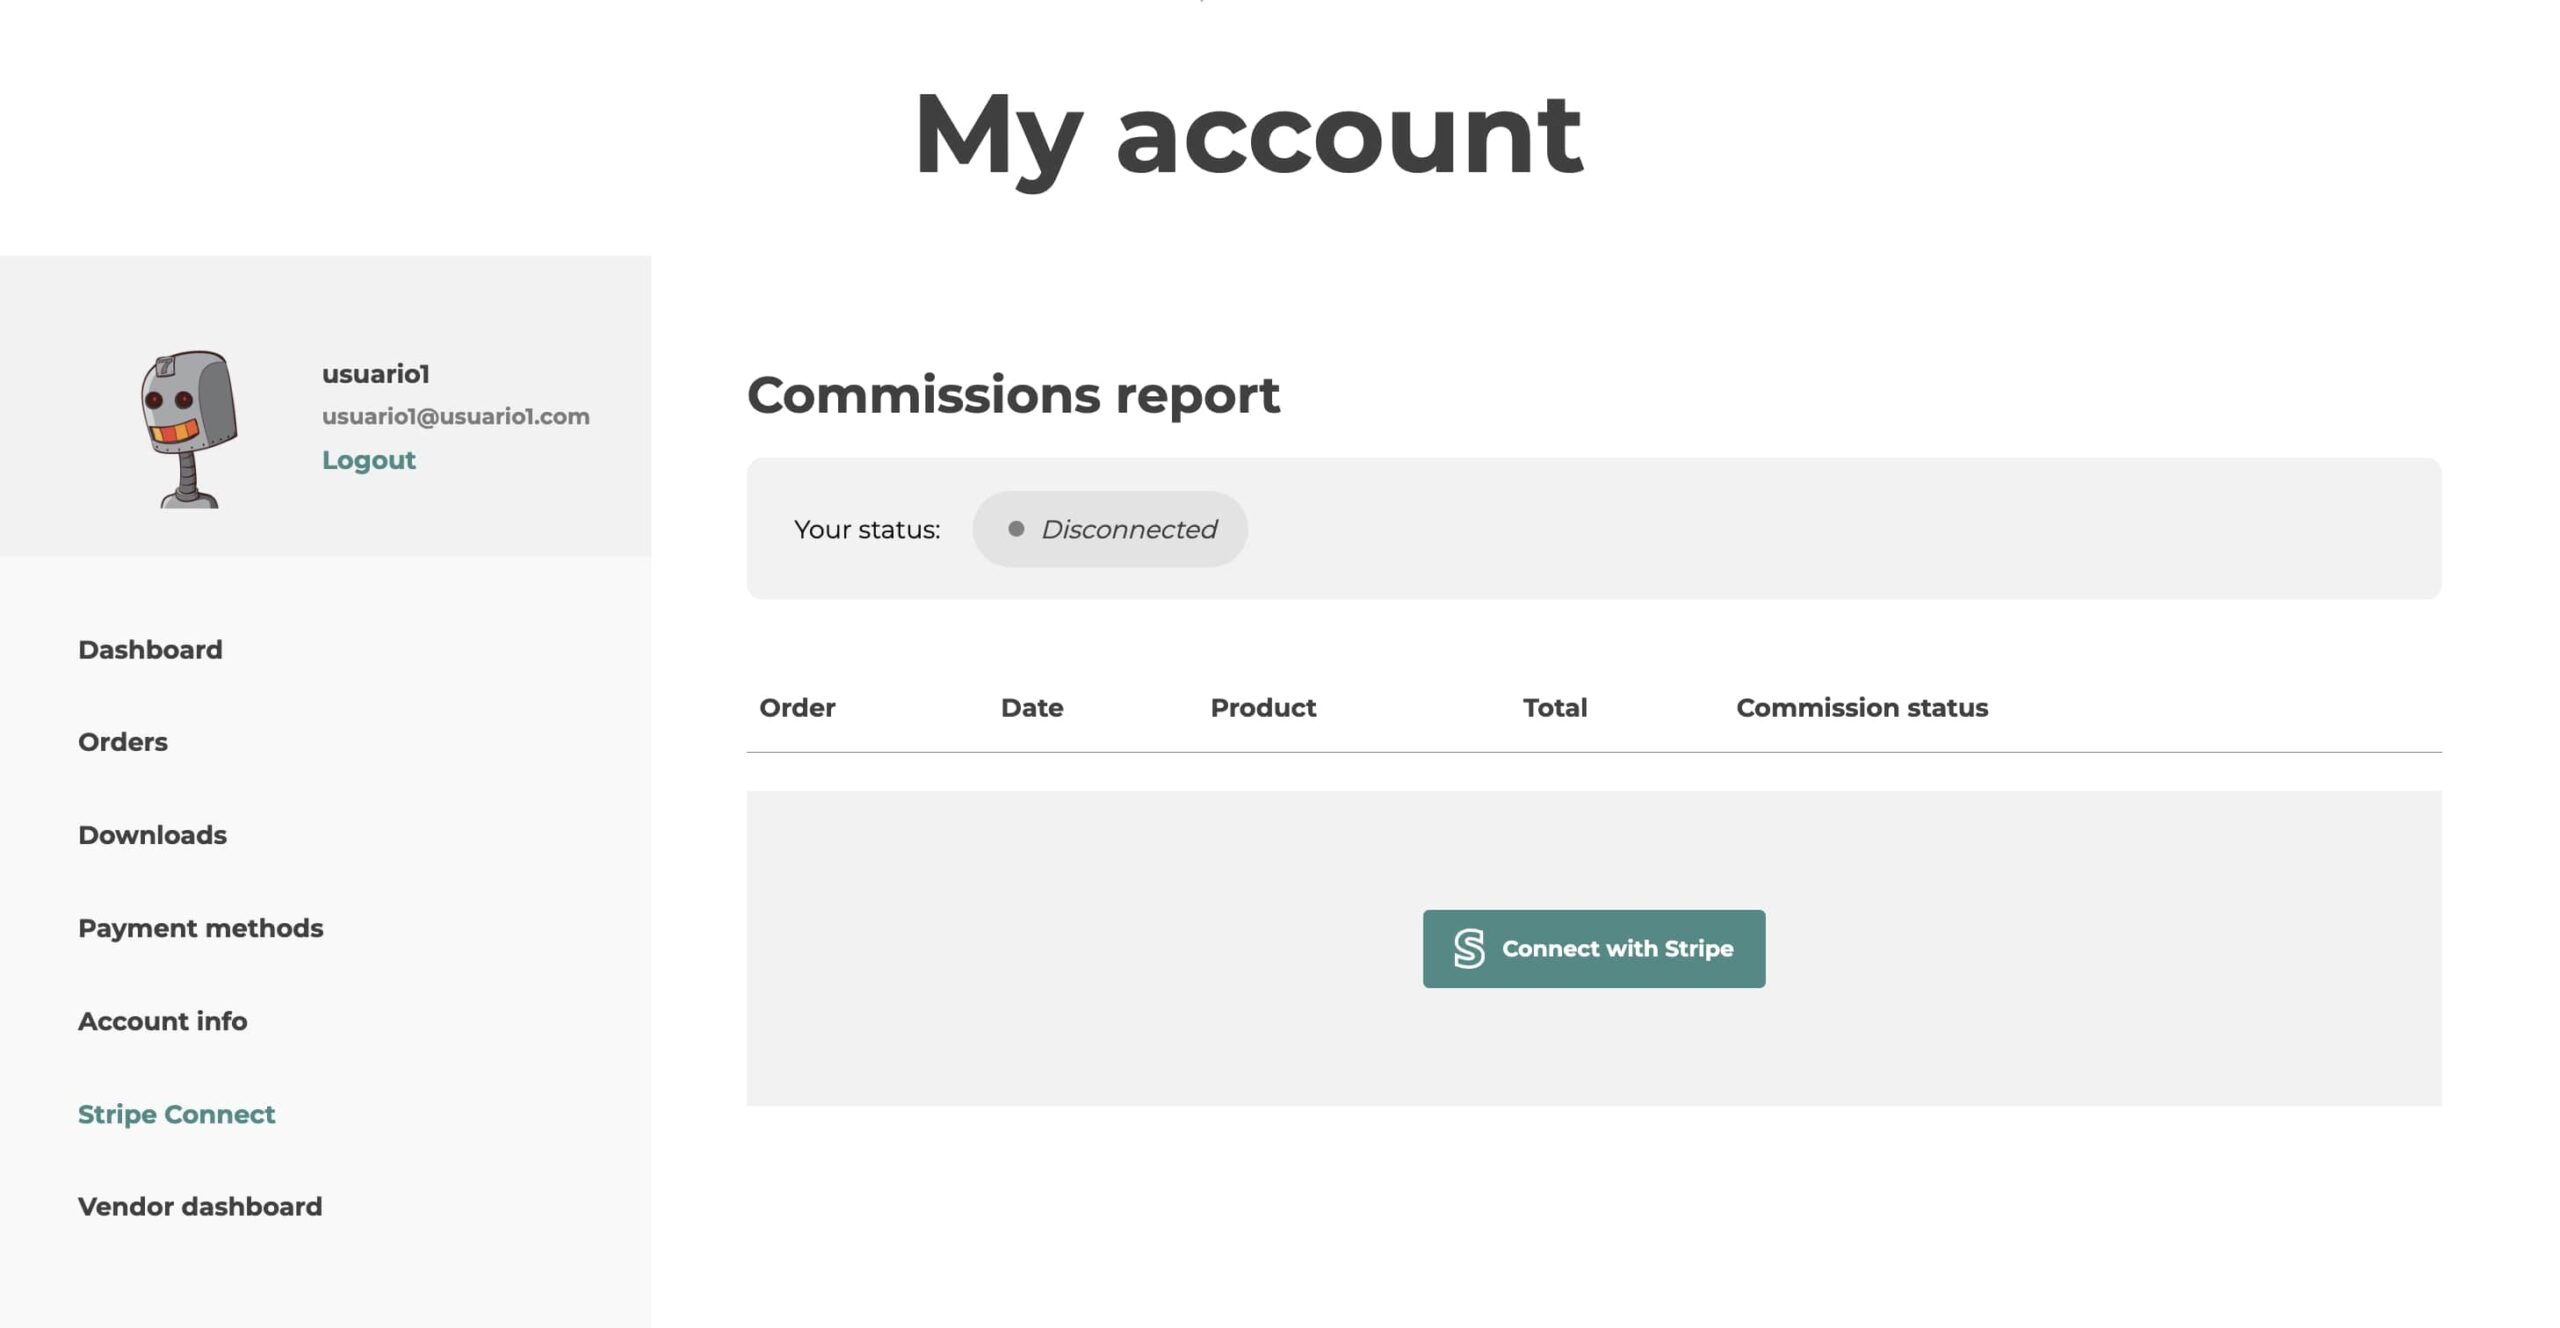
Make sure your vendor visits his/her dashboard and goes to Your shop > Payment info. Here they can find the Connect with Stripe button and click on it.
They will be taken to Stripe site. If they already have an account, they can simply log in. If they do not have any yet, they will be asked to create a new one:
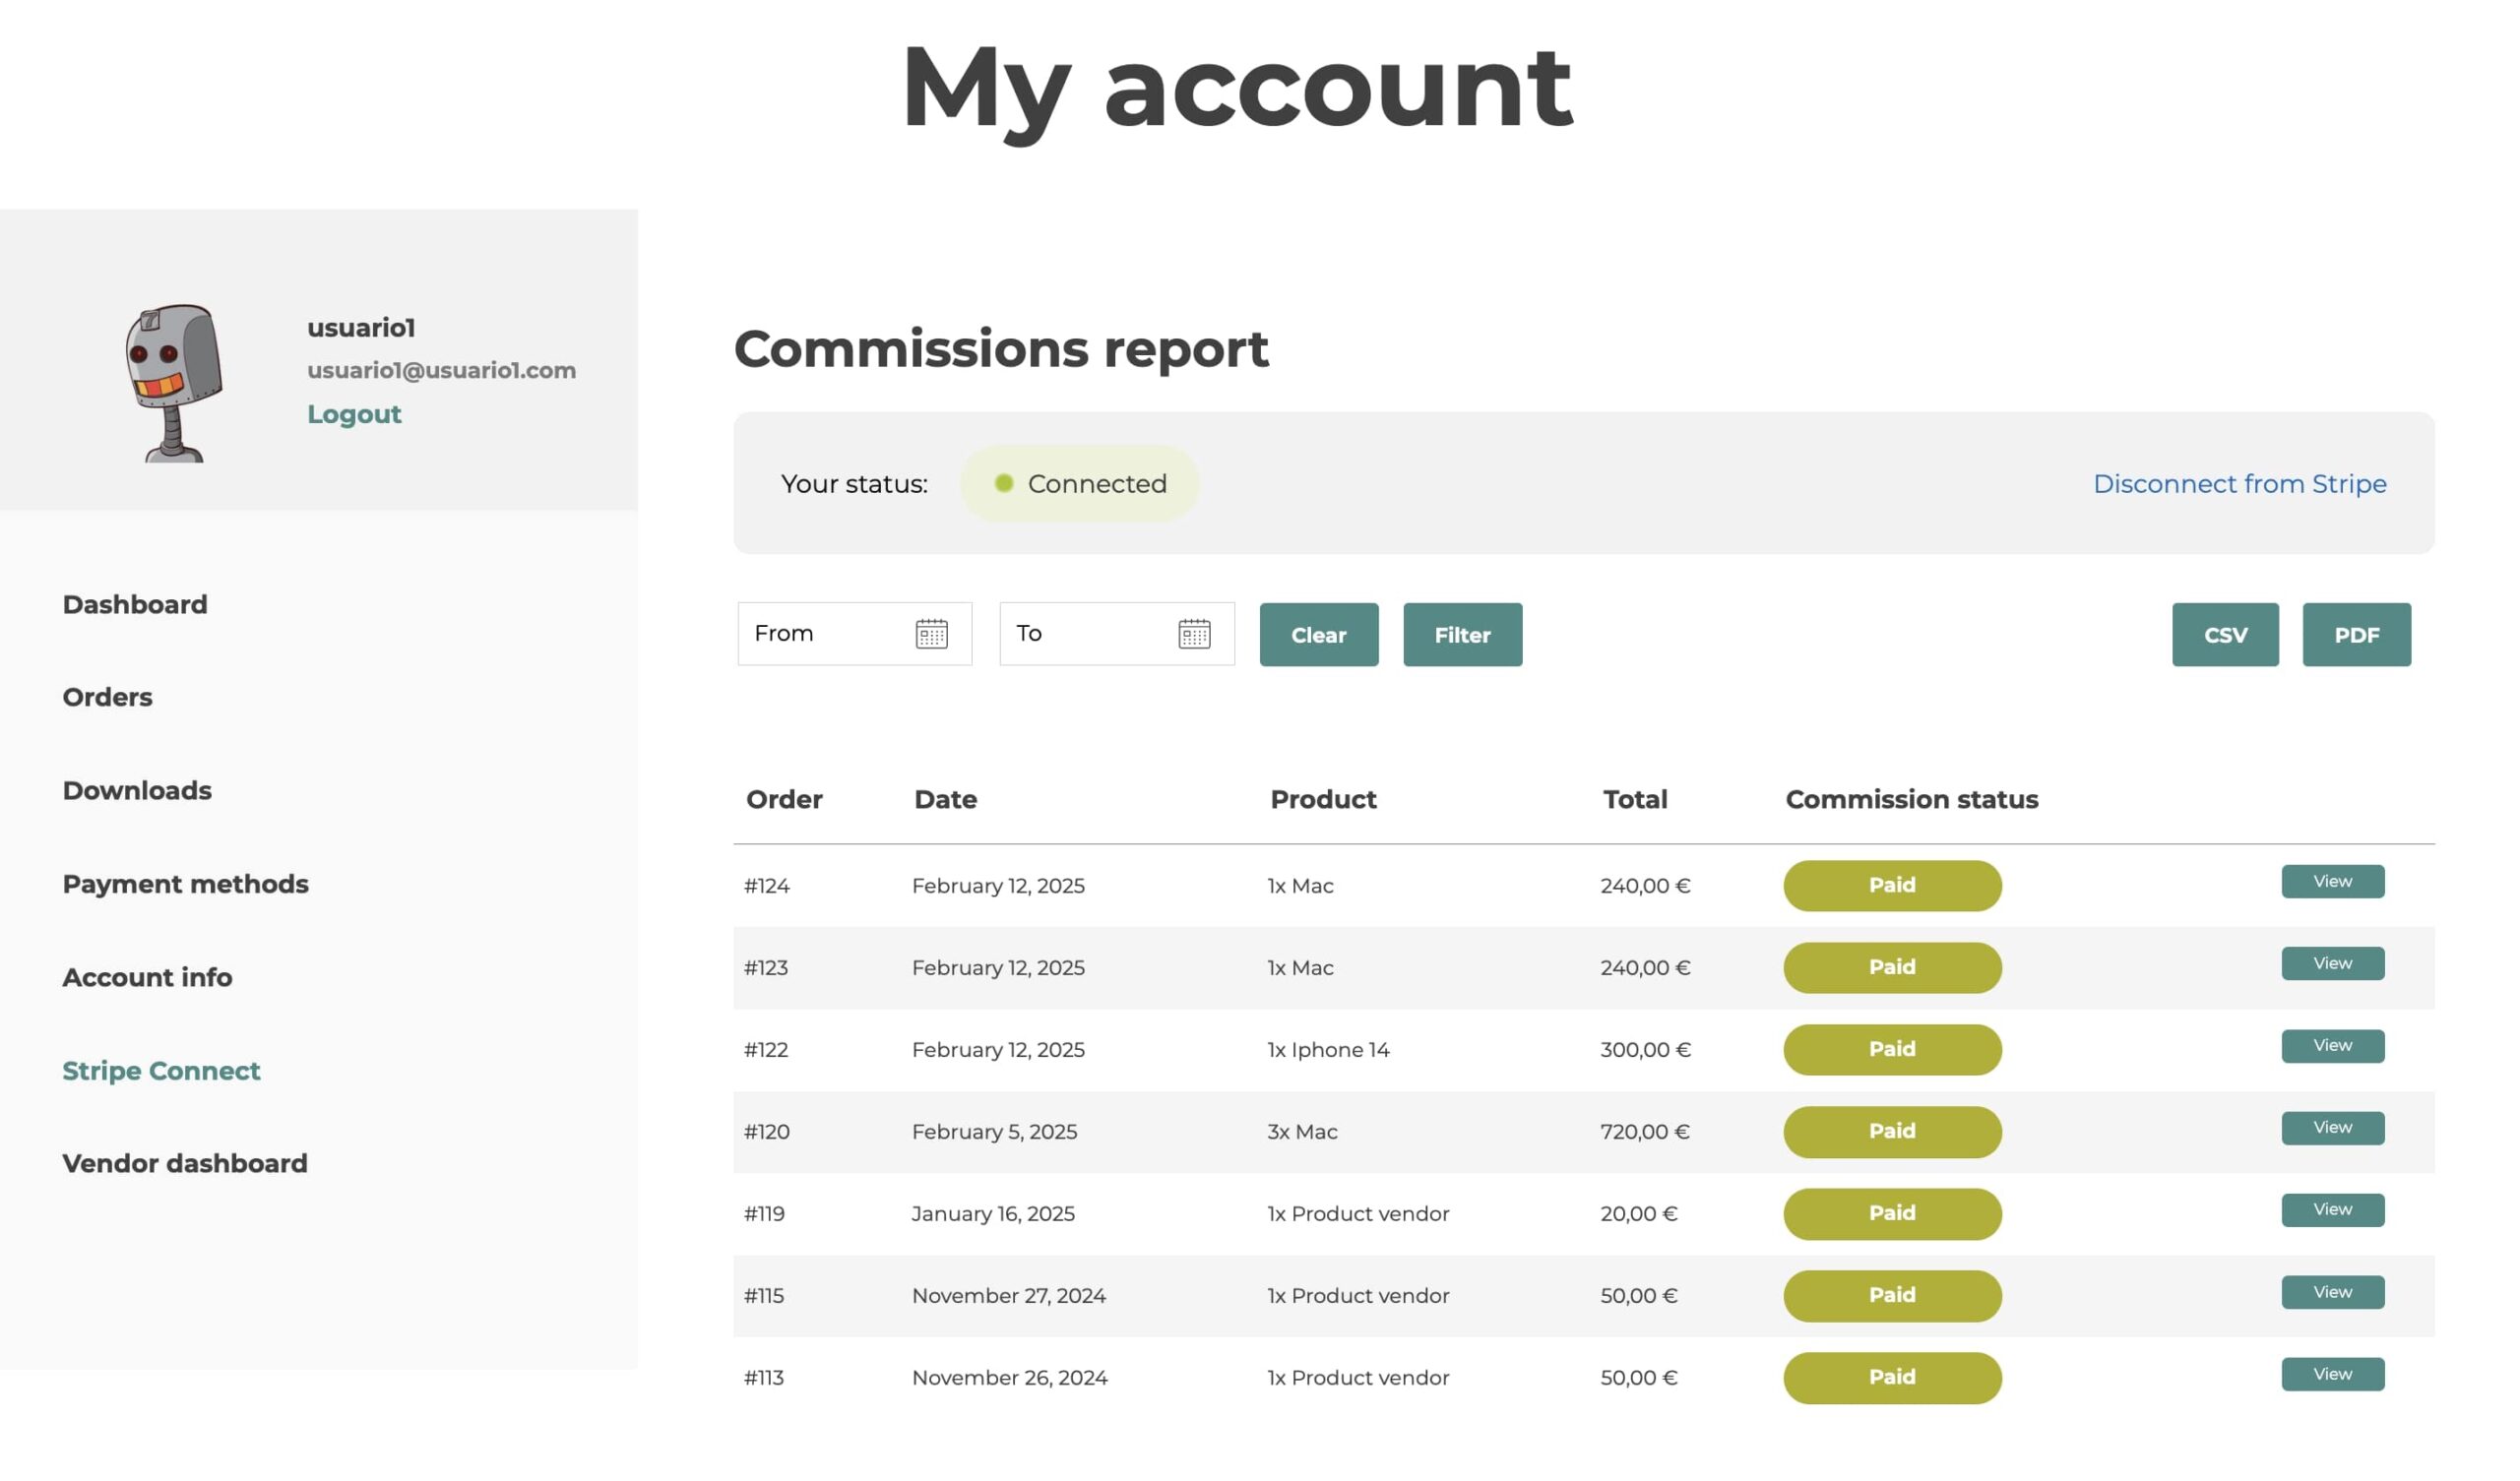
Vendors will be able to see the very same button in their reserved area, My Account > Stripe Connect.
…and will be able to also see and export a list with all transactions related to their commissions.
After the vendor has authorized Stripe account to receive money, you can go on and pay the commissions manually from the Commissions page as explained here.
Please, refer to Stripe official page for any details about the payments and transaction fees.
Commission reports
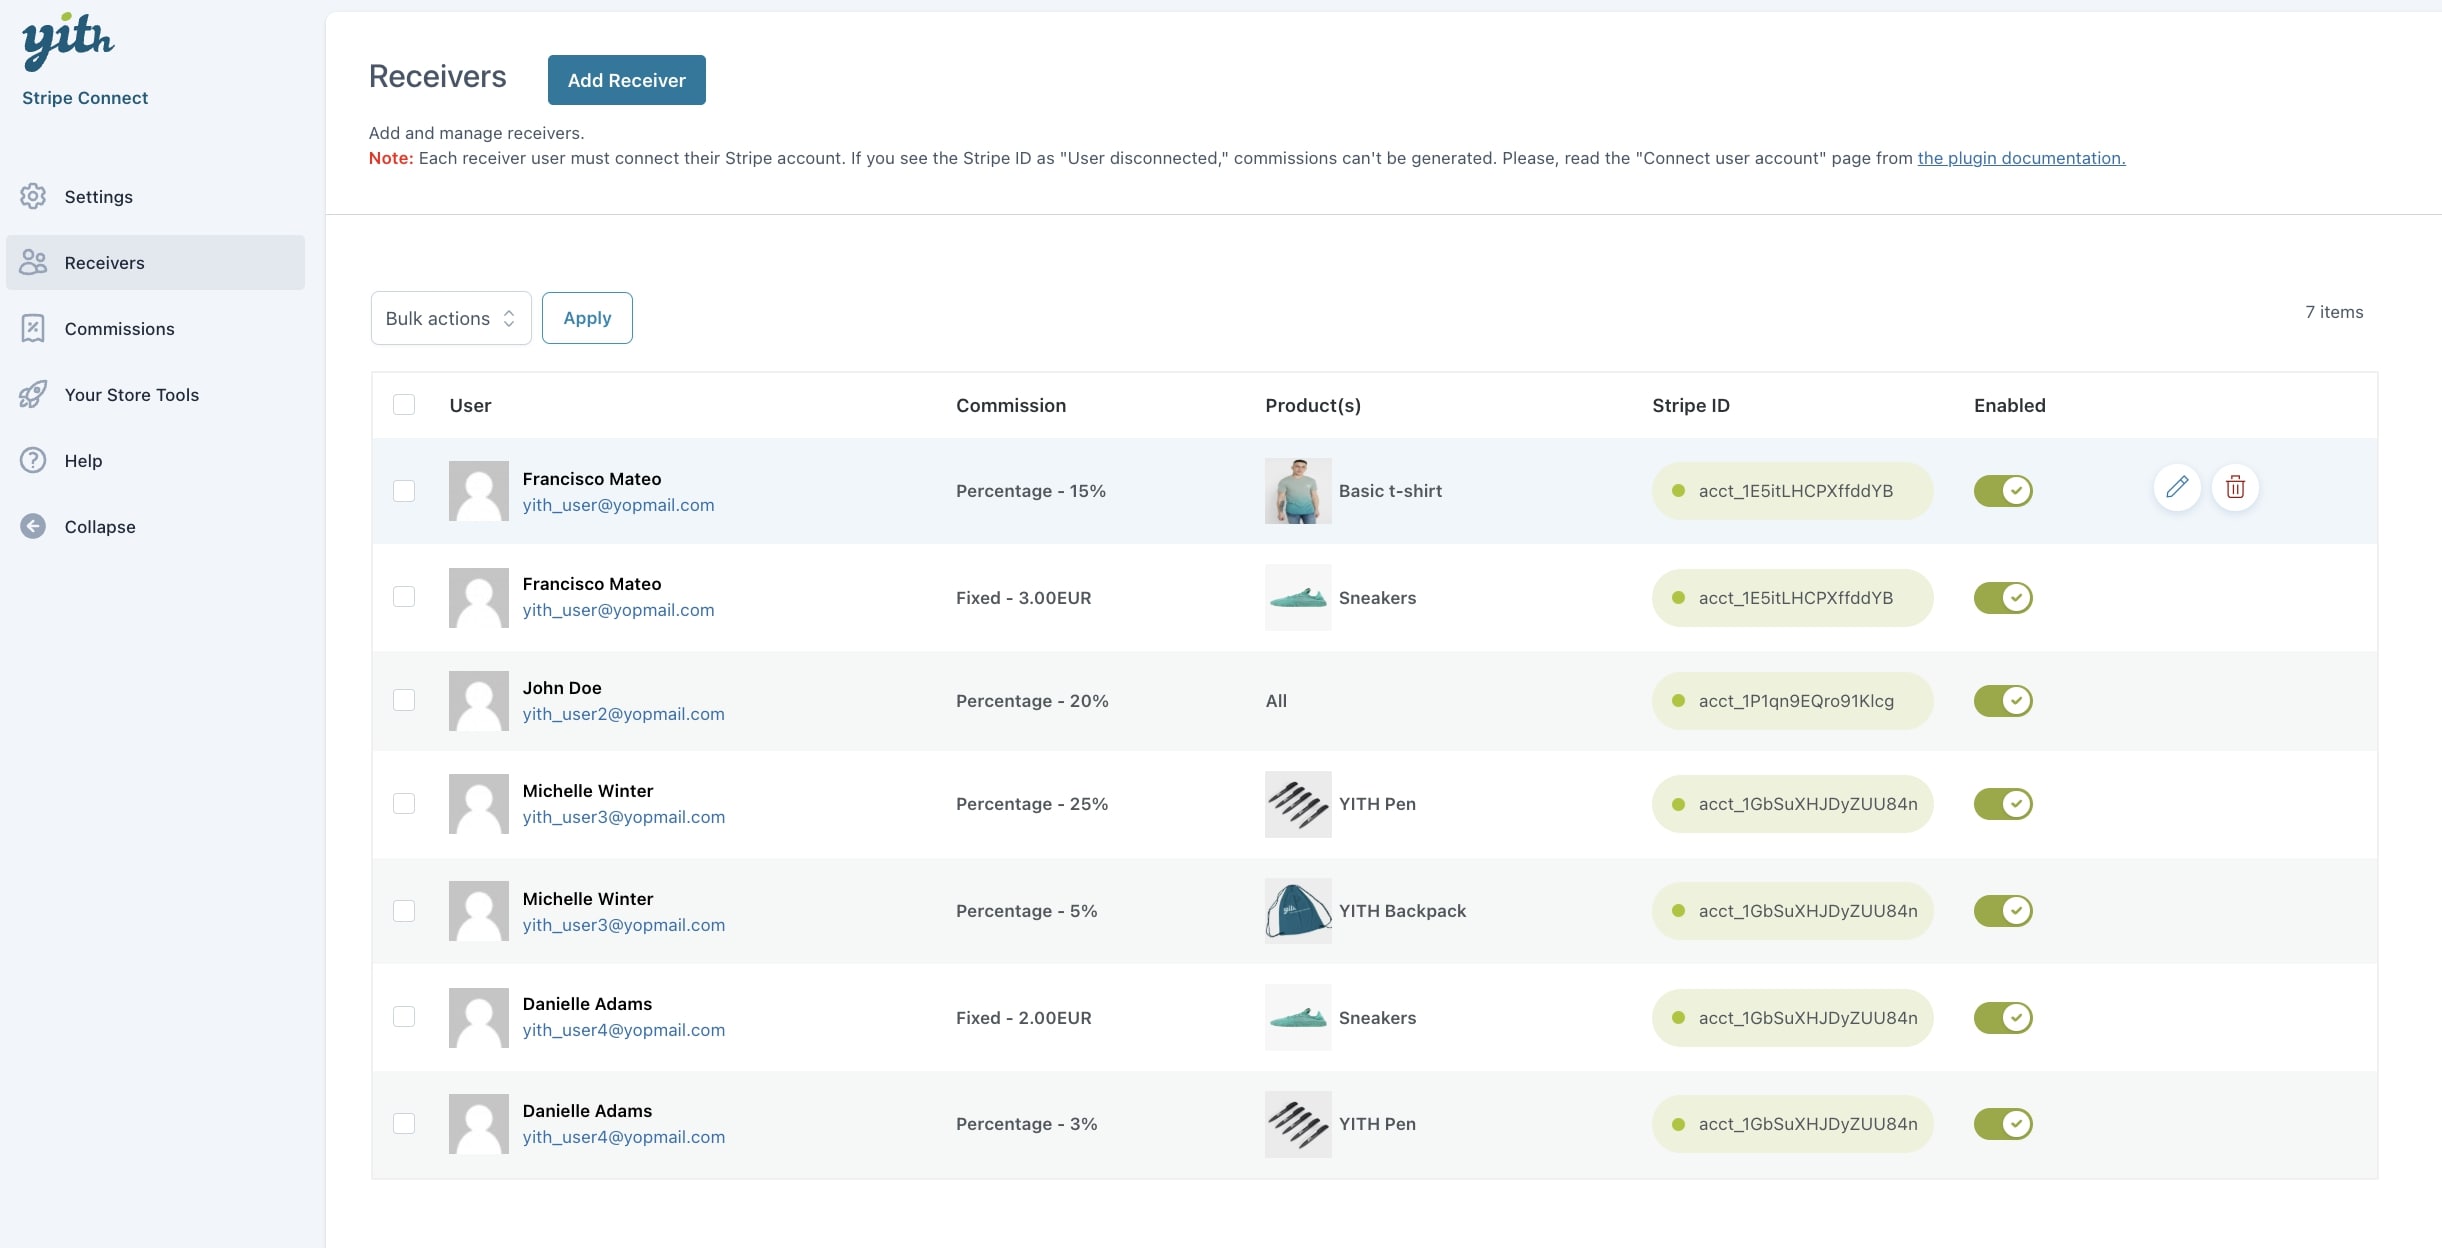
If you want to, you can also Add vendors’ commissions to Stripe Connect Commission Reports. You can enable the dedicated option from the gateway details in Commissions > Gateway as you can see below.
All commission vendors payouts made through Stripe Connect will appear in your Stripe Connect Report that you can also find in YITH > Stripe Connect > Commissions (for more details please refer to this page).
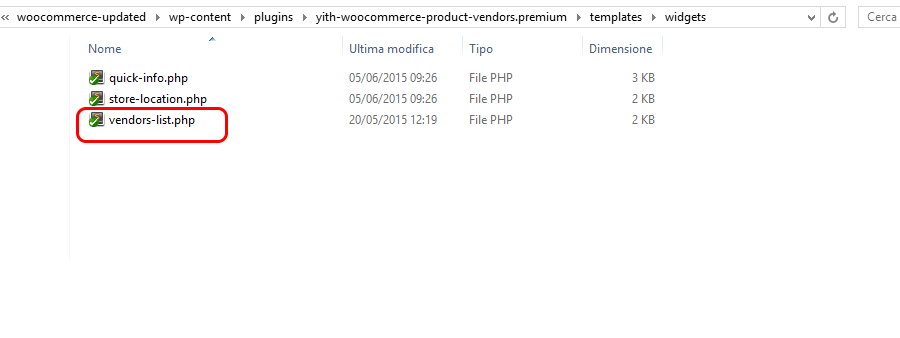
In order to override plugin files, you just have to create into the folder WooCommerce of your theme the same tree structure you find in the plugin.
Let’s say, for example, that you want to override the file vendor-list.php, that is in the folder templates > widgets in the plugin.
Copy the file you want to edit from plugin folder (in this case vendor-list.php in templates > widgets). Then, go to folder WooCommerce of your theme and create exactly the same path you find in the plugin (starting after “templates”) for that file.
So, in this case, you have to create the folder widgets and paste template file into this folder. Then, paste the copied file into this path.
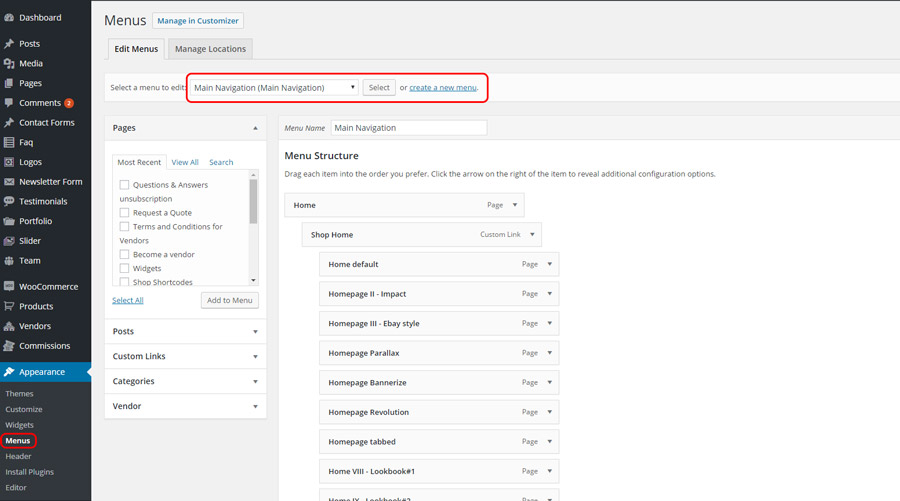
The plugin supports the possibility to use each vendor as menu field. This allows you to create a new WordPress menu including the list of vendors you have selected.
Click on WordPress “Appearance -> Menus”. Create a new menu or select one already available in which you want to insert the list of vendors.
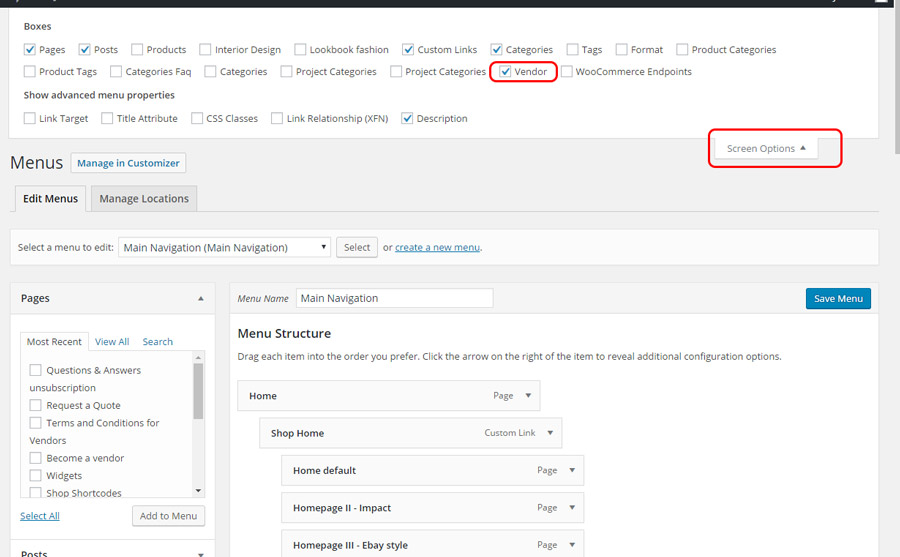
Now enable, in case it isn’t, “Vendors” field that you find in “Screen options”.
Now select and insert the vendors within your menu.
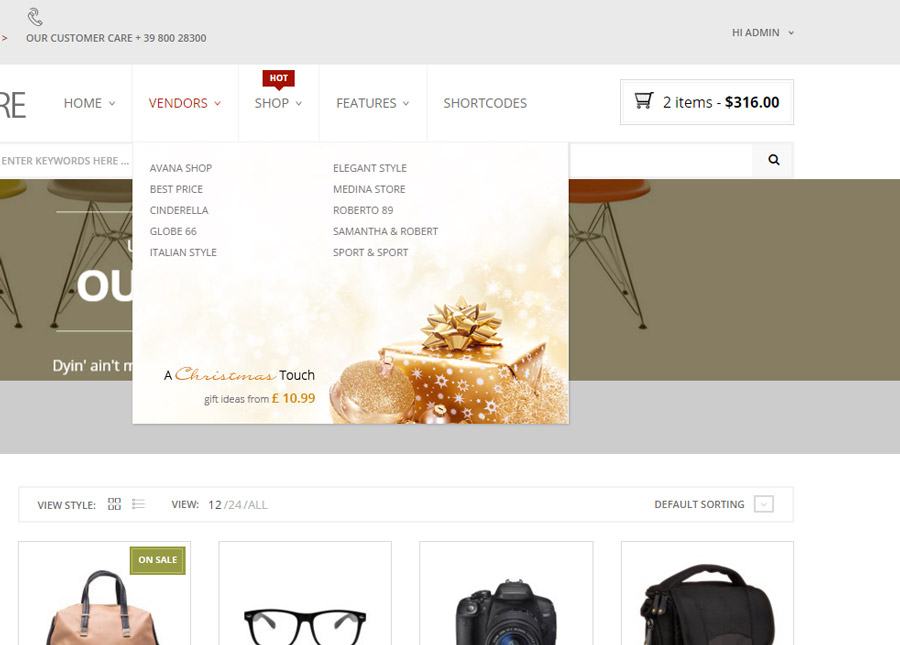
Here is an example of menu that includes the list of vendors of the site.


