For every completed order, the receivers that you’ve previously set will get a percent commission calculated on the order subtotal amount.
Let’s consider, for example, an order worth €100, with 2 eligible receivers, one has a 50% commission rate, the other one has a 20% commission rate.
As soon as the order acquires the status Completed, two payments will be issued from the admin PayPal account, the first one is worth €50 and the second one is worth €20.
Now, let’s see how to configure all the API settings in the right way.
In order to work properly, opcache.save_comments must be set at 1 in php.ini file of your server.
Configuration
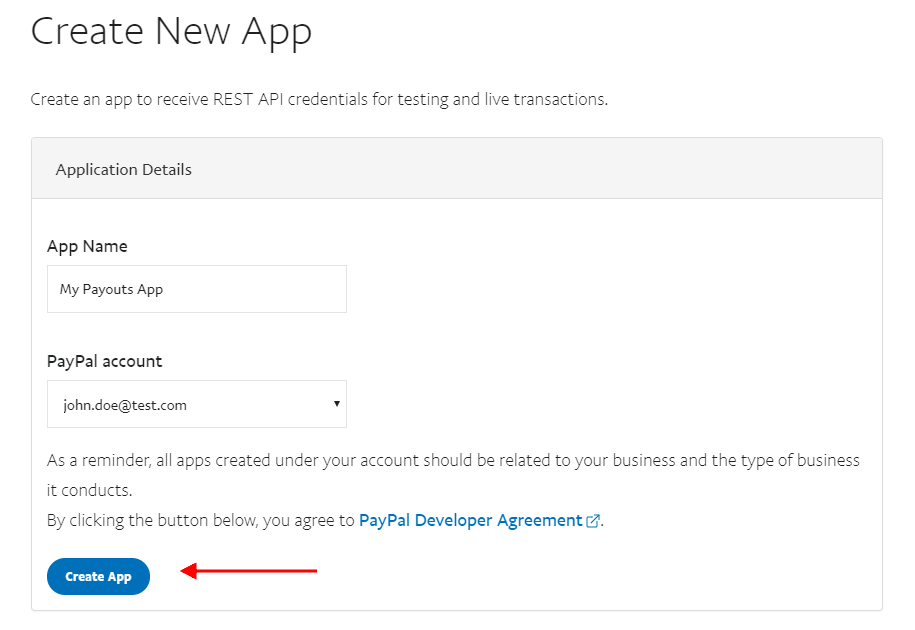
To start using your PayPal account to pay percent commissions to your partners, you will have to create a Payouts app.
Once you are in your PayPal account, make sure you create a REST API app or use one you’ve already created.
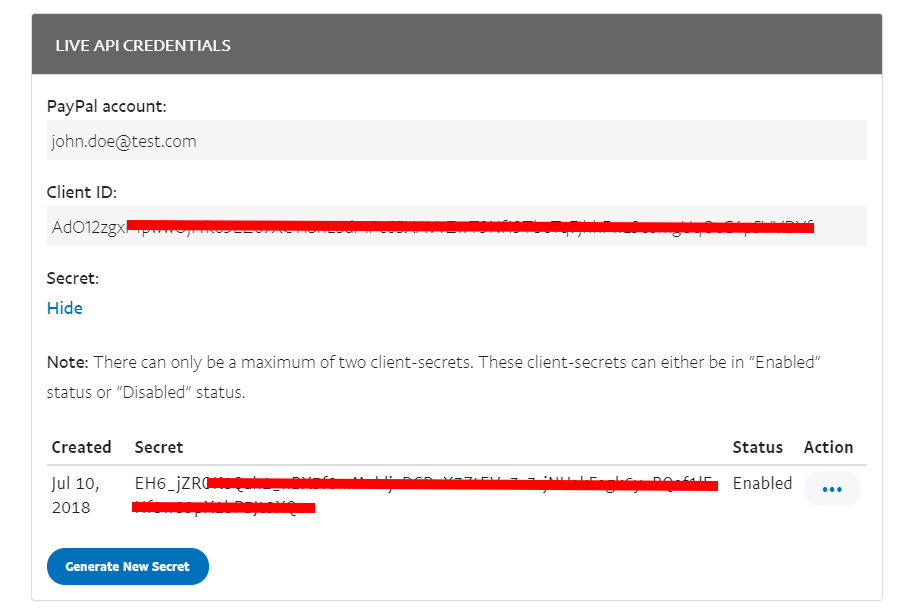
Here, you will find your Client ID and Secret KEY in your REST API app.
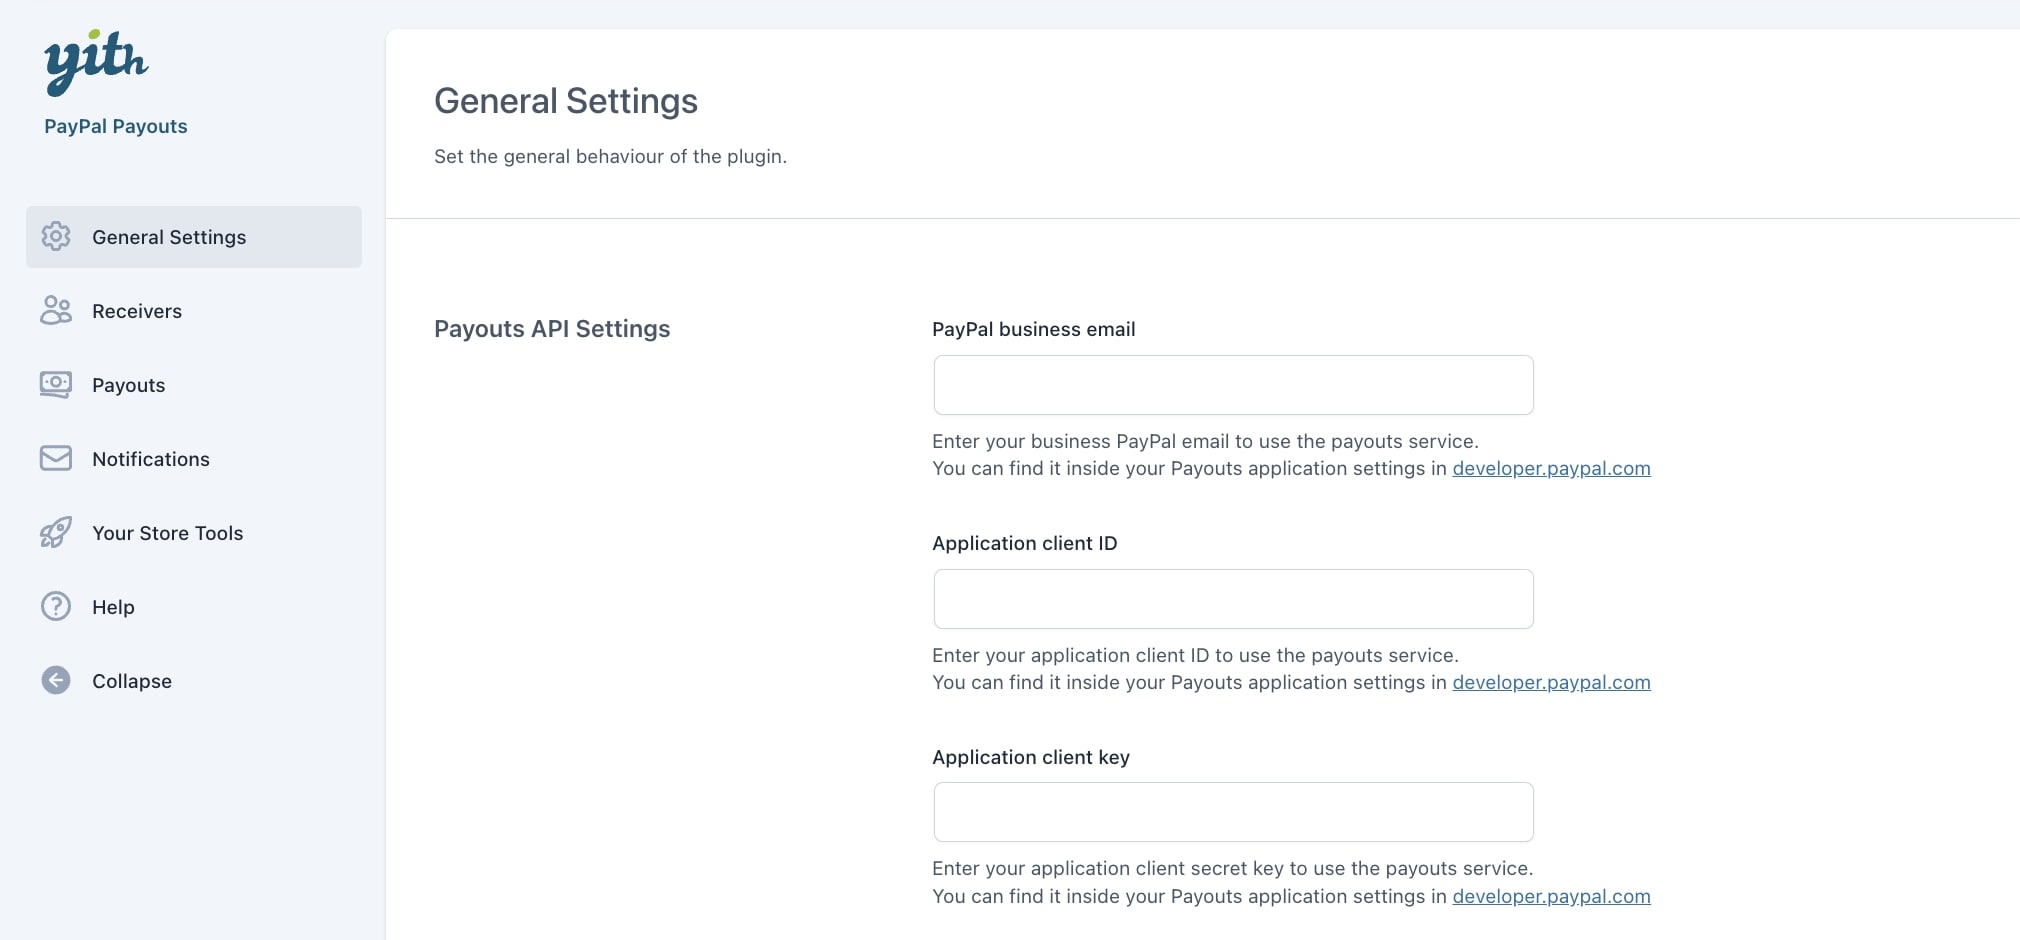
These are the keys that you have to add in the plugin settings. So, go to General settings > Payouts API settings:
PayPal business email: enter your business PayPal email to use the payouts service. You can find it inside your Payouts applications settings in developer.paypal.com.
Application Client ID: enter the key you find under Client ID.
Application Client KEY: enter the key you find under Secret.
Let’s see the other option available in this section:
Enable Sandbox Mode: enable this option if you want to test the plugin with a sandbox PayPal account first, so no real transaction will be made. If you want to create a sandbox account, please, refer to PayPal official documentation.
IMPORTANT: By default, Payouts is enabled in the sandbox environment. Merchants in the U.S. with a business account can enable Payouts in the live environment. Please, refer to PayPal official documentation for more information.
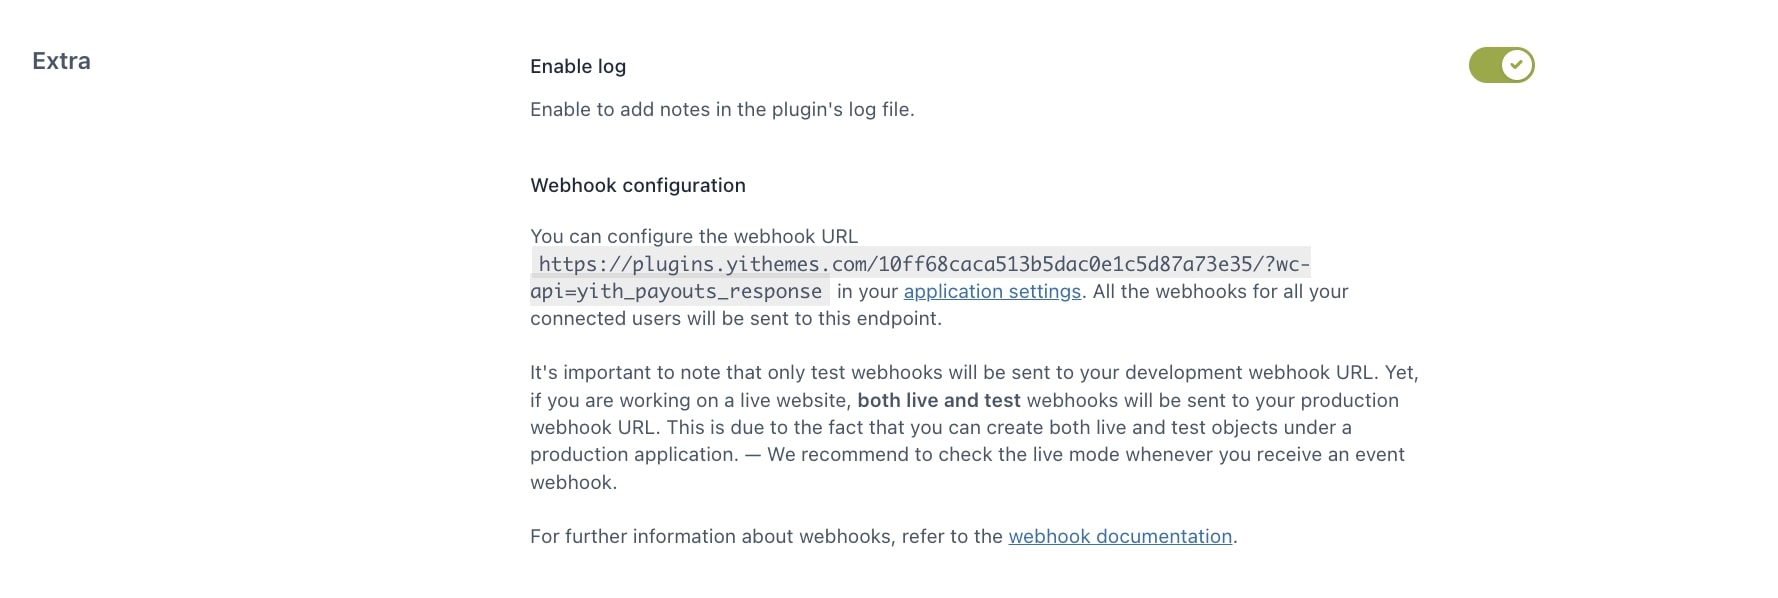
Enable Log: enable this option to see the error log during debugging. Remember to disable it when your website is regularly running.
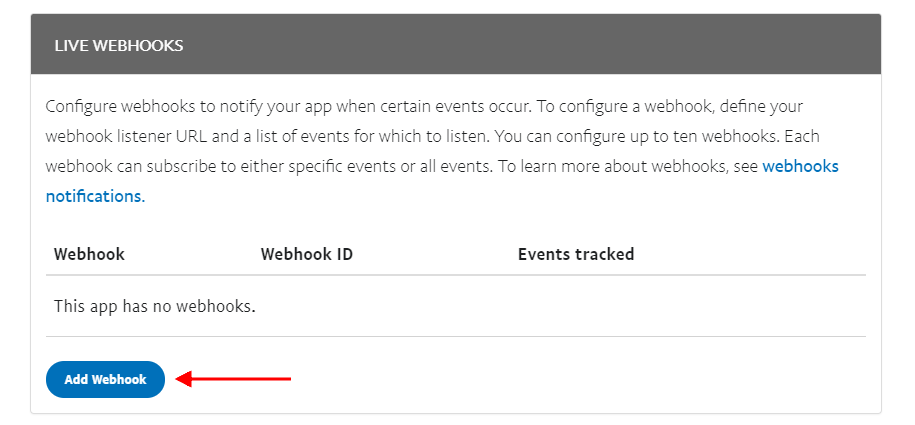
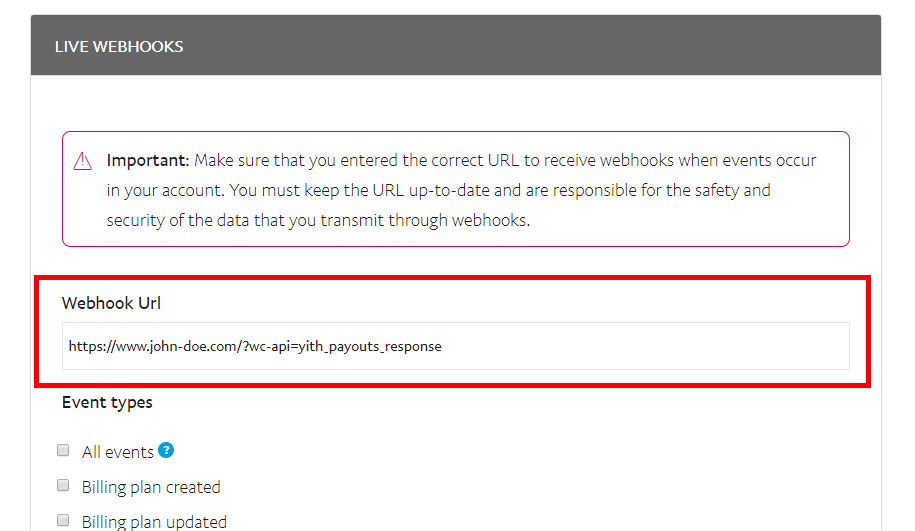
Webhook Configuration: here you can find the URL you must enter in your PayPal account setting to issue the payments correctly. To set it up, click on Add Webhook in your PayPal account and paste the URL into the Webhook URL there:
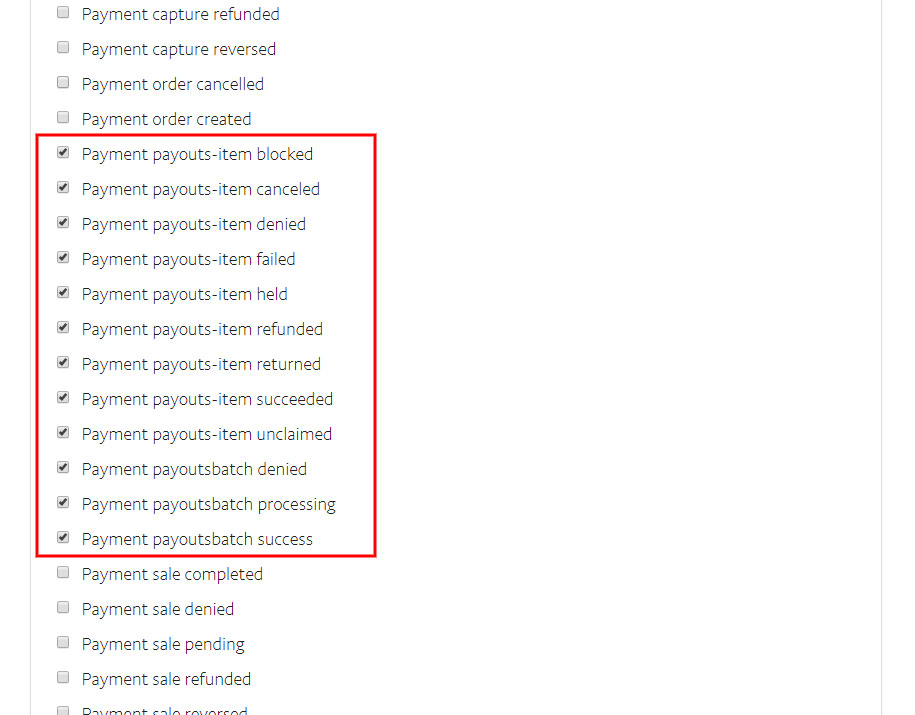
Then, select all PayOuts events as shown in the following image:
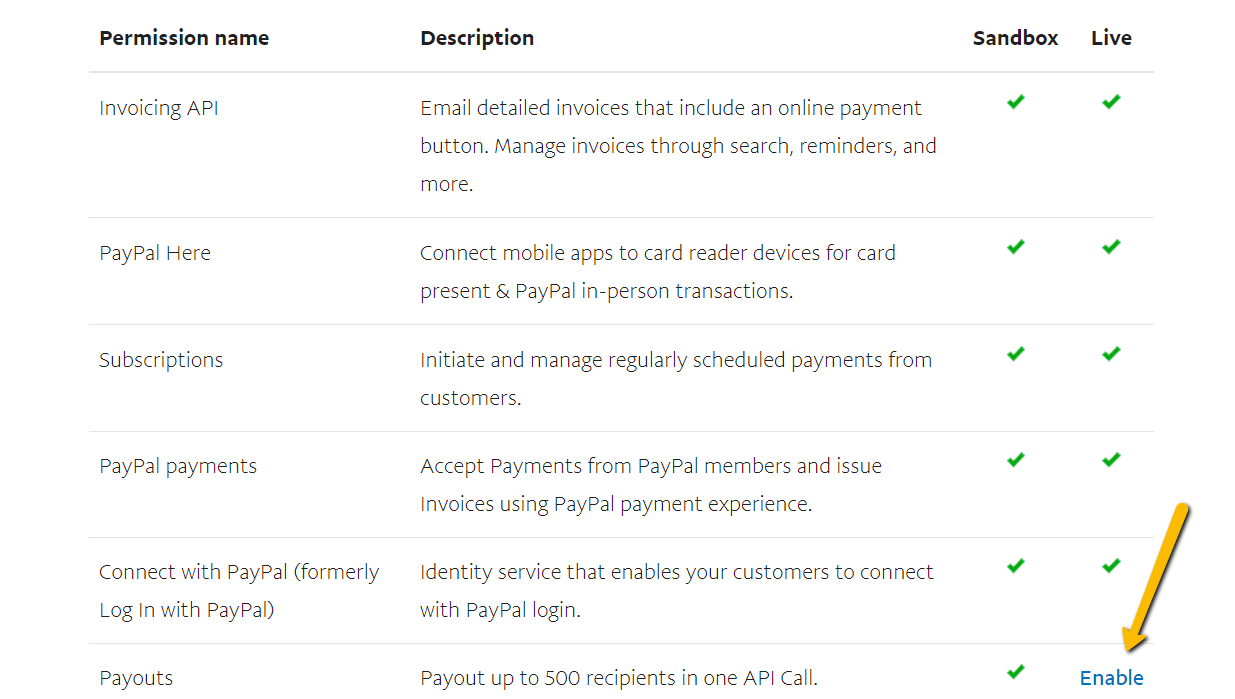
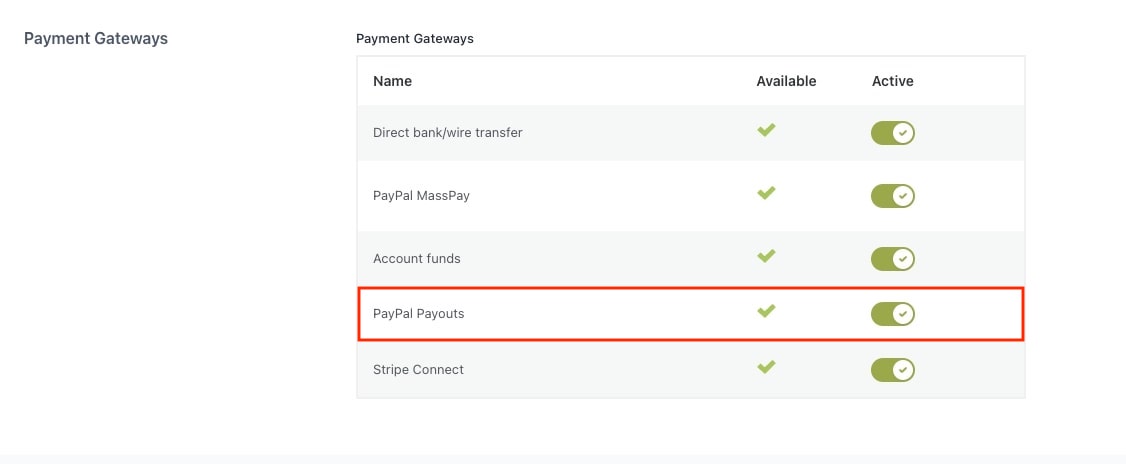
In the Live App settings, check if Payouts is checked like this:
And then in My Account check that your account is a business account , and then the Payouts item has the “green check”.
If it displays the “enable” text, just click on the link and send a message to PayPal to get it enabled:
Once completed, press Save and you’re done.
GDPR
In order to comply with the GDPR (General Data Protection Regulation), the plugin includes a dedicated section in the plugin settings from which you can decide what to do with the information managed by YITH PayPal Payouts.
Export payouts in personal data export requests: when enabled, this option allows users to export information about their own payouts when they submit an account personal data export request.
When handling an account erasure request: this option allows you to choose what to do when a user submits an account erasure request. You can
Remove user ID and PayPal email from the receivers list
Remove the PayPal email from receivers payouts.
For what concerns all the other user information, please, refer to WordPress main page under Tools > Export Personal Data and/or Erase Personal Data.
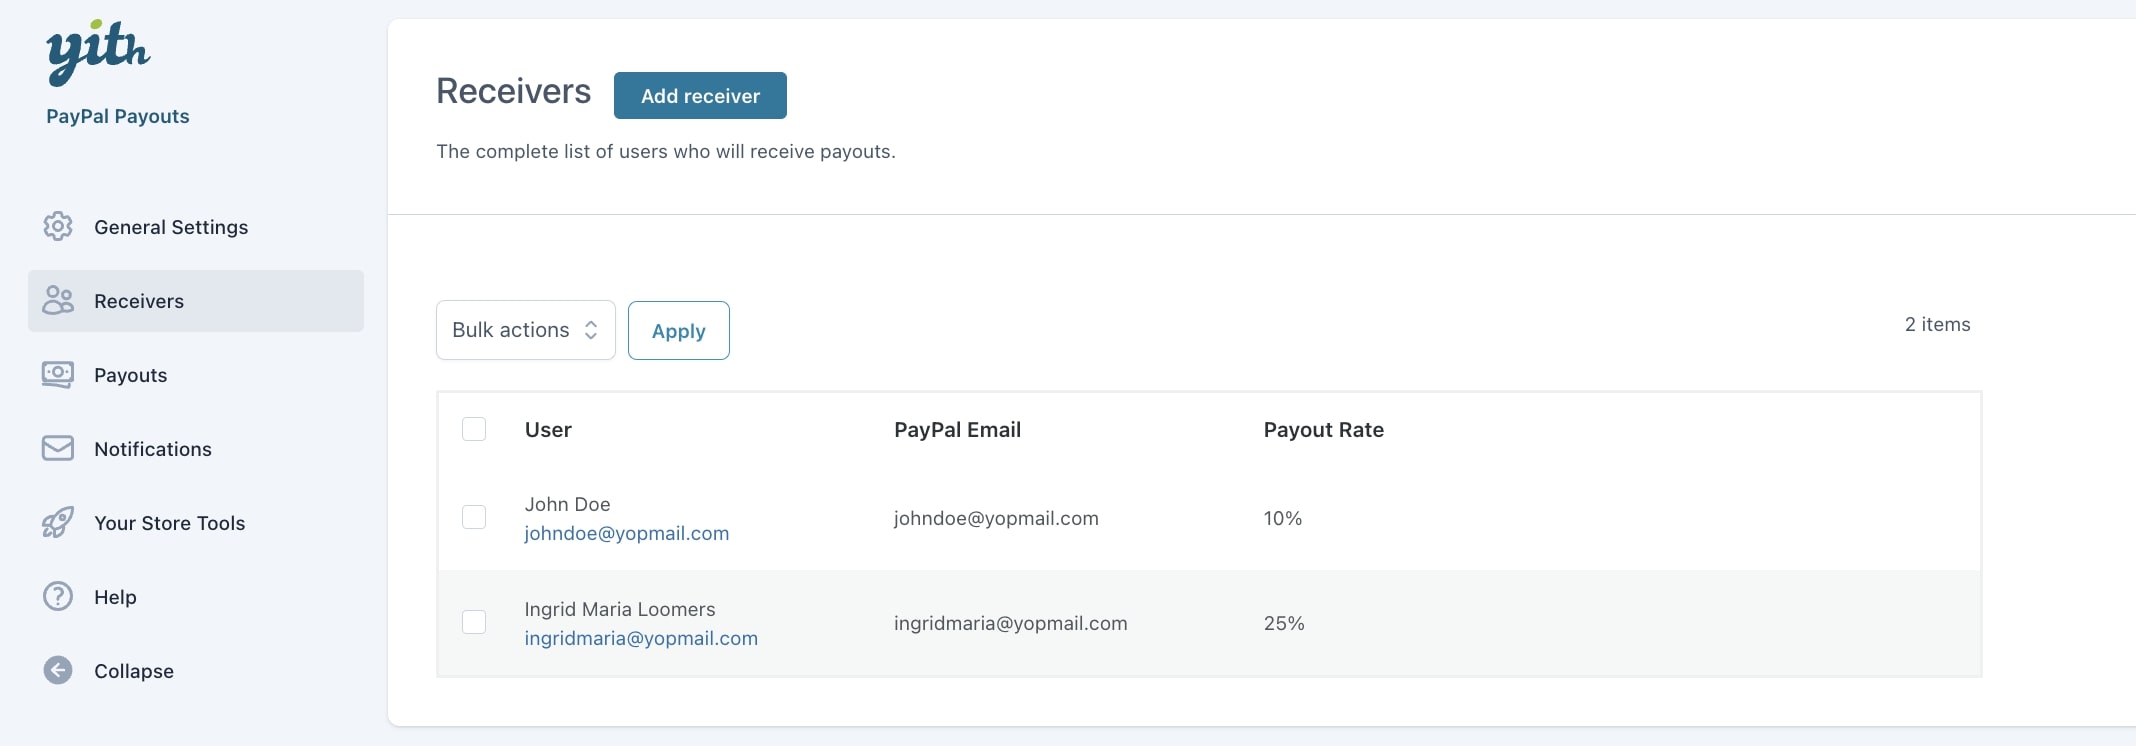
From the section Receivers, you can view all the users who will receive a payout payment.
From this page, you can also manually add new receivers by clicking on the Add Receiver button.
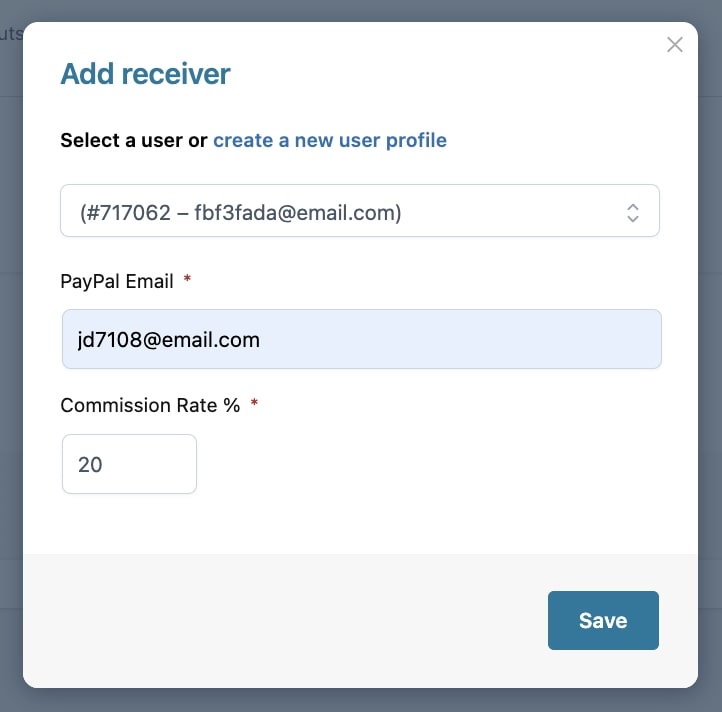
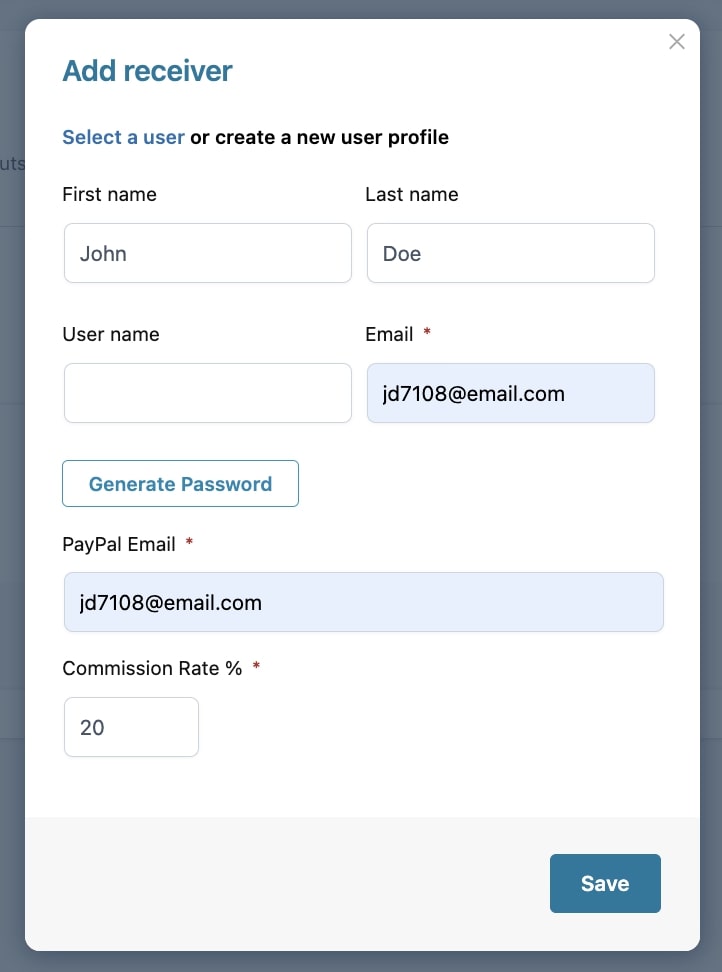
Now, you can either select an existing user or create a new user profile.
In the PayPal email option, enter the user’s PayPal email address, which is where the payments will be sent to. Finally, enter the value of the Commission rate %.
Existing user
New user
Please, note: when you set the commission percentage, make sure it is a reasonable percentage as this commission will be calculated out of the order subtotal, excluding taxes. Yet, every transaction processed by PayPal has fees, so, make sure you consider all the expenses when you set this commission rate.
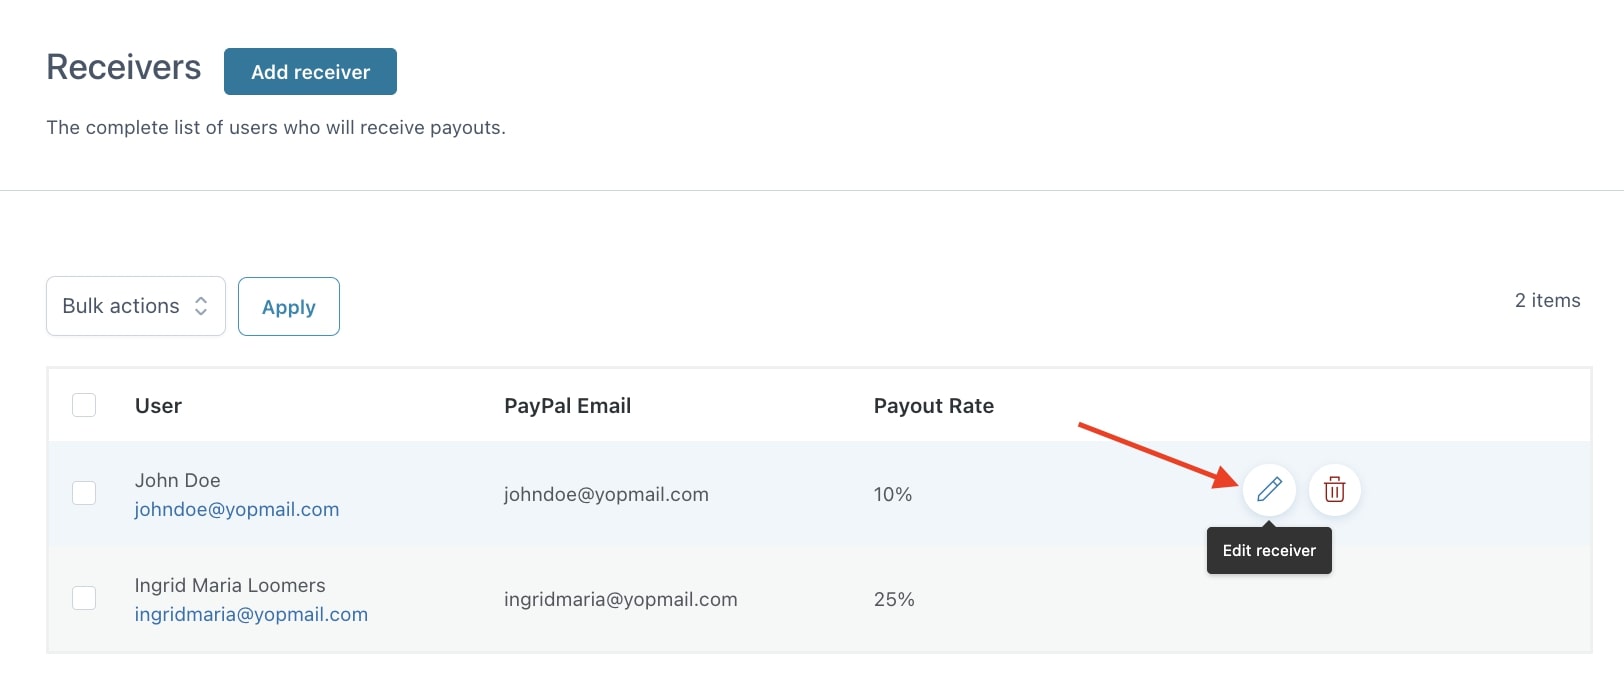
From this page, you can also edit the receiver details at any time and update the PayPal email address and the commission rate:
If you want to read more about PayPal commission fees on transactions, please, refer to PayPal official documentation.
Note: if you’re using this plugin with either YITH Multi Vendor or YITH Affiliates, the plugin uses data retrieved from Affiliates and Multi Vendor to pay the payouts. Therefore, it is not necessary to add affiliates and vendors as receivers.
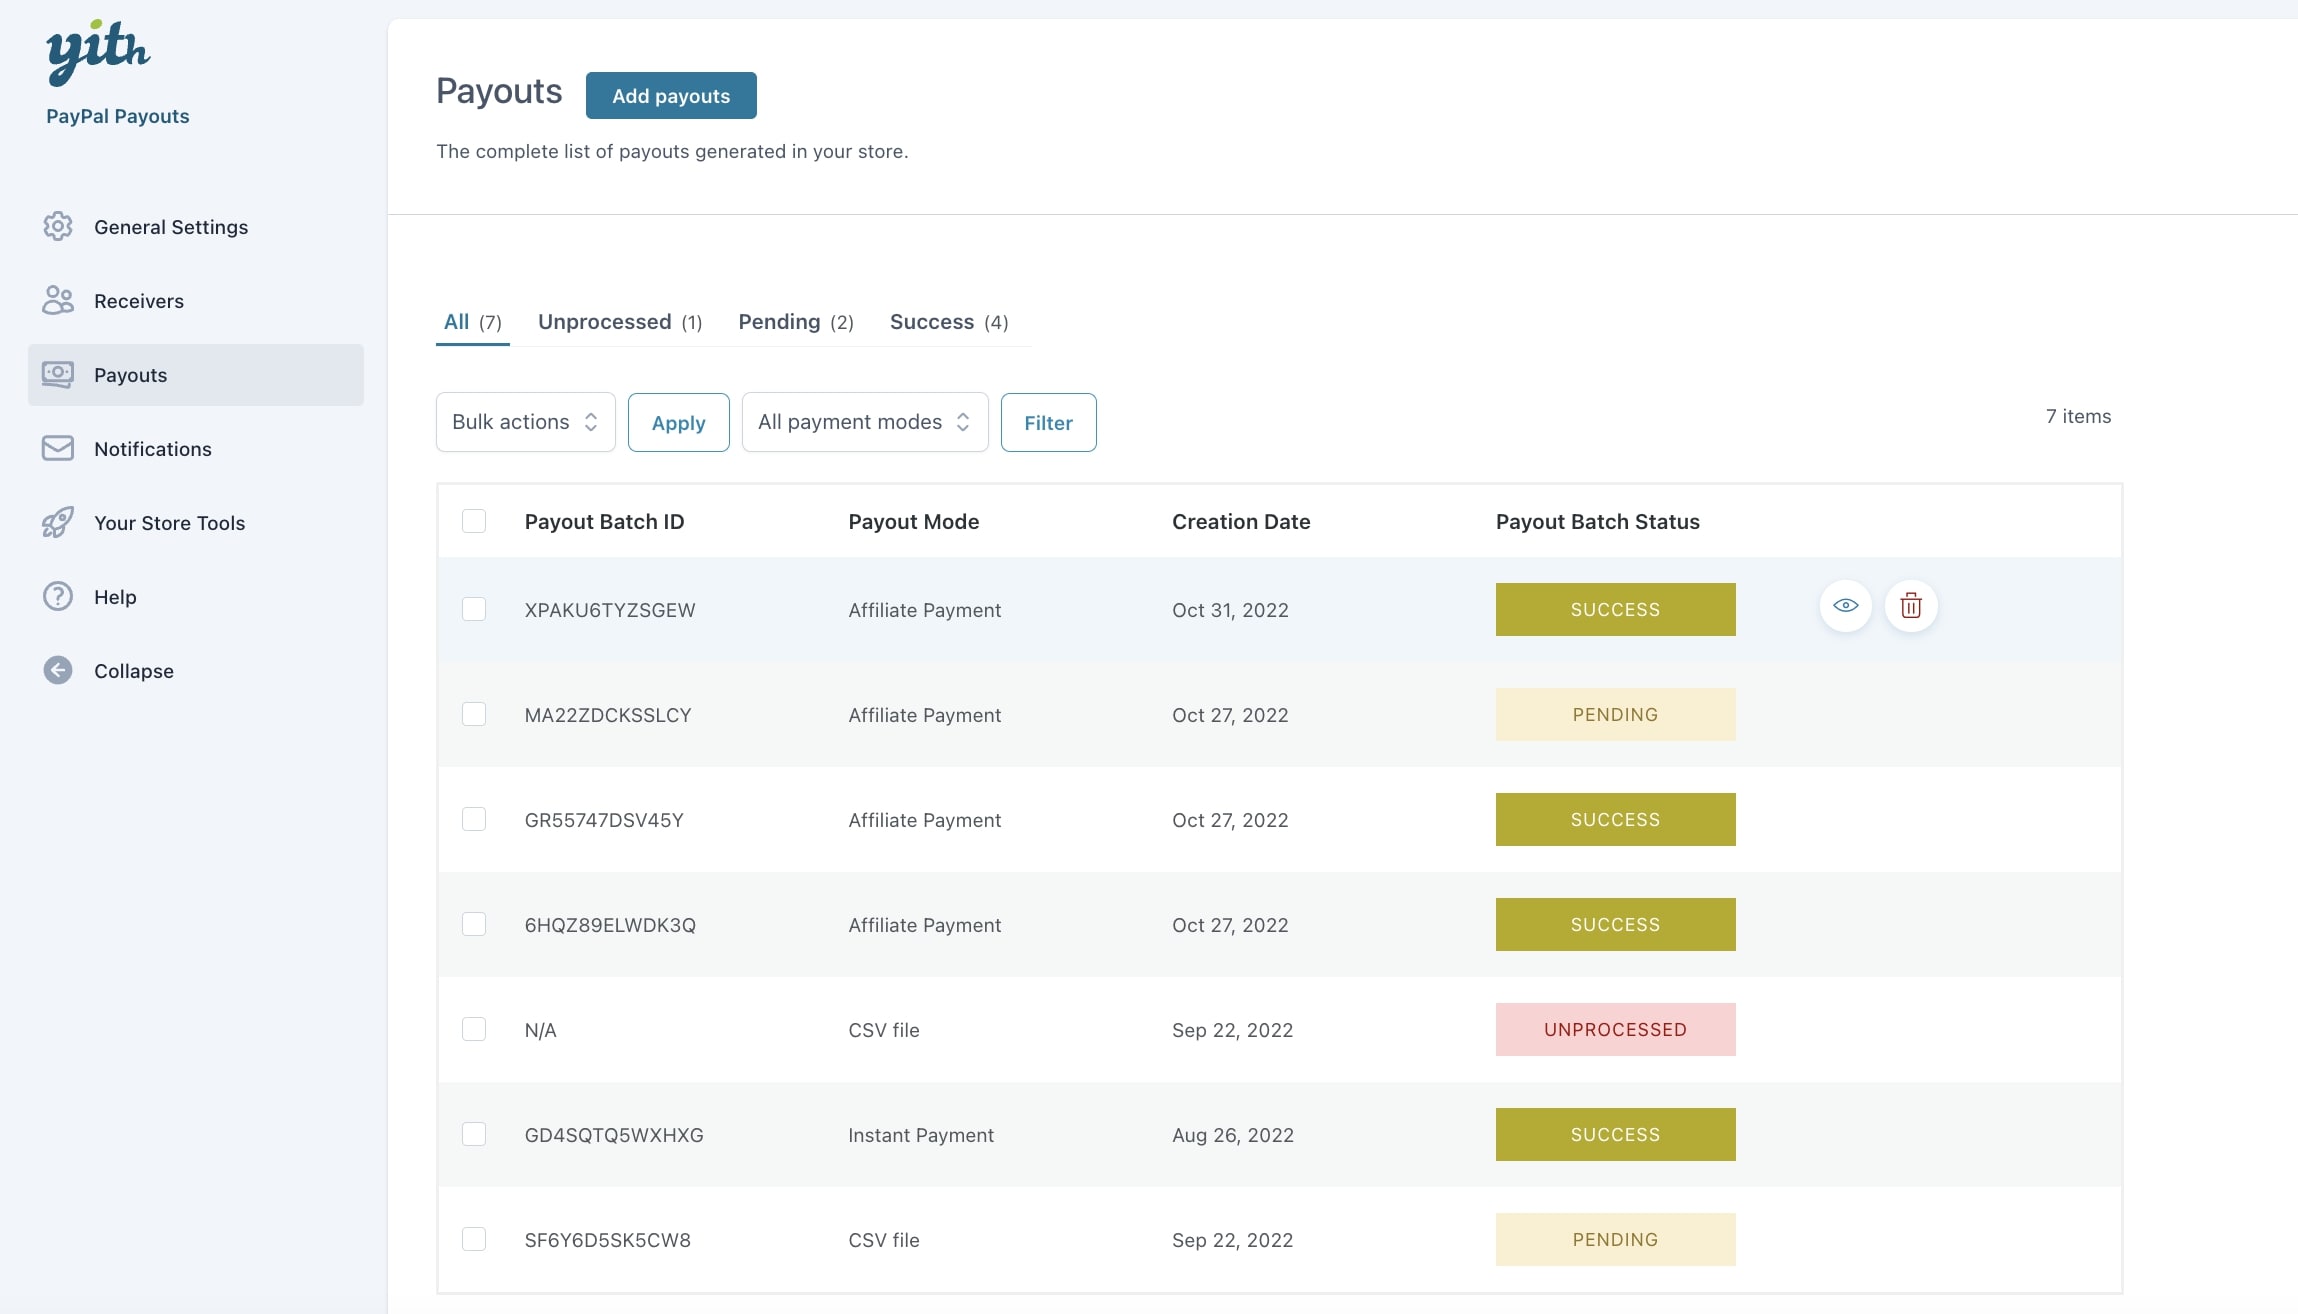
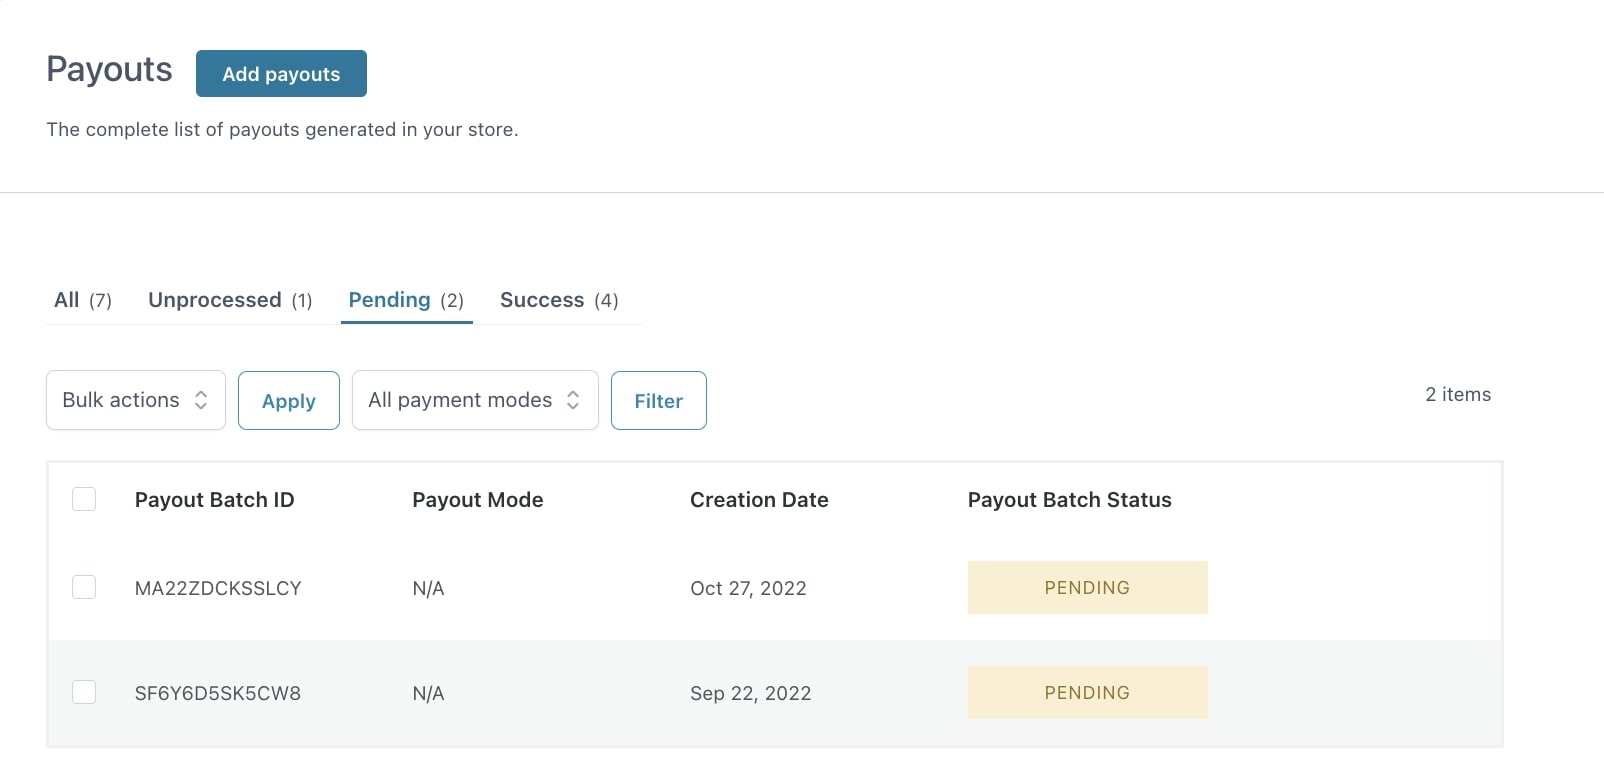
In the following section, Payouts, you will find all the payouts you have issued so far.
Batch ID
Payouts are listed in batches and you will see one batch for every order of your store. Every batch is identified by a unique ID.
IMPORTANT: Please, consider that the payouts will only be issued when the order status goes to completed.
Payout mode
It refers to the type of payment that is linked to the batch. It can be any of the following:
InstantPayment: this is the default status you will see when the plugin is used to pay a percentage on every order to all the receivers.
CSVfile: you can add a payouts batch from a CSV file. See below for more details.
AffiliatePayment: this status appears when the Payout payment is related to an affiliate commission generated through YITH WooCommerce Affiliates plugin.
Commission: this status appears when the Payout payment is related to a vendor commission generated through YITH WooCommerce Multi Vendor plugin.
Batch status
In the Payouts list, you will see also the status of the batch. It can be one of the following:
unprocessed: you will see the status when no payment has been made yet and the order hasn’t gone to completed status yet.
pending: this is a temporary status that appears when the transaction hasn’t been processed yet.
processing: this is the status that the batch payment takes when the payments are being processed.
success: the payout batch take on this status when all payments have been correctly issued to all receivers.
Actions
Next to each batch row, on mousehover, you can quickly apply some actions based on the batch status:
viewpayout
deletepayout
checkstatus
pay.
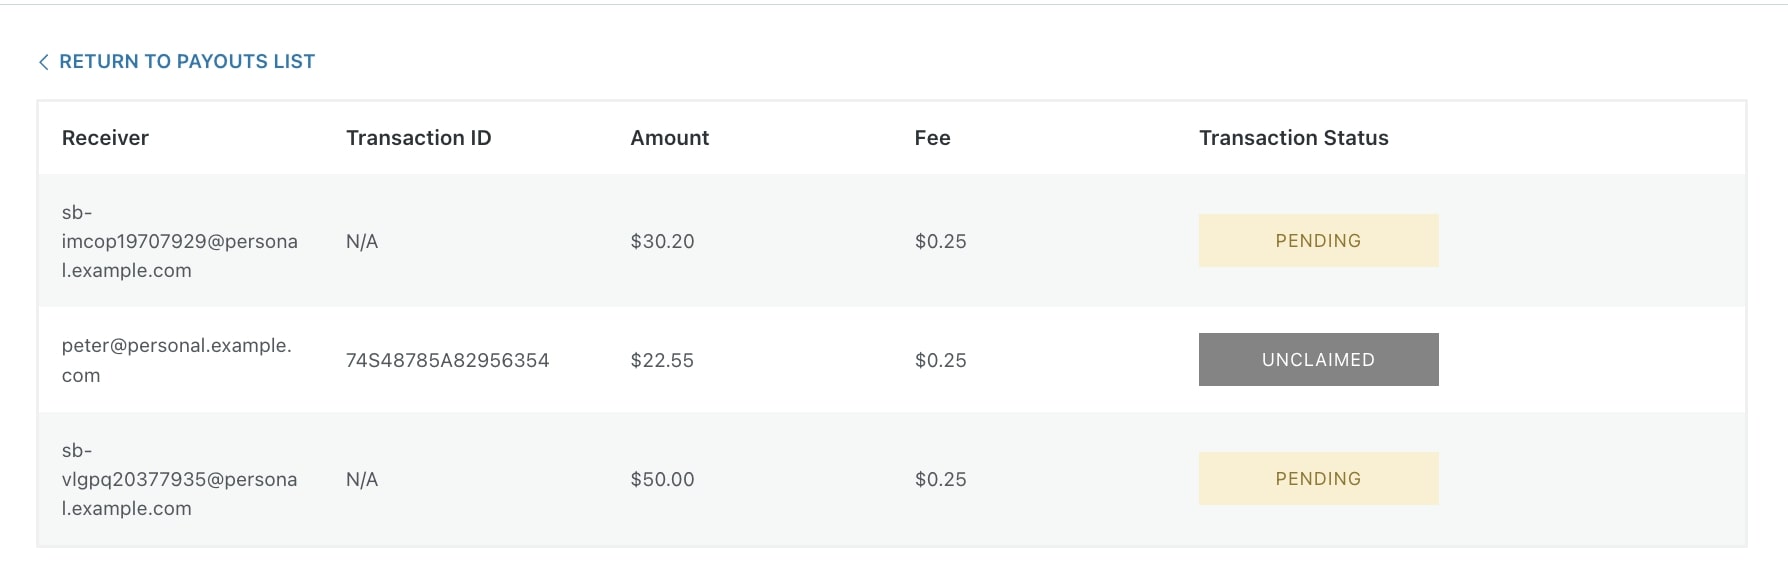
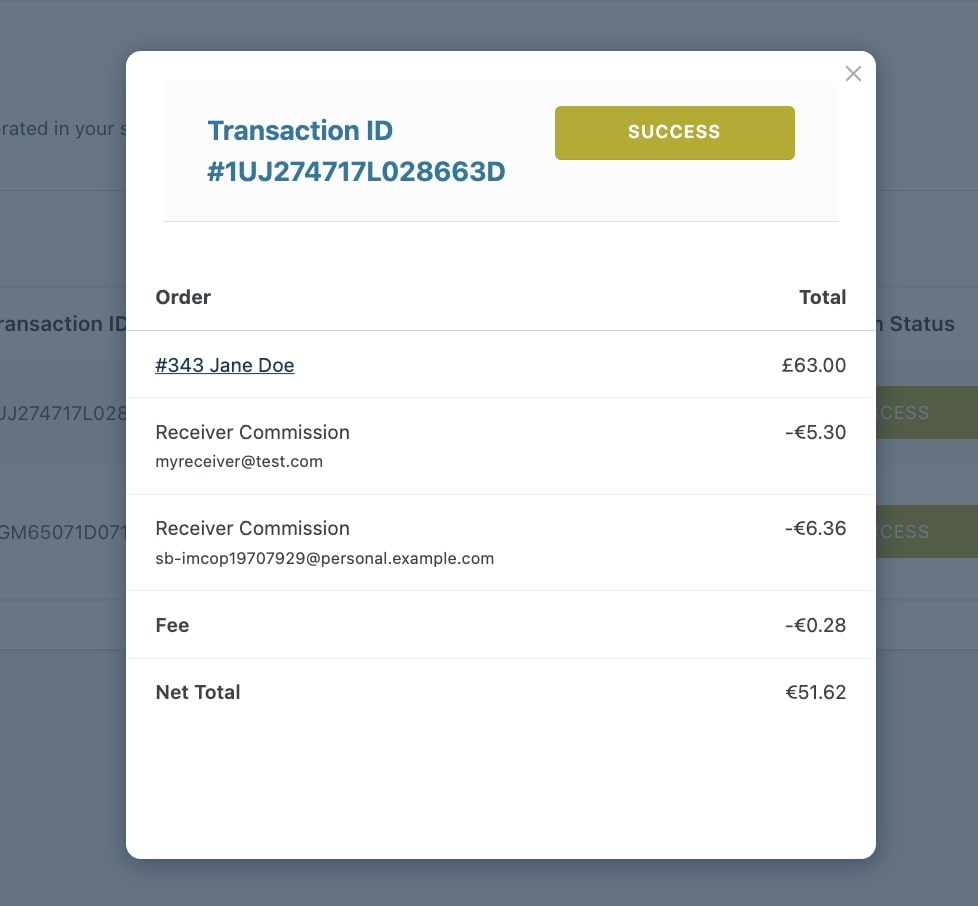
View payout
By clicking on the View payout icon, you can see the details of the payout, which can include payments for one or multiple receivers.
Here you can see a reference of the receiver, the transaction ID for each receiver, the amount, the fees paid and the transaction status.
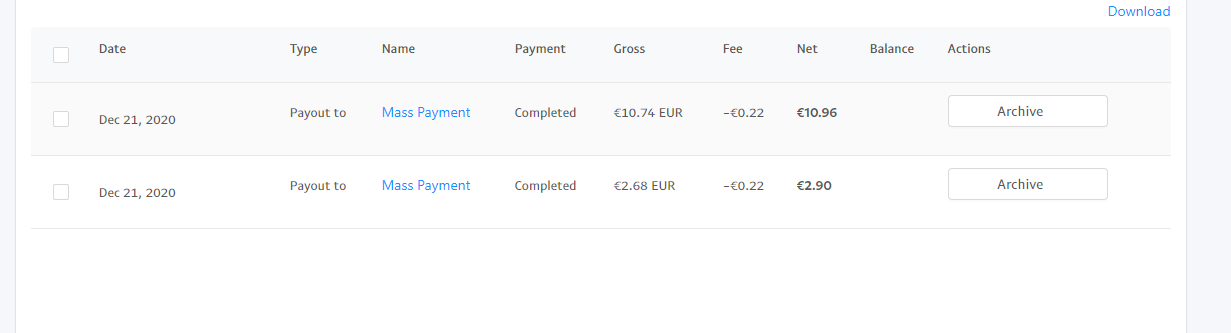
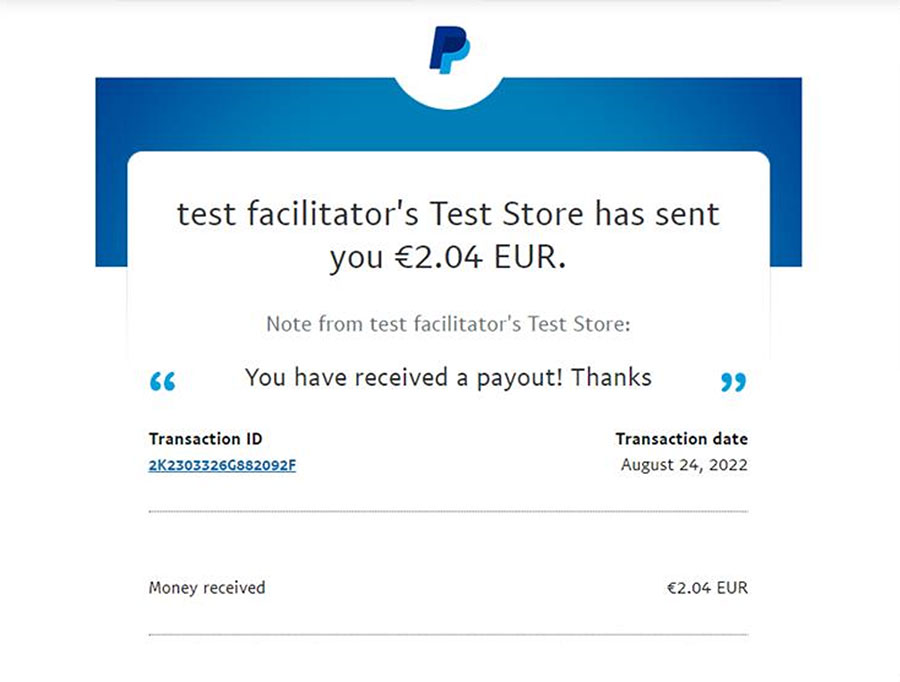
This is an example of how the transactions look like in the admin’s PayPal account:
If you use this plugin in combination with YITH Multi Vendor or YITH Affiliates, there might be more transactions in the same batch than the listed receivers.
Check status
From this view, if a transaction status is “pending”, you will be able to check the status: if there was an issue with PayPal IPN, this check will make sure it is updated and you can complete your payouts.
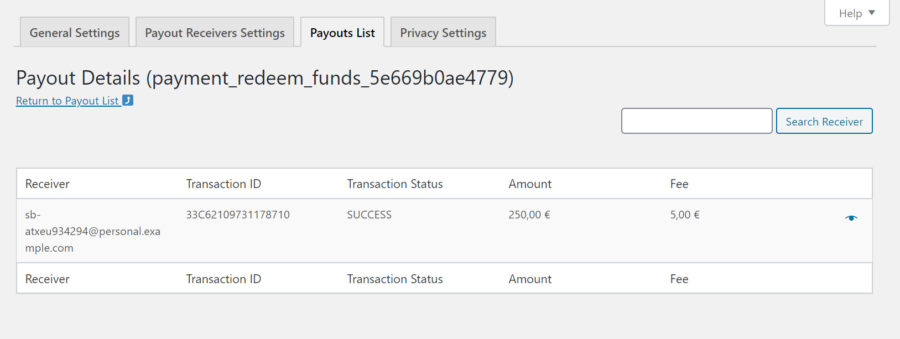
By clicking on the view details icon in the last column of Payout Details, you will get to see a popup with the Payout item details:
You can find the list of all available statuses of a transaction on this page (refer to §transaction_status).
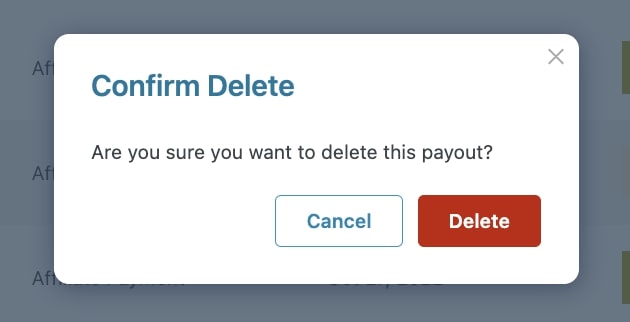
Delete payout
For any payout status, you can delete the payment by clicking on the Delete payout icon.
Since this action cannot be undone, you’ll be asked to confirm the deletion.
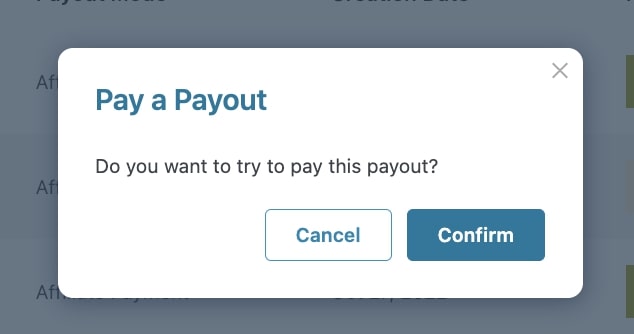
Force payment
Again from the Payouts list, if the batch status is unprocessed, you will be able to see a Pay button to force the payment.
If you click on it, a confirmation popup will appear, so you can confirm the payment.
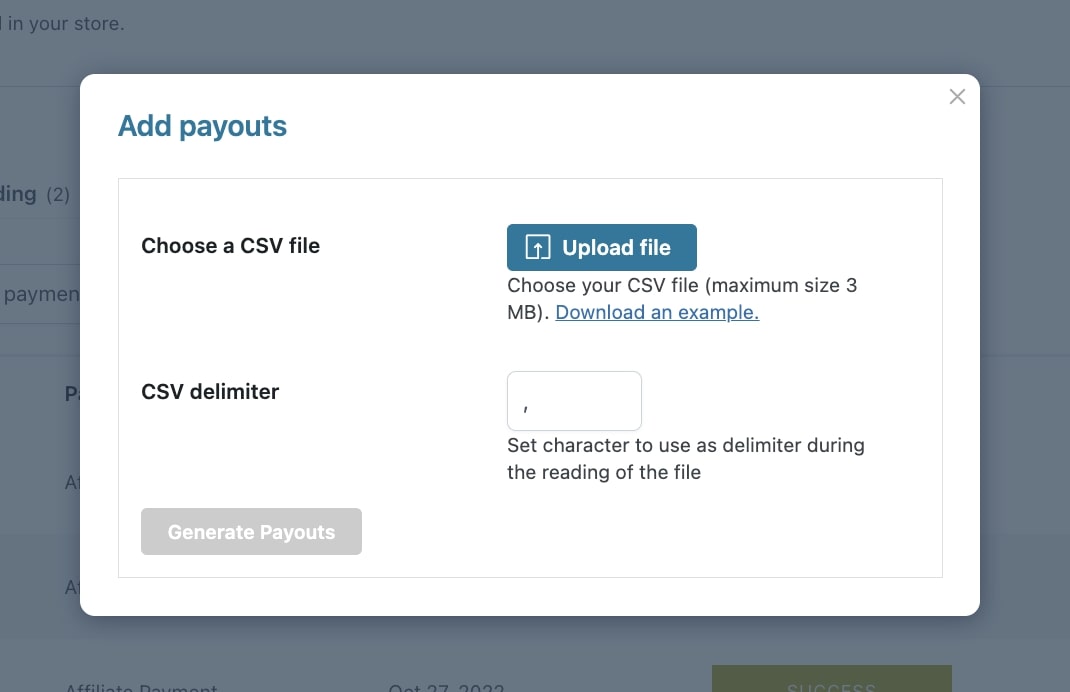
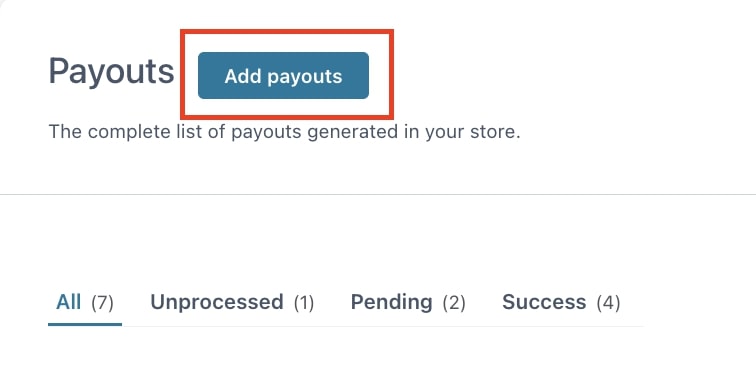
Add payout by CSV
By clicking on the Add payouts button, you will be able to add a payout batch through a CSV file. The CSV file must include the following fields:
payment email
amount
currency
IMPORTANT: each payout can only have one currency, otherwise it will not be processed.
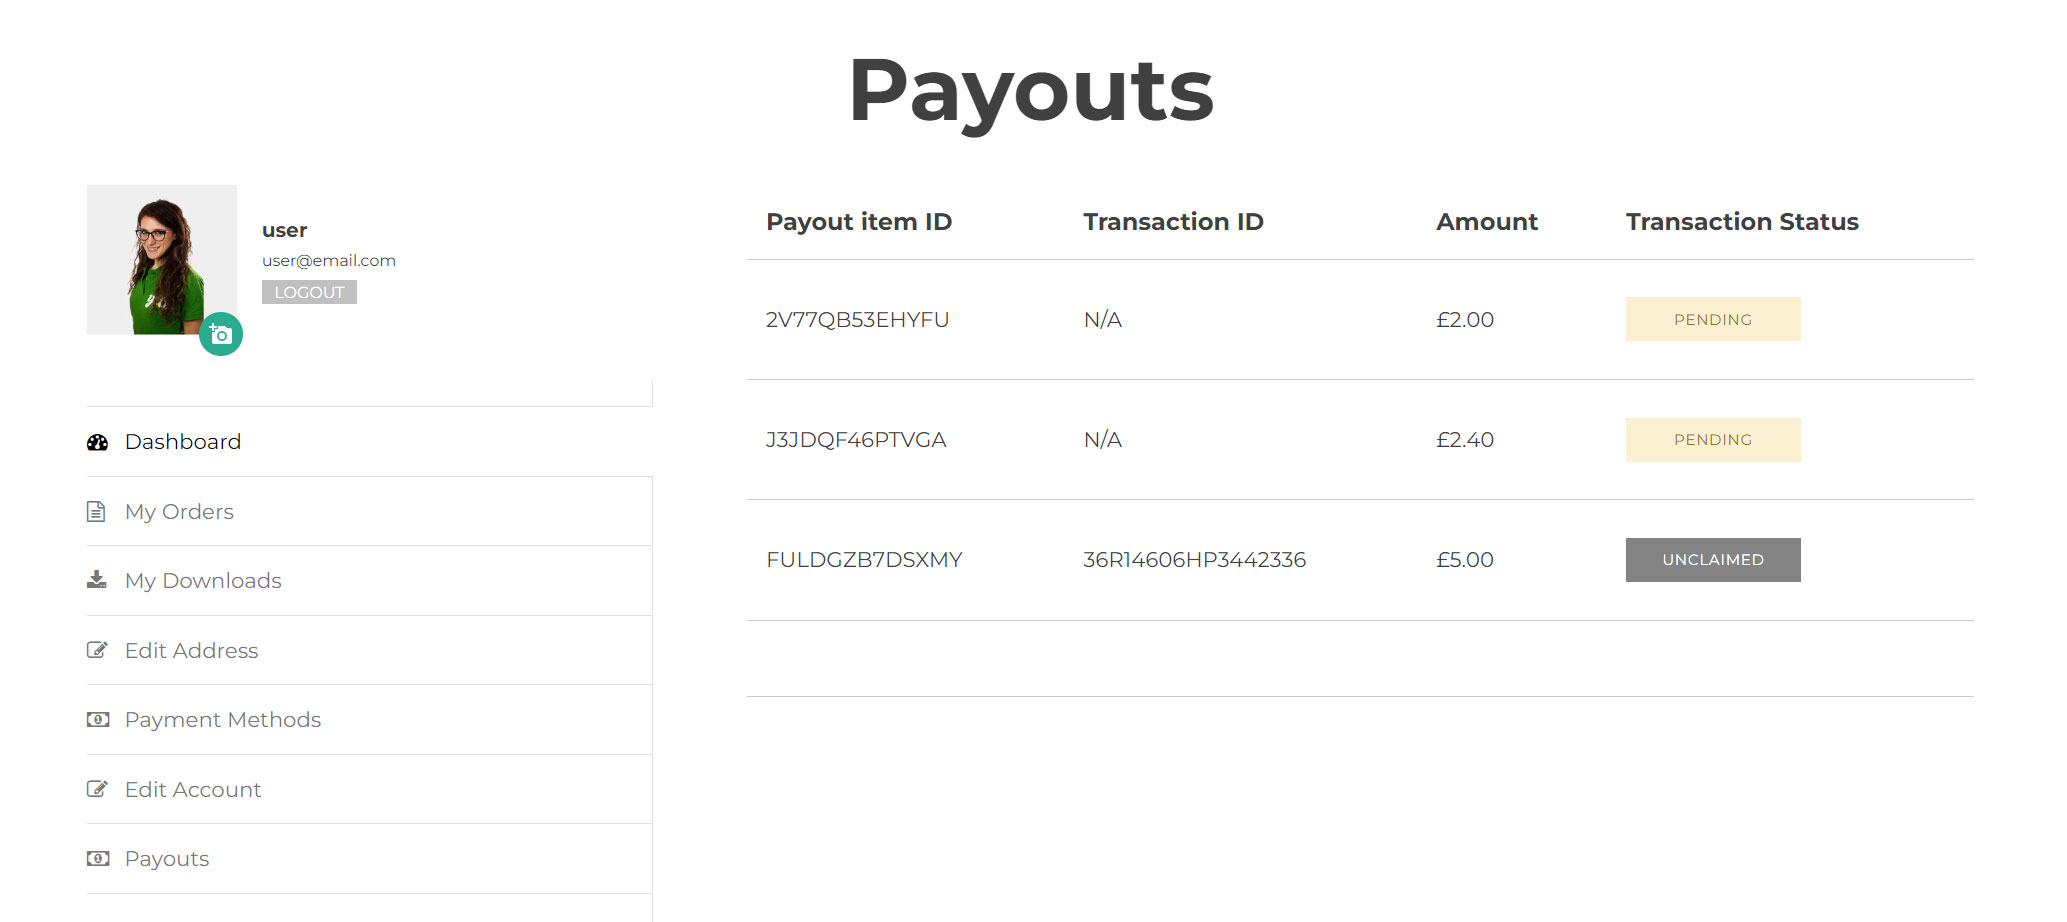
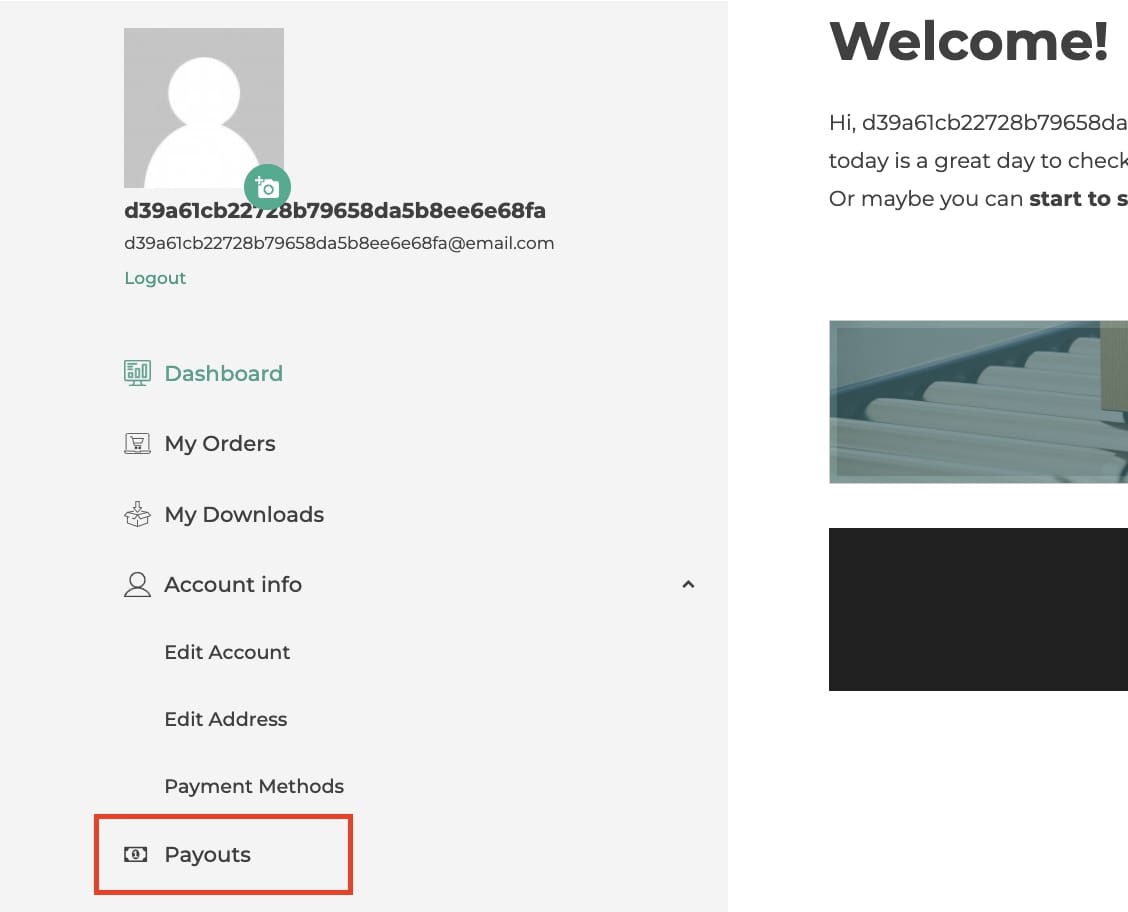
While the admin can keep track of all the payments issued to the receivers from the plugin panel in the Payouts section, each receiver can check their payouts on the frontend, in a dedicated section in My Account page where they can find a menu item called Payouts, automatically added by the plugin.
Here they find the list of all transactions received.
The table includes a reference to the Payout item ID, the Transacton ID, the Transaction status and the amount.
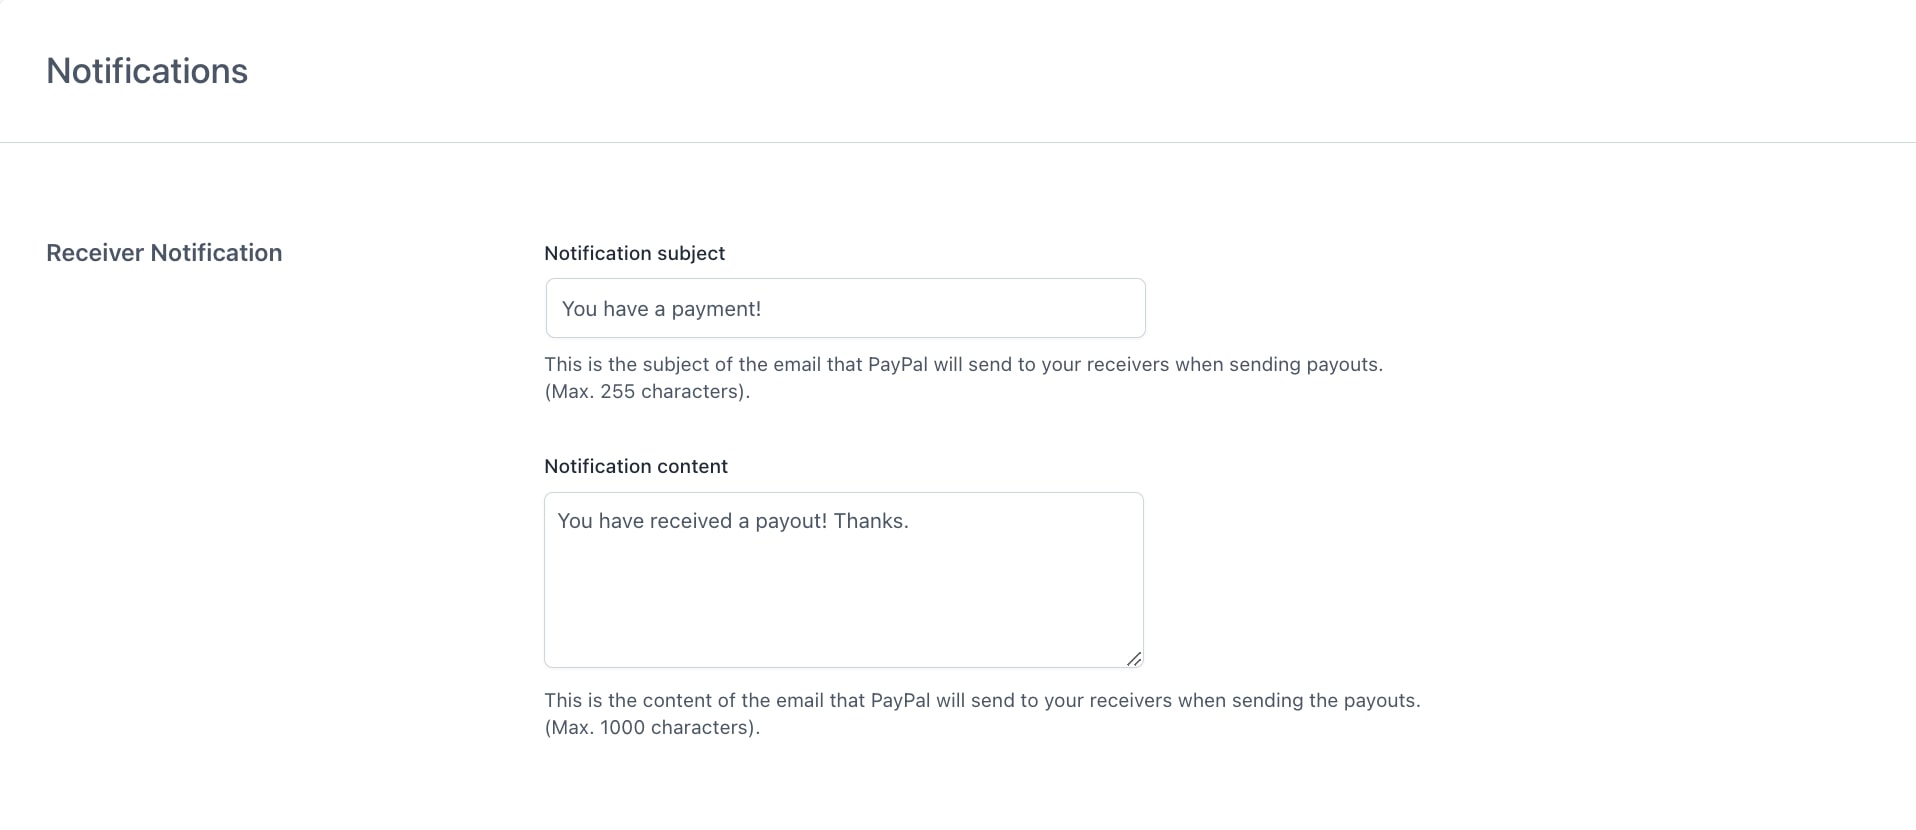
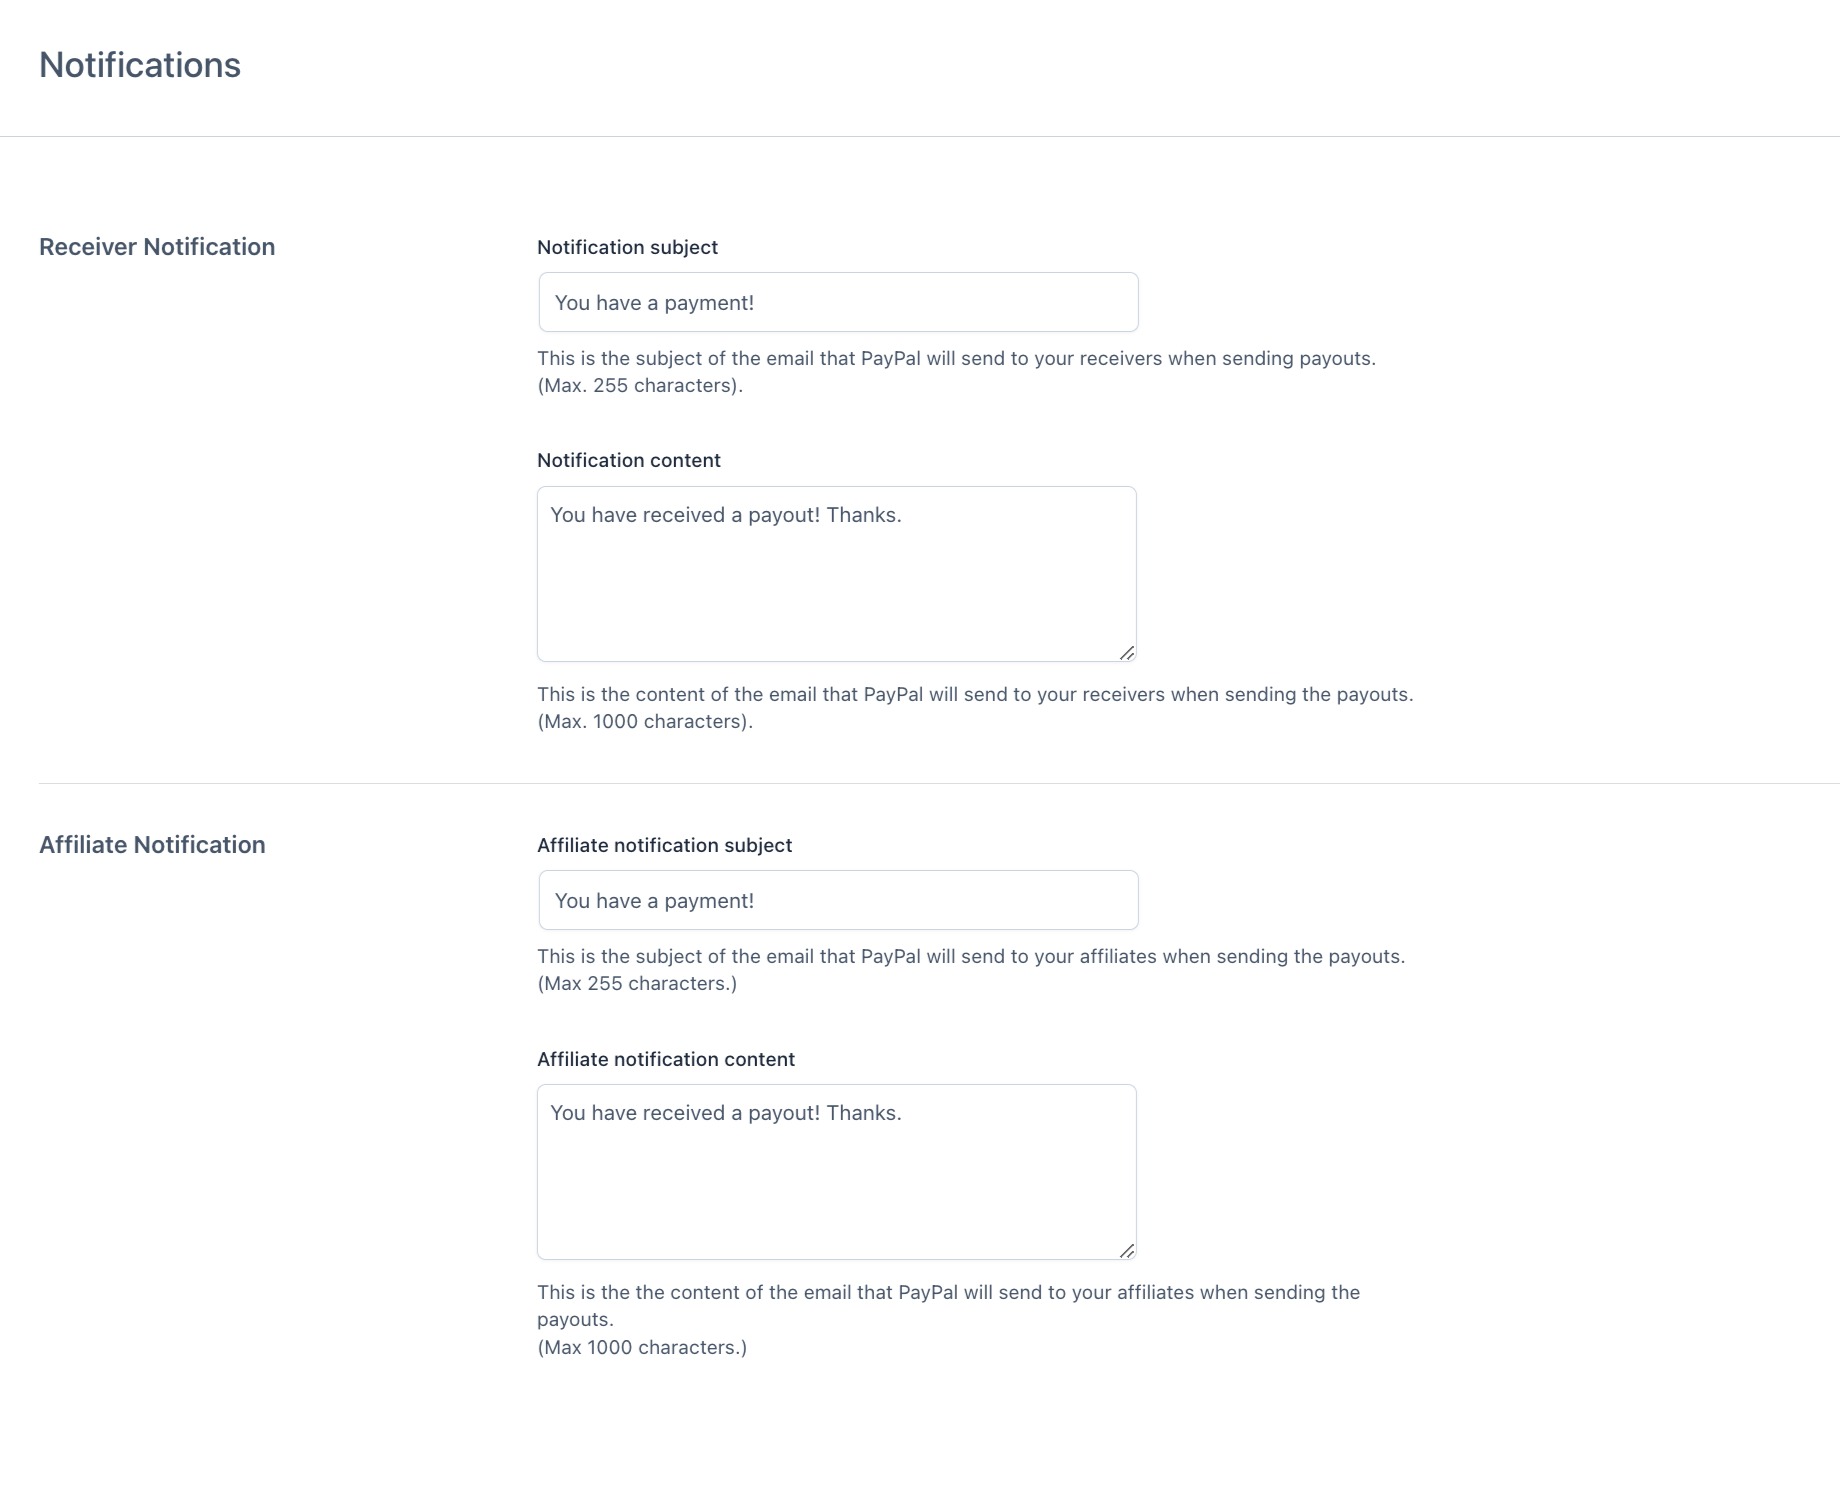
From the Notifications tab, you can customize the text of the email sent to the receivers when they get a payout. You can customize the subject and the content through the available options.
YITH Affiliates allows you to set up an affiliation program on your site, so your users can promote your store and earn a commission on each sale made through their referral link.
The integration with YITH PayPal Payouts for WooCommerce allows you to pay all the commissions that are generated by your affiliates through PayPal.
First of all, make sure the plugin is installed and activated. Now enable this gateway from YITH > Affiliates > General options > Commissions & Payments > Payment gateways.
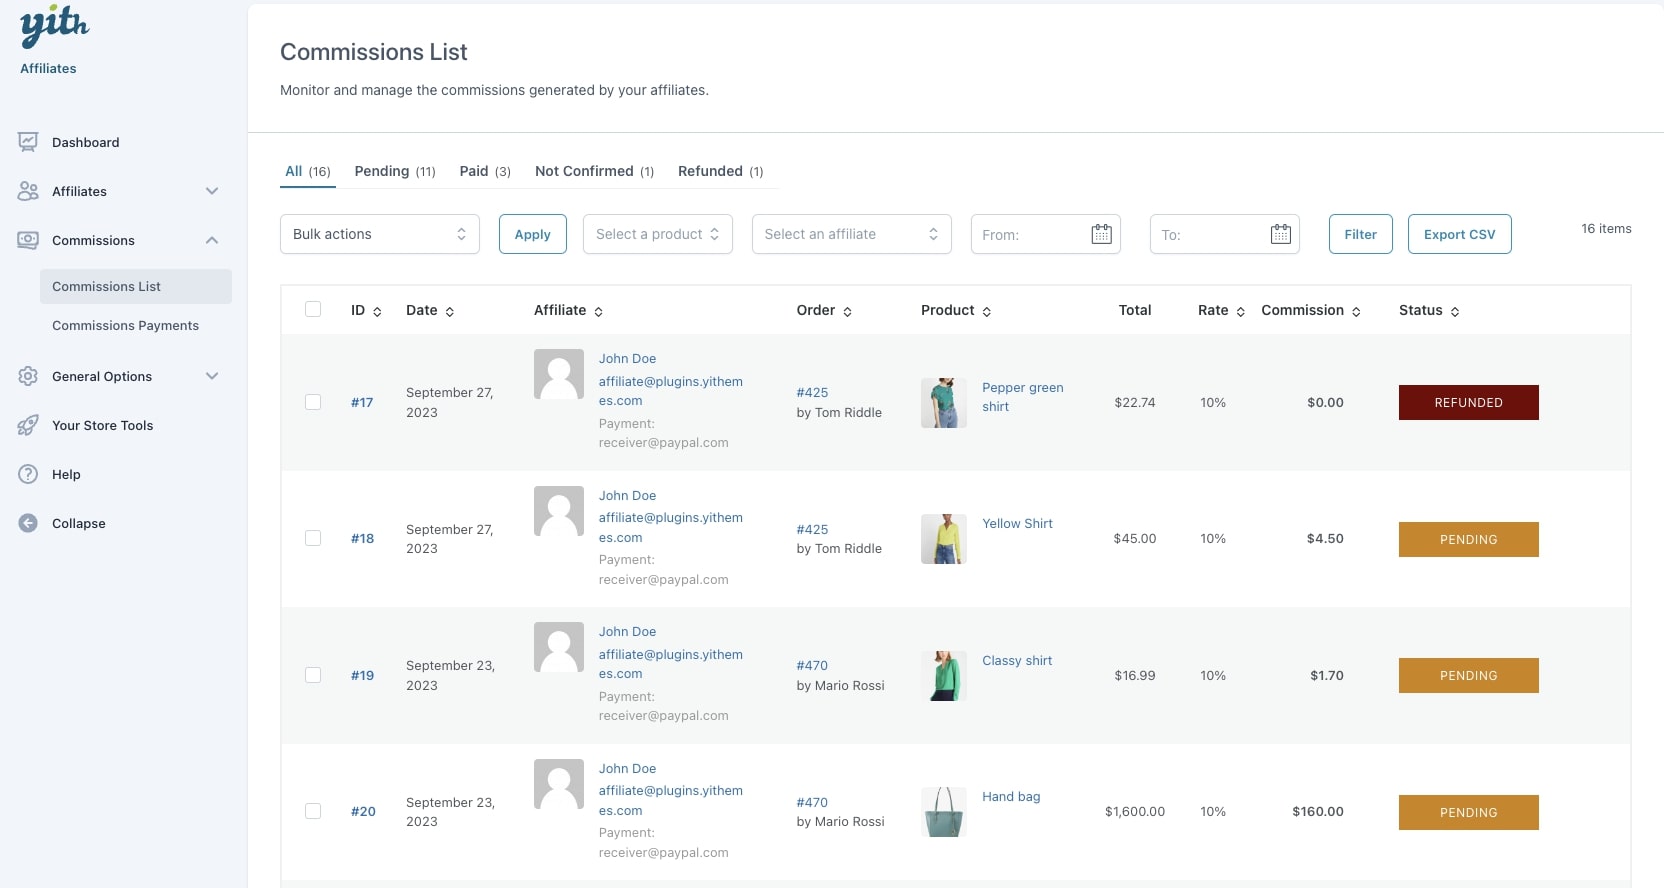
Whenever an affiliate drives a sale to your shop, you will see the list of commissions in YITH > Affiliates > Commissions > Commissions List.
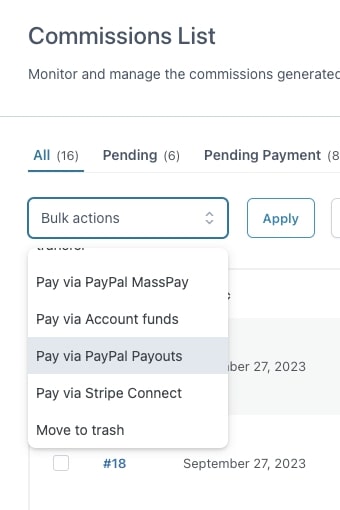
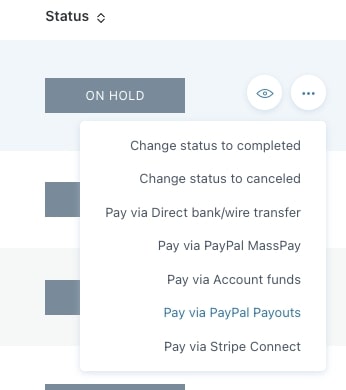
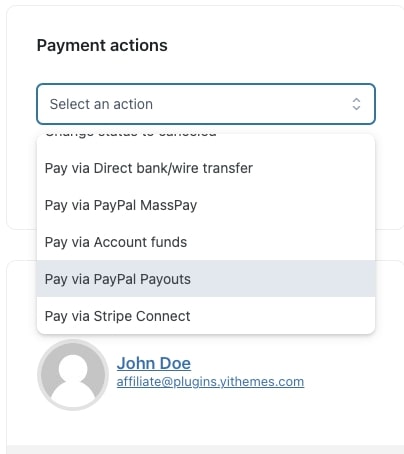
You will be able to see this payment gateway as a payment option for on the Commissions page, both in the bulk actions and in every single commission.
Based on the payment settings, the payment will be either processed automatically (please, see this page) or manually.
A payment record will be created in the Commissions Payments tab. The payment will be temporarily set as Pending and the commissions as Pending payment. Once PayPal completes and confirms the payment, it will be automatically set to Completed and the commissions as Paid.
Affiliate payments in Payouts list
Once the payment is done, you will also be able to see this payment in your Payouts List. It will be easy to spot the payment of affiliate commission, as they are listed as Affiliate Payment for (followed by the affiliate payment ID) and will take on the affiliate status in the PayOut Mode column.
Notifications
When a payout is made, PayPal sends a notification to both the sender and the receiver. You can customize the email subject and content from YITH PayPal Payouts > Notifications. To show the affiliate’s commission IDs in the content of the email, you can use the placeholder ´{commission_ids}.
YITH WooCoomerce Customize My Account Page helps you customize your “My Account” page in your website in a few simple step, by adding new sections and letting you edit the default ones included in WooCommerce.
When using the two plugins together, a new endpoint will be automatically visible in My account page. By clicking there, the user will be able to see a detailed list with all his/her payouts.
For more information on how to set up the Customize My Account Page plugin, check the complete documentation here.
With YITH Multi Vendor you can turn your e-commerce store into a marketplace (a multi-vendor platform) like Amazon or Etsy. Turn your e-commerce store into a marketplace (a multi-vendor platform) and earn commissions on orders generated by your vendors.
You can use YITH PayPal Payouts for WooCommerce to pay your vendors’ commissions instantly and automatically.
Additionally, you will also be able to credit your vendors’ commissions into their digital wallet if you use also YITH Account Funds. So, let’s see this step by step.
1. YITH Multi Vendor and Payouts
To start using it, make sure that both plugins are installed and activated.
Configure YITH PayPal Payouts on your shop as explained on this page.
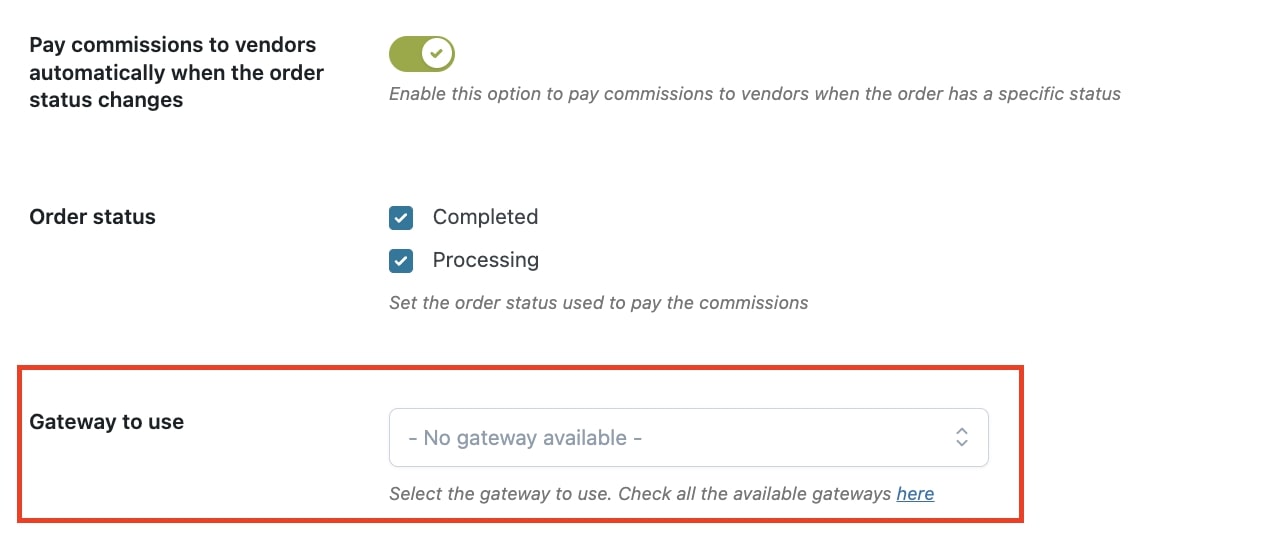
Then, go to the plugin settings under YITH > Multi Vendor > Commissions > Gateways, where you can find all the available gateways for your vendors’ payouts, and enable YITH PayPal Payouts.
Now, if you want to pay vendors commissions automatically when the order status is Completed and/or Processing, go back to the Commissions Settings section, and select it as default payment gateway.
This is the gateway that will be used by default for automatic payments of vendors commissions. Yet, you can also pay the commissions manually through PayPal Payouts as explained here.
Exclude vendors’ products from Payouts commissions
If you want to avoid that vendors’ products are included in the total calculation of your store’s receivers commissions, we suggest you enable the following option from YITH > PayPal Payouts > General settings > Multi Vendor Settings.
Suppose you get an order with 2 products. Product A belongs to vendor A and costs €60, product B does not belong to any vendor and costs €40, so the total order is worth €100. In addition to this, you have set one receiver with a 50% commission.
If the option is disabled, your receiver will get €50.
If the option is enabled, product A is excluded, so the receiver will get €20, which is 50% of product B price only.
If you want to read more about Multi Vendor configuration settings, please, refer to the official plugin documentation.
2. Extra options when using also YITH Account Funds
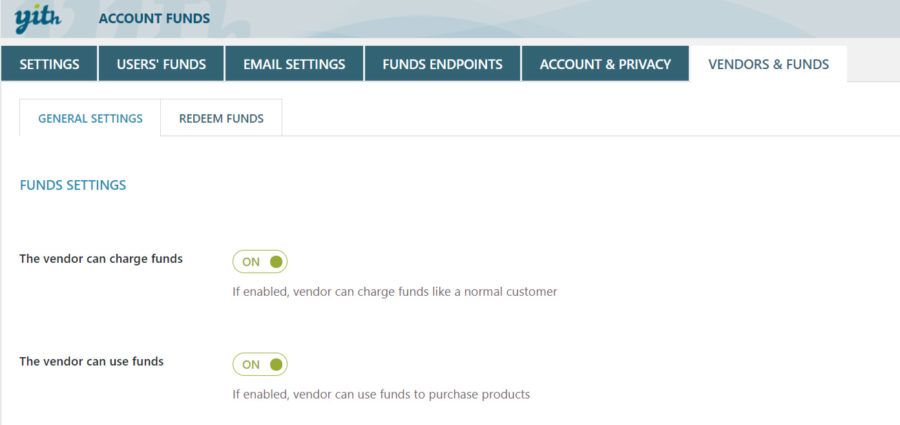
When you activate YITH PayPal Payouts and YITH Multi Vendor with YITH Account funds, you will be able to see a dedicated tab in the plugin settings YITH > Account Funds > Vendors & Funds. This tab includes two sections, the General settings and the Redeem funds one.
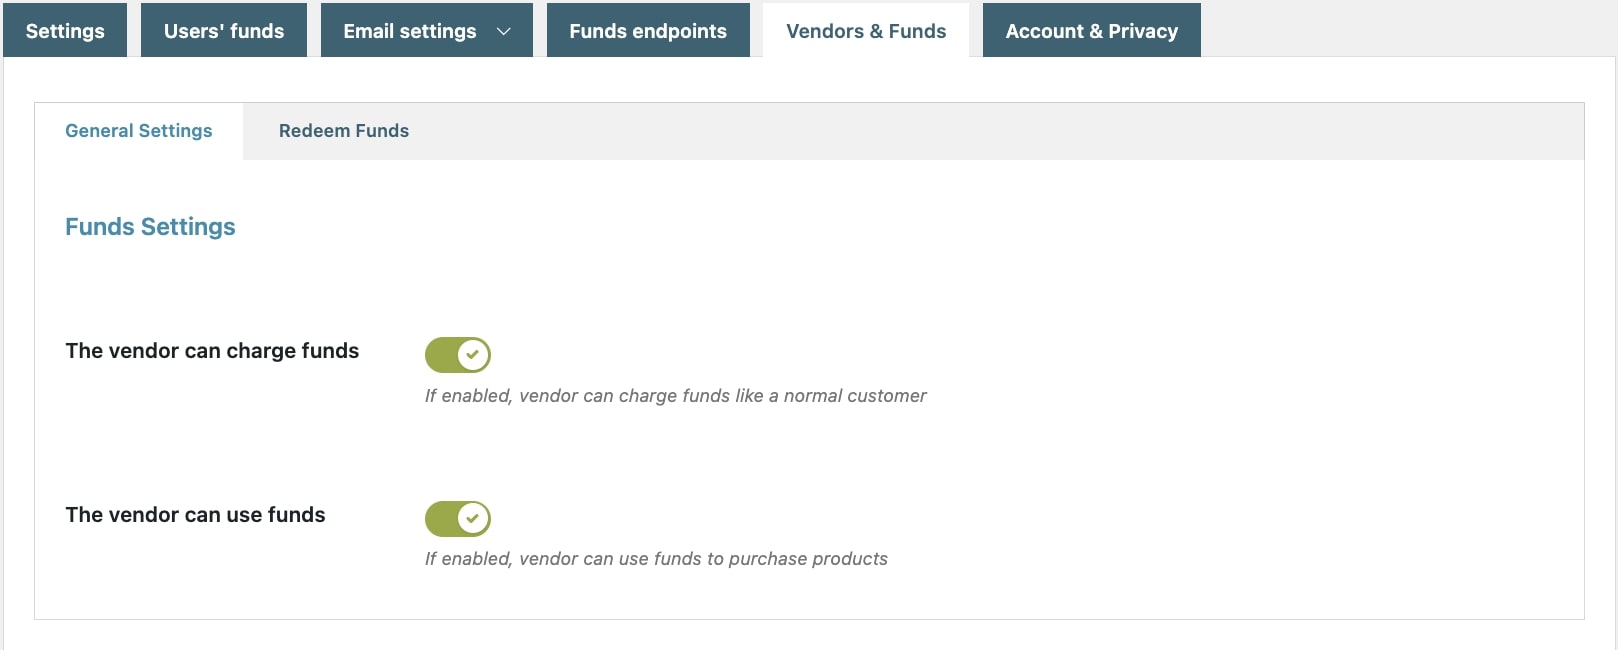
2.1 General settings
In the General settings, you can enable or disable the following options:
The vendor can charge funds: this option allows your vendors to deposit funds in their online wallet like any other customer.
The vendor can use funds: this option allows your vendors to use their funds to purchase products of your shop.
2.2 Redeem funds with PayPal Payouts
The second section, instead, allows you to configure how vendors can Redeem their collected funds.
Please, note that this specific option requires an additional plugin to be installed, so you’ll need all the three plugins below:
Why should I use this combination of plugins instead of using only YITH PayPal Payouts?
If you want to reduce the number of transactions via PayPal and any possible issues with them or with expensive fees.
If you want to incentivate your vendors to purchase from your store using their credit, so you both can save on transaction fees.
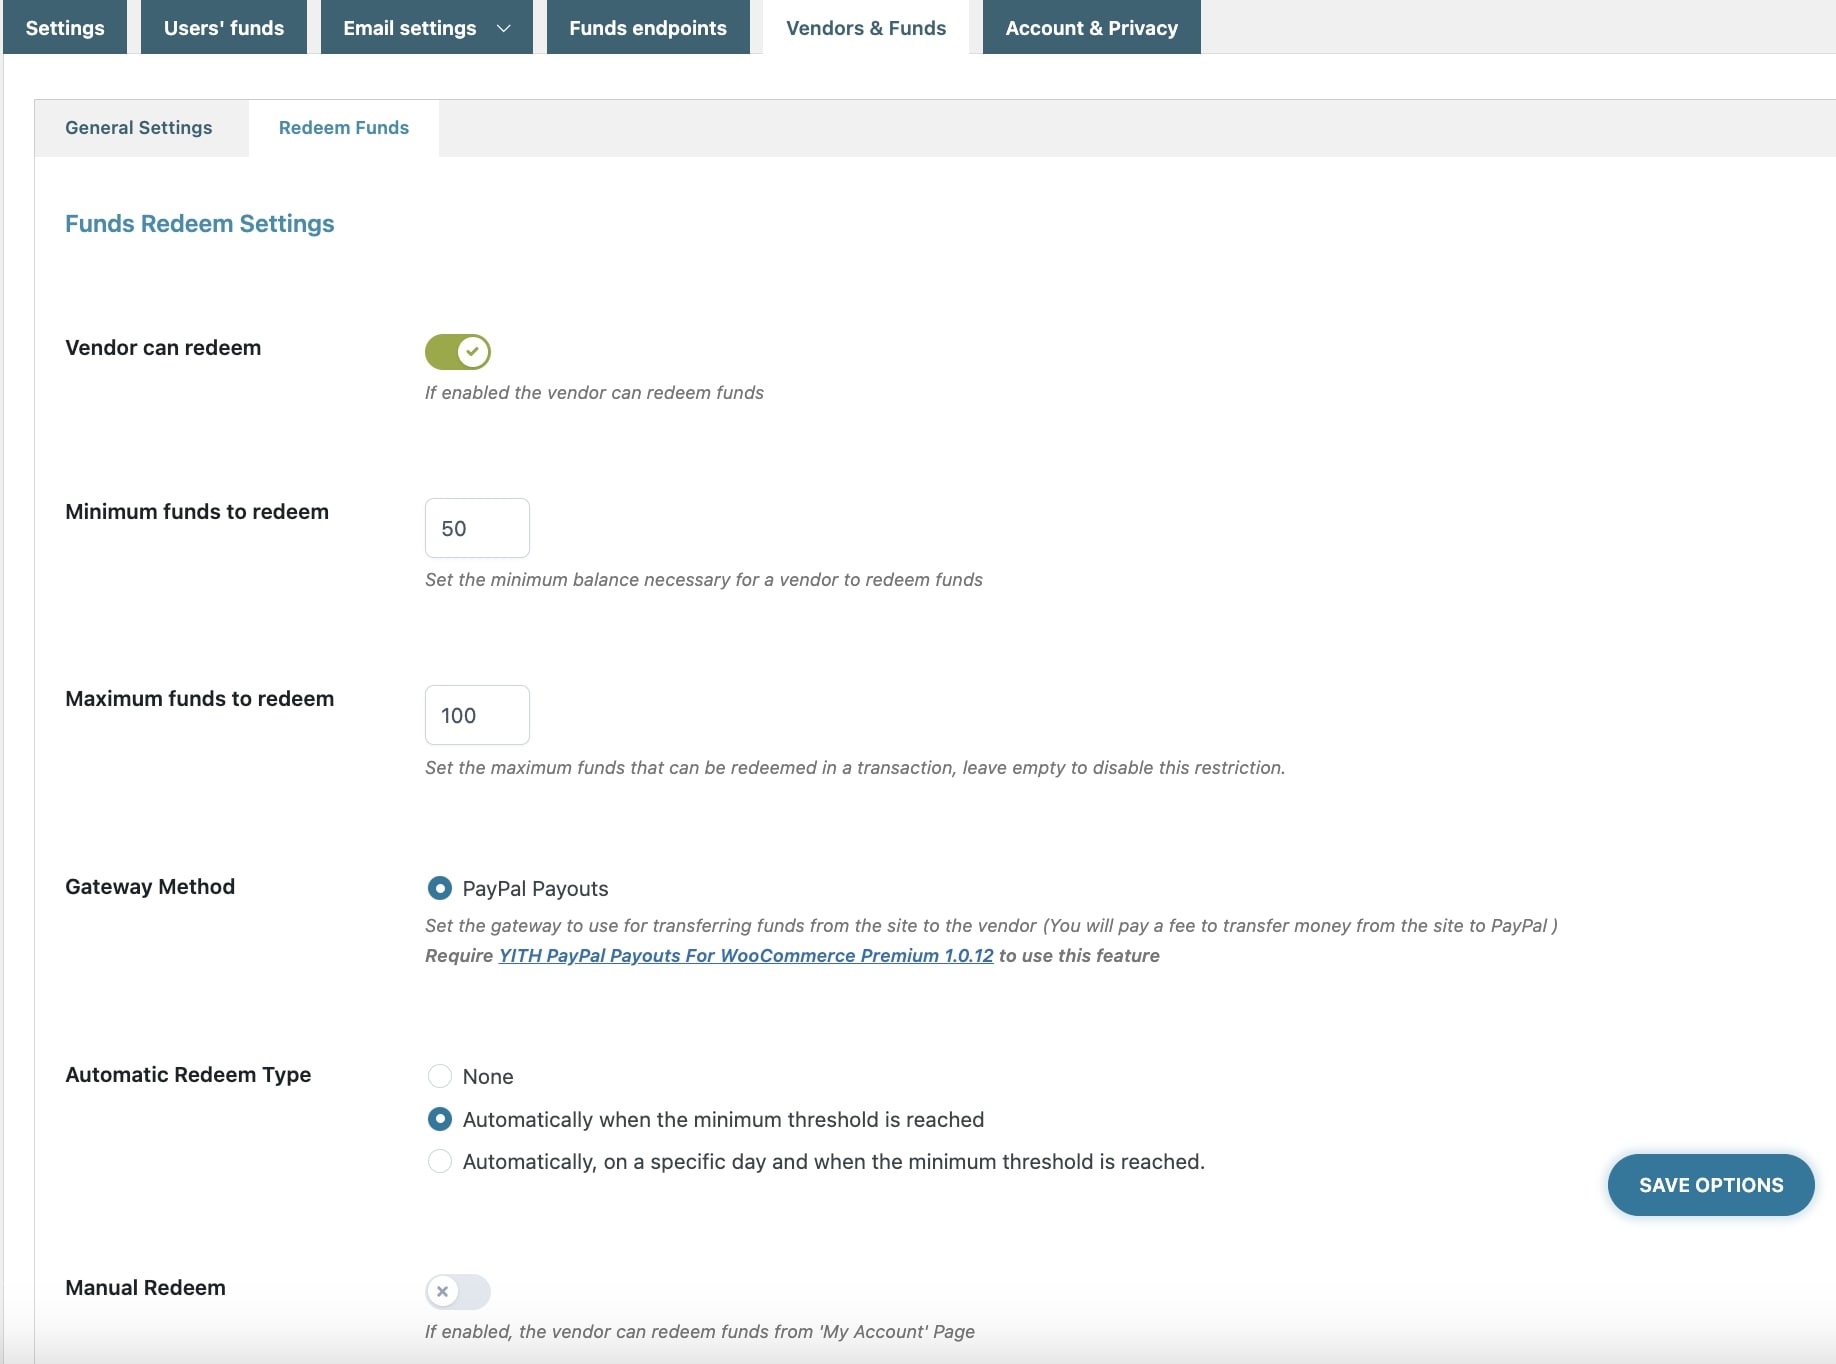
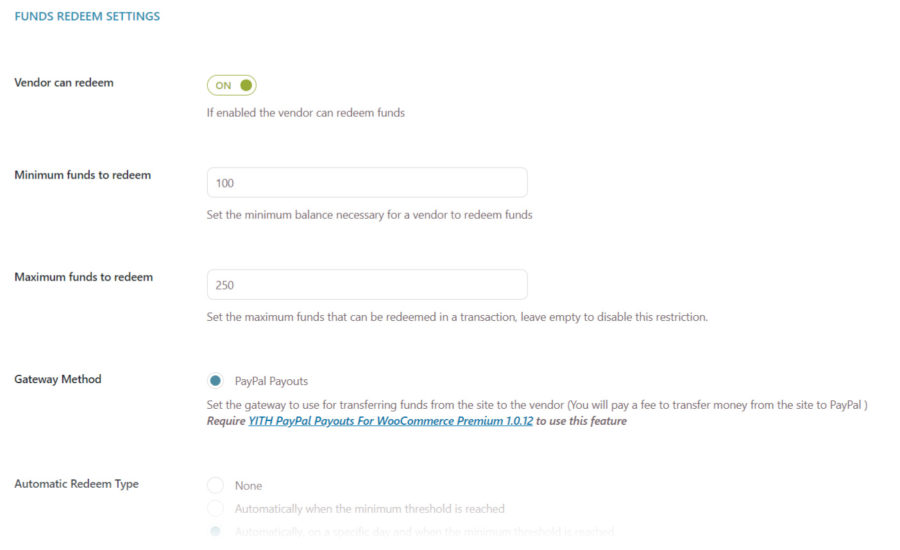
In this tab, you can set up the redeeming option either as a manual or an automatic process.
Vendor can redeem: make sure you enable this option to let vendors redeem their available funds.
Minimum funds to redeem: set the minimum balance necessary for a vendor to redeem funds.
Maximum funds to redeem: set the maximum funds that can be redeemed in a transaction, leave empty to disable this restriction.
Gateway Method: set the gateway to use for transferring funds from the site to the vendor. At the moment only PayPal Payouts is available and it requires YITH PayPal Payouts For WooCommerce Premium 1.0.12 to use this feature. Please, note that you will pay a fee to transfer money from the site to PayPal.
Now you can choose whether to redeem them automatically or manually.
2.2.1 Automatic payment
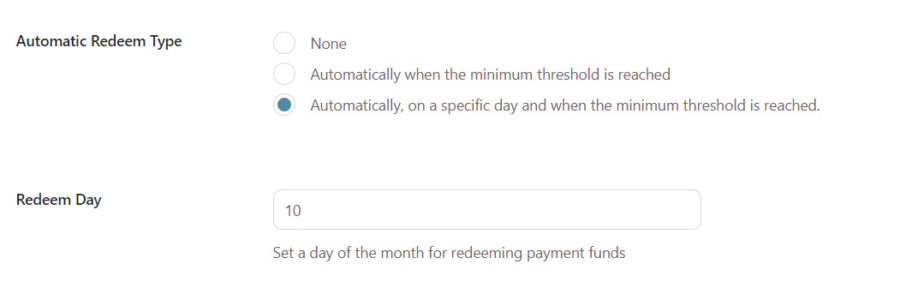
Automatic Redeem Type: this option allows you to let vendors be paid automatically instead of submitting a payment request every time.
None: select this if you want to keep the automatic feature disabled. Make sure you select the manual redeem below to let your vendors submit a request at any time from My Account page (see below).
Automatically when the minimum threshold is reached: this way you can issue automatic payments as soon as the minimum amount set above is reached.
Automatically, on a specific day and when the minimum threshold is reached: this way you can issue automatic payments on the 1st of the month (or any other day you set) but only for vendors’ accounts that have reached the minimum amount set above. Vendors can however submit a payment request manually if the ‘Manual redeem’ option below is enabled.
Redeem Day: choose the day on which issuing the automatic payment, i.e. enter 1 to issue payments automatically on the first of every month.
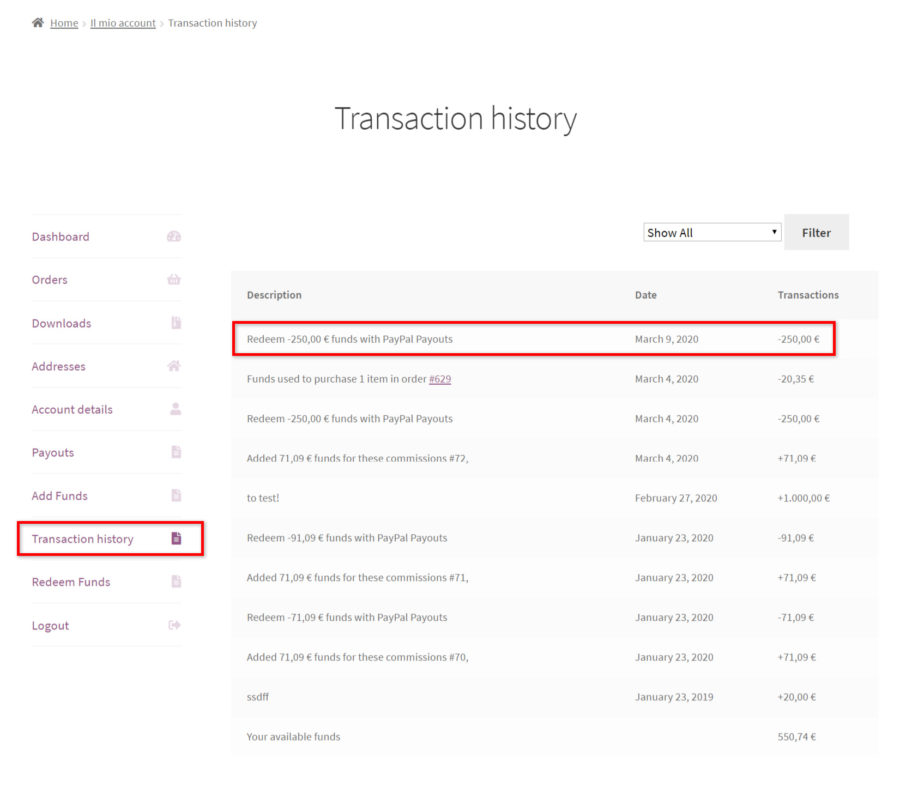
All transactions will be visible to the vendor in My Account > Income/Expenditure History.
2.2.2 Manual redemption
Alternatively or in addition to the automatic payment, you can also let vendors redeem their available funds manually on request. Below in YITH > Account Funds > Vendors & Funds, these are the options that you have to configure:
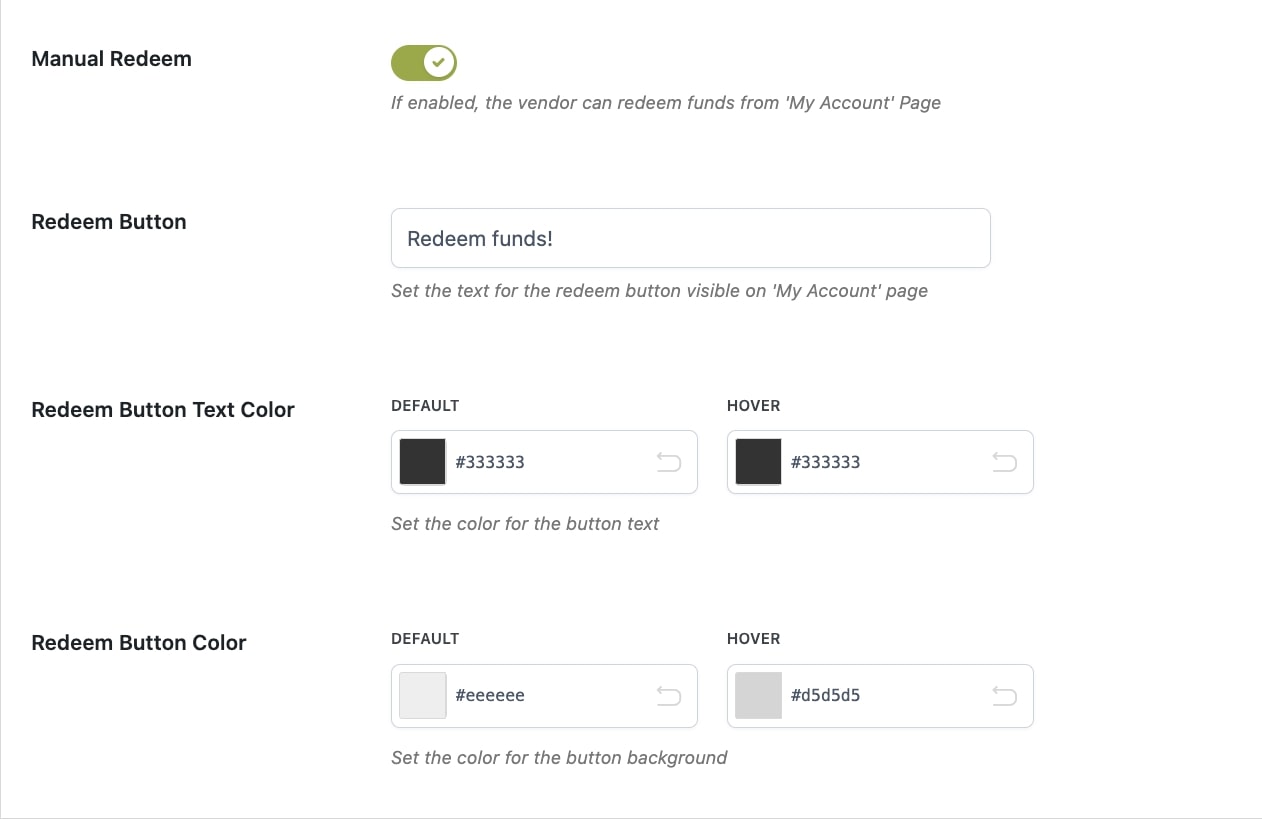
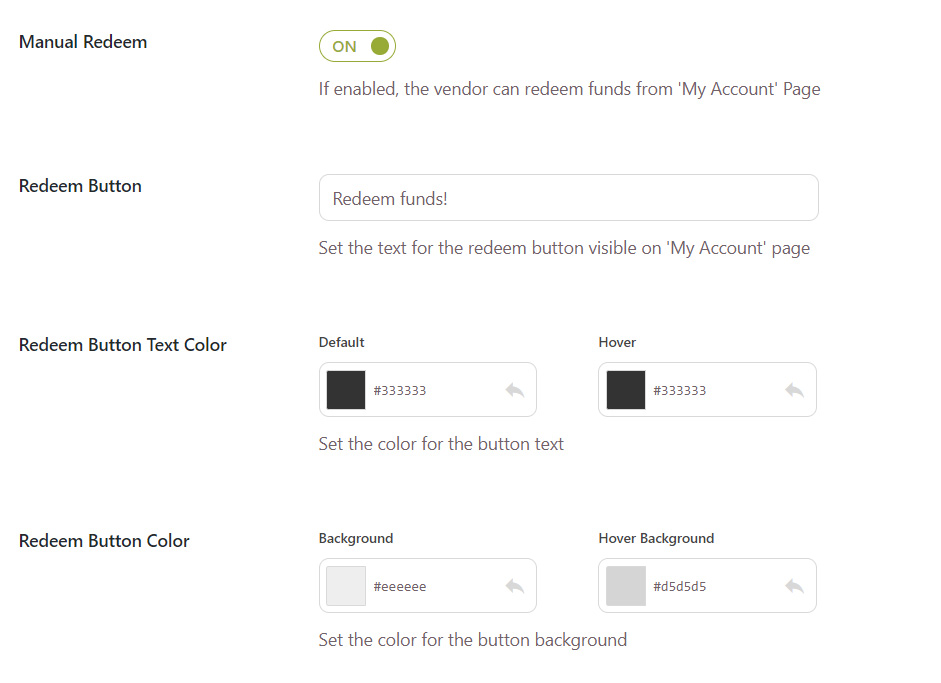
Manual Redeem: enable this option if you want to allow also manual redemption and submit a request from My Account. By enabling this option, you will also be able to customize the button text and colour.
Redeem Button: customize the label of the button shown in My Account here.
Redeem Button Text Color
Redeem Button Color
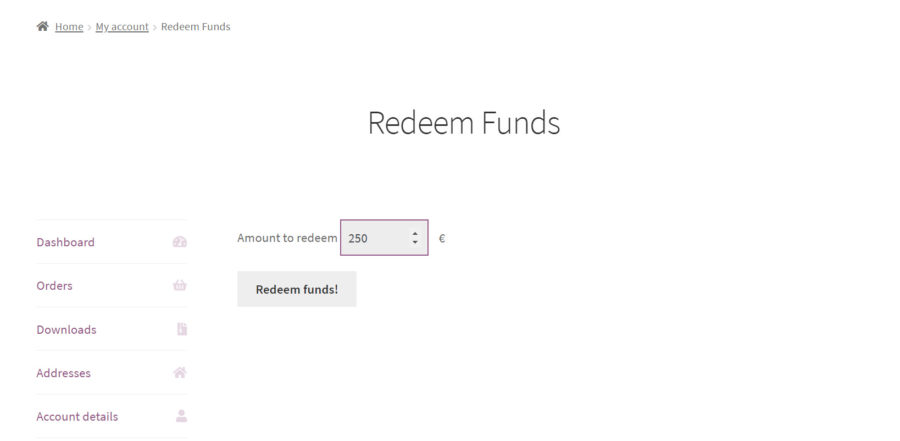
If you enable this option, your vendors will be able to see a dedicated section in My Account > Redeem funds, from where they can submit a request and being paid immediately.
They can enter a custom amount (between the minimum and maximum allowed if you’ve set up these values in the settings) and as soon as they send the request the payment will be processed through the gateway that you’ve selected (only YITH PayPal Payouts available at the moment).
The payment will be will be recorded in the Income/Expenditure History.
The transaction status will be available in My Account > Payouts and the admin can check the transaction in PayPal Payouts > Payouts List > Details.
For more details about the configuration of YITH Account Funds, please, refer to the full documentation here.
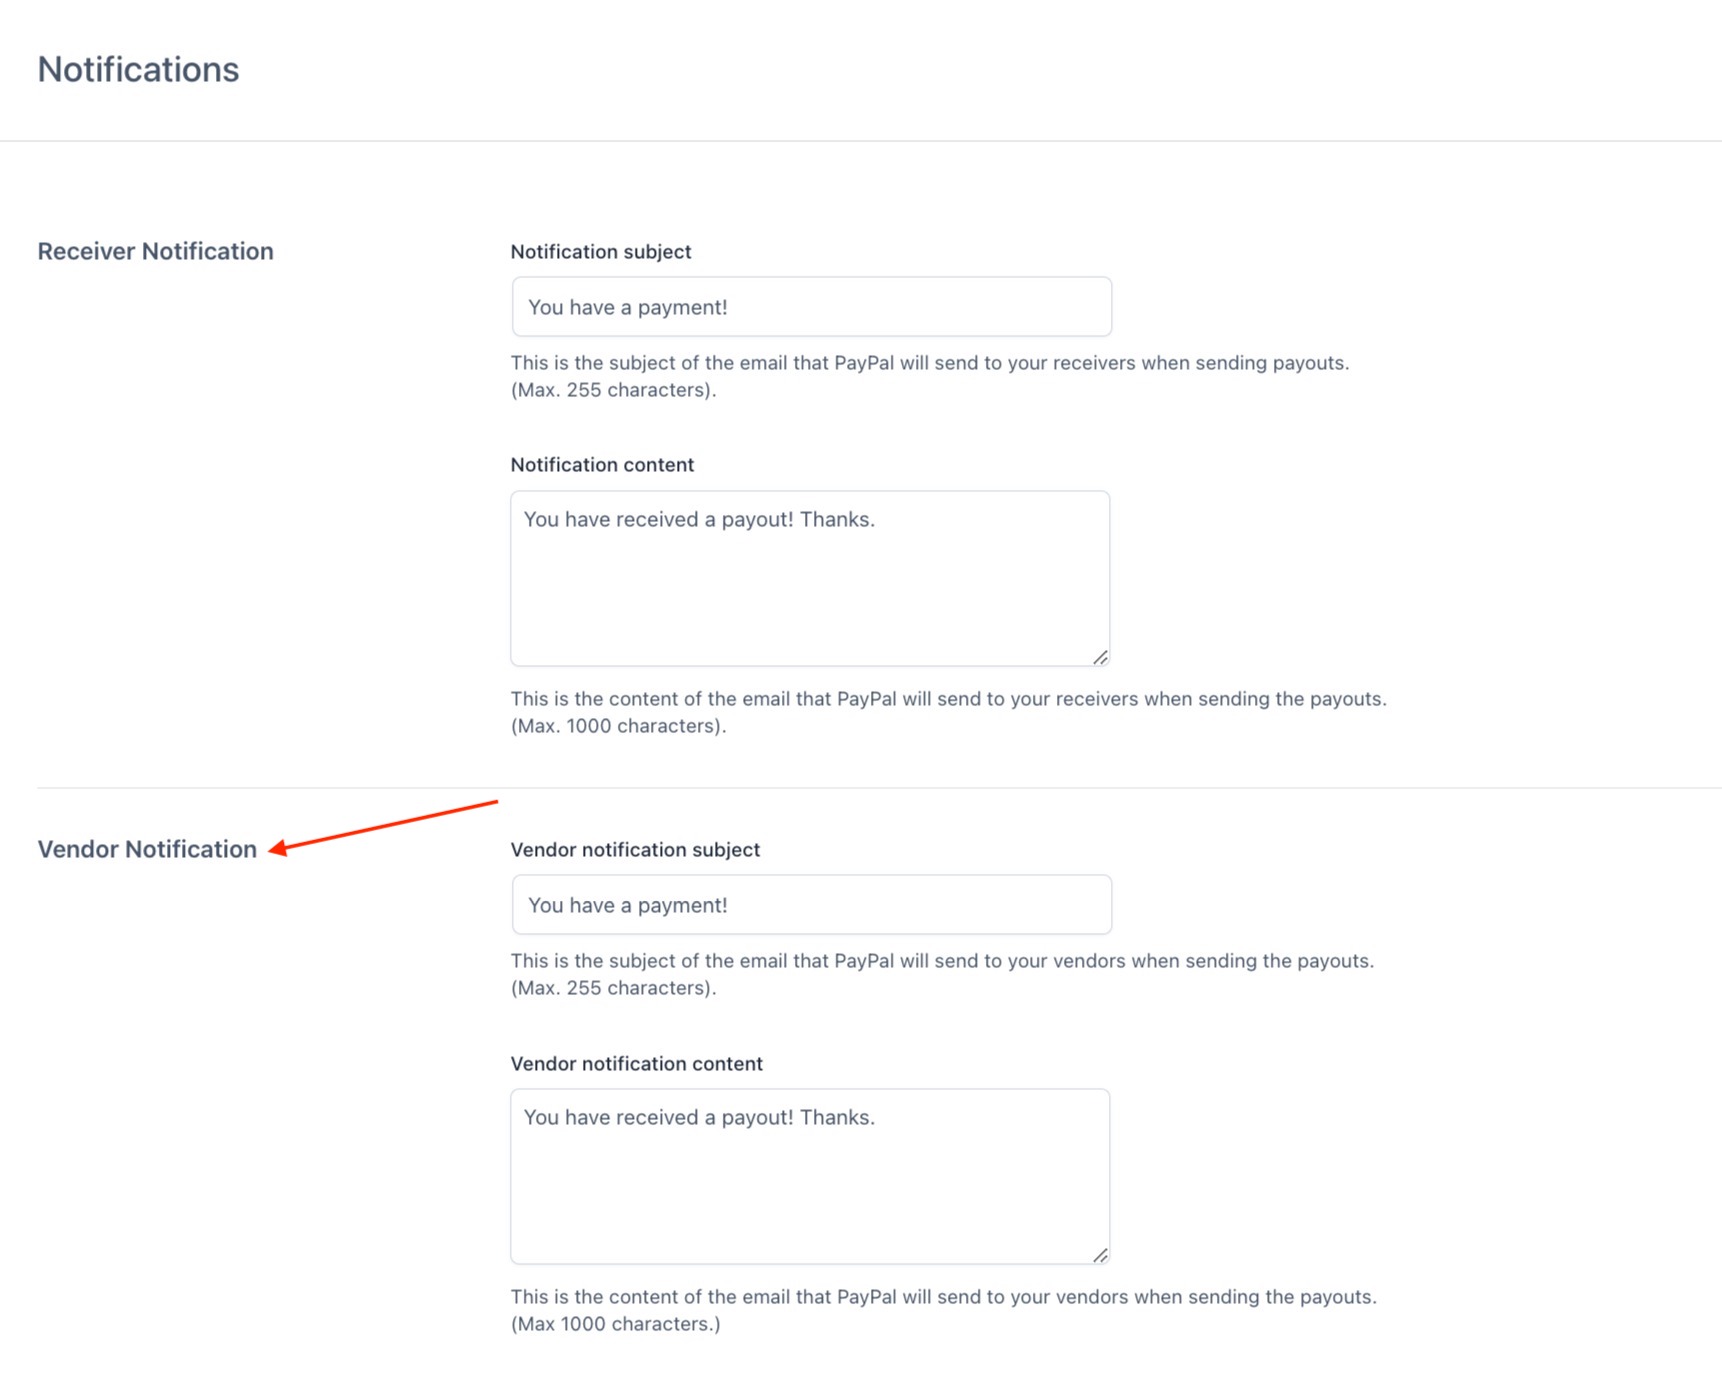
Notifications
When a payout is made, PayPal sends a notification to both the sender and the receiver. You can customize the email subject and content from YITH PayPal Payouts > Notifications. To show the vendor commission and order IDs in the content of the email, you can use the placeholder ´{commission_ids} and {order_id}.


