In the Typography menu you will be able to customize every option related to text, with custom settings for every kind of heading.
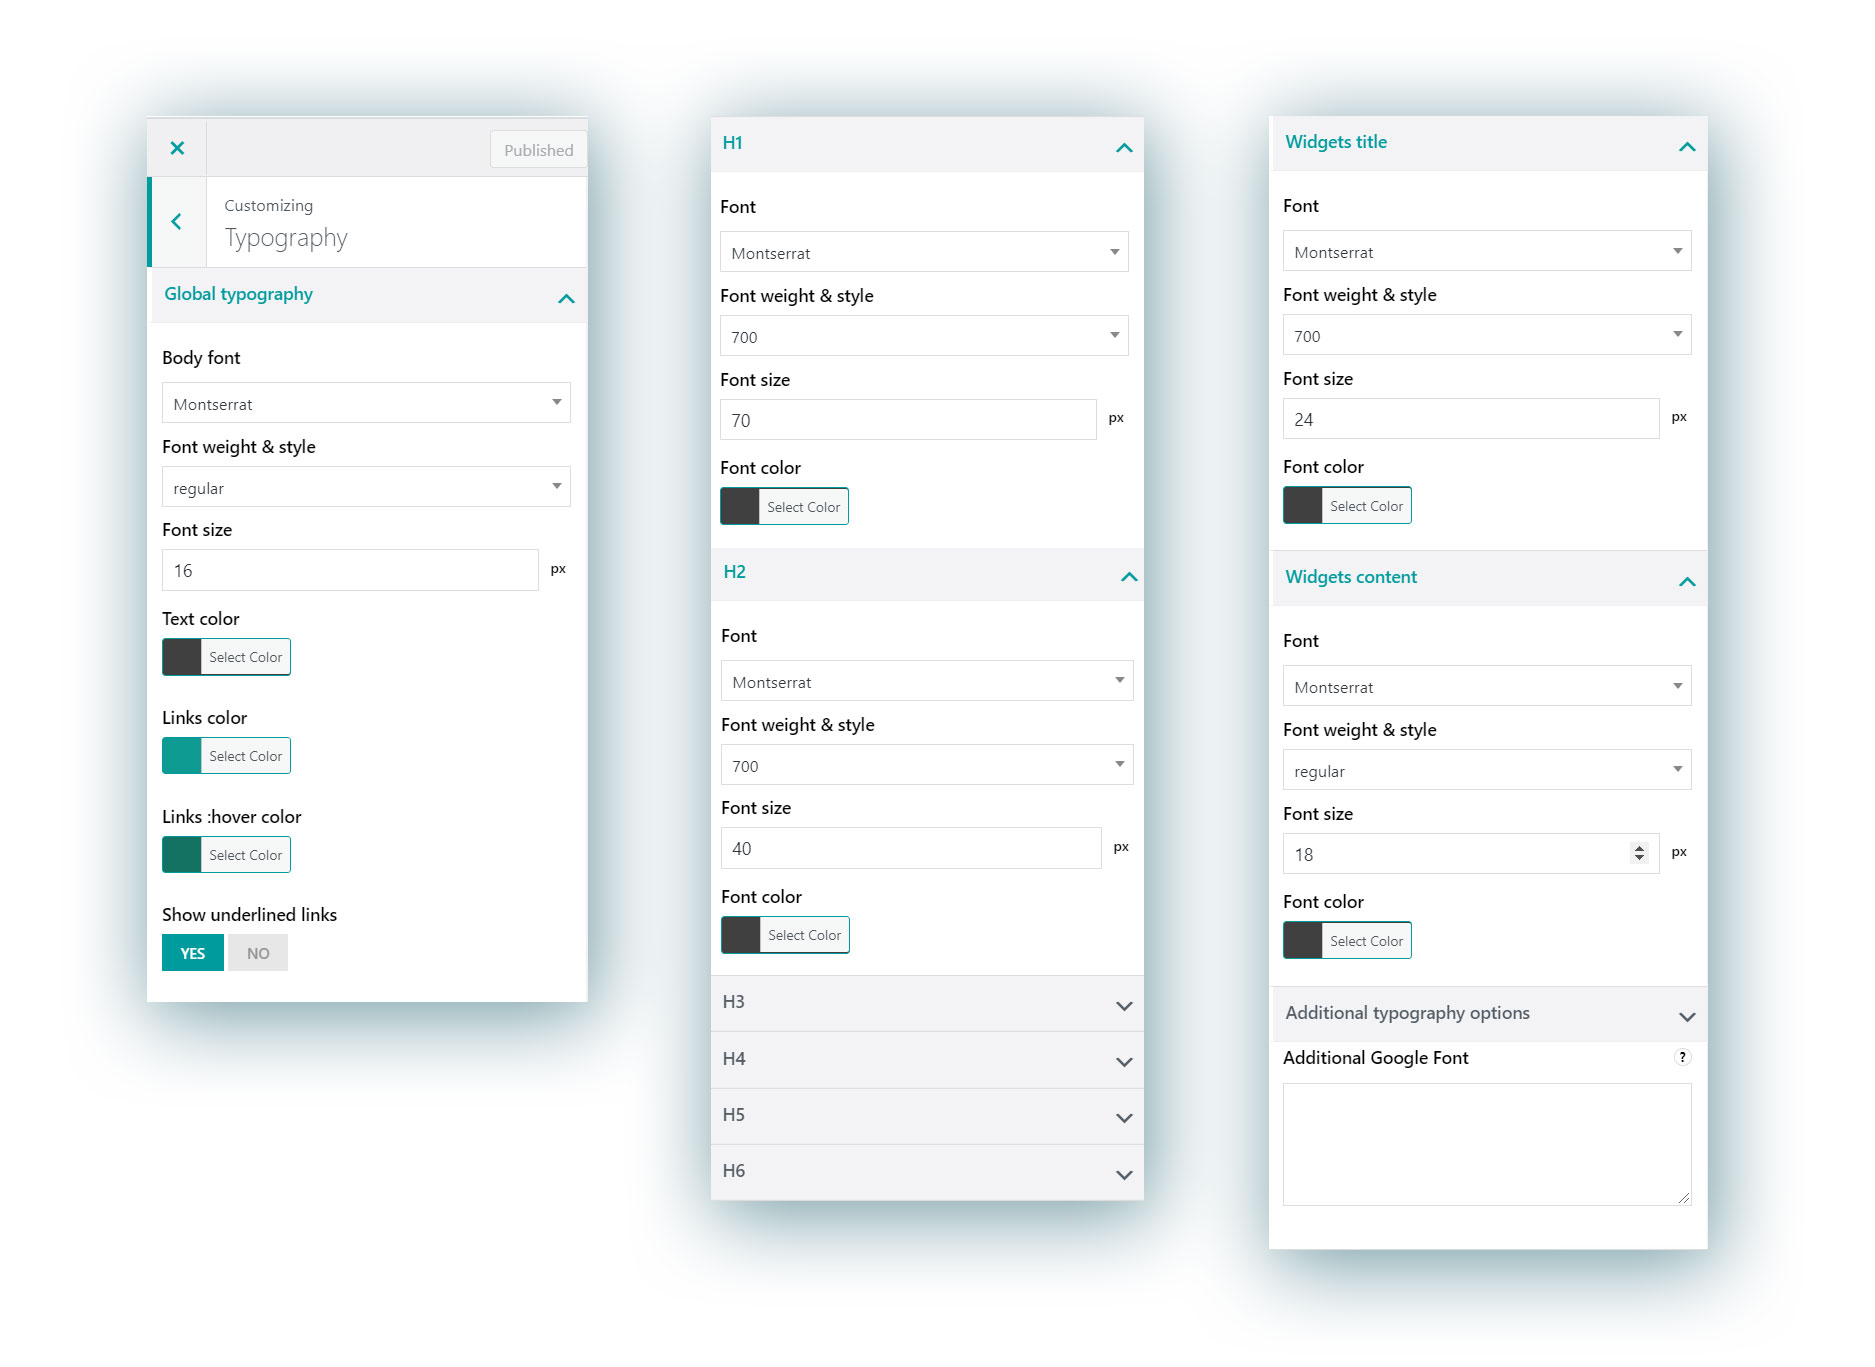
Global Typography
Here you can configure text options for the body text across your website. It is used for <p> tags and similar. Google fonts are supported. The available options are:
- Font
- Font weight & style (regular, bold, italics etc.)
- Font size
- Text color
- Links color
- Links color on hover
- Underlined links: enable this to show links with the traditional underlined style
Heading typography options
For every heading from H1 to H6, you can separately configure the following options:
- Font
- Font weight & style (regular, bold, italics etc.)
- Font size
- Font color
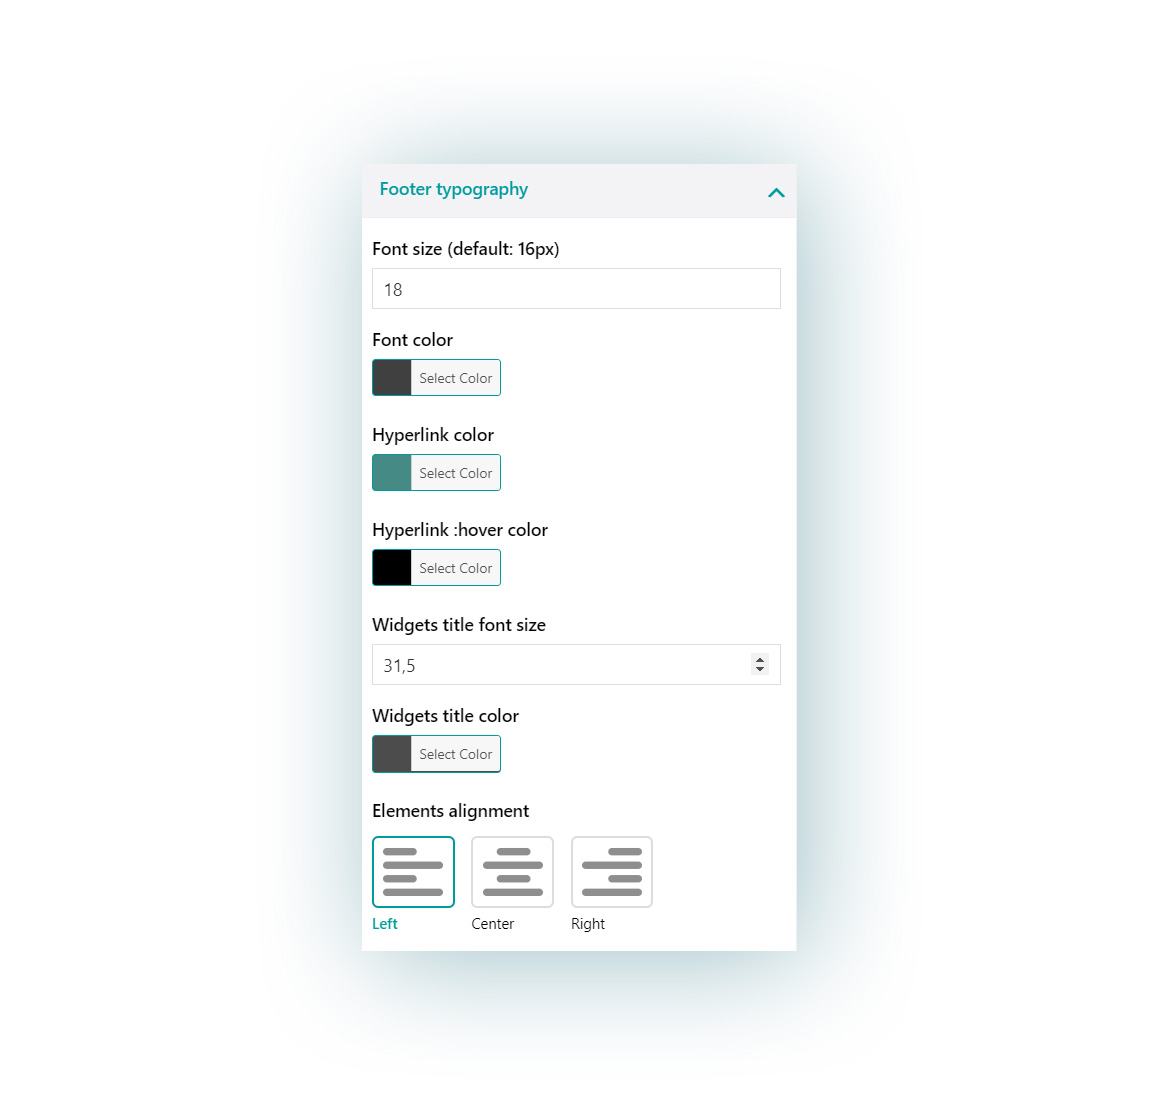
Widget titles
Here you can configure the style of the titles of all widgets. Google fonts are supported. The available options are:
- Font
- Font weight & style (regular, bold, italics etc.)
- Font size
- Font color
Widget content
Here you can configure the style of the text showing in all the widgets. Google fonts are supported. The available options are:
- Font
- Font weight & style (regular, bold, italics etc.)
- Font size
- Font color
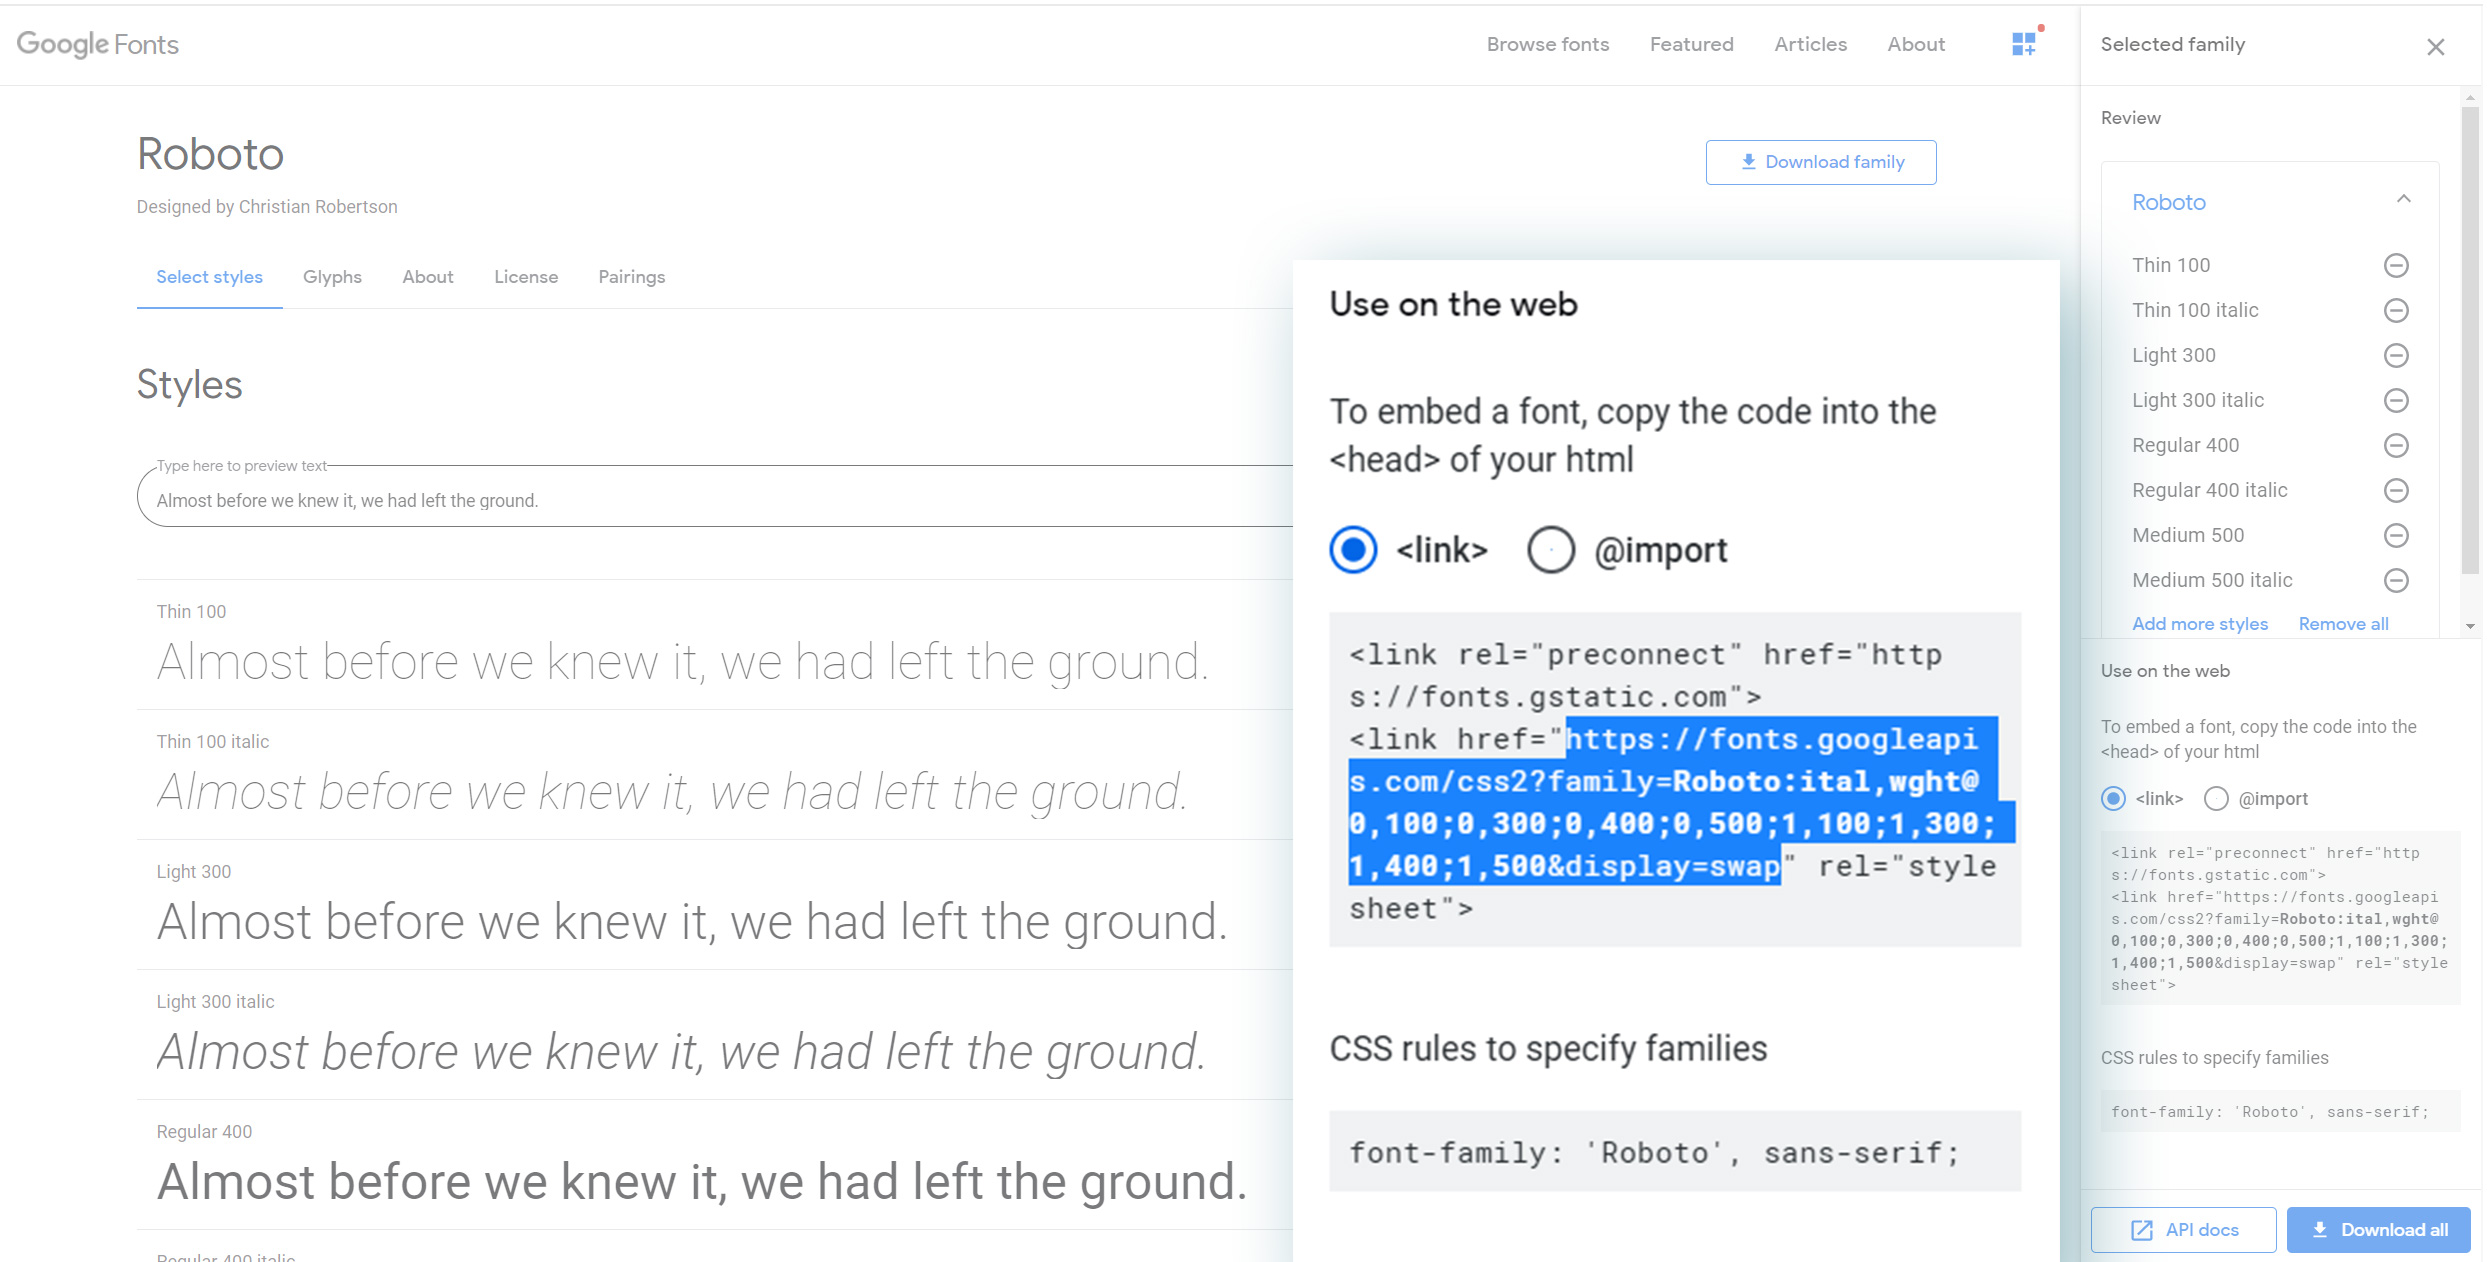
Additional Google fonts
If you can’t find your favourite Google font in the list, no worries, you can add it as well.
Please follow these steps:
a) Go to https://fonts.google.com/
b) Select the font you want to use (i.e. Roboto)
c) Customize the font as you wish by choosing the font weight and style you want to use.
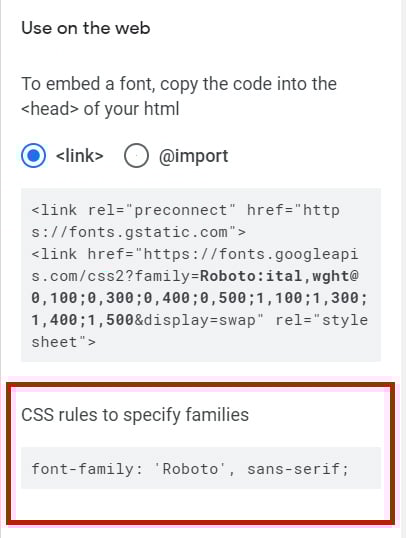
d) Copy the href link from Google Font. It should be something like
https://fonts.googleapis.com/css?family=Roboto:300,400,500,600,700&display=swap
e) Visit your site and navigate to Appearance > Customize > YITH Theme Options > Typography > Additional Google Font
e) Paste the link into the text area.
f) Now navigate to Appearance > Customize > Additional CSS and add the following rule:
body {
font-family: 'Roboto', sans-serif;
}
Here is another rule example based on the Montserrat font (the Proteo default font)
body {
font-family: 'Montserrat', sans-serif;
}
Please note that this rule depends on the font you choose. Google Font helps you identify the right rule to use inside the “CSS rules to specify families”: