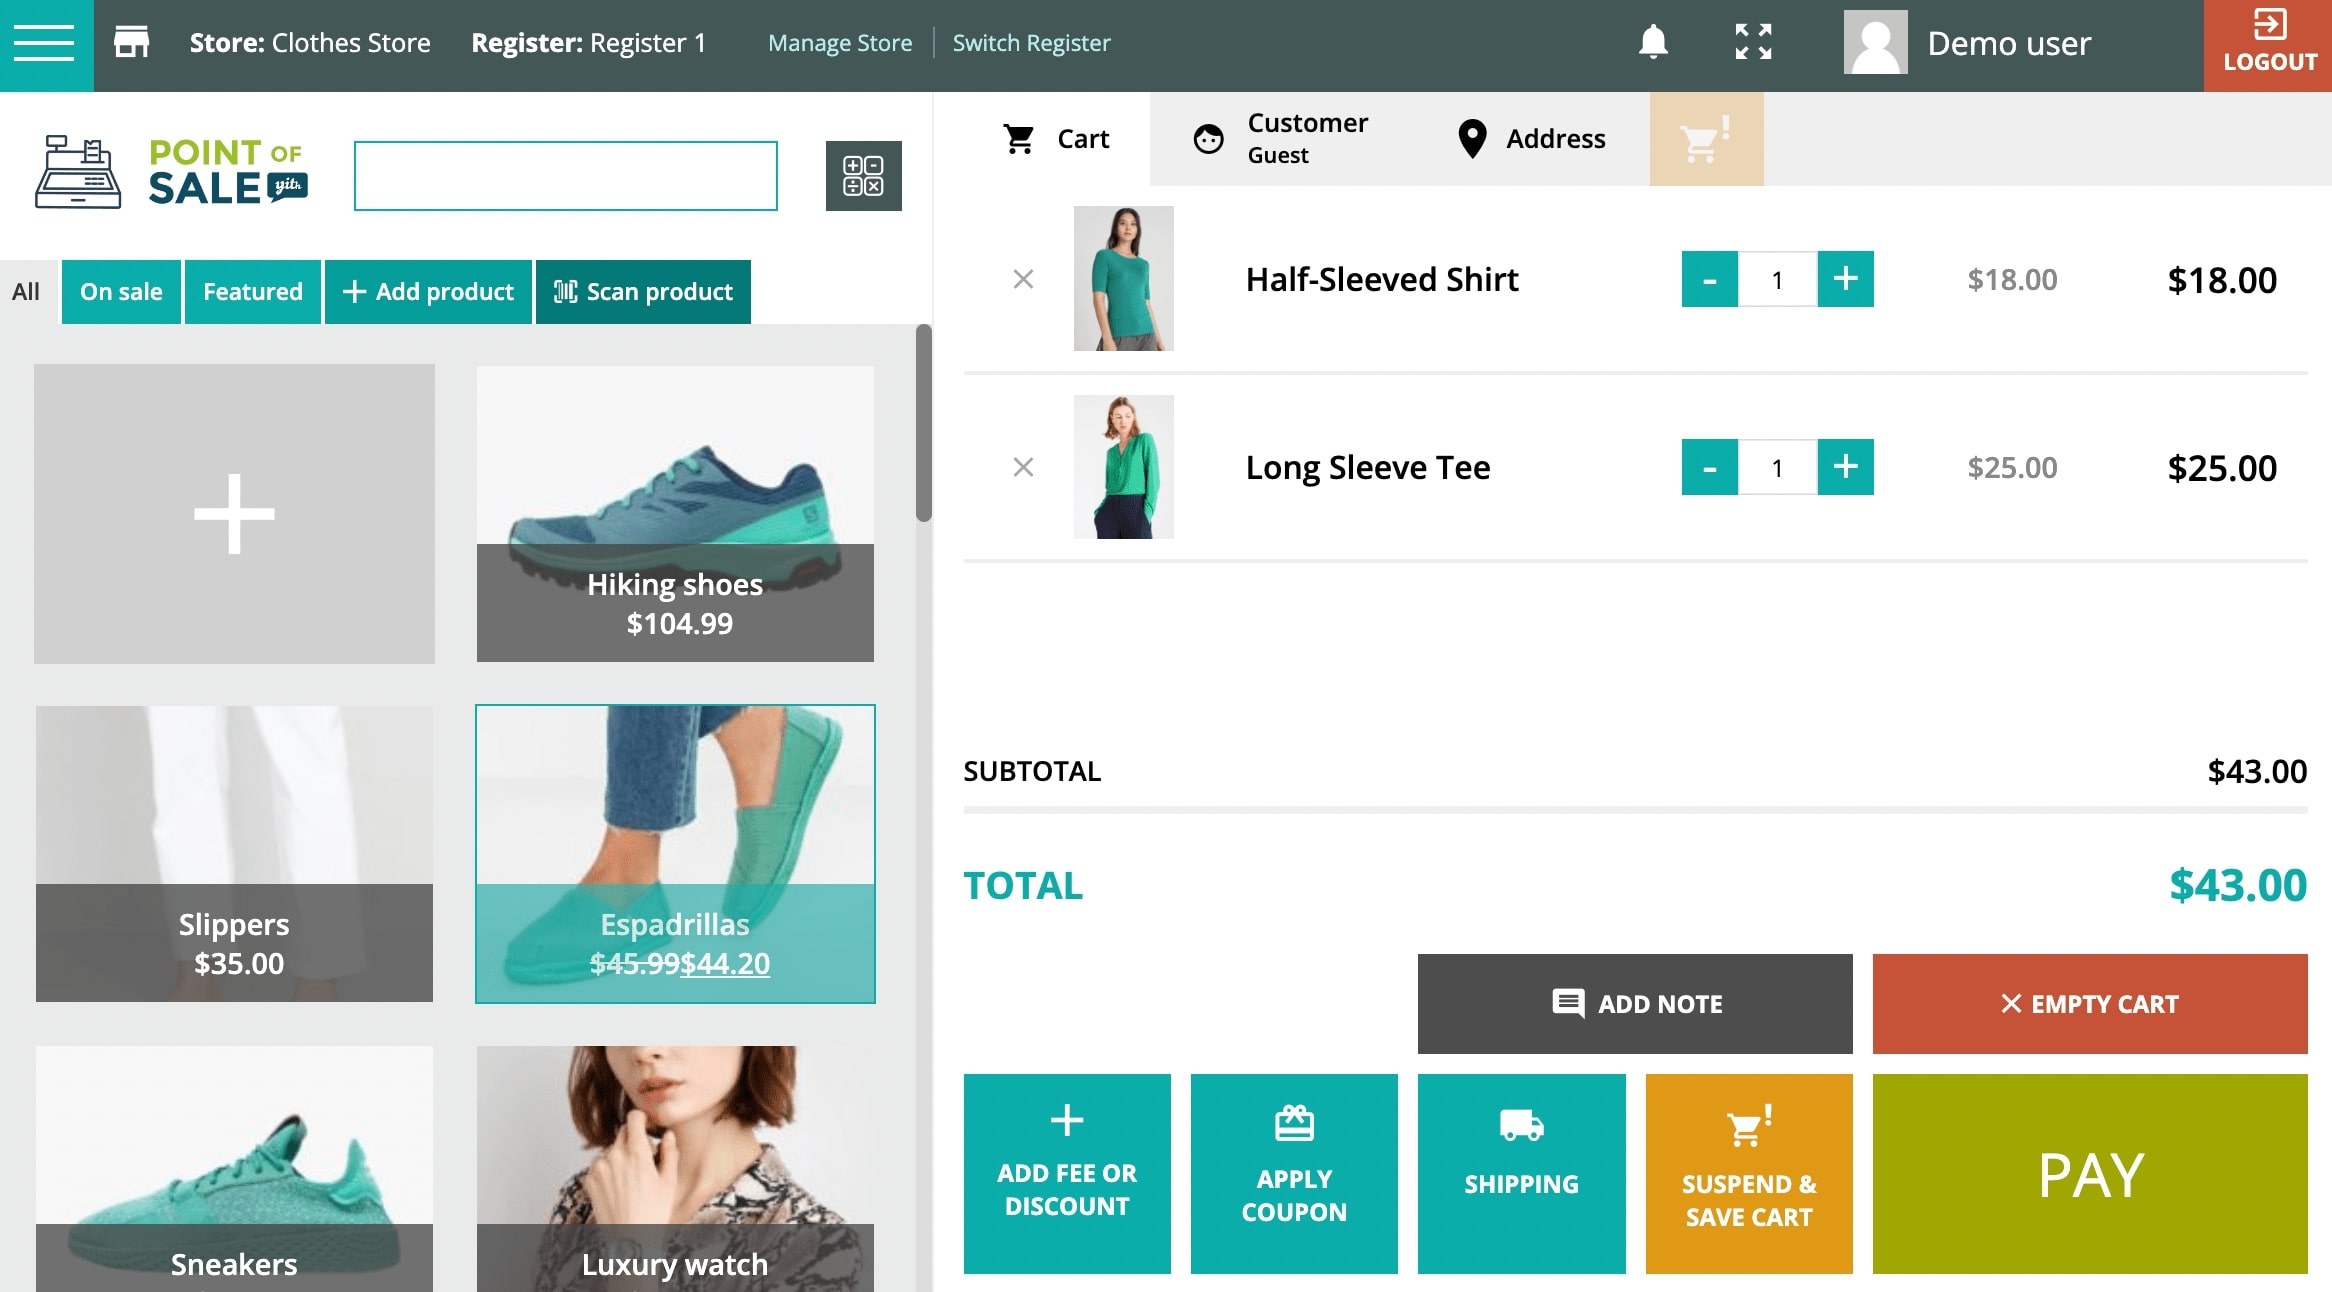
On the right side of the screen, you will see the Cart with all its options.
Whenever you click on a product from the left or scan its barcode, you’ll see it appear in the Cart.
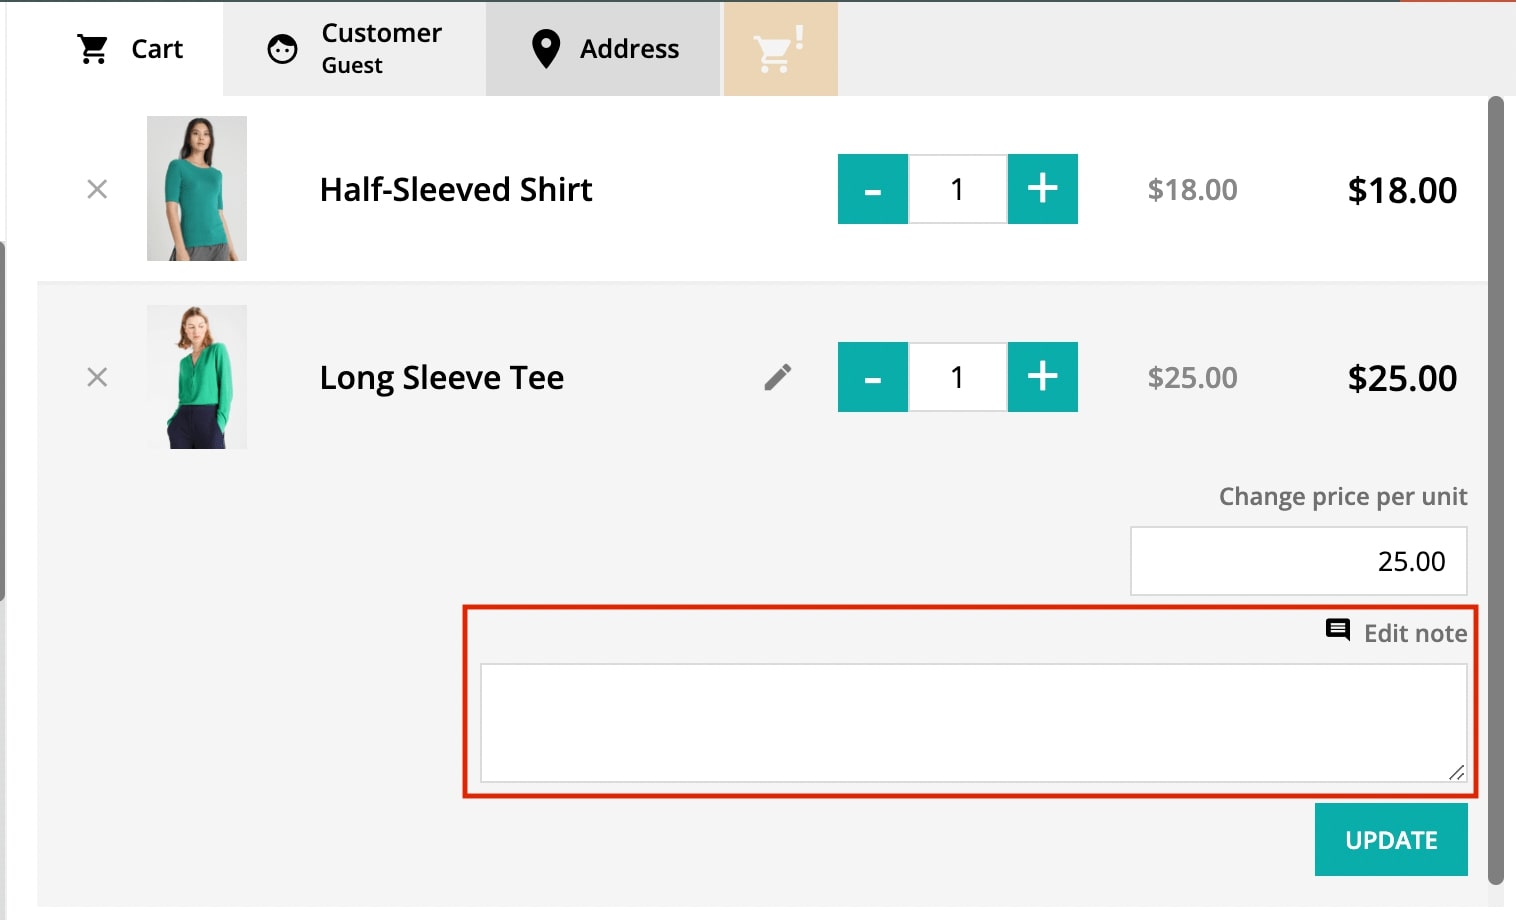
Every time you click on the product, the quantity in the cart will be updated. Yet, you can also edit more information on a product basis, once the product has been added to the cart.
If you hover over the product in the cart, you will see a pencil icon: click on it to open more details.

You will be able to edit the unit price. Click on the price to open the Number keyboard and apply either a fixed price (click on the $ symbol) or a percent discount (click on the % symbol) on the unit price.

You can also add a note on the product. You will see an icon on the product when the product box is closed.
Cart buttons
At the bottom of this screen, you will also see more buttons.

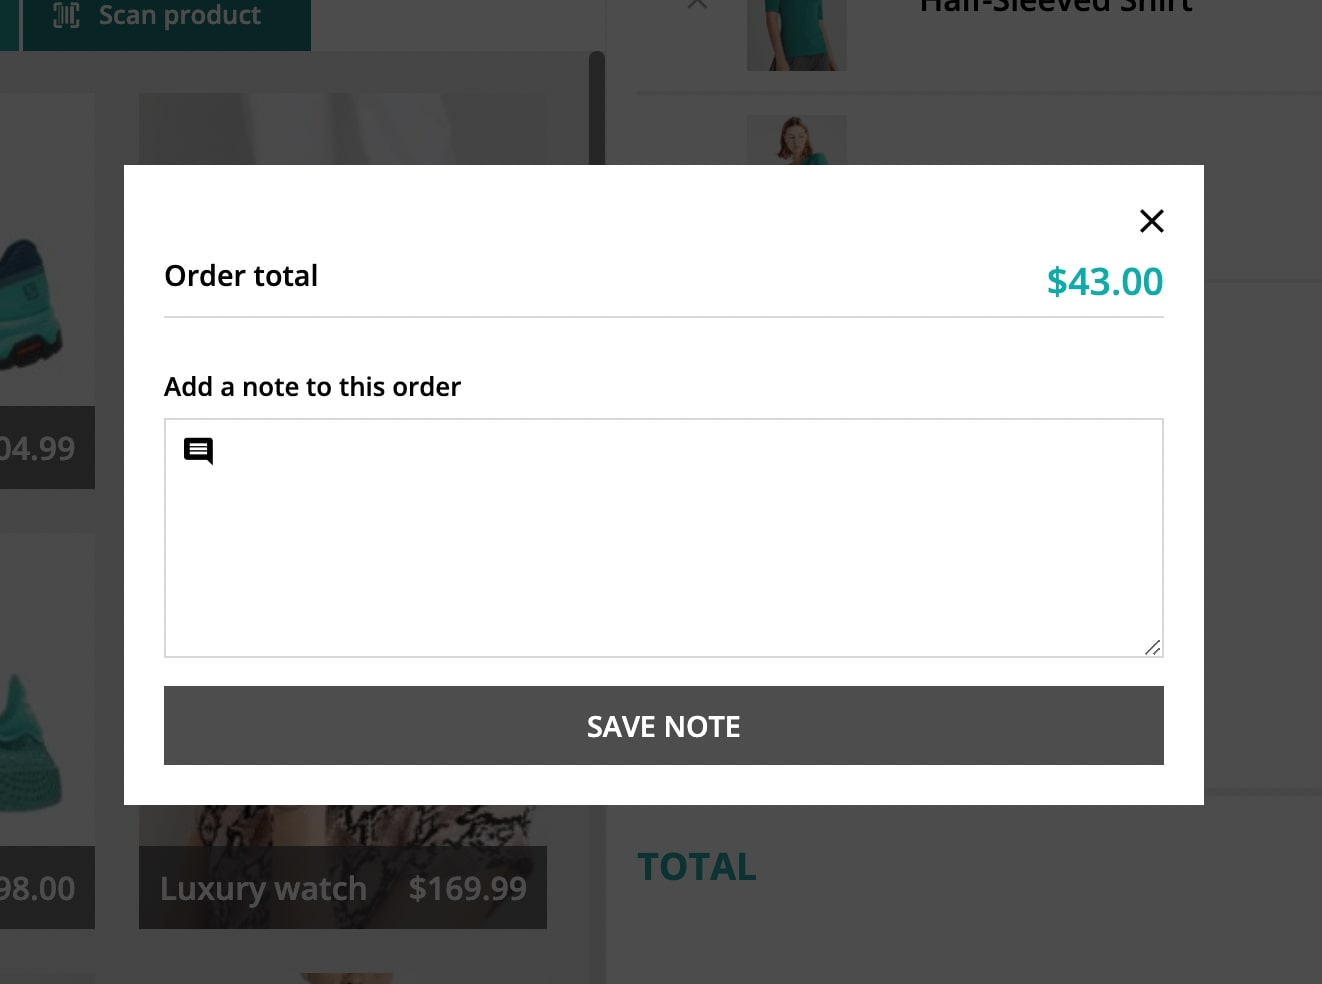
1. Add note
This allows you to add a note to the entire order.
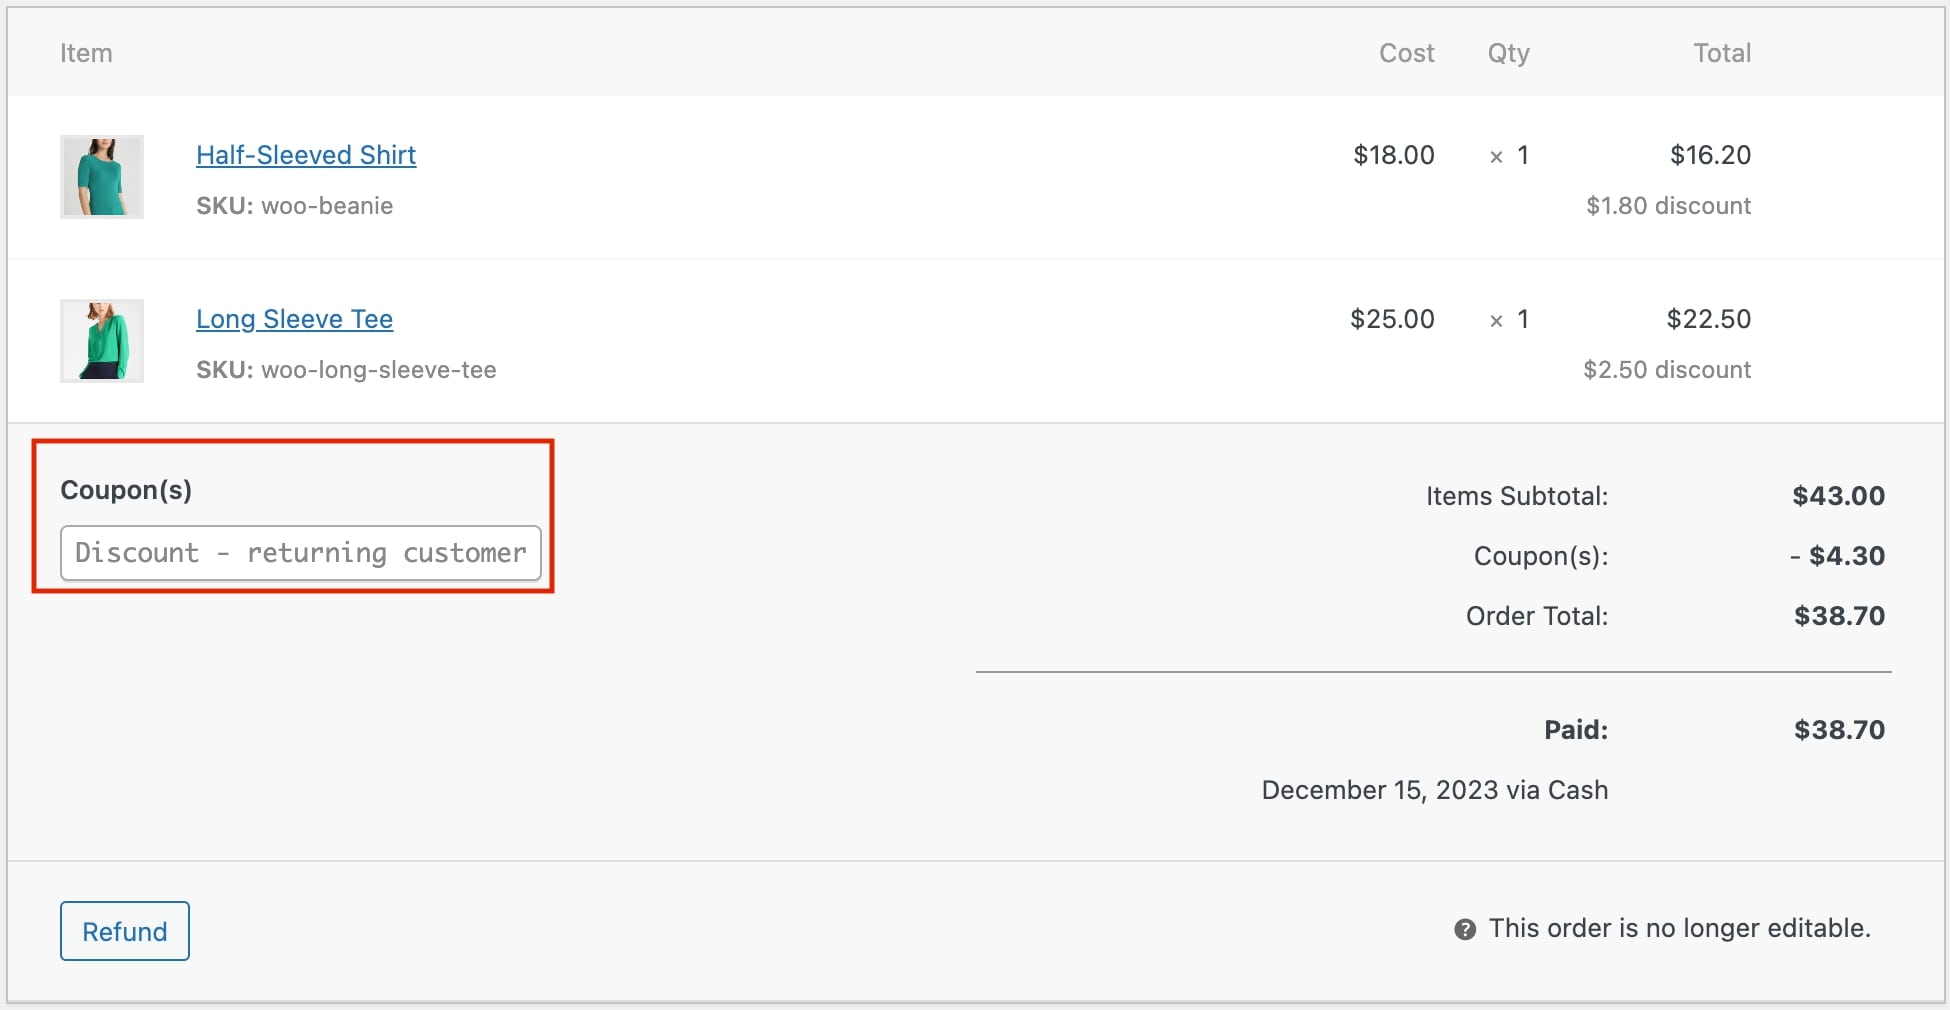
2. Add fee or discount
This allows you to add either a fee or a discount on the order total. You can either choose fee or discount and select whether it has to be fixed or percent.
You can take advantage of the preset keys for a quick selection (Popular fees). You can set up these keys with custom values from YITH > Point Of Sale > Customization as explained here. Additionally, you can add a Reason text to take note of why the fee/discount has been applied.

When applying a discount, this will be automatically converted into a coupon that will be added to the order details, like in the image below.
3. Apply coupon
Click on this button to apply a coupon code that has been previously created in WooCommerce > Coupons. Copy and paste the code and click on ‘Apply coupon’ to confirm.

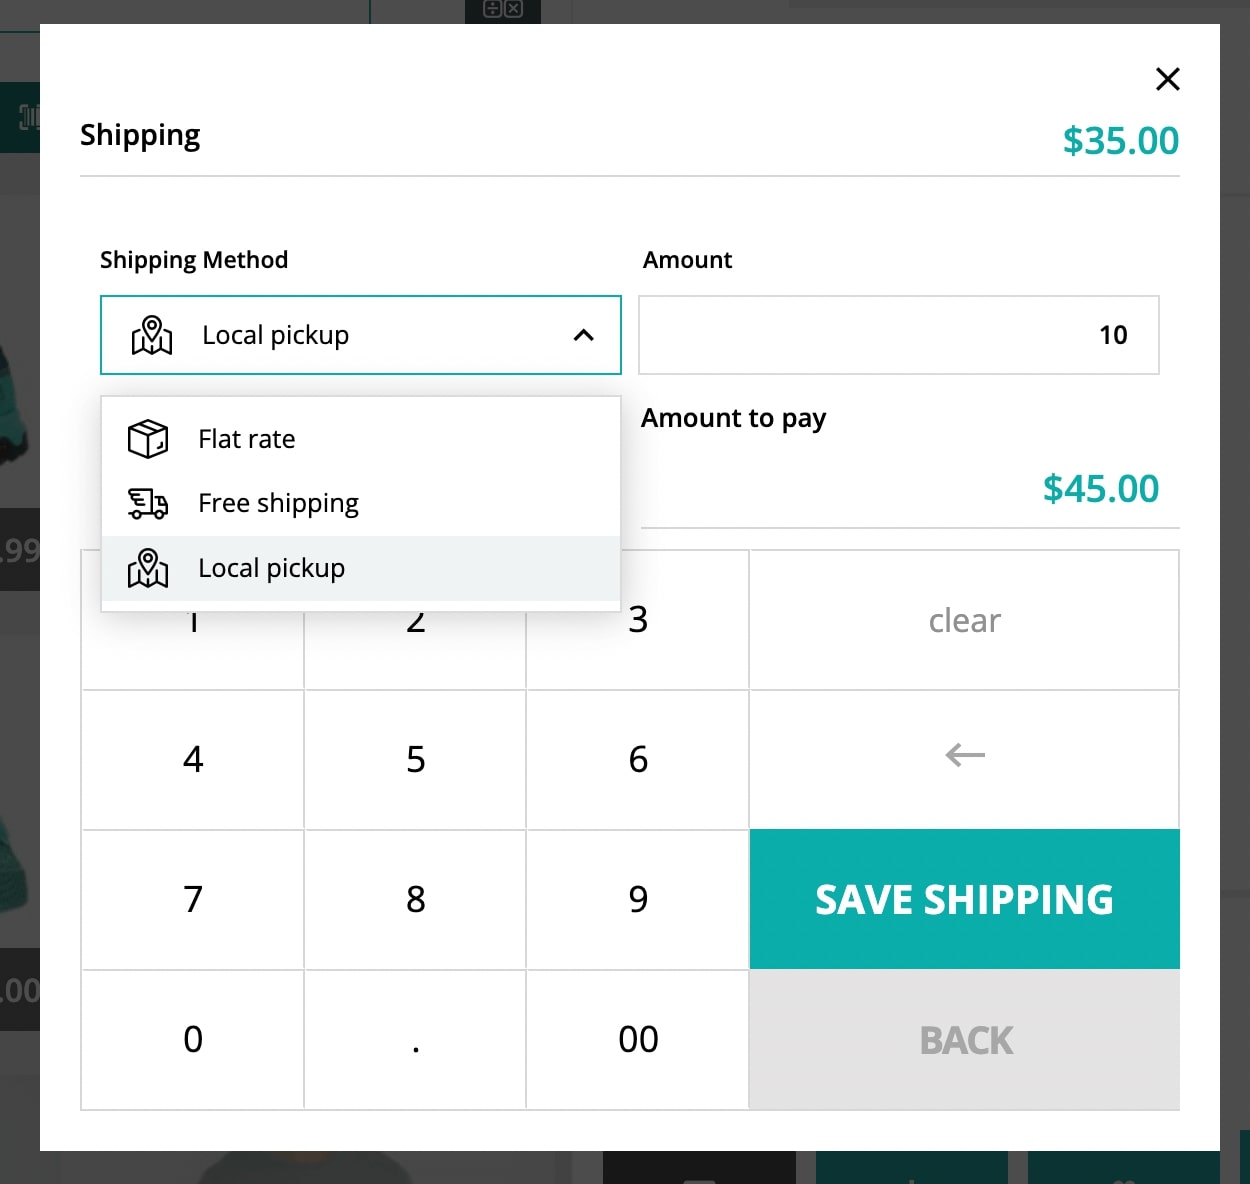
4. Shipping
Click here to add a shipping cost. Select the shipping method first and then type in an amount that will be added to the cart total.
5. Suspend and save cart
Click this button if you want to freeze the cart for a while and start over with a new one. This option may turn out to be very handy if the customer has forgotten a product, or if you have to quickly update something on the website’s backend. You can add a note to it, so it’ll be easier to find it back.
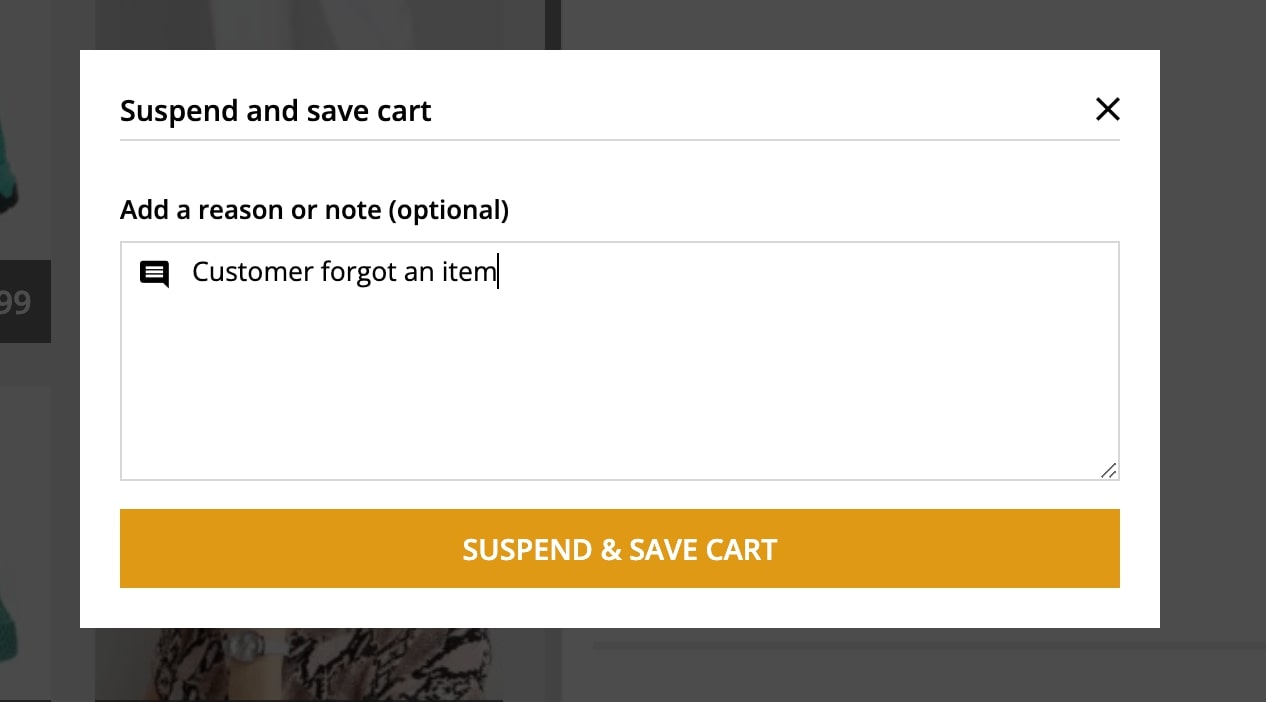
After saving the cart, you can start with a new order.
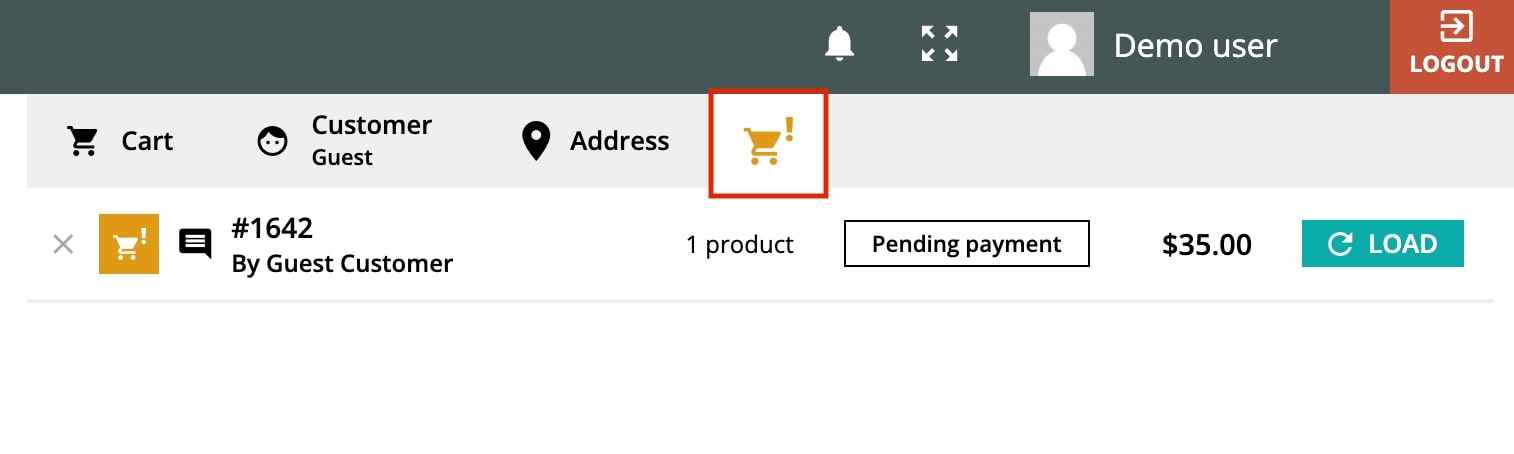
Whenever you’re ready to retrieve one of the saved orders, click on the Cart icon button that you find on top of the cart, select the cart that you want to restore, and click on Load. You’ll be able to proceed and complete the order.
6. Empty Cart
You can also empty the cart in one move, and start adding products again.

7. Pay
When everything is set, you can click on the Pay button which will open a popup window with all available payment options.
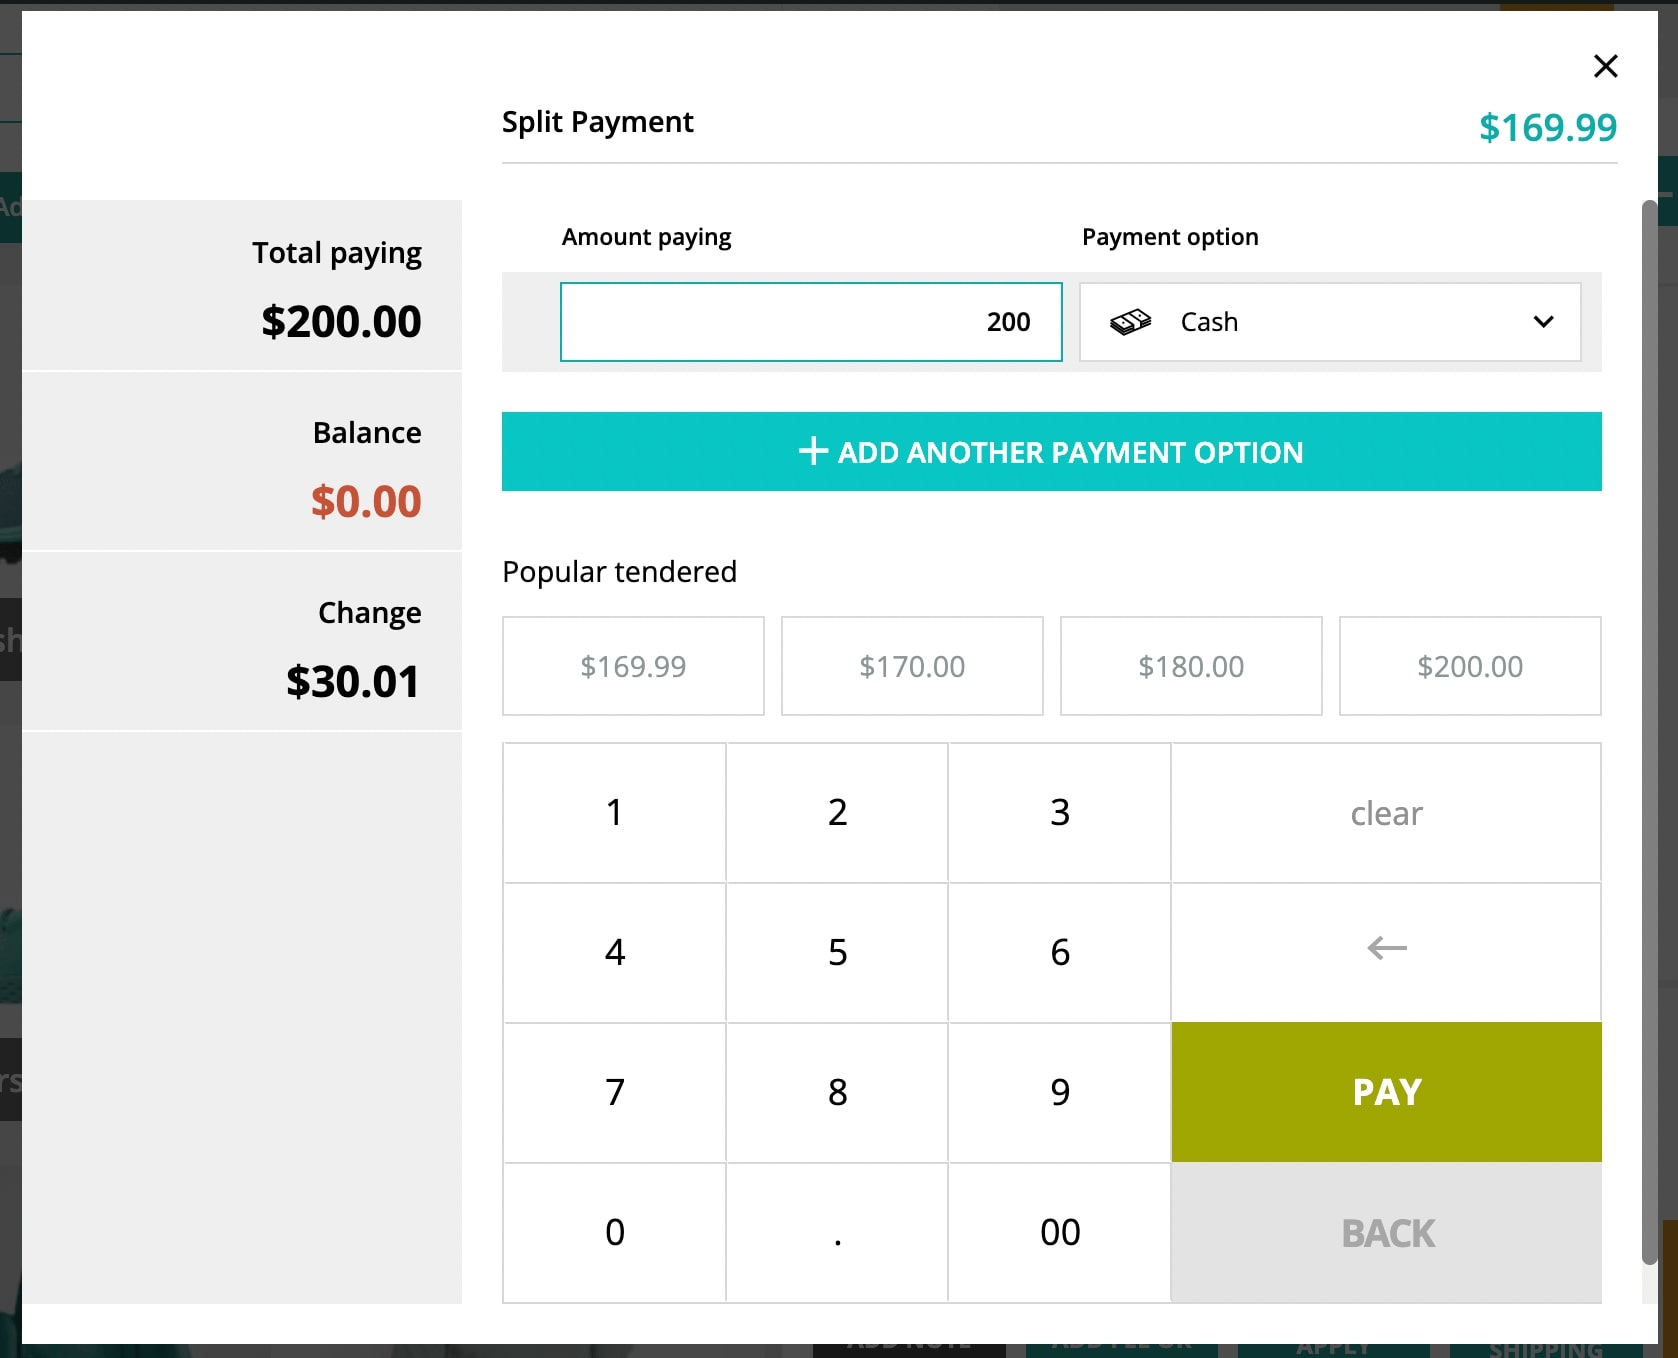
In this window you will see on the left:
- Total due: this is the total amount that the customer has to pay.
- Total paying: this is the total amount that the customer is actually paying. It includes amounts from all the payment methods selected.
- Balance: this is how much is still left to pay.
- Change: this is the change that the cashier has to give to the customer.
You can also split the payment and let customers pay the same order with more than one payment method:
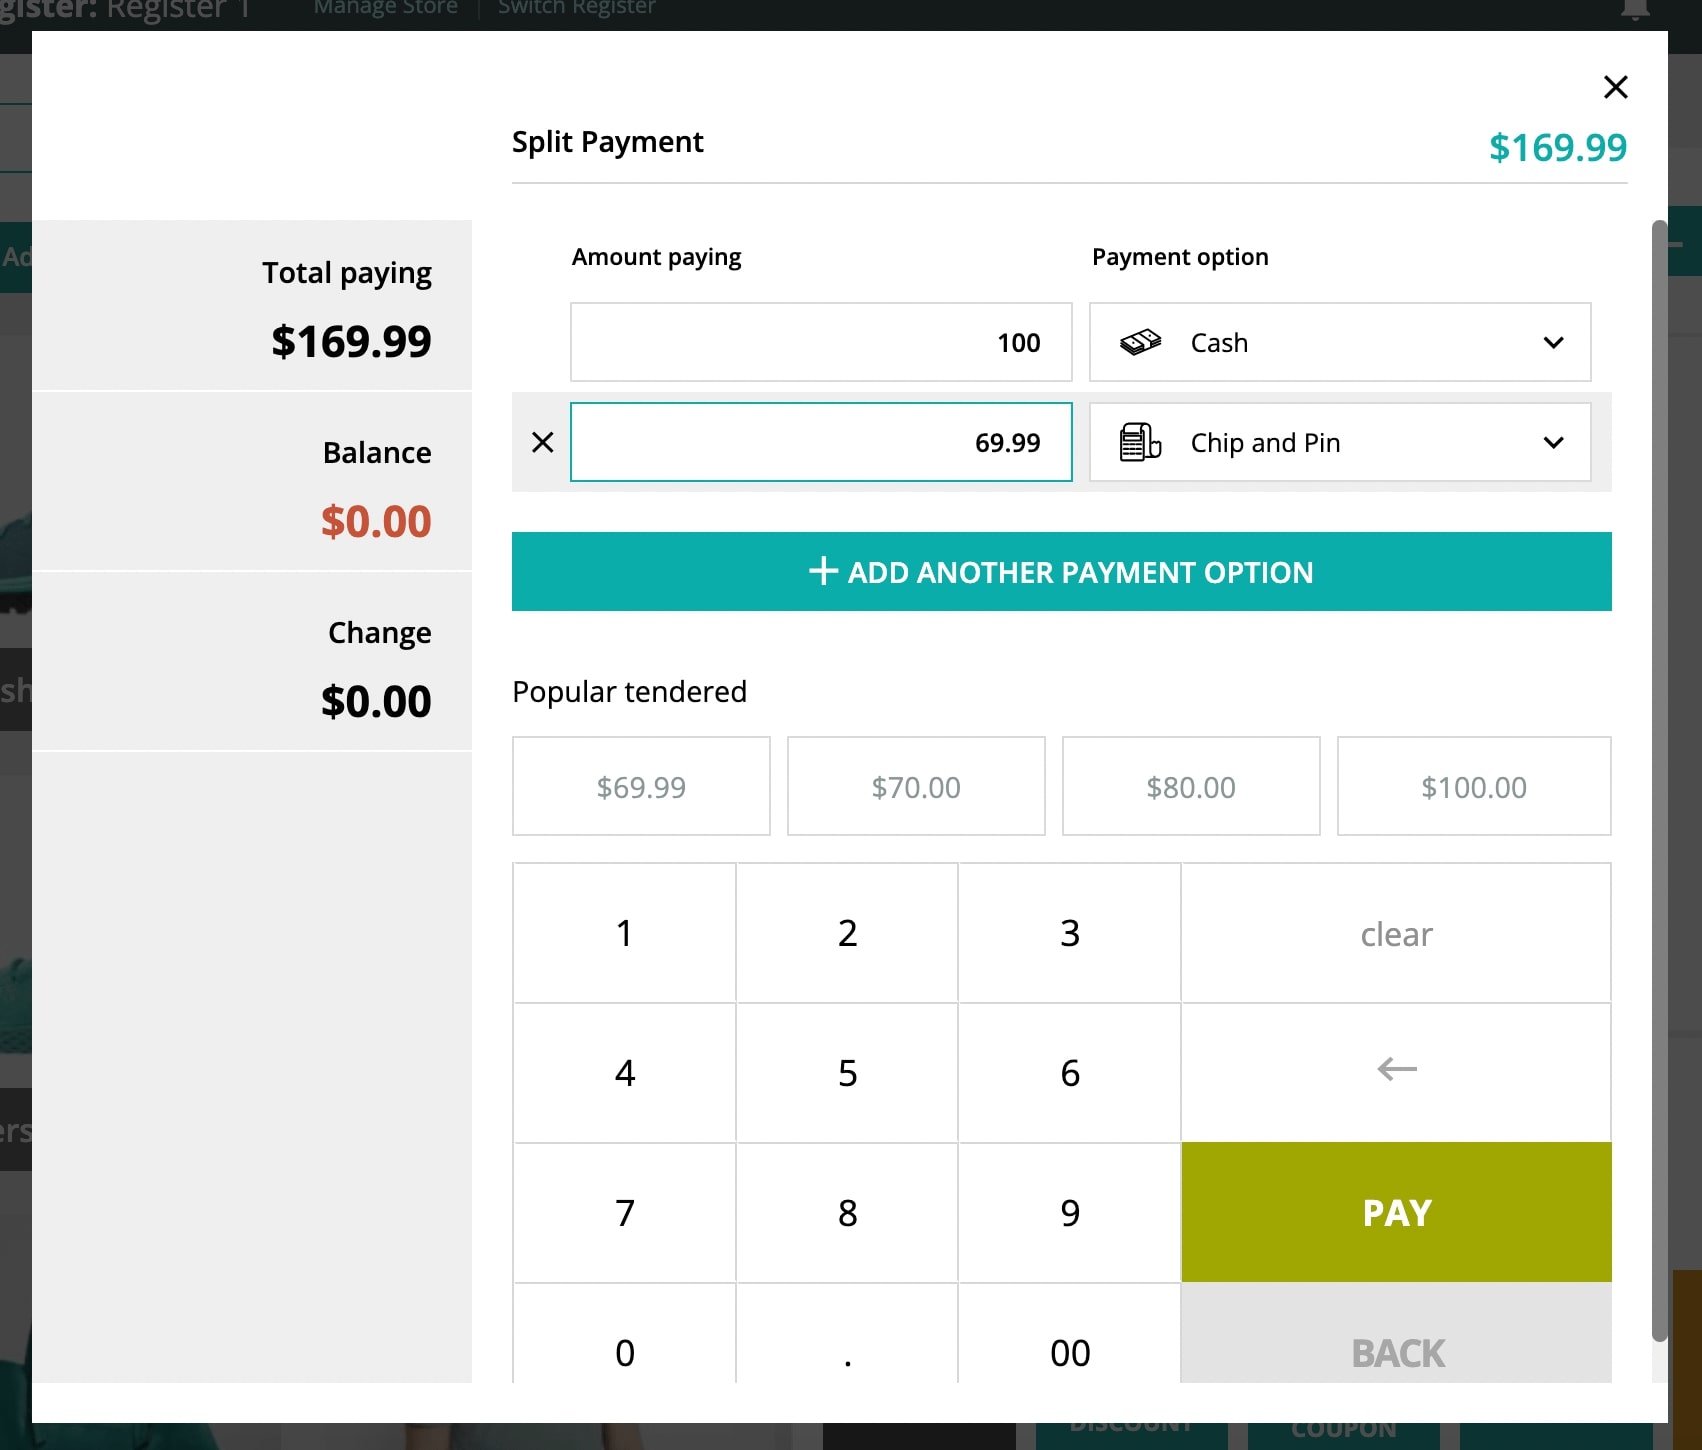
- Amount paying: enter here the amount that the customer is actually paying by each specific payment method.
- Payment option: select here the payment method used.
- Add another payment method: click here to add another payment method and fill in the Amount paying and payment option.
- Popular tendered: here you will find preset amounts that are smartly calculated. The first available one is the balance due, whereas the other ones are the nearest amounts calculated depending on the currency denominations. You can either select one of them or type the amount from the Number keyboard.
Example
Let’s give an example to show exactly how this works.
John is buying a meal for his family and needs the products to be delivered to his home, so he will pay $50 cash now and will pay the balance when the products are delivered.
The total due is $62.20.
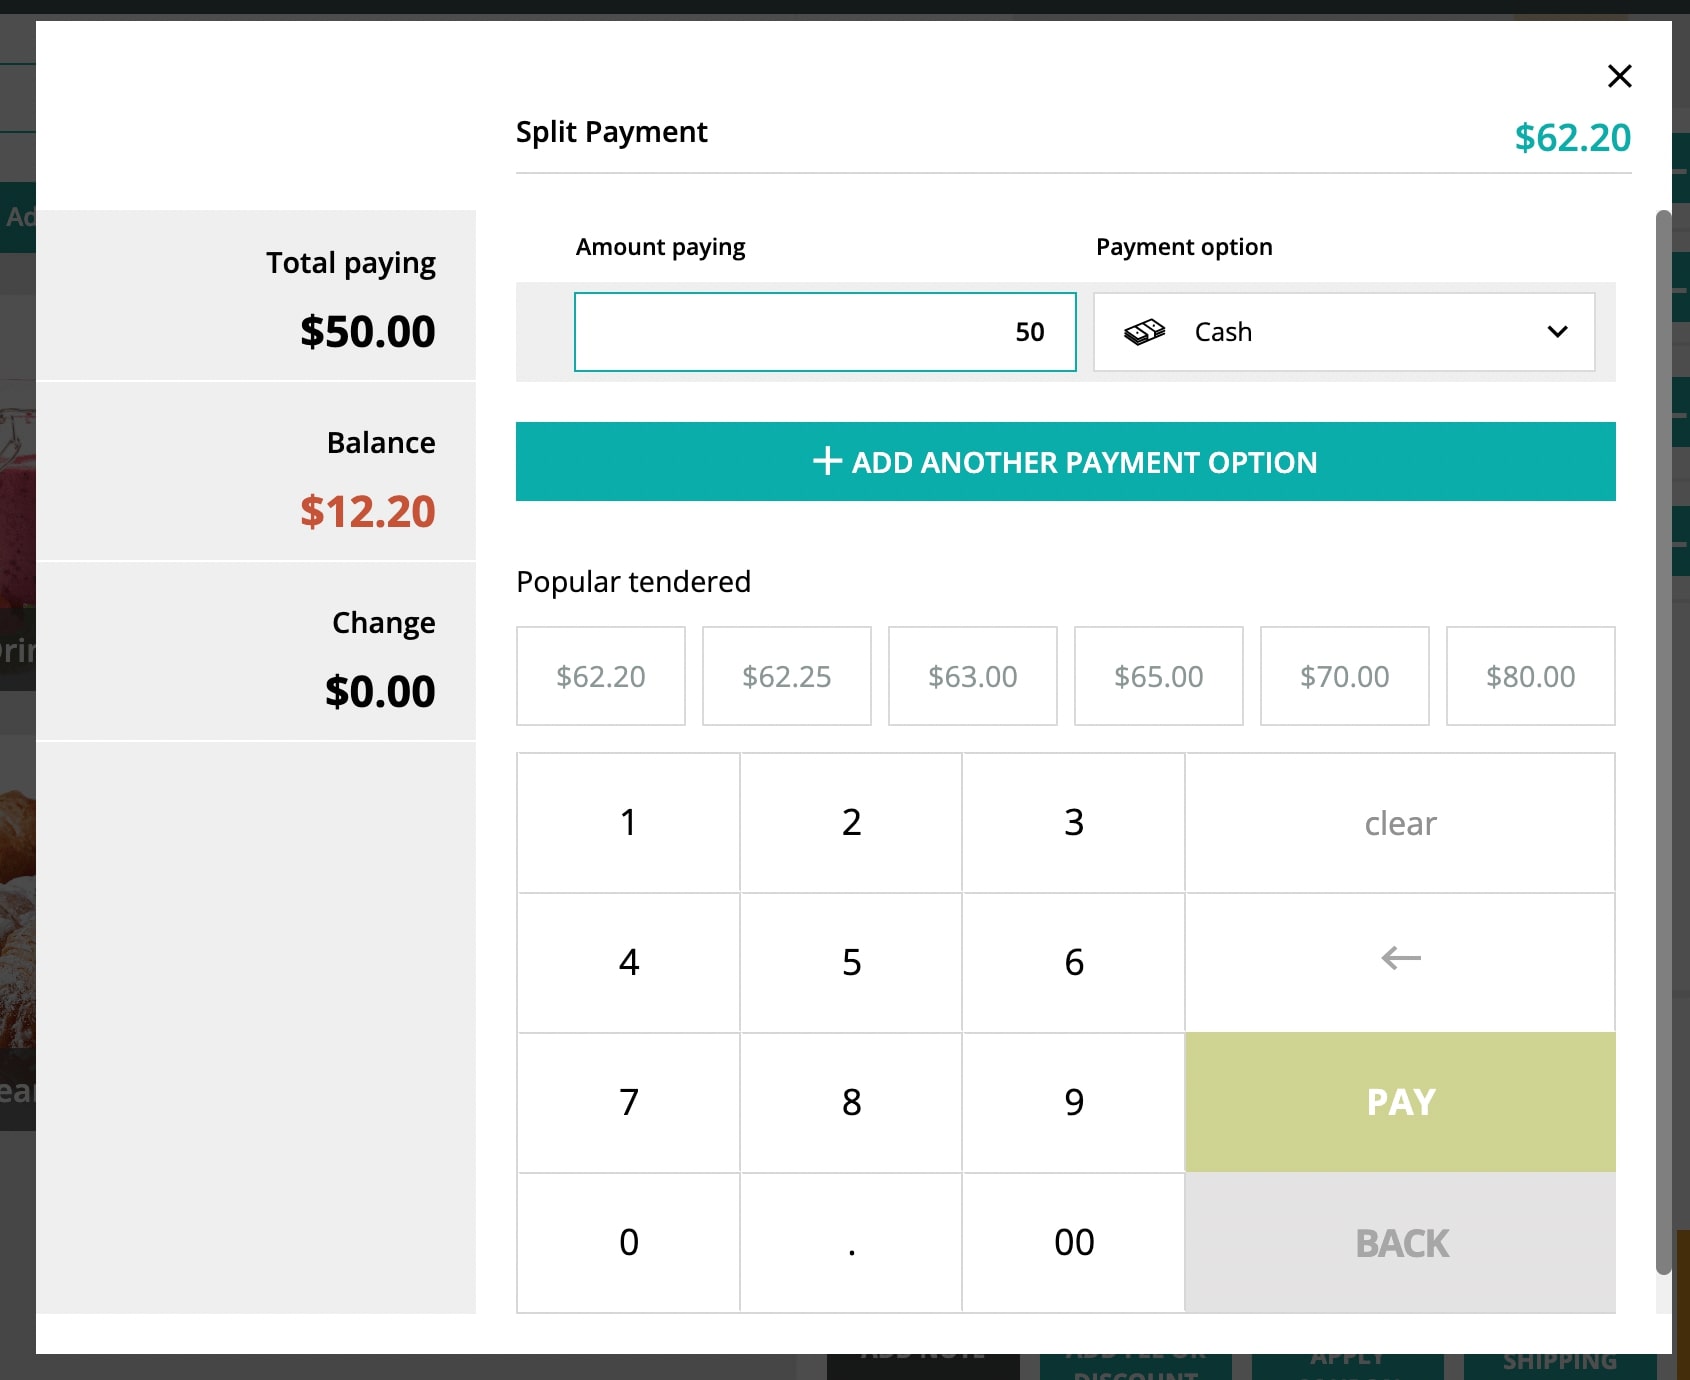
He’s paying now $50 cash, so you can Clear the pre-filled total and type in $50, select Cash as the payment method, then click on Add new payment method to let him pay the balance with cash on delivery.
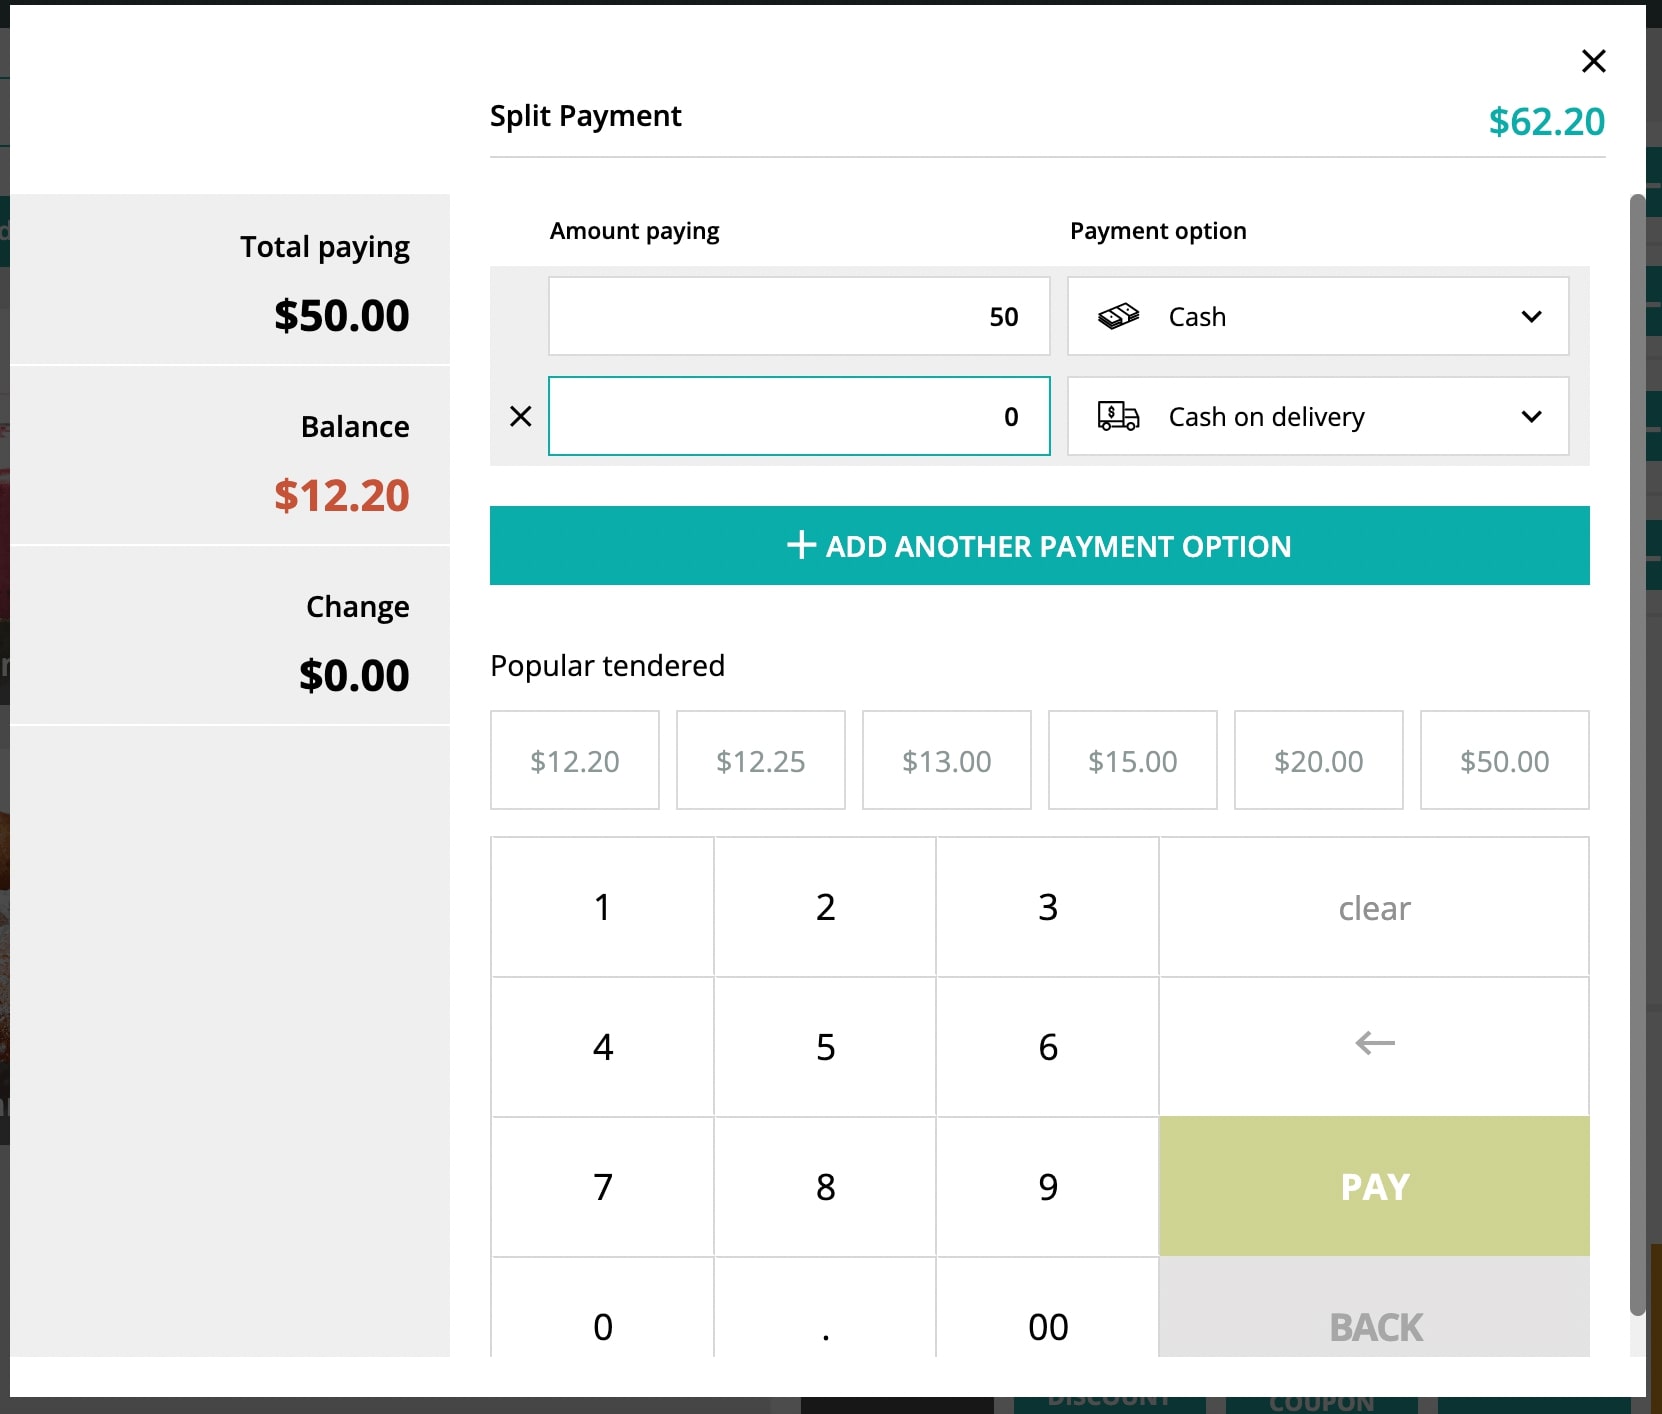
In the popular tendered, you will find some smartly calculated preset amounts, so, select the first one, which suggests you the balance of $12.20, to fill in the Amount paying and select Cash on delivery as the payment method.
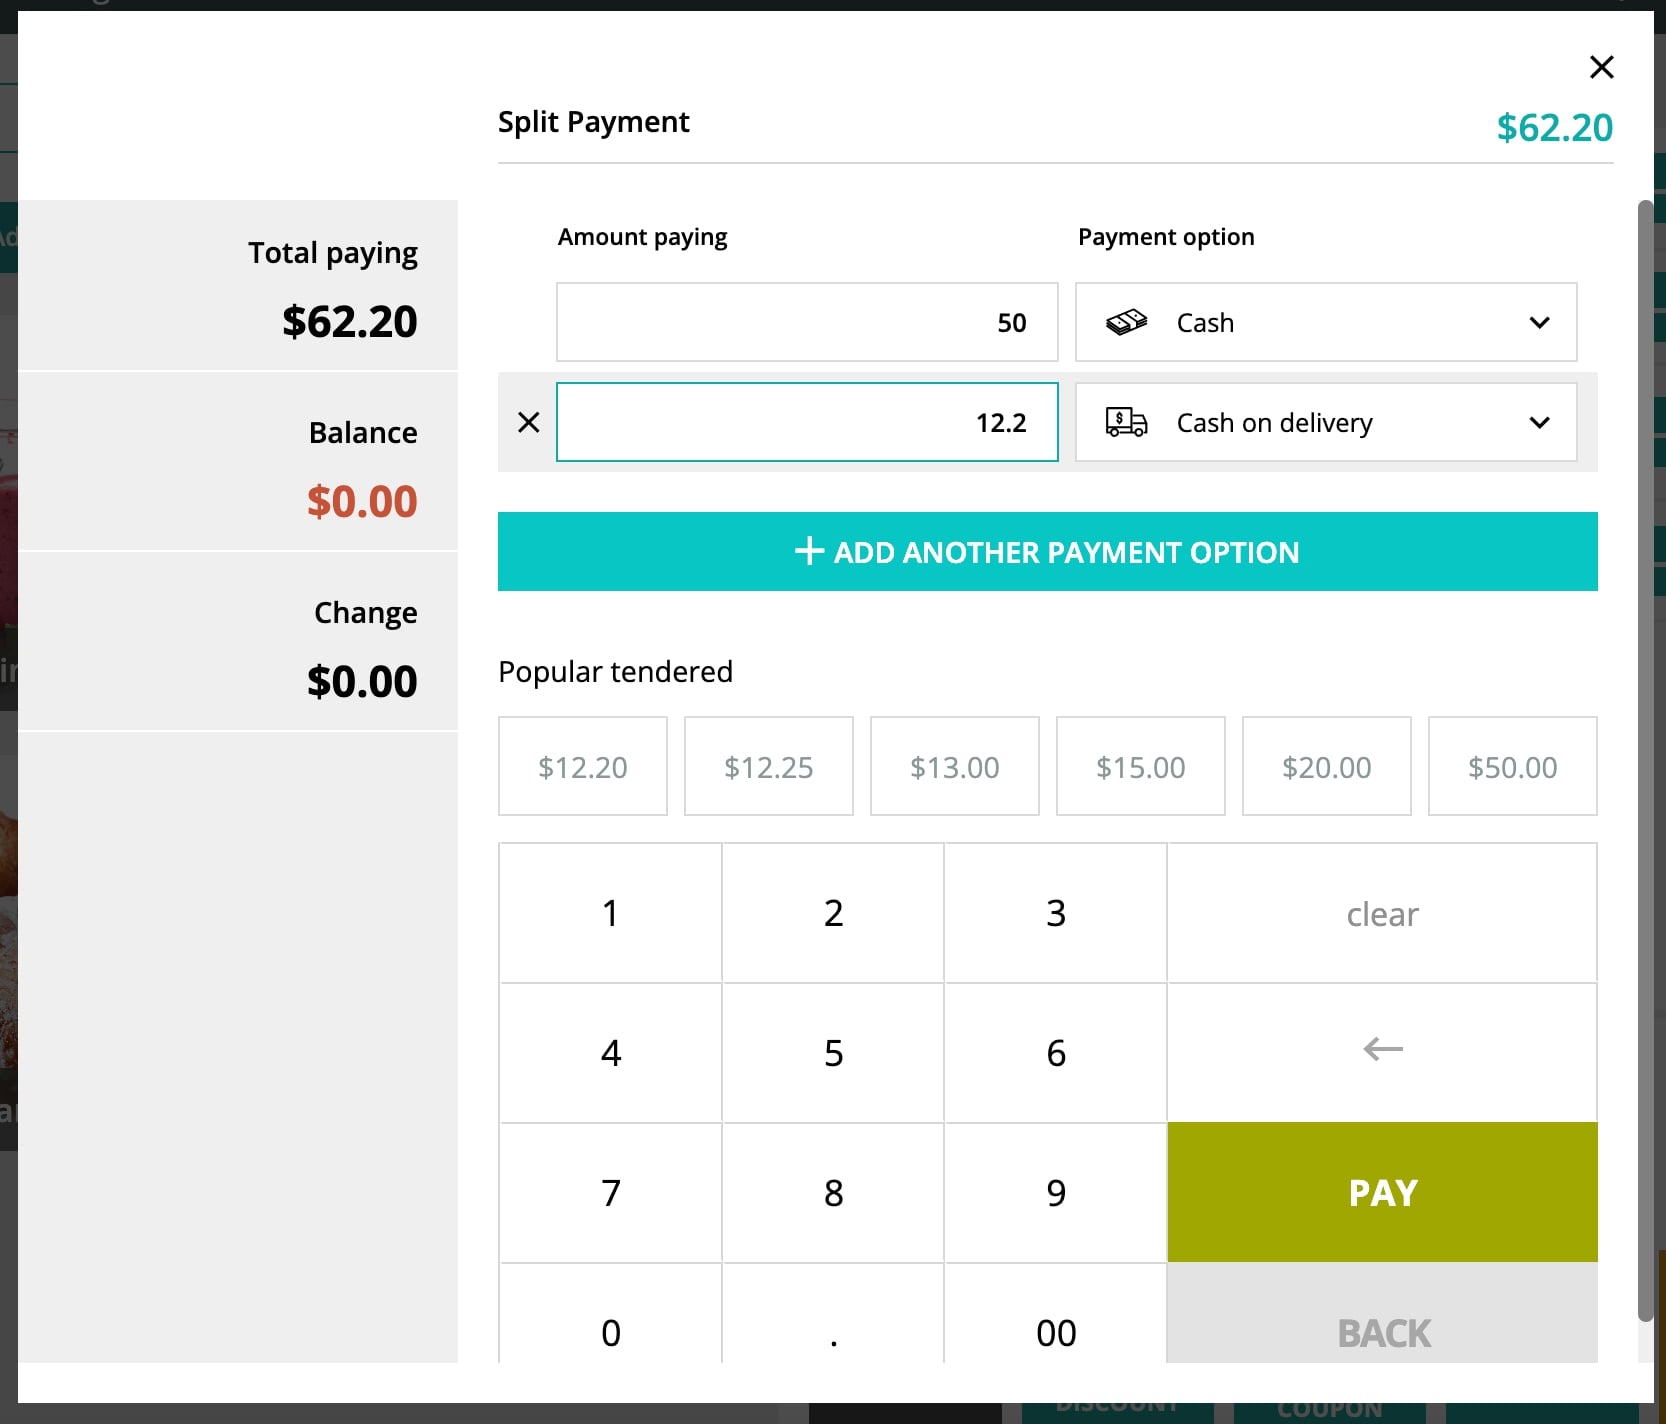
Finally, click on Pay and an order will be created with Completed status. If you add also Shipping information, the order will be created with Processing status.

This is what the admin will see on the backend in the order details:

As you can see, you will find a metabox on the right side called POS info, which includes the Store name, the Register, the Cashier, and the payment methods with the related amount paid.