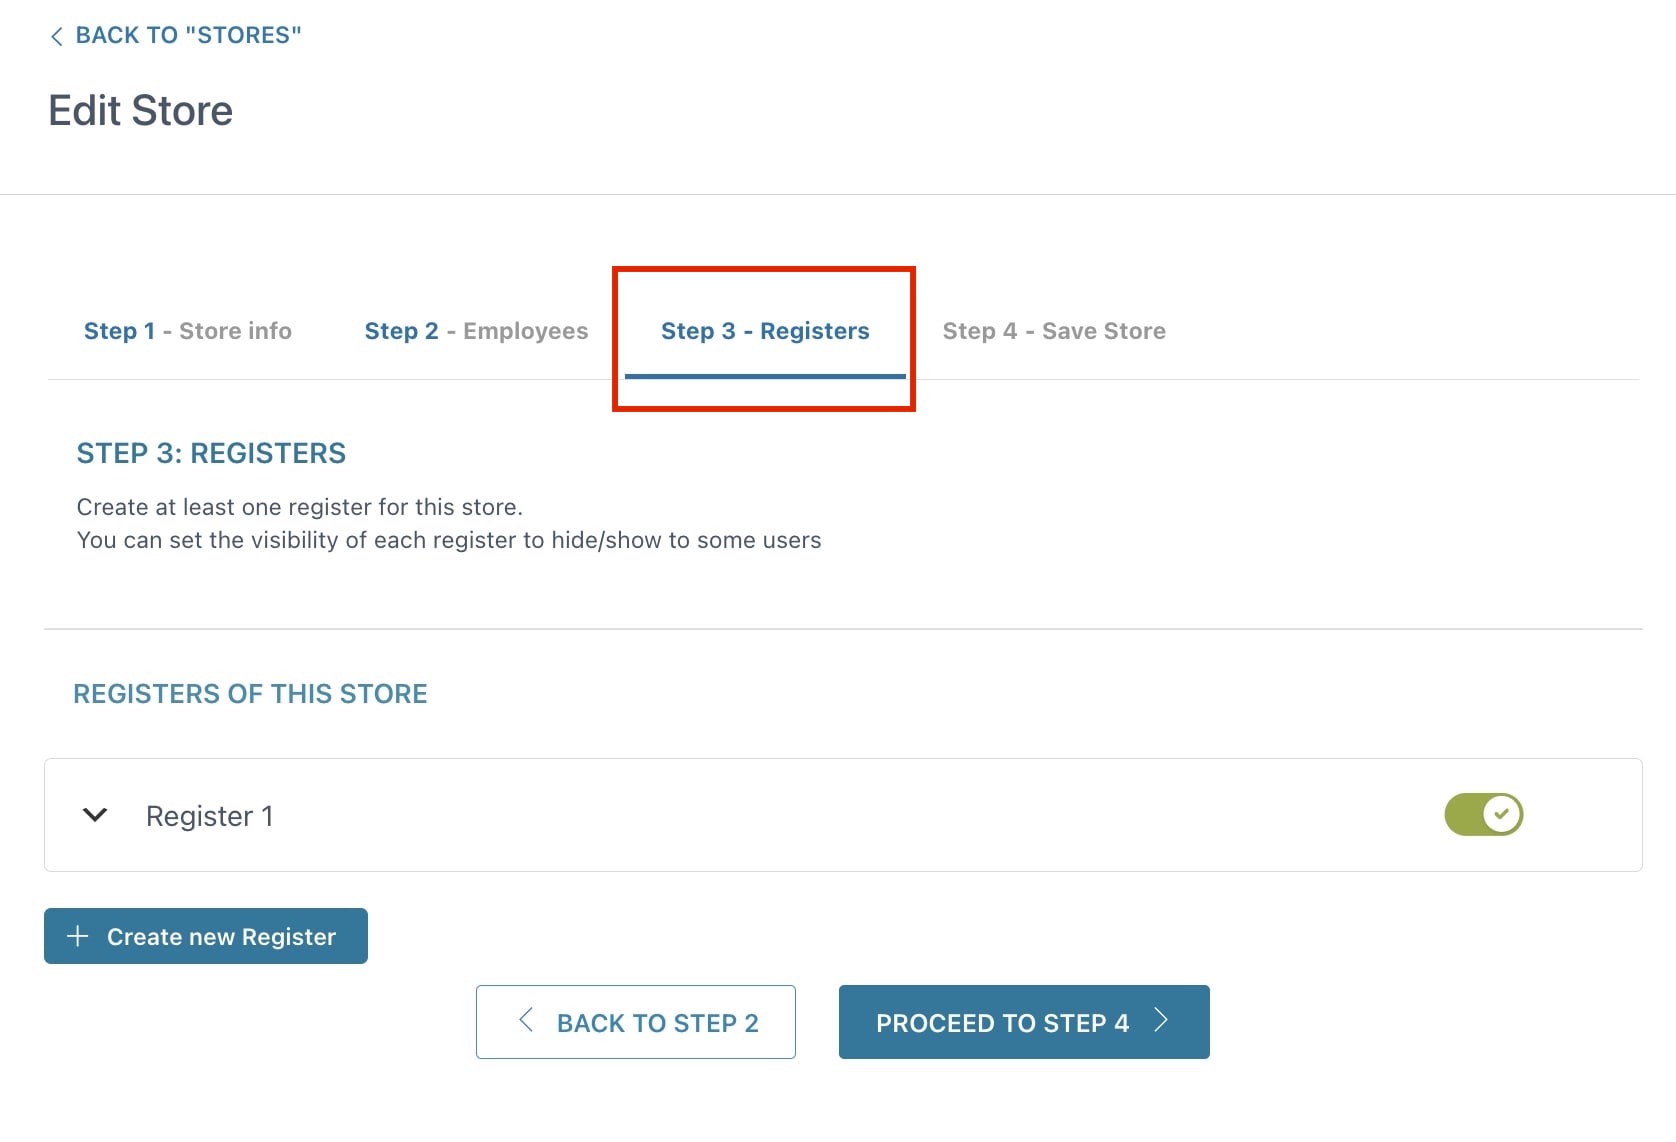
Step 3 – Registers
In this step, you can set up all the Registers available for the Store. Every Register might have different settings, regardless of other Registers of the same store. Please, see all the available options below:
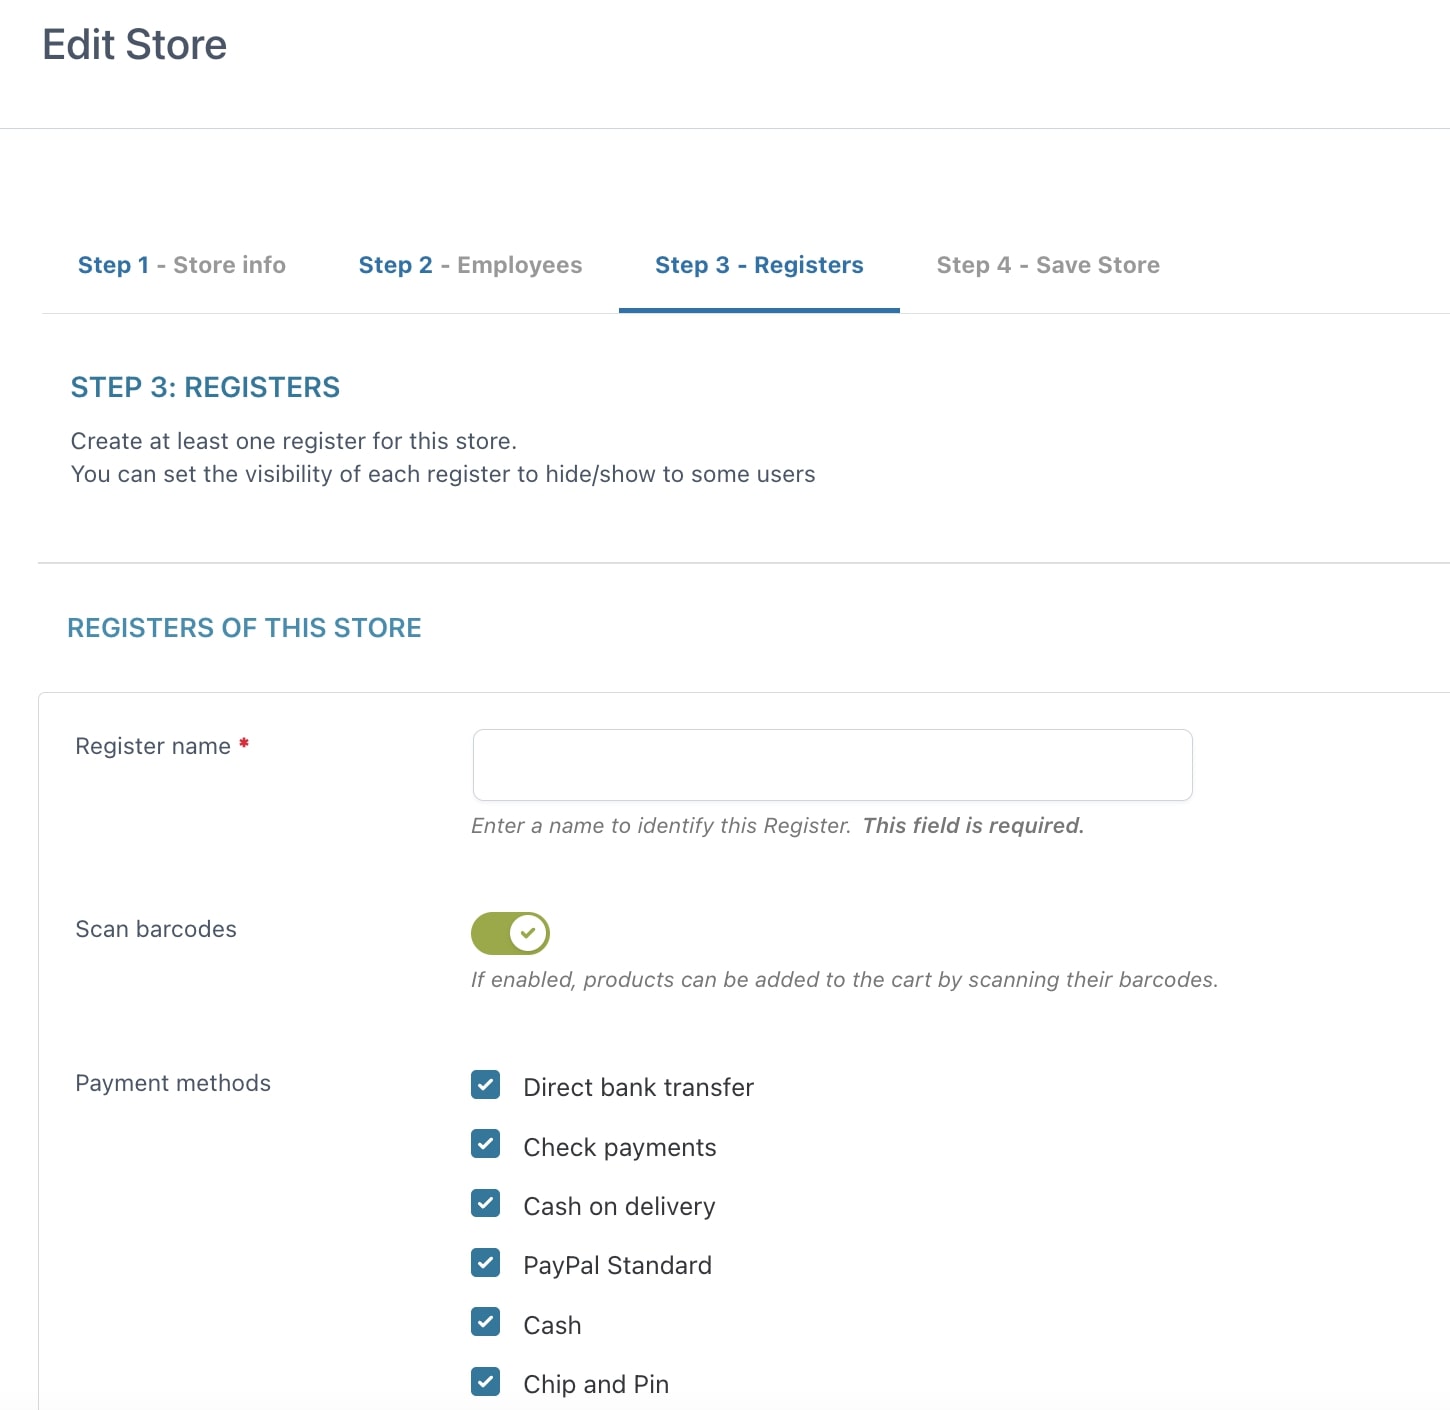
- Register name: this is a required field that will help you identify Registers.
- Scan barcodes: enable this option if you want to let Cashiers scan items with a barcode scanner device from the POS view. Read more about this feature here.
- Payment methods: choose which payment gateways will be available for this specific Register.
Now, we can check three options that will allow customizing the way products are displayed in the register.
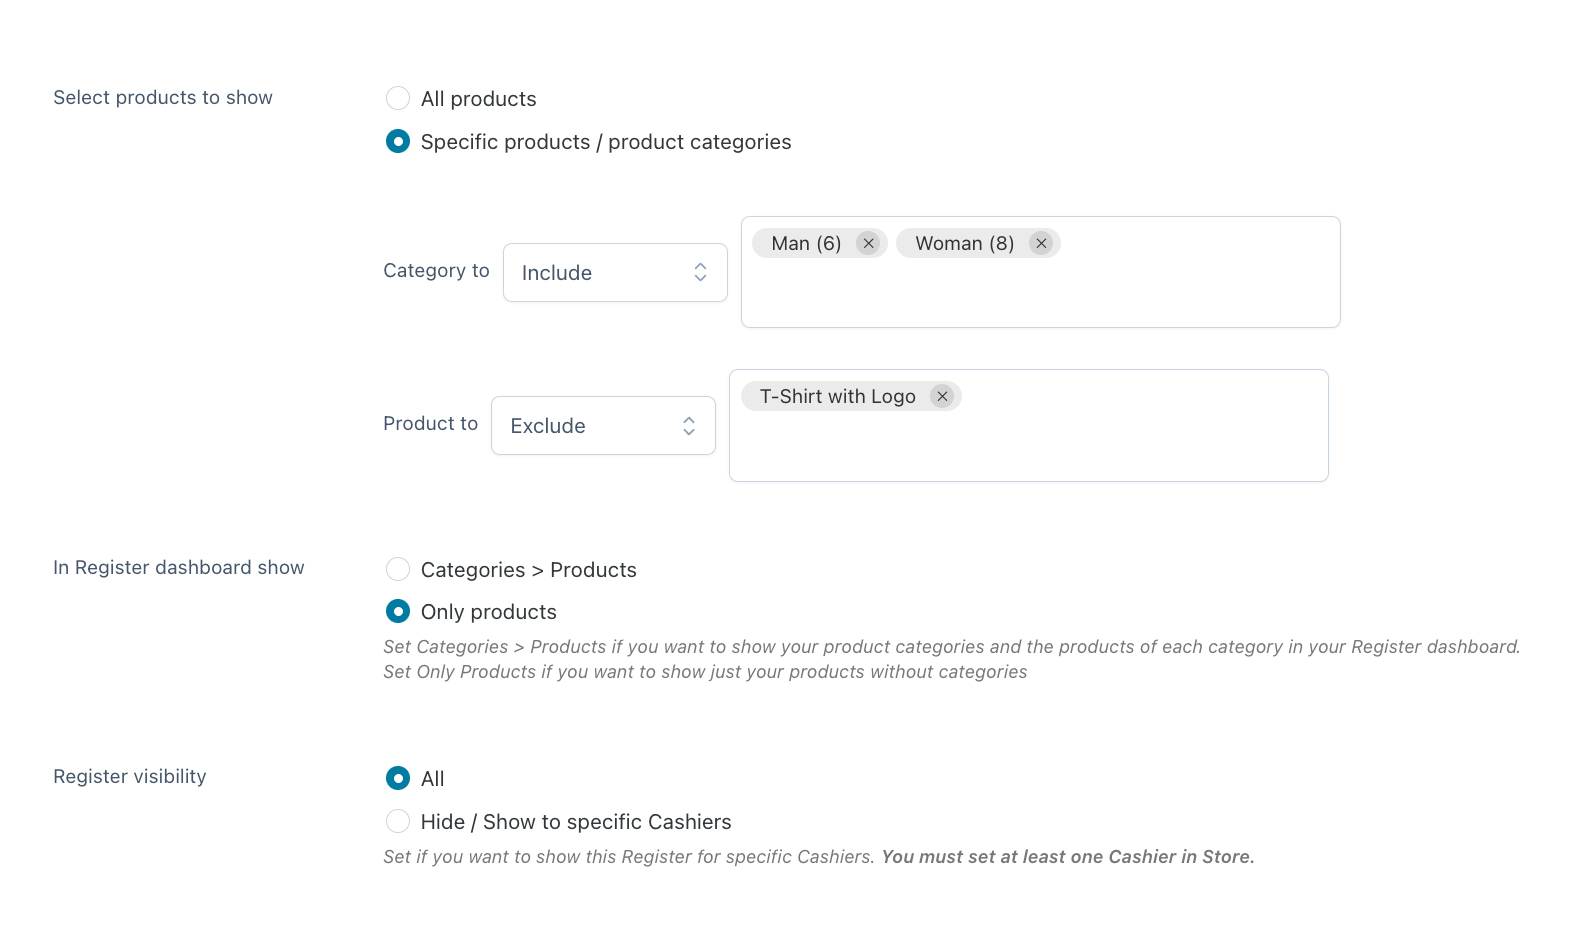
- Select products to show: this option can be useful if you want to sell some products only in your WooCommerce online and make them unavailable in your physical points of sale, or if you have distinct departments.
In the example above, from this Register, you can only purchase products in the categories Man and Woman, and the T-shirt with logo is not purchasable either. - In Register dashboard show: this option allows you to choose how to display products, whether All products together (so immediately available for selection), or split by category (so you’ll have to select the category first and then the product in it).
- Register visibility: you can configure here which cashiers are able to see the register. You can choose to show it to all cashiers or to show or to hide it to specific cashiers.
Now, a few more options related to the Receipt, closing reports and final notes.

- Receipt: Select the receipt for this register. You can also choose between no receipt or select one of the receipts you have created. You can refer for this page to configure sale receipts.
- Enable Register closing report: enable this option if you want to let Managers and Cashiers download a Register closure report in CSV format, including all the information listed in the Closure window (opening time, closing time, logged-in cashiers, number of placed orders, number of sold products, sales by payment method, net sales, VAT, order tax and total tax – if enabled in WooCommerce – total sale, and cash total).
- Enable Register final notes: this enables a dedicated box in the Register closure view, where you can add notes.

Go to YITH > Point of Sale > Store > Registers whenever you want to edit one or more of the above details for an existing store.