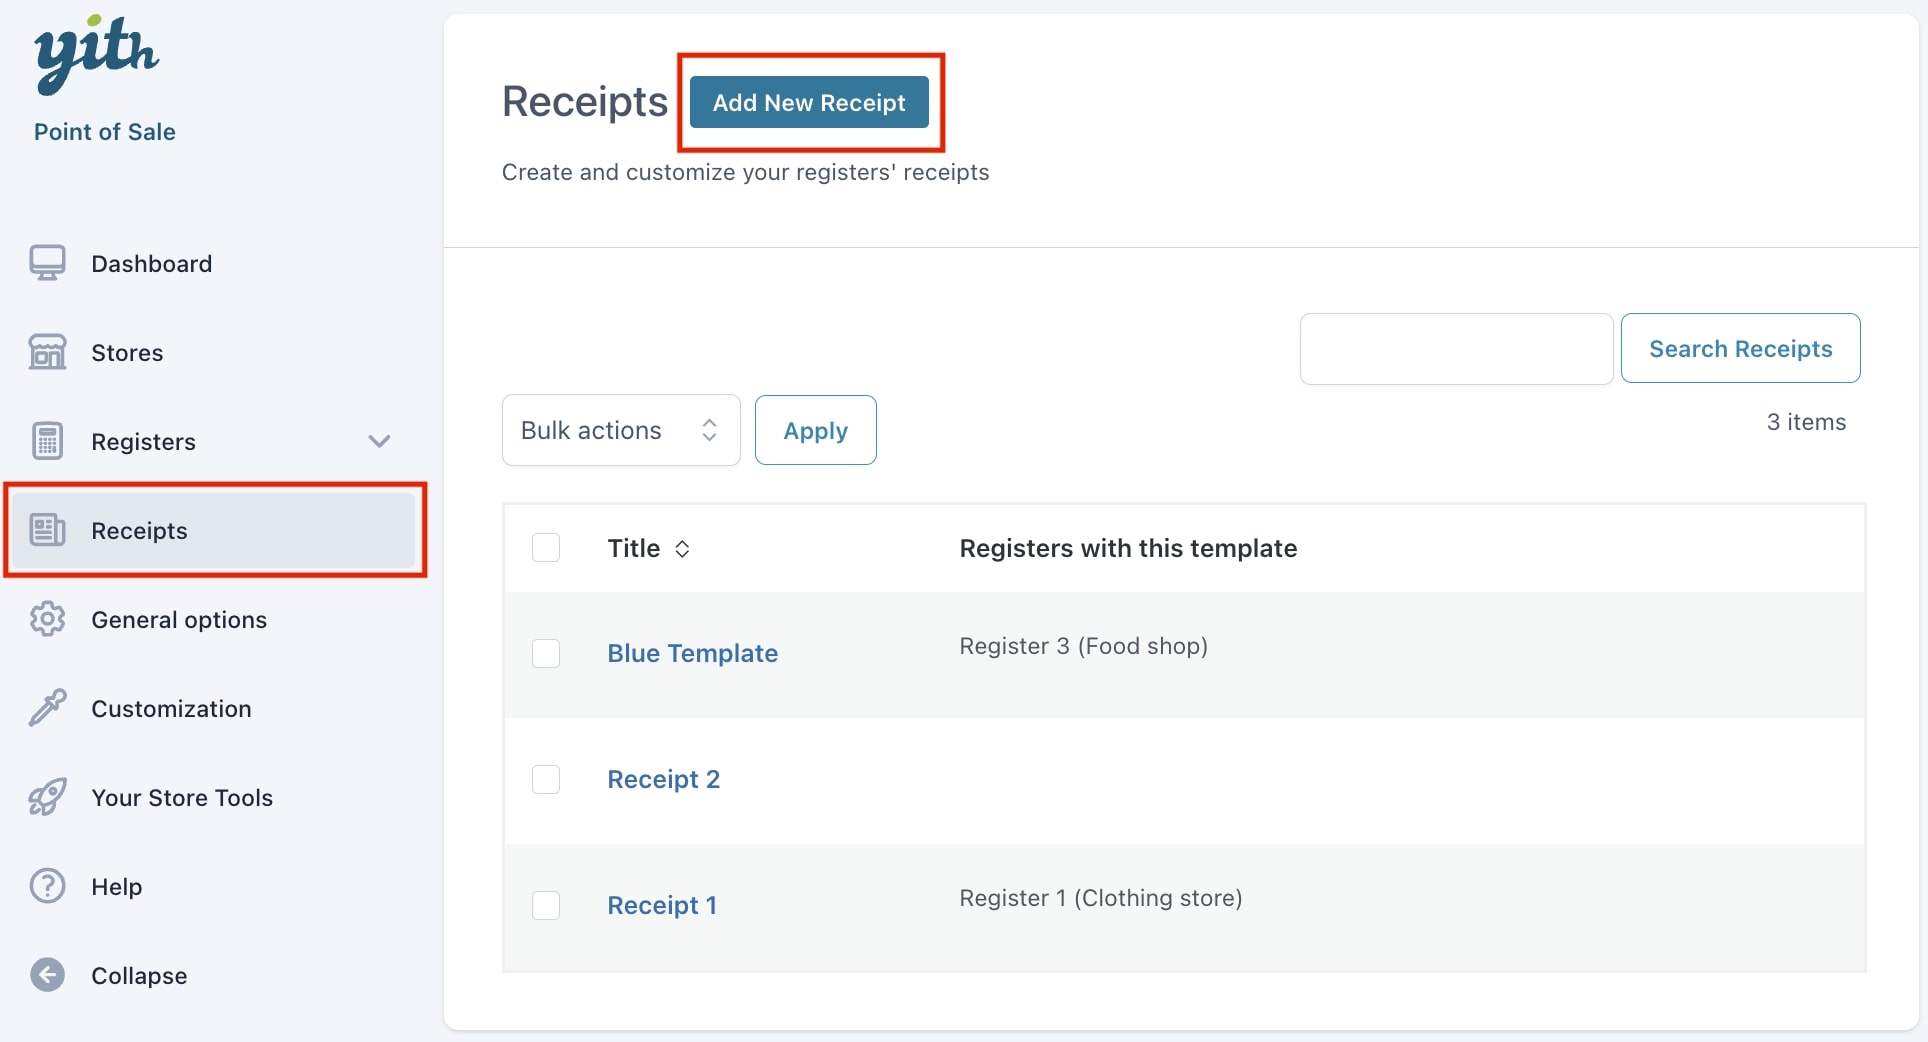
Go to YITH > Point Of Sale > Receipts to configure your sales receipt templates. Every Register can use a custom template. Click on Add new receipt to create a new one.
The new receipt template is divided into sections and on the right side, you’ll see a preview of the changes that you are currently doing. You can configure the following options:
General Settings
In the General settings section, you can edit the Receipt name: this is the name of the template, the one that you will see in the Register picker tool in the Register settings.
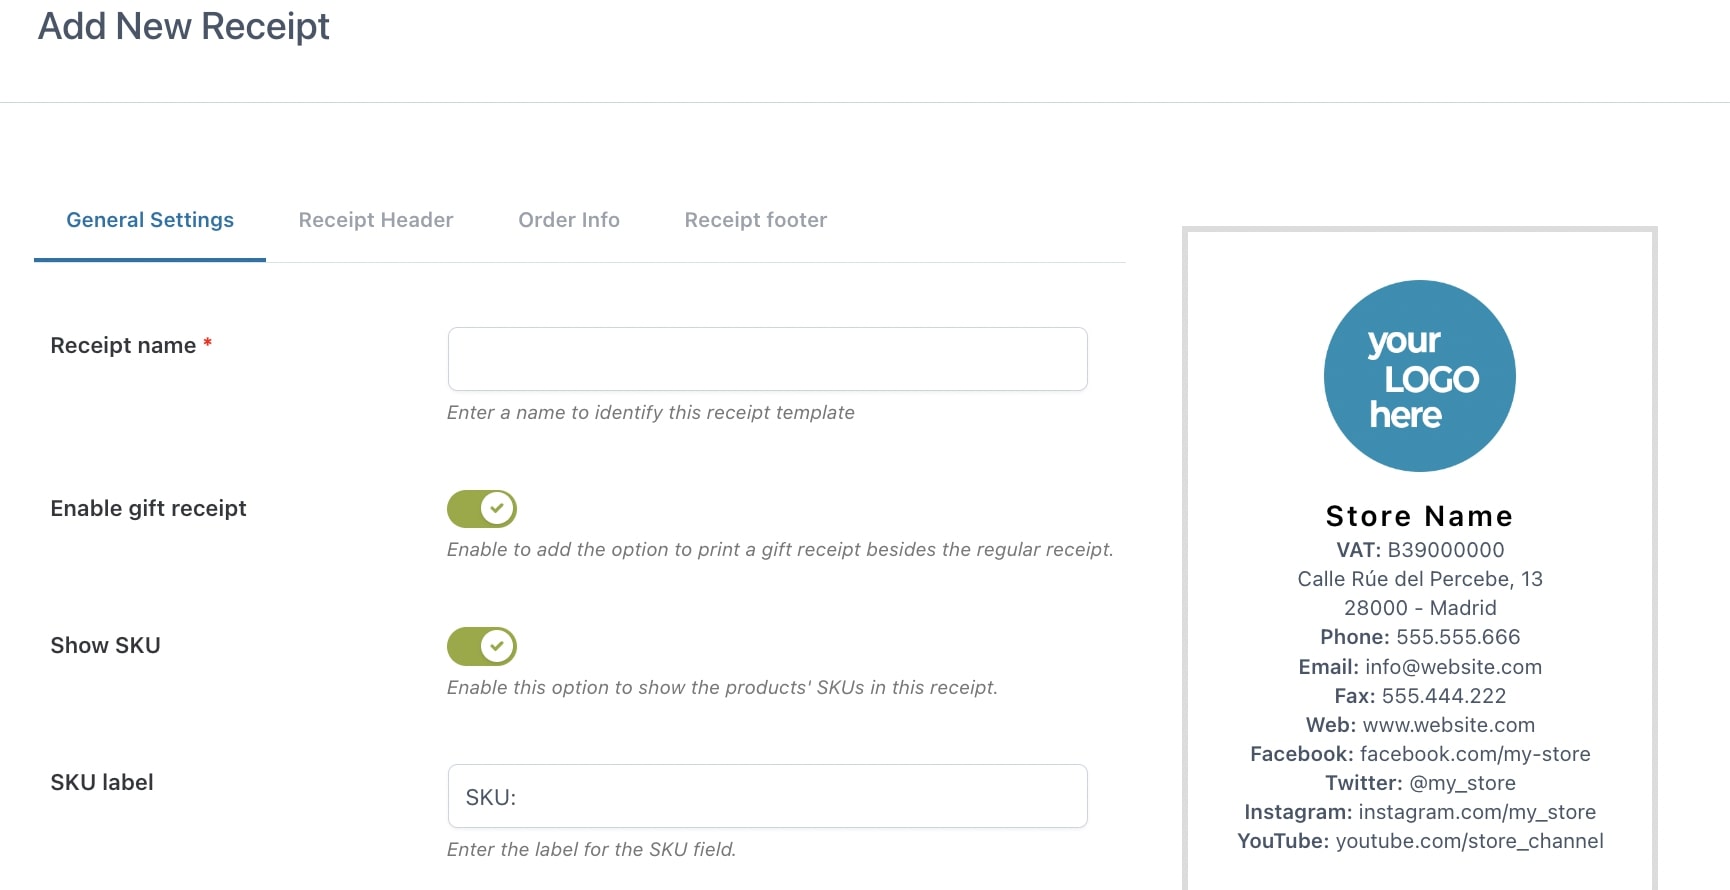
The other available options are:
- Enable gift receipt: by enabling the option, it will be possible to also print the gift receipt in addition to the standard one. This option is useful when users purchase a gift for someone else and want to give them the receipt to possibly change the product (with a different item or a different size, color, etc.) without showing the price paid.

- Show SKU: enable if you want to show the product SKU in the receipt.
- SKU label: enter the label that will define the SKU field.
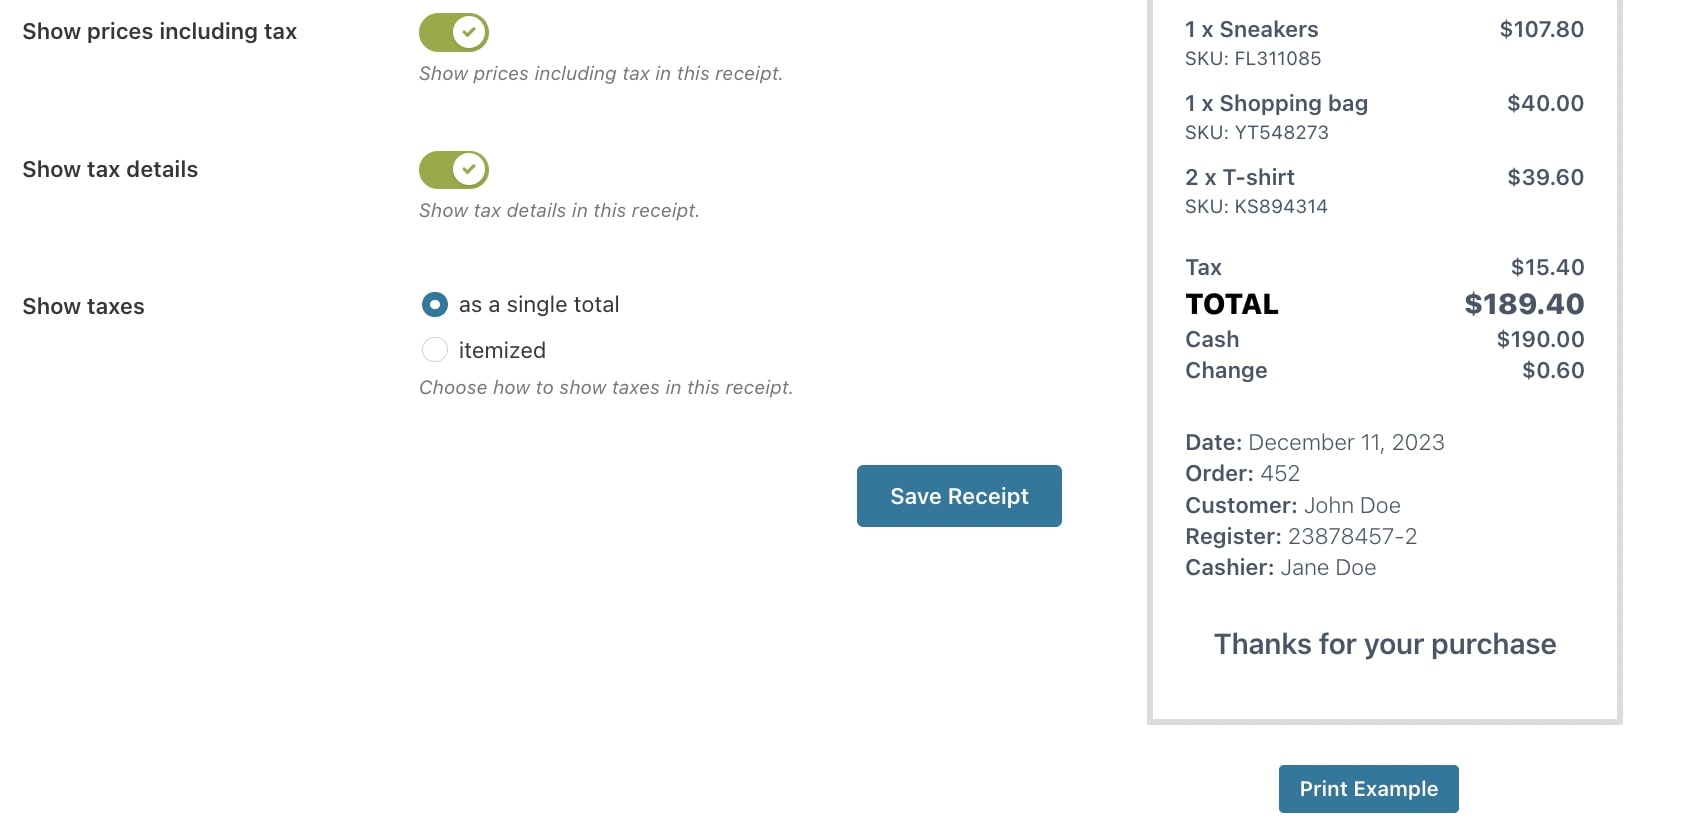
The tax settings will appear only if you have enabled the tax option in WooCommerce. Otherwise, these settings will be hidden:
- Show prices including tax: enable to show prices tax included.
- Show tax details: enable if you want to force the tax row to be shown in the receipt.
- Show taxes: choose to show taxes as a single total or itemized.
Receipt header
Here you will be able to set up what will appear in the receipt header. You can edit the following options:

- Logo: upload here your custom logo to show at the top of the receipt.
- Name: enable if you want to show the shop name on the receipt.
- Show VAT: enable this option if you want to show the VAT number that you’ve set in the Store settings.
- VAT label: edit here the text that will identify the VAT in the receipt. Default to ‘VAT:’
- Address: enable this option if you want to show the store address as specified in the Store settings.
- Contact info: enable if you want to show the Store contact info as specified in the Store settings. You can choose whether to display all or just a few of the available ones.
- Socials: enable this option to select the socials you want to show in the receipt.
Order info
Here you can edit all the information related to the order as it will appear in the receipt:
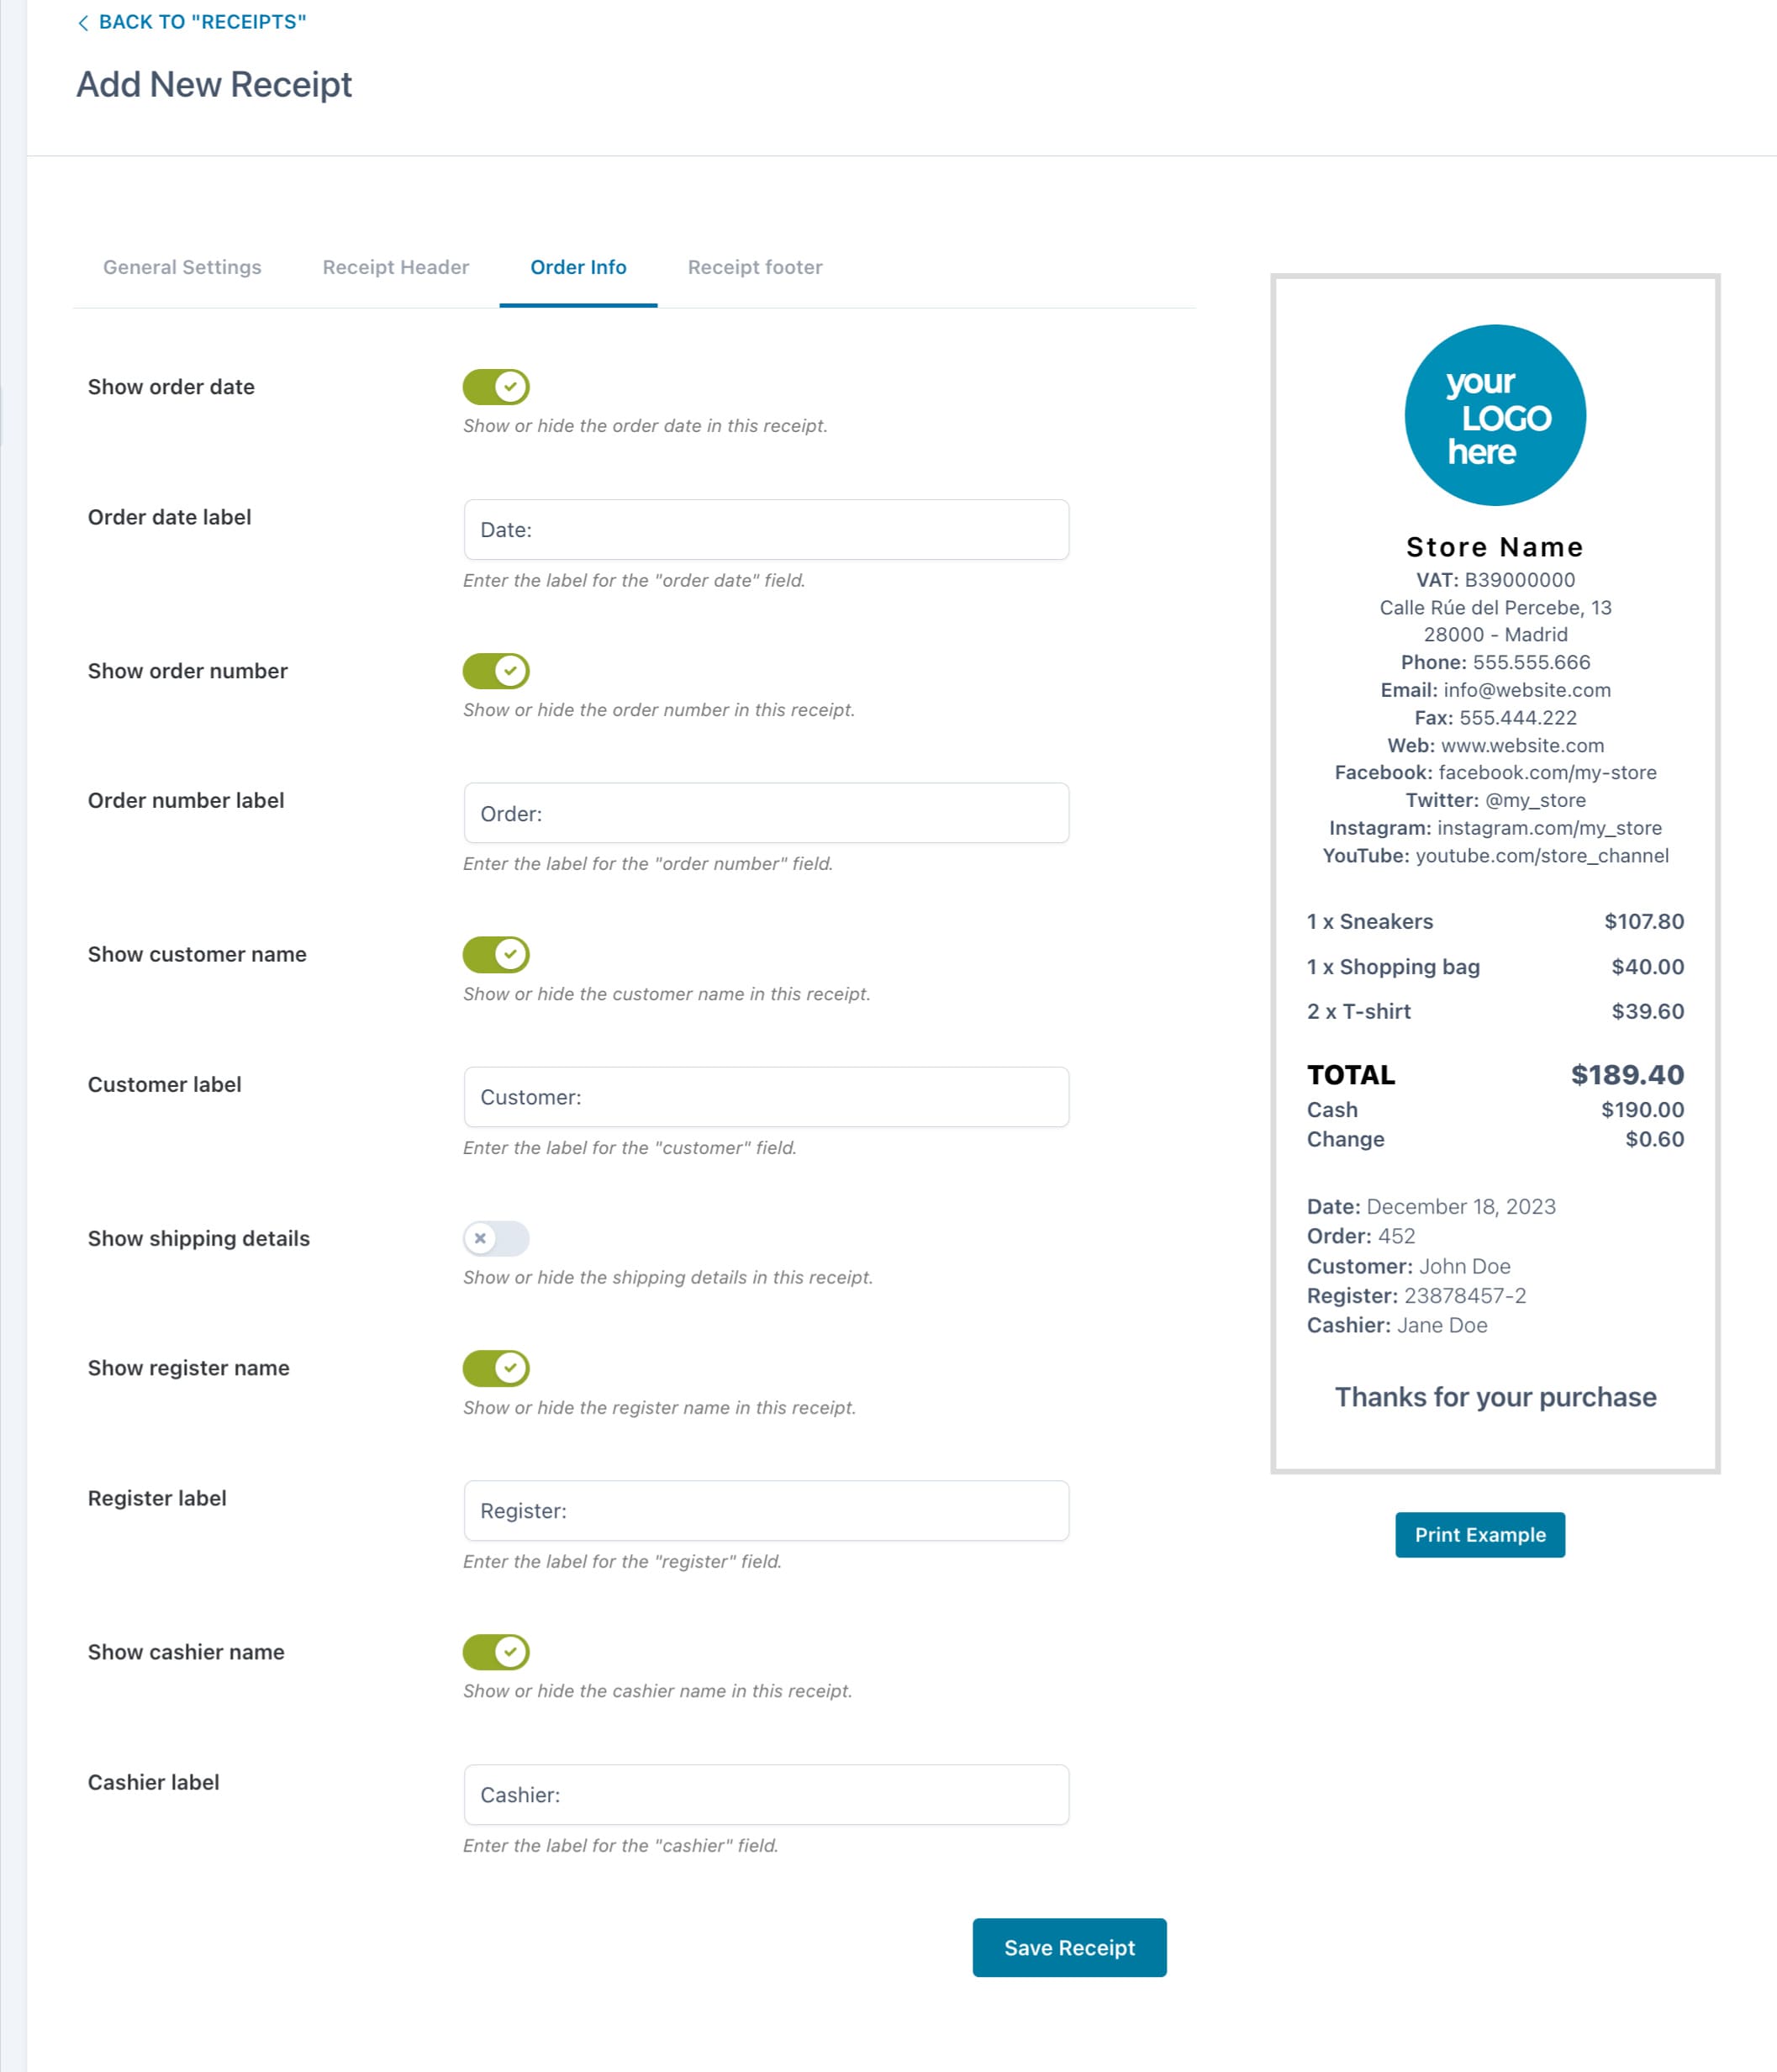
- Show order date: include the date of the order.
- Order date label: change here the text that identifies the order date. Default to ‘Date’.
- Show order number: this will print the order number.
- Order number label: change here the text that identifies the order number. Default to ‘Order’.
- Show customer name: this shows the customer name (if available).
- Customer label: change here the text to identify the customer. Default to ‘Customer’.
- Show shipping details: this shows shipping info.
- Shipping label: change here the text that identifies shipping details.
- Show register name: this allows showing the Register through which the order was placed in the receipt.
- Register label: change here the text to identify the Register. Default to ‘Register’.
- Show cashier name: this allows showing the name of the Cashier who placed the order.
- Cashier label: change here the text to identify the Cashier who placed the order. Default to ‘Cashier’.
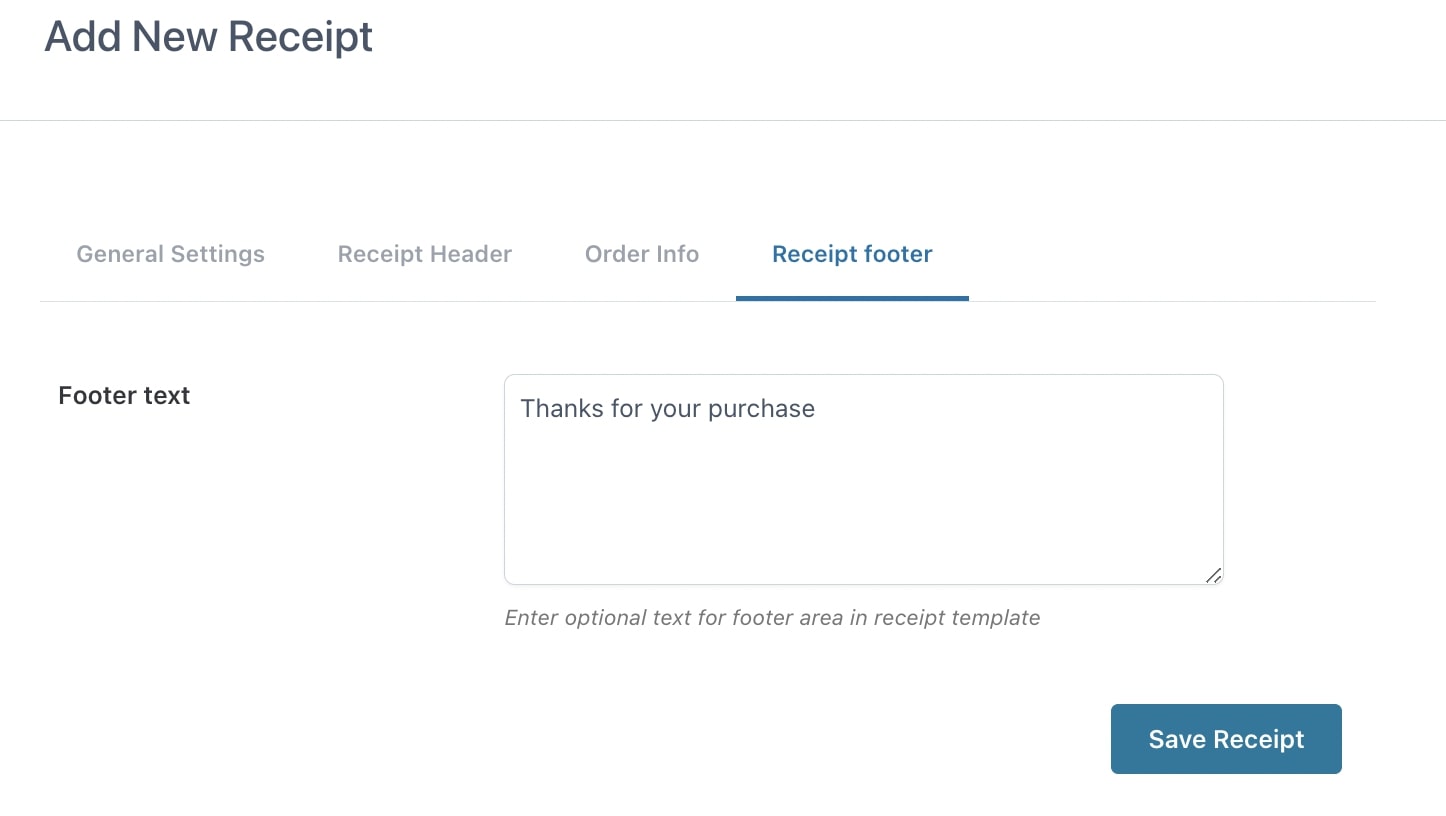
Receipt footer
In this last section, you can add a custom text that will be shown in the receipt footer.

Click on Save receipt to save your settings. From now on, you will be able to find this receipt template as one of the available choices in the Store settings.
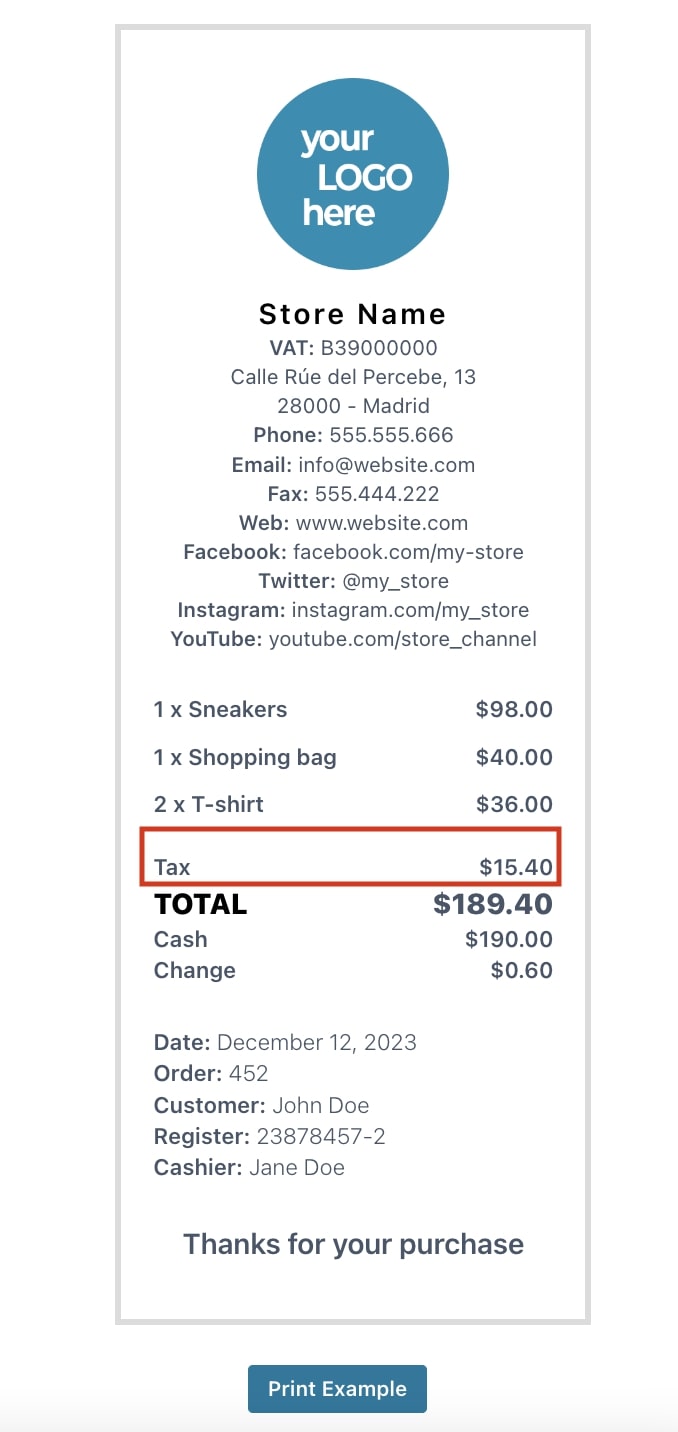
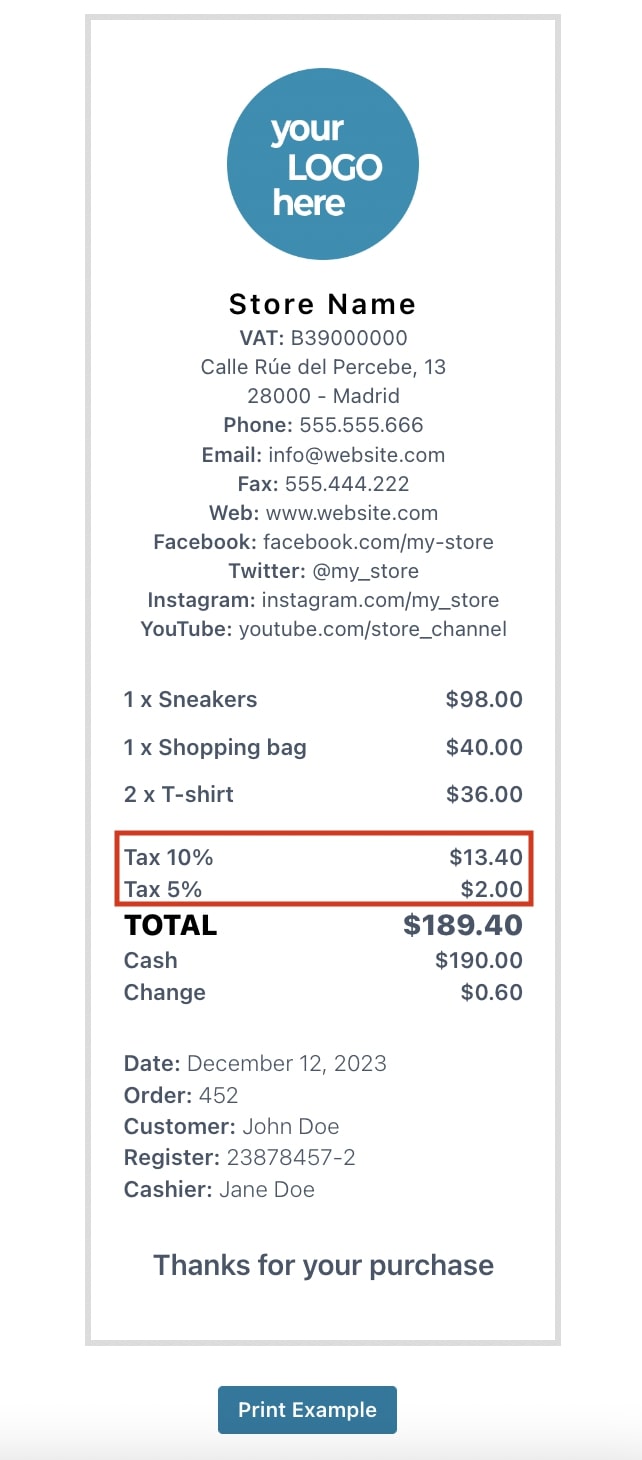
Receipt example
If the receipt option is enabled, whenever a new order is placed, on the POS screen, you will be able to see a Print receipt and/or Print gift receipt button that allows you to either print the receipt through the connected printer or save a PDF copy of it.
