This block prints a list with all the downloadable files linked to a membership plan product. This is what it looks like after adding the block:
Users can see and download all the files directly from this table. The table displays the product to which the link belongs to and the download button:
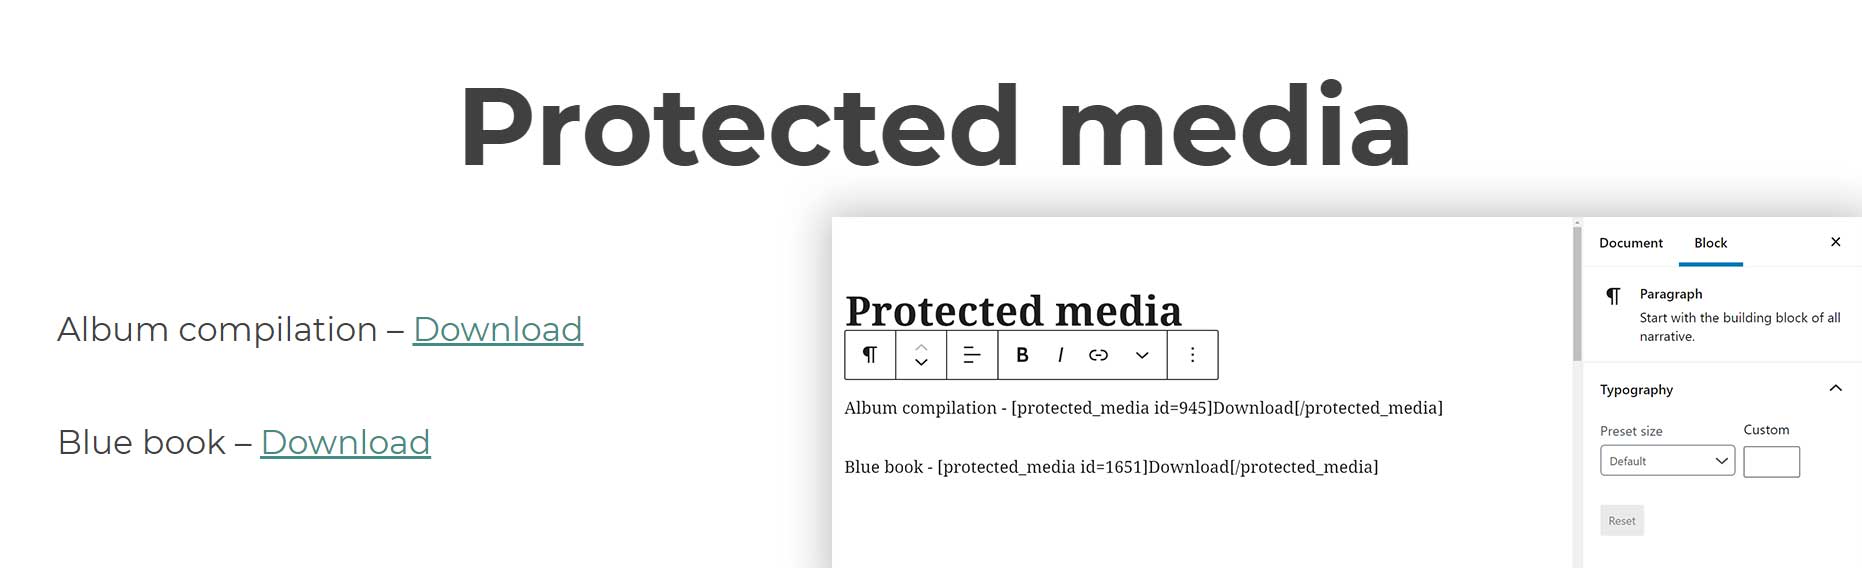
The shortcode “Protected media” prints the protected media link. Please note: media should be set as protected before printing the link.
Shortcode attributes are:
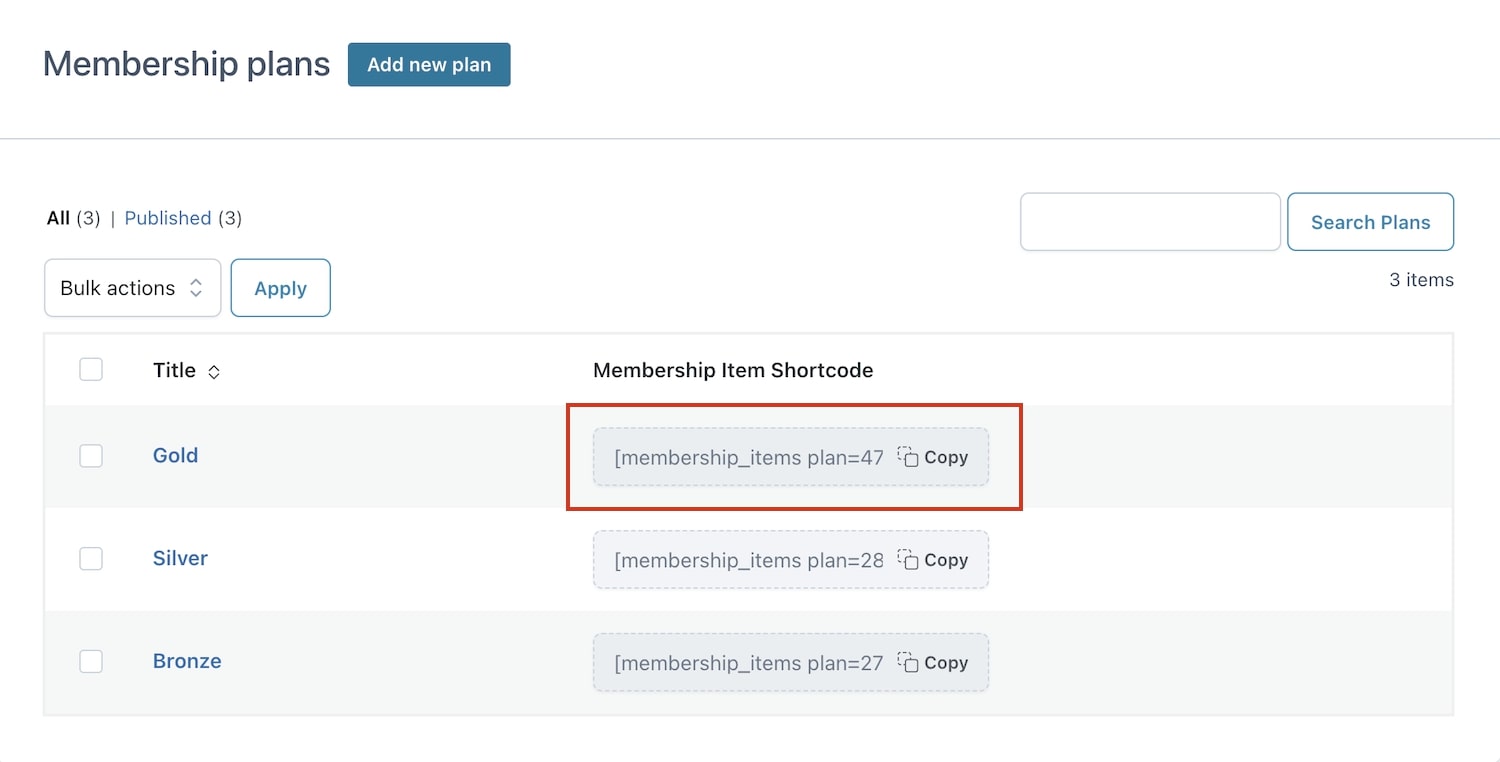
The shortcode “Membership Level Items” allows you to show a complete list of all elements associated to a specific membership plan. This list is visible only to users who have subscribed to that plan. Go to “Membership > Membership Plans” to copy the shortcode related to the plan you want to show.
You can use the attribute “plan” to set the ID of the membership plan.
The “Membership history” shortcode lets you show users the list of all memberships they are following.
The attributes of the shortcode are:
title: title you want to show ahead of the content of the shortcode
type: this attribute lets you filter the list of the membership displayed when you are also using the YITH WooCommerce Subscription plugin. type = “membership” this lets you show all memberships with no subscription plan of the users. type = “subscription” this lets you show all memberships with a subscription plan of the users.
An example of a shortcode: [membership_history id=”123″ title=”Shortcode Title” type=”membership”]
Please, note, to make sure all contents are visible here, you must have enabled it from Membership plans > [Your plan] > Show contents in membership details:
This shortcode allows you to handle displaying links within a specific page, post or product in your website.
Its goal is to display the files only to users who own a specific membership plan.
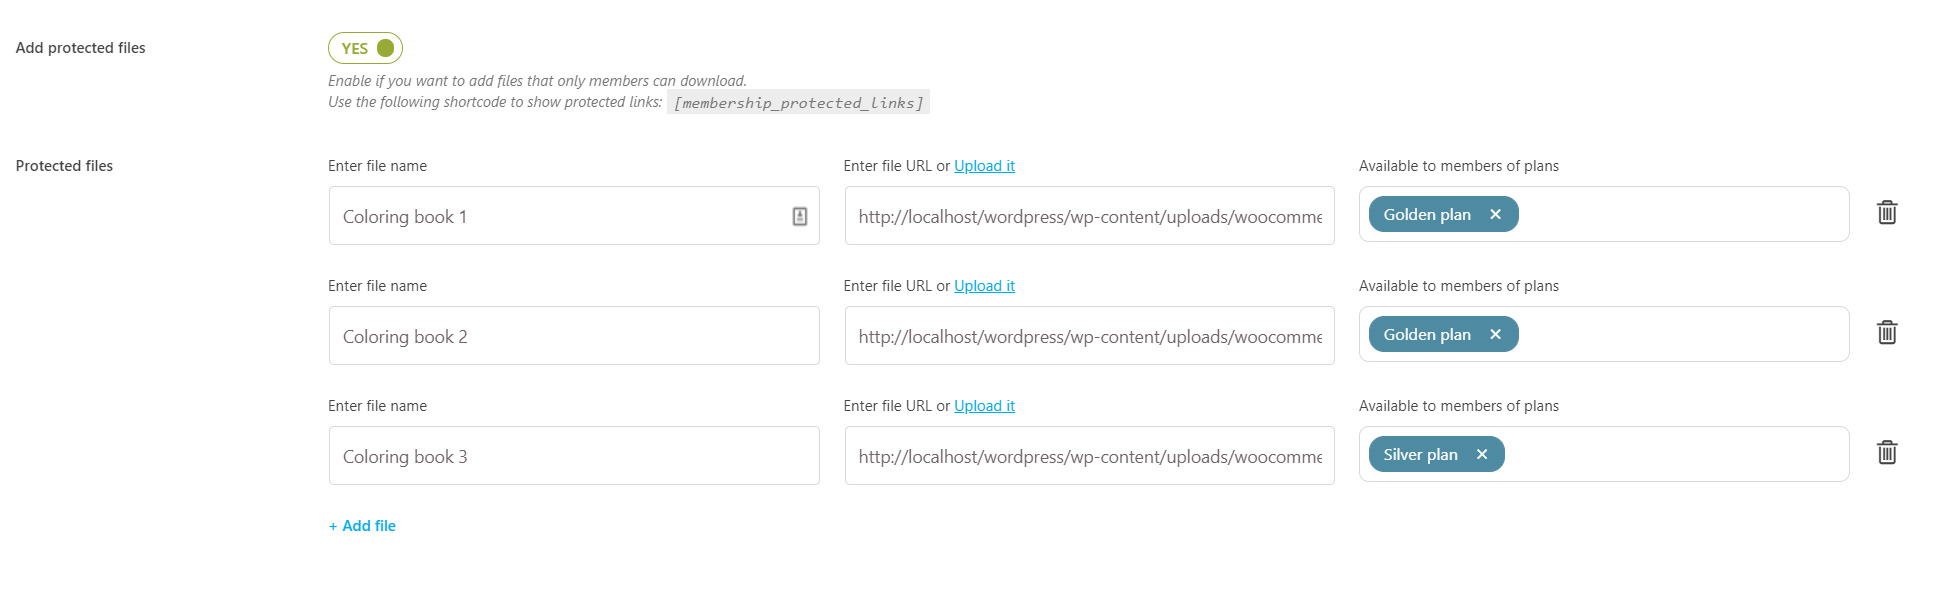
Enable the Membership Protected Files from the Membership options metabox in the edit page of any post, page or product of your website.
Paste a link or load a file right from this page and choose the membership plan it will be visible to.
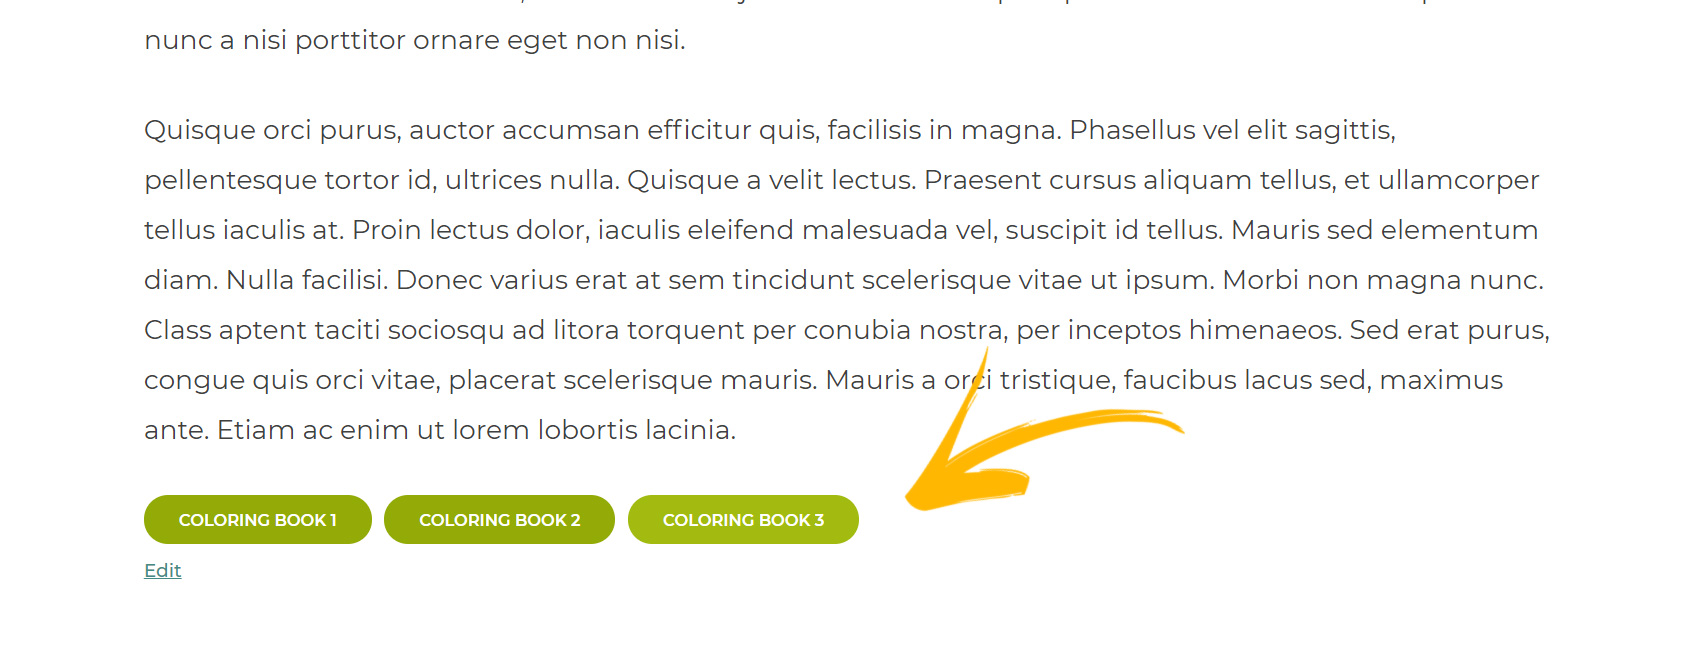
Now you can enter the[membership_protected_links] shortcode within the content and users will be automatically displayed the links related to the membership plan they own.
Shortcode attributes
post_id: the ID of the post, the page or the product that contains the protected links. If not set, it uses global post ID
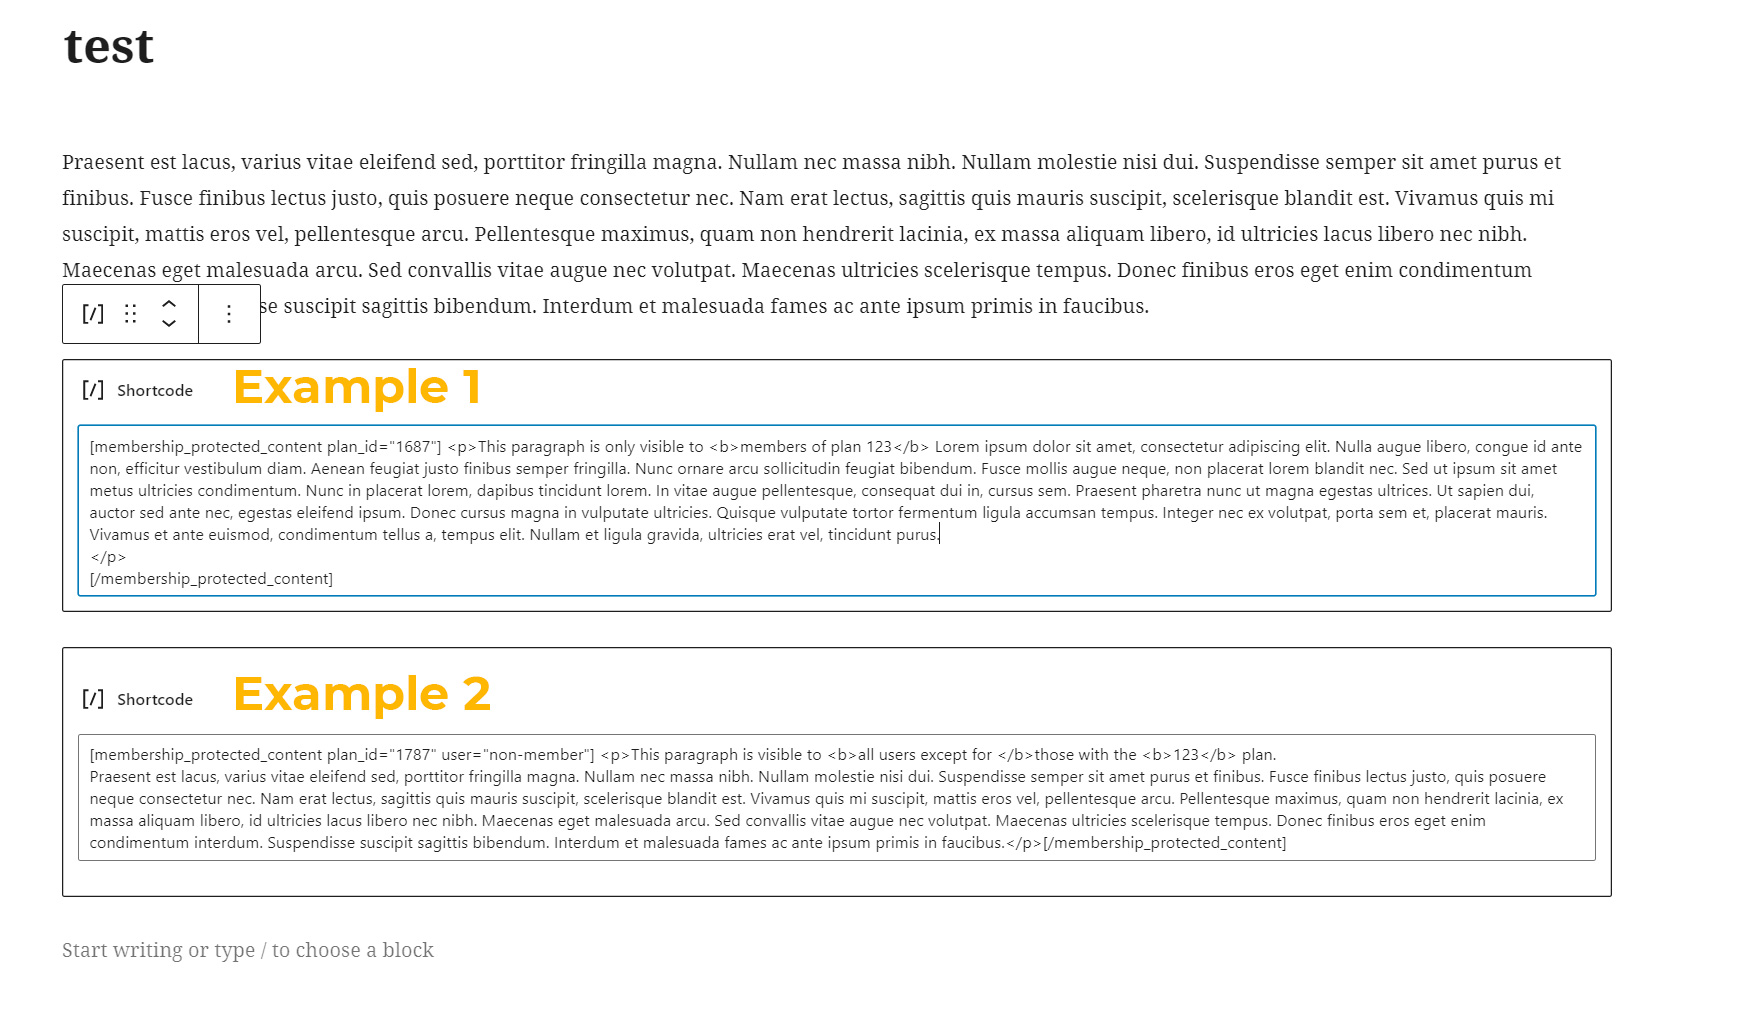
The “Membership Protected Content” shortcode can be selected from within posts, pages and products.
It allows you to set up different content for the same “post” (page or product) of each different membership plan: the system will automatically select the content to display to each customer, according to the type of membership they own.
Every content added within the shortcode will only be displayed to customers who own a membership plan.
Please, consider this shortcode has two different forms: an opening and a closing one. The restricted content has to be placed within the opening and closing shortcode.
Example: [membership_protected_content]Content to restrict in between[/membership_protected_content]
In the opening shortcode, you will be able to specify more details through the available attributes:
plan_id=” “: to restrict the content visibility to the members of one or more plans, you can add the plan ID attribute in the opening tag of the shortcode. To find the plan ID, go to “Memberships”:
user=” “: this attribute defines the type of user that can view the content, and so change the way the restricted content works. By default, it is set to member, but all available options are: member, non-member, guest, logged.
Examples
Example 1:
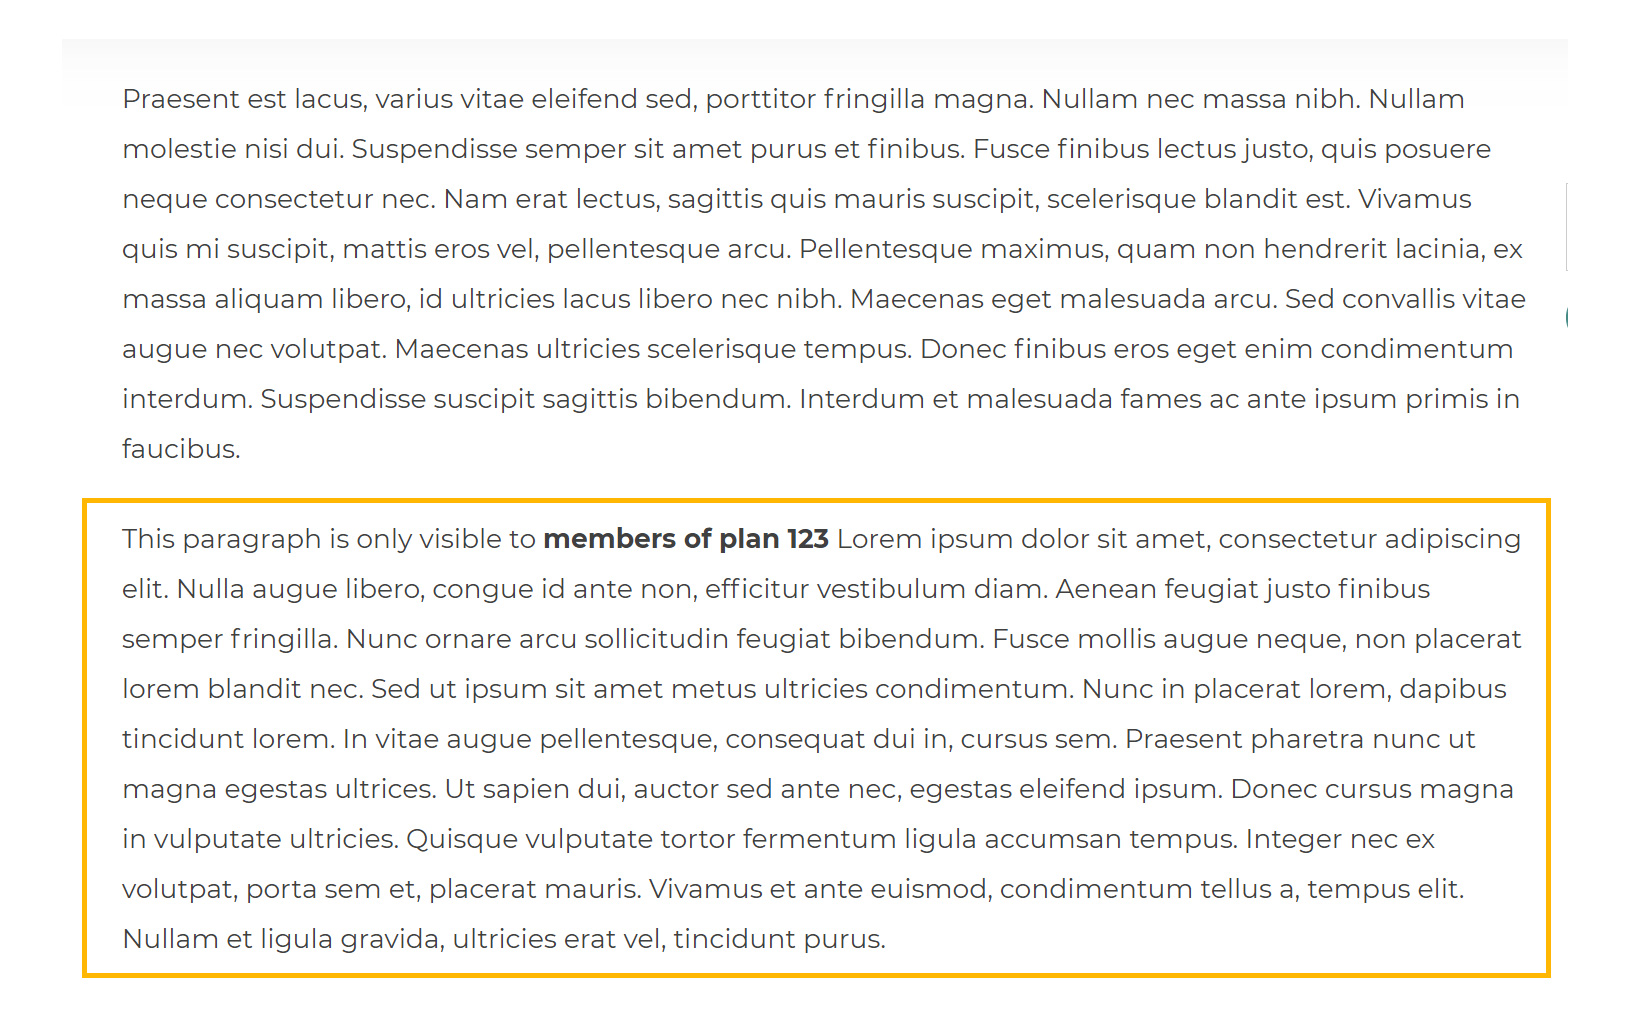
[membership_protected_content plan_id=”123″]This content is only visible to members of plan 123 [/membership_protected_content]
Example 2
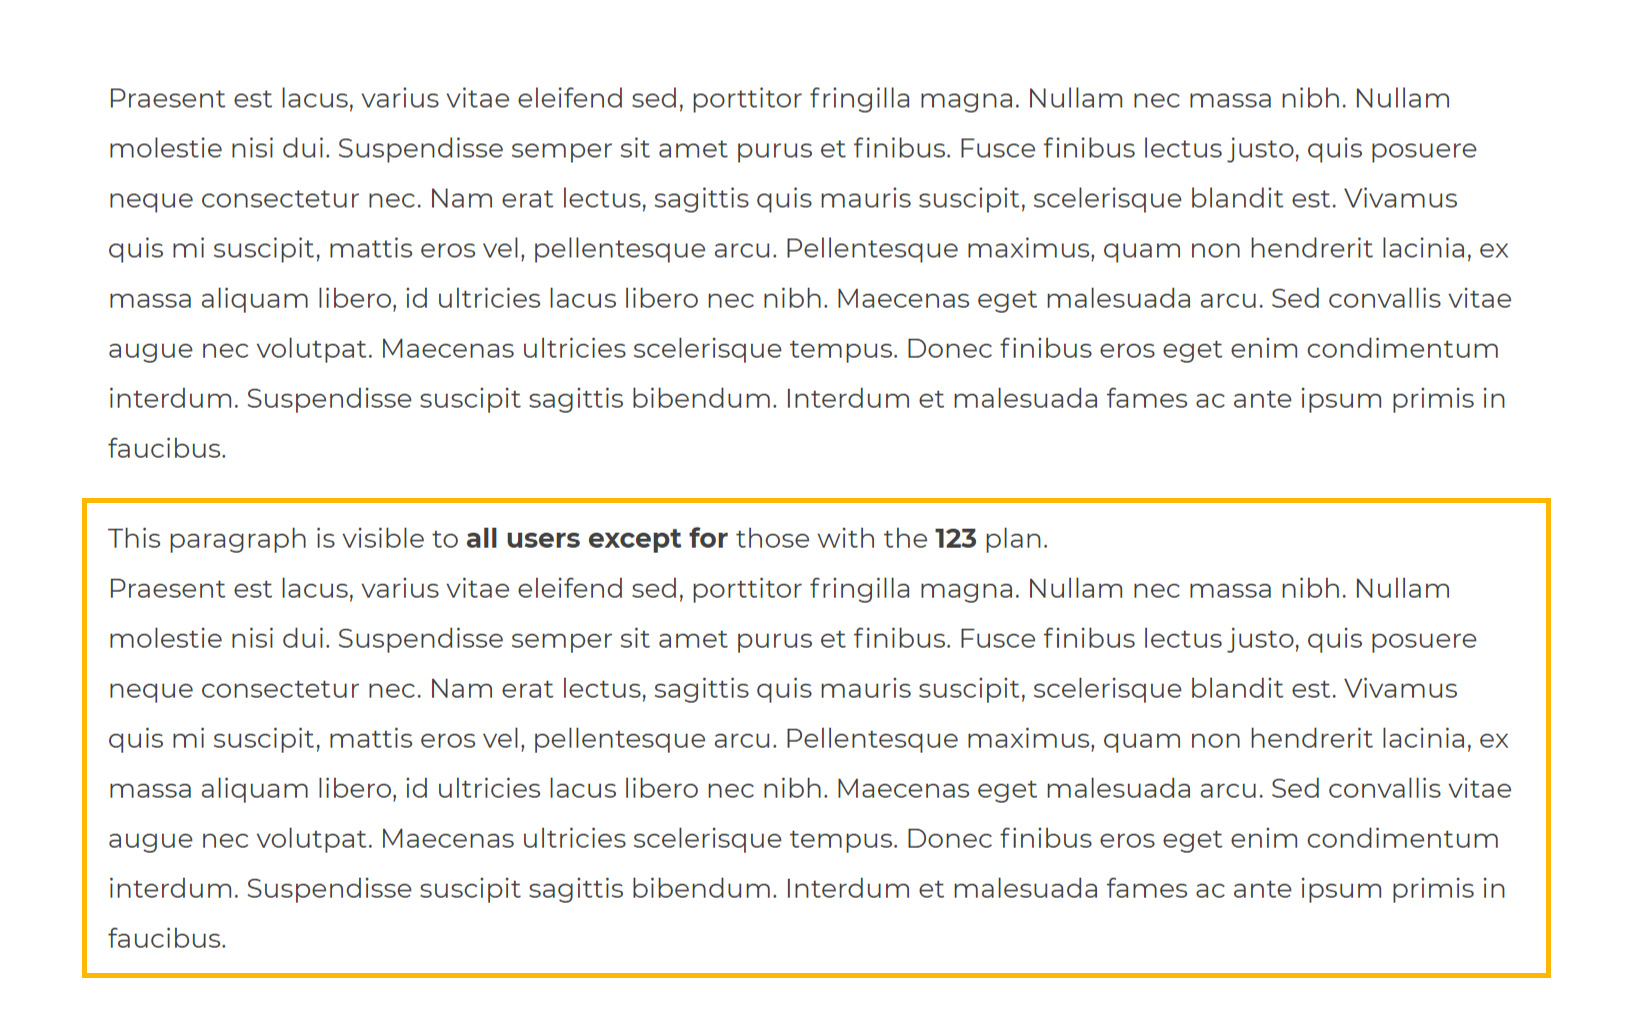
Suppose you want to show the content to all non-members except for those who have the plan with id=”123″, you may want to compose the shortcode as follows:
[membership_protected_content plan_id=”123″ user=”non-member”] All users except for those with the 123 plan will see this content. [/membership_protected_content]
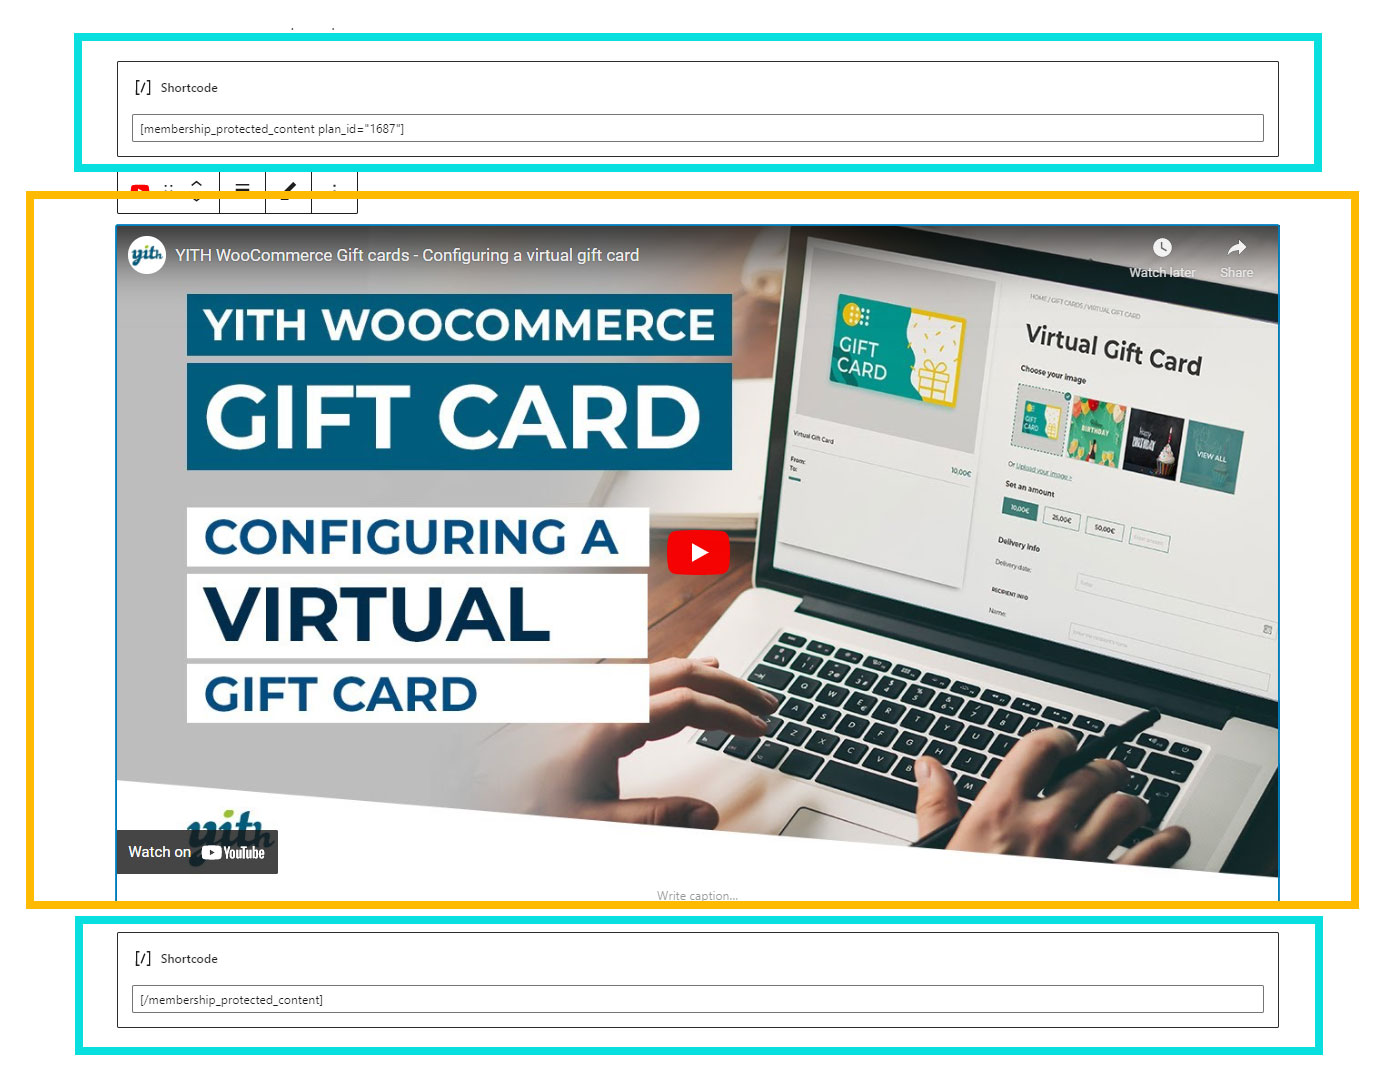
Example 3 – Gutenberg blocks
You can also restrict access to one or more Gutenberg blocks, for example, if you have a video block.
In this case, you’ll have to compose your blocks as follows:
one block to add the opening shortcode
one block with the content to restrict (for example the video block)
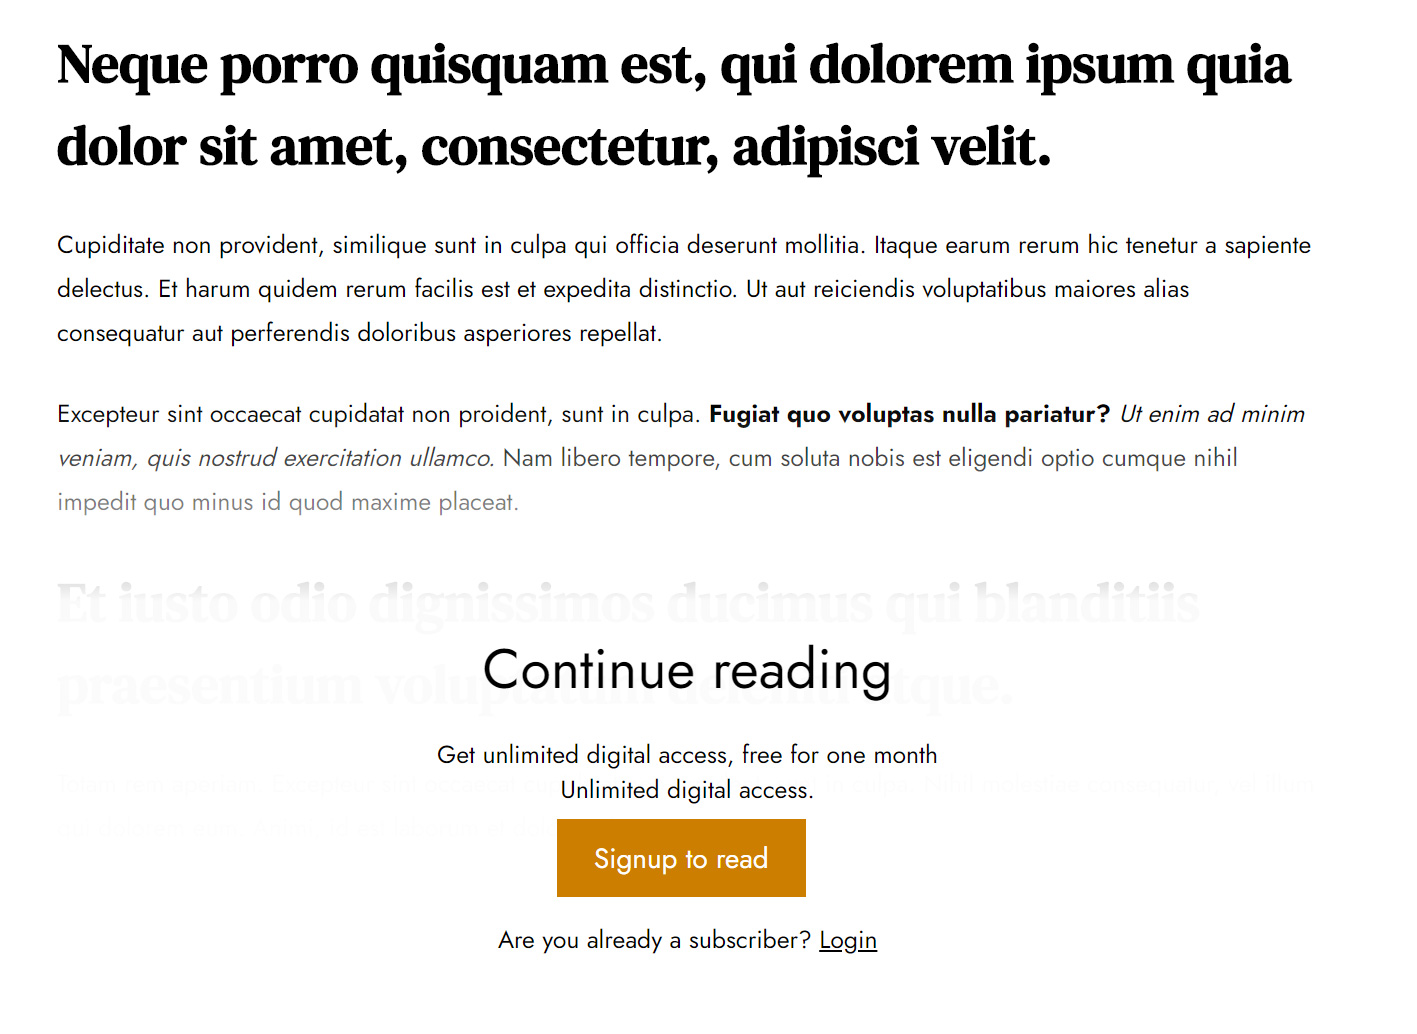
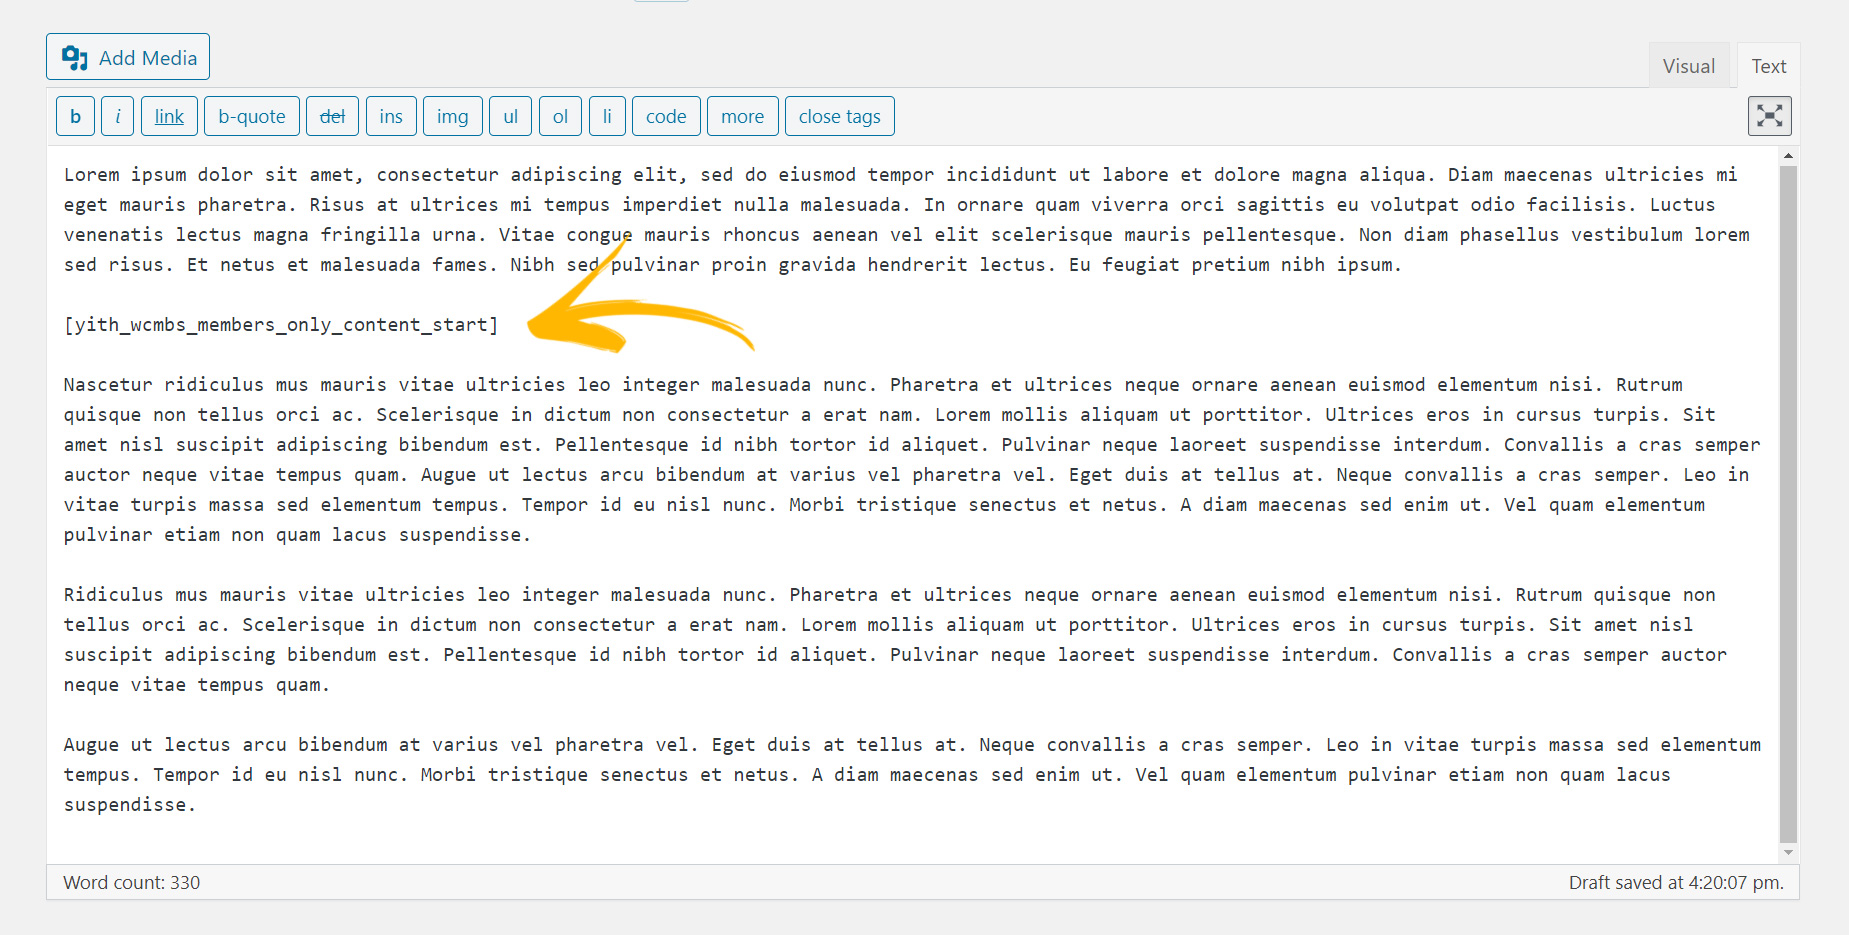
The plugin gives you the possibility to insert a divider line in your posts so you can hide the content of the post partially, namely everything that is AFTER the divider.
This way members will see the whole content, whereas non-members will only see the first part.
You can find it both as a Elementorwidget and as a simple shortcode. You can also find it as an Gutenberg block, you can refer to this page for more information.
Elementor widget
Click on the “add block” button and you will find the widget in the YITH section.
After the divider, the plugin will automatically show the default alternative content (if set).
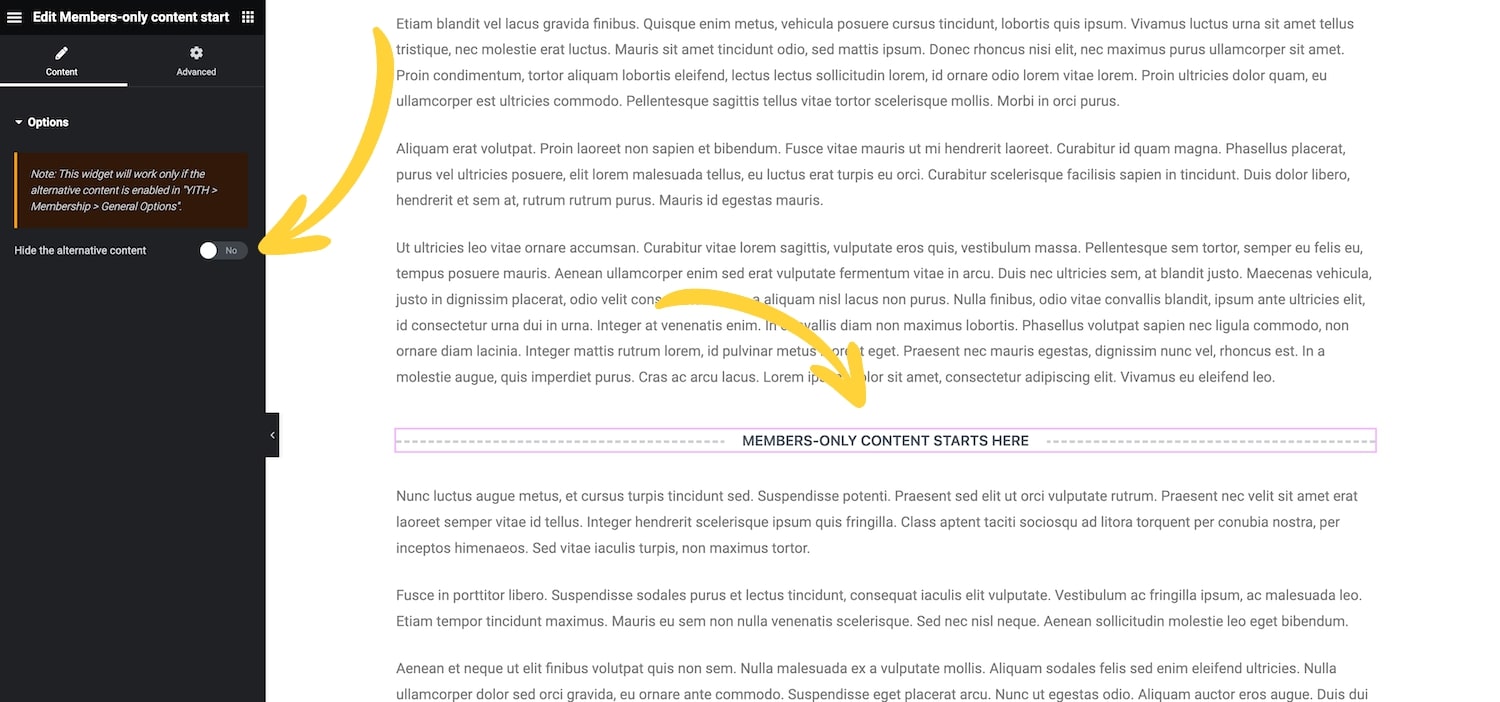
Please, note that this widget and the related shortcode only works if you have chosen to show an alternative content for non-members from the General options, as explained here.
Yet if you want to hide the alternative content, you can enable the “Hide alternative content” option (if necessary) from the page builder editor:
Elementor
Shortcode
You can also use it as a simple shortcode:
[yith_wcmbs_members_only_content_start]
And if you want to hide the alternative content, you can use the attribute hide-alternative-content and set it to ‘yes’, like this: