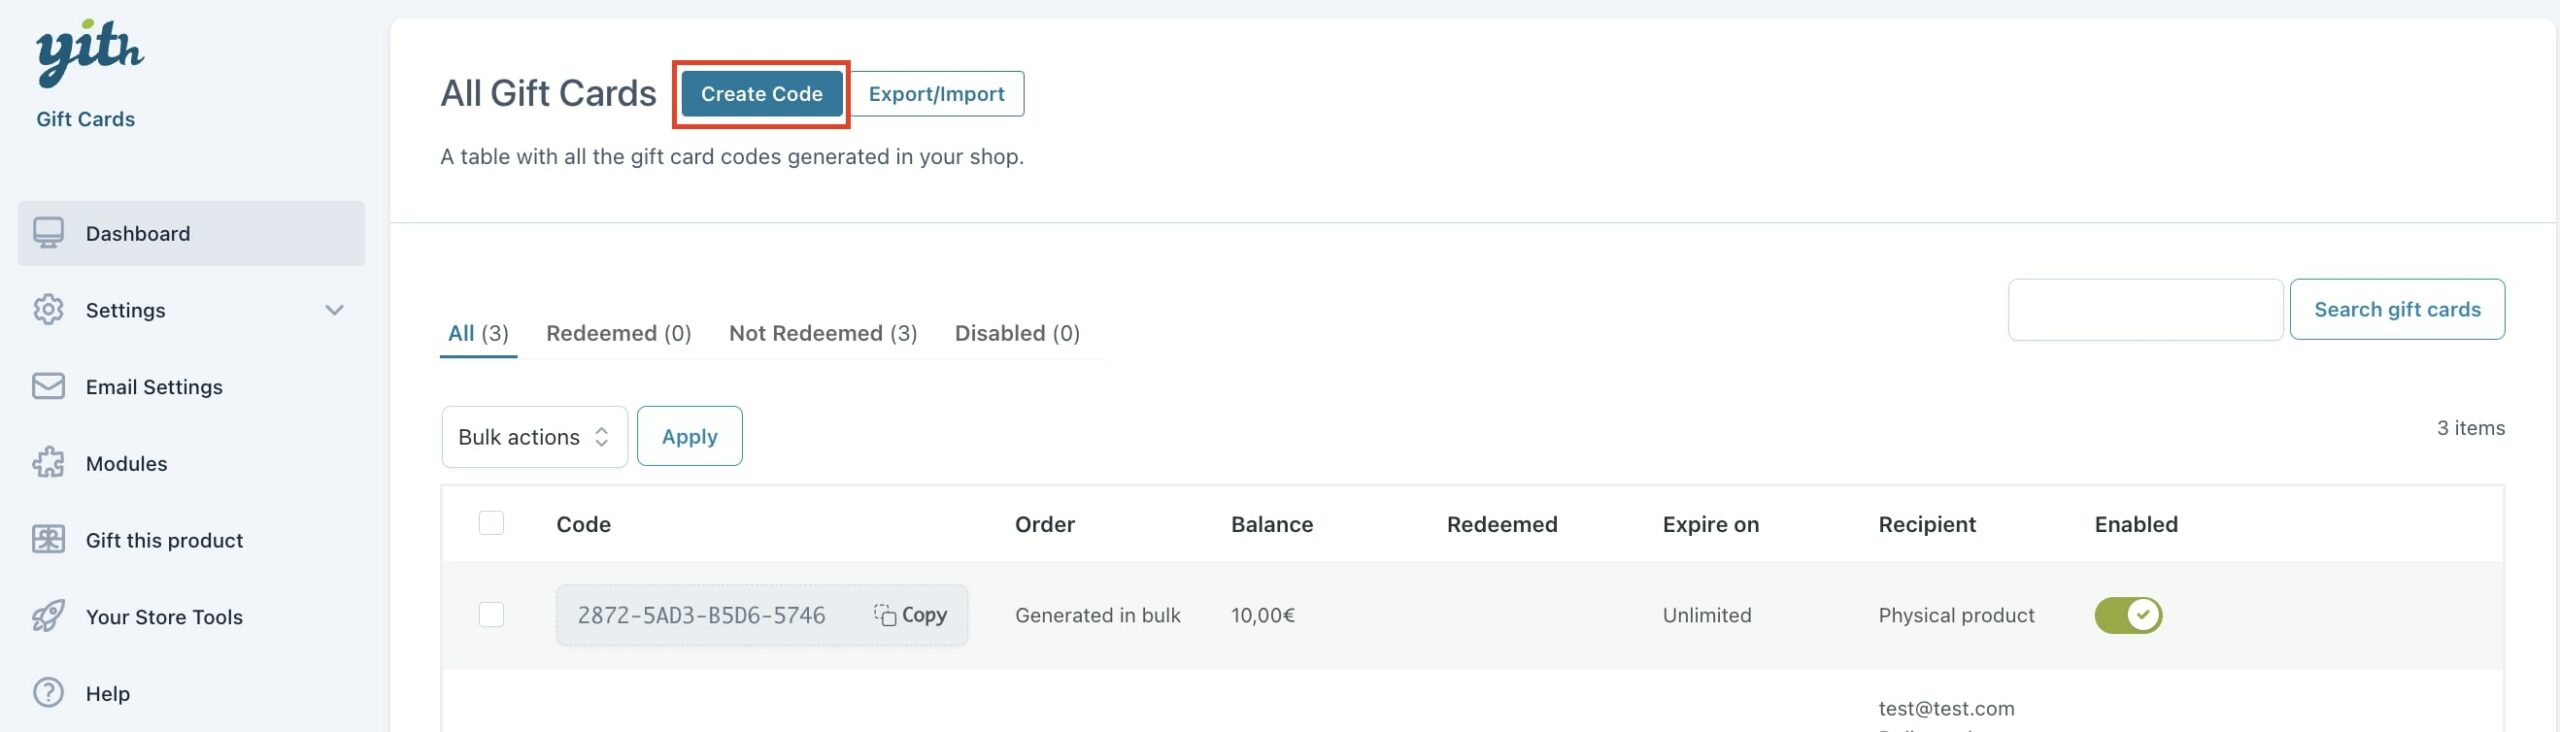
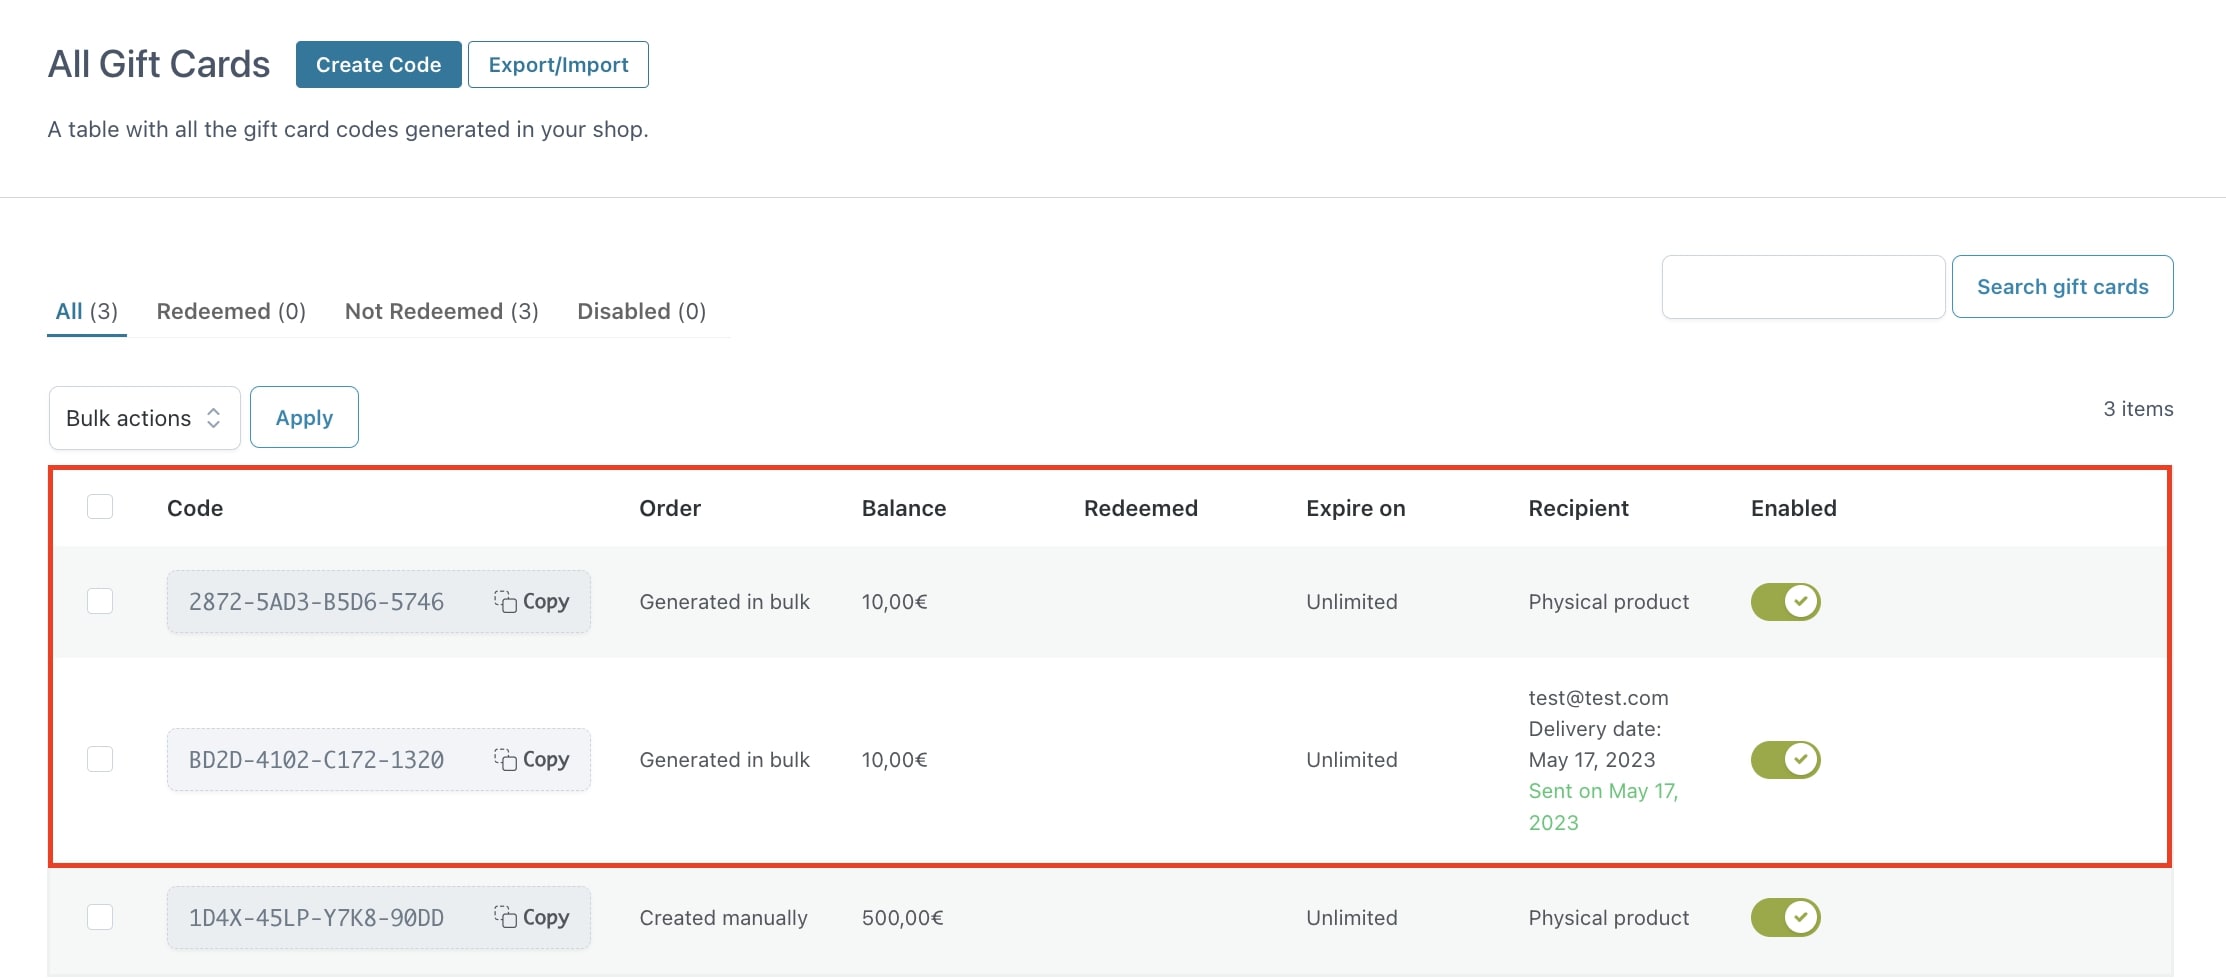
The Dashboard page is the first page you find when you open the plugin settings from YITH > Gift Cards. Here you can find a list with all the created gift cards, edit them and create new ones. You can also edit them in bulk and import or export a file with all your gift cards.
You can also filter them by Redeemed or not and quickly enable or disable one gift card.
Create a gift card
Note: to make sure your customers can buy a gift card, refer to this page. Gift cards generated through purchases will appear on this Dashboard.
To create a new gift card without your customers to order it from the site, just go to the Dashboard and click on the Create code button.
A popup will open where you can choose to generate a single gift card code or multiple codes with the same amount.
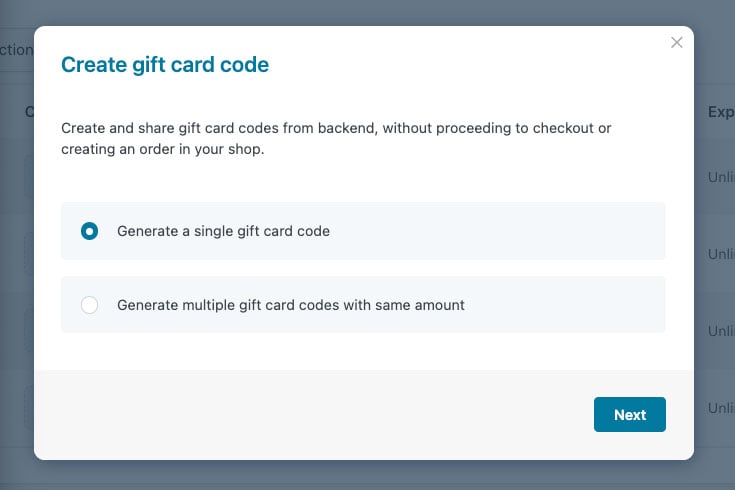
By selecting Generate a single gift card code, you can easily generate a code by clicking on the Next button.
Enter the identification code to associate with the gift card or enable the option Generate automatically a code when creating a gift card post that you can find in the tab General > General settings to create the code automatically based on the gift card code pattern defined in the plugin settings.

To associate the purchase value to the gift card, you must configure the following fields:
- Purchased amount: gift card amount
- Current balance: current purchasing power of the gift card.
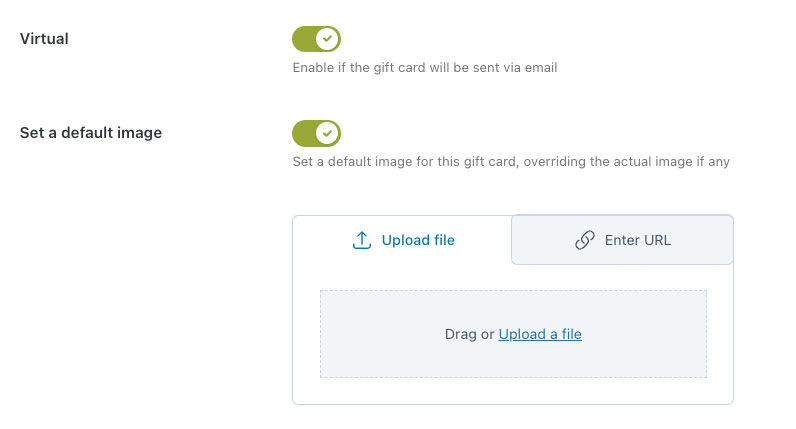
If you want the gift card to be virtual, you can enable the “virtual” toggle, so you will be able to enter also the recipient email address, an image and the delivery date.

Image:
You can upload a custom image for this gift card by enable the Set a default image option.
If not image is set, the gift card will automatically take the default image set in the general Settings > Style.
Recipient’s email:
if no email is inserted in the “Recipient’s email” field, the system will associate the gift card with the site administrator’s email address.
Delivery date:
If you set a delivery date, the gift card will be automatically sent on that date. Yet, if it has no delivery date set, you will just have to go back to the Dashboard and click on the dots icon > Send email. The email will be sent immediately.

On the contrary, to generate multiple codes with the same amount at the same time, select the option as shown below and define the number of codes you want to generate and the gift card value.
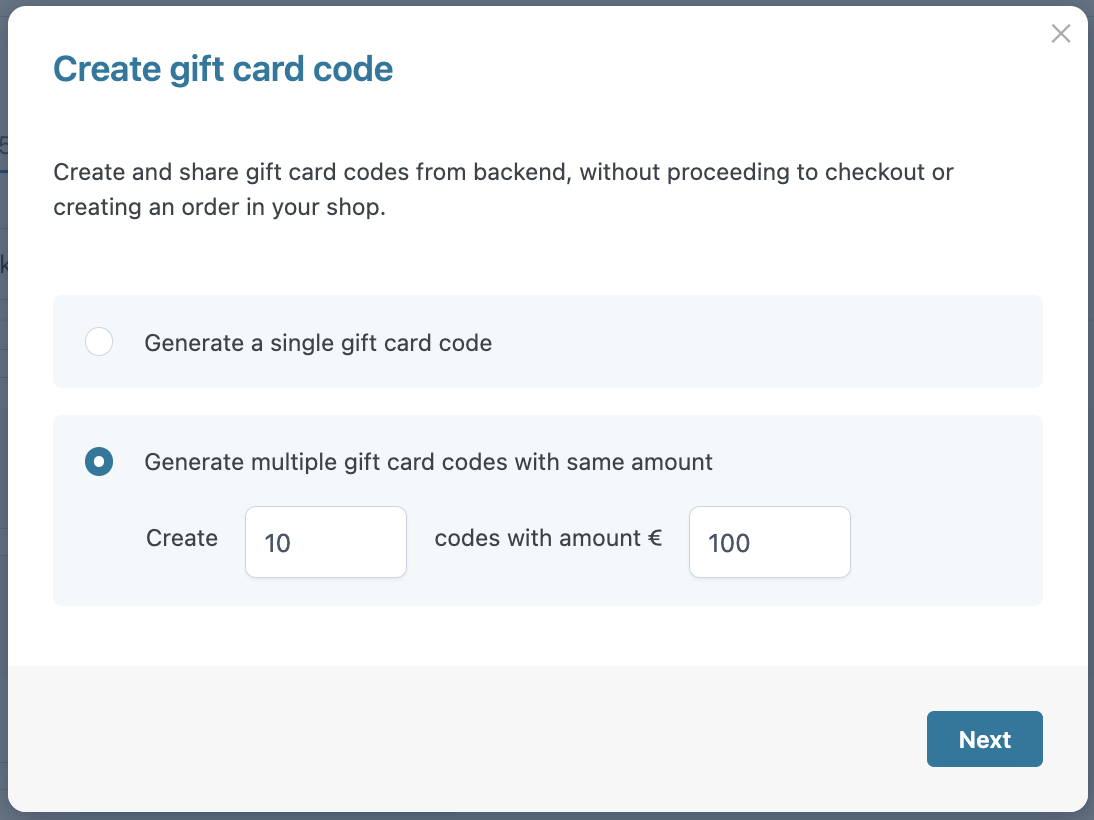
After clicking on Next, the gift cards will be added to the Dashboard and will be identified as Generated in bulk.
Bulk-generated codes are created as physical gift cards that you can easily edit and set as virtual by accessing each code’s details.
Actions on gift cards
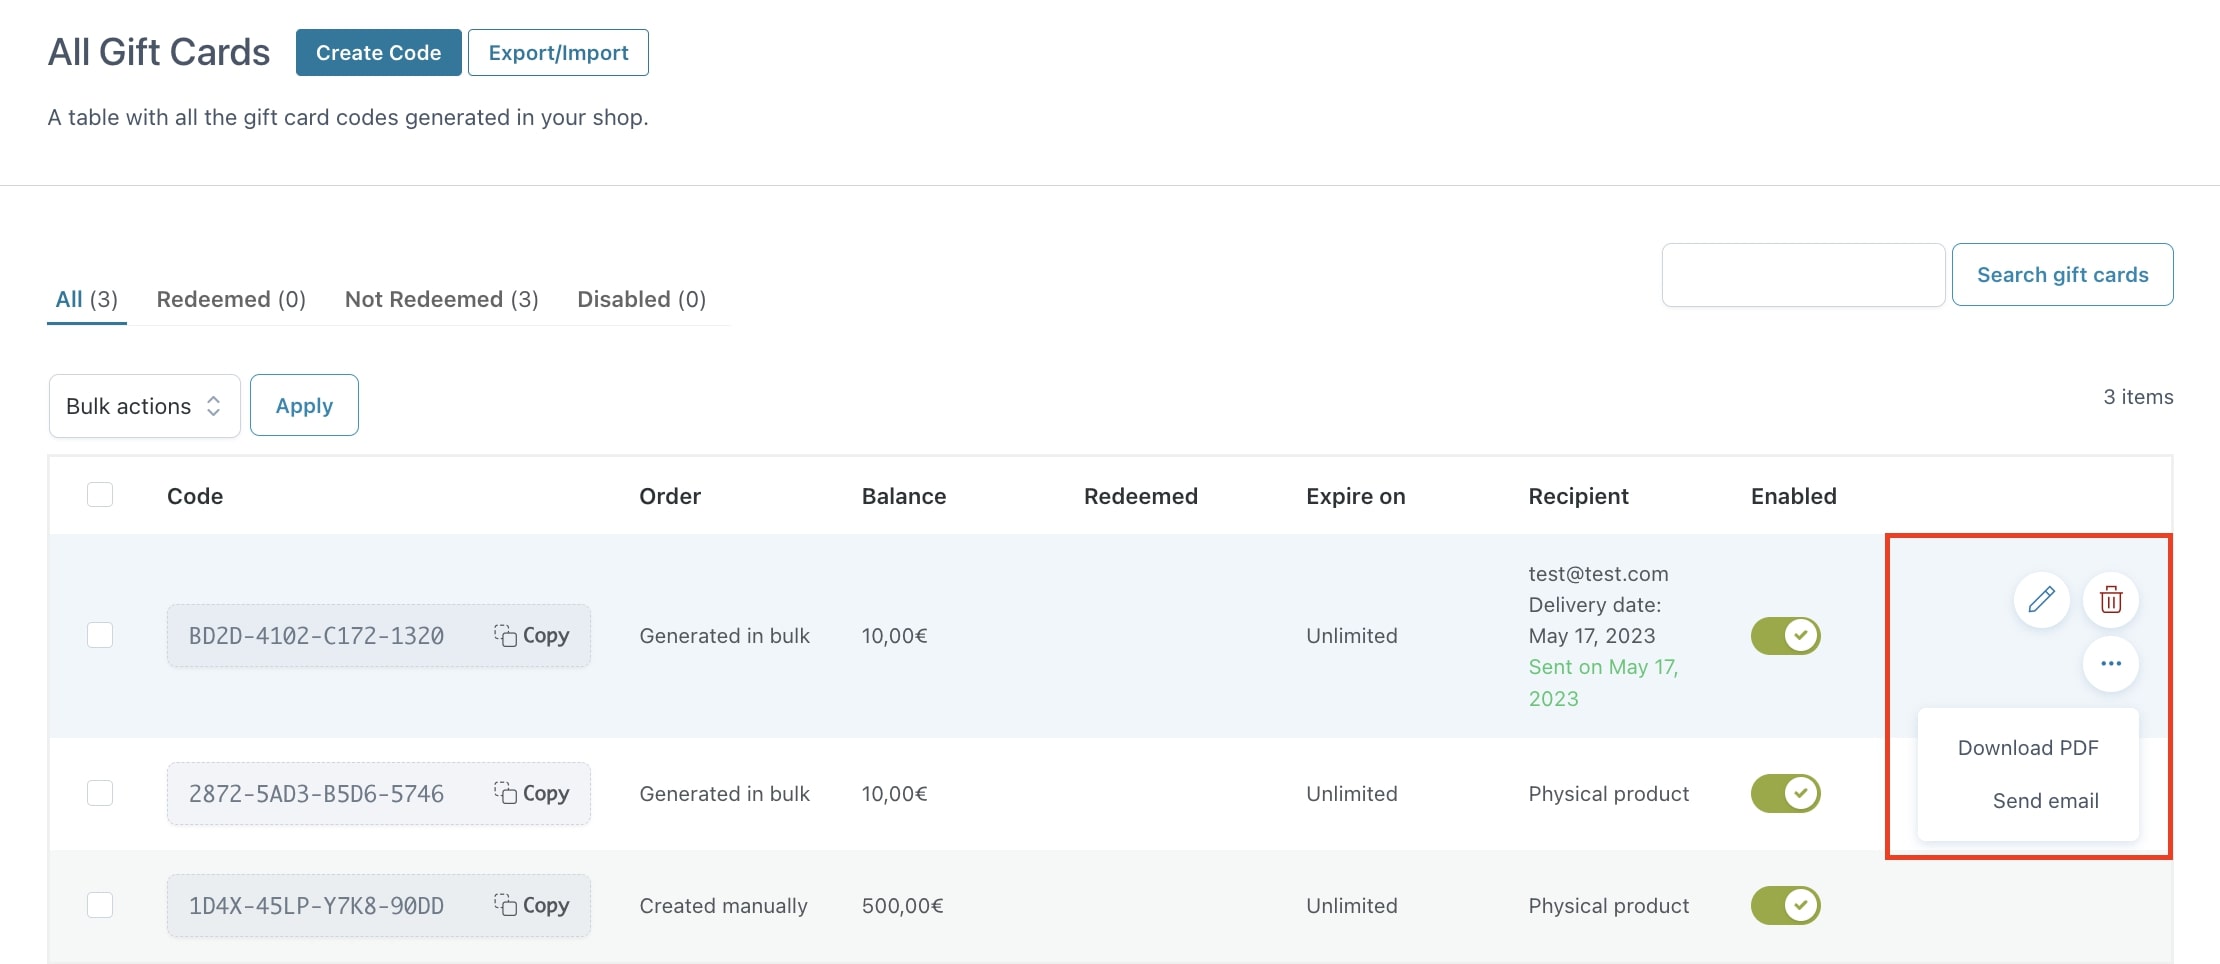
From the Dashboard it is also possible to edit a gift card and you can simply do that by clicking on the Pencil icon.

You can manually edit all the gift card details.
You can also delete the gift card through the Trash icon, and download the PDF or send the email from the actions hidden in the 3-dot button.
Bulk actions
If you need to simultaneously send multiple emails or delete multiple gift cards, you can use the bulk action available in the plugin Dashboard.
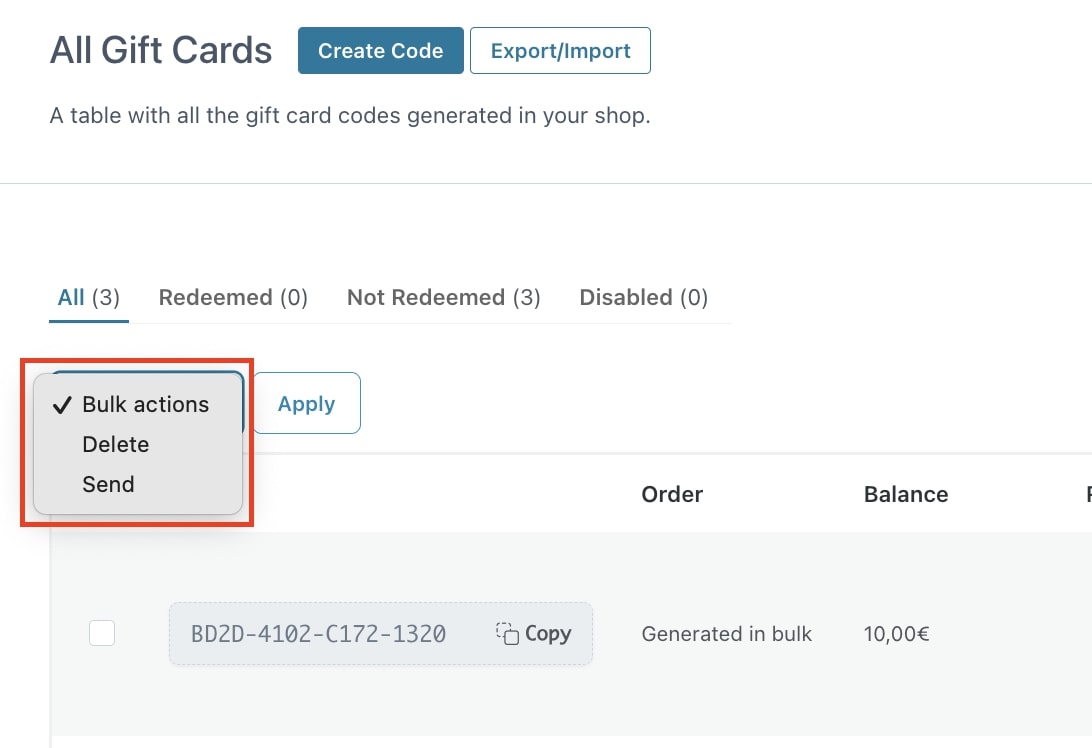
This can be useful when manually creating some virtual gift cards or after importing them via a CSV file and you want to send them all with just a few clicks.
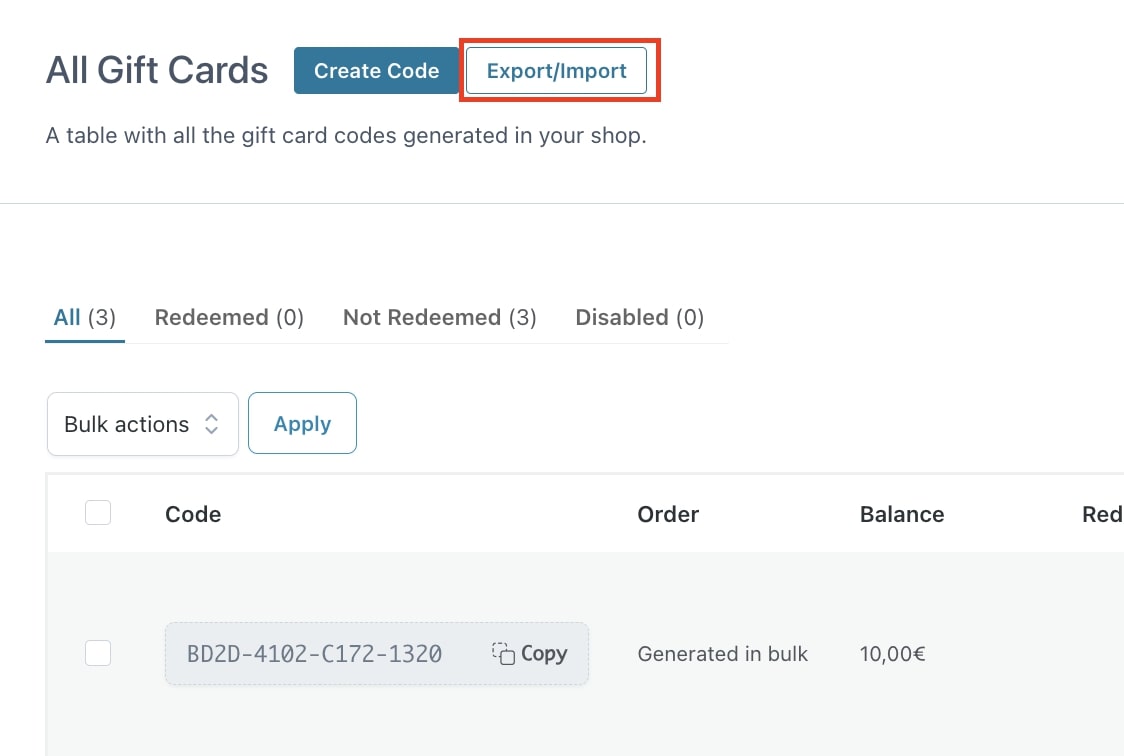
Export and import
On the Dashboard page, you also find an Export/Import button that allows you to import or export your gift card codes into a CSV file.
Export
To export gift cards, click on the Export/Import button, then select “Export gift card codes” and then “Continue”.
Now you will be able to choose whether exporting ALL your gift cards or only the ones that fall in a specific date range.

Then, you can choose which information fields have to be included in the export file, whether all or just some of them from the list below:
- Gift card ID
- Amount
- Sender’s name
- Recipient’s email
- Message
- Delivery date
- Order ID
- Code
- Current balance
- Recipient’s name
- Expiration date
- Internal notes
Also make sure you select the CSV delimiter (the character that separates the records, semicolon by default). Finally click on Export.

Import
To import a CSV file with your gift cards, just make sure you select the Import feature first.
Then, select the file you want to upload.

If you have doubts about the CSV file format, you will be able to download a sample file too.