The plugin allows adding multiple images that can be selected by your customers when purchasing a digital/virtual gift card. These images can be grouped into different categories, for example Christmas, Birthday, Events and so on. These will be used to keep images sorted by topic, but will not appear as separate groups on the frontend.

Please, note: the image gallery option is only available for virtual gift cards if you are using the free version. Yet, if you need the gallery option also on physical gift cards, it’s supported in the premium version.
Let’s see how to configure gift card images in the right way.
First, you have to activate the Enable the images gallery option from Settings > General tab in the plugin panel.
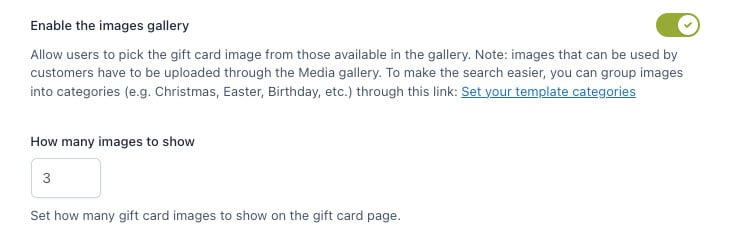
By enabling this option, you will also be able to select how many images to display on the product. For example you can display a total of 10 images.
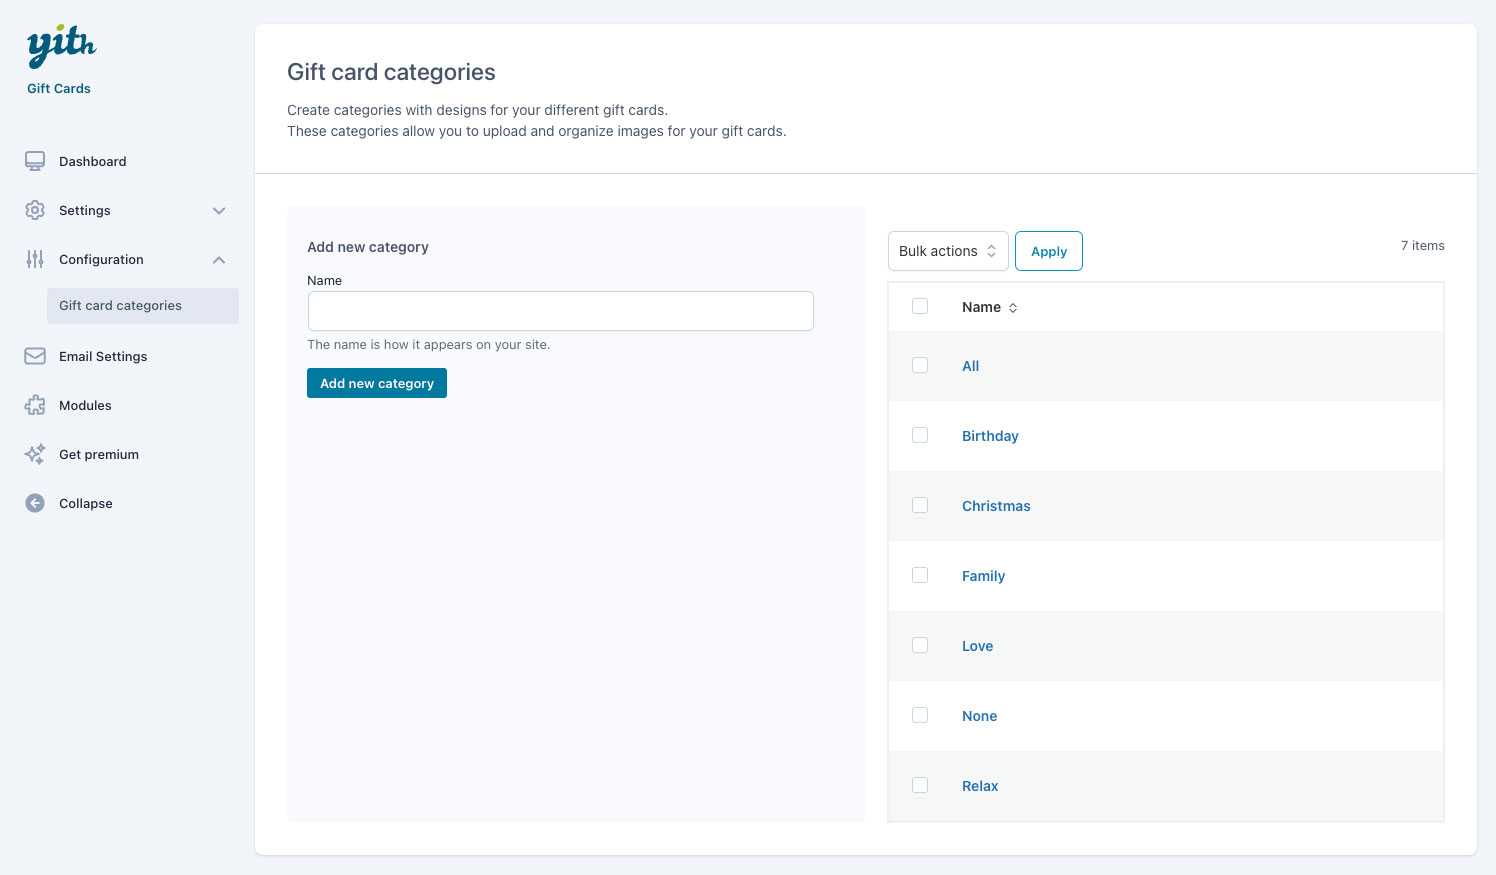
Go to Configuration > Gift card categories tab in the plugin panel and add here one or more categories that you will use for your gift card images.
Now, go to the Media library and add a new image from there.

You can choose to display the media as a “list” to get a better view of the “gift card categories” column, which is empty now.

Then, you have to add a category to each of your gift card images.
You can either select the image and select the category from the media edit page:

If the you are seeing images in grid mode, you will have to enter the category slug in the gift card category input field:

Alternatively, you can bulk assign a gift card category to multiple images from the bulk actions:

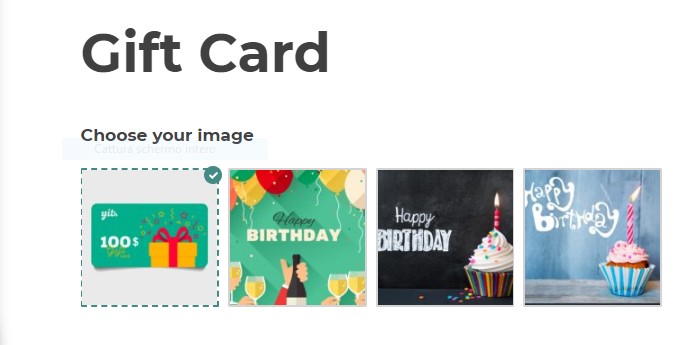
Now users can select a template in the “Choose your image” section from the gift card product page.