View Product Page

Membership plan options

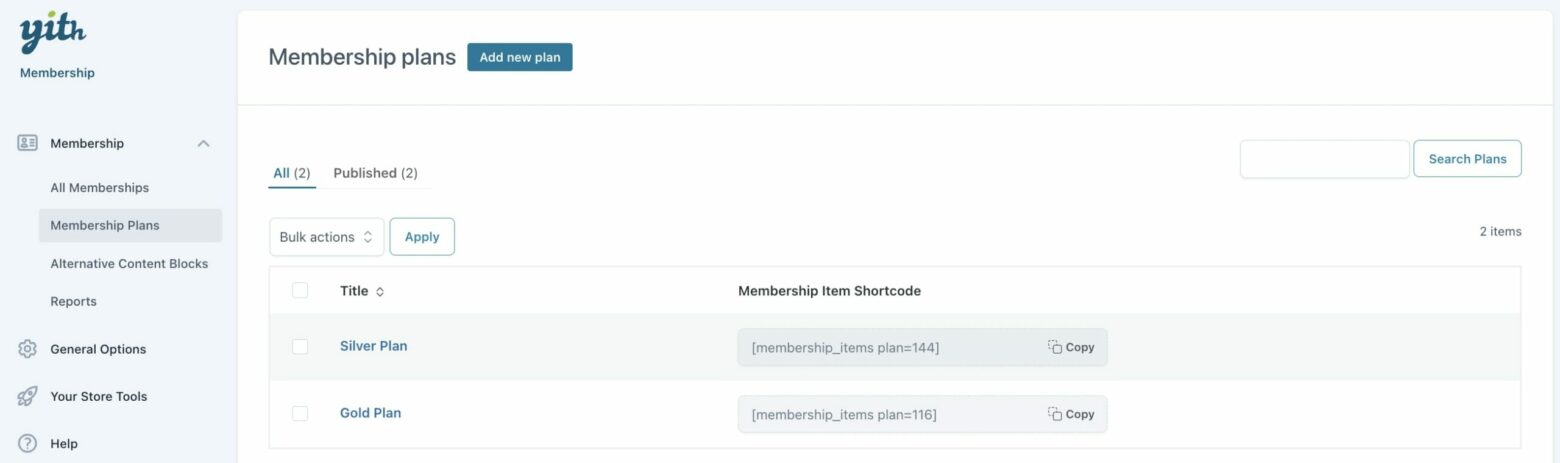
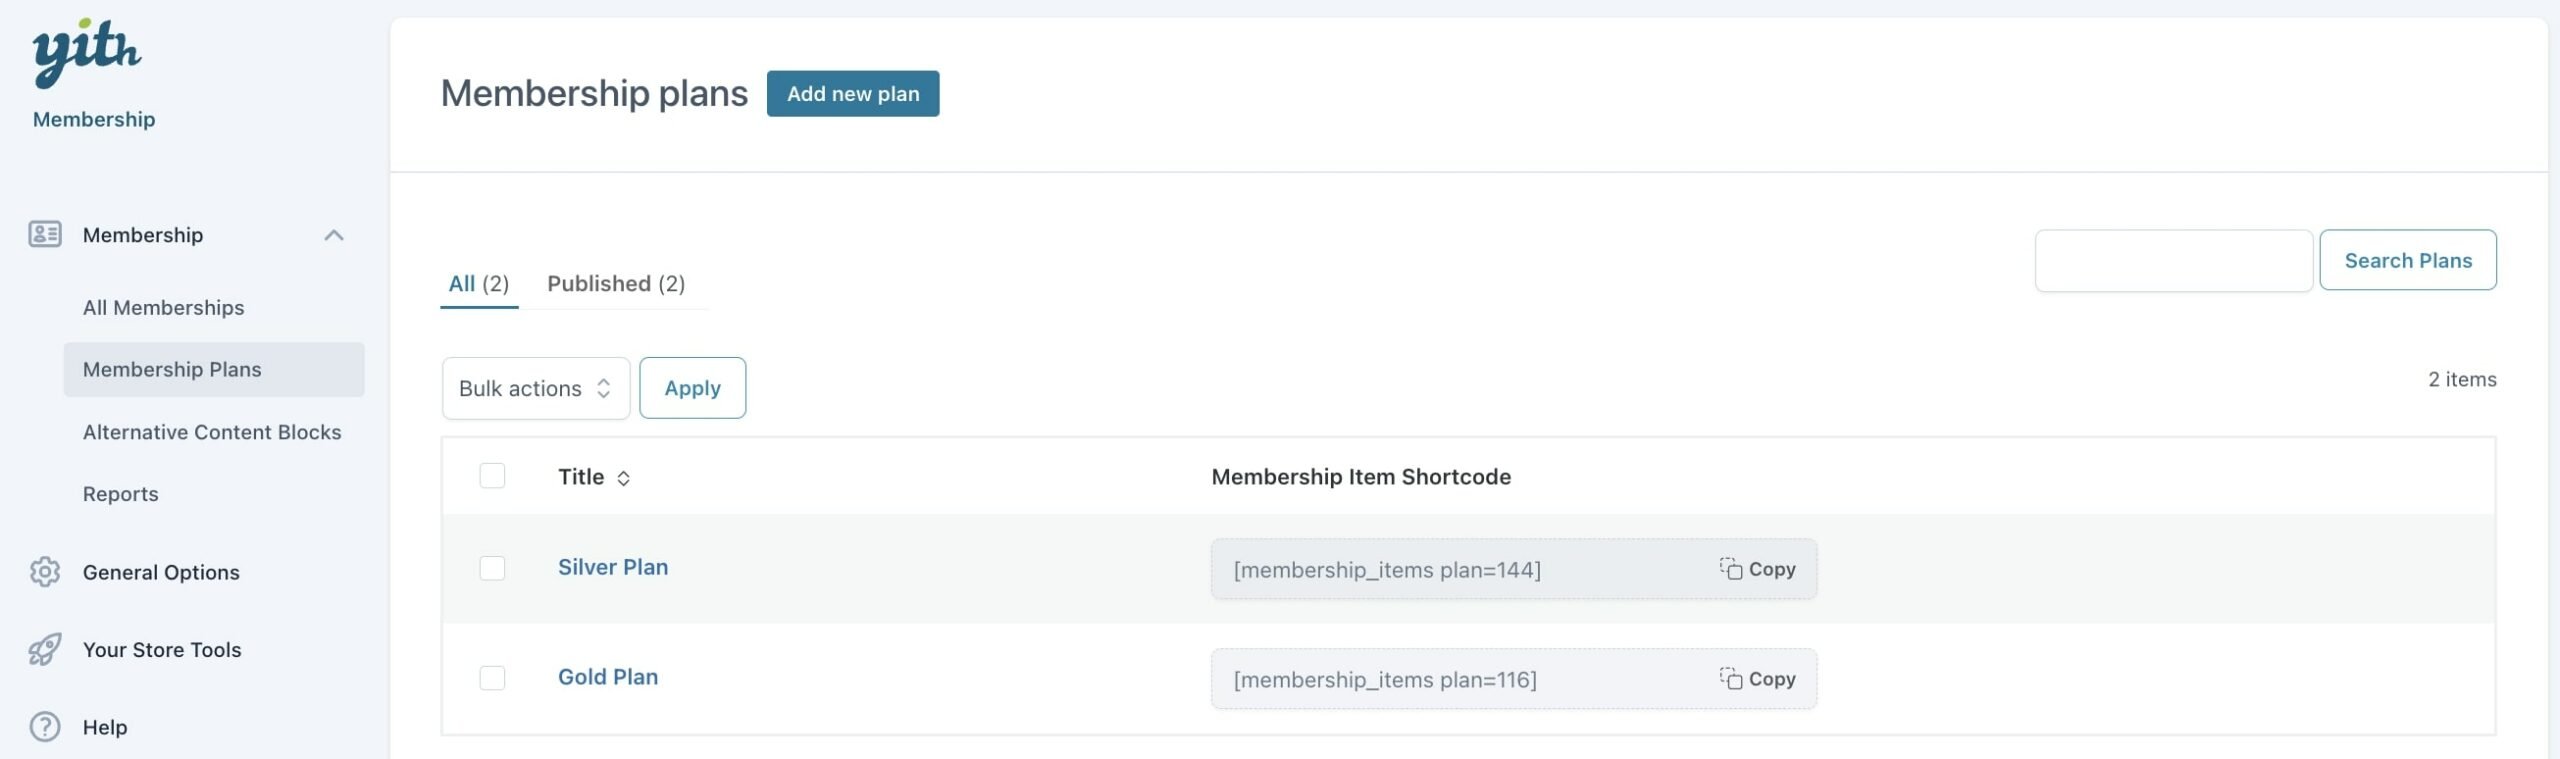
Membership plans are the core of the plugin. With no membership plans, you cannot hide or sort any content. You can configure as many membership plans as you want. To create a new membership plan, just go to YITH > Membership > Membership Plans and click on Add new plan.

Add new plan

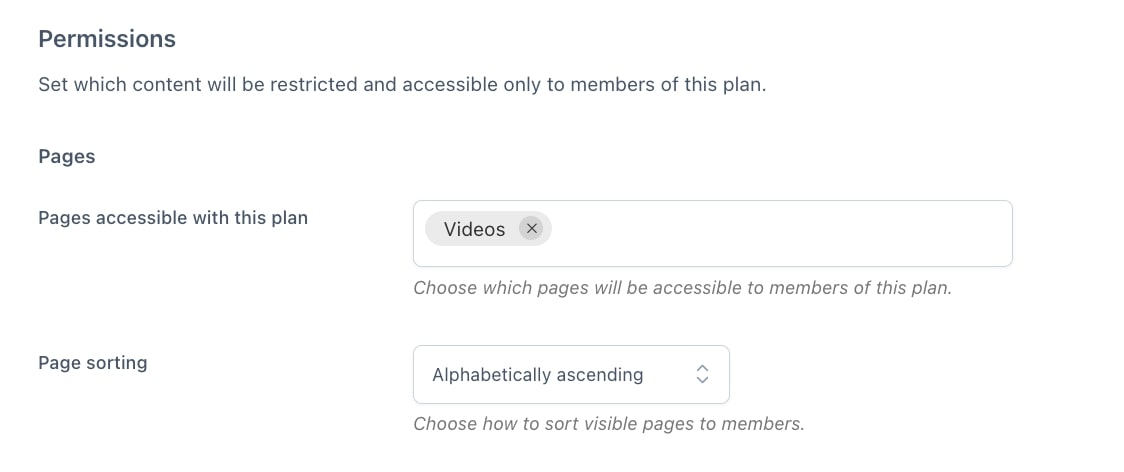
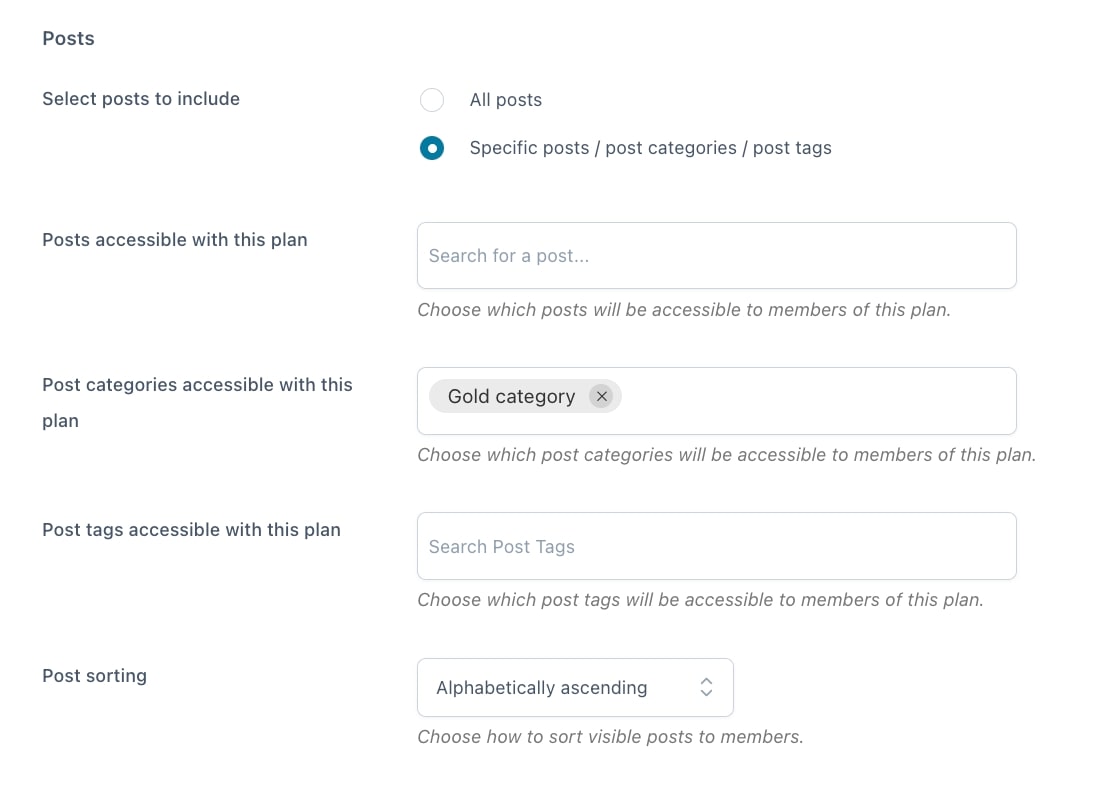
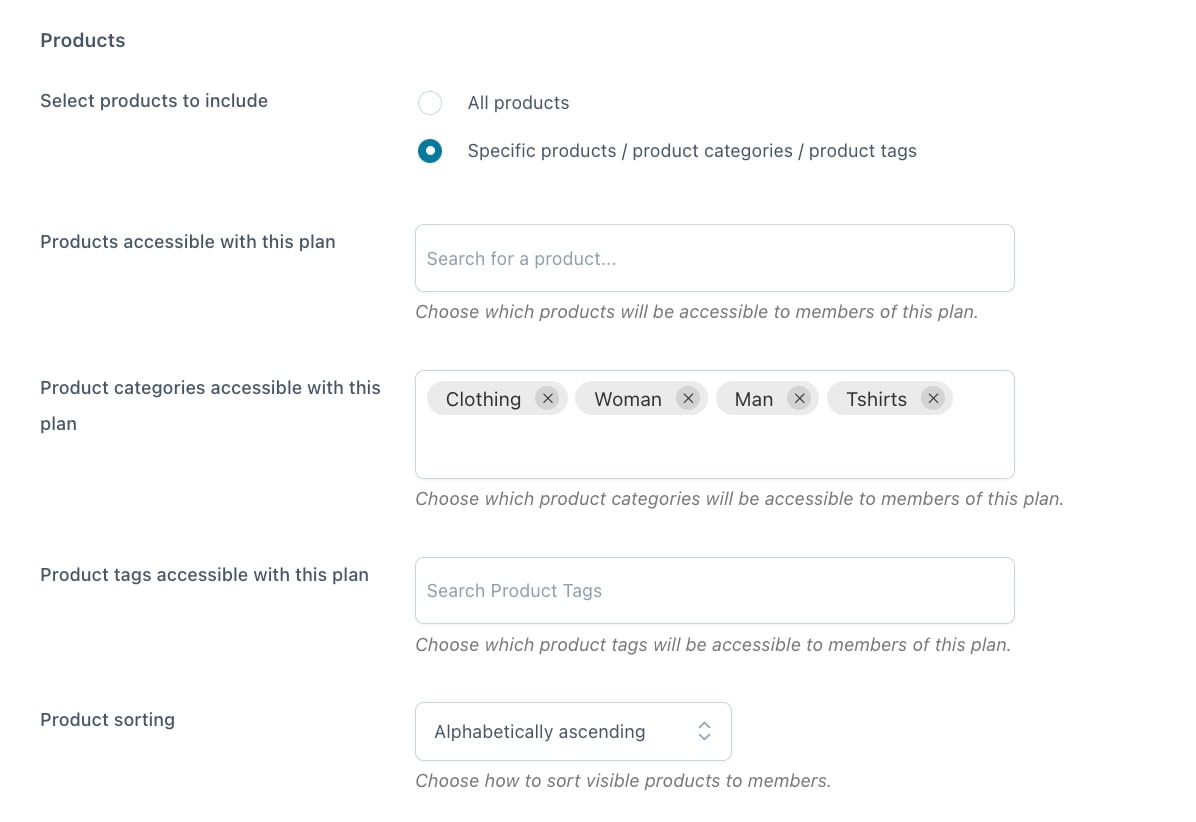
Now you can configure the general settings of the plan and of the content included. In the membership plan, you will find two sections, Options and Permissions. We will go through all the options in the next pages.

Membership Options

When you create a new membership plan, the first section you will find is about the membership plan options:

Membership plan options

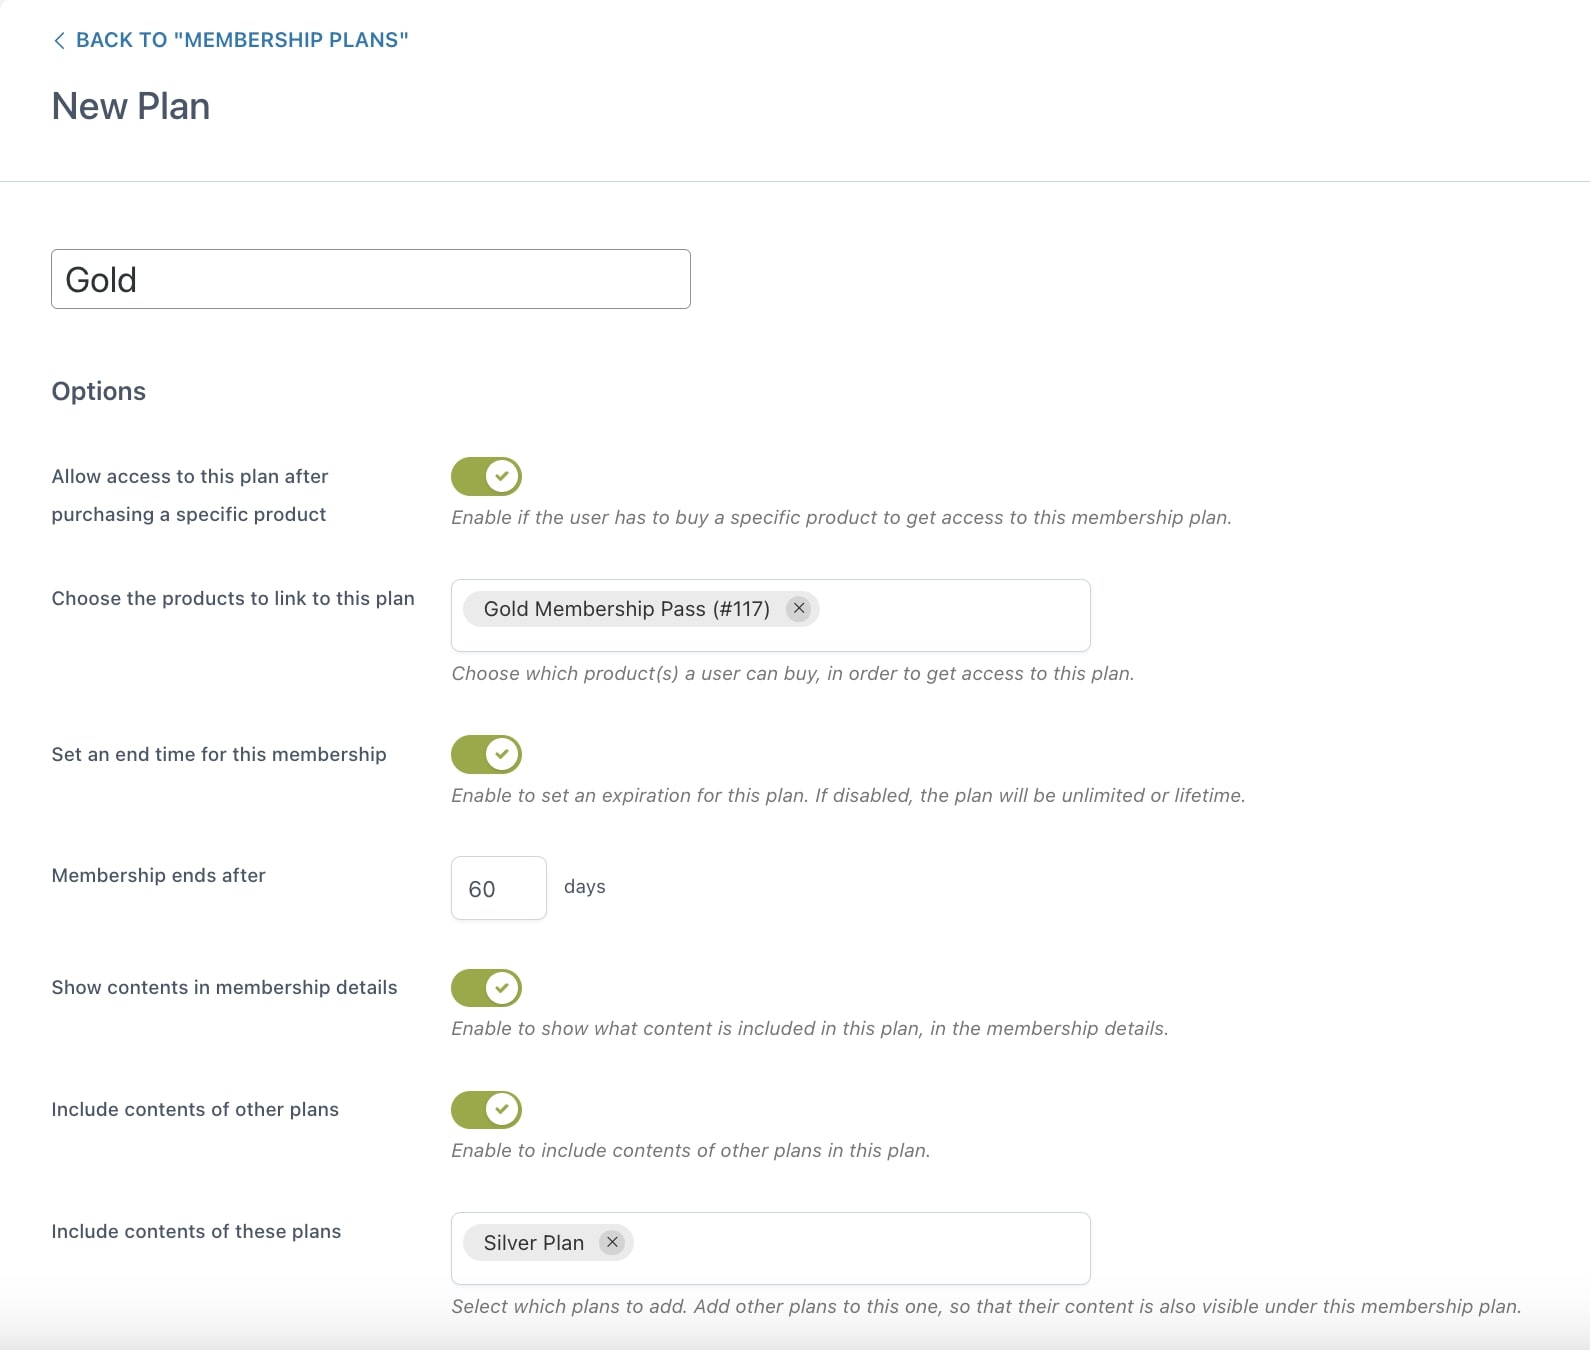
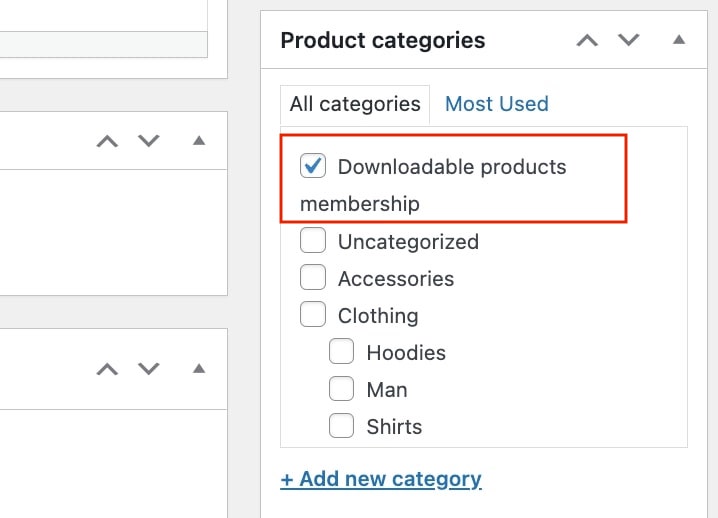
Allow access to this plan after purchasing a specific product: enable this option and select the product (or a product variation) that will grant access to the contents of this membership plan.

Set an end time for this membership (days): enable this option to make the membership expire after a certain number of days. If you set 30 days, every user who gets access to the plan contents will be able to use them for 30 days only, after which they will lose access.

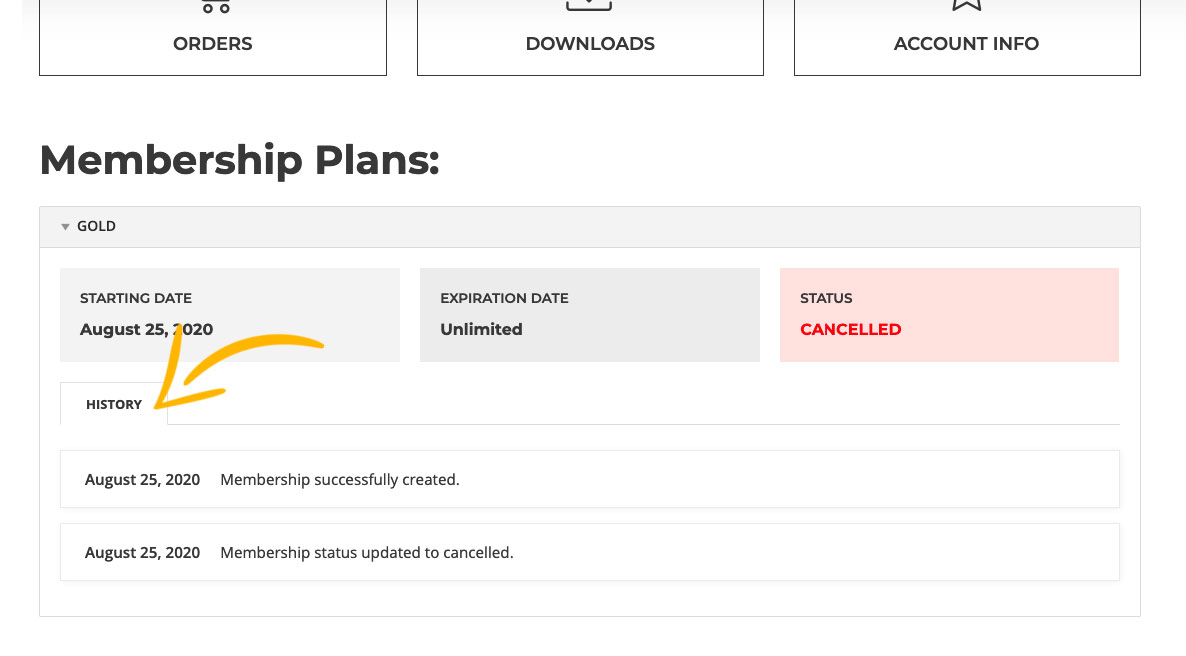
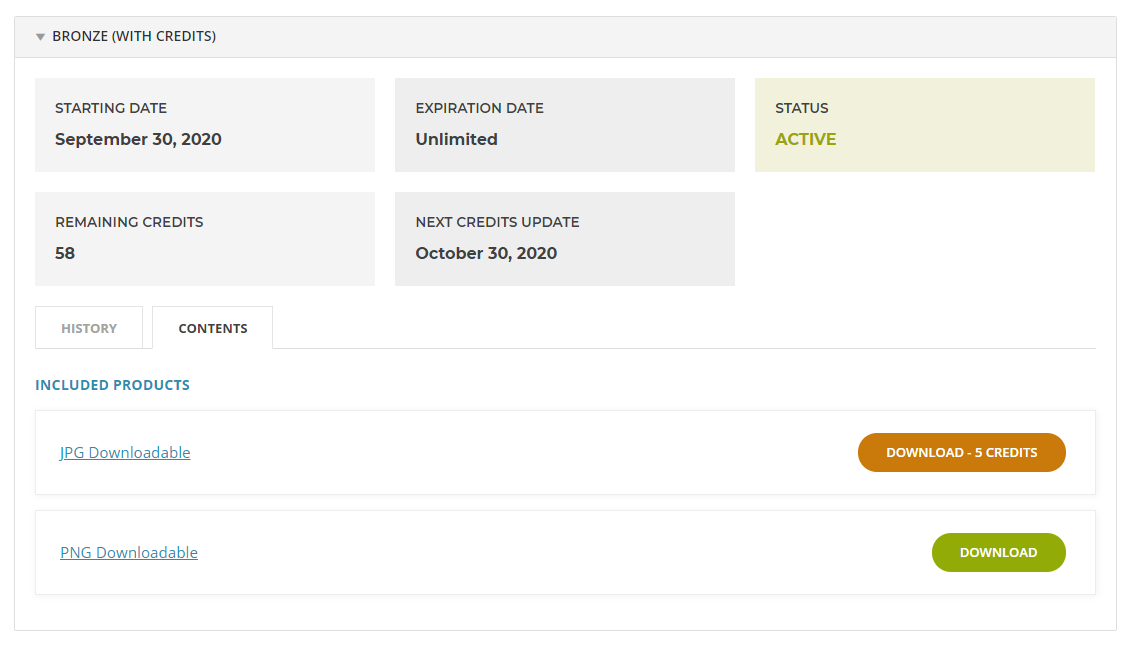
Show contents in membership details: enable this to show the contents of the plan in the custom endpoint Membership in My account.

Memberships in My account

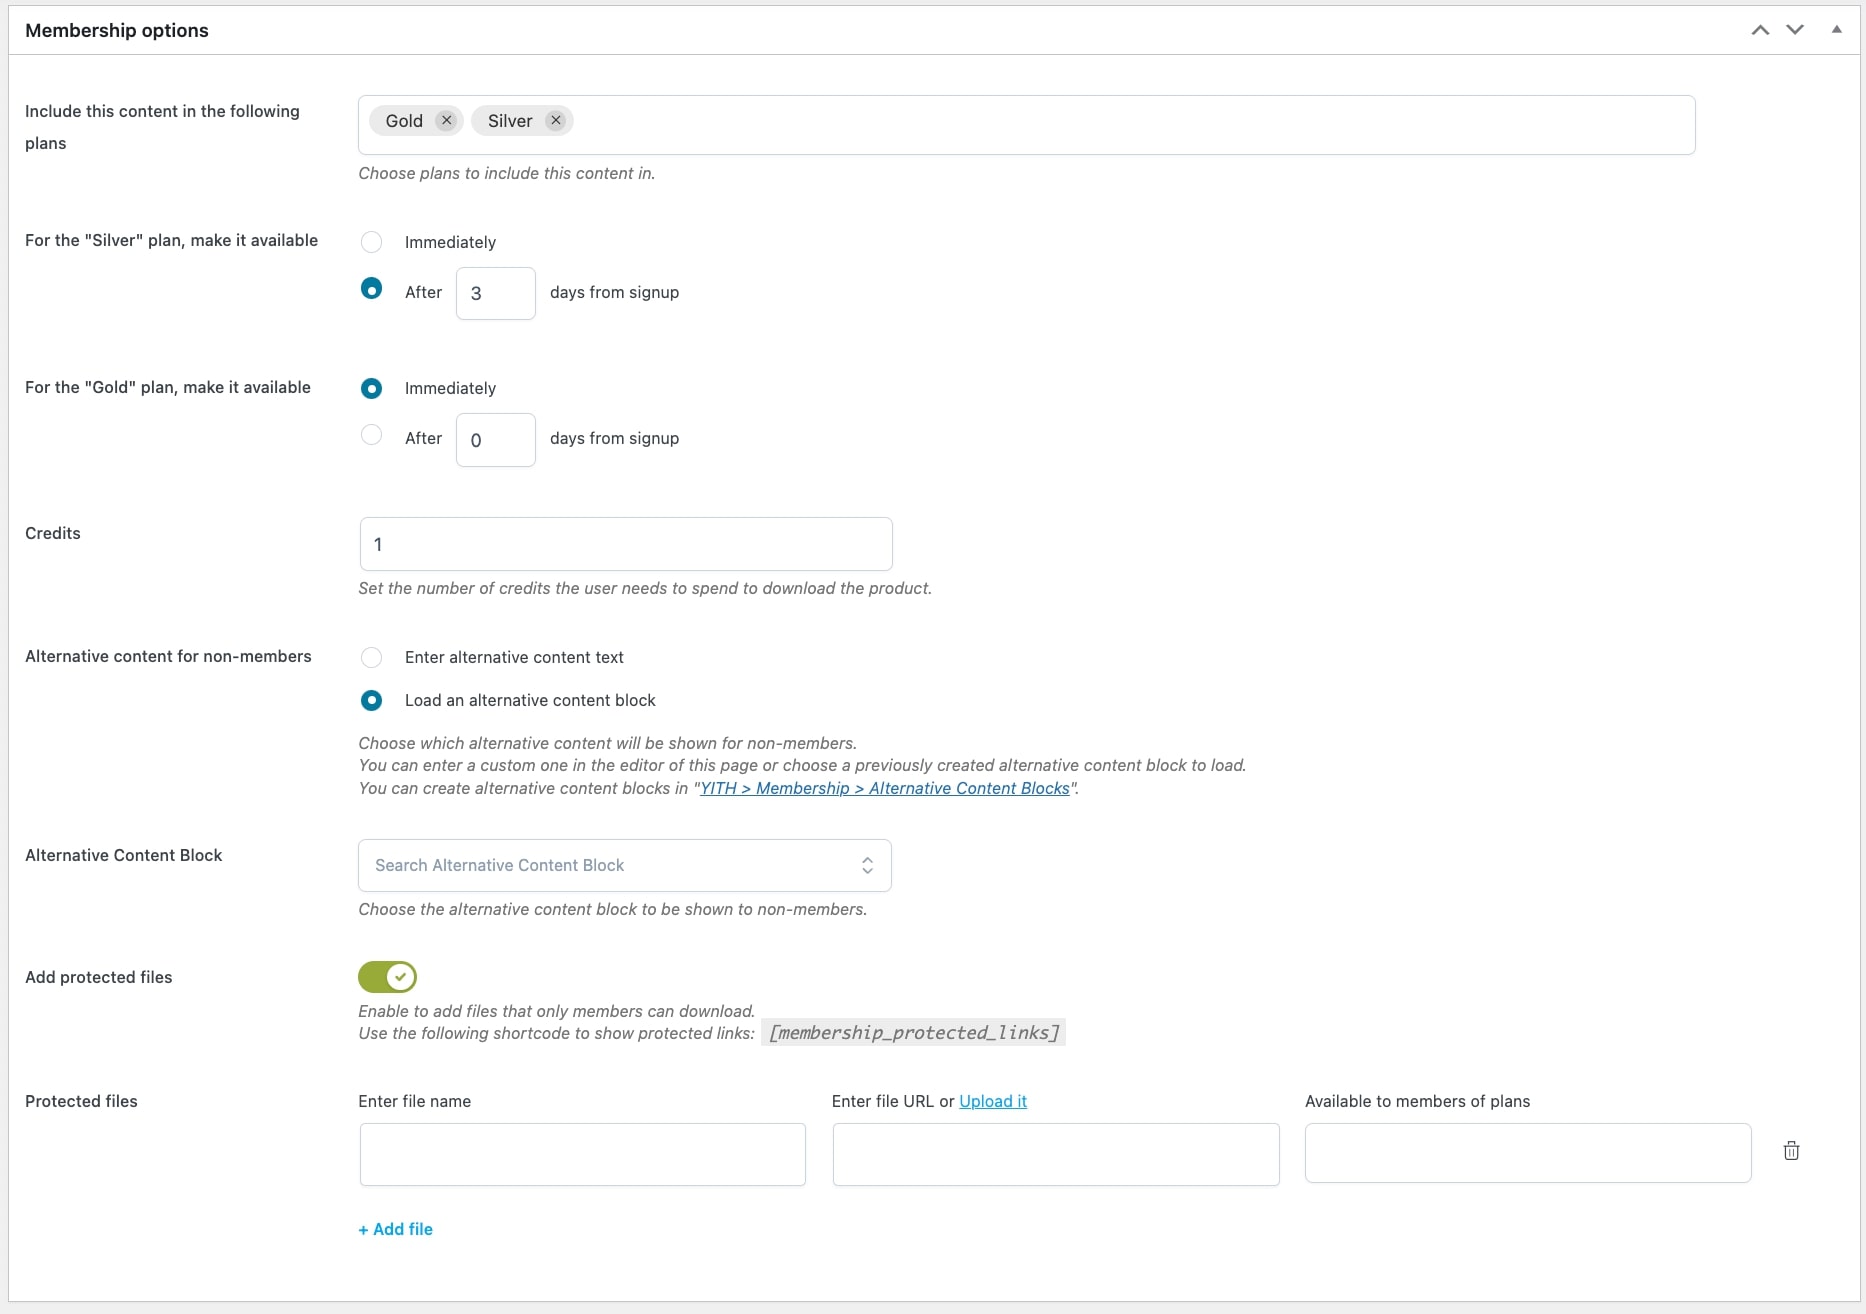
Include contents of these plans: you can automatically include the contents of other membership plans that you’ve previously created. This option turns out to be really handy if you have layered plans, for example, a Golden plan includes the Silver and Bronze ones plus additional contents.
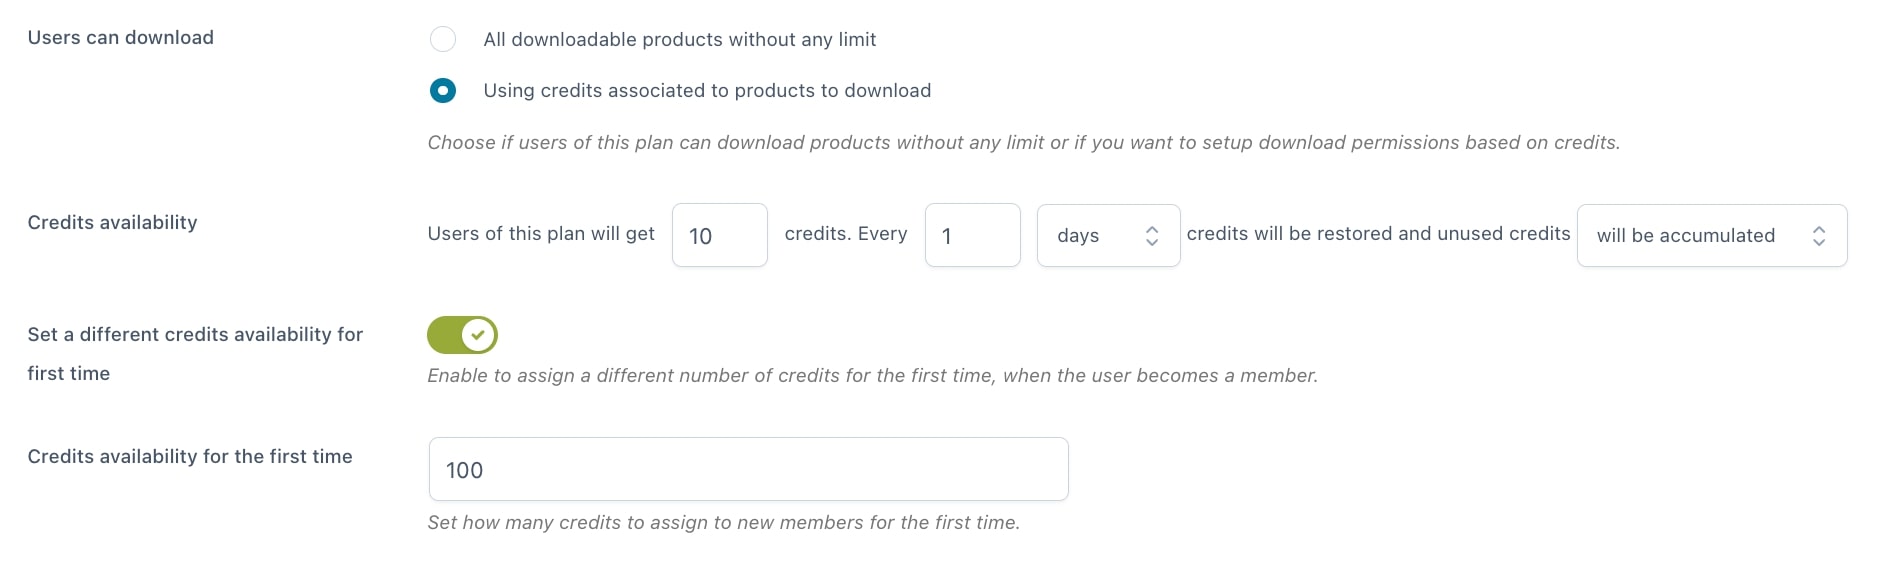
Users can download:

  • all downloadable products without any limit
  • using credits associated to products to download: this option is quite important, as you can activate it to restrict members’ downloads based on the plan and you can find more detailed information in the next paragraph.

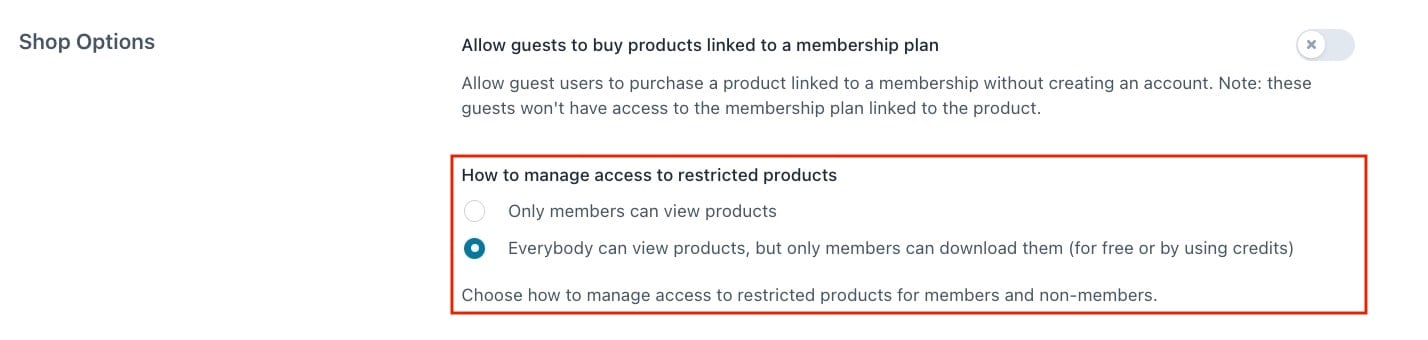
Please, note: this option is only available if you set Everybody can view products, but only members can download them (for free or by using credits) in YITH > Membership > General Options > Shop options.

Downloads restrictions and credits

If in Users can download you select the option to limit downloads and use credits, you will be able to set up the number of credits and regenerate them, if you want to, periodically, as long as the membership is active.

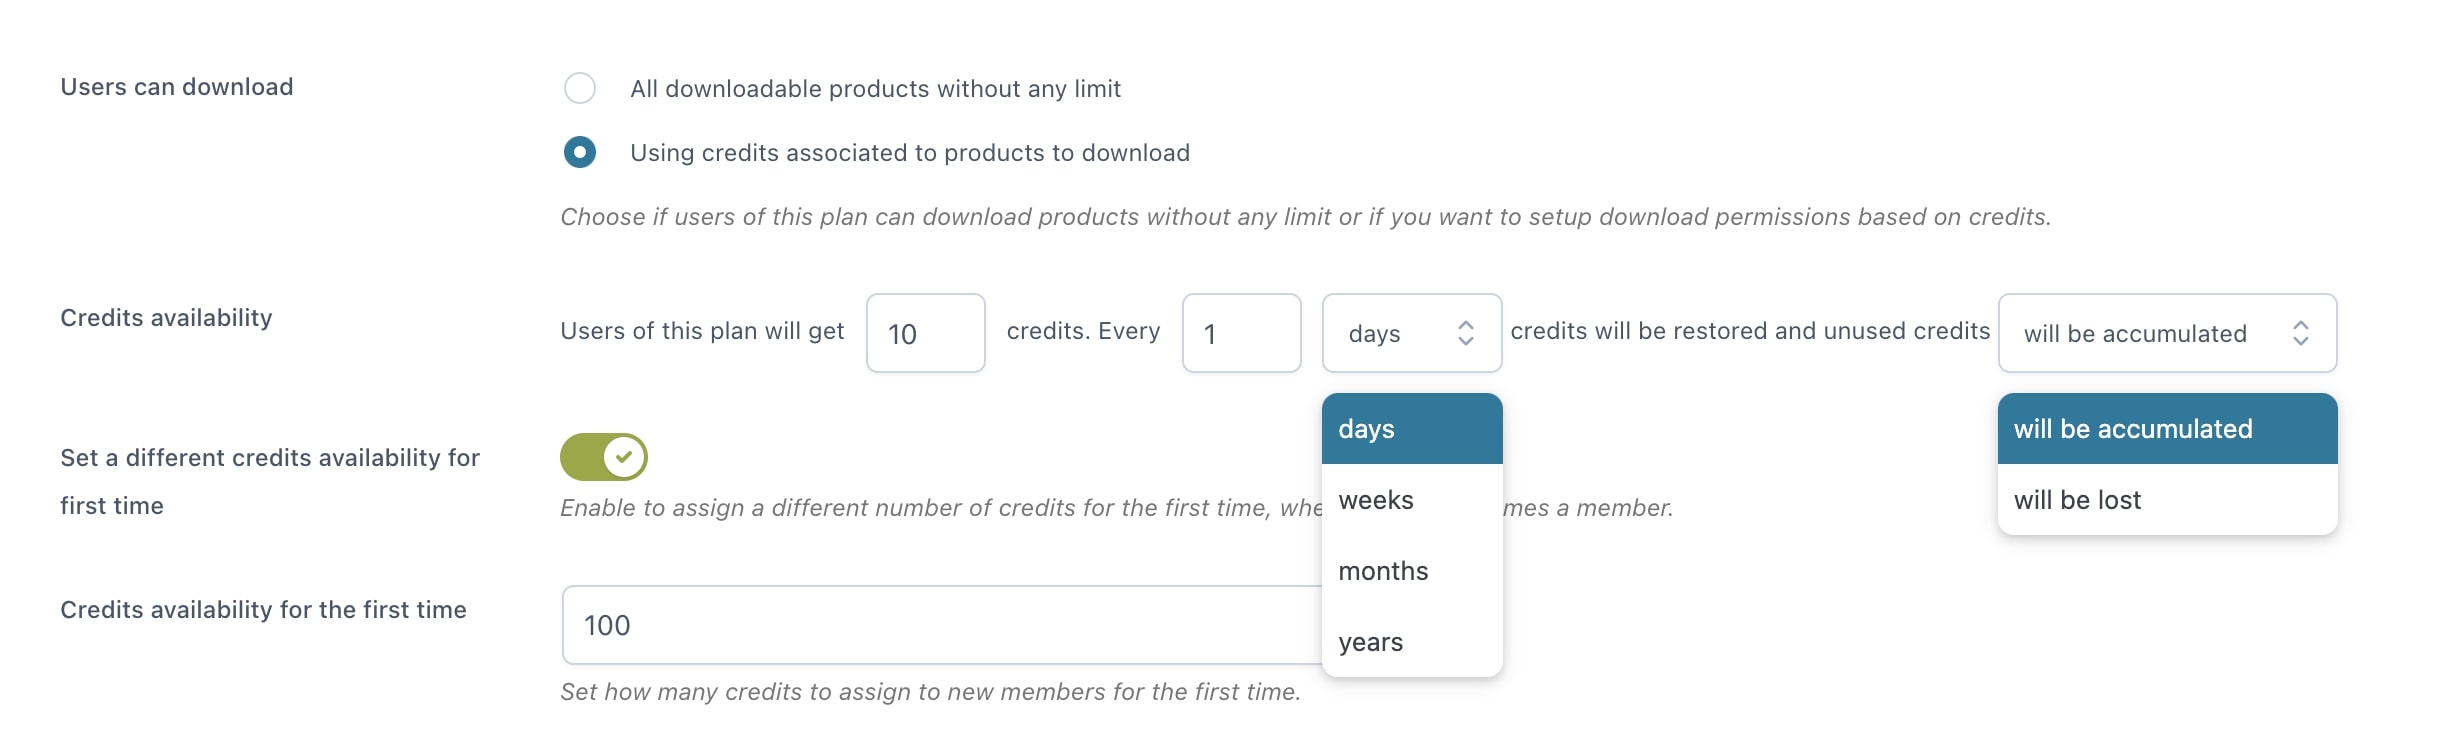
Users of this plan will get XX credits: you can choose how many credits to grant to members.

Every XX XX credits will be restored and unused credits xx: here you can choose whether to activate the regeneration of new credits periodically choosing among:

  • days
  • weeks
  • months
  • years

and choose whether credits unused will be accumulated or lost.

Credits availability for the first time: finally, you will be able to enable a different amount of credits for the first access, so for example, you can grant them 100 credits for the first time and then add 20 credits every week.

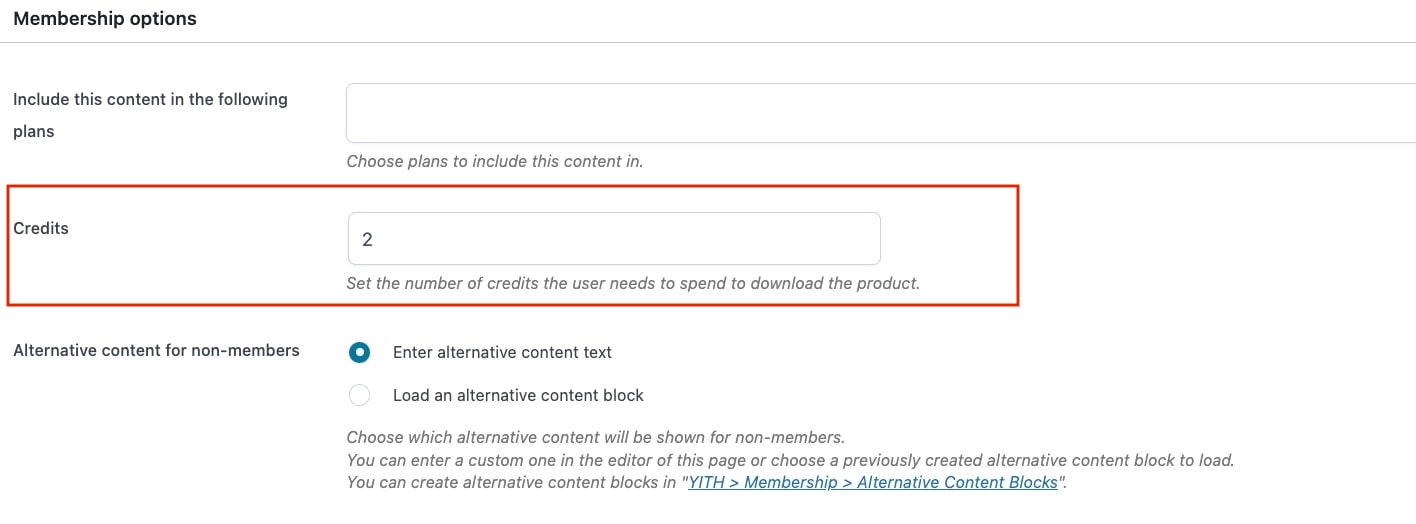
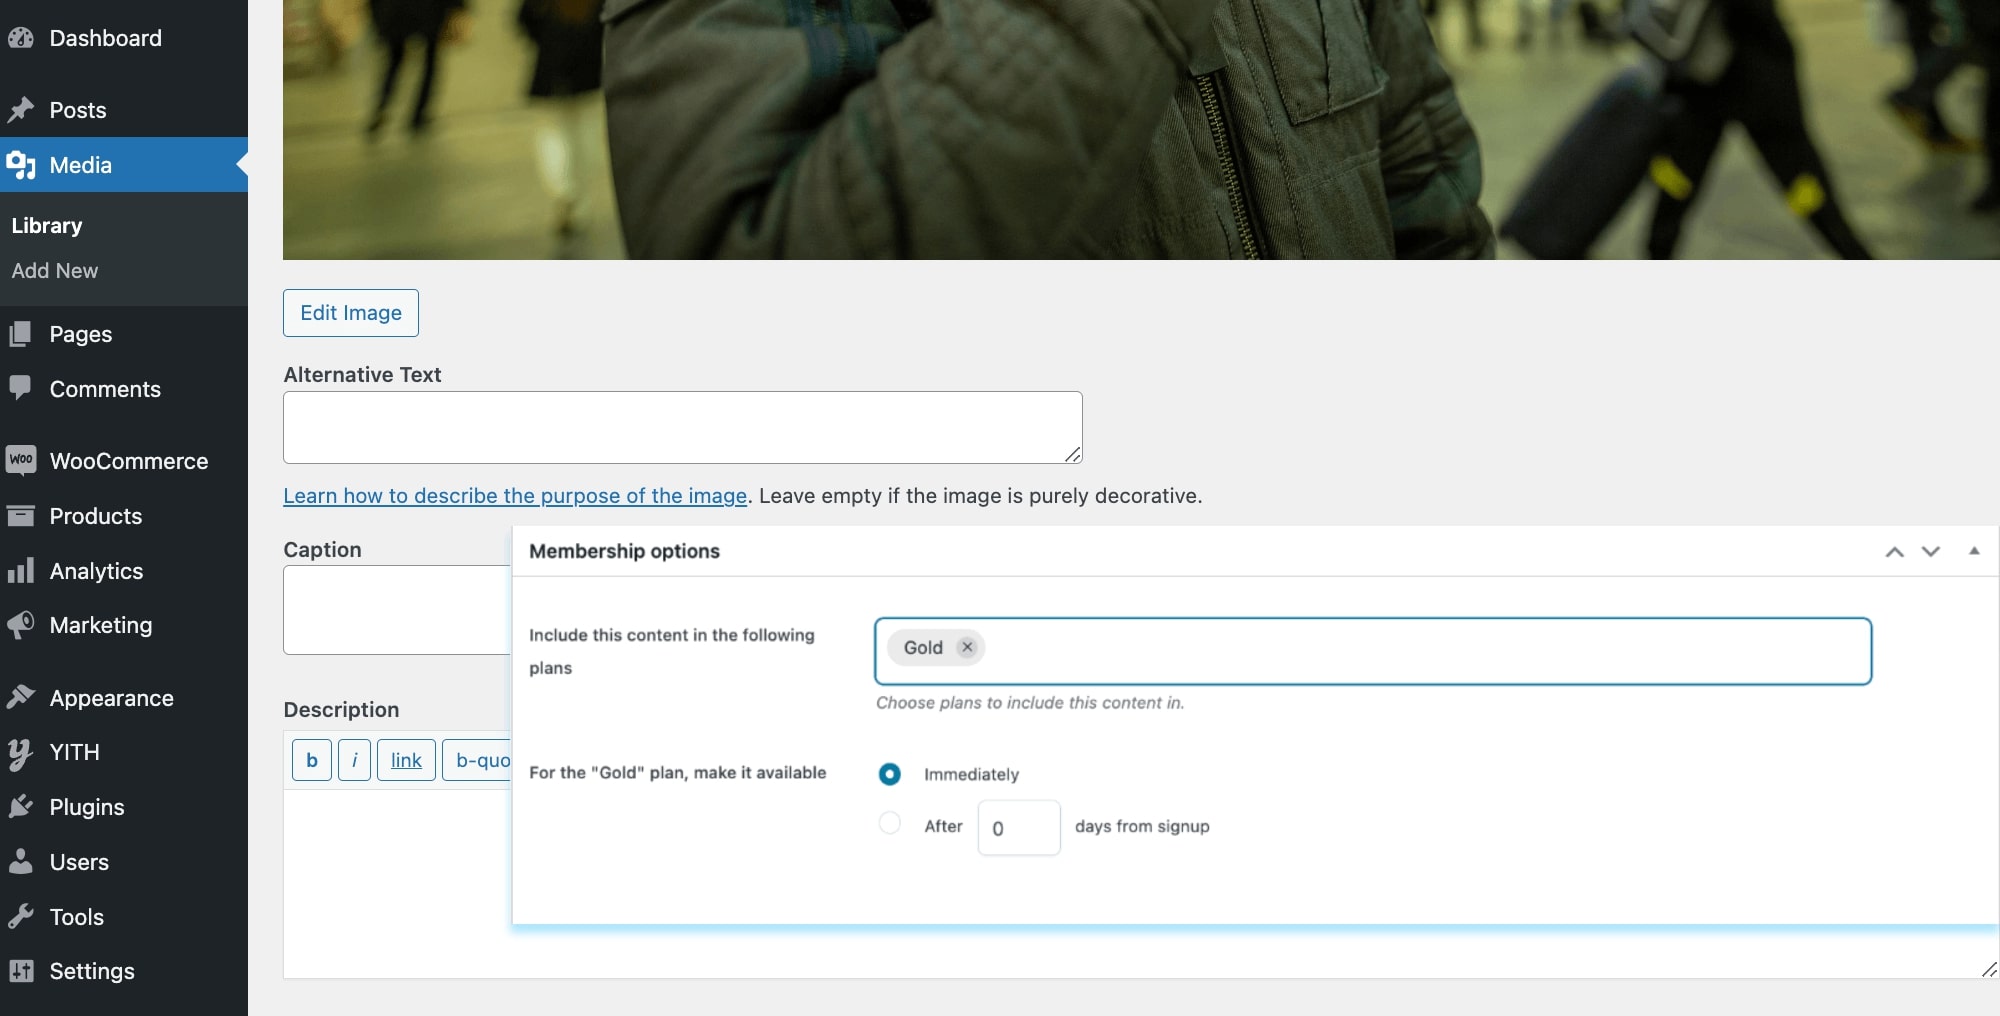
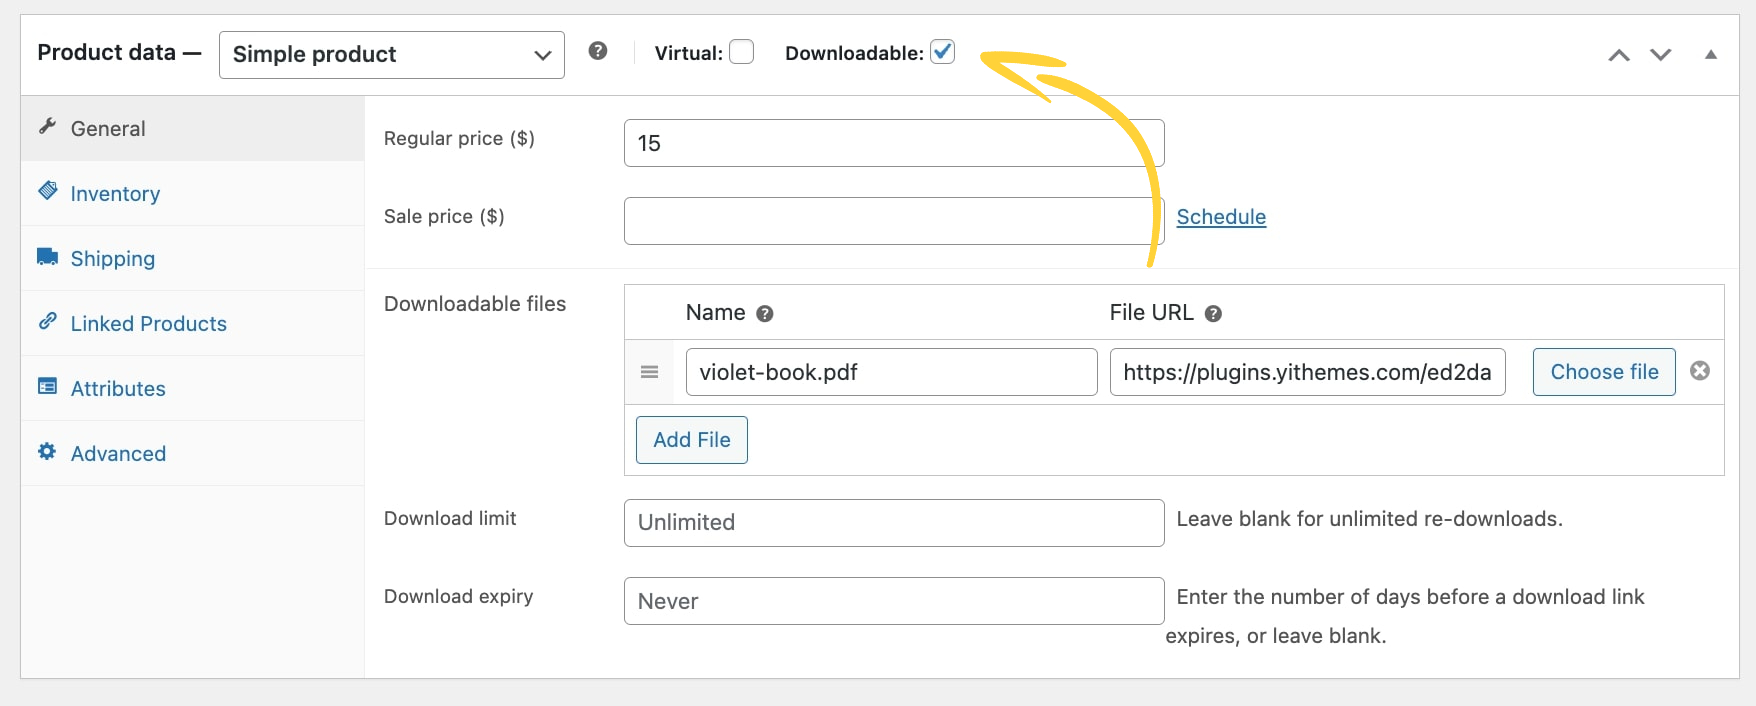
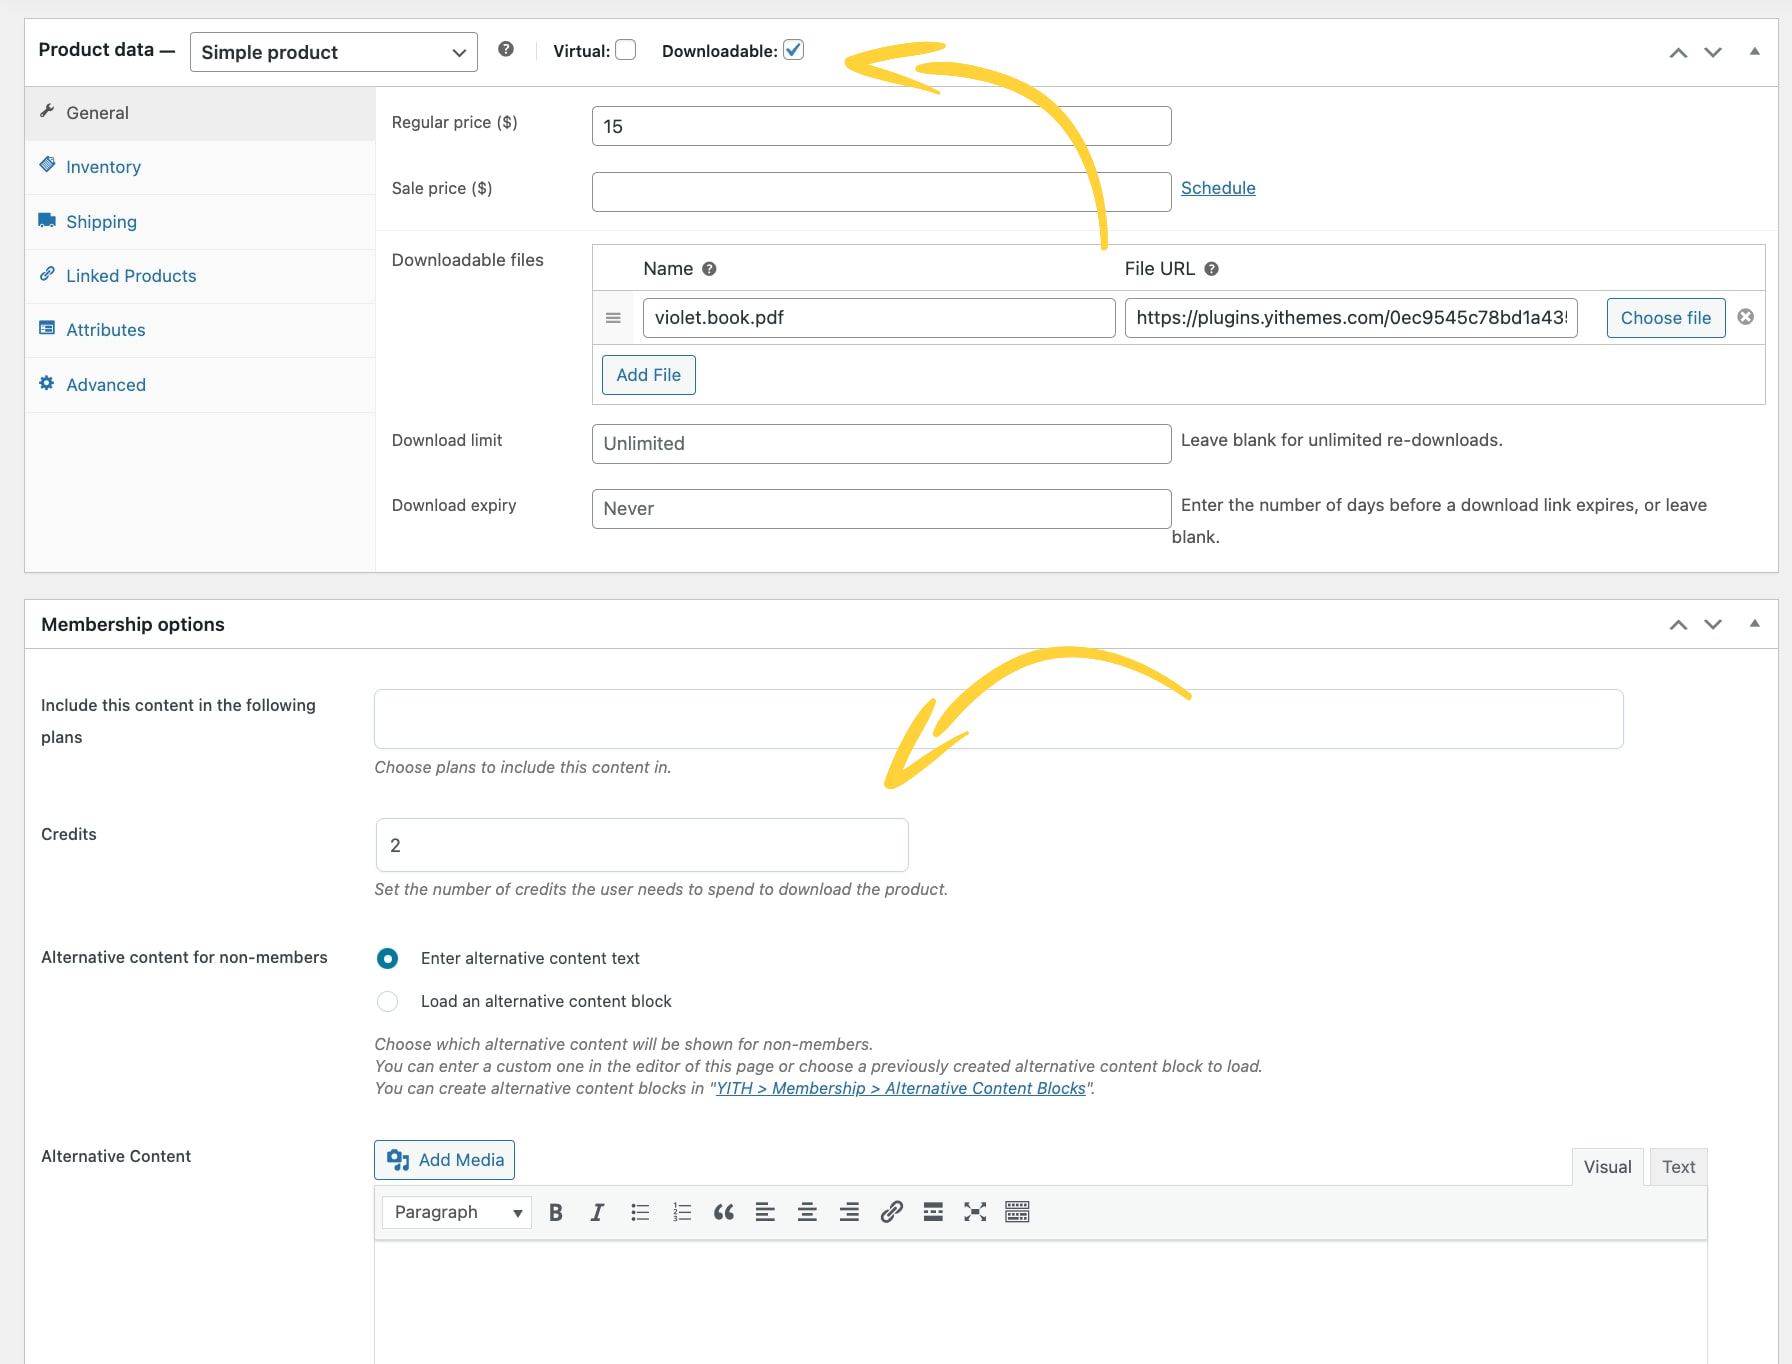
The default number of credits for each downloadable product can be set from the plugin general options (see this page), but it can be always overridden from the product details page (in the Membership options metabox) as you can see below.

Please, note, that the credit option is only available for downloadable products, so, if you can’t see it in the product details, just make sure you have checked the downloadable option:

Users will be able to see the number of credits necessary for each product download either from ‘My account’ page or from the product page.


Discounts

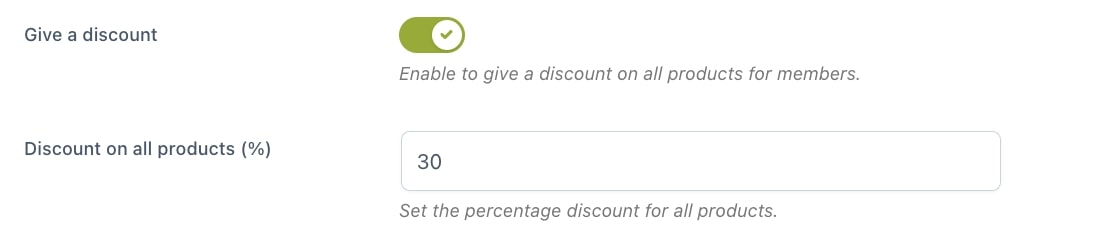
Finally, from this page, you will also be able to set up a discount for the members of this plan on all the products of your shop.

Just enable the option Give discount and enter a percentage value:

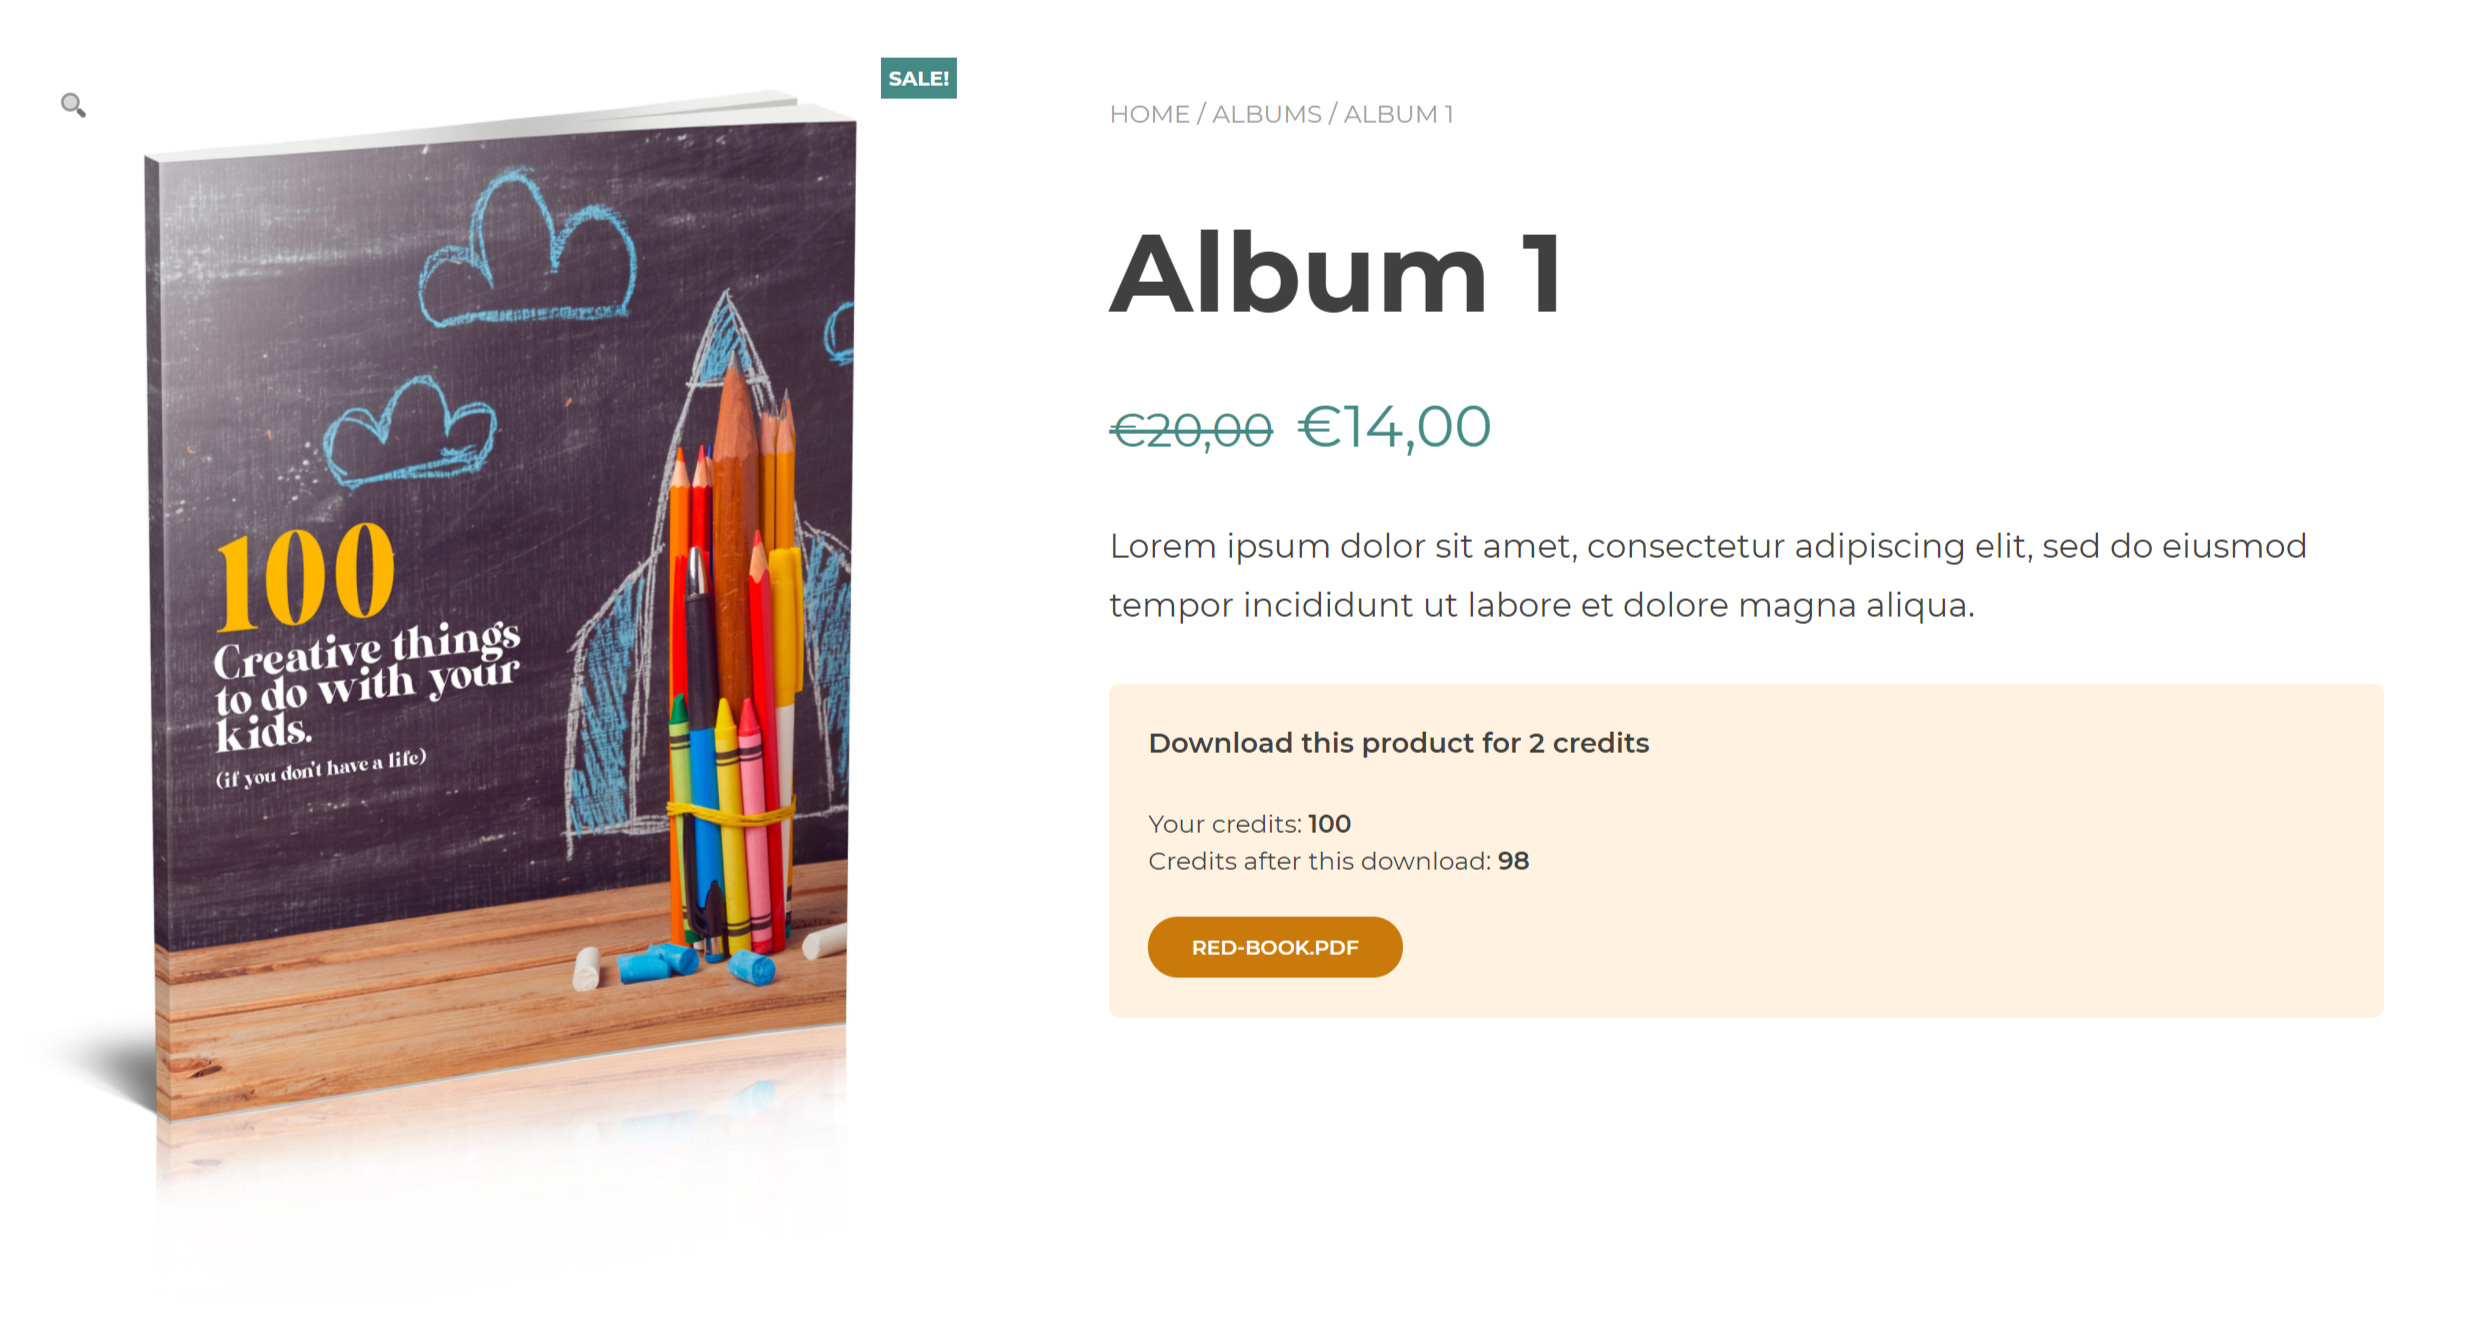
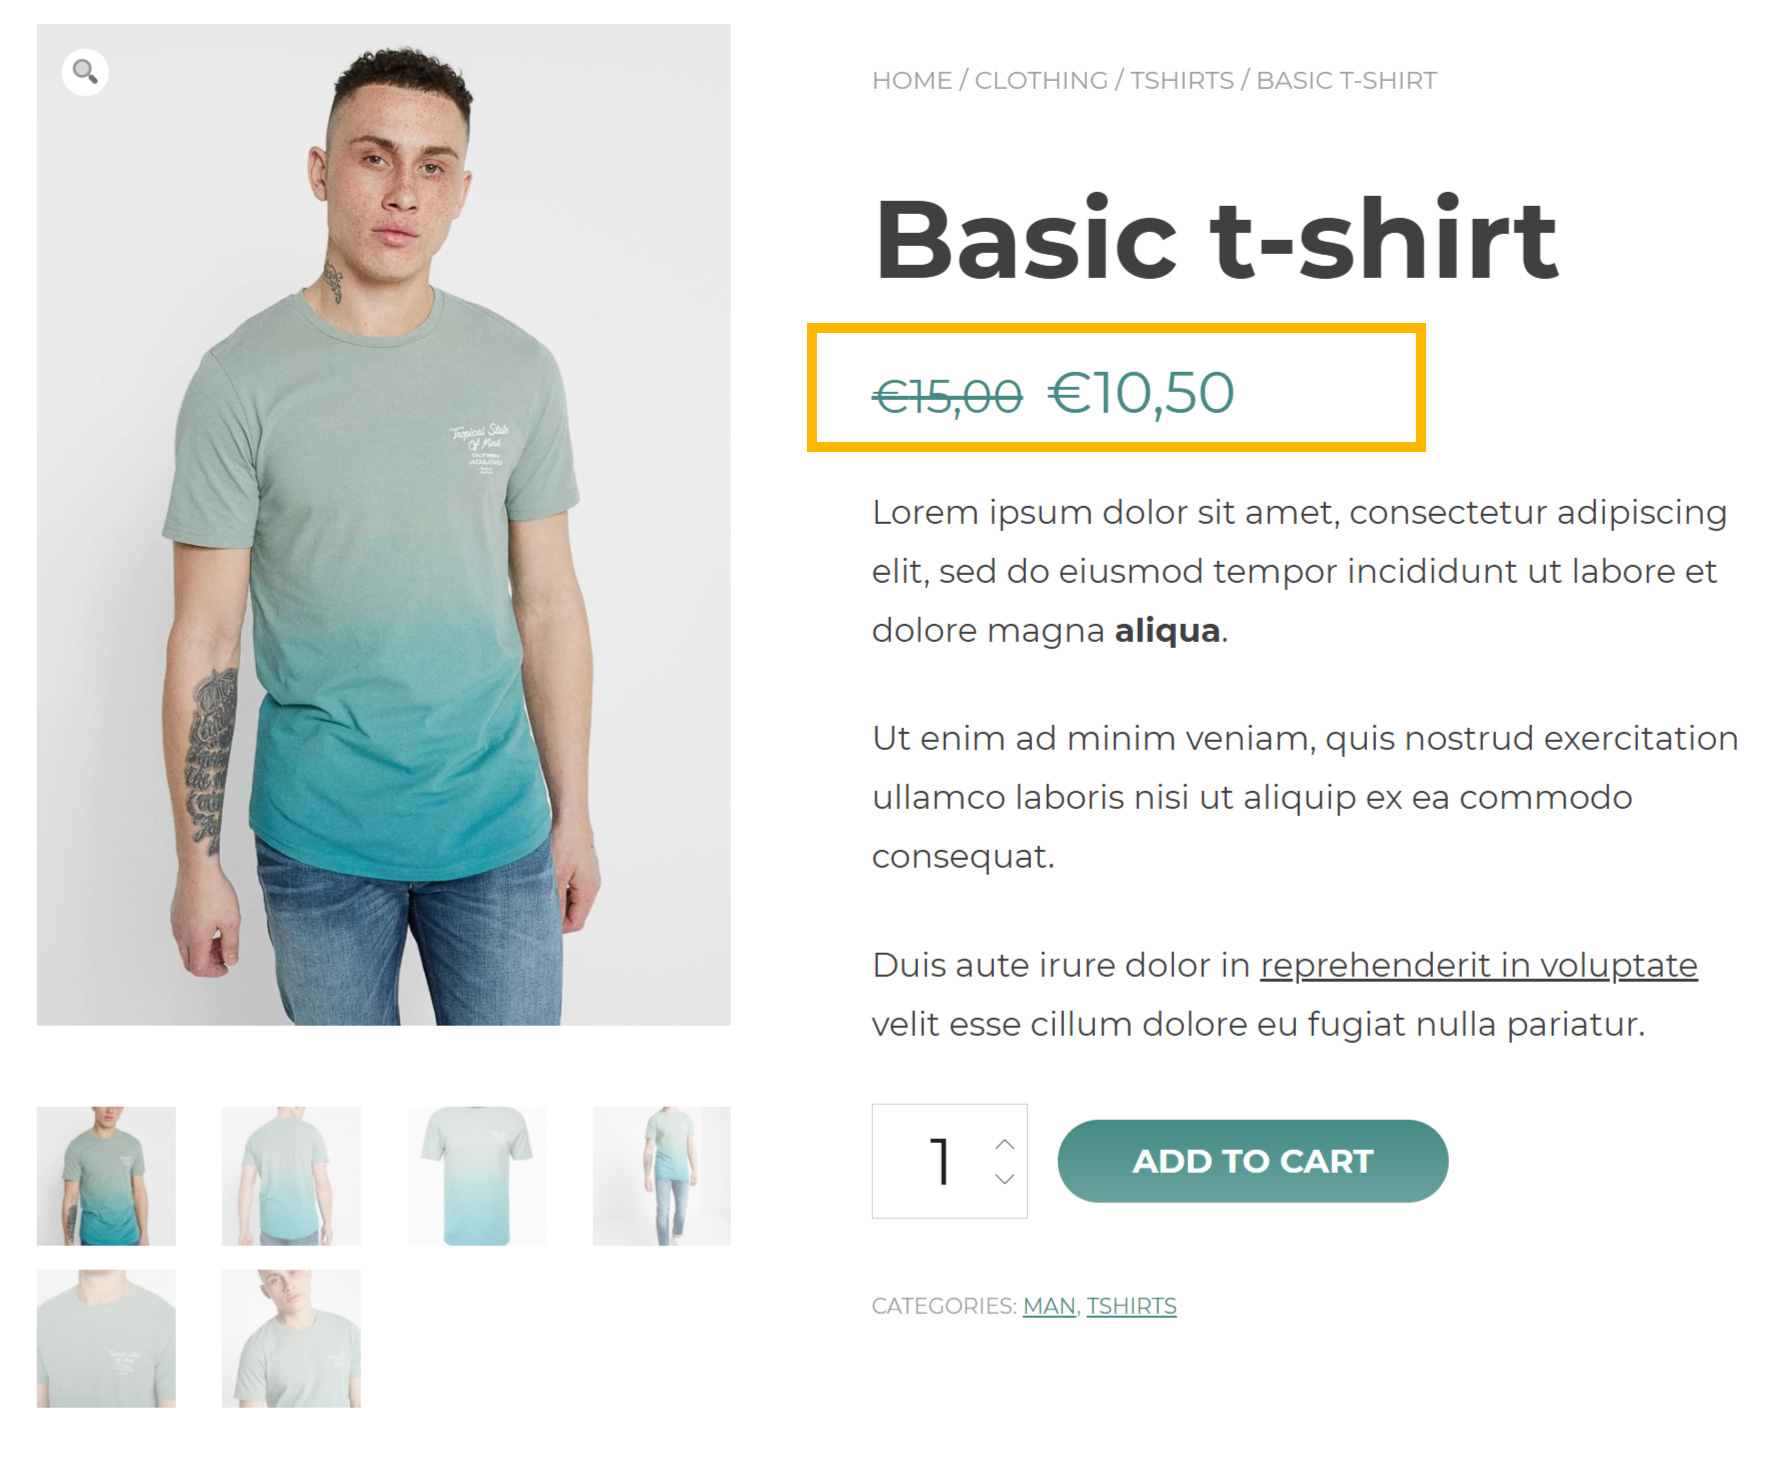
The discount will show to members on the product page like in the example below:

Discount on product page

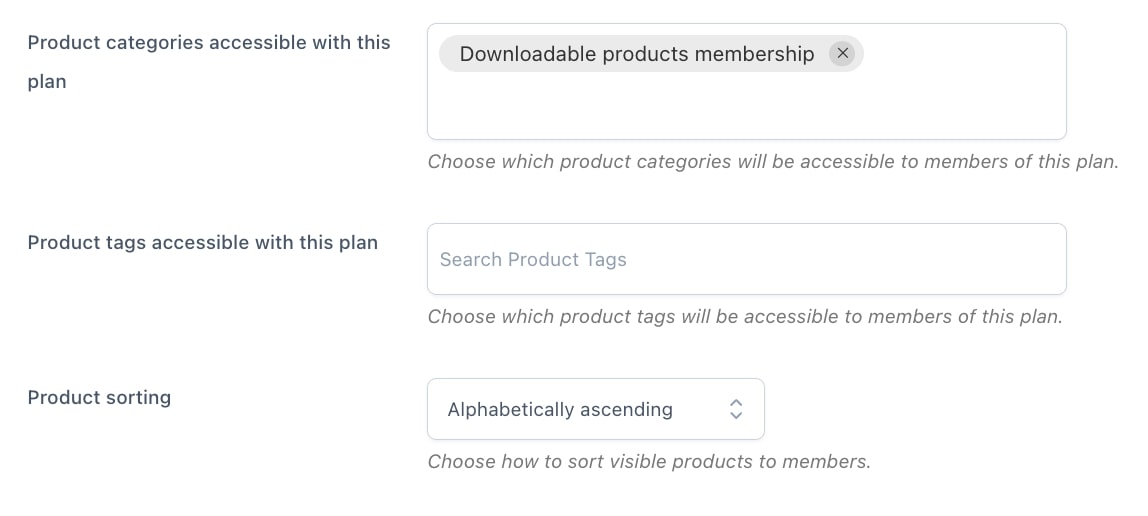
If you want to grant different discounts based on categories or specific products or create some special offers only for the members of a specific plan, then, you might want to consider the integration with YITH Dynamic Pricing and Discounts plugin. Please, refer to this page for more details.

Membership plan Permissions

In the section below you will also be able to set the membership plan Permissions, so you can set here which contents will be restricted and accessible only to members of this plan and how to sort them.

It includes 3 sections for pages, posts and products.

PAGES
  • Pages: select the pages
  • Page sorting:
    • alphabetically ascending
    • alphabetically descending
    • date ascending
    • date descending
POSTS
  • All posts
  • specific posts / post categories / post tags: you will be able to select them
  • Post sorting (same options as above)
PRODUCTS
  • All products: this will include all products except for those products that allow purchasing memberships (otherwise there would be no way to purchase a membership plan).
  • specific posts / post categories / post tags: you will be able to select them
  • Product sorting (same options as above)

Edit membership options from the product/page/post view

From the page/post/product edit view, you will be able to customize and override some of the membership options. You will find them all grouped in the Membership options box.

Let’s see which options are available.

1. Include in a plan

You can choose to include any type of content in your memberships: a page, a post, a product, or any other media uploaded to the site. For each type of content in your site, you can set the membership plan to which it is associated, regardless of the general configuration settings of the plan together with other membership options.

To do that, log in as admin to your site and open the page (or post or product) and select the membership plan you want to add it to from the Membership options metabox.

Include this content in the following plans: choose the plans to include this content in.

For the X plan, make it available (you will see this option replicated for every plan entered above):

  • immediately
  • after X days from signup: you can choose to make this content available to users only after a specific number of days since the purchase date.

2. Credits

Here you can override the number of credits needed to download this item.

Please, consider that this option is only available if it’s a downloadable product and you’ve previously enabled the credits option from the General options > Shop options.

3. Redirect link

If in the General options tab, you’ve chosen to redirect non-members to a specific link, you can however override this link from the product/post/page with a custom URL.

4. Alternative content for non-members

You can override here the alternative content that will be shown to non-members who visit this page/post/product. You can either type in a custom text from the built-in editor or load one of the previously created contents.

  • Enter alternative content text
  • Load an alternative content

Please, refer to this page for more details about how to create and customize the alternative content.

5. Protected files

Finally, from the Membership options box, you will also be able to add files that are linked to this specific product/page/product but that will only be available to members of selected plans.

Enable the option and then add the file URL (you can either add the URL or upload the file right from this page).

Then, select the membership plans for which this media file will be available.

To show the download button in the post/product/page, please, make sure you add the [membership_protected_links] shortcode in the content. No worries, it will be hidden to non-members.

For example, you will be able to create a blog post that is visible to everyone (members and non-members), but only members of the Golden plan will be able to download a file attached to it.

Media files

Also media files can be included in one or more membership plans. Yet, this is usually done using the Protected files option so they can be attached to a post or a page.

Yet, if you want to add a specific media file to a membership plan, without including it in a specific post, you can edit permissions directly from the media settings. So, go to Media, select the file and you will be able to choose the membership plans it is enabled for and if this media has to be delayed.

Credits and downloads – Configuration example

On this page, you can see an example of the configuration of a membership plan with downloadable products and credits.

1. Set up the products

First of all, you will have to create the products that you want to include in the membership. Just make sure you check the Downloadable box and add a file to be downloaded.

We recommend grouping all the products in one or more categories or tags, as this will make it easier for you to include them in the membership plan with just a few clicks.

2. Set up the membership plan

Now, you can create the membership plan that will give access to these products. Go to YITH > Membership > Membership plans and click on Add new.

Add new plan

Set up the plan based on your preferences and make sure you set up the credit system to work as you wish:

In the above image, the membership will grant 10 credits every day, with an initial bonus of 100 credits. Credits will automatically renew every day and if they are not used, they will be accumulated. For a detailed explanation of the membership options and credits settings please refer to this page.

Finally, include the contents of your plan from the Permissions section. We are including only products using the product category where we’ve added all our downloadable products, but you can add any posts, pages, or products. Please, refer to this page for more details.

3. Display settings

Now, save and test if the membership is showing the right content. How?

Either make a test order through which you buy the product linked to the membership (if set), or assign the membership plan to yourself from the Users page as explained here. You can remove this plan from your membership at any time, from the same page.

Bulk edit memberships

Make sure you enable the option Show membership history in My Account from the General options as explained here.

And choose the Download button position on the product page from the Shop options menu.

If you want to show the available downloads on any other page of your website, you can also use the Membership History shortcode as explained here or the Membership items shortcode as explained here.

If the downloadable product is included in the plan, it will show a green Download button like this:

Downloadable for free

If the downloadable product is not fully included in the plan and the member will have to use a certain number of credits to get access to it, then, it will look like this:

Product downloads with credits