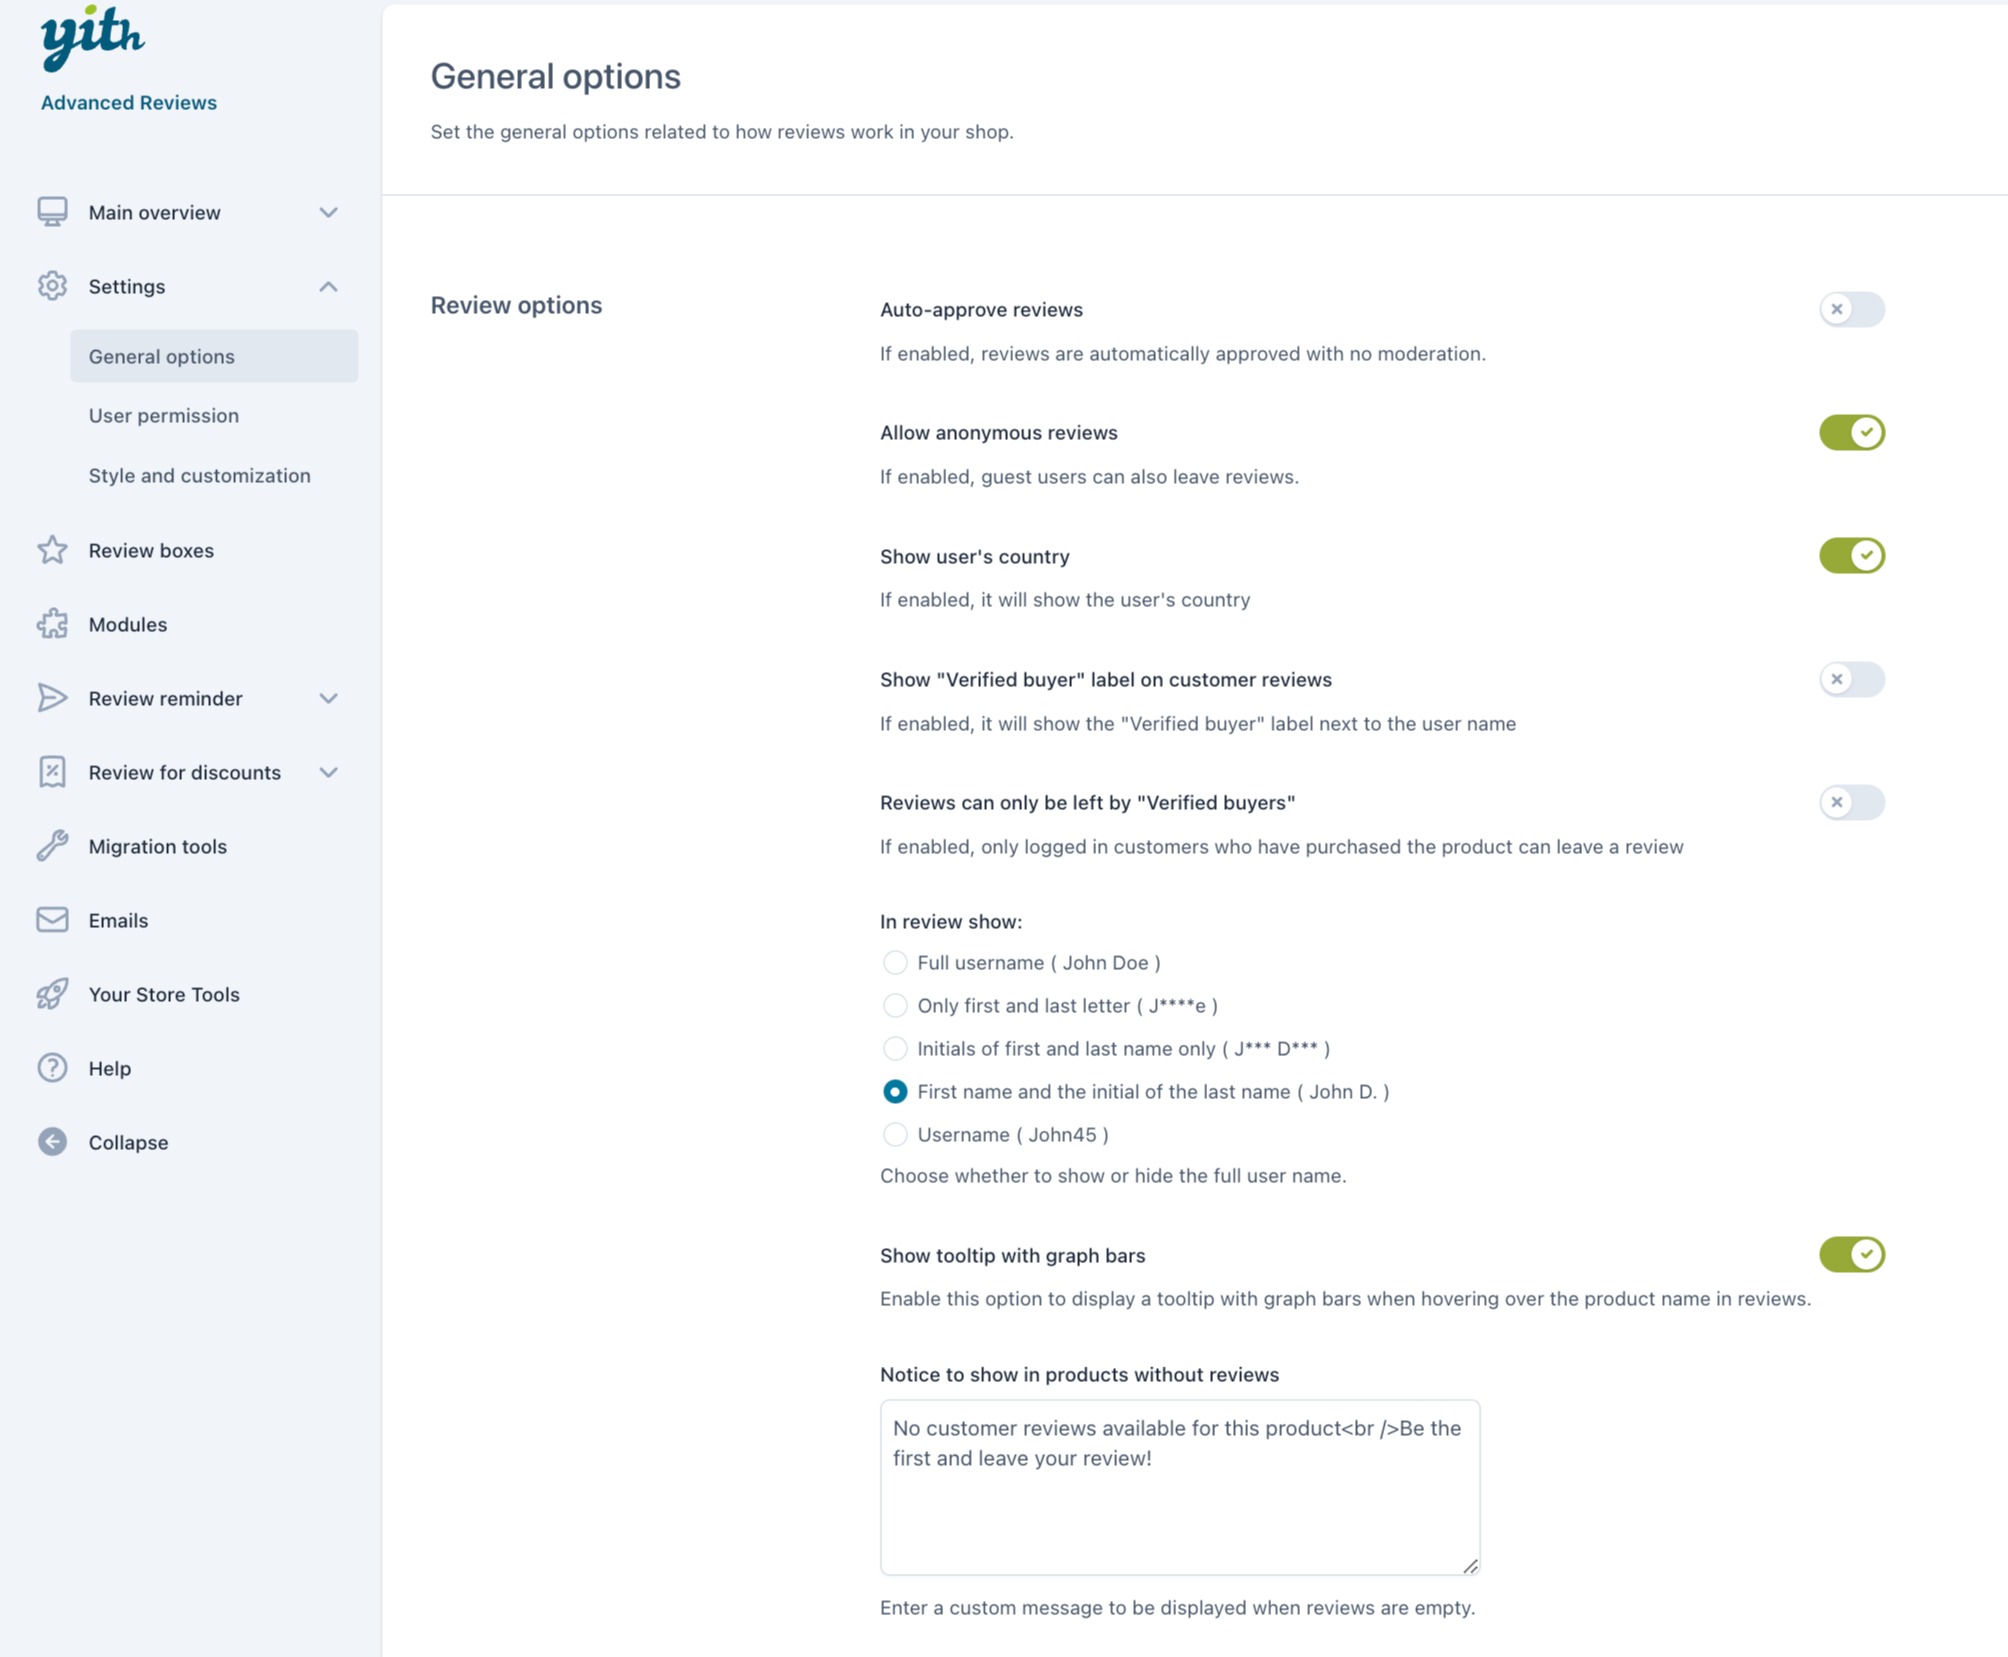
You can start configuring the global settings for reviews posted in your store from the section General options in the plugin Settings. The options are divided into the following sets of settings:
Review options

- Auto-approve reviews: enable this option if you want the reviews to be automatically approved. By leaving it disabled, the review status will be Pending and the users will view a message after publishing the review.

As an admin, you can approve the reviews from the plugin panel section All reviews > Pending through the Bulk actions or by changing the status in the review edit page.
- Allow anonymous reviews: enable this option to let guest users publish their reviews. When enabled, please make sure the option Reviews can only be left by “verified owners” in WooCommerce > Settings > Products is left unchecked.
- Show user’s country: enable if you want to show the user’s country based on their IP address geolicalization;

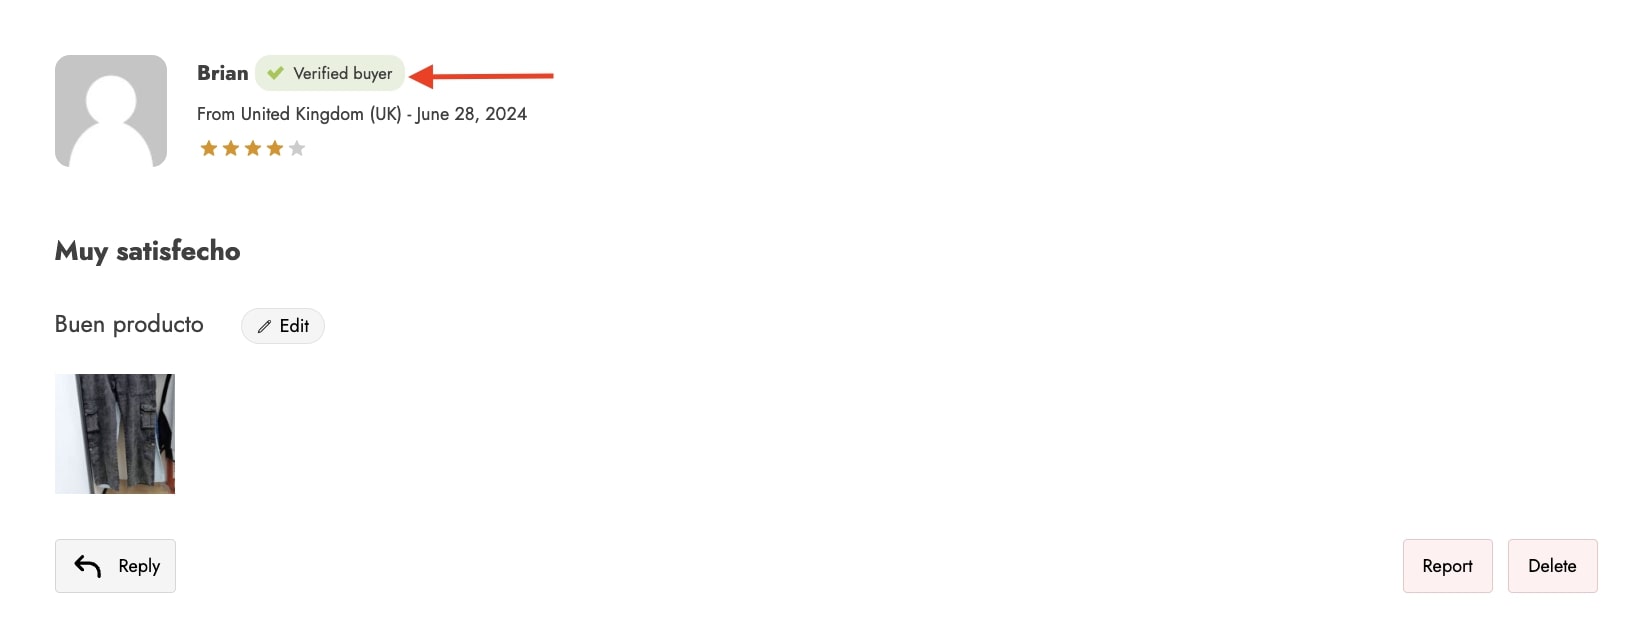
- Show “Verified buyer” label on customer reviews: enable to show the verified buyer badge. This option is linked to the option available in WooCommerce > Settings > Products;

- Reviews can only be left by “Verified buyers”: enable to let only logged in customers who purchased the product leave a review. This option is linked to the option available in WooCommerce > Settings > Products;
- In review show: choose how to show the username of the review authors from:
- Full username
- Only first and last letter ( A****E )
- Initials of first and last name only ( J*** D*** )
- First name and the initial of the last name ( John D. )
- Username ( John45 )
- Show tooltip with graph bars: enable this option to show graph bars in a tooltip when hovering over the product name;
- Notice to show in products without reviews: enter the text to show on the frontend on products with no reviews.
reCAPTCHA options
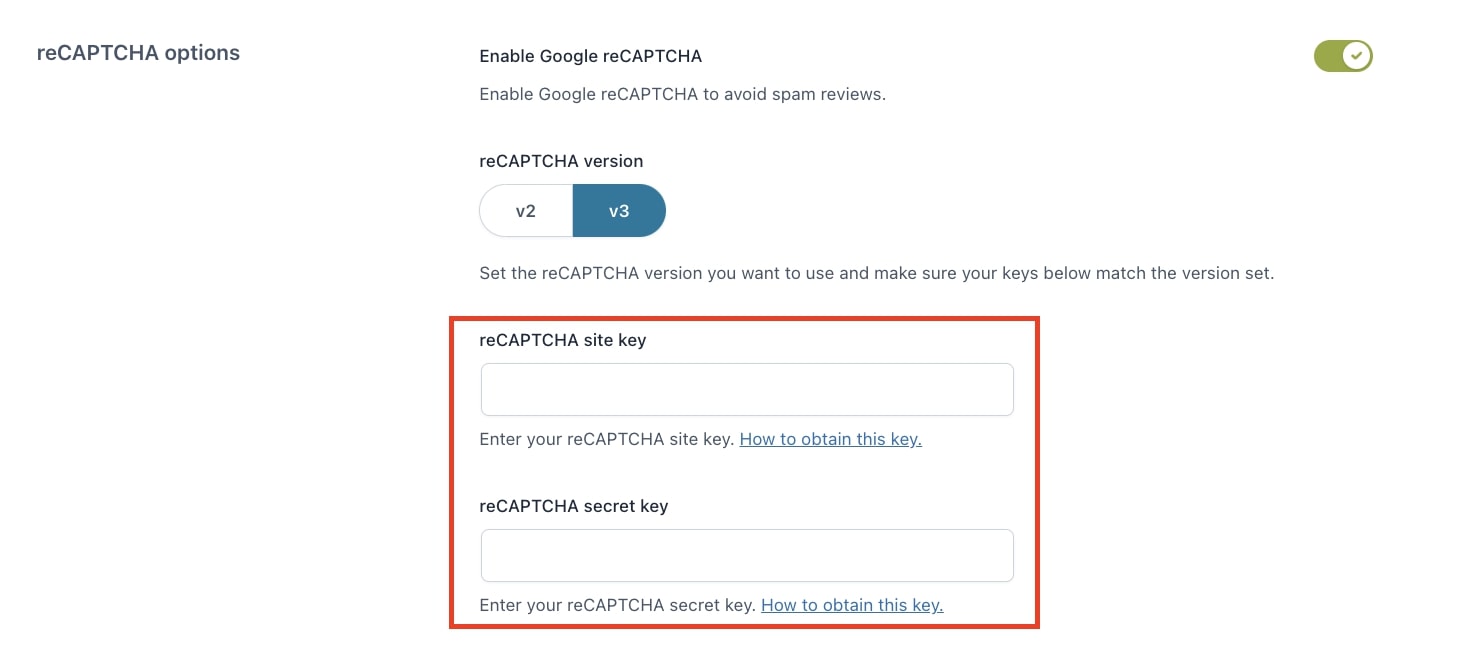
The reCaptcha system refers to Google’s “No CAPTCHA reCAPTCHA”. To work correctly, it requires both the reCaptcha site key and the reCaptcha secret key. Let’s learn how to configure the reCaptcha correctly.
Register an account on Google (if you don’t have any yet), go to https://www.google.com/recaptcha/about/ and click on v3 Admin Console.
Now select the reCAPTCHA version you want to use, fill in the available fields and click on the submit button to add the reCAPTCHA to your site.
The site key and secret key are now created.
Go to the plugin General options > reCAPTCHA options and copy and paste the site and secret keys into the related fields.

Reviews attachment gallery
These are the options through which you can manage the gallery of review attachments.

- Display a gallery to highlight all review attachments: enable this option to show the gallery of all review attachments. The gallery will show at the top of the list of reviews;
- Hide attachments of review replies from the gallery: enable this option to prevent reply attachments from being shown in the gallery.
Reviews pagination
Here, you can choose whether to show pagination or not.

- Show pagination of reviews: enable this option to show the reviews with pagination;
- Reviews pagination: define the number of reviews to show per page.

Note: by disabling this option, please consider that, in the case of a large number of reviews, the product page may take longer to load.
Mandrill integration
To benefit from the integration with Mandrill and send emails through this service, you need to have or create a Mailchimp account first. You can then enter your Mandrill API Key after enabling the option Mandrill integration.


