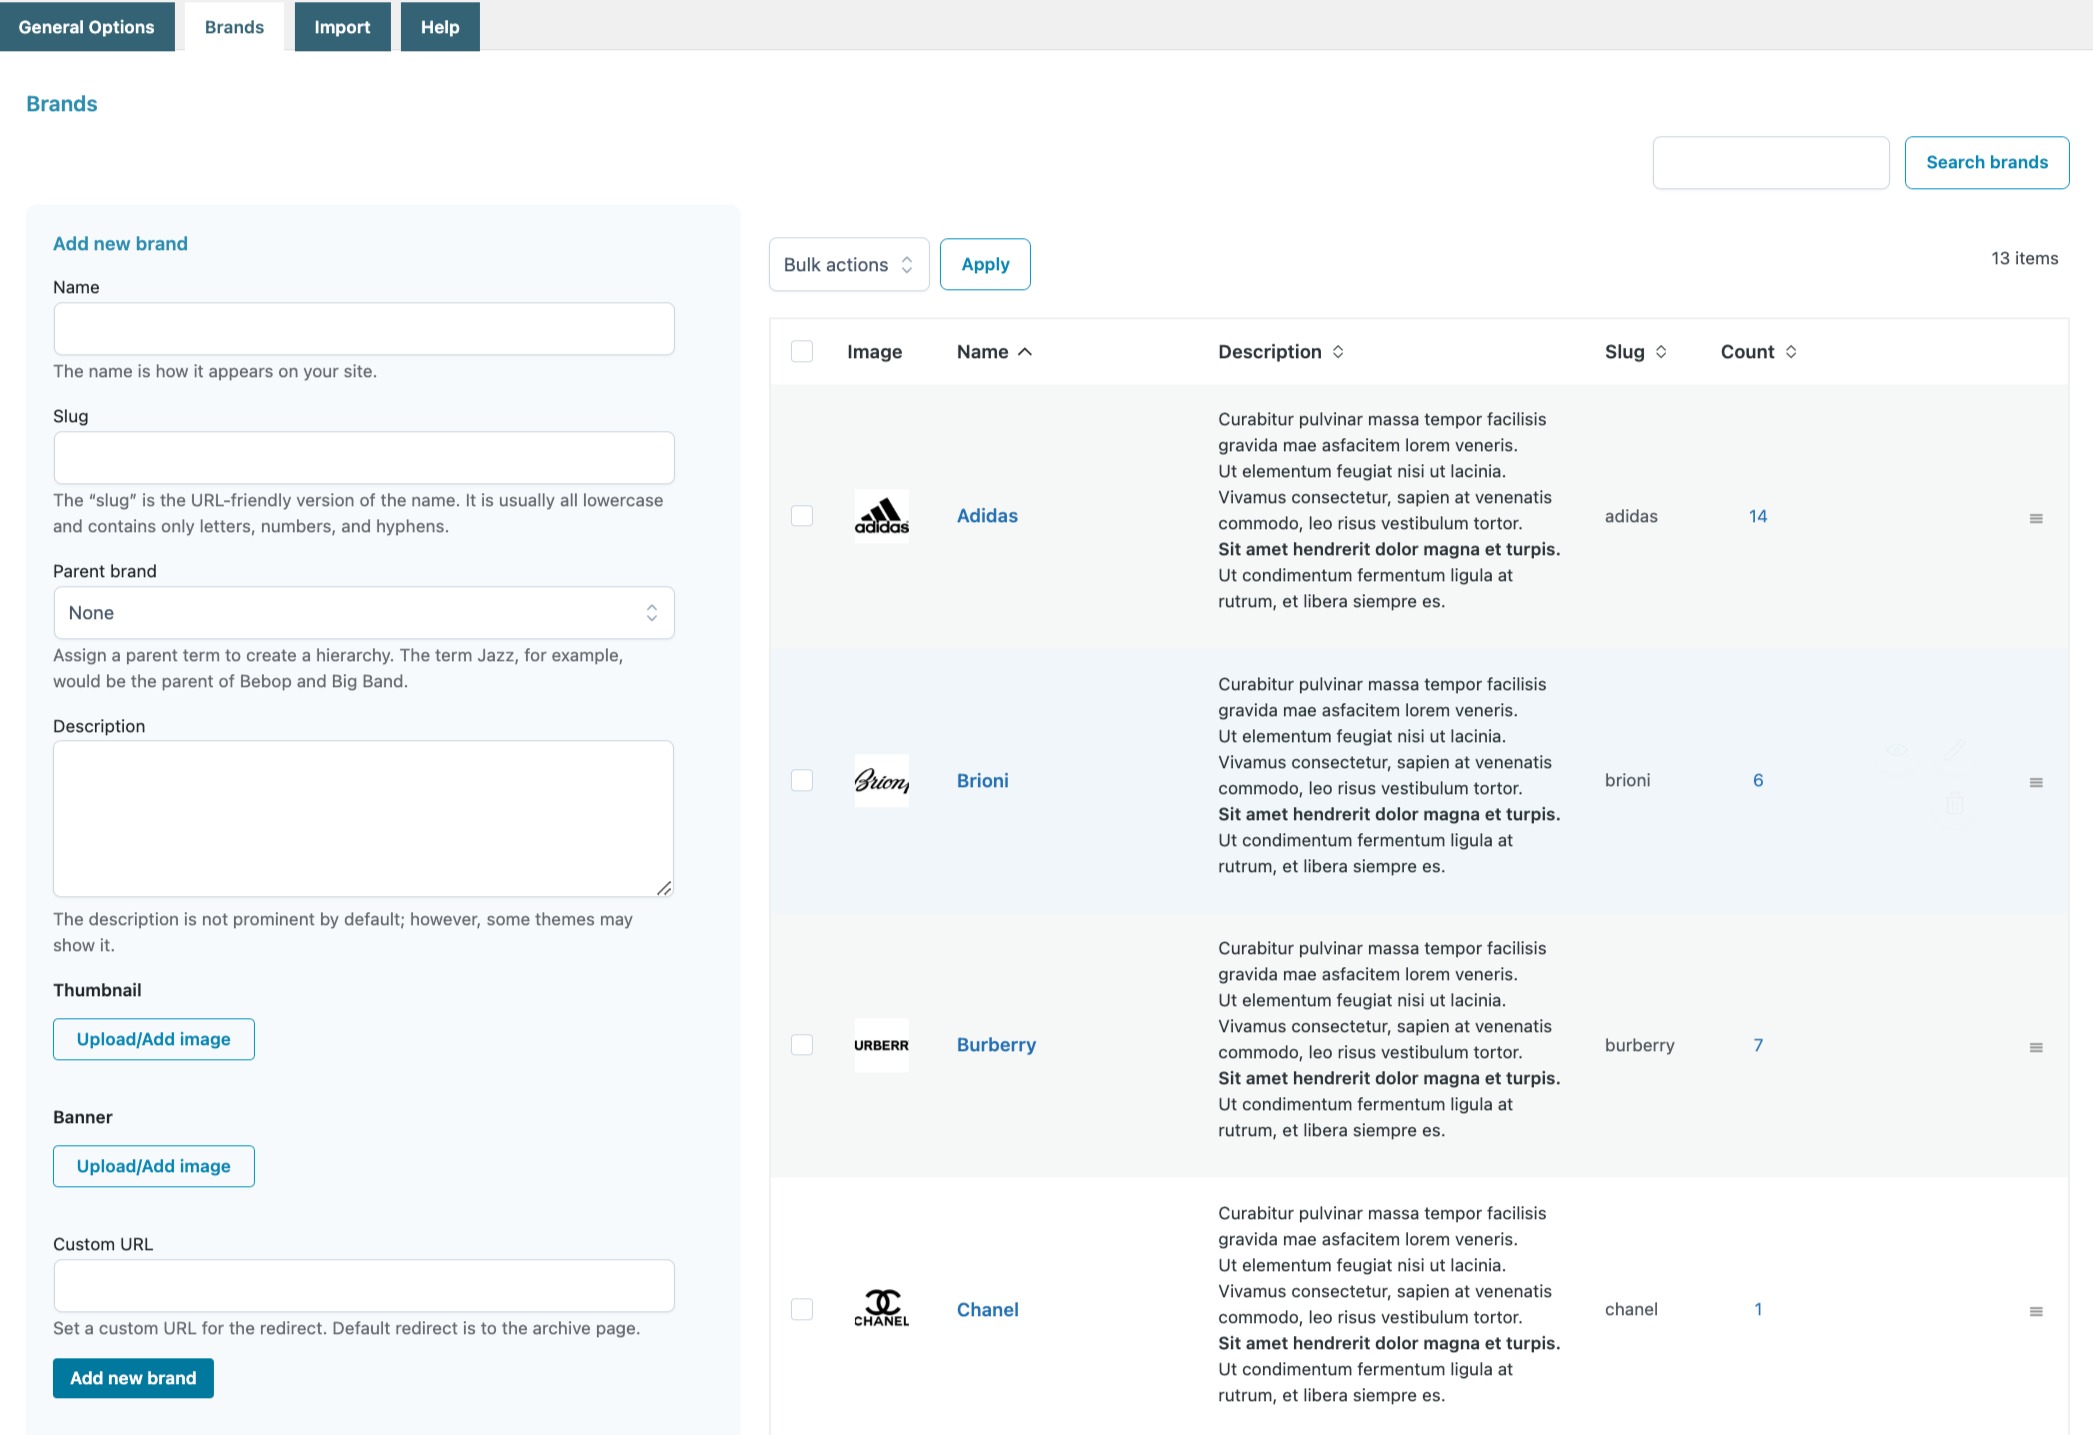
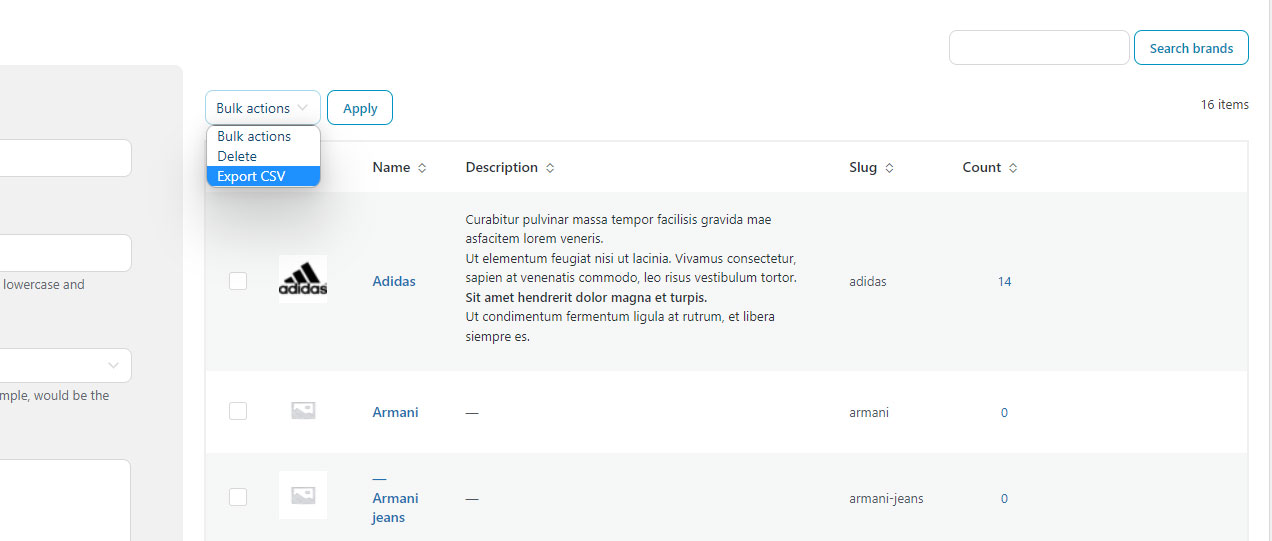
View Product Page

General options

In the plugin you will be able to find the General options tab, where you can set up all the general features, then the Brands tab, where you can add and configure each brand and an Import tab, where you can import the brands from a CSV file.

Moreover, you will find plenty of Gutenberg blocks, shortcodes and widgets to display your brands on the frontend.

Let’s start with the General options first.
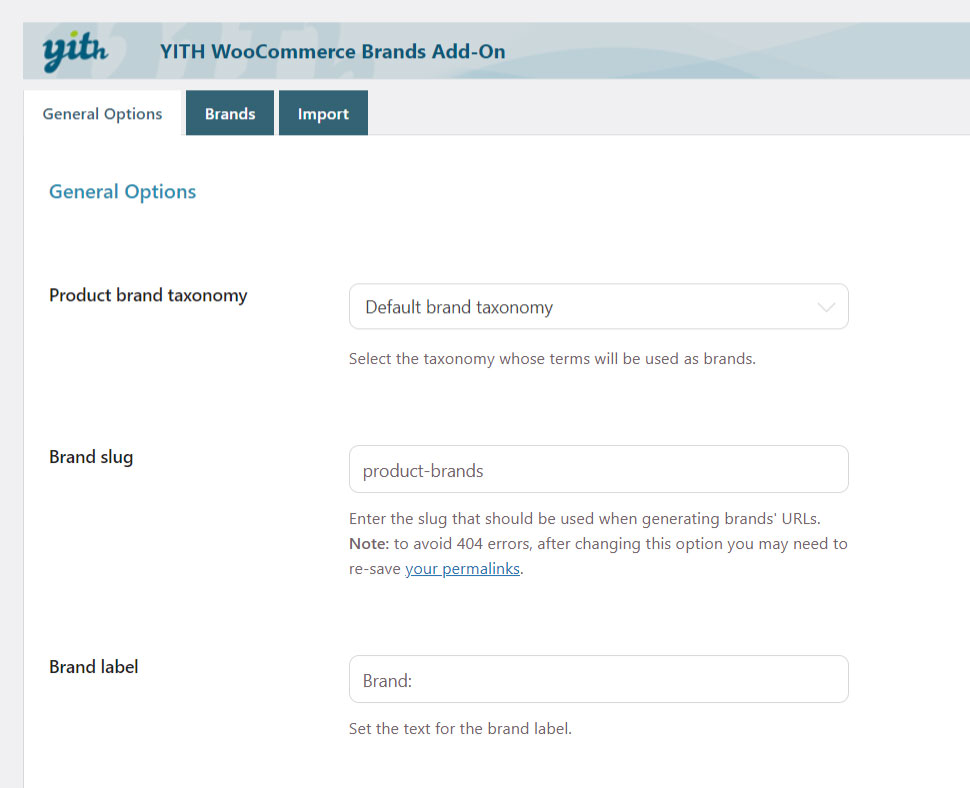
Product brand taxonomy: select here the taxonomy you want to use for your product brands. See the available options below:

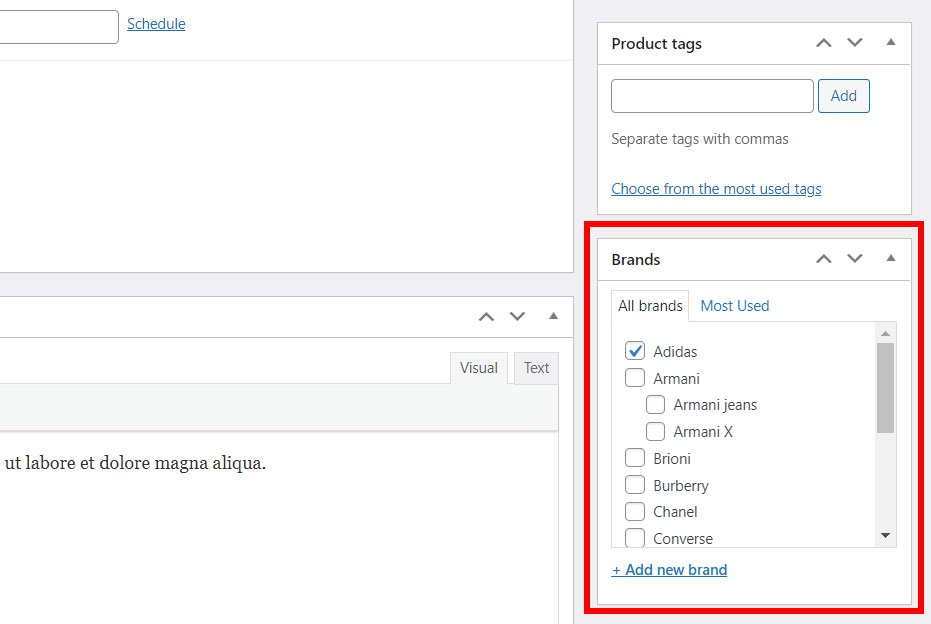
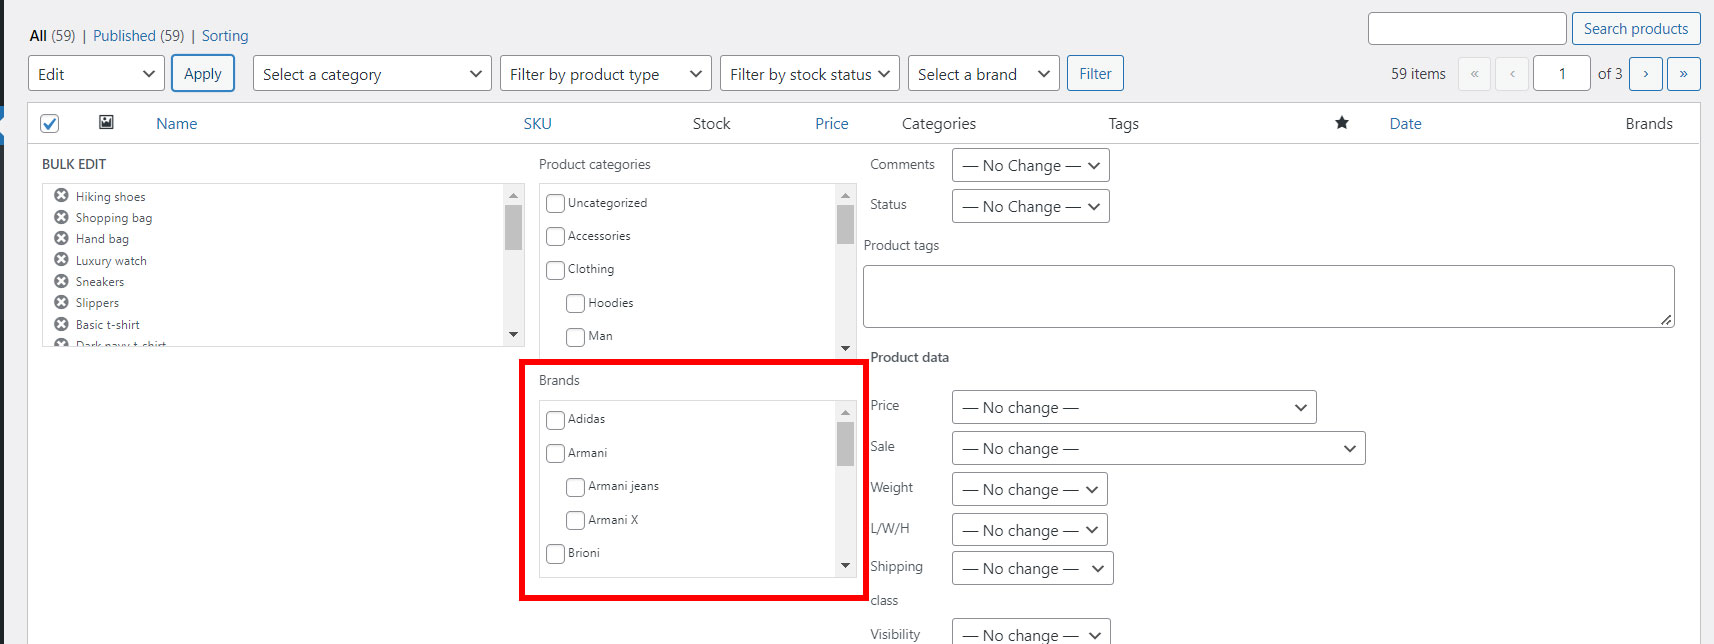
  • Default brand taxonomy: all entries in Product -> Brands will be treated as brands; For further details, scroll the page to the Brand creation entry.
  • Product categories: all product categories will be treated as brands and for this reason, for each of them, you can set an image to show in detail page and the redirect link for users who click on the category name.
  • Product tags: all tags created for products in your shop will be treated as brands. Therefore, what has been said for categories goes also for tags.
  • Attributes: among the available options you will be able to find also all the product attributes created in the shop, for example product color, product materials and product size in the screenshot below. You can handle just one attribute at a time if they are treated as brands.
    Brand taxonomies

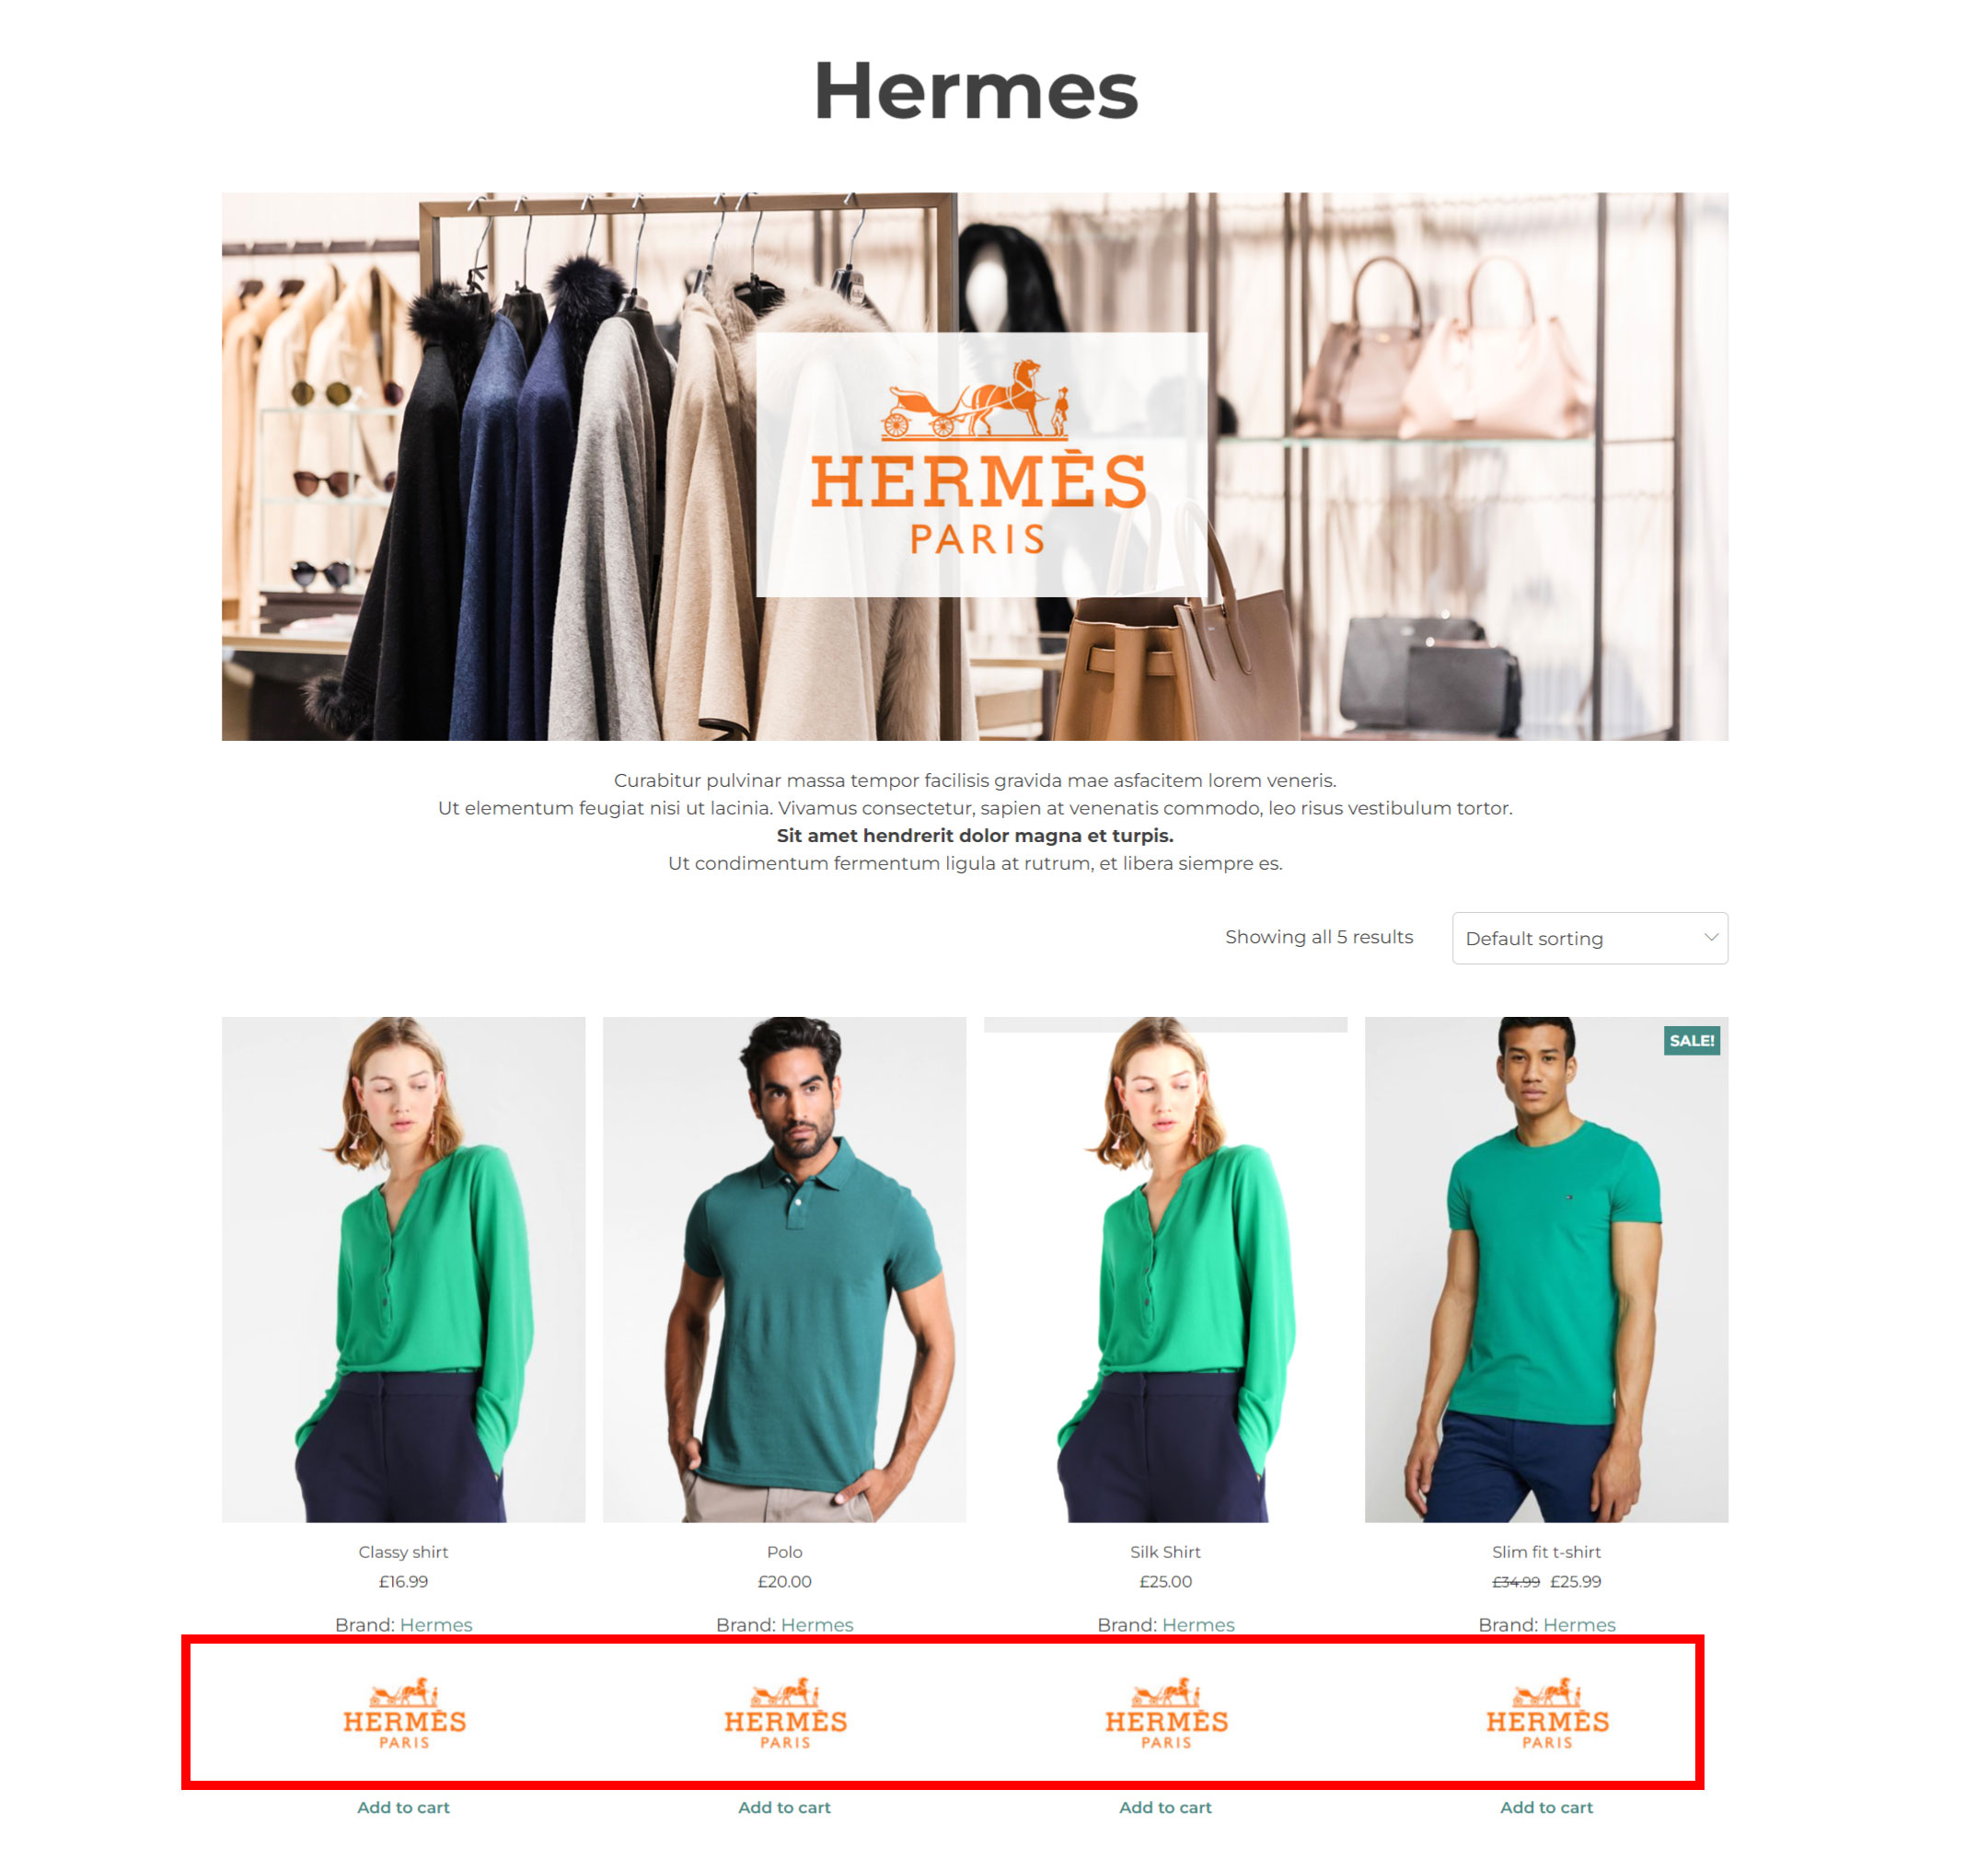
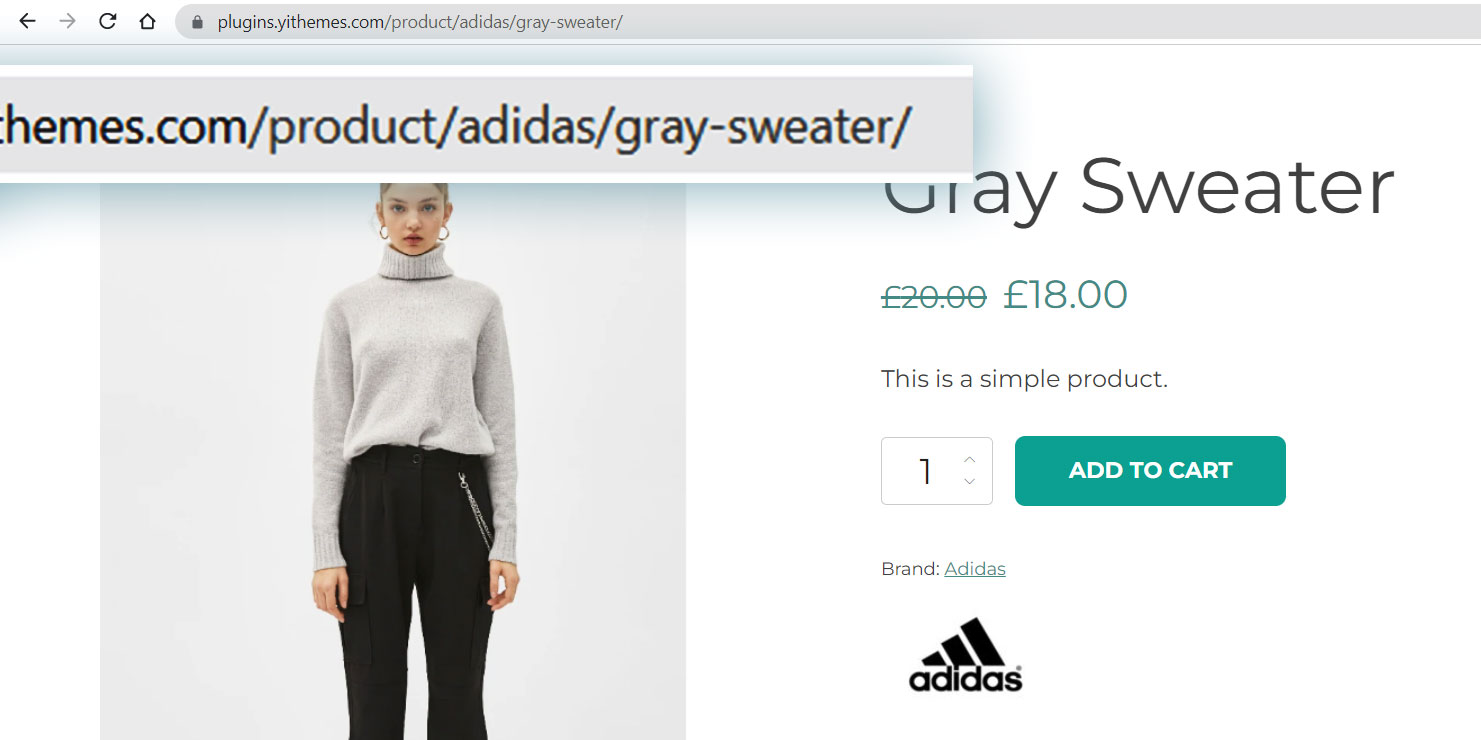
Brand label: you can customize the “Brand” name as it is displayed in the product archive pages and on the single product page.


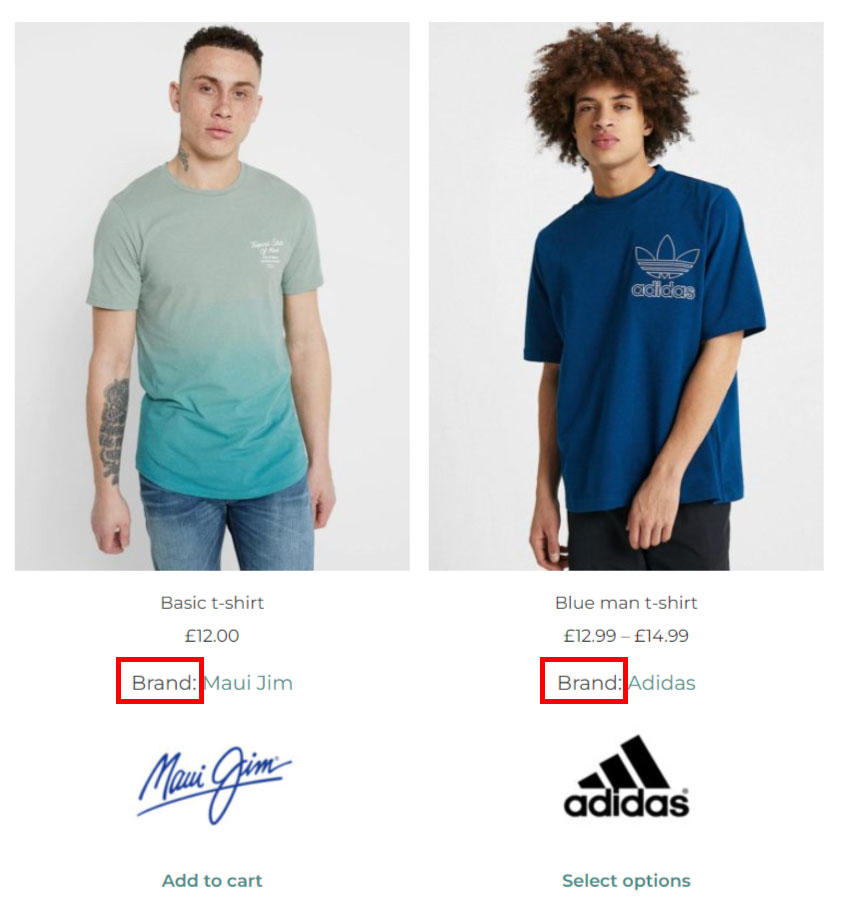
Show brand on the product detail page: enable to show the brand on the product page and to configure all the related options

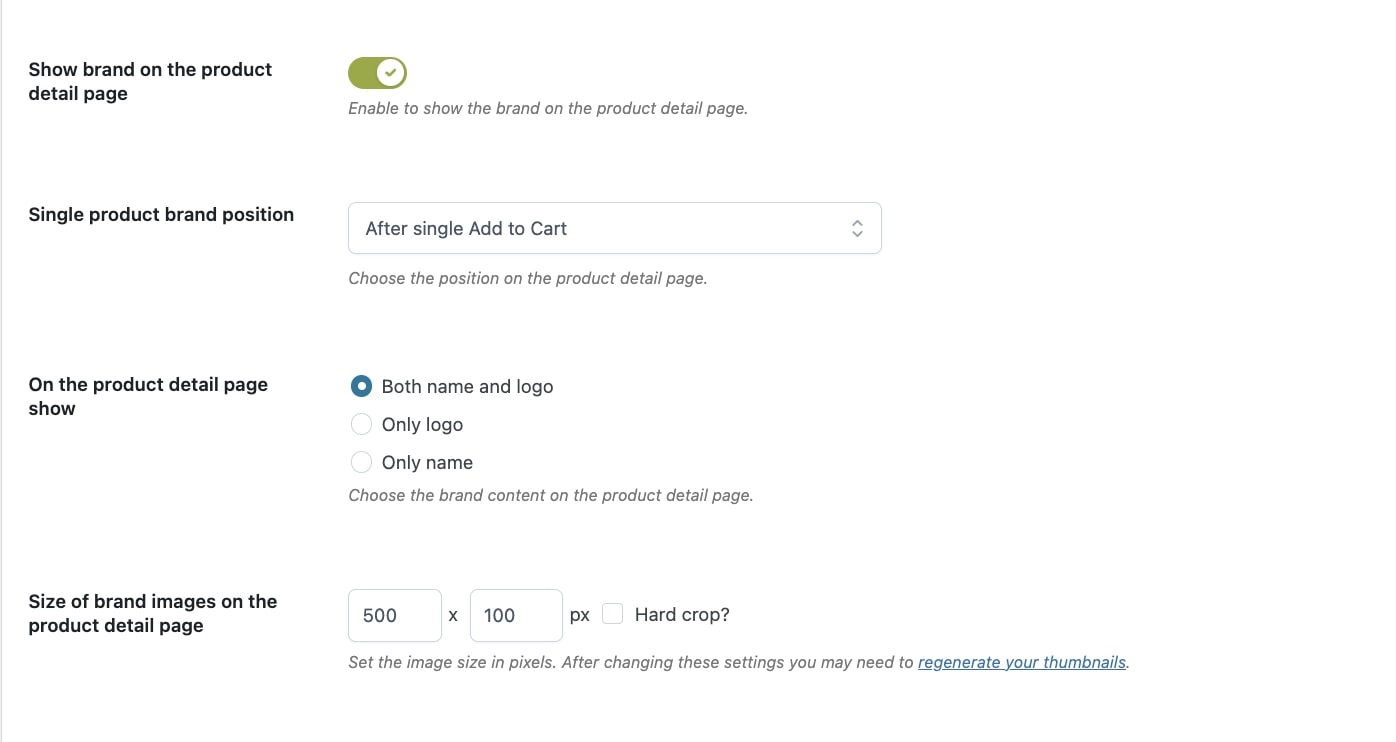
Single product brand position: you can choose where showing brands in the product detail page:

  • Hide on single product page
  • Before product title
  • After product title
  • After product price
  • After product exerpt
  • After “Add to Cart” button
  • After product meta
  • After product share

On the product detail page show:

  • Both name and logo
  • Only logo
  • Only name

Size of brand images on the product detail page: set the image size in pixels. After changing these settings, you may need to regenerate the thumbanails.


Show brand on the Shop page: enable to show the brand on the Shop page and configure all the related options.

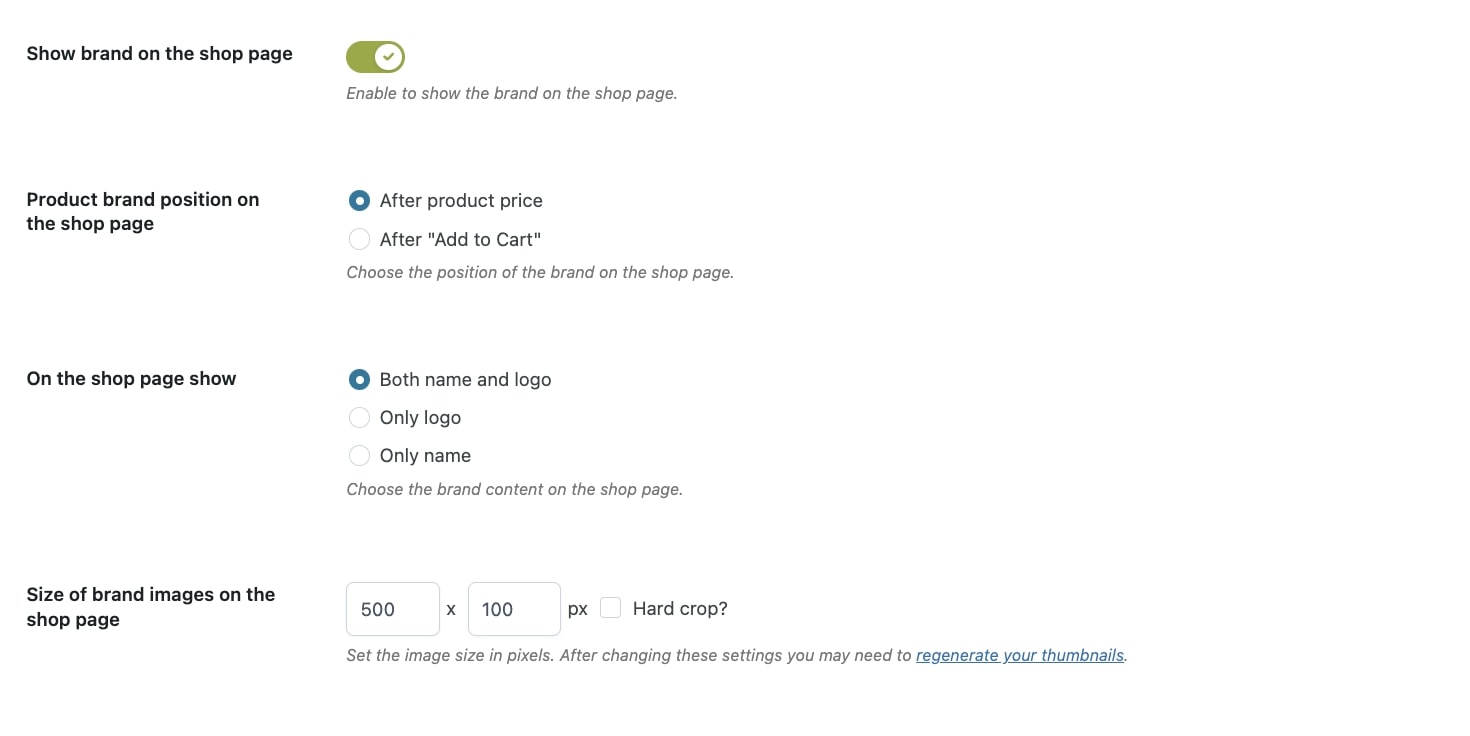
Product brand position on the Shop page:

  • after product price
  • after “Add to Cart” button

On the shop page show:

  • both name and logo
  • only logo
  • only name

Size of brand images on the product detail page: set the image size in pixels. After changing these settings, you may need to regenerate the thumbanails.


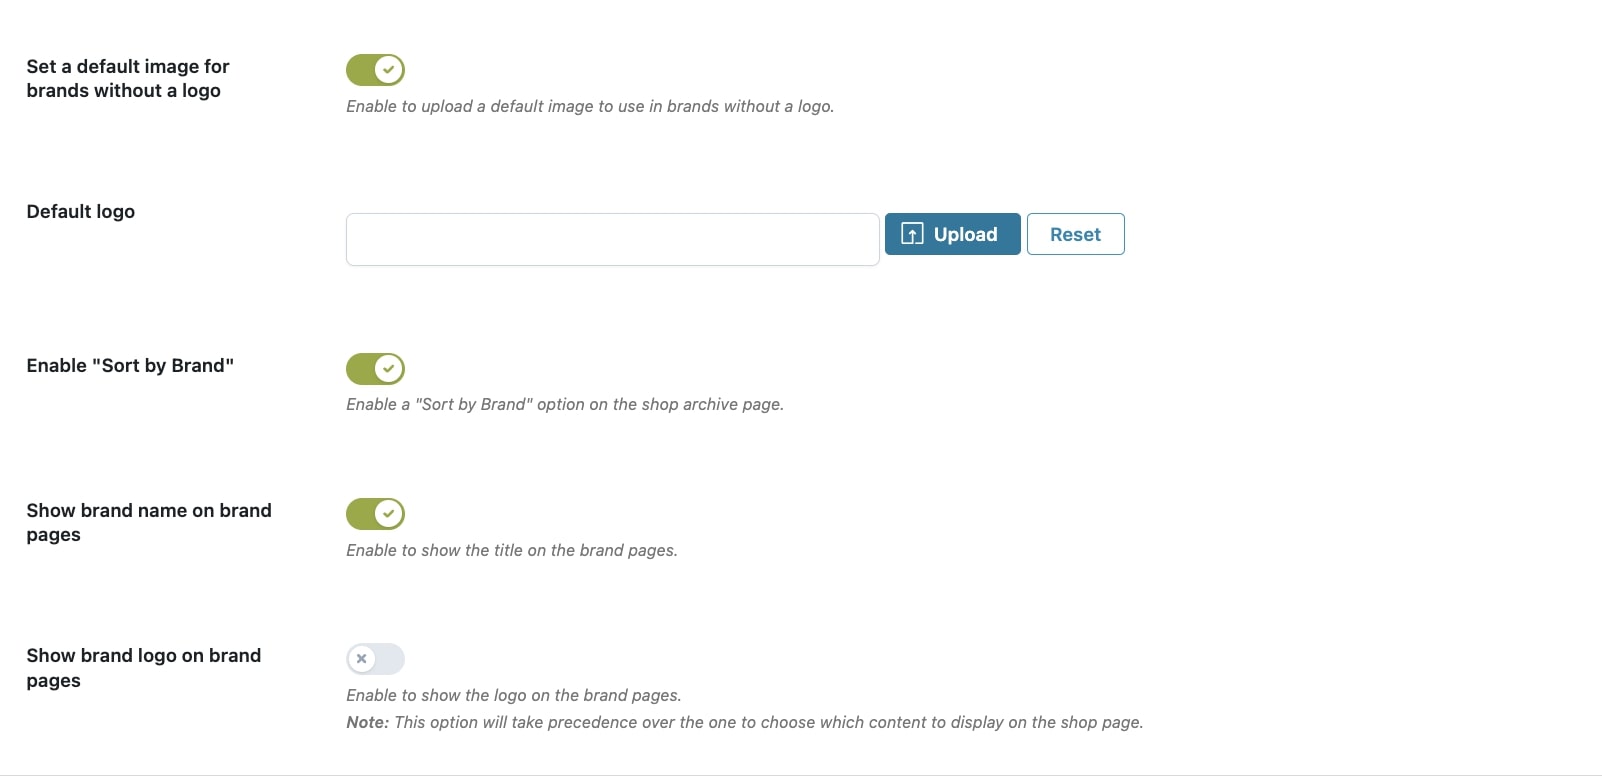
Set a default image for brands without a logo: enable to upload a default image to us in brands without a logo.

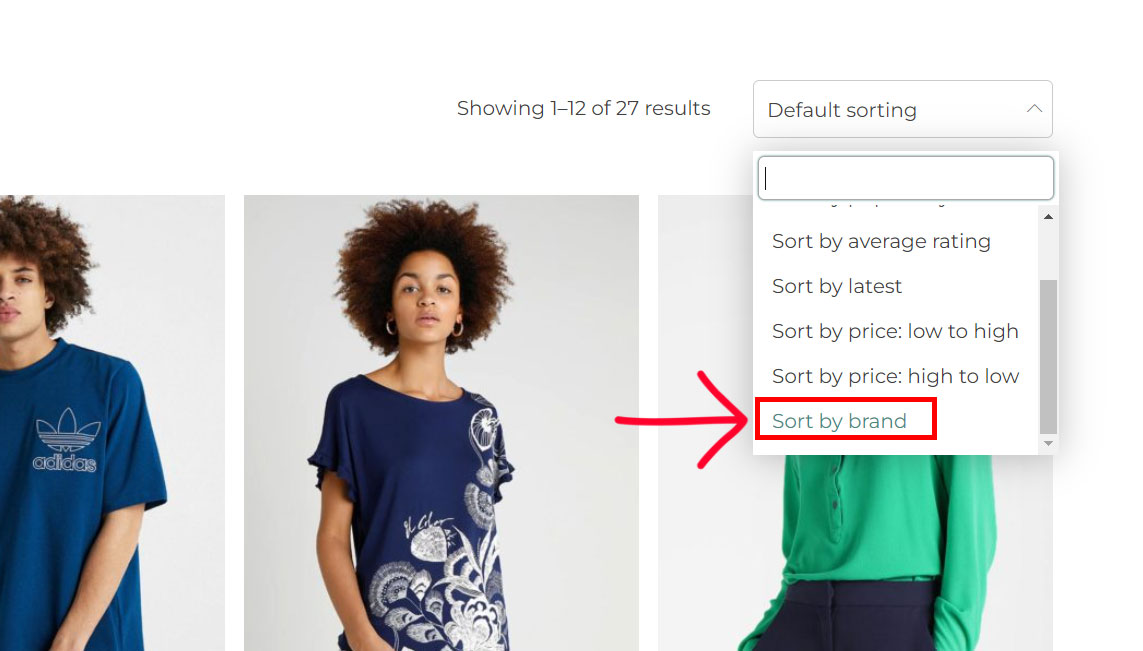
Enable “Sort by brand”: enable the “Sort by brand” option on the Shop page.

Sort by brand filter on shop page

Show brand name on brand pages: enable to show the brand name as the title of the brand page.

Brand name on brand page

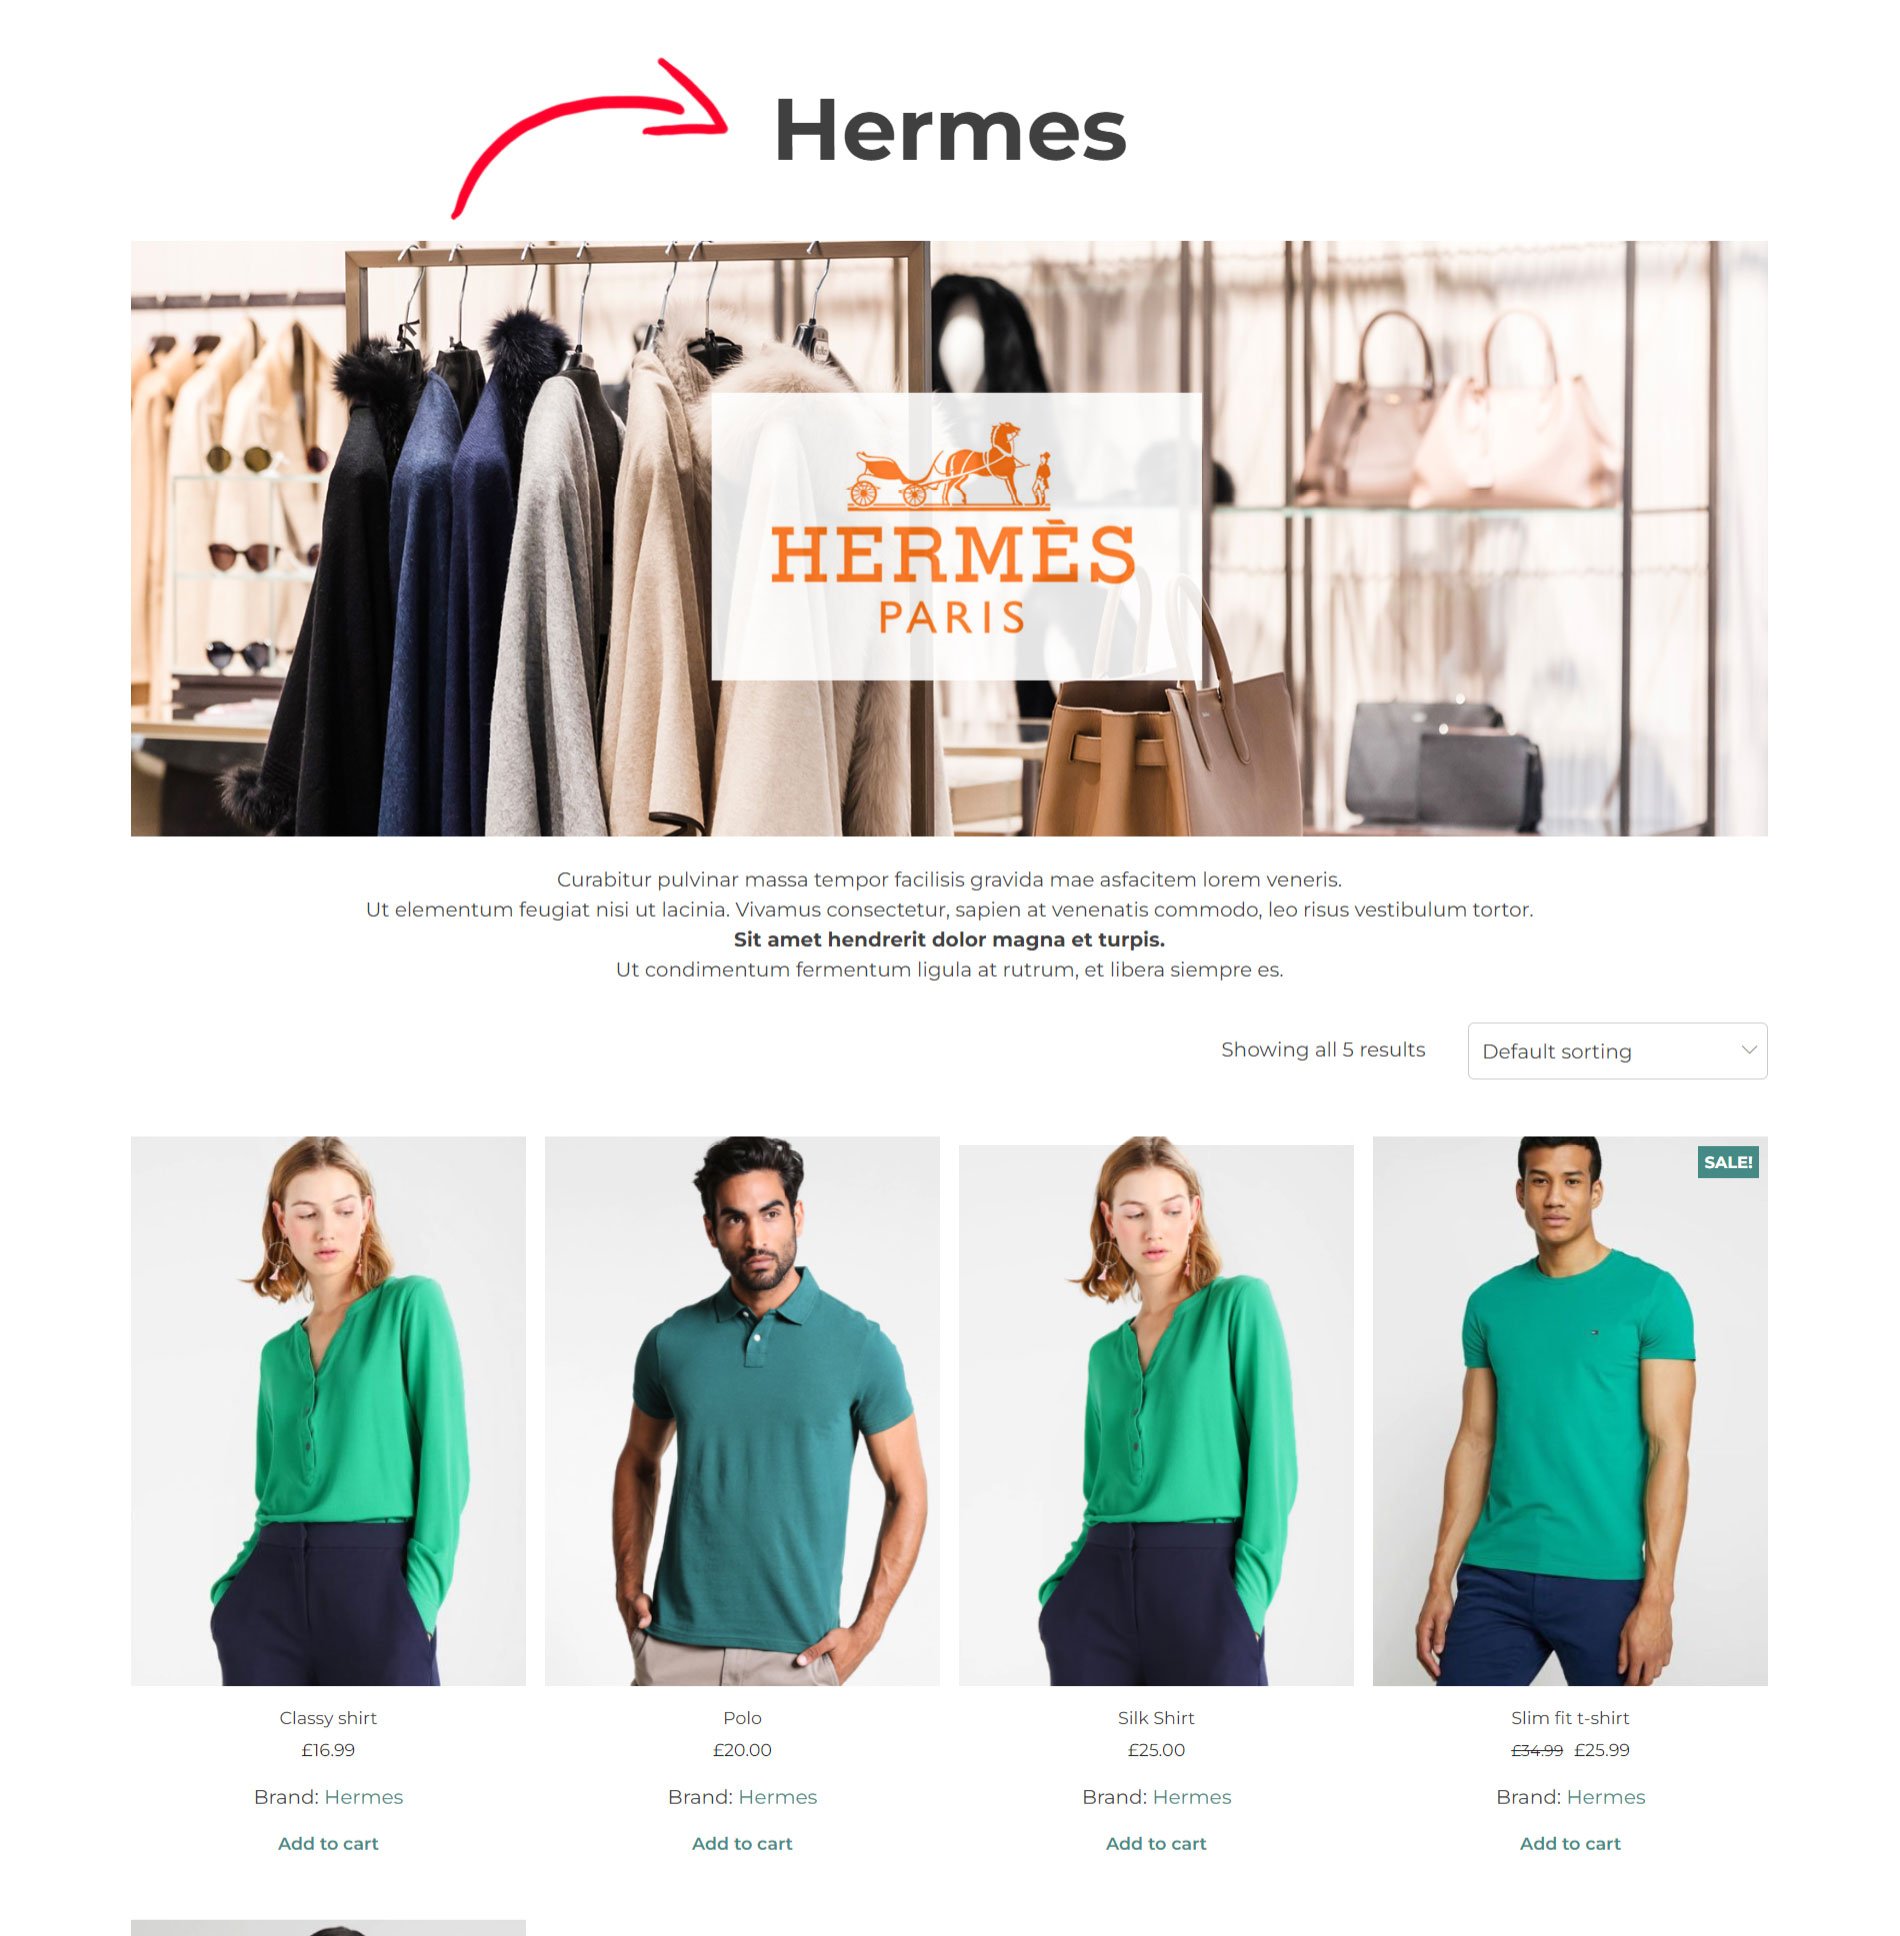
Show brand logo on brand pages: enable to show the logo on the brand pages.
Note: this option will take precedence over what you set in the options “On the shop page show” and “On the product page show”.

Brand logo on brand page

Brands tab

From the Brands tab, you will be able to see all your brands, create new ones and edit the current ones.

Brands tab

On the left side you will be able to create a new brand and add the following details:

  • Name
  • Slug
  • Parent brand
  • Description
  • Thumbnail or logo
  • Banner: this is the banner image that appears on the brand page
  • Custom URL: here you can add a custom URL for this brand, by default it takes to the brand page

On the right side, instead, you will be able to see the list of all brands and for each of them you can view the brand detail page, edit the brand, delete the brand from the brand actions.

Brand actions

Bulk delete brands and CSV Export

From this page, you can also select either all or specific brands and either delete or export them into a CSV file.

Bulk delete and export

Please, see the Import page to see how to import brands from a CSV file.

CSV import

From the Import tab, you will be able to import the brands from a CSV file.

Import tab

You can also edit the delimiter, which by defaul is the comma.

The CSV file will include the following columns:

  • id: ID of the brand (the format requires it although it is not used);
  • name: name of the brand;
  • slug: slug of the brand;
  • description: description of the brand;
  • parent: ID of the parent brand (it will be searched in the current installation and not in the CSV brands);
  • base_siste_url: the domain where search all attachments; you can leave it empty if you use absolute URLs for the attachments;
  • thumbnail: the image of the brands that has base_url domain;
  • banner: banner image for the brands that has base_url domain;
  • custom_url: custom URL to be stored within the brand and used instead of the default brand URL.

Wondering how to export the brands instead? Please, refer to the Bulk delete and CSV export section on this page.

How to assign brands to products

In the product edit page, you will be able to find a dedicated metabox to choose the brand, just below the Category and Tag metaboxes.

Brands metabox in product page

You can also select multiple products from the Products page and bulk assign one or more brands from the Bulk actions.

Bulk assign brands

To find out how to show your brands on the product and Shop page, please, make sure you enable the related options in the General options tab.

Brand detail page

The plugin automatically generates a new archive page for every brand, where you can display the brand logo, banner, description, and all the products in that brand.

For more details about how to configure these details, please, refer to the Brands tab.

Brand page

Brand restrictions in coupons

When you create a coupon code, you will also be able to set restrictions by product brand. You will see two dedicated fields in the Usage restrictions tab:

  • Product brands: you can select here the brands on which the coupon code will apply
  • Excluded brands: select here the brands on which the coupon code does NOT apply
Brand restrictions in coupons

Insert brand in product permalink

The product permalink basic structure can be edited to dynamically insert the brand name associated to the product in the URL.

Go to Settings > Permalinks, and in Product permalinks, select Custom Base and add %yith_product_brand% to include also the brand name in the permalink. For example, we’ve set it to:

/product/%yith_product_brand%/

Brands Filter

The Brands Filter is a block or shortcode that shows a complete list of all brands and gives you the possibility to filter them by name.

block
Brands filter

Below, you find the options of the block.

  • Title: you can enter a custom title before this block
  • Paginate items: choose whether to paginate the items or not
  • Items per page: if you paginate items, you can choose how many items per page to show
  • Show only brands of the current category: enable this option to dinamically show only the brands of the current category. This option is useful if you are displaying this block on a category page or on a filtered page.
  • Enter the list of category slugs (separated with a comma) to show. Leave empty to show all categories. This option overrides the previous option.
  • Enter the list of brand slugs (separated with a comma) to show. Leave empty to show all brands.
  • Enter the parent brand ID to show. All the sub-brands will be displayed. Leave empty to show all brands.
  • Order by – choose here how to sort the displayed brands:
    • None
    • Name
    • Slug
    • Term ID
    • Description
  • Order – if any order option has been selected, choose whether to sort them:
    • Ascending
    • Descending
  • Show filters: choose whether to show or not letter filters just below the title.
  • Show reset button: this will display a reset button, to quicky reset the filter.
  • Show all filters or just filters with content (that include at least one brand).
  • Show items count for each brand: this allows you to show a counter with the total number of products in each brand.
  • Hide brands with no products: choose whether or not to hide brands that do not include any product.
  • Shortcode style:
    • Default
    • Big header
    • Small header
    • Shadow
    • Boxed
    • Highlight
  • Highlight color selector (available only for the Hightlight style and if the Show items count is enabled): this is the accent color of the counter items.
Brands with filters with content only
Shortcode

The same options are available in the shortcode as attributes. Below you find all the attributes and their accepted values.

  • ‘title’: shortcode title
  • ‘pagination’: [yes / no] enable/disable brand pagination
  • ‘per_page’: [int] brands shown at a time per page
  • ‘autosense_category’: [yes / no]  if set to ‘yes’ it only shows the brands of the current category.
  • ‘category’: [ids / all] it shows one or more product categories; you can specify more than one category slug and separate them using commas (10,20,12) or select them all by specifying the value ‘all’ for the attribute.
  • ‘show_filter’: [yes / no] it allows brand filter
  • ‘show_reset’: [yes / no] it allows filter reset
  • ‘show_all_letters’: [yes / no] it shows all letters to filter brands by name
  • ‘show_count’: [yes / no] show the amount of products associated to each brand
  • ‘hide_empty’: [yes / no] it hides brands that have no products associated
  • ‘style’: [default / big-header / small-header / shadow / boxed / highlight] style to assign to the shortcode
  • ‘highlight_color’: code for the colour to assign to the text in the shortcode (available only if ‘highlited’ style is selected)

Example

[yith_wcbr_brand_filter title="Brand Filter (default style)" pagination="no" show_filter="yes" show_reset="yes" show_all_letters="yes" show_count="yes" hide_empty="yes" style="default" highlight_color="#ffd900"]

Brand Thumbnails

The Brand Thumbnail is a block or shortcode that shows a list of all brands with a logo for each of them.

block

Following you find the options of the block.

  • Title: you can enter a custom title before this block
  • Paginate items: choose whether to paginate the items or not
  • Items per page: if you paginate items, you can choose how many items per page to show
  • Show only brands of the current category: enable this option to dinamically show only the brands of the current category. This option is useful if you are displaying this block on a category page or on a filtered page.
  • Enter the list of category slugs (separated with a comma) to show. Leave empty to show all categories. This option overrides the previous option.
  • Enter the list of brand slugs (separated with a comma) to show. Leave empty to show all brands.
  • Enter the parent brand ID to show. All the sub-brands will be displayed. Leave empty to show all brands.
  • Order by – choose here how to sort the displayed brands:
    • None
    • Name
    • Slug
    • Term ID
    • Description
  • Order – if any order option has been selected, choose whether to sort them:
    • Ascending
    • Descending
  • Hide brands with no products: choose whether or not to hide brands that do not include any product.
  • Hide brands with no image: choose whether to show or hide brands without a logo image.
  • Show brand name: choose whether to show or hide the brand name, so only the logo will show.
  • Show average rating for products of the brand: this will show a genearal rating calculated out of the reviews rating of all products of the same brand.
  • Columns: you can choose how many brands per row to show.
  • Shortcode style:
    • Default
    • Shadow
    • Boxed
    • Borderless
    • Top border
Brand thumbnails default style
Default style, with 4 columns
Shortcode

The same options are available in the shortcode as attributes. Below you find all the attributes and their accepted values.

  • ‘title’: shortcode title
  • ‘pagination’: [yes /no] enable/disable brand pagination
  • ‘autosense_category’: [yes / no] if set on ‘yes’, only brands associated to products available in the selected category will be shown in the category page.
  • ‘category’: [slug / all] show brands of one or more product categories; you can specify more category slugs and separate them with commas (shoes,jackets) or select them all by specifying the value ‘all’ in the attribute.
  • ‘per_page’: [int] number of brands to show at a time
  • ‘hide_empty’: [yes / no] it hides brands that have no products associated
  • ‘hide_no_image’: [yes / no] it hides brands that have no images associated
  • ‘cols’: [int] number of columns for displaying brands
  • ‘style’: [default / boxed / shadow / borderless / top-border] style for the shortcode

Example

[yith_wcbr_brand_thumbnail title="Brand Thumbnail (default style)" pagination="no" per_page="6" hide_empty="no" hide_no_image="no" cols="2" style="default"]

Brand Thumbnail Carousel

The Brand Thumbnail Carousel is a block or shortcode that shows a list of brands in a slider.

BLOCK

Following you find the options of the block.

  • Title: you can enter a custom title before this block
  • Paginate items: choose whether to paginate the items or not
  • Items per page: if you paginate items, you can choose how many items per page to show
  • Show only brands of the current category: enable this option to dinamically show only the brands of the current category. This option is useful if you are displaying this block on a category page or on a filtered page.
  • Enter the list of category slugs (separated with a comma) to show. Leave empty to show all categories. This option overrides the previous option.
  • Enter the list of brand slugs (separated with a comma) to show. Leave empty to show all brands.
  • Enter the parent brand ID to show. All the sub-brands will be displayed. Leave empty to show all brands.
  • Order by – choose here how to sort the displayed brands:
    • None
    • Name
    • Slug
    • Term ID
    • Description
  • Order – if any order option has been selected, choose whether to sort them:
    • Ascending
    • Descending
  • Hide brands with no products: choose whether or not to hide brands that do not include any product.
  • Hide brands with no image: choose whether to show or hide brands without a logo image.
  • Autoplay carousel on page load: this will automatically start the carousel when the page is loaded.
  • Loop carousel: if set to yes, the brands carousel will start again from the beginning once it displays the last brand. If set to no, it will simply stop after the last brand.
  • Slider direction: you can choose between horizontal and vertical.
  • Show slider dots: choose whether to show the slider navigation or not.
  • Carousel pagination style: choose between square or rounded dots.
  • Show prev/next buttons: show the arrows to let users move to the next or previous brand logo in the slider.
  • Prev/Next buttons style: square or rounded arrows.
  • Show brand name: choose whether to show or hide the brand name, so only the logo will show.
  • Show average rating for products of the brand: this will show a genearal rating calculated out of the reviews rating of all products of the same brand.
  • Columns: you can choose how many brands per row to show.
  • Shortcode style:
    • Default
    • Shadow
    • Boxed
    • Top border
    • Centered title
    • Square
    • Background
Brand thumbnail carousel with round dots and square arrows
Shortcode

The same options are available in the shortcode as attributes. Below you find all the attributes and their accepted values.

  • ‘title’: shortcode title
  • ‘autosense_category’: [yes / no] if set on ‘yes’ only products associated to current category will be shown in the category page.
  • ‘category’: [slug / all] show brands of one or more product categories; you can specify more category slugs and separate them with commas (shoes,jackets) or select them all by specifying the value ‘all’ in the attribute.
  • ‘hide_empty’: [yes / no] it hides brands that have no products associated
  • ‘hide_no_image’: [yes / no] it hides brands that have no images associated
  • ‘direction’: [horizontal / vertical] sliding direction for the slider
  • ‘cols’: [int] number of brands to show at a time
  • ‘loop’: [yes /no] enable/disable looping continuously
  • ‘pagination’: [yes /no] enable/disable brand pagination
  • ‘pagination_style’: [round /square] graphic style of the pagination
  • ‘prev_next’: [yes /no] show/hide navigation buttons: ‘prev’ and ‘next’
  • ‘prev_next_style’: [round / square] style for ‘prev’ and ‘next’ buttons
  • ‘show_name’: [yes / no] show/hide brand name
  • ‘show_rating’: [yes / no] show/hide rating for each brand
  • ‘style’: [default / top-border / shadow / centered-title / boxed / squared / background] shortcode graphic style

Example

[yith_wcbr_brand_thumbnail_carousel title="Brand Thumbnail Carousel (style 2)" hide_empty="no" hide_no_image="no" direction="horizontal" cols="4" pagination="yes" pagination_style="round" prev_next="yes" prev_next_style="square" show_name="no" show_rating="no" style="shadow"]