View Product Page

YITH WooCommerce Name Your Price

YITH WooCommerce Name Your Price is used when you want to offer users the chance to choose the amount they wish to pay for a selected product, allowing a minimum and a maximum amount.

Using the plugin in combination with the YITH WooCommerce Product Bundles, your customers can choose the amount they wish to pay for the product bundles available in your store.

After installing and activating both plugins, you must:

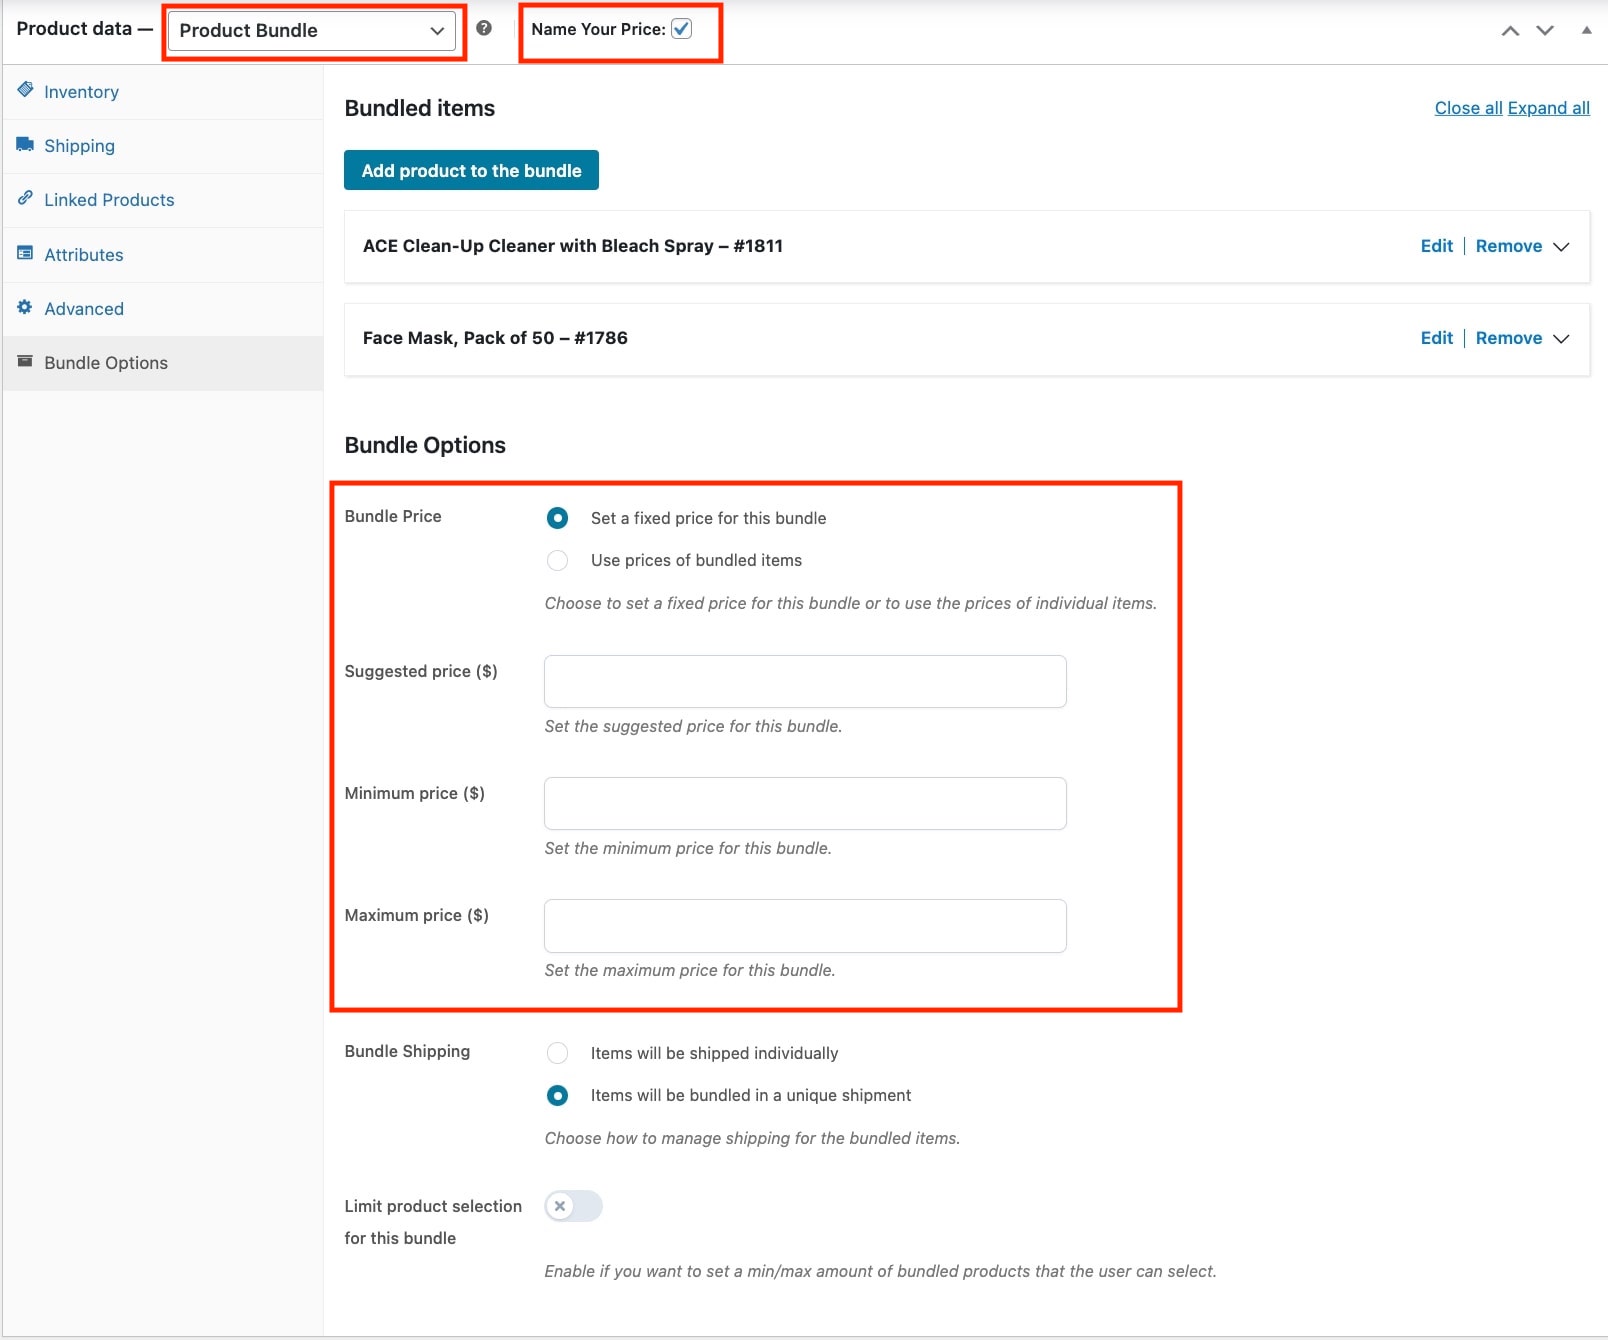
  • Create a bundle type product
  • Enable the “Name your price” checkbox
  • Set the “Bundle Price” option to “Set a fixed price for this bundle”

And then the related Name your price fields would be available.


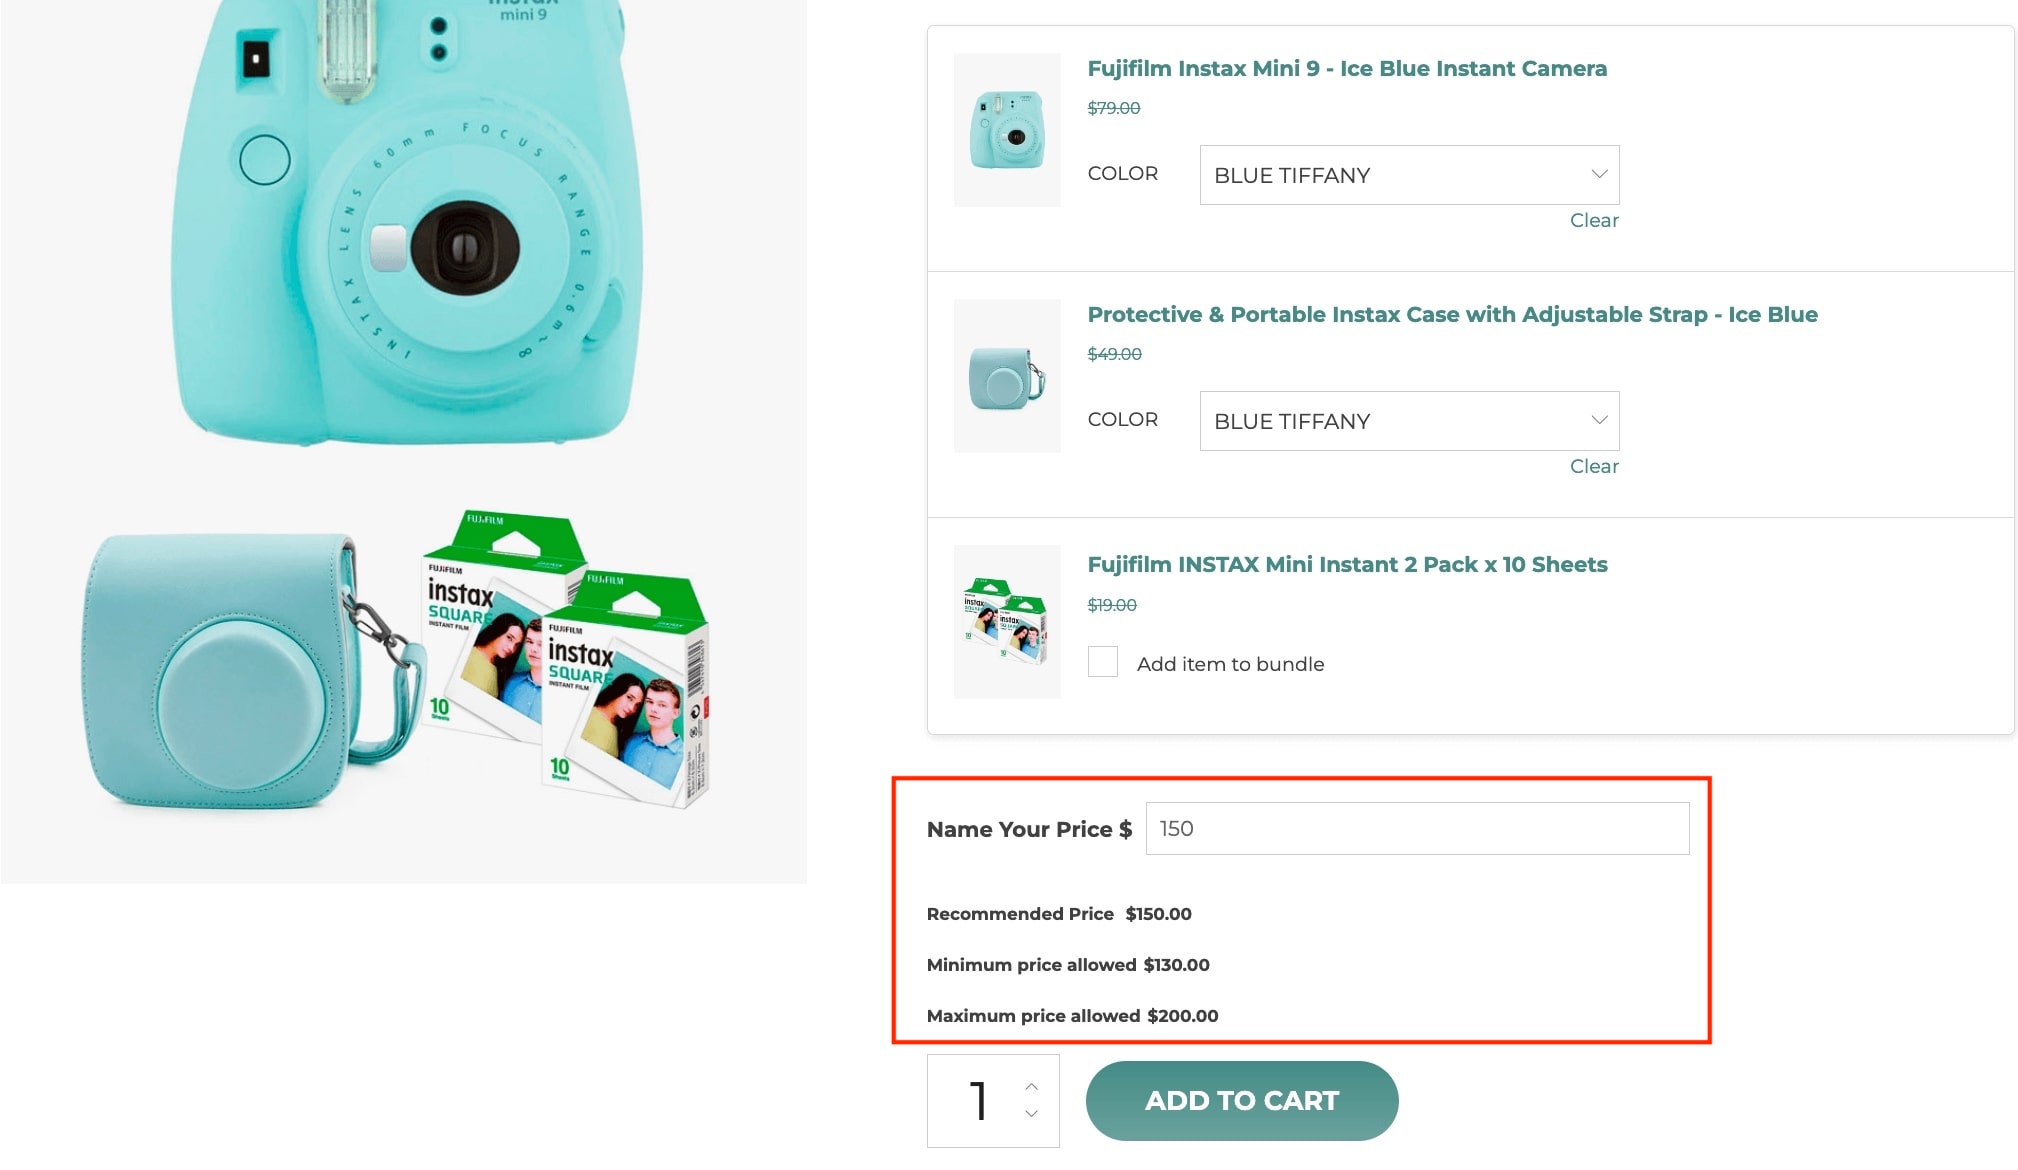
After inserting the values in the related fields, the plugin will show the recommended, minimum and maximum price on the product page.

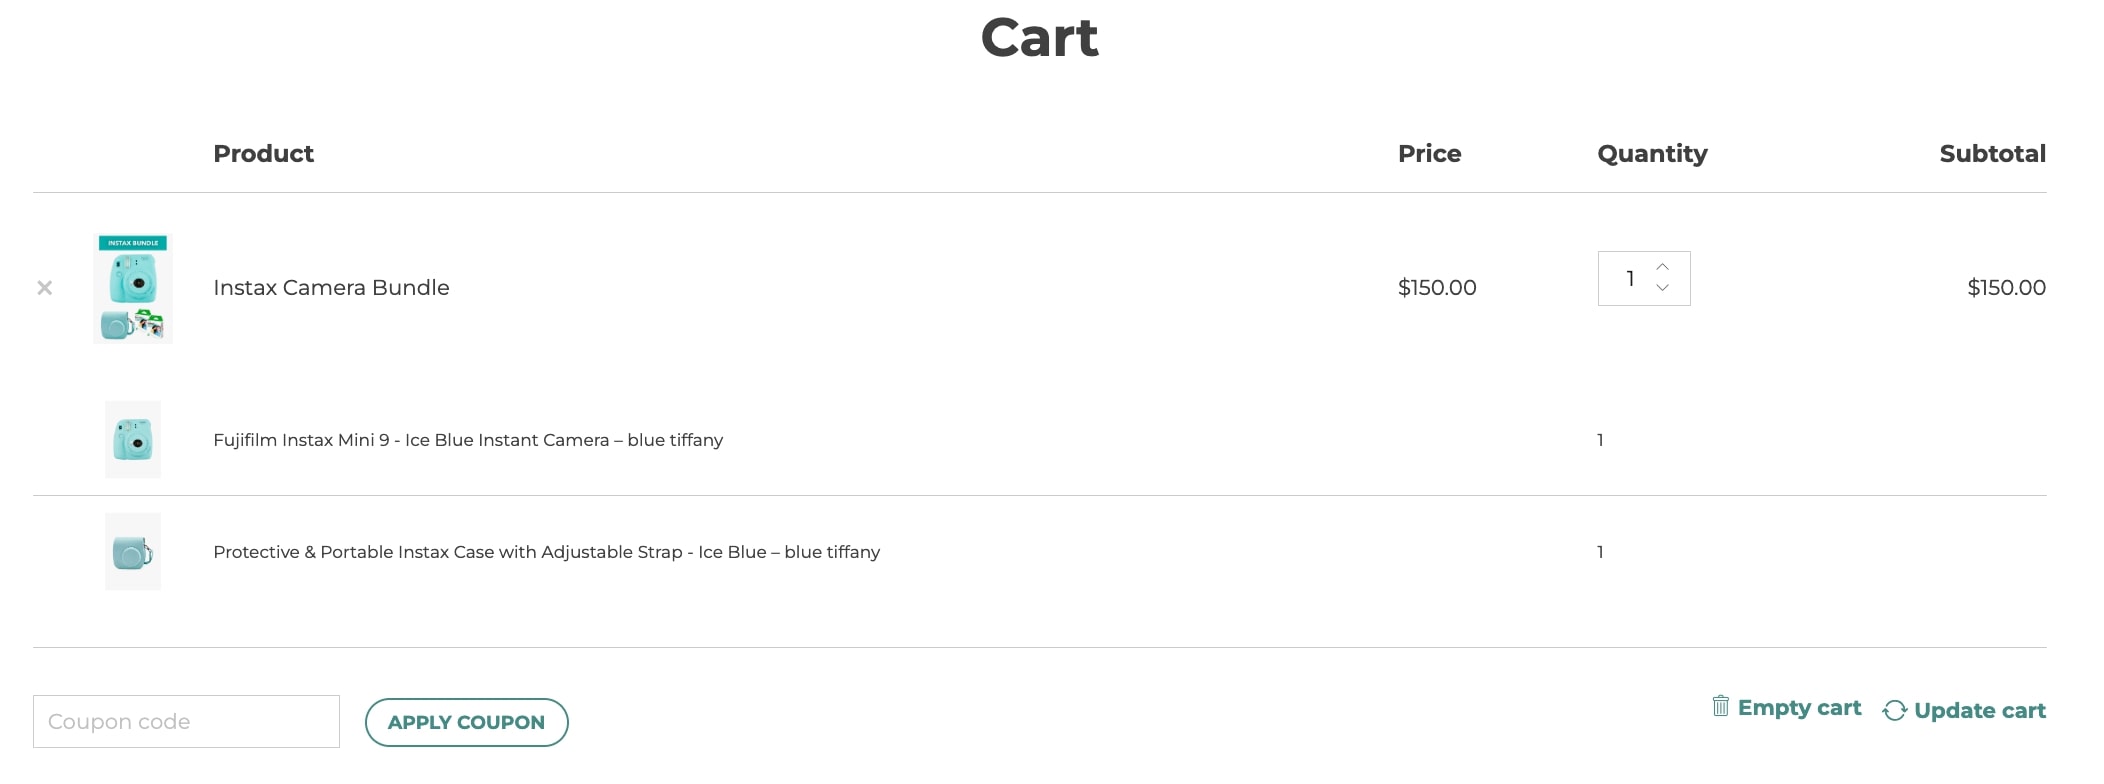
Cart page


For further details about YITH WooCommerce Name Your Price settings, please refer to the official documentation.

YITH WooCommerce PDF Invoice & Packing Slips

YITH WooCommerce PDF Invoice & Packing Slips allows you to automatically generate an invoice in PDF format for each registered order in your shop.

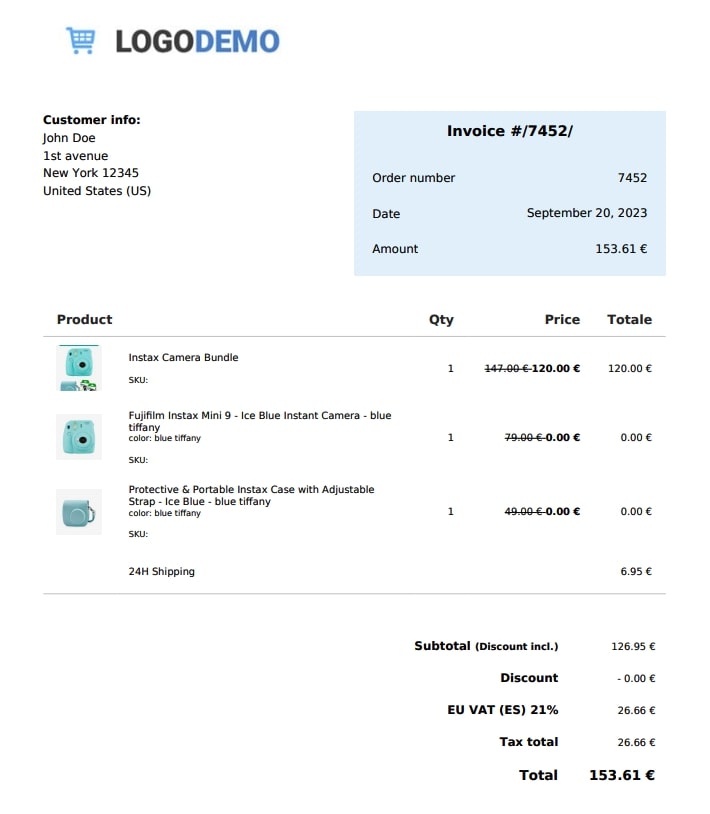
The integration between these two plugins will give you the ability to show the bundles in the invoice.

In order to make the plugins work together, you will only have to activate them both. For further detailed settings on the PDF invoice and shipping list, you can check the documentation here.

YITH WooCommerce Product Add-ons

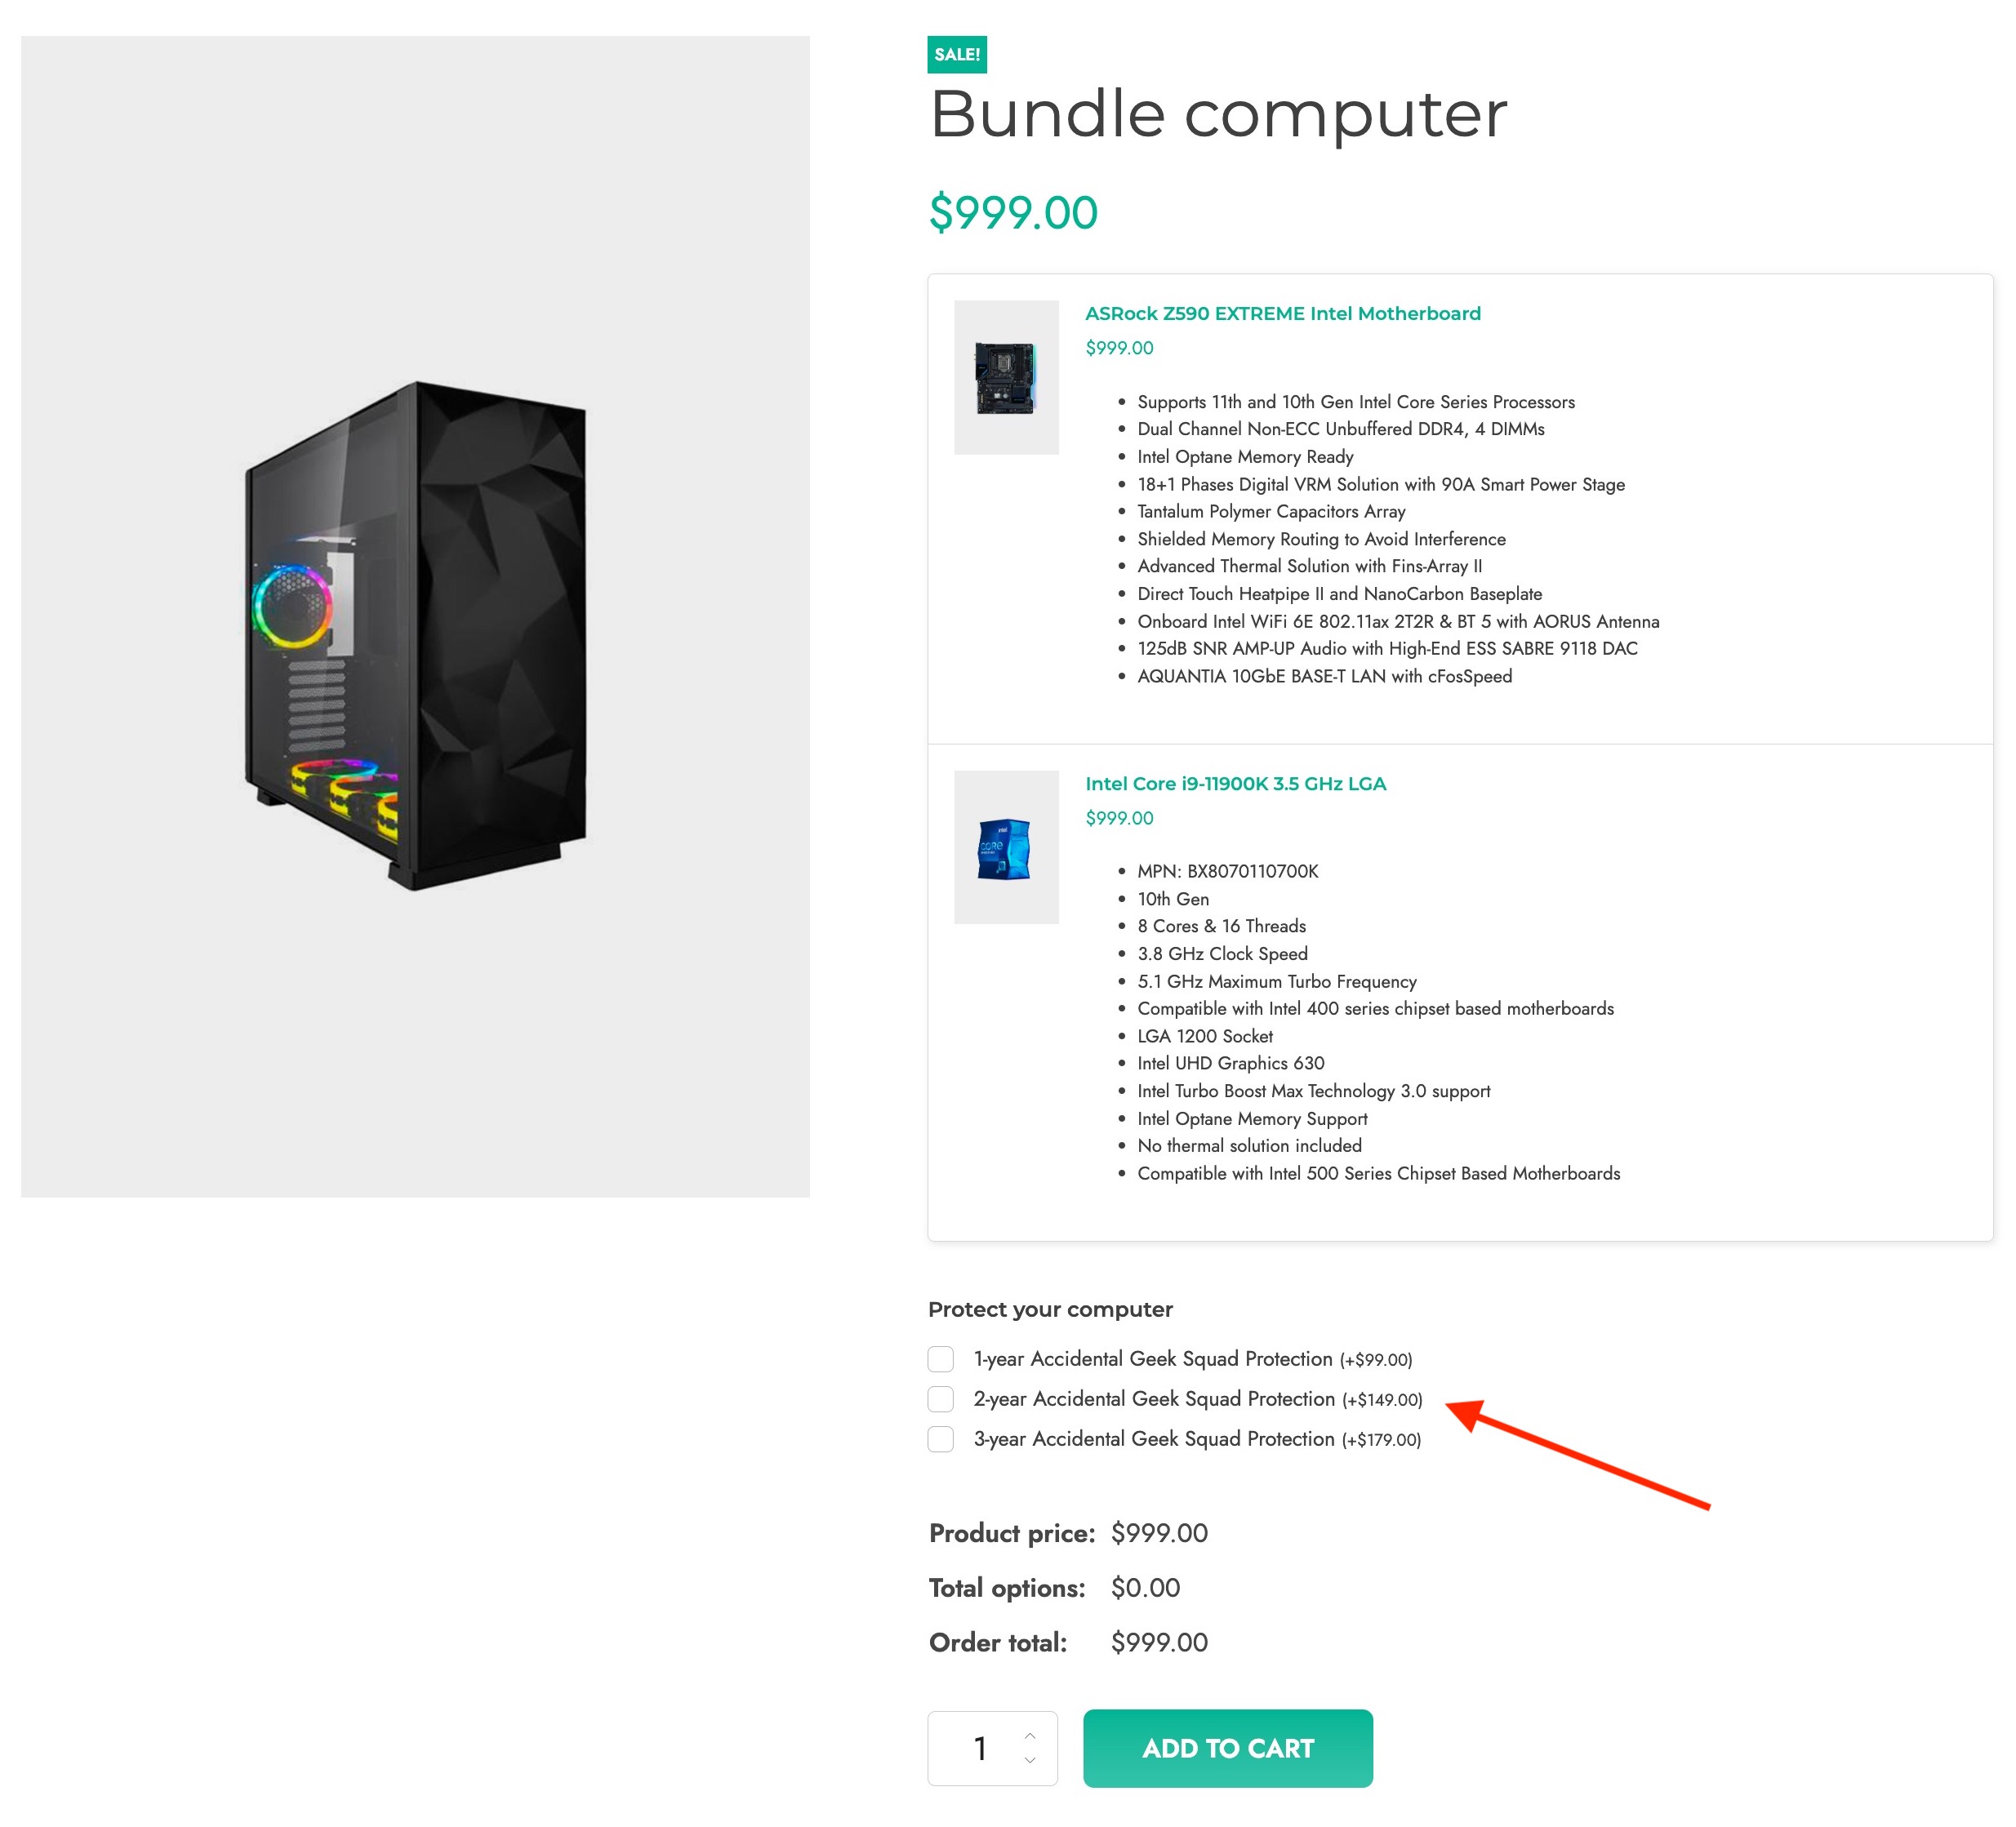
YITH WooCommerce Product Add-Ons allows you to configure additional options that can be added to product in your shop. For each action, it’s possible to choose a name, an image and a price, which will add up to the basic ones the product has.

You will only have to activate both plugins in order to make them work together. After that, you can configure the product options from YITH > Product Add-ons and assign them to your products — even bundle products.

Integration with YITH Product Add-ons

For more information on how to set up add-on options, check the complete documentation here.

YITH WooCommerce Quick View

YITH WooCommerce Quick View (premium) allows you to quickly display the most important information of the product in a lightbox without leaving the shop archive page.

This integration allows you to correctly display the bundles in the lightbox. You will also be able to open the links of each item of the bundle.

To enable this feature, go to YITH > Product Bundles > General Settings and enable the option called Open bundled items in quick view. Make sure you save the settings.

Integration between YITH Quick View and YITH Product Bundles

The quick view summary will show all the products in the bundle including an active link to each of them. This way, if your users want to check the details of only one of the bundled products, they will be able to open the related link in the quick view lightbox.

Bundle items in quick view

For further details about YITH Quick view settings, please refer to the official documentation.

YITH WooCommerce Role Based Prices

Using YITH WooCommerce Role Based Prices you can dynamically change the price of the products in your store, increasing or decreasing it based on the role the user has. Perfect for wholesale and retail shops, or simply to make dedicated prices to your users.

YITH WooCommerce Role Based Price can be perfectly integrated into YITH Product Bundles and set a different price also on bundle products. 

To start setting dedicated discounts on Bundles, you just have to install and activate both plugins (premium versions) from the menu Plugins.

Everything will go through automatically. Just make sure you set the correct discounts from Role Based settings and they will also apply to the bundle.

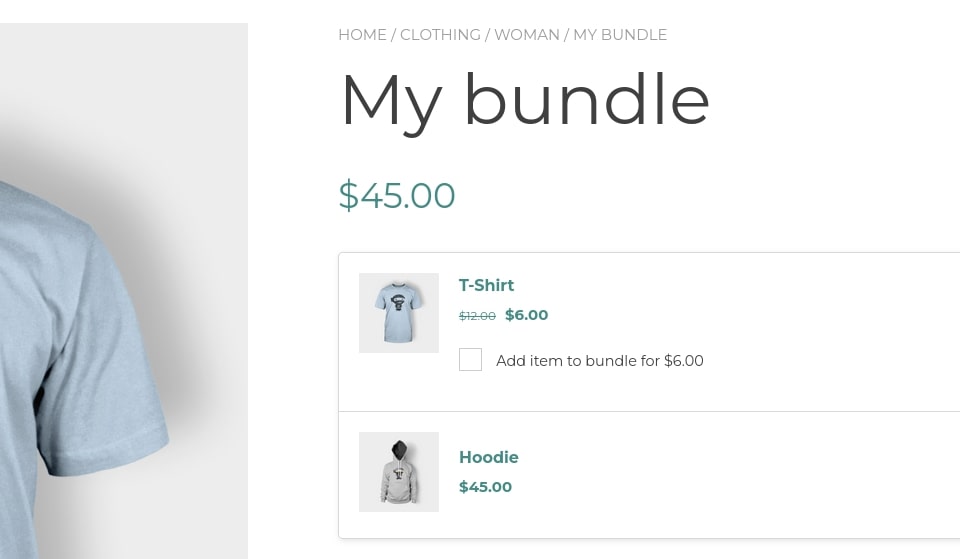
This is an example of how the discounts of YITH Role Based Prices and YITH Product Bundles plugin combine on a bundle product, where for the Polo bundled product:

  • $12 is the role based price and
  • $6 is the role-based price with the bundle discount.

Read more about YITH Role Based Prices in the official plugin documentation.

YITH WooCommerce Waitlist

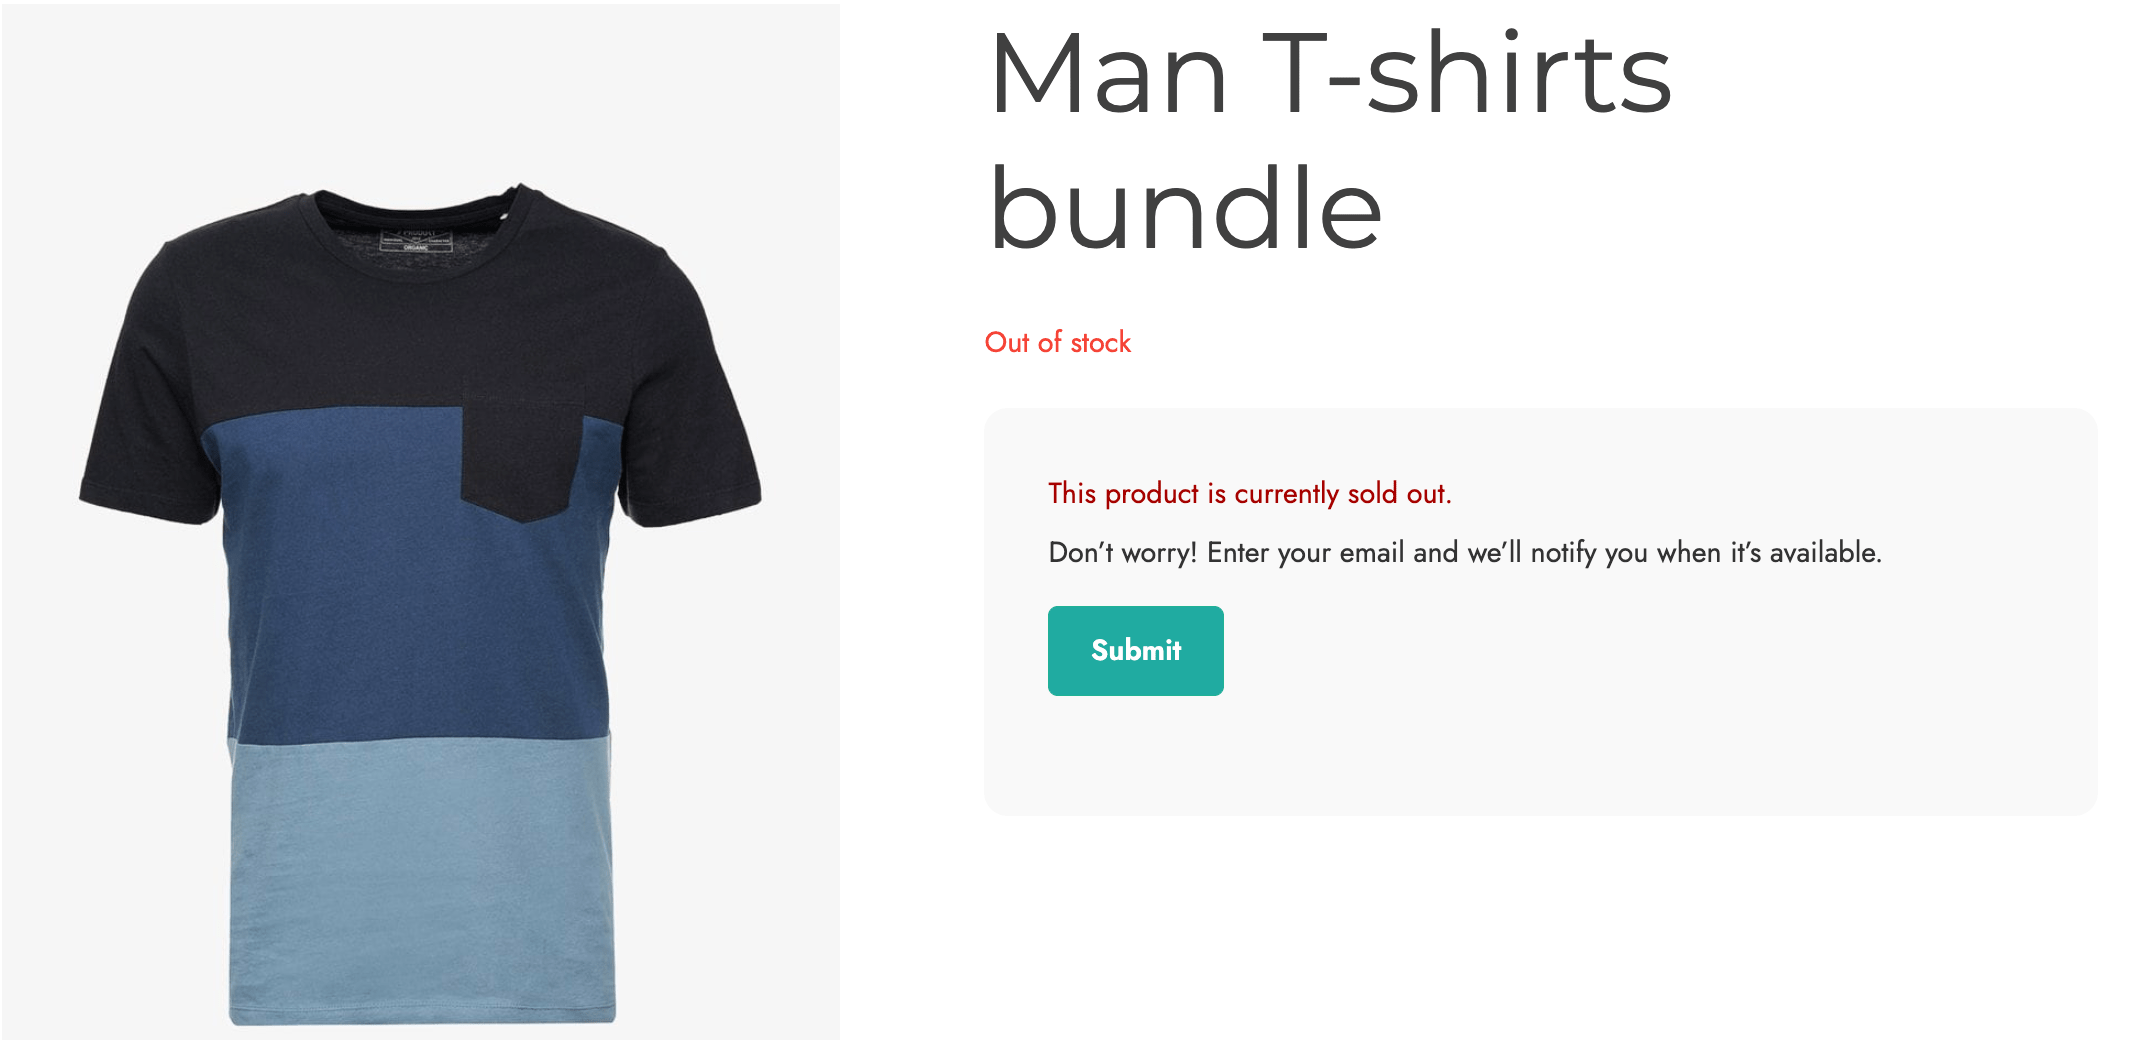
YITH WooCommerce Waitlist allows users to subscribe to a waitlist and be notified when the product is back available for purchase.

The integration between these two plugins allows your users to add also bundle products to their waitlist.

After installing and activating both plugins, you will be able to give your users the possibility to add out-of-stock bundle products to their waitlist.

Integration with YITH Product Bundles

For further details about the settings of YITH WooCommerce Waitlist, please refer to the official documentation.

WPML localization

IMPORTANT

When translating YITH Bundles with WPML, please, note that bundle products have to be created in the default site language, and only after that, they can be duplicated and translated in the additional languages.

Even though WPML allows creating default WooCommerce products in any language, this option is not available when creating a bundle product. If the product is created in any of the non-default languages, when you duplicate the product, it may cause serious issues to your site.

So, please, make sure you always create the bundle product in the default language: only by doing so, the bundle can be easily translated in all languages.

Big thanks to WPML team for sharing these helpful documentation with our customers

Getting started

To translate YITH WooCommerce Product Bundles with WPML, you need the WPML core plugin, as well as the WooCommerce Multilingual addon. To get both plugins, buy the WPML Multilingual CMS package.

If you’re new to WPML, check out its getting started guide to learn how it works before following this tutorial.

Translating YITH WooCommerce Product Bundles

To translate texts in the YITH WooCommerce Product Bundles with WPML, go to WPML → Translation Management and scroll down to the Other texts (Strings) section. There, search for any texts related to YITH WooCommerce Product Bundles that appear on your website and select them.
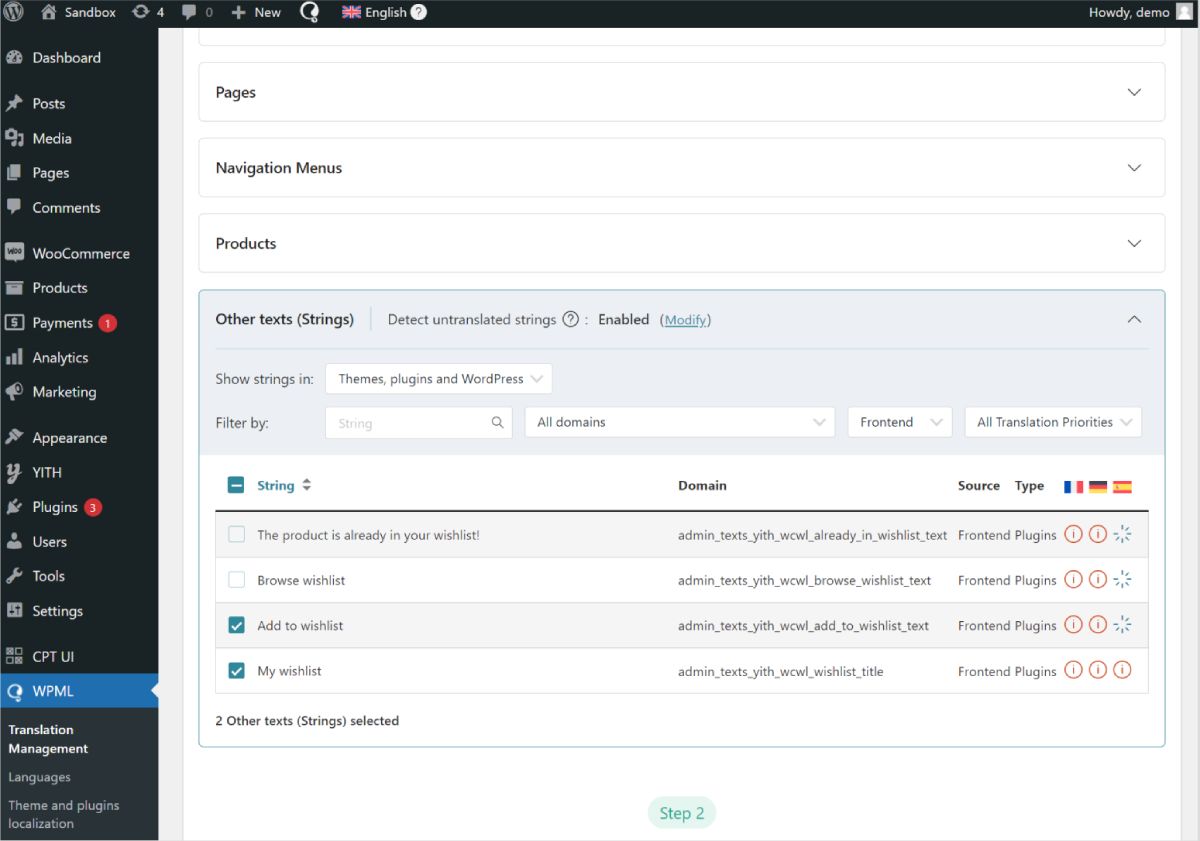
If you don’t see some of your texts, go to your website, navigate to the page with your missing texts, and switch languages. As you view the page, WPML will automatically detect the missing texts and populate them in the strings section.

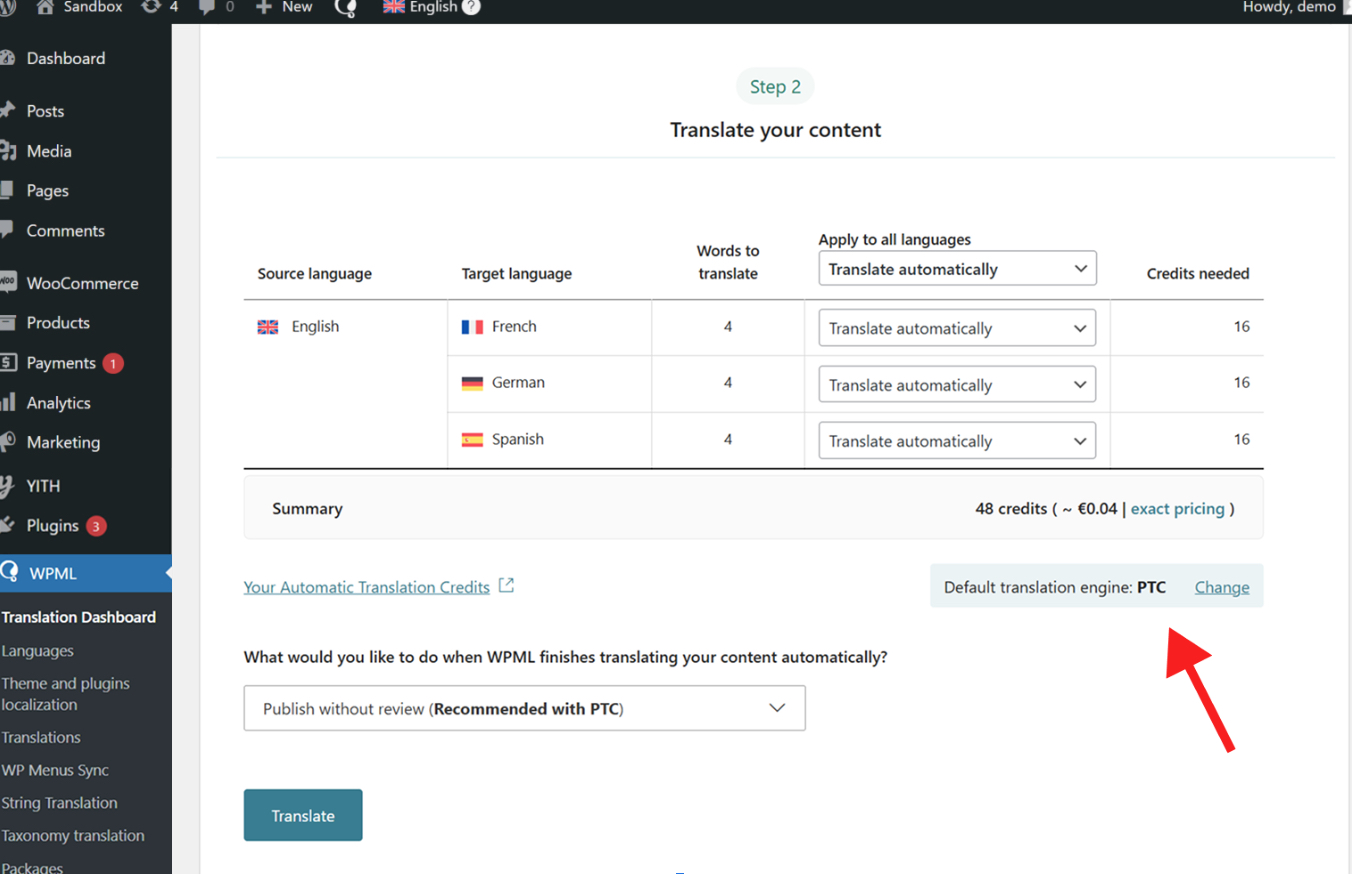
Once you select all your strings, the next step is to choose your translation method. With WPML, you can translate by yourself, automatically using machine translation or with professional translation services.

To get the best translations, while spending just a few minutes, we recommend using WPML AI, WPML's most advanced translation engine powered by ChatGPT.

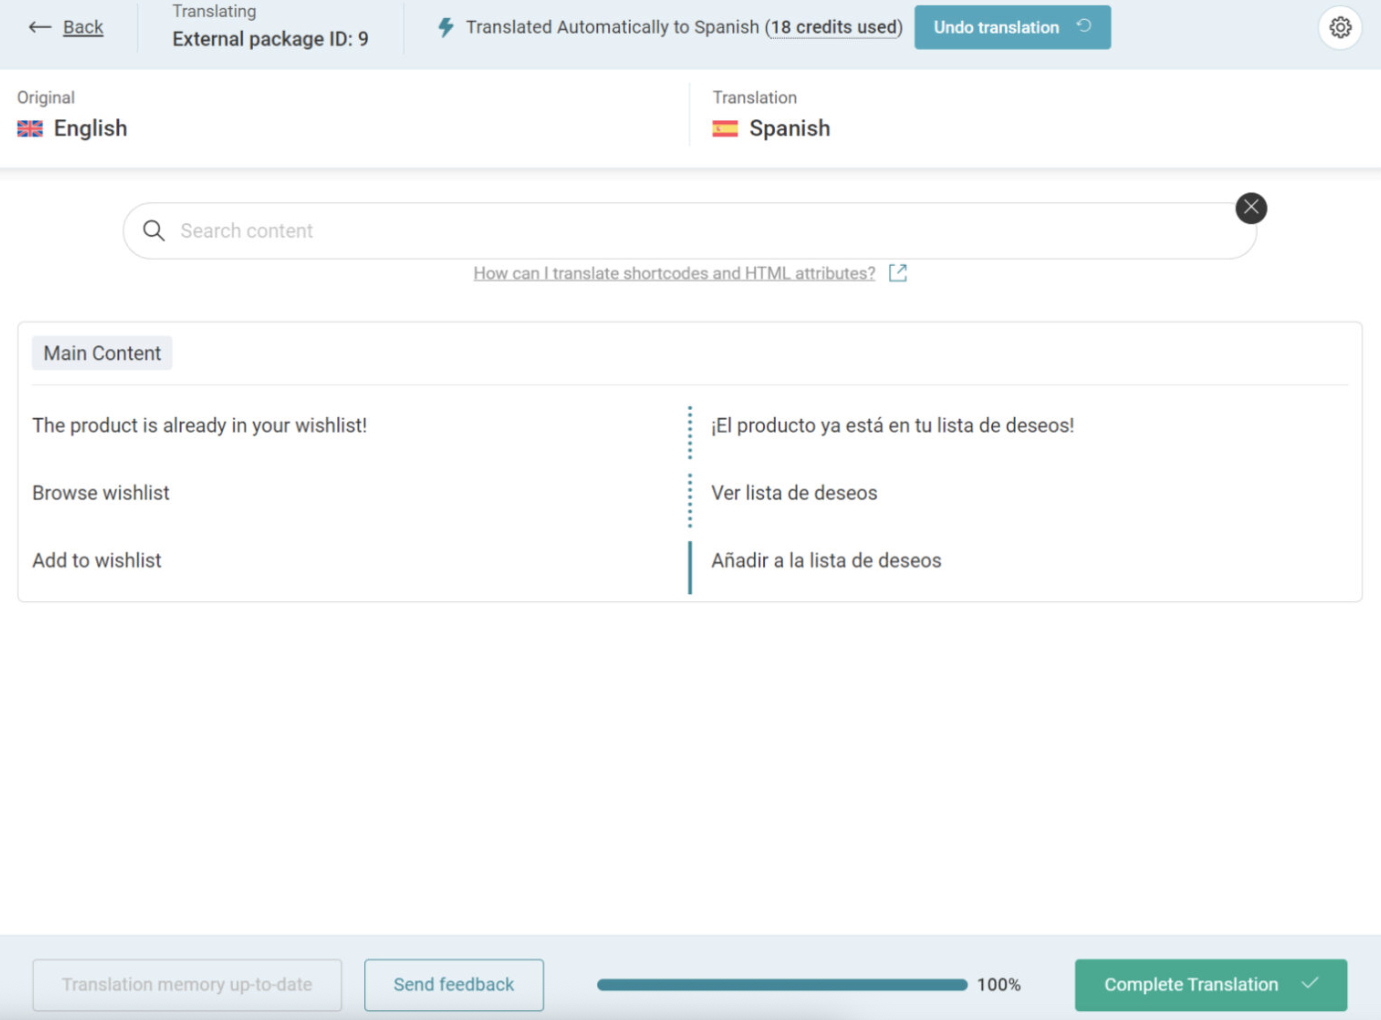
Once you send your content for translation, go to WPML → Translations to review your automatic translations, or manually translate them yourself.

Your translations will appear on your website once you click Complete Translation. To view them, go to the page you just translated and switch languages.