Once you have the plugin installed and activated, you can choose to enable the pre-order mode only in specific products so let’s see how to do that.
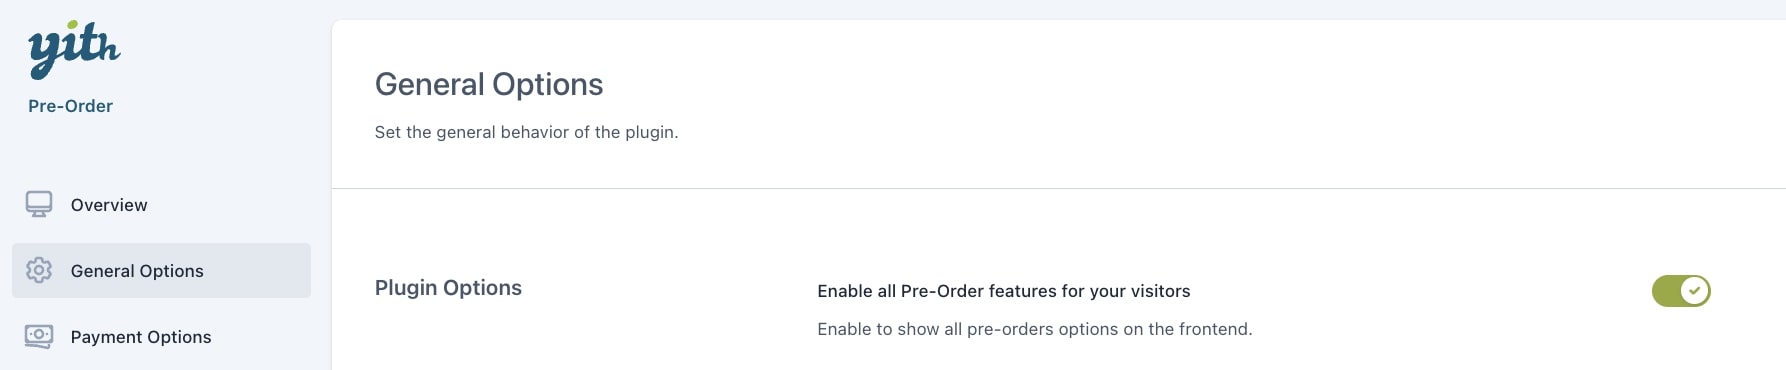
1. On your backend, head over to YITH > Pre-Order > General Options and enable the Pre-Order features:
2. Go to Products and select a product to edit.
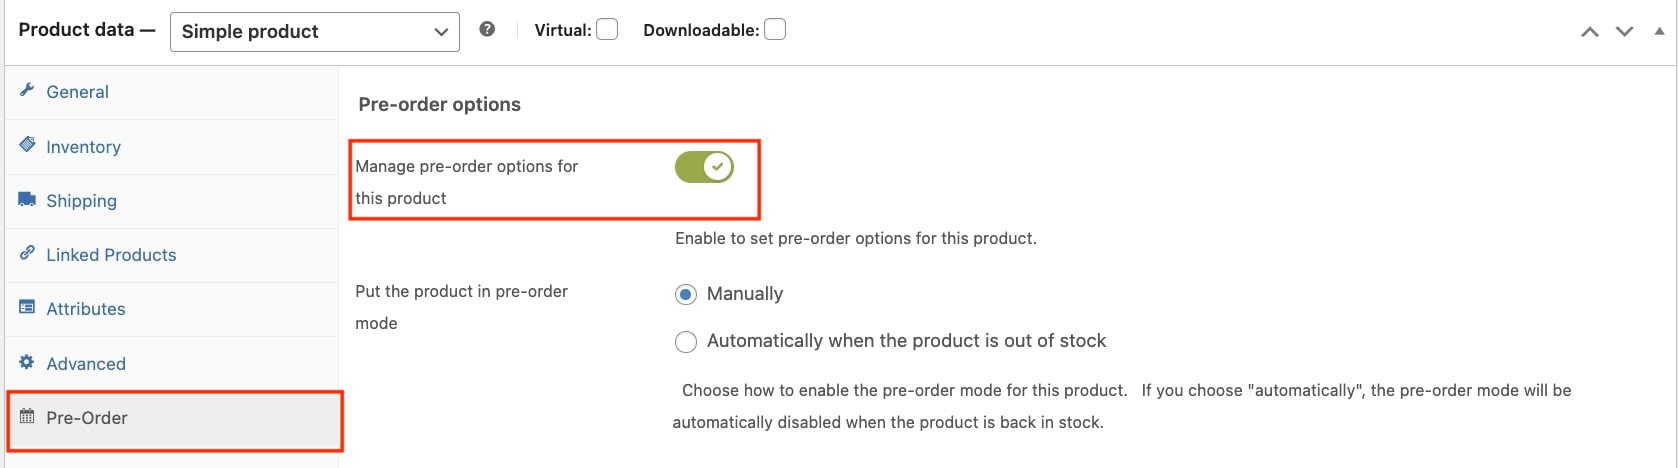
3. Once you’re on the product edit page, scroll down to Product data > Pre-Order and enable the option to manage pre-order options for that specific product:
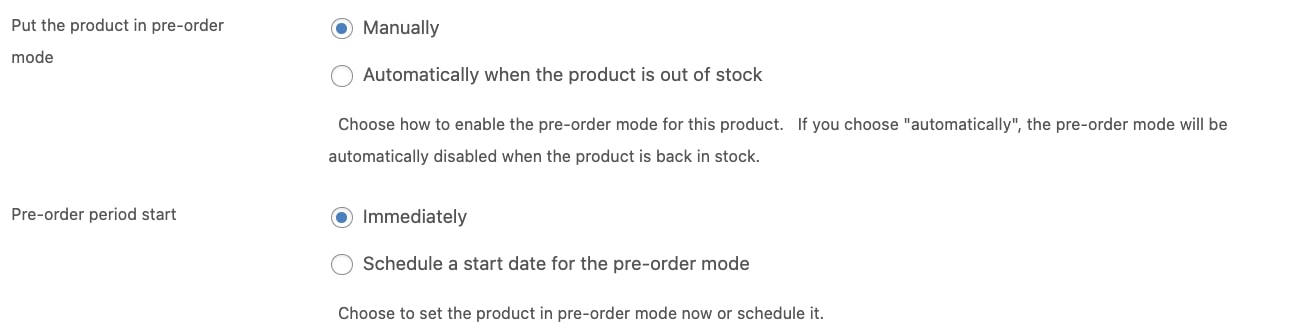
4. As soon as you enable that, you’ll see several options available to set the pre-order mode for that specific product. The first option you need to decide on is whether to enable the pre-order mode manually or automatically when the product is out of stock.
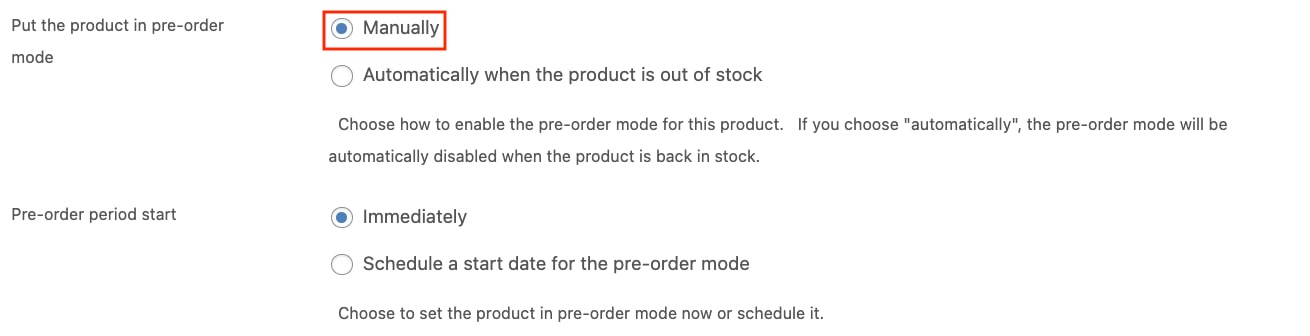
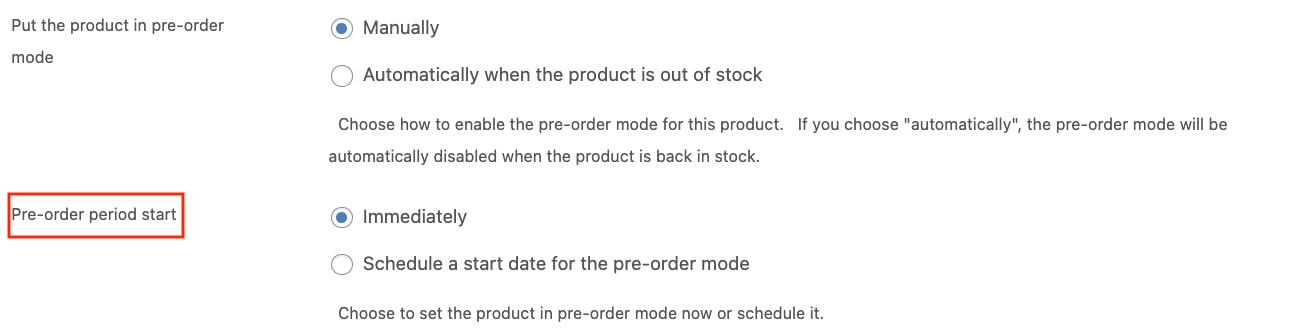
5. If you select the first one, you need to decide if you want to have the product in pre-order mode immediately or schedule it for a future date and time using a calendar. In this case, we’re going to put the product in pre-order mode manually and immediately:
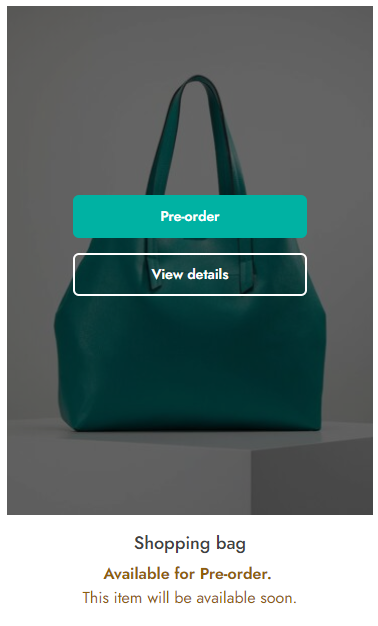
This way, once you update the product, it will be in pre-order mode:
Once you have installed and activated the plugin, from the ‘General options‘ tab you will have the possibility of automatically enabling the ‘pre-order‘ mode for out-of-stock products. Let’s see how to achieve this:
1. Go to YITH > Pre-Order > General Options.
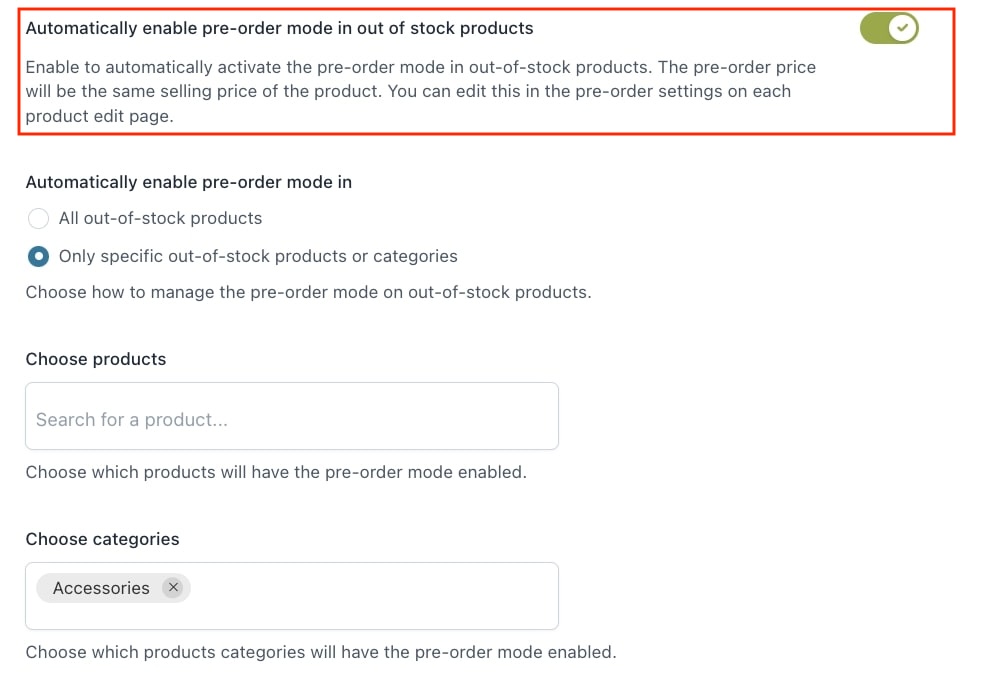
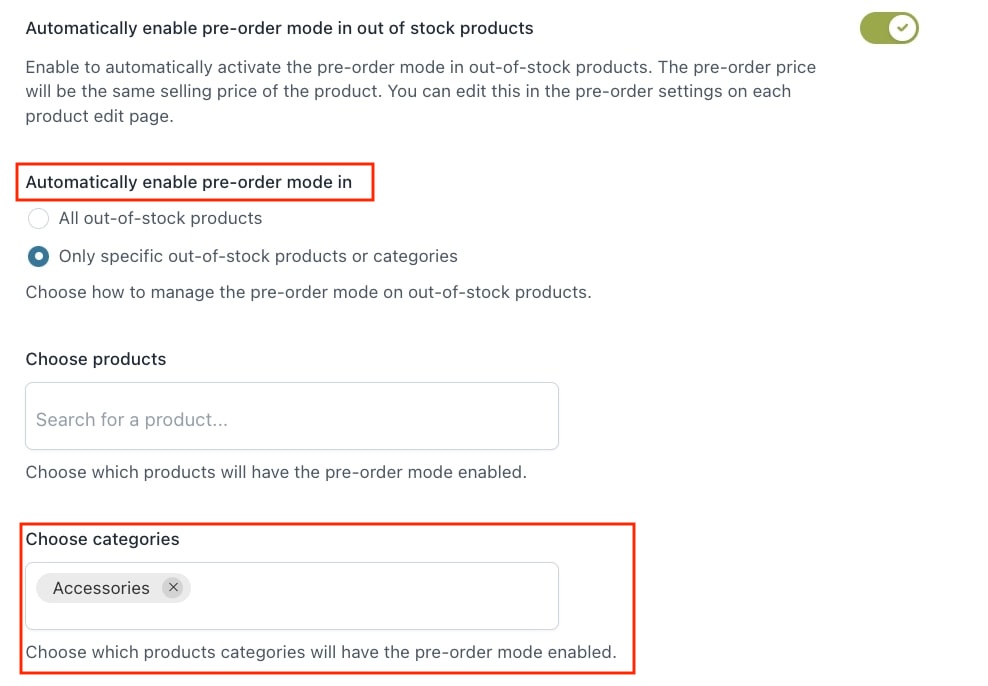
2. Enable the option ‘Automatically enable pre-order mode in out-of-stock products‘:
3. Once enabled, you will find below an additional option to decide on which products to enable the ‘pre-order’ mode, either All out of stock products or Only specific out of stock products or categories.
4. If you select Only specific out of stock products or categories, you can further set the specific products or categories:
With YITH Pre-Order for WooCommerce, once you have enabled the Pre-Order mode on a specific product, you can additionally schedule the start date. Let’s see how we can achieve this:
After enabling the ‘Manage pre-order options for this product‘:
You can decide whether to put the product in pre-order mode manually or automatically when the product is out-of-stock. If you chose the option to do it manually:
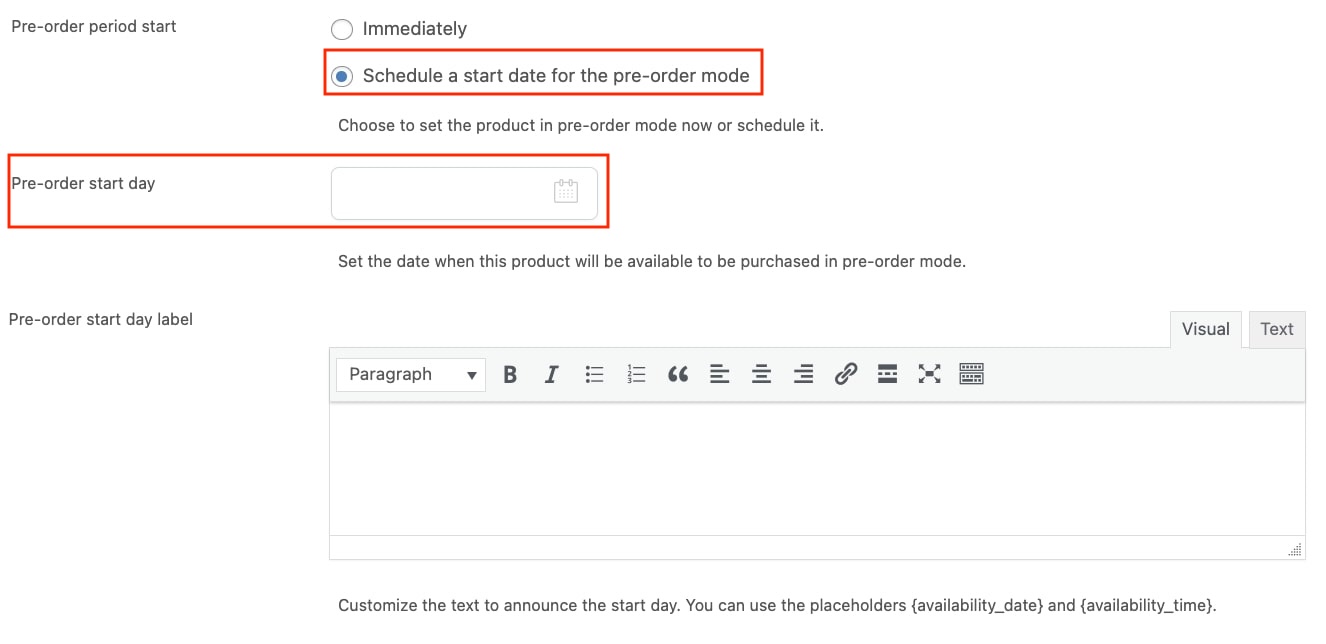
A new option will appear below to set the start of the pre-order mode:
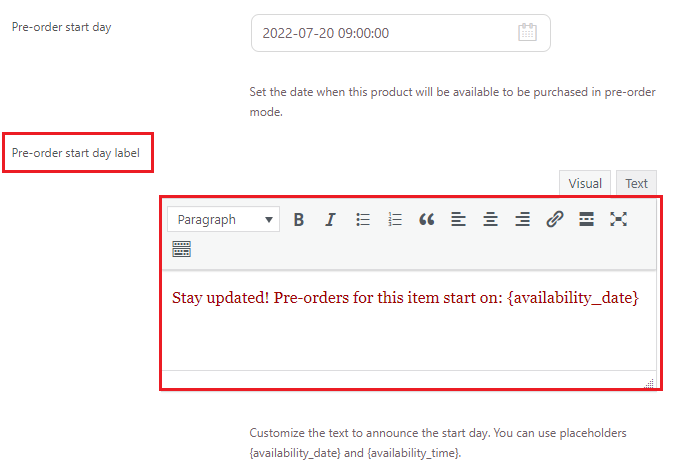
Here you can set the pre-order period to start immediately or schedule a start date for the pre-order mode. By choosing to schedule a start date, you can define the date through the calendar available in the following ‘Pre-order start day’ field:
Finally, through the built-in editor, you can customize the text shown to users to inform them when the product will be available for pre-order:
If within the product’s ‘Pre-Order’ options, you have chosen to put the product in pre-order mode manually, you will also be able to set when the product will be available/released. Let’s review the options you will find:
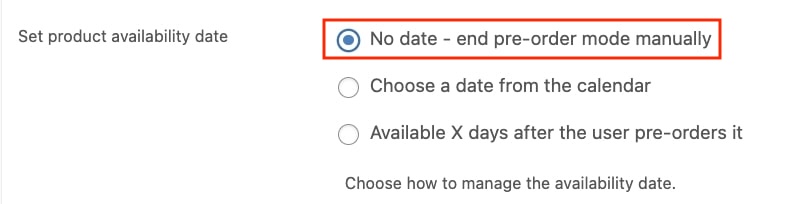
When you decide to put a specific product in pre-order mode manually, you will have the following options to ‘Set product availability date‘:
If you select No date – end pre-order mode manually, you can decide to set no date. In this case, the pre-order mode will need to be manually disabled:
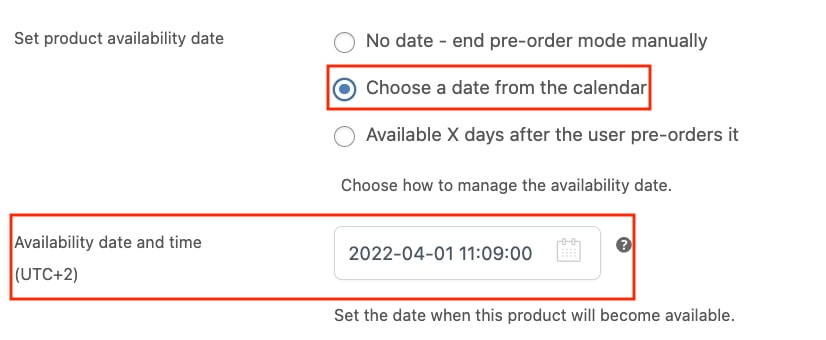
If you select Choose a date from the calendar, a new field will show where you can select the day and time when the product will be available:
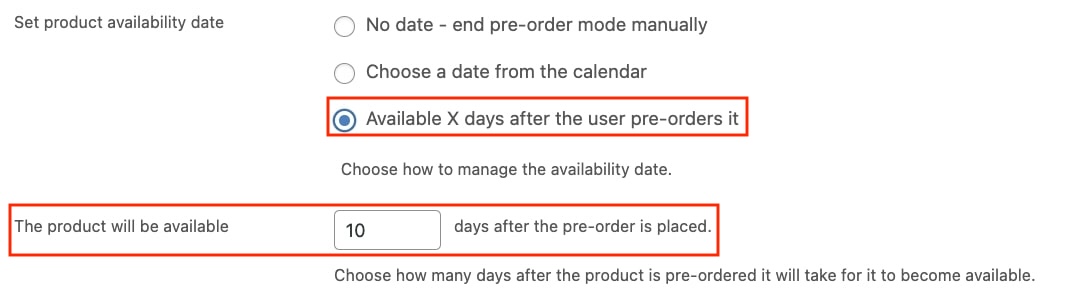
Finally, if you select Available x days after the user pre-orders it, you can dynamically make the product available a specific number of days after a user pre-orders it. You can define the number of days in the option ‘The product will be available‘:
For products in‘pre-order’ mode you will be able to set a custom price during the pre-order period. Let’s review the price options you will have available:
Once you have enabled the ‘pre-order’ mode on a product, you will find the following ‘Pre-order price’ option:
In the select field, you will find 6 options to choose from. The first option is to Use the selling price. In this case, the pre-order product will have the same price set as the regular price:
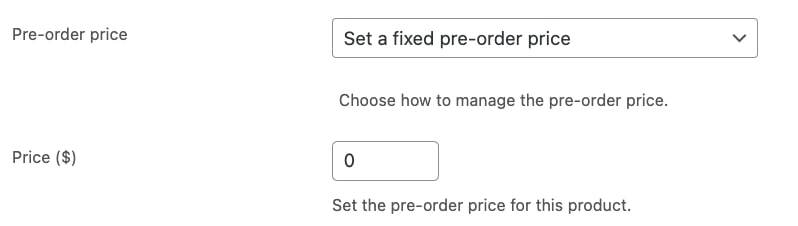
The second option is to Set a fixed pre-order price. Here, you can set a specific price for the pre-order product by defining it in the related ‘price’ field:
The third option is to Discount a percentage % of the selling price. With this option, you can decide to set a percentage discount on the regular price by defining the value in the related ‘Discount on selling price’ field:
The fourth option is to Discount a fixed amount of the selling price. With this option, you can decide to set a fixed discount on the regular price by defining the value in the related ‘Discount on selling price’ field:
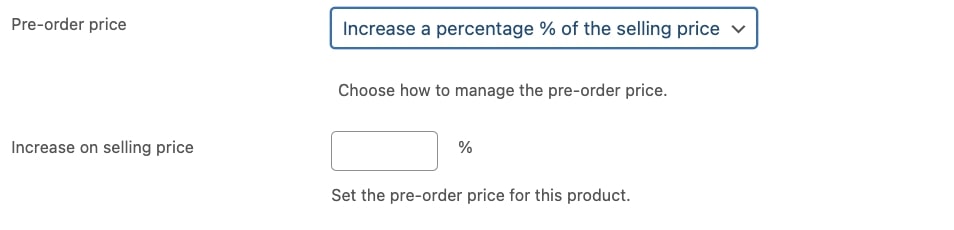
The fifth option is to Increase a percentage % of the selling price.With this option, you can decide to set a percentage increase on the regular price by defining the value in the related ‘Increase on selling price’ field:
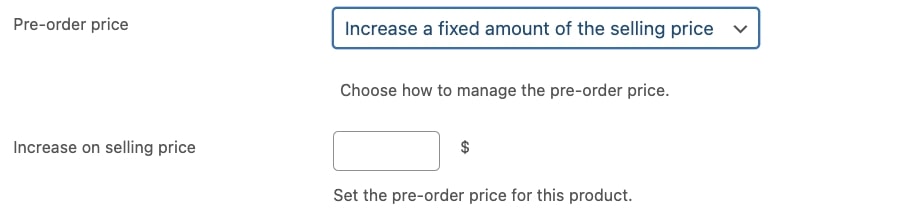
Finally, the sixth option is to Increase a fixed amount of the selling price. With this option, you can decide to set a fixed amount increase on the regular price by defining the value in the related ‘Increase on selling price’ field:
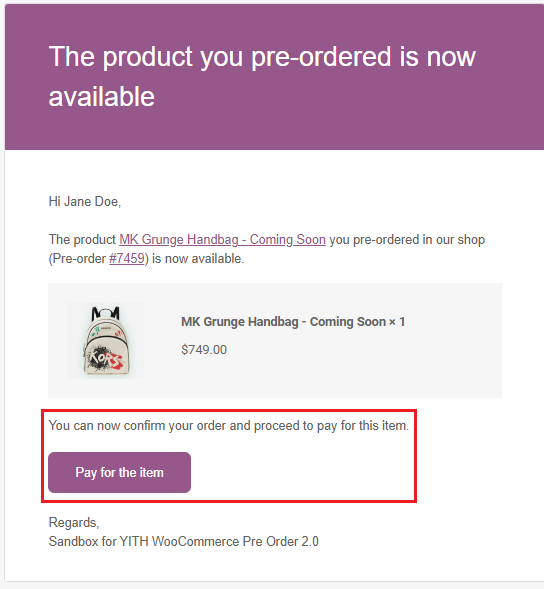
One of the payment options our Pre-Order plugin offers is the new Pay Later gateway. This gateway does not request payment information at checkout when the customer is pre-ordering the product. Instead, the customer will receive an email requesting the payment when the pre-ordered product becomes available.
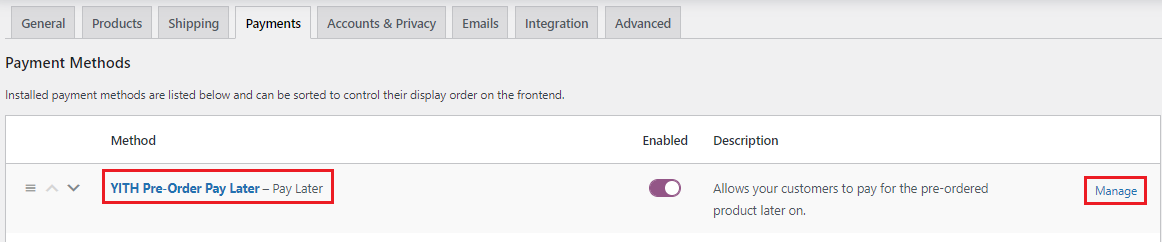
To set this as your default option for pre-orders head over to YITH > Pre-Order > Payment Options on your backend:
Select the Pay Later gateway and save to enable it for every pre-order product as a global rule; as always, keep in mind that global rules can be overridden on each product’s edit page.
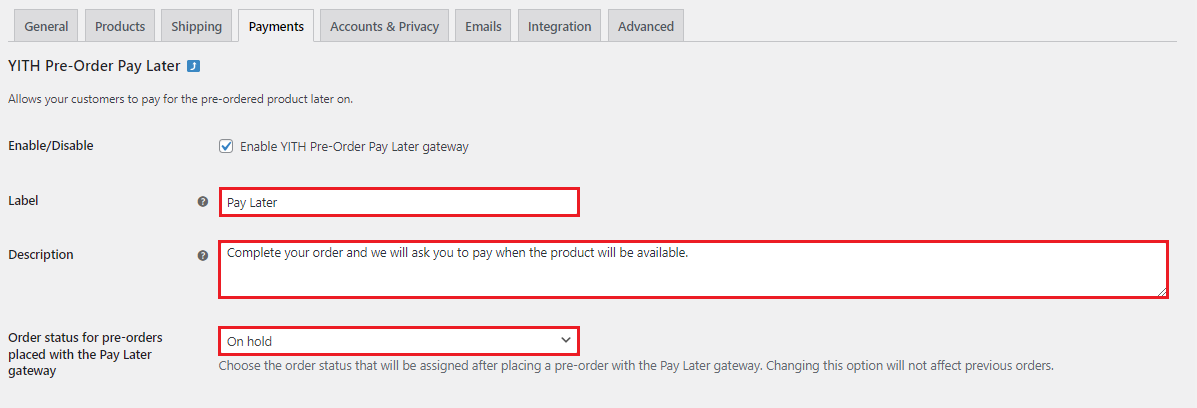
You will find this payment gateway’s settings in WooCommerce > Settings > Payments; you can click on “Manage” to edit the gateway’s name, its description and the status of the pre-orders placed with it:
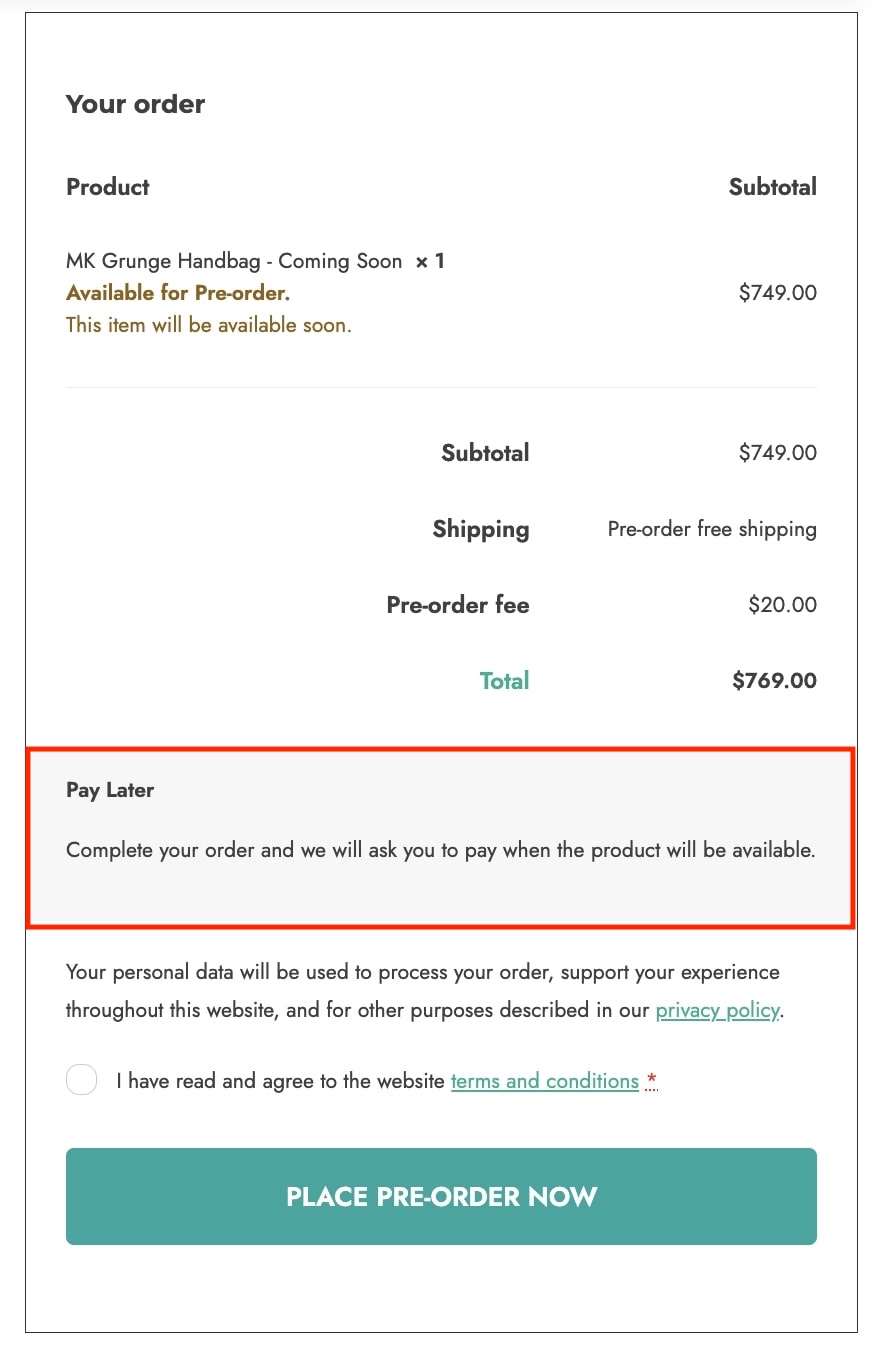
Customers will see that label and description when they’re on the Checkout page about to pre-order a product:
Finally, as soon as the product becomes available, the customer will receive an email with a link that will redirect him/her to the site to make the payment:
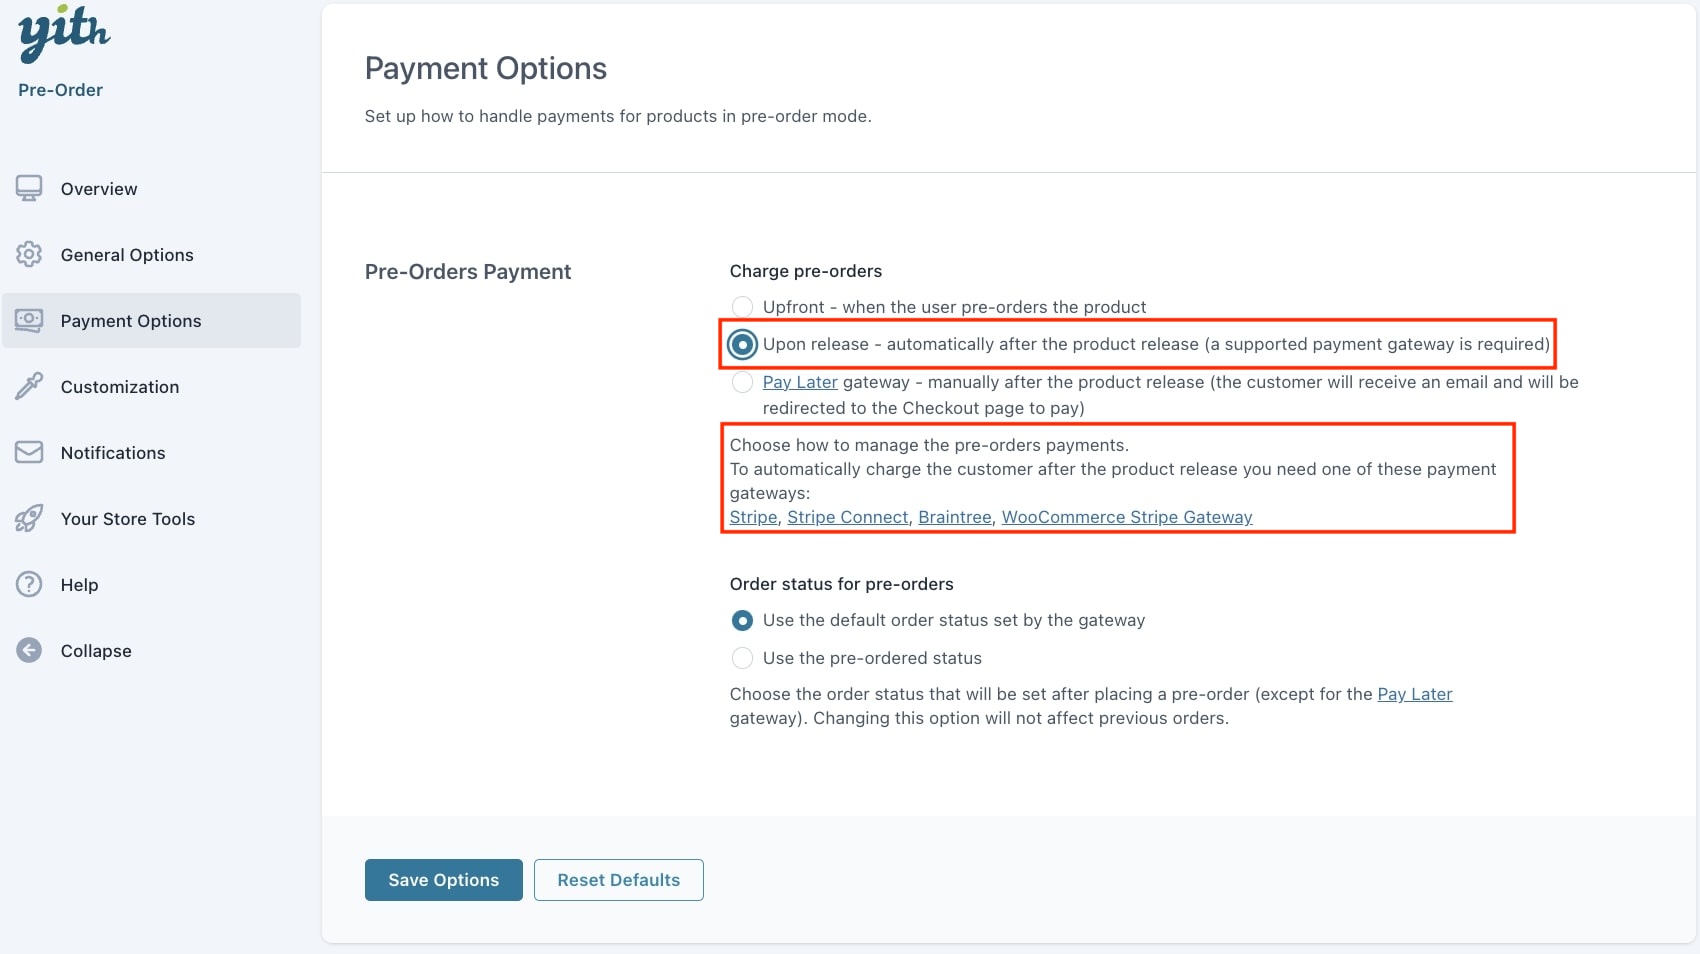
One of the payment options our Pre-Order plugin offers is “upon release”, this option allows you to automatically charge users for the product they pre-ordered when the product is released instead of charging them when the pre-order is placed. This way, you can rest assured you’ll receive the payment as soon as the product becomes available, and your customers won’t have to pay for it beforehand.
You can enable that option in YITH > Pre-order > Payment Options:
As you can see, this payment option requires you to have at least one of the supported payment gateways in order to work: YITH Stripe, YITH Stripe Connect, YITH PayPal Braintree or WooCommerce Stripe Gateway. Let’s see it working with our Stripe plugin.
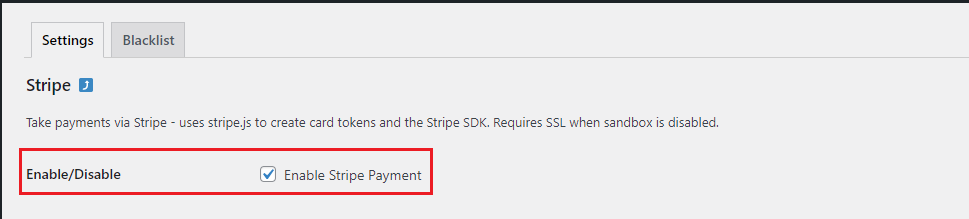
You can install and activate our YITH Stripe plugin, and then activate the license.
Once you’re done setting up the Stripe plugin, make sure you enable it in YITH > Stripe > Settings:
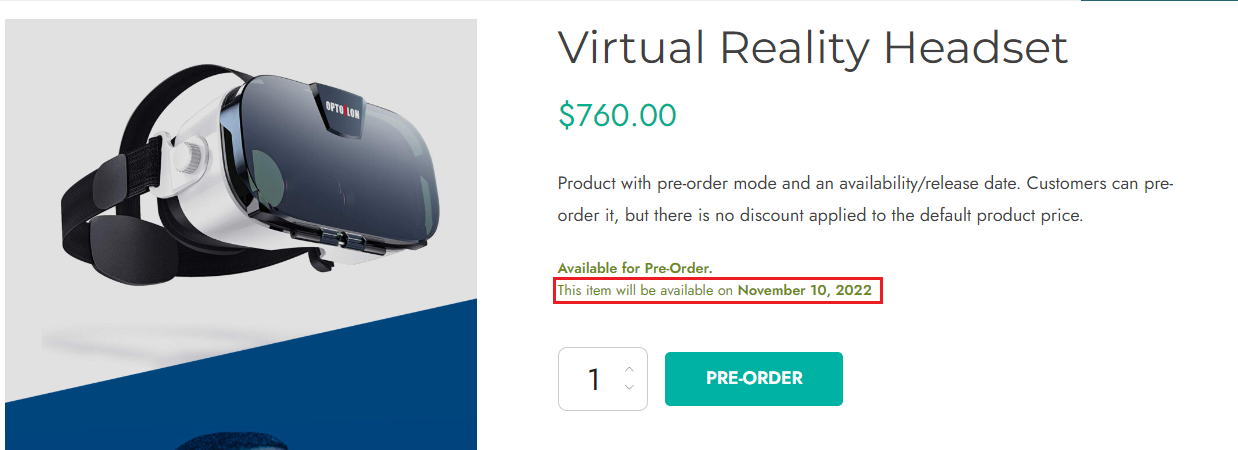
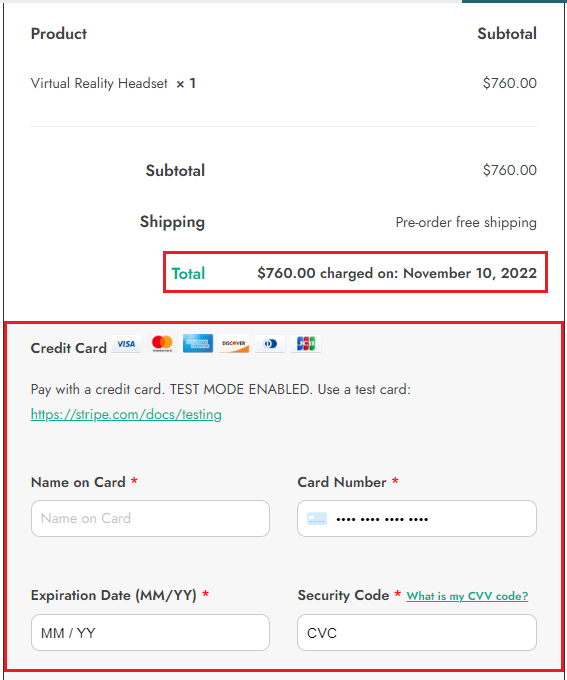
This way, Stripe will be ready to use on your site and your customers will be able to use it with the “upon release” payment option. Let’s take this virtual reality headset as an example:
The product is not available yet, but it can be pre-ordered, the release date is already announced for November 10, 2022. If a customer clicks on the ”Pre-order” button and goes to the cart, he’ll see this message letting him know that the product price will be charged on November 10, when the product is released:
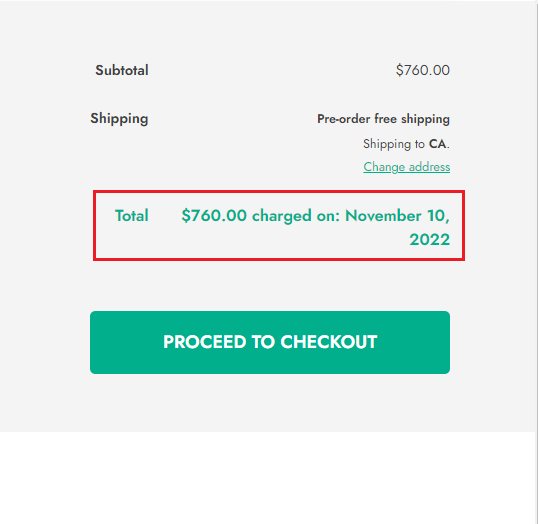
Then, by clicking on “Proceed to checkout”, the customer will see that same message again and will only see the option to add his credit card information with the Stripe payment gateway:
The credit card information will be saved and used only when the product becomes available, on November 10, to process the payment.
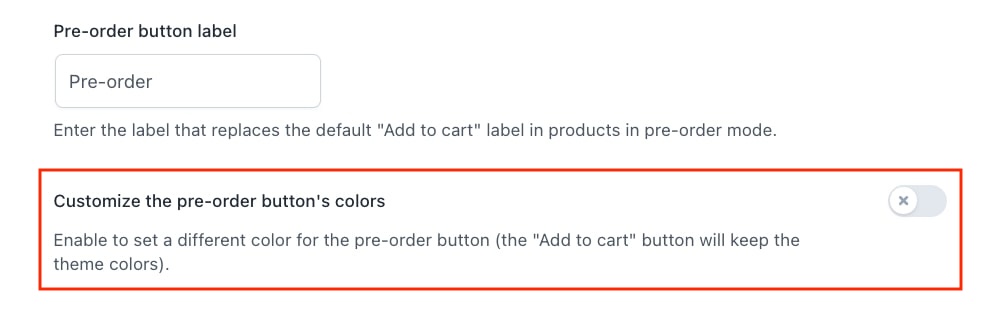
Whenever a product is set to ‘pre-order’ mode, by default the plugin replaces the ‘Add to cart’ button with a ‘Pre-order’ one. For this new button, you will be able to customize the label as well as the colors, let’s see how we can configure it
First, you need to go to YITH > Pre-Order > ‘Customization’ tab. Here you will find the ‘Pre-order button label’ field to enter the label of your choice:
Below this field, you will find the option to decide whether you want to further customize the button’s colors or not:
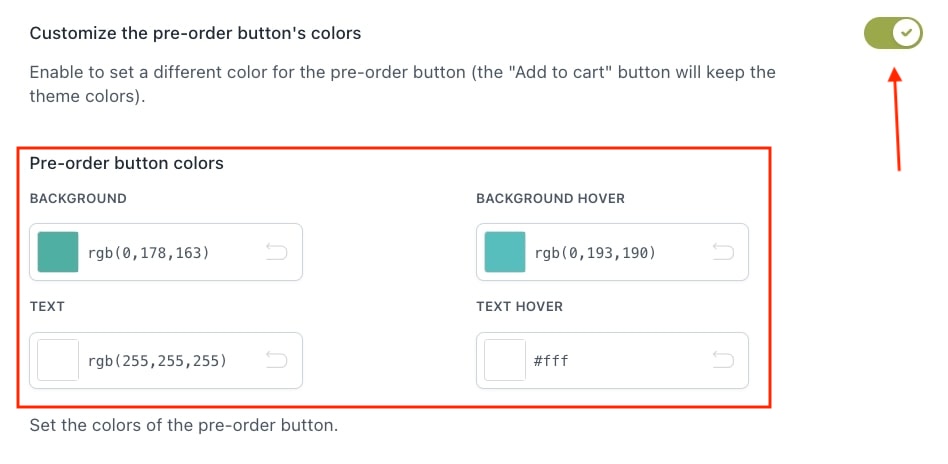
If enabled, you will be able to set the color for the background, background hover, text and text hover:
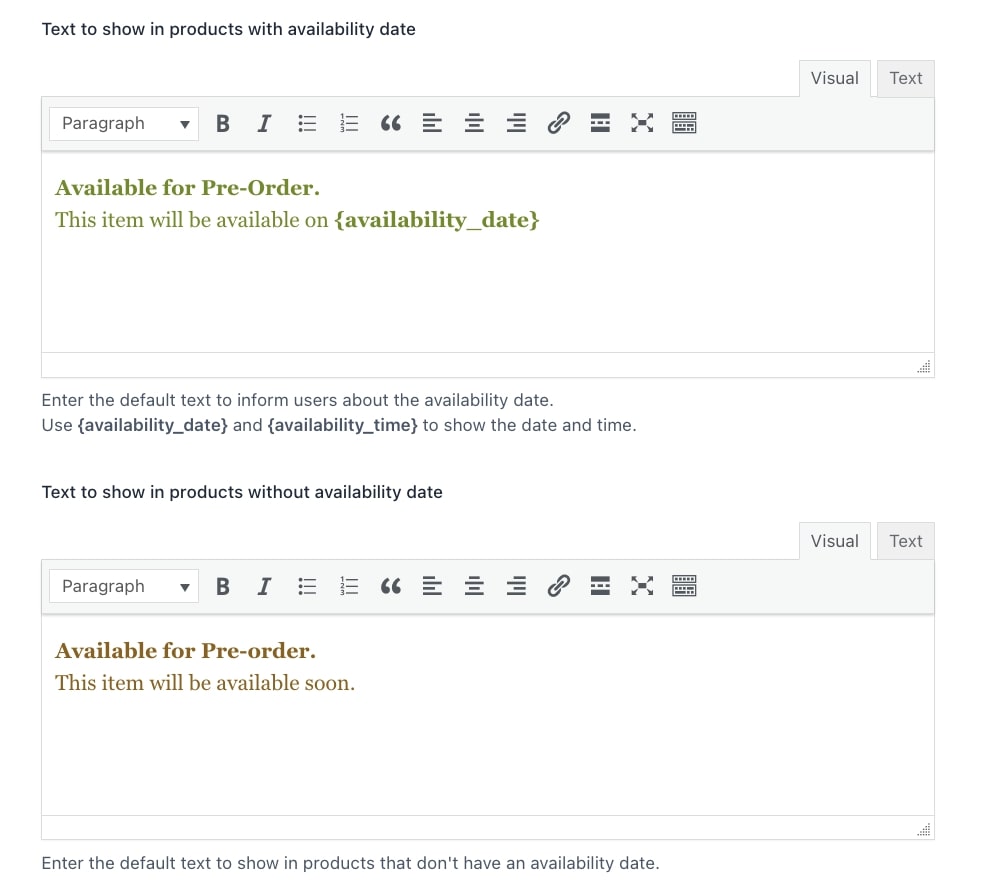
From the plugin ‘Style’ tab, you will have the possibility to customize certain text messages to show on the product page when you have products in ‘pre-order’ mode. Also, you will have the option to decide whether or not to show the messages on other WooCommerce pages. Let’s see how we can manage this:
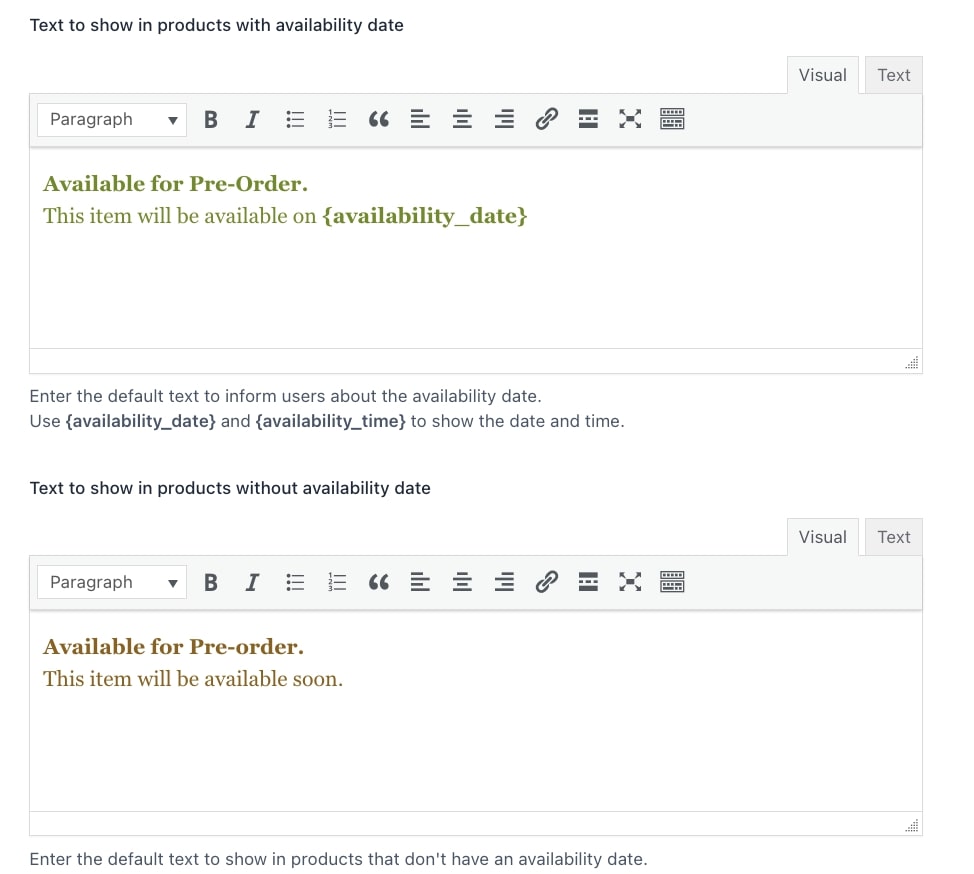
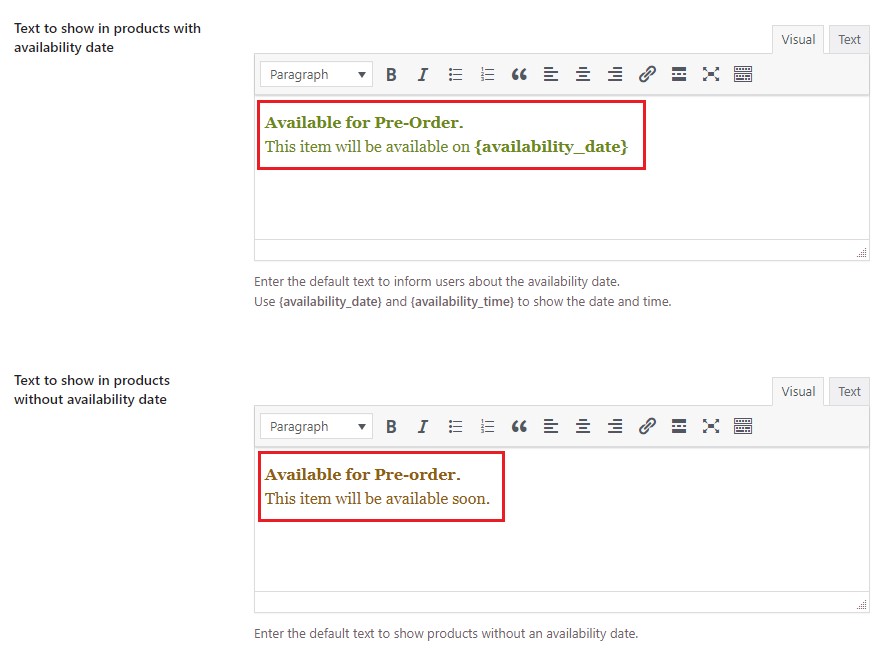
If you go to YITH > Pre-Order > ‘Customization’ tab, you will see the following built-in editors:
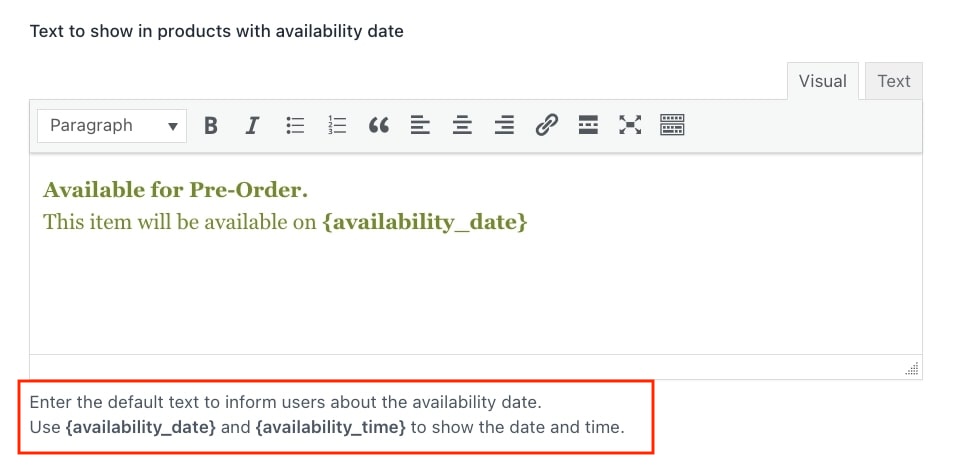
These texts will be applied globally to all ‘pre-order’ products. Within the first editor you can set the custom text to show in ‘pre-order’ products with availability date and in the second editor you can set the custom text to show in ‘pre-order’ products without availability date. For the text in products with availability date, you will additionally find two placeholders you can use to display the date and time:
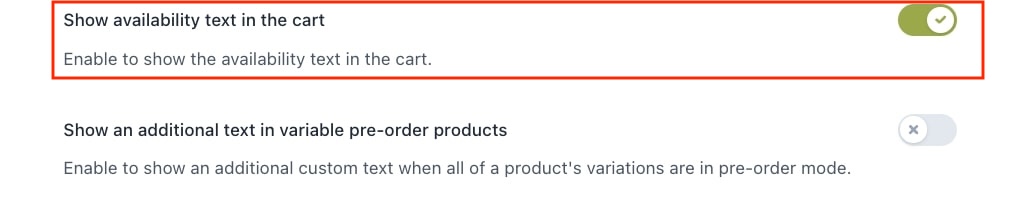
Next, you will find two options to decide if you want to show the text also on the Shop and/or Cart pages. You can manage these options by simply enabling/disabling them:
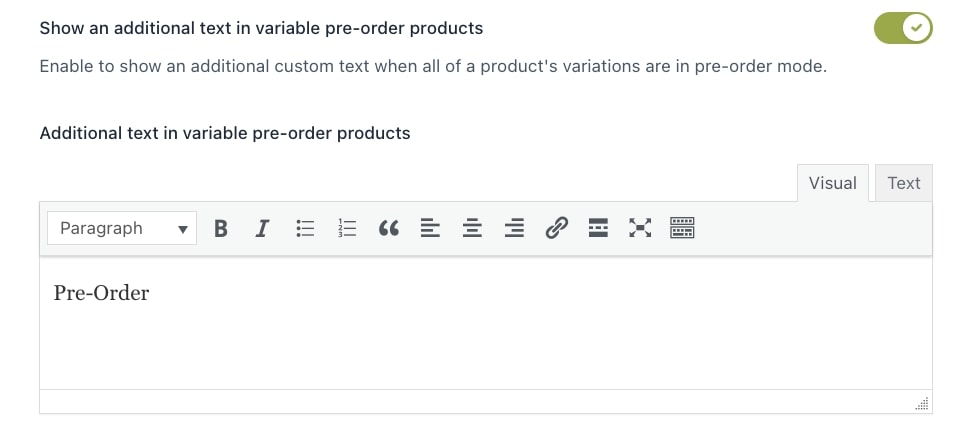
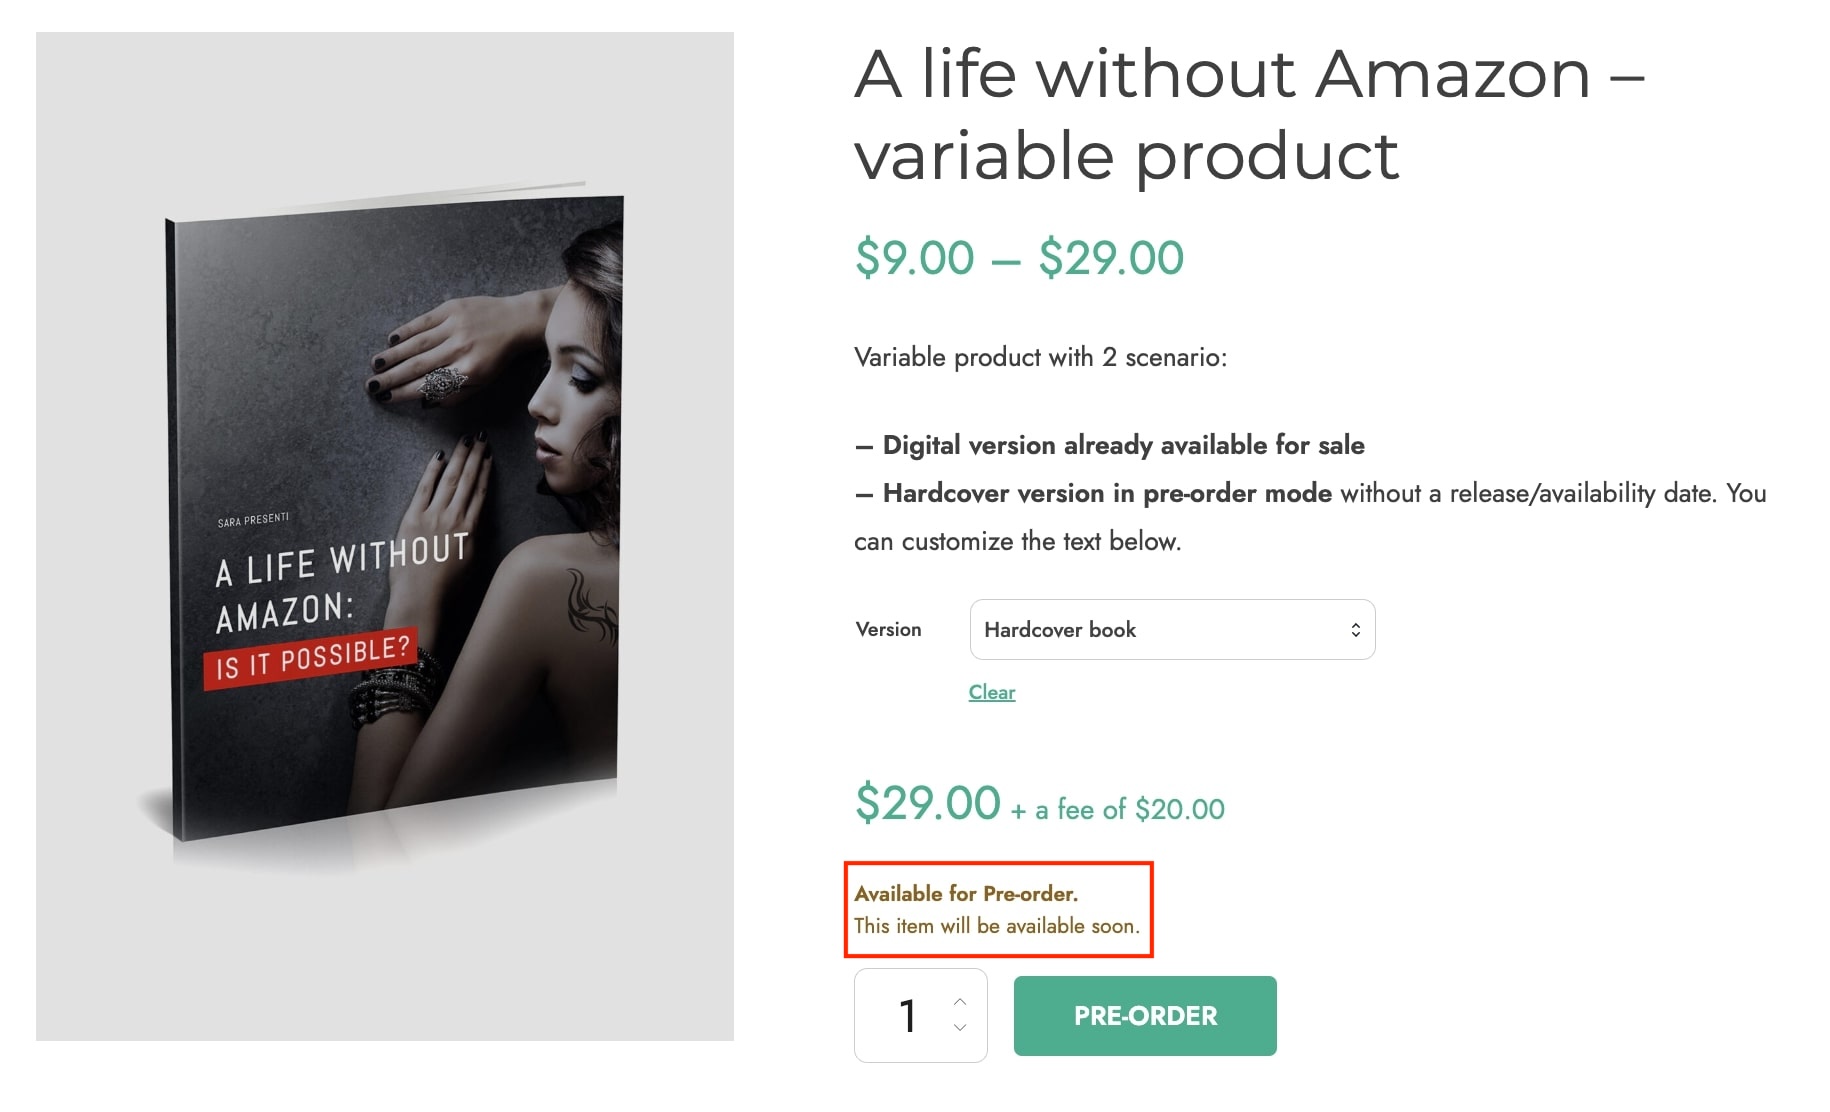
Additionally, you can also decide if you want to Show an additional text in variable pre-order products by enabling the following option:
Once enabled, a new editor will appear to configure the text to show:
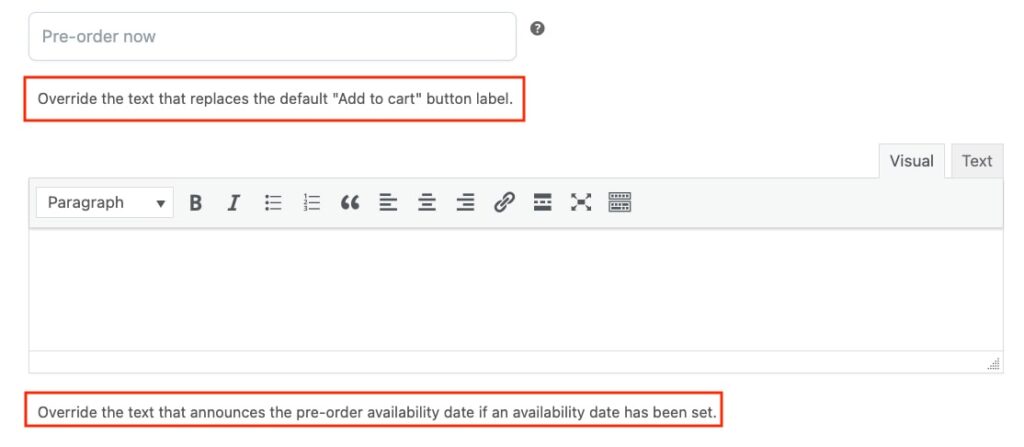
Besides the global options available in the ‘Customization’ tab, it is also possible to override the text to show at product level. Inside Product Data > Pre-Order, you will see this option:
If you enable it, depending on the availability configuration you have set for the product, you will find the related built-in editor to set the custom text to show for the specific product. These texts will override the default ones configured from the plugin settings:
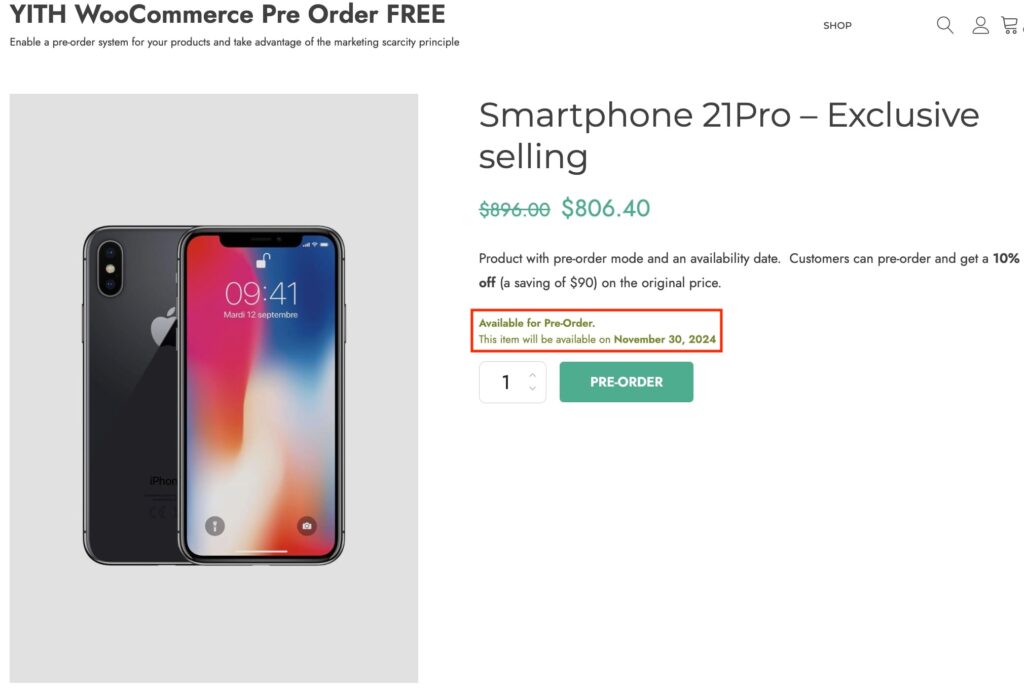
Finally, let’s see an example so we can take a look at the final result from the frontend. Below, we can find two custom messages configured from YITH > Pre-Order > Customization, one for products with an availability date and another one for products without an availability date:
Now, this will be the result in a product with an availability date:


