View Product Page

Customers points

From the section Customers points, you can monitor and manage the points collected so far by your customers. In the table, you’ll see the list of users, the number of points they earned, their points balance and the rank.

Customers' points

Bulk actions and filters

Just above the list, you will be able to see three dropdowns for the following actions:

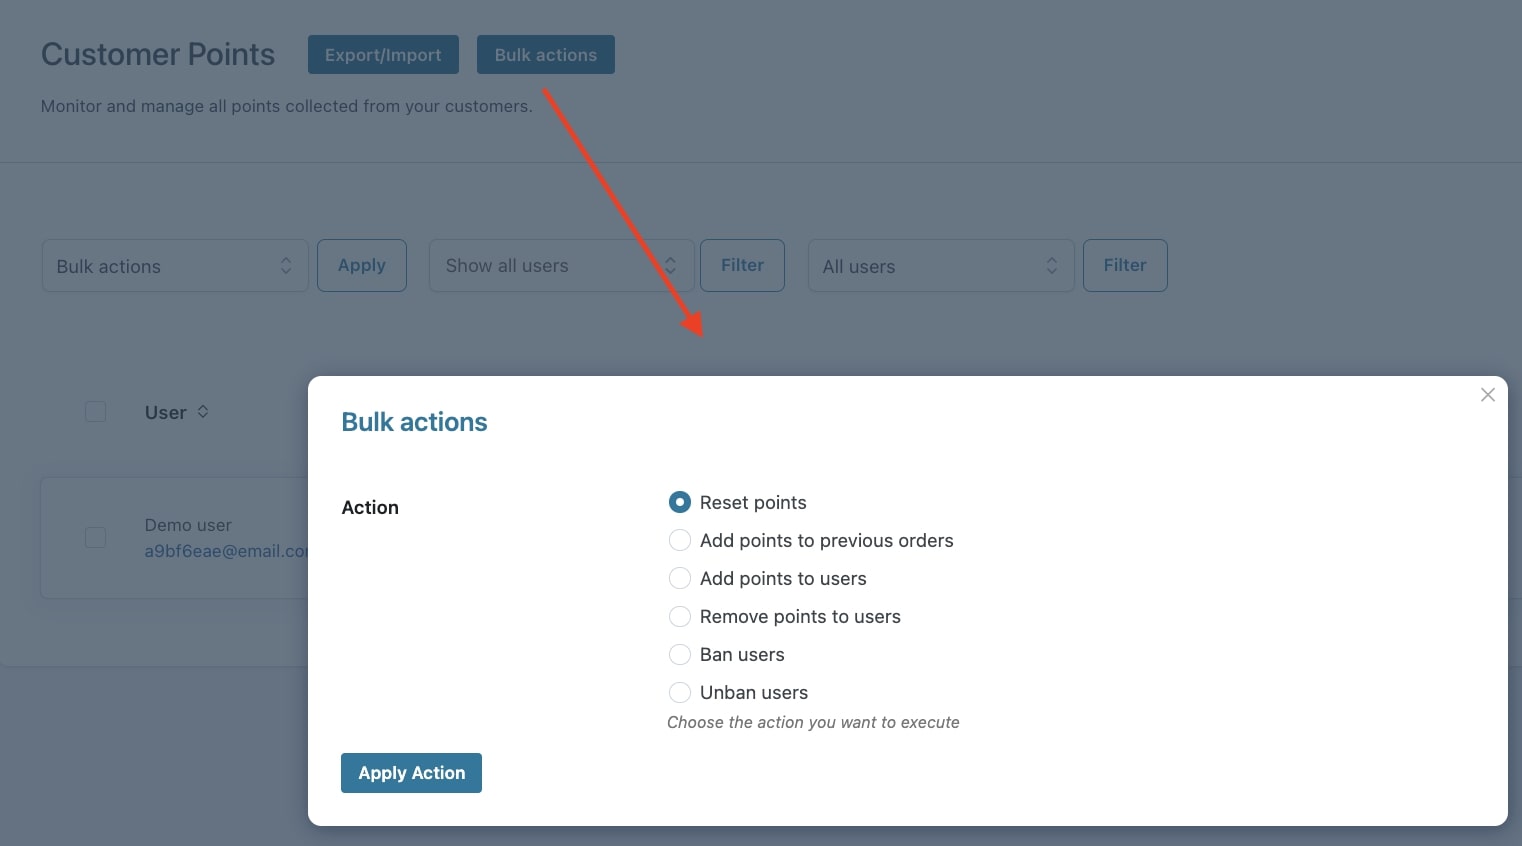
  1. You can apply Bulk actions to one or more customers in this list:
Bulk actions

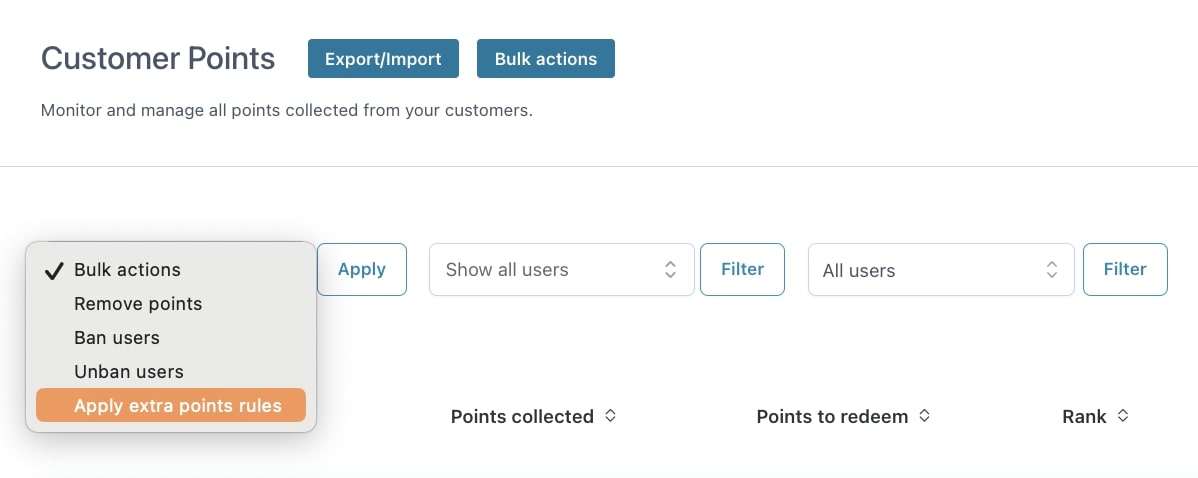
Available options are:

  • Remove points
  • Ban users
  • Unban users
  • Apply extra point rules
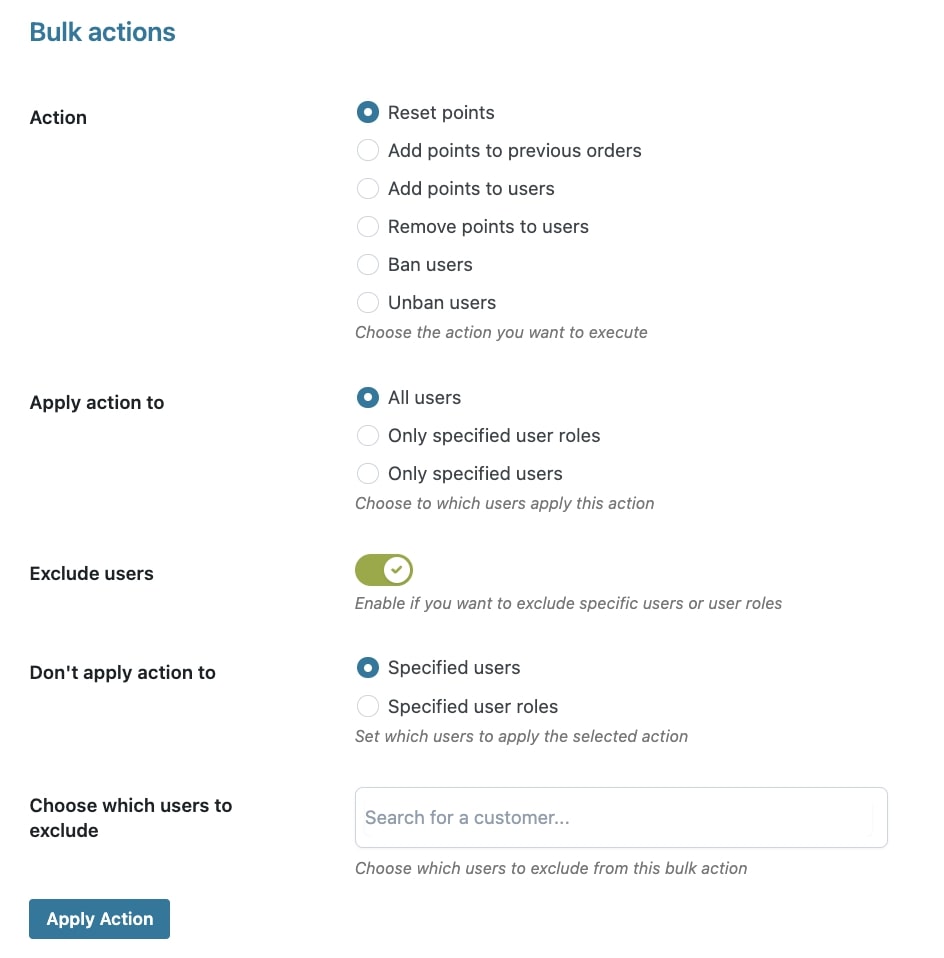
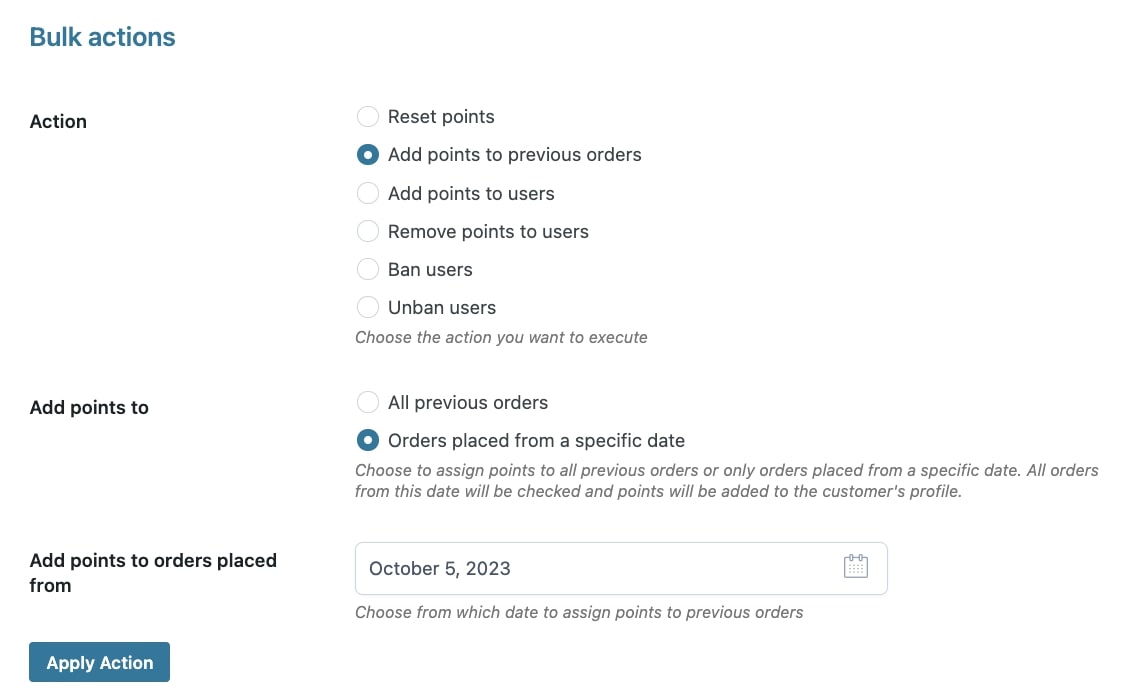
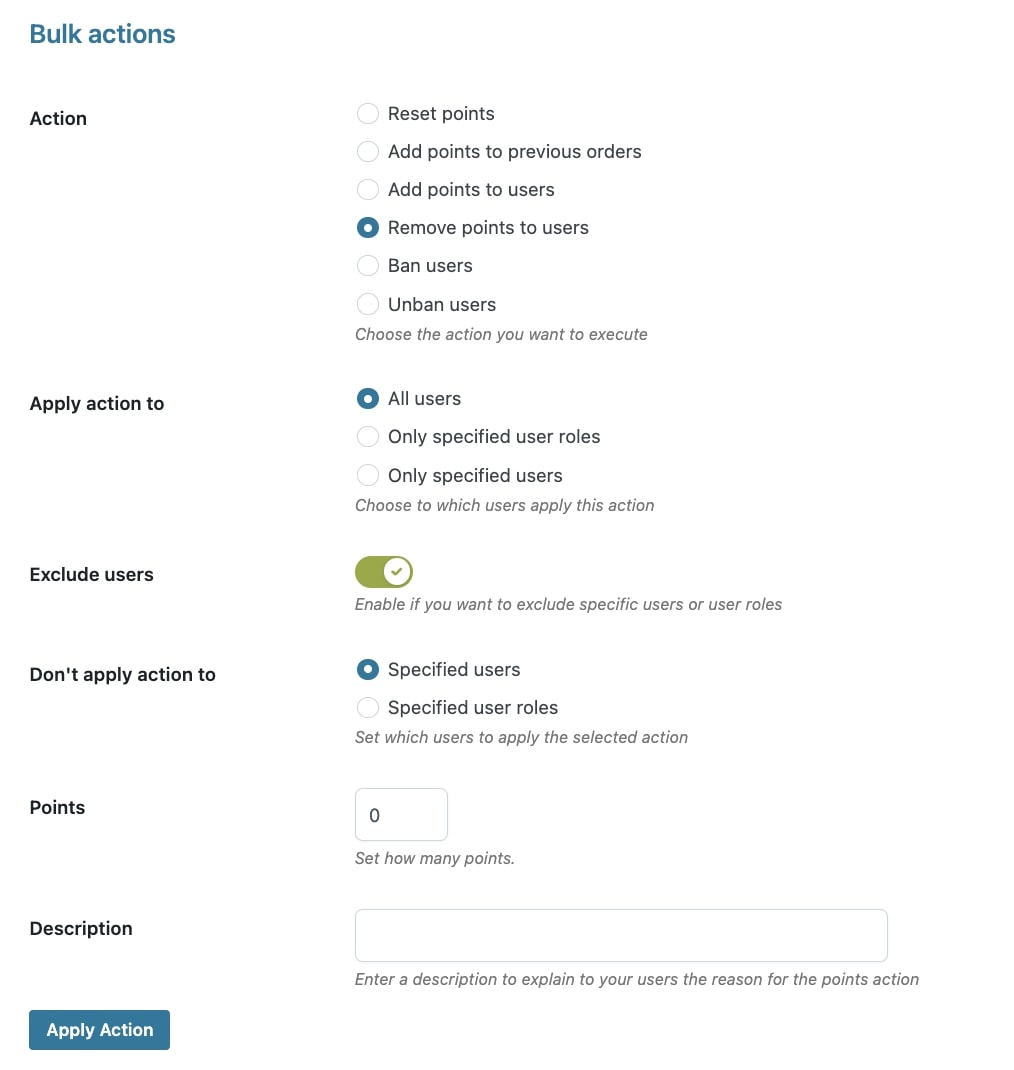
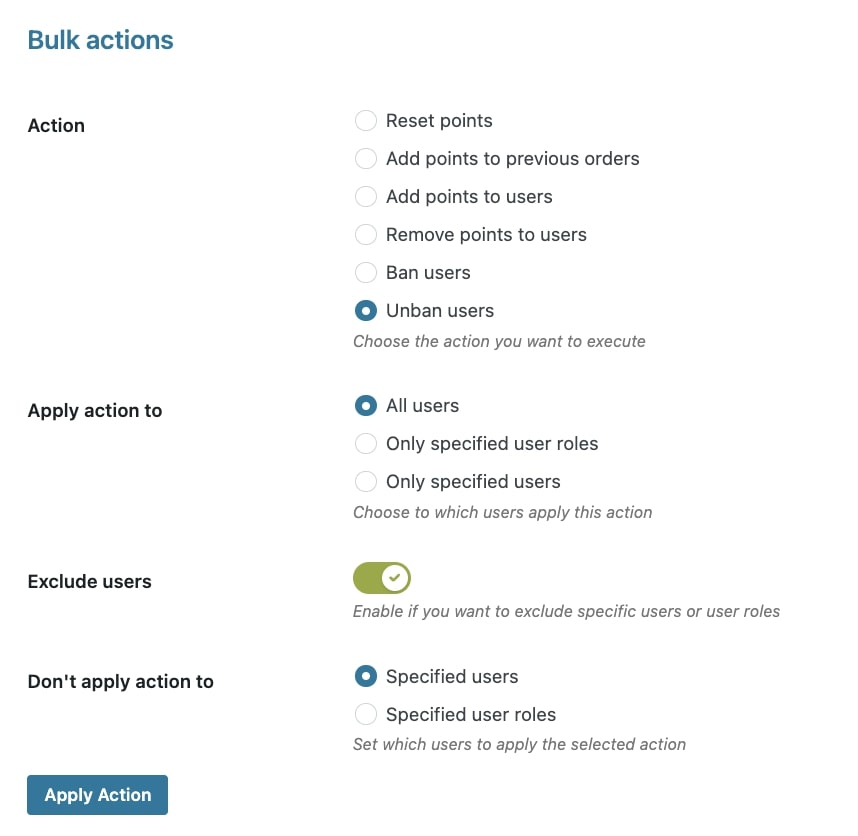
    Alternatively, you can apply these and more actions from the Bulk Actions tab. Please, refer to this page for more details.
  1. You can filter customers by name.
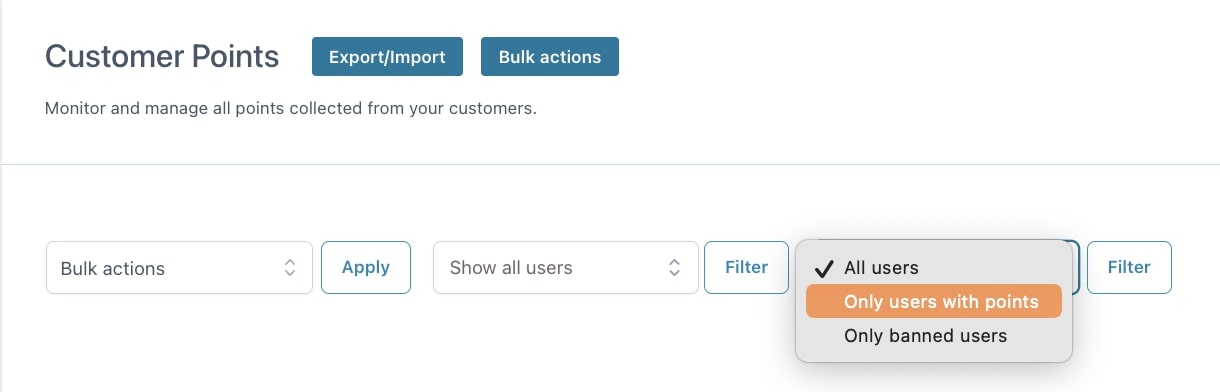
  2. You can filter users and show whether to show all users, only users who have collected points or only banned users.
Filter users

Moreover, the list can be sorted by User, Points collected, Points to redeem, and Rank. So for example, you can choose to show first the ones with the highest number of points.

For every user in the list, on mouseover, the plugin will show three buttons: View history, Remove Points and Ban User. Yet, these and other actions can be also applied after clicking on View history from the customer’s detailed view. Let’s see what’s available in the View history details.

Action on user

View history

View user's history

Ban user

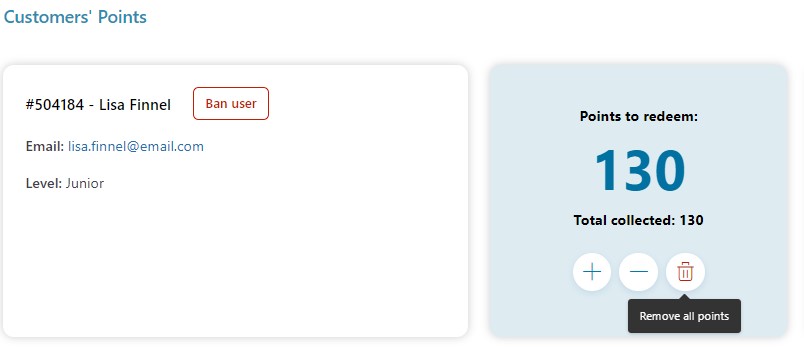
In the first box on the left, you will be able to see the customer’s name, email, levels achieved (if any) and the Ban user button that allows you to make exclude the user from the points programme, so he/she will no longer be able to earn or redeem points.

Ban user

Update points

In the second box on the right, you will be able to see the customer’s total points available and update them by clicking on the + or - signs, or to remove all of them in one go by clicking on the trash icon.

Add points

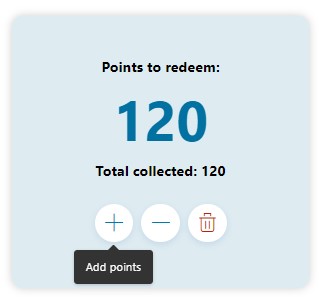
You can also add a description, so you can easily remember why those points have been added or removed. It will appear in the history below, together with all other actions on points.

Points history description

The same description will be visible to the customer on the frontend, on My Account page in the Reason field (make sure the option Show points on My Account is enabled).

Points history description in My Account

You will also be able to remove all points in one go, by clicking on the Trash icon button.
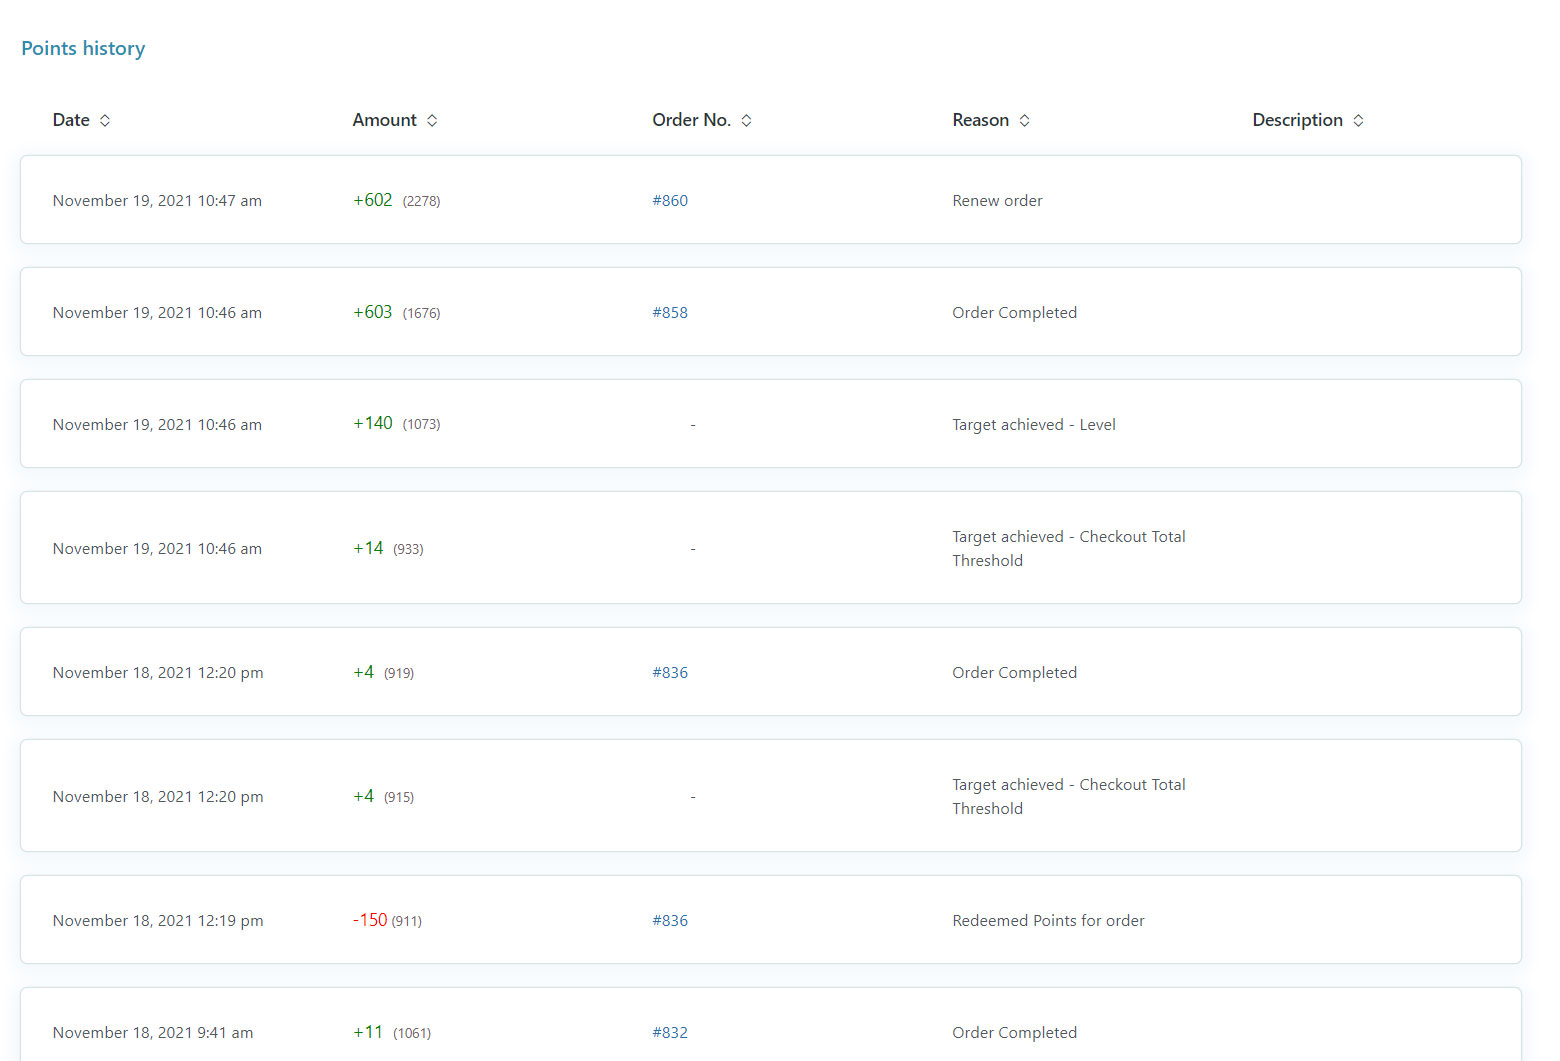
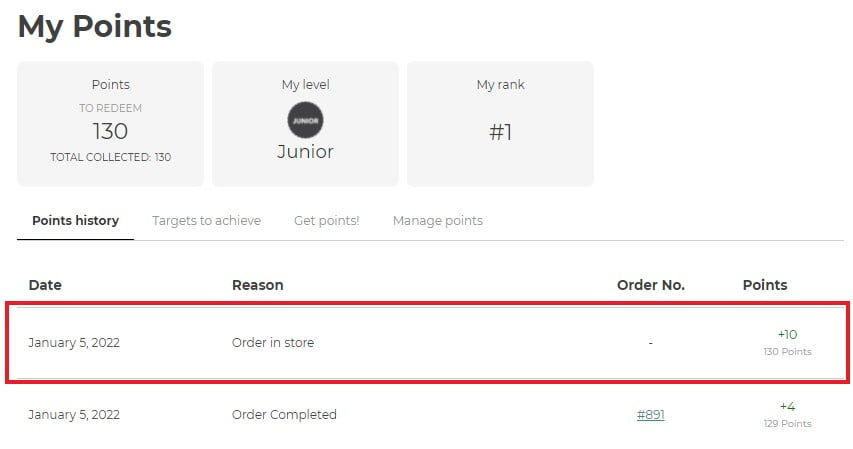
Remove all points

Points History

In the points history, you can find any action that assigned or removed points to the customer (orders completed, extra points, admin actions, levels achieved).

In the table you will find the following info that will work also as filter to sort the table:

  • Date;
  • Amount of points and in brackets the total achieved with that action;
  • Order No: this is filled only when points are earned through a purchase;
  • Reason: this field will be populated automatically so you can quickly understand what kind of action generated the points;
  • Description: this is the text entered by the admin when points are edited from the backend.
Points history

Bulk actions

To apply the same action to multiple users at the same time, go to YITH > Points and Rewards > Customers’ points and click on the Bulk actions button.

Bulk actions

You can:

Reset points

Reset points

To reset points to your users through a bulk action, select Reset points in Action then choose to which users you want to apply the reset:

  • All users: this will allow resetting the points to all the users with the possibility to Exclude user roles or users (both specific customers or certain user roles) that you will define in the fields below.
  • Only specified users: that you will select in the field Choose which users.
  • Only specified user roles: that you will select in the field Choose which roles. You can also exclude some specific users.

Please note: this will set all your customers’ points to zero. Please, make sure you want to apply this action as it is irreversible.

Then click on Apply action.

Add points to previous orders

Add points to previous orders

You can generate points for orders placed before activating the plugin. You can apply this action to all previous orders or only to orders placed from a specific date that you can select in the dedicated option.

Then click on Apply action.

Add points to users

Add points to users

To add points to your users through a bulk action, select Add points to users then choose to which users you want to apply this action:

  • All users: this will allow adding the points to all the users with the possibility to Exclude users (both specific customers or certain user roles) that you will define in the related fields > Specified users and Specified user roles.
  • Only specified user roles: that you will select in the field Choose which roles.
  • Only specified users: that you will select in the field Choose which users.

Now enter the number of points you want to add in the entry Points and insert a text in Description (optional) to inform your customers about the reason for applying this action.

Then click on Apply action.

Remove points to users

Remove points to users

To remove points to your users through a bulk action, select Remove points to users then choose to which users you want to apply this action:

  • All users: this will allow removing the points to all the users with the possibility to Exclude users (both specific customers or certain user roles) that you will define in the related fields > Specified users and Specified user roles.
  • Only specified user roles: that you will select in the field Choose which roles. You can also exclude some specific users.
  • Only specified users: that you will select in the field Choose which users.

Now enter the number of points you want to remove in the entry Points and insert a text in Description (optional) to inform your customers about the reason for applying this action.

Then click on Apply action.

Ban Users

Ban users

To ban your users through a bulk action, select Ban users in Action then choose to which users you want to apply the ban:

  • All users: this will allow banning all the customers with the possibility to Exclude users (both specific customers or certain user roles) that you will define in the related fields.
  • Only specified user roles: that you will select in the field Choose which roles. You can also exclude some specific users.
  • Only specified users: that you will select in the field Choose which users.

With this action, the users will no longer be able to earn points, neither when they place new orders, nor on specific occurrences (extra points). You will, however, be able to update their points manually.

Unban users

Unban users

To unban your users through a bulk action, select Unban users in Action then choose which users you want to unban:

  • All users: this will allow unbanning all the customers with the possibility to Exclude users (both specific customers or certain user roles) that you will define in the related fields.
  • Only specified user roles: that you will select in the field Choose which roles. You can also exclude some specific users.
  • Only specified users: that you will select in the field Choose which users.

Export and import

In the Customers’ points main window, you will be able to find also the Export/Import button. From the modal, you can export or import your users’ points through a CSV file.

Export

To export the points into a CSV file, select the option Export points and click on Continue.

Export points

Now choose the format of the CSV file:

  • User ID / Points
  • User email / Points

and the delimiter you want to use (e.g.  , / ;) then click on “Submit” to start the process.

Choose CSV format and delimiter

Import

To import the points into a CSV file, select the option Import points and click on Continue.

Import points

Now choose the format of the CSV file:

  • User ID / Points
  • User email / Points

Choose which action you want to apply when importing the data:

  • Add points to the current balance
  • Override points

Choose the delimiter you want to use (e.g.  , / ; )

Finally, upload the CSV file you want to import then click on “Submit” to start the process.

Import options

Example

Example import-export