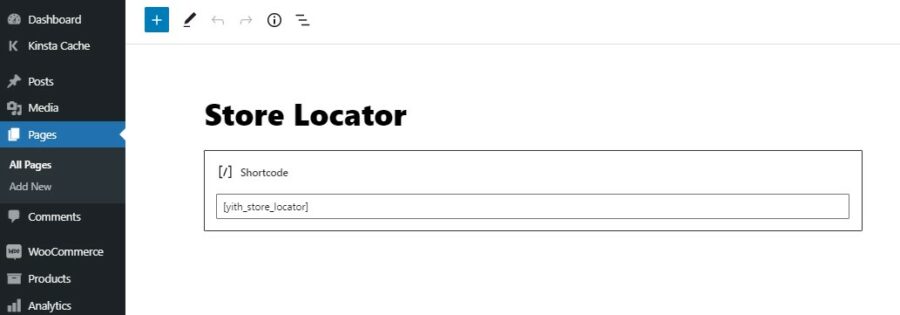
To work correctly, the plugin automatically creates the Store Locator page on your site through the shortcode [yith_store_locator].
To start configuring the style of the page, go to the tab Store locator page > General.
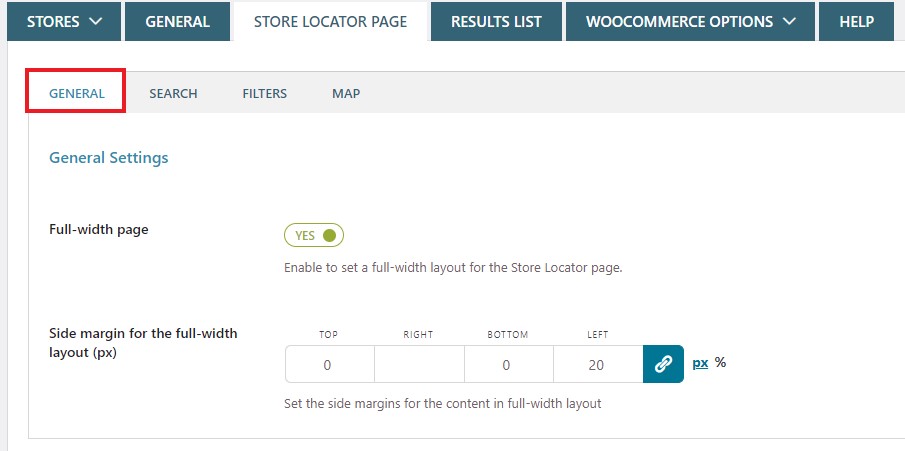
Here, you will be able to choose whether to show the page with a full-width layout or not and set the side margins (in px).