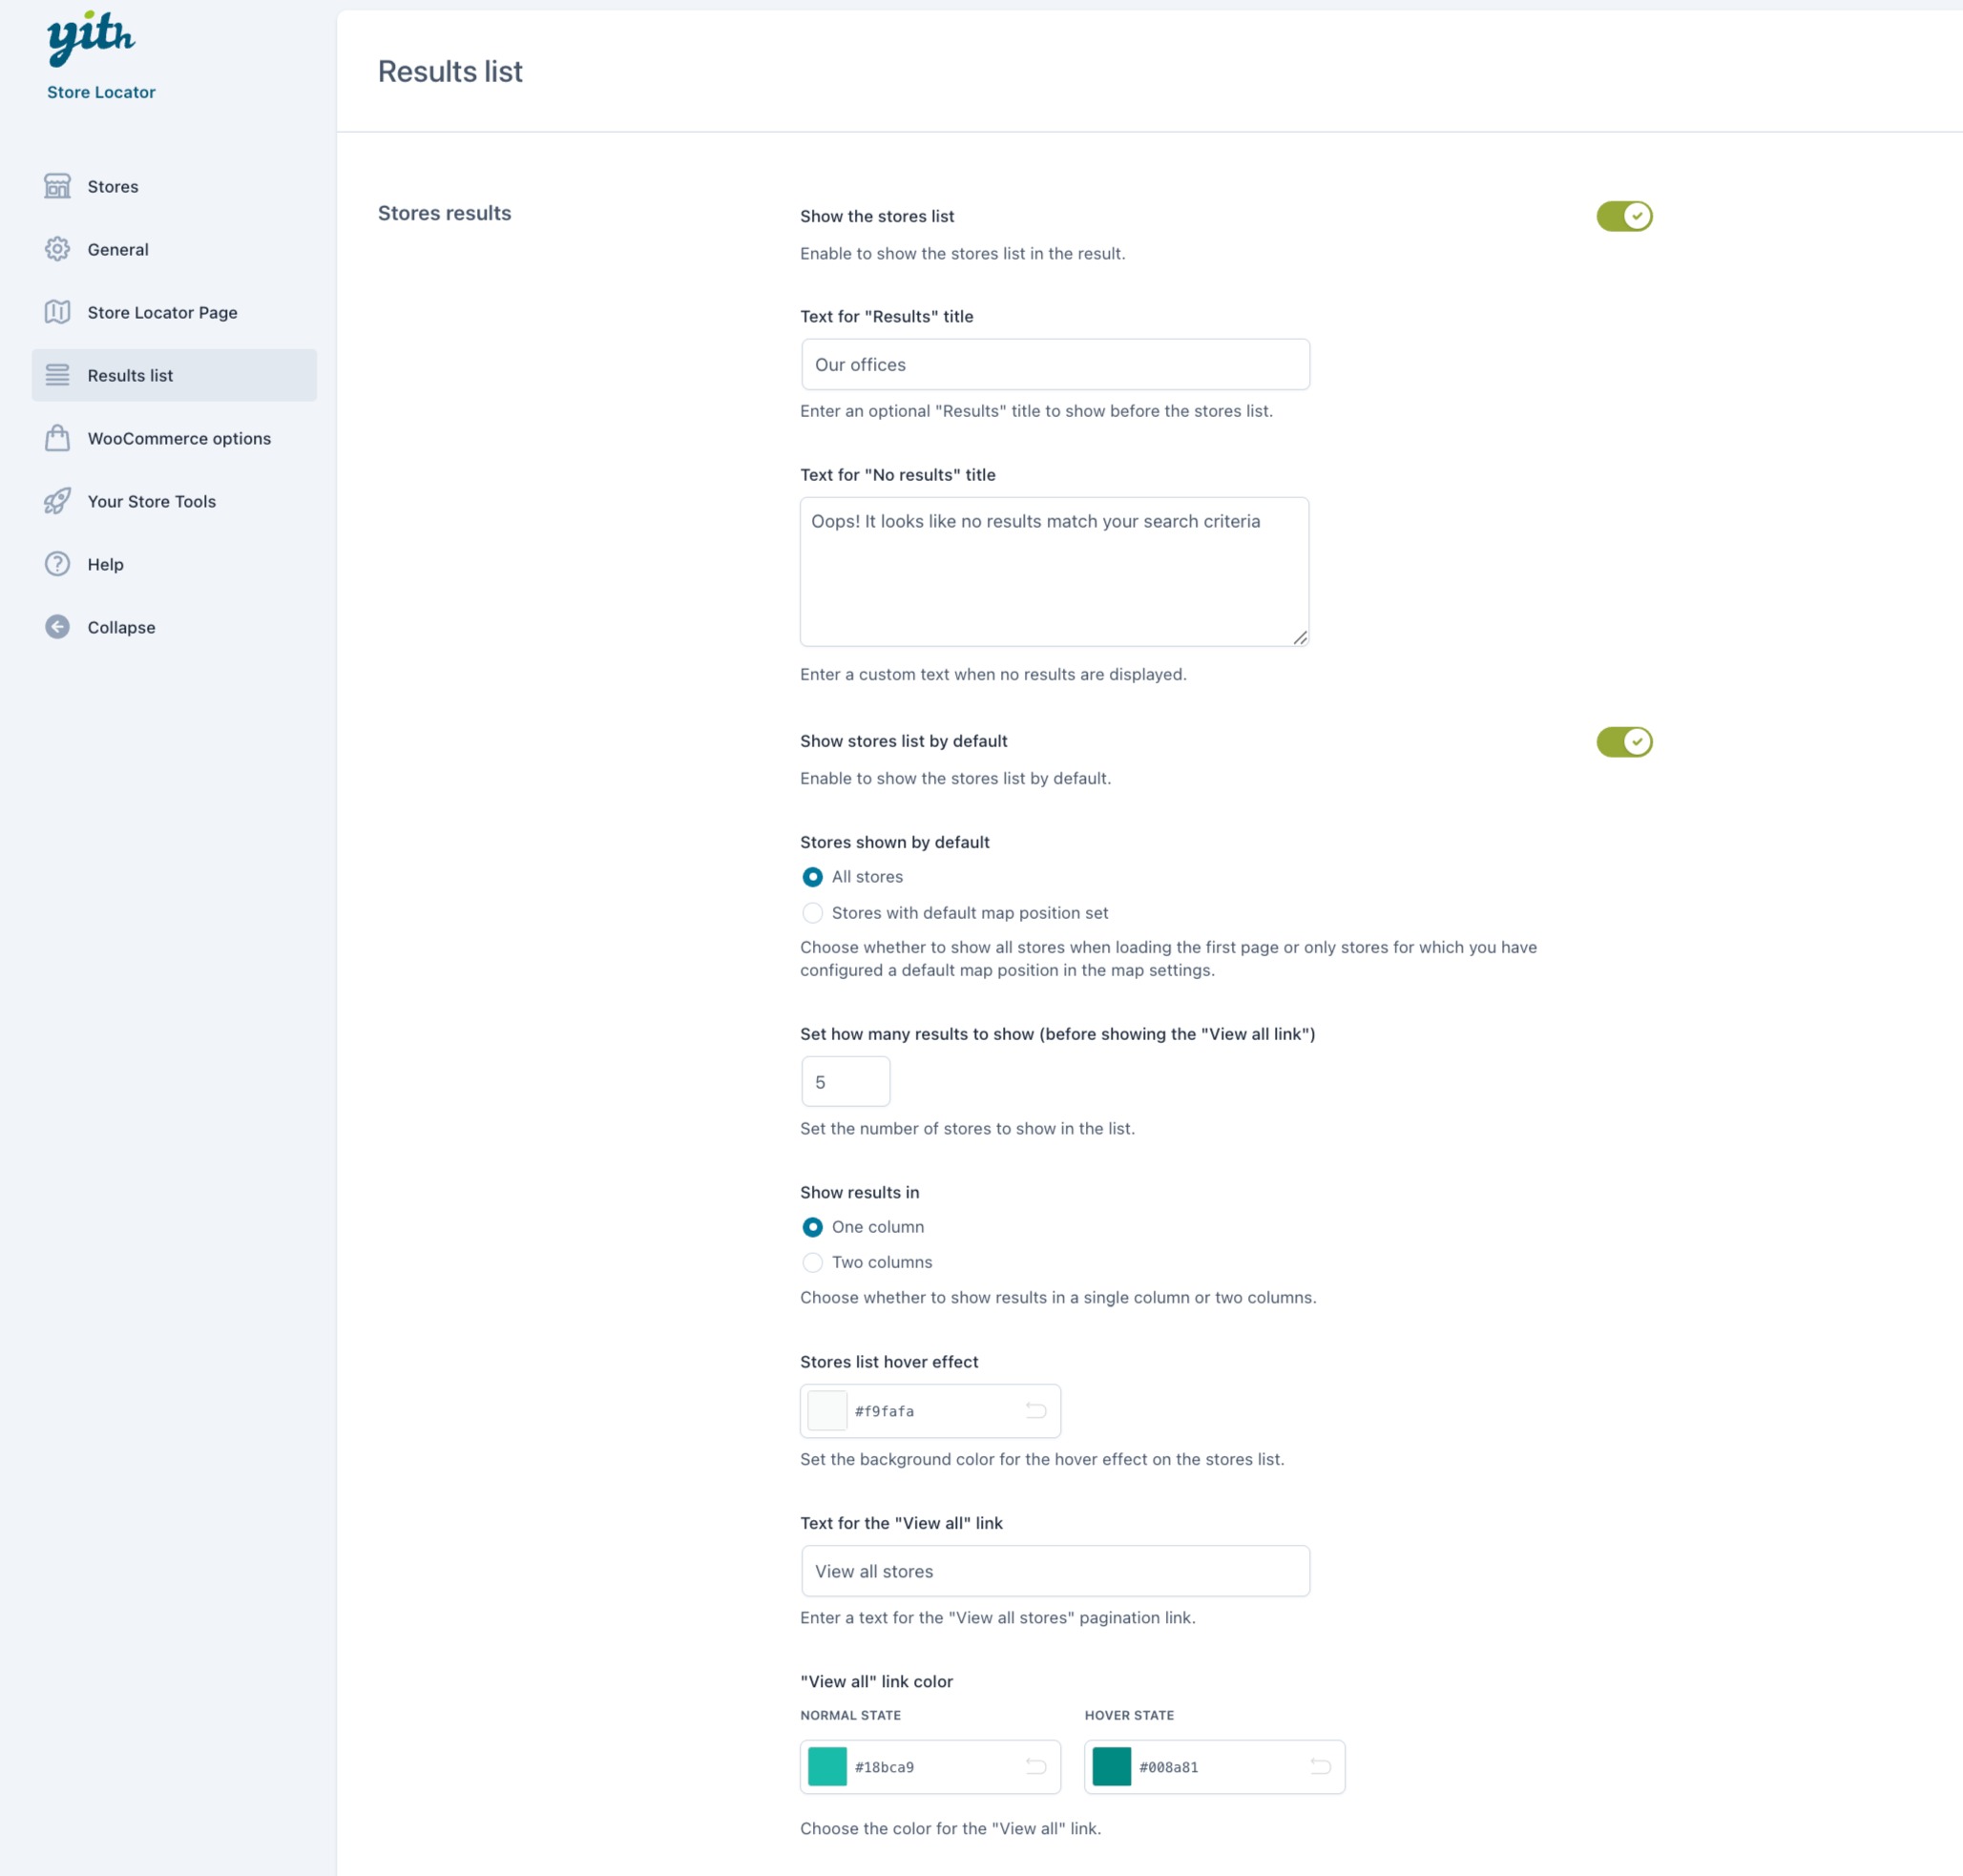
To manage the store information to show in the list, go to the section Results list .
Please note : These are global settings that apply to all the stores.
Store details
These are the available options:
Show store name : enable to show the store names.Show store image : enable to show the store image.Image position : choose the position for the store images from left , right, and top .Show store description : enable to show the store descriptions.Show store address : enable to show the store addresses.
The following options are related to the Get directions links.
Show “Get Directions” : enable to show the “Get directions” link.“Get directions” link style : choose the style to show the Get directions links from Text or Button .Enter a text for “Get Directions” button : enter the text to show for the for Get directions links.“Get directions” colors : (available only when selecting Button style) set the colors for texts and backgrounds.Upload an icon for “Get directions” button: (available only when selecting Button style) upload the icon to use for the button Get directions .
The following options are related to the contact info and the links to contact the stores .
Show “Contact info”: enable to show the Contact info section.Show “Contact store”: enable to show the Contact store link.
Text for the “Contact” button : enter the text for the Contact store links.
“Contact store” style : choose the style to show the Contact store links from Textual or Button .
“Contact store” colors : (available only when selecting Button style) set the colors for texts and backgrounds.Upload an icon for “Contact store” button: (available only when selecting Button style) upload the icon to use for the button Contact store .
Select the contact page to link : choose the page to redirect users when clicking the “contact store” link.
The following options are related to the links redirecting to the store websites and the opening hours.
Show “Visit website” link : enable to show the link “Visit website” to redirect users to the store page.“Visit website” link style : choose the style to show the Visit website links from Textual or Button .Text for “Visit website” link : enter the text to show for the Visit website link.“Visit website” colors : (available only when selecting Button style) set the colors for texts and backgrounds.Upload an icon for “Visit website” button : (available only when selecting Button style) upload a custom icon to identify the “Visit website” links.Show Opening Hours : enable to show the stores opening hours.Open the store page in a new window : enable to open the store page in a new tab.