View Product Page

Currencies

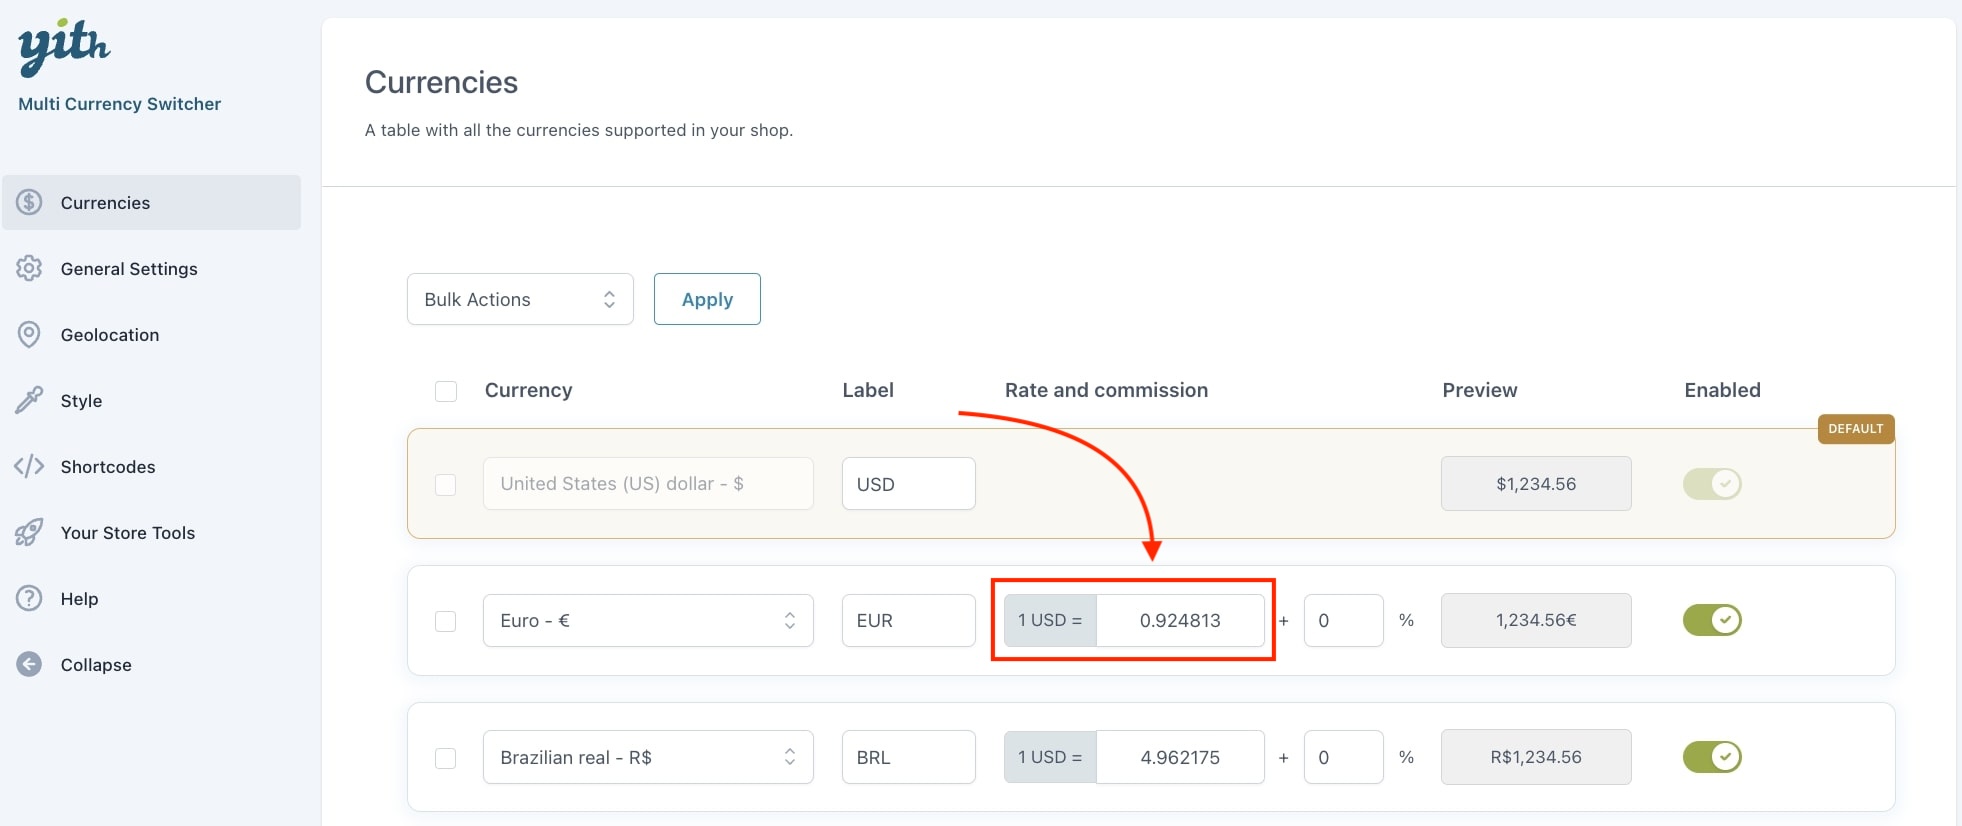
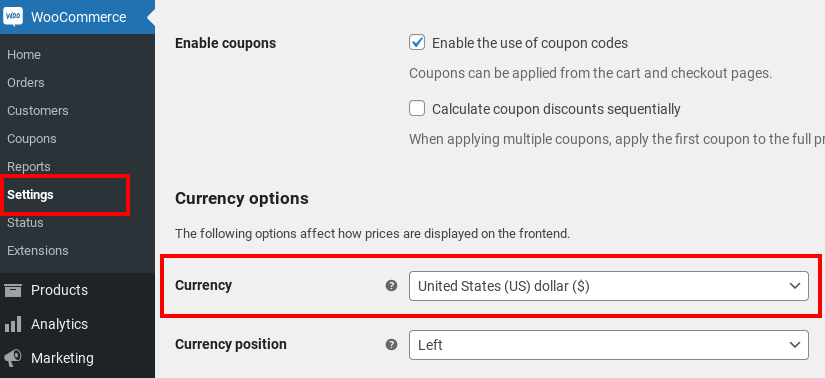
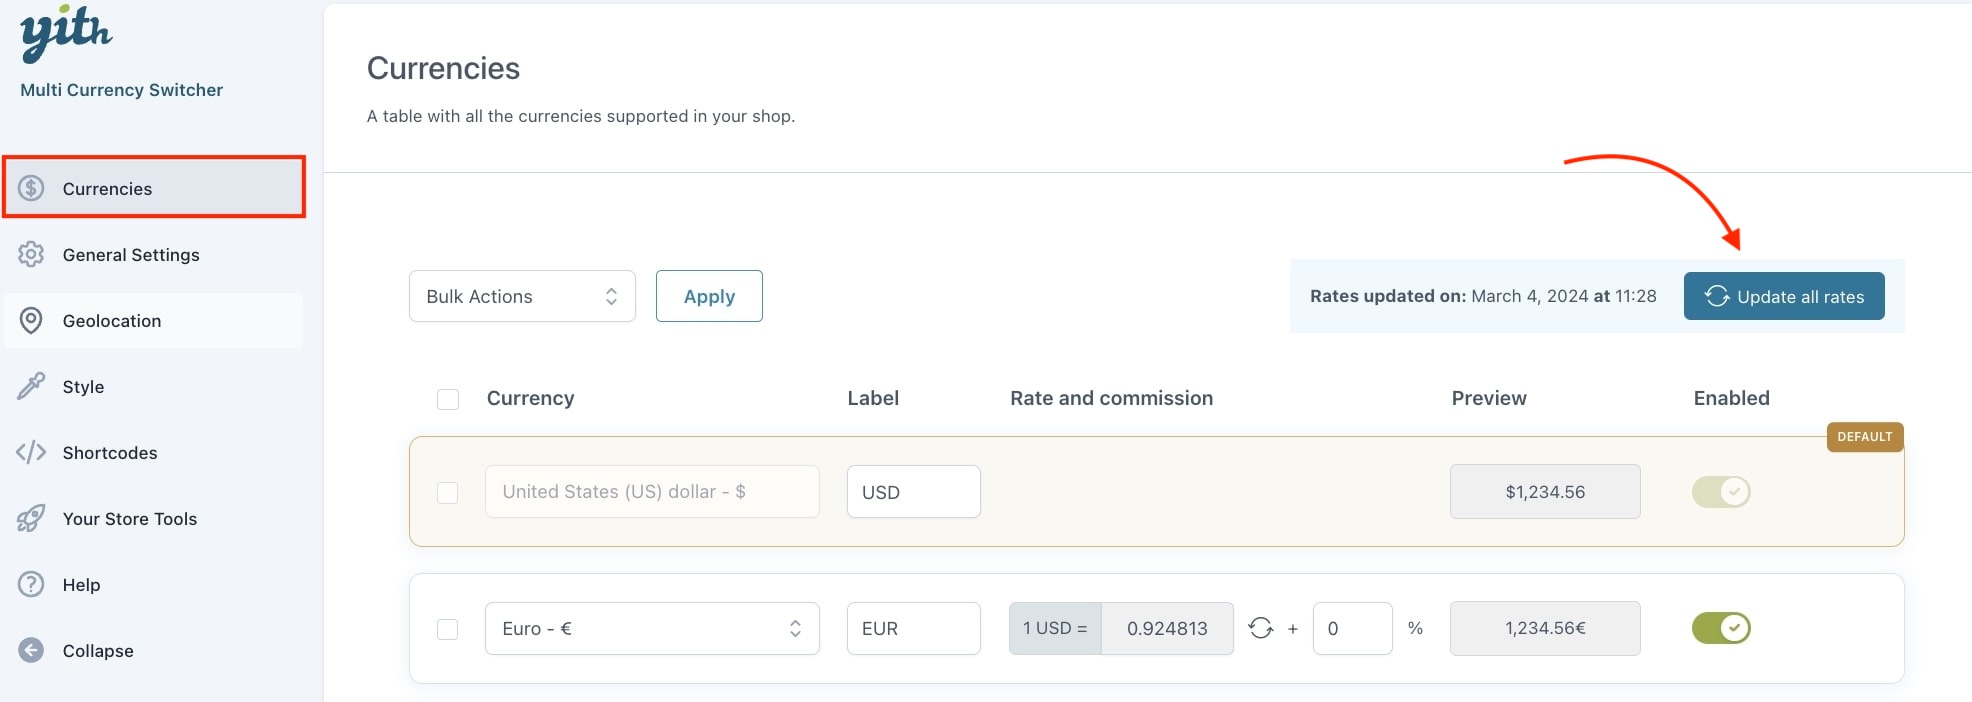
From this page you can see all available currencies for your site. When you first start, you will only see the default currency. But you can add, edit, enable and disable them all from here.

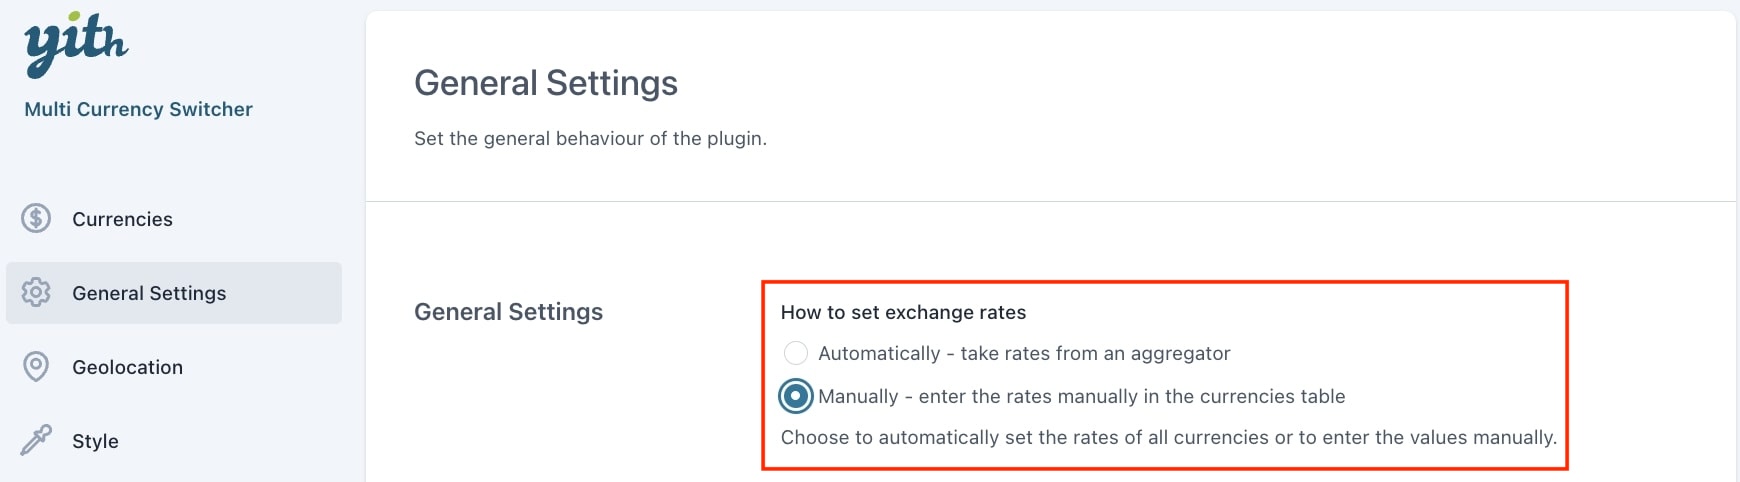
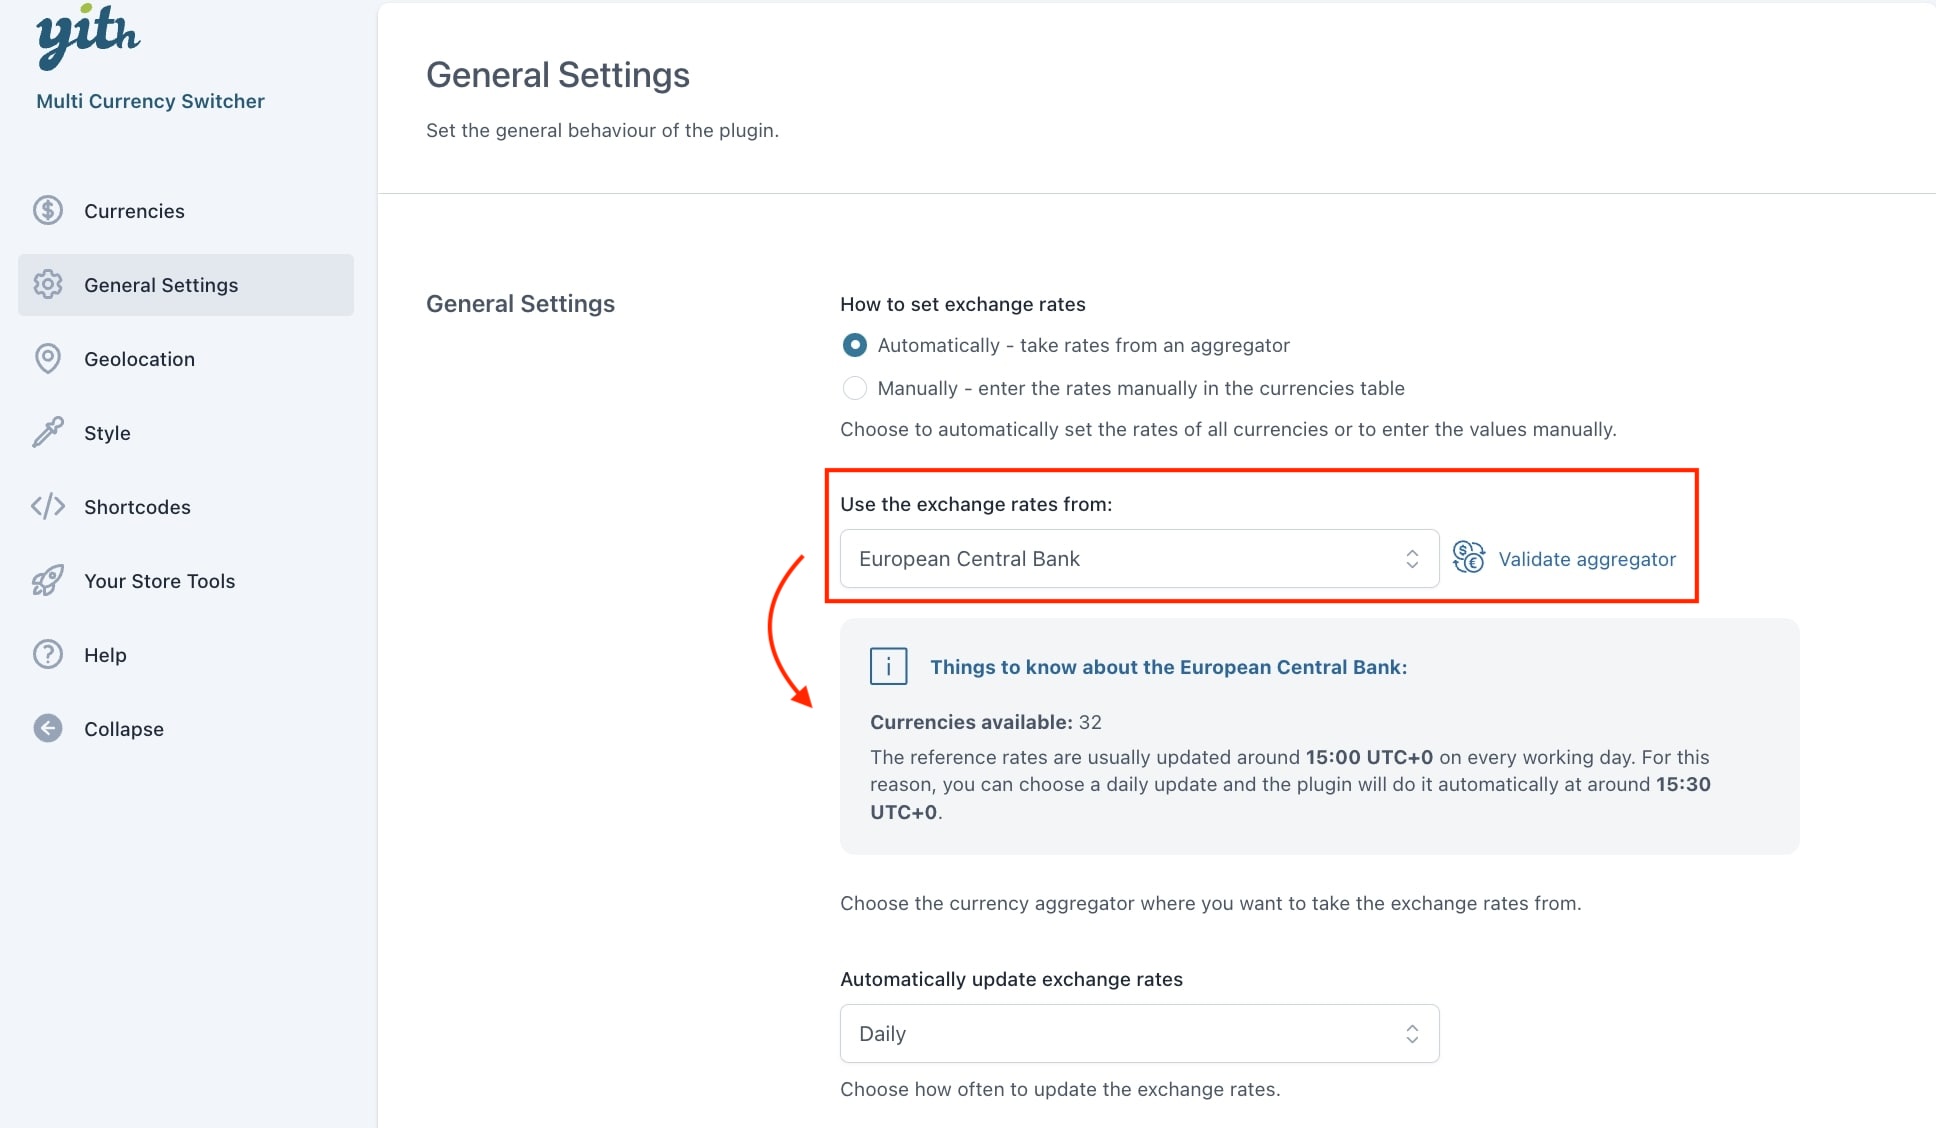
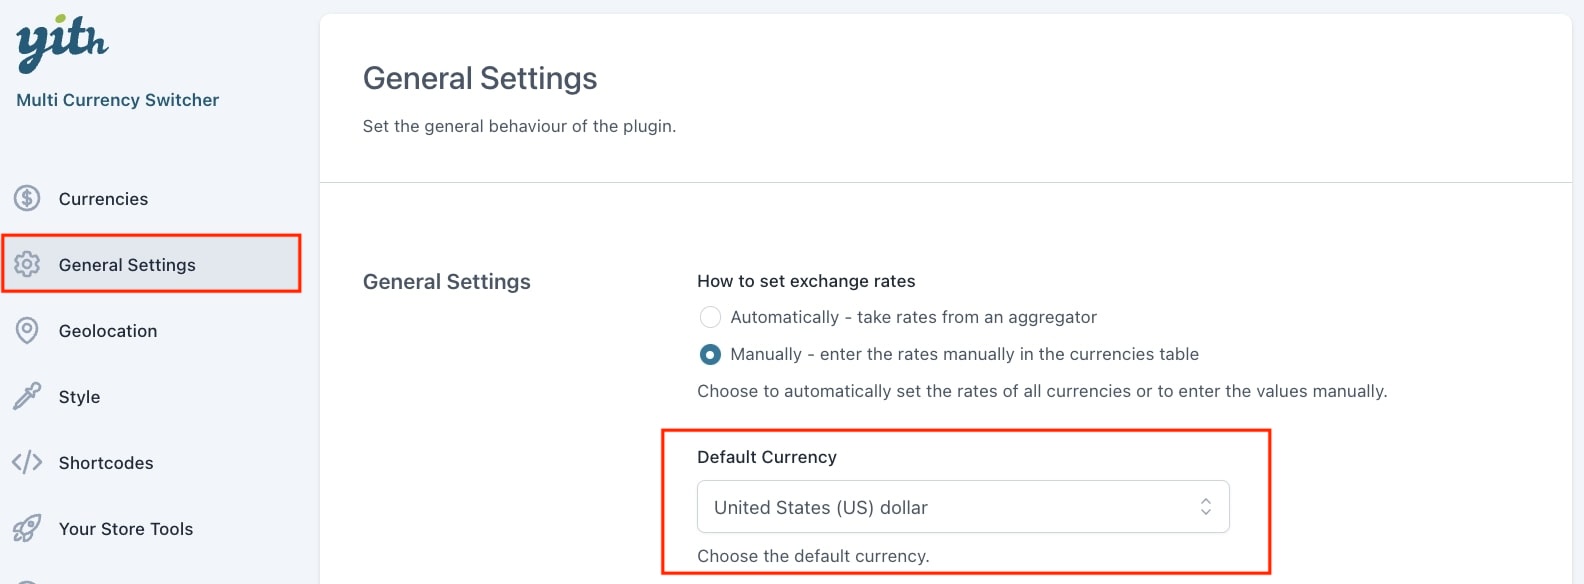
If you decide to set the exchange rates “Automatically“, a dedicated button to manually update all rates directly will be visible.

NOTE: This is only visible when you choose the “Automatically” option, as explained here.
 
In the “Commission” field, you can add a percentage that is added in the price conversion. For example:

– No commission > 1.00 EUR = 2.00 USD
– 10% commission > 1.00 EUR = 2.20 USD (2.00 USD + 10% = 2.20 USD)

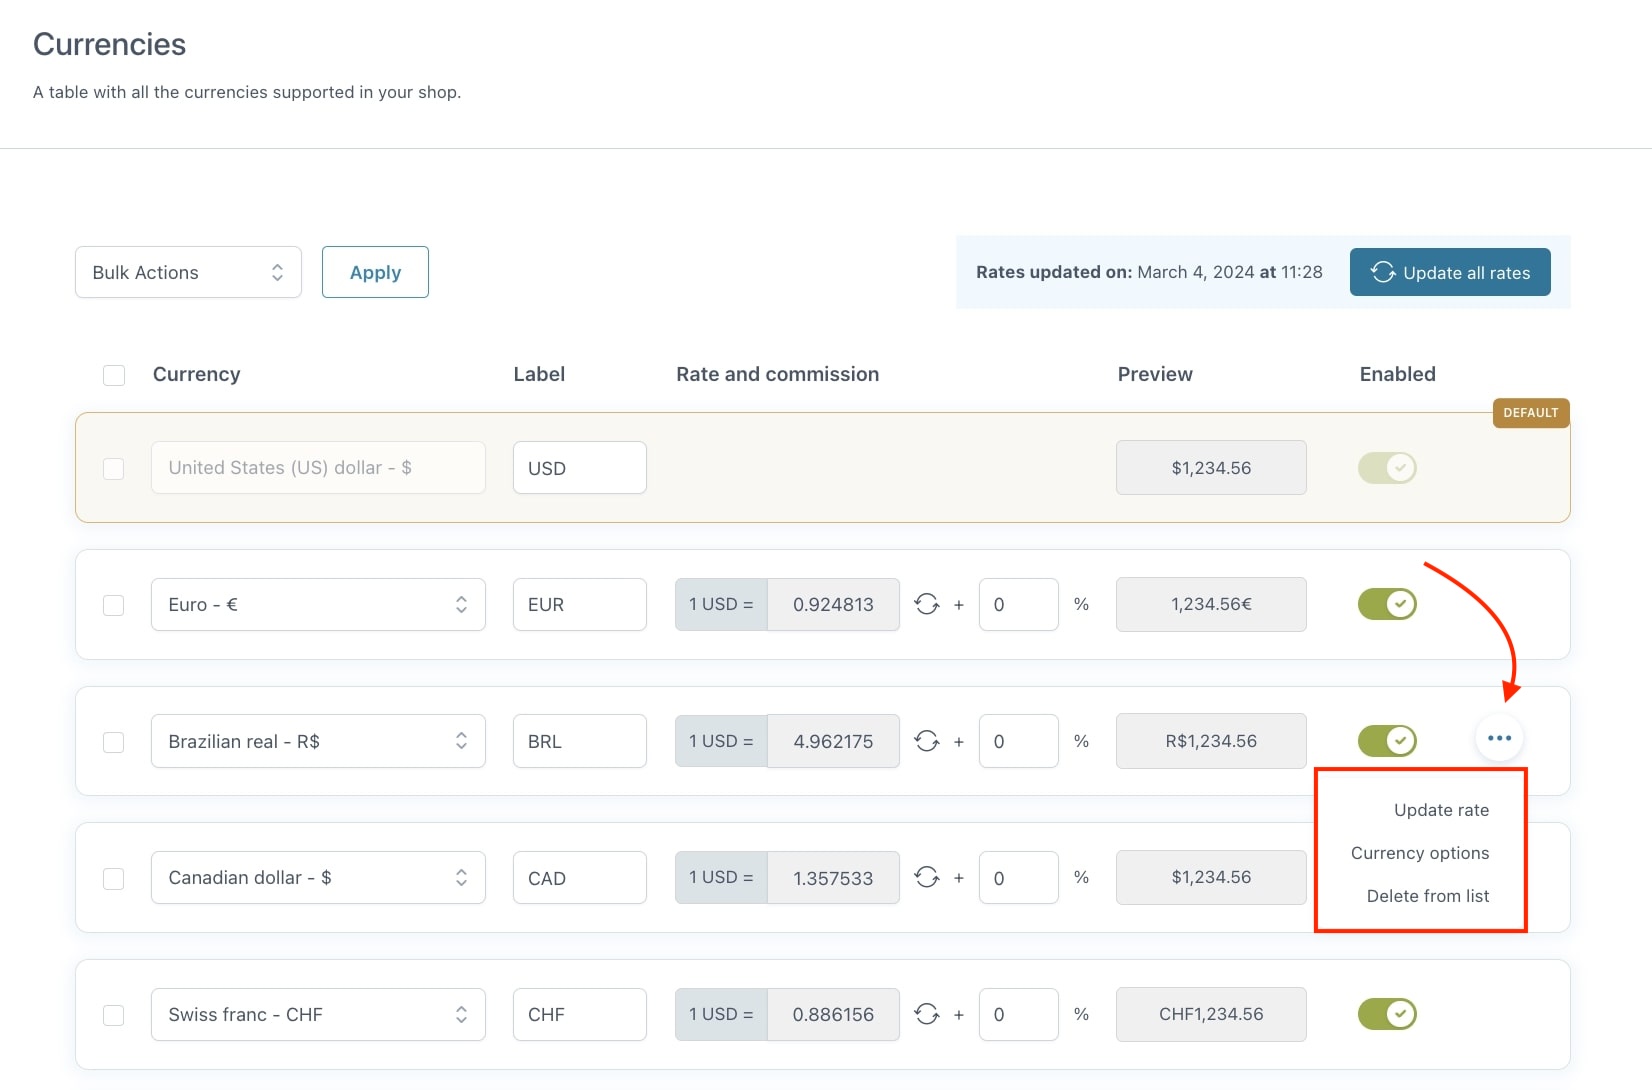
By clicking on the “3 dots” on the right side, you can see the options per currency. Like updating that specific rate or delete that specific currency from the list.

Currency options

By clicking on “Currency options” a popup will appear, showing several options for that specific currency.

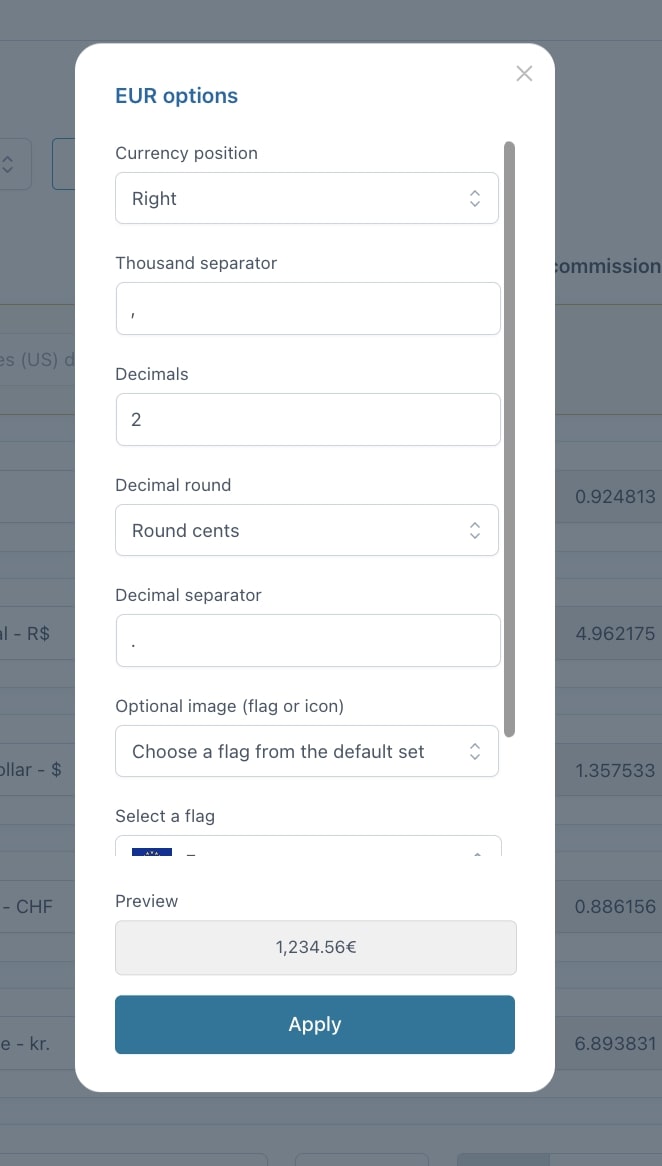
  • Currency position: Show the currency symbol on the left/right side of the amount, and with or without space.
  • Thousand separator:  Decide how to separate thousands (eg. comma, dot, etc.).
  • Decimals: Decide how many decimals to show.
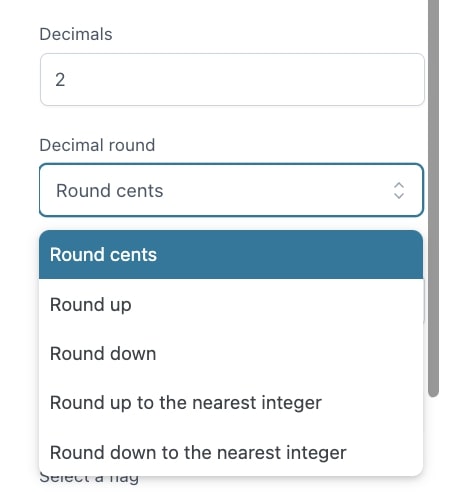
  • Decimal round: Decide how to round decimals, cents, up, down etc.
  • Decimal separator: Decide how to separate thousands (eg. comma, dot, etc.).
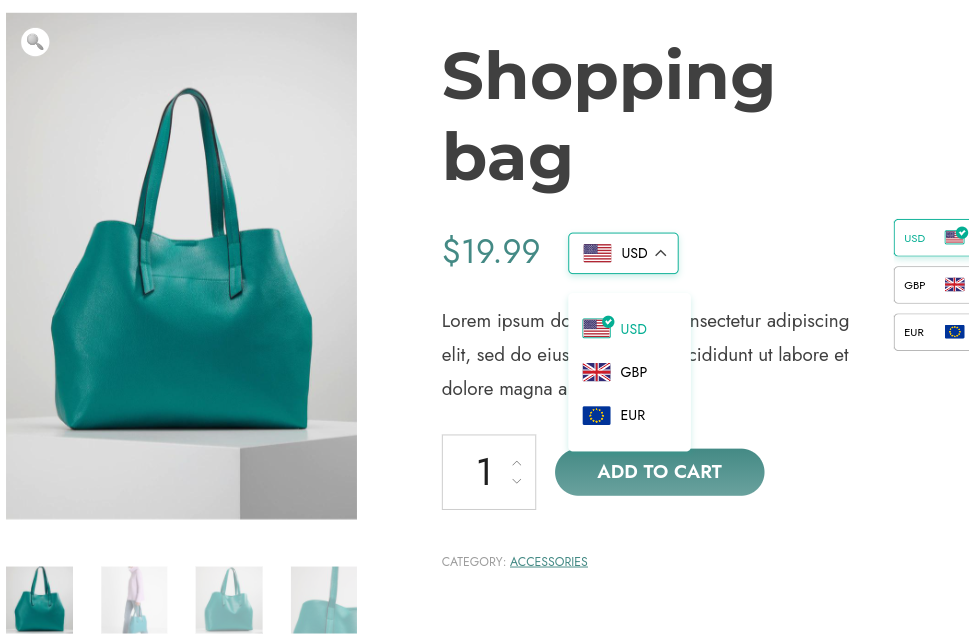
  • Optional image (flag or icon):
    • Don’t show a flag
    • Choose a flag from the default set: select a flag from the default list.
    • Upload a custom icon: an upload field will appear.
  • To identify the currency, show: 
    • Only the currency.
    • Currency and label.
    • Only the label.

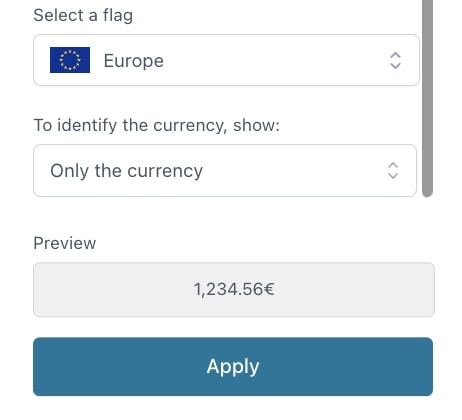
At the bottom of the popup, a preview of the price is shown.

Please note – The currency position, thousand, and decimal separators are automatically applied based on WooCommerce currencies information when selecting the currency.

Set rates manually

First you have to decide if you want to set exchange rates manually or automatically. You can do so from Multi Currency Switcher > General Settings.

Manually

You will have to enter the values of all currency rates manually in the “Currencies” tab.

Rate field can only be edited only if it is set to “manually“. If this option is set to “automatically” the rate can only be updated, but not edited manually.

Set rates automatically

If you choose the option to set the rates automatically, the rates will be taken from an aggregator. This is a tool that sets the currency rates for you.

You can only use the “Automatically” option if you have entered the plugin license key. You can enter the key in YITH > License activation.
  • Use the exchange rates from: Select the currency aggregator of your choice. Below the selected aggregator, you will see some important information with regards to the chosen option. Like the number of available currencies and the usual update time.
  • Automatically update exchange rates: how often will the rates be updated.
    • Twice a day
    • Daily
    • Weekly
    • Every 15 days
    • Monthly
  • Validate aggregator: It runs a quick check to see if everything is ok. The popup will tell you if it is all good, or if you have to fix something.

Other general settings

Here you can set the other general settings like, default currency, checkout currency and how to change the currency.

This is also the currency set in WooCommerce > Settings, so it is the currency of the Whole Store. If you change this in the plugin, it will also change the WooCommerce Currency (and viceversa).

default currency
  • Checkout currency: Choose which currency to show at checkout
    • Customer selected currency: Customer is free to select his own currency.
    • Forced to a specific currency: A new option appears where you can select the currency to show and use at checkout.
  • Forced, based on the customer’s country: Based on billing- or shipping address. They cannot be blank on checkout.
  • Change currency using: 
    • Ajax: The currency will change through an AJAX call, so the URL of the site will not change (www.example.com).
    • Query string: When changing the currency in the query string will appear ‘currency=USD’ (where USD is the ID of the selected currency) so the URL will be (www.example.com/?currency=USD).
    • Query string only for non-logged users: This option will show the Ajax one for logged in users, and a query string when the user is non-logged.

Shipping options

If you need to set different currencies for the minimum order amounts for free shipping and costs for the flat rate, enable the option Enable multi-currency shipping options available in the General settings.

Now go to WooCommerce> Settings > Shipping and select the shipping method to configure the different costs based on the currencies enabled on your site.

Flat rate example

Multi-currency shipping options

Free shipping example

Multi-currency shipping options
Please note: if the general option is disabled or if one or more currency fields in Free shipping and/or Flat rate options are left empty, the plugin will convert the costs based on the currency selected by the user.

Payment gateway

In the “General settings” tab you will also find the “Payment gateway” options. From this section you can decide to hide some payment gateways for users that use specific currencies.

Let’s take the example image above:

  • Cash on delivery is hidden for the USD currency
  • Direct bank transfer is hidden for the Pound sterling currency.

Multi currency for simple product

If you want to set specific prices in different currencies per product, that is also possible. You can override the general settings within the product edit page.

Simply enable the “Multi Currency options” and you are ready to edit.

Once enabled, you see all available currencies in your store, and you can set the price per currency. It is also possible to schedule a sale price.

The ‘Regular’ price you see on top, is the default currency, in this case $ (USD).

Product - simple example

On the shop page, the prices will show accordingly, by changing the currency (either manually by customer or automatically depending on your settings).

Multi currency for variable product

If you want to set specific prices in different currencies per variation, that is also possible. You can override the general settings within the product edit page.

Simply enable the “Multi Currency options” within the variation and you are ready to edit. Once enabled, you see all available currencies in your store, and you can set the price per currency. It is also possible to schedule a sale price.

You can enter each variation and set the prices as you wish (or decide to use the general settings, and not enable to options for this specific variation).

The ‘Regular’ price you see on top, is the default currency, in this case $ (USD).

Product - variable example

On the shop page, the prices will show accordingly, by changing the currency (either manually by customer or automatically depending on your settings).

Coupons

From “Marketing > Coupons” you can create new coupons and set the currency per coupon.

Coupon with options

The general settings correspond with the default currency.

The options below “Multi-currency options” refer to the available currencies in your store. The amount is either a percentage or an amount, depending on the ‘Discount type’ you set.

Geolocation

You will have to decide if you want to show the currency based on the customer’s location.

When you enable this option, the customers will automatically see the currency of the country where they are located. When you disable this option, and the user location currency is not available (or the geolocation fails), the customer will see the default currency.

You can set the default currency in the “General settings” tab.

Add new geolocation rule

By going to ”Geolocation rules” and clicking on “+ Add rule”  you can create a new geolocation rule.

  • Name: Name of the rule (only visible to admin).
  • To users of these countries: Select the countries you wish to include in this rule.
  • Show this currency: the selected countries will see this currency.

All rules are added to the list, which you can easily edit, remove, enable or disable (also in bulk).