Big thanks to WPML team for sharing these helpful documentation with our customers
Getting started
To translate YITH WooCommerce Waitlist with WPML, you need the WPML core plugin, as well as the WPML Multilingual & Multicurrency for WooCommerce addon. To get both plugins, buy the WPML Multilingual CMS package.
If you’re new to WPML, check out its getting started guide to learn how it works before following this tutorial.
To learn more about translating your WooCommerce store, see how to translate WooCommerce with WPML.
Translating YITH WooCommerce Waitlist
To translate texts in the YITH WooCommerce Waitlist with WPML, go to WPML → Translation Dashboard and scroll down to the Other texts (Strings) section. There, search for any texts related to YITH WooCommerce Waitlist that appear on your website and select them.
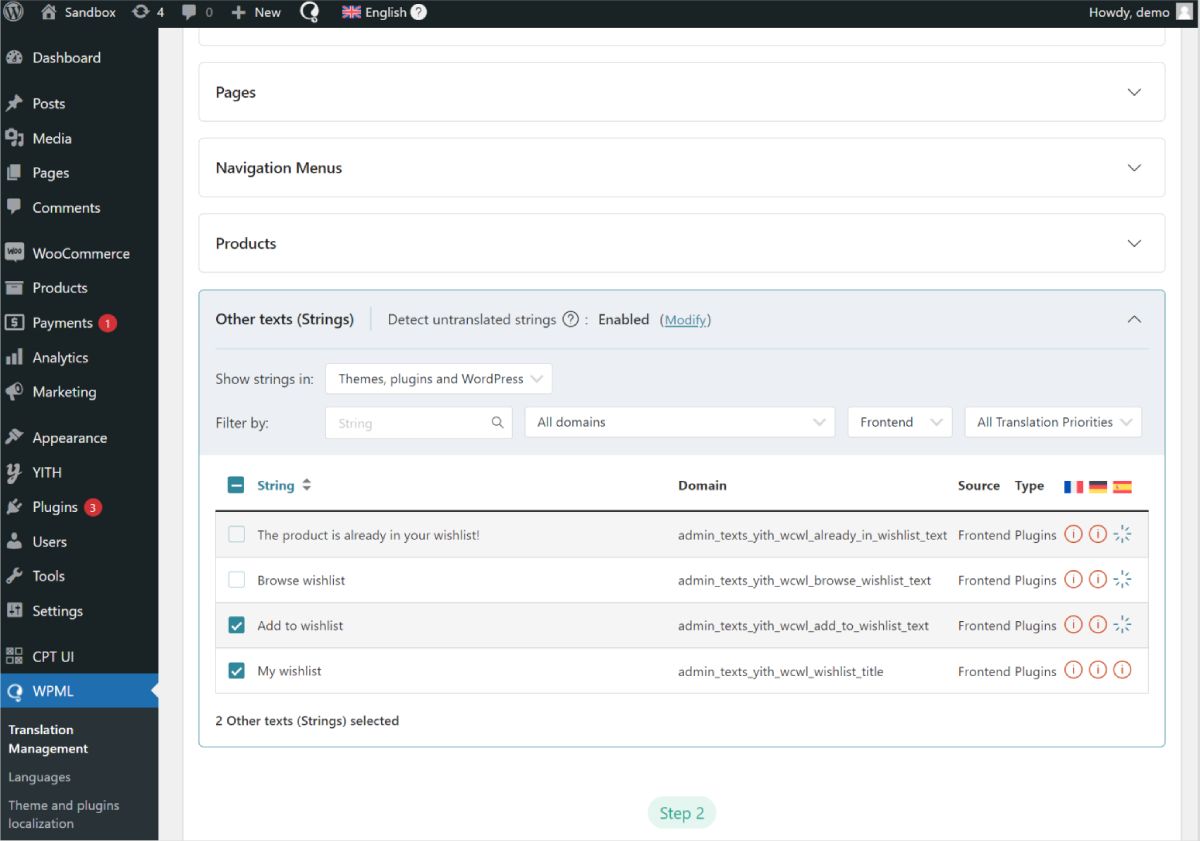
If you don’t see some of your texts, go to your website, navigate to the page with your missing texts, and switch languages. As you view the page, WPML will automatically detect the missing texts and populate them in the strings section.
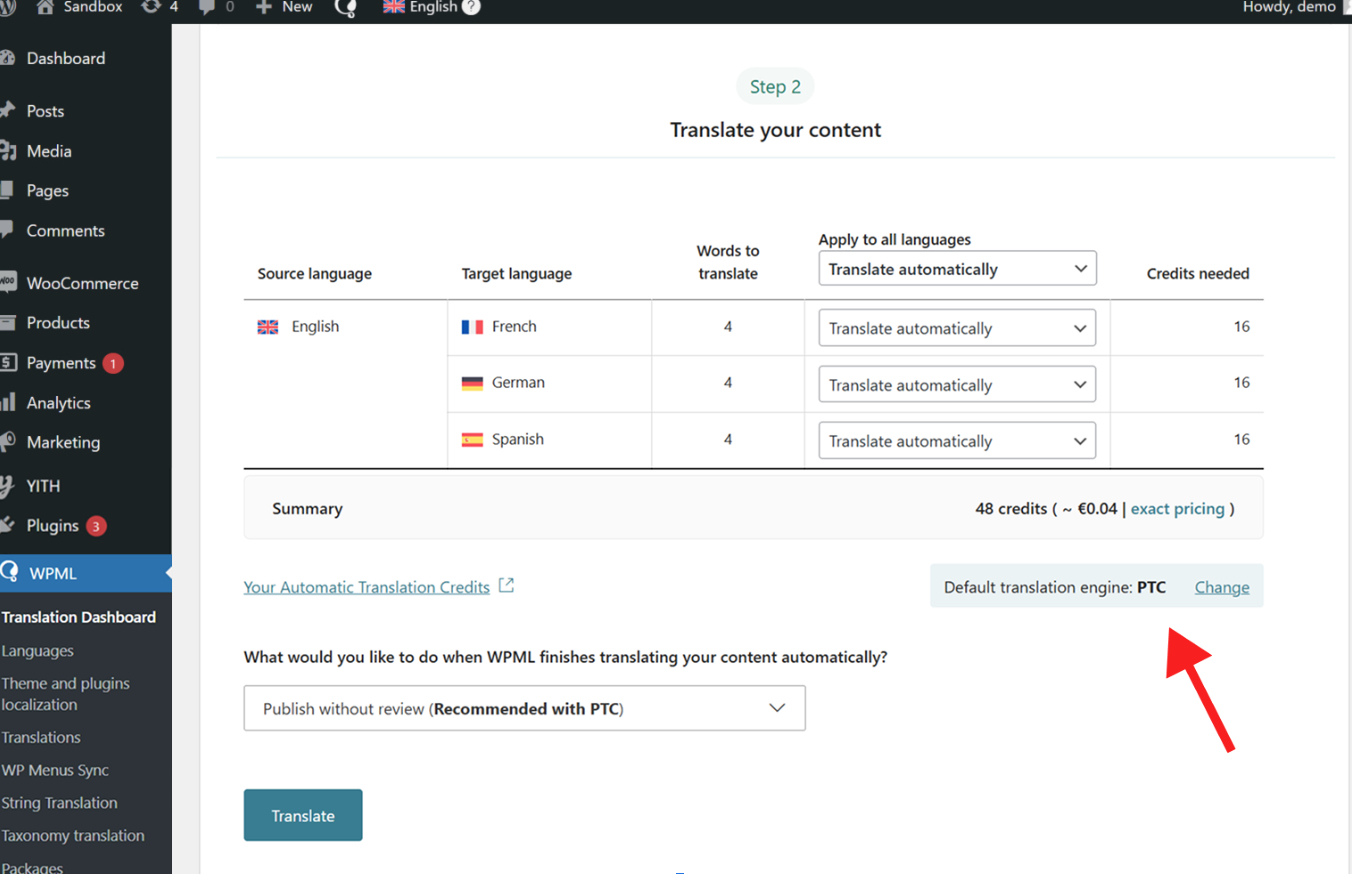
Once you select all your strings, the next step is to choose your translation method. To get the best translations, we recommend translating automatically using WPML’s most accurate AI translator – Private Translation Cloud (PTC).
PTC is like your own team of expert translators with a deep understanding of your content and niche. It’s WPML’s proprietary AI technology, and even includes a translation quality guarantee: If you’re not satisfied with PTC’s translations, you’ll get a full refund.
Once WPML finishes translating your content, your texts will appear translated on your website when switching languages.
If at any moment you want to edit your AI translations, you can always make changes using the Advanced Translation Editor.
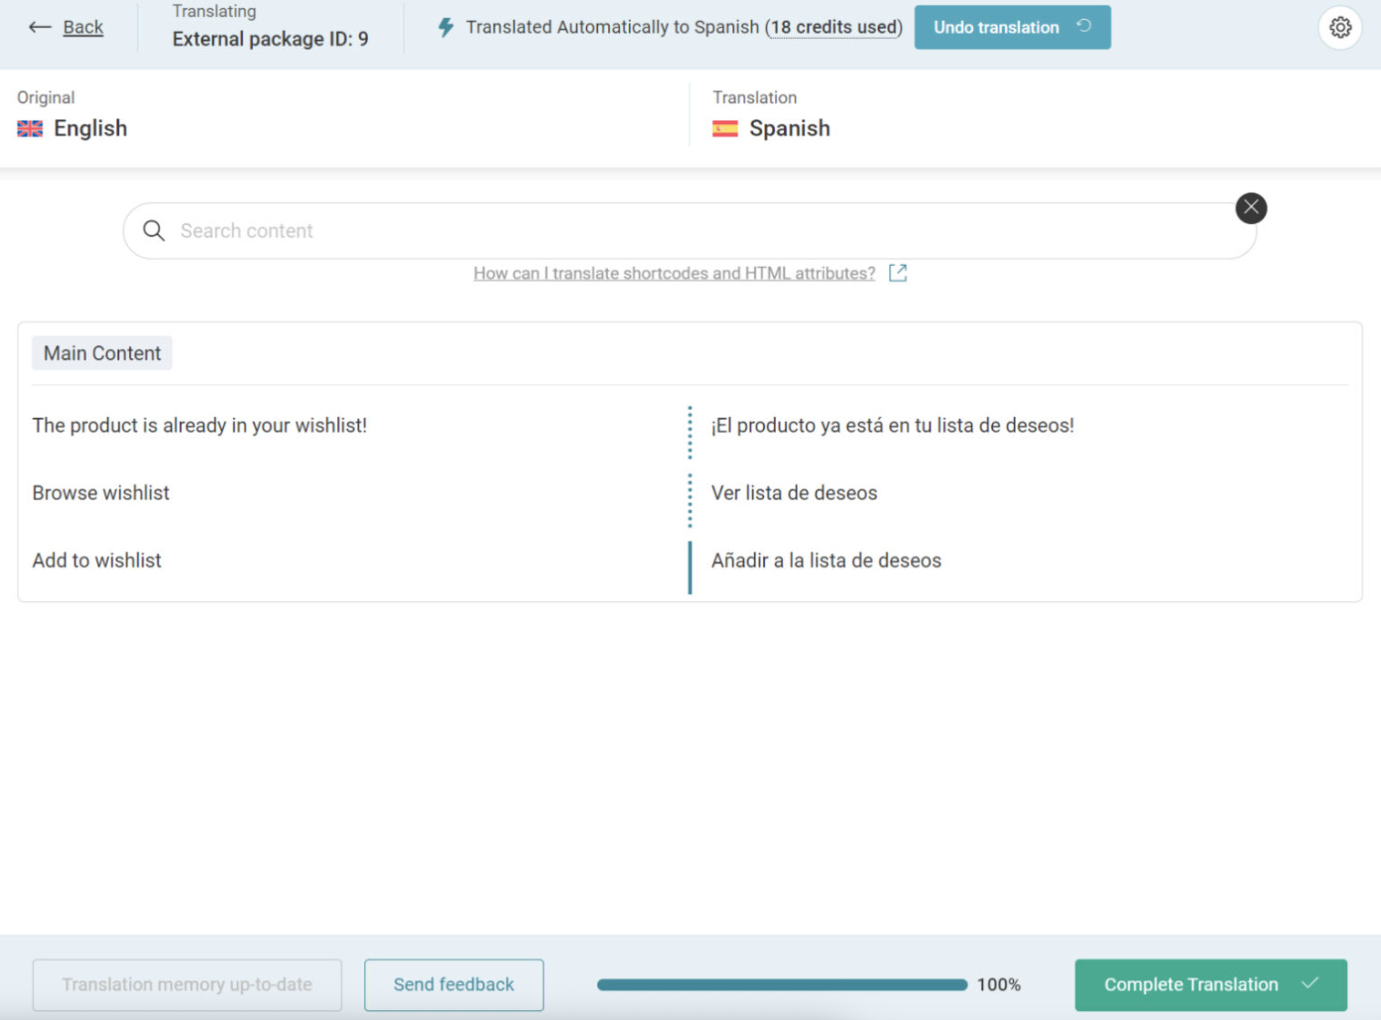
Just visit the translated page you want to edit on the front-end, and click Edit translation in the top admin bar. This will open the editor, where you can make any necessary changes.