View Product Page

Waitlist table

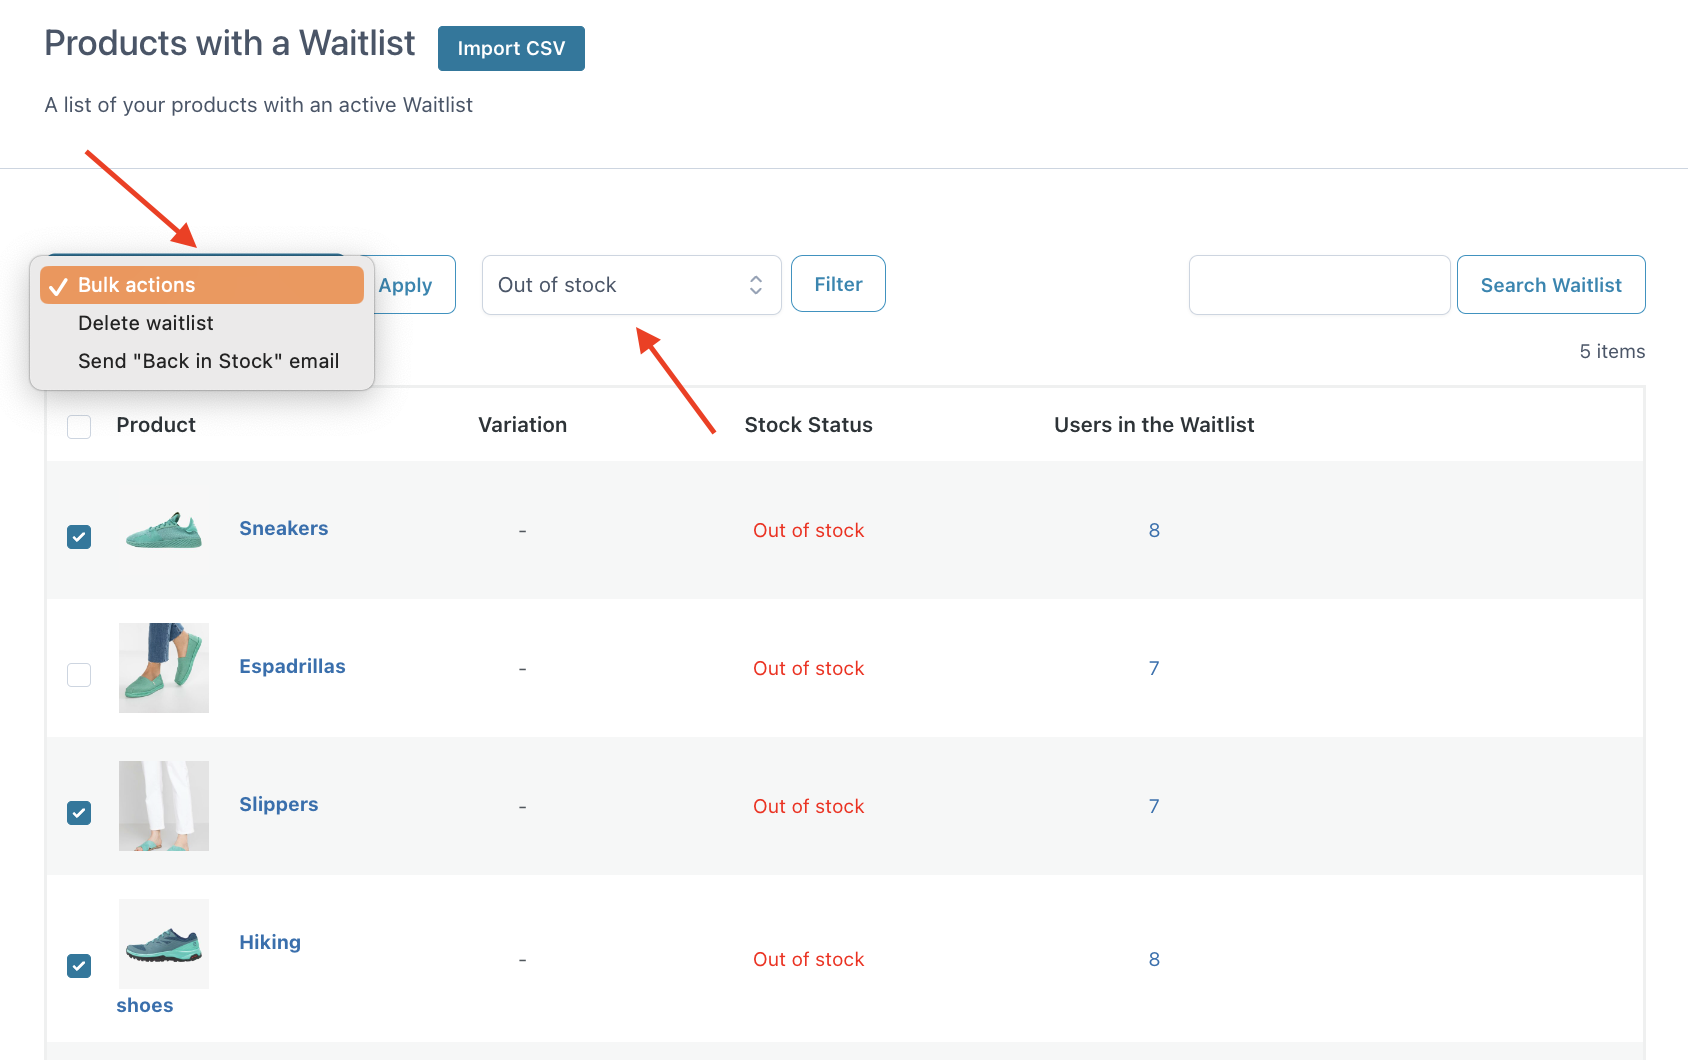
Every time a user subscribes to a waitlist, the products will show in the dedicated plugin section Products with a waitlist. 

Through the table, you can see the products, the specific variations added to the waitlist (for variable products), the stock status, and the number of users with an active waitlist for that product.

Waitlist table

For every product with an active waitlist, you can execute some actions which are:

  • delete the item and the related waitlist
  • view users subscribed to the waitlist
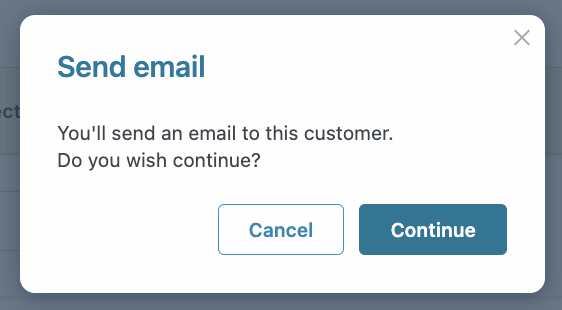
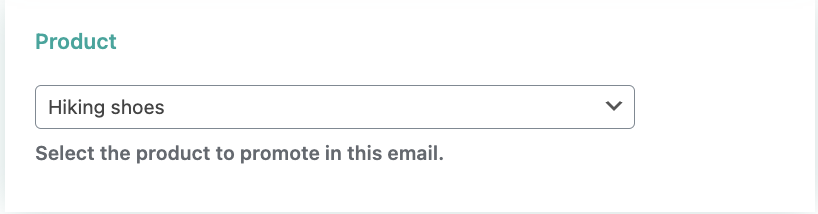
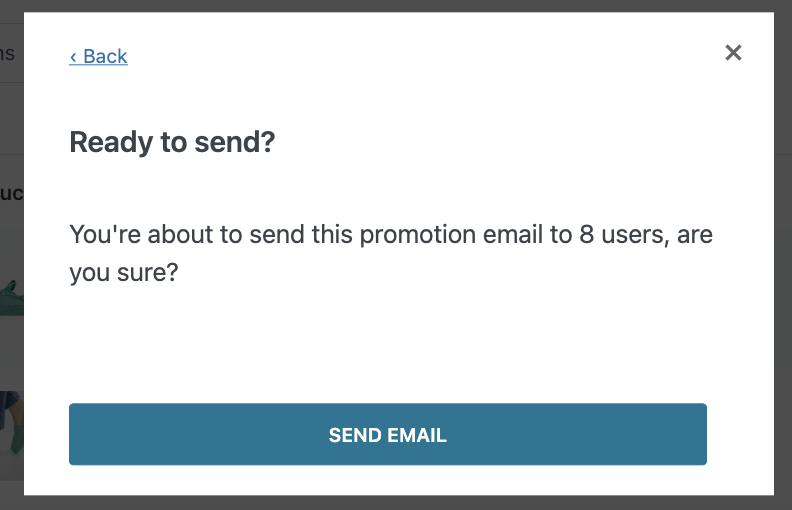
  • send the email both the back-in-stock one and the promotional email to all users subscribed to the waitlist.

The search field available in the table allows you to easily find a specific waitlist among those active in your site.

Bulk actions

To quickly delete several waitlists or send the product back-in-stock email for more products at the same time, you can use bulk actions. You can additionally filter the products by status (in stock or out of stock).

Bulk actions on waitlists


View users

From the waitlists table, you can view all the users subscribed to every waitlist by hovering over the dots icon and clicking on View users.

View users in waitlist

Here, you can easily spot whether the users are already registered on your site or not under the column Is customer.

Actions on waitlist users

Additionally, you can remove each user from the waitlist (also with bulk actions if needed) and send the product back-in-stock or promotional email. Let’s see how:

Send back in stock email

When selecting the option Send “Back in stock” email, you will be asked to confirm this action through a popup as shown below.

Send back-in-stock email popup

By clicking on Continue, the email will be automatically sent to the user and a notice will show.

Send “Promotional” email

When selecting the option Send “Promotional” email, you will be able to set up the email content through the dedicated modal.

How to set the promotional email

The email content can be customized by taking advantage of the advanced built-in editor, while the header can be customized in WooCommerce › Settings › Emails.

For the content, you can use the available placeholders which are:

  • {username}: the name of the user;
  • {product_info}: the product information;
  • {promotion}: the item promoted as the alternative product;
  • {blogname}: the name of the blog

The item promoted in the email can be searched and selected through a specific field.

How to select the promoted product

While setting up your promotional email, you will dynamically get a preview of it from the box on the right.

After completing the email configuration, click on the Continue button and confirm the email sending.

The users will now receive your promotional email.

Promotional email example

Add and export users

Add users

From the Products with a waitlist section, after accessing the table where you will find all the users subscribed to a waitlist (check this page to learn how to view waitlist users), you can add other users by clicking on the Add user button.

In the popup, you can add either an existing user by searching and selecting it from the related field

How to add an existing user to a waitlist

or add a new user by completing the form fields as shown below.

To inform the user about the account creation via email, just enable the specific checkbox at the bottom of the form.

The user will be now added to the product waitlist.

Added user

Export users

From the user table, you can also export the list of users subscribed to that specific waitlist. To do it, just click on the Export CSV button.

This will immediately execute the file download.

Waitlist Importer

If you need to import the customers’ emails from a CSV file to a waitlist, you can do it from the section Products with a waitlist by clicking on the Import CSV button.

Import users' emails to waitlist

As a first step, you must select the product of the waitlist for which you want to import the file and click on Continue.

Choose the waitlist product for the import

You can then upload the CSV file and, if needed, overwrite the existing waitlist by enabling the related option.

Upload CSV file

Now select the column you want to use as customers’ emails from those available and click on Run the importer to complete the import.

Select a column for the import