View Product Page

GDPR compliance (Privacy Policy)

This plugin is fully compliant with the General Data Protection Regulation (GDPR).

Specifically, users will have the possibility to be redirected to the Privacy Policy and give their consent to be added to a waitlist through a dedicated checkbox.

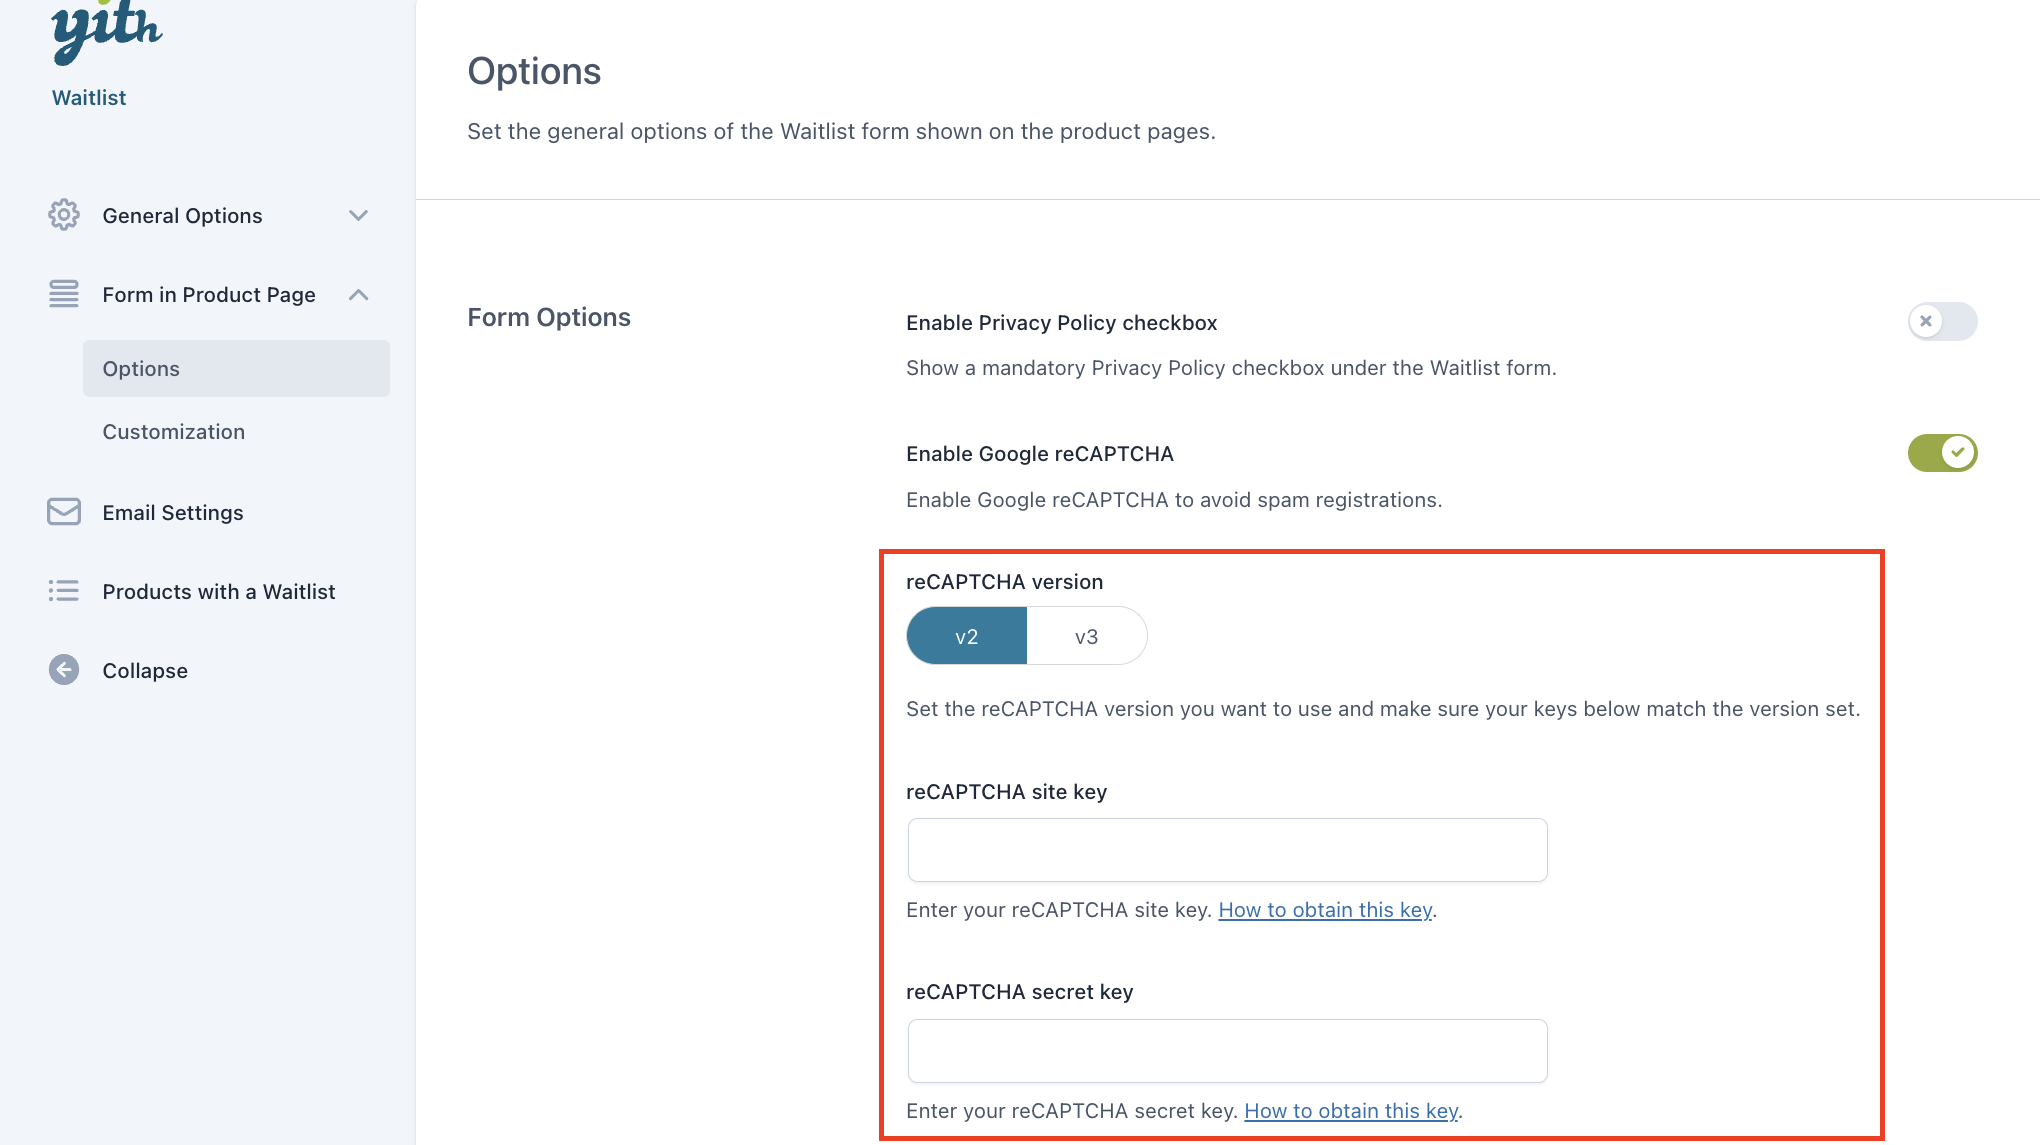
To add this checkbox to the waitlist form, go to YITH > Waitlist > Form in Product Page > Options and enable the option Enable Privacy Policy checkbox.

Enable Privacy Policy checkbox

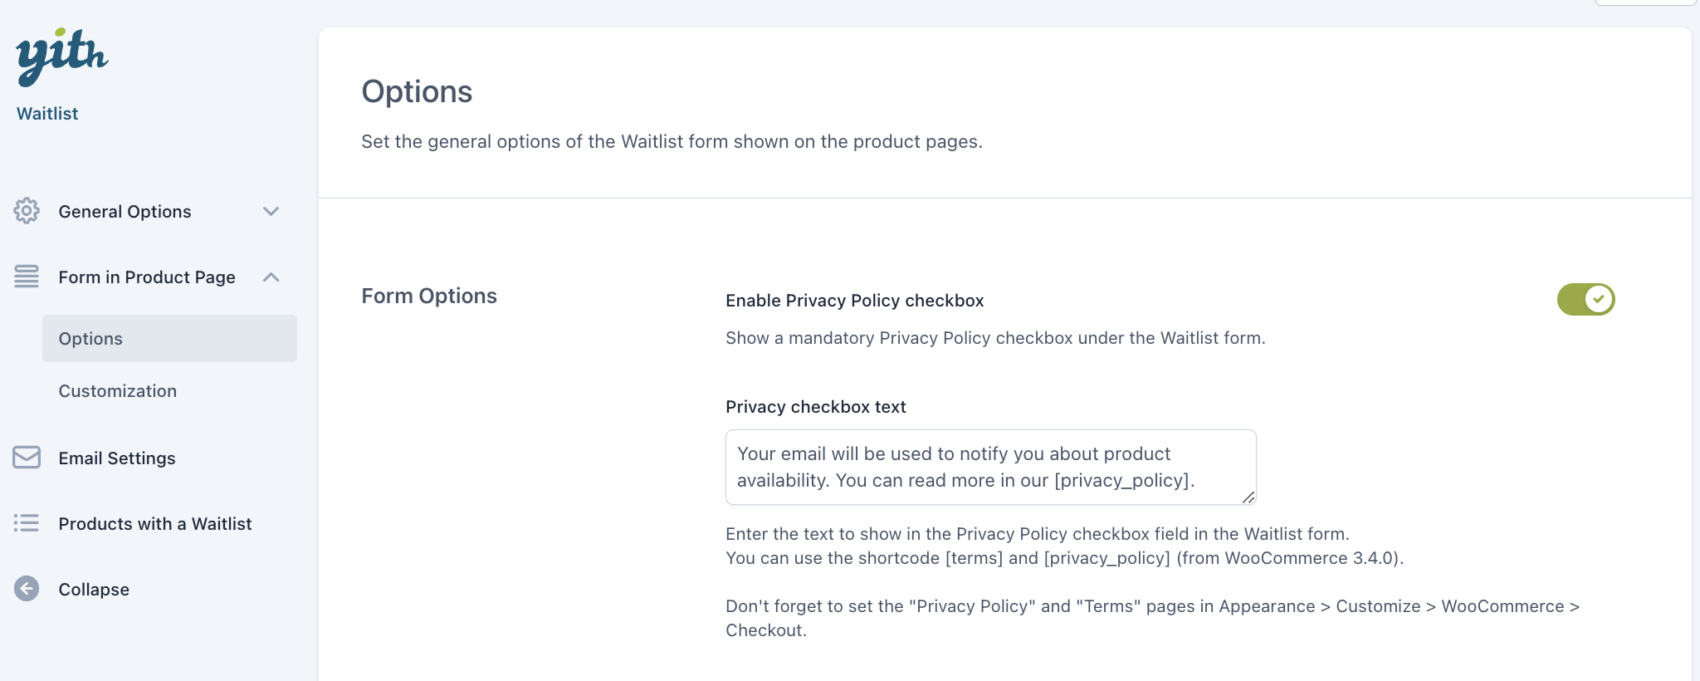
After enabling it, you can enter a custom text to show next to the checkbox. You can also include the shortcode [terms] and [privacy_policy] that will redirect users to the Terms and Privacy Policy pages if you have created and configured them in Appearance -> Customize -> WooCommerce -> Checkout.

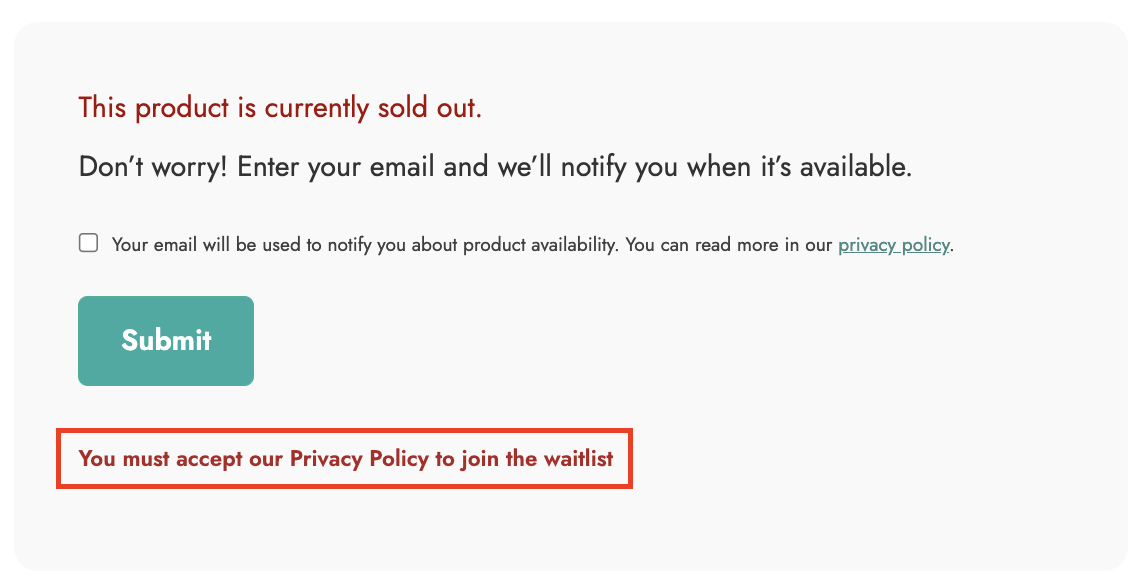
Below is an example of what the checkbox looks like in the waitlist form.

Privacy Policy checkbox example

If the user clicks on the Submit button without selecting the checkbox, a notice will show to invite them to accept the Privacy Policy.

Privacy Policy notice

reCAPTCHA

To prevent spam registrations to your site waitlists, you can enable Google reCAPTCHA from YITH > Waitlist > Form in Product Page > Options.

But first of all, let’s see how to get your reCAPTCHA site key and secret key.

Register an account on Google (if you don’t have any yet), go to https://www.google.com/recaptcha/about/ and click on v3 Admin Console.

How to enable reCAPTCHA

Now choose the reCAPTCHA version to use, fill in the available fields and click on the submit button to add the reCAPTCHA to your site.

The plugin supports reCAPTCHA v3 and v2 “I’m not a robot”.  On the contrary, v3 is not visible and doesn’t require any action from the users.

The site key and secret key are now created.

Go to the Form options section of the plugin, make sure you select the reCAPTCHA version for which you have registered your site and copy and paste the site and secret keys into the related fields.

    Customization

    To customize the form style and notices added by the plugin, go to YITH > Waitlist > Form in Product Page > Customization where you will find the following options.

    Waitlist customization options

    • Section background: choose the background color for the waitlist section that will show on product pages;
    • Section padding: set the padding (in px or %) for the waitlist section;
    • Section border-radius: set the border radius for the waitlist section;

    Advanced editor

    • Notice to show in out-of-stock products: use the advanced editor to enter a custom message to show before the form through which users can subscribe to the waitlist. You can also use the following placeholders:
      • {blogname}
      • {site_title}
      • {product_title}
      • {product_sku}
      • {product_price}
      • {unsubscribe}here{/unsubscribe}

    Waitlist customization options

    • Form placeholder: use this field to add an optional text to show in the form input field;
    • Button label: enter the text to show in the Waitlist button;
    • Button colors: choose the background and text colors for the button;

    Enable Waitlist counter

    • Show counter: enable this option to show the number of users who subscribed to the product waitlist;

    Waitlist counter on frontend

    • Counter text: enter the text that you want to show in the counter section. To dynamically show how many users subscribed to the waitlist so far, you can use the placeholder {counter};

    Show removal button

    • Show removal button: enable this option to show the button through which users can remove the email address previously registered on the product waitlist;
    • Removal button label: enter the text to show in the removal button;
    • Removal button colors: choose the background and text colors for the button.

    Removal button on frontend

    Success/Error Notices

    From the Customization section in Form in Product Pages settings, you can customize the messages shown to users when they subscribe to a waitlist.

    How to customize Waitlist notices

    Here, you can also set the text and background colors of the notices.

    Subscription message

    This is the message to show to your users when they subscribe to a product waitlist. You can customize it as you prefer by entering a text that will replace the default one.

    Waitlist subscription message


    Removal message

    This is the message to show to your users when they unsubscribe to a product waitlist. You can customize it as you prefer by entering a text that will replace the default one.

    Waitlist removal message

    Notice to show when confirmation is required

    This is the message to show to your users when they are asked to confirm if they want to be subscribed to a product waitlist. You can customize it as you prefer by entering a text that will replace the default one.

    Waitlist confirmation message

    Error message

    This is the message to show to your users when an error occurred while subscribing to a product waitlist. You can customize it as you prefer by entering a text that will replace the default one.

    Waitlist error message

    Error message for users that are already subscribed

    This is the message to show to your users when they try to subscribe to a product waitlist to which they are already registered. You can customize it as you prefer by entering a text that will replace the default one.

    Waitlist error message

    Message example

    Confirmation message example


    Variable products

    In the case of variable products, if one or more variations are out of stock, users can subscribe to the waitlist and get notified as soon as that product variation is back in stock.

    Waitlist for product variations

    When users subscribe to the waitlist for a specific product variation, this will show in the waitlists table like in the example below.