Form options
This plugin is fully compliant with the General Data Protection Regulation (GDPR).
Specifically, users will have the possibility to be redirected to the Privacy Policy and give their consent to be added to a waitlist through a dedicated checkbox.
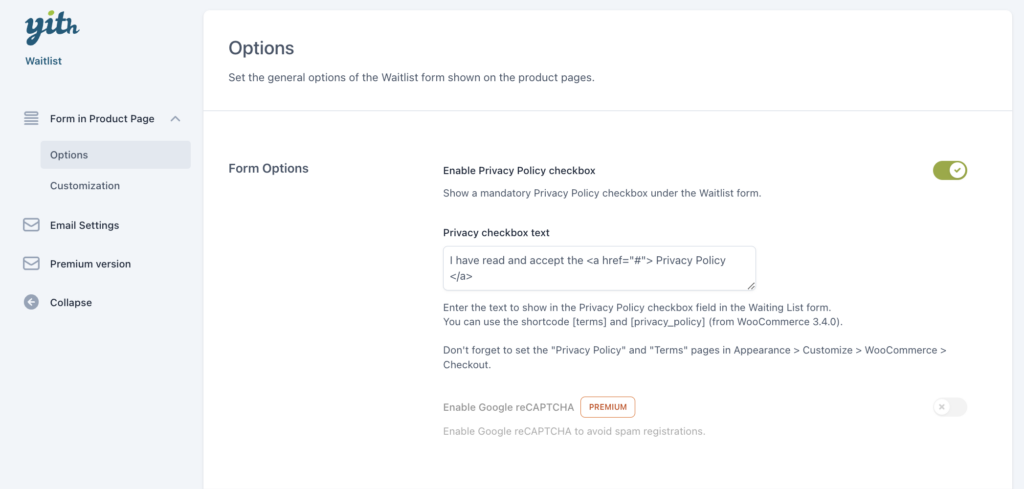
To add this checkbox to the waitlist form, go to YITH > Waitlist > Form in Product Page > Options and enable the option Enable Privacy Policy checkbox.

After enabling it, you can enter a custom text to show next to the checkbox. You can also include the shortcode [terms] and [privacy_policy] that will redirect users to the Terms and Privacy Policy pages if you have created and configured them in Appearance -> Customize -> WooCommerce -> Checkout.
Below is an example of what the checkbox looks like in the waitlist form.

If the user clicks on the Submit button without selecting the checkbox, a notice will show to invite them to accept the Privacy Policy.

Customization
To customize the form style and notices added by the plugin, go to YITH > Waitlist > Form in Product Page > Customization where you will find the following options.

- Section background: choose the background color for the waitlist section that will show on product pages;
- Notice to show in out-of-stock products: use the built-in editor to enter a custom message to show before the form through which users can subscribe to the waitlist.

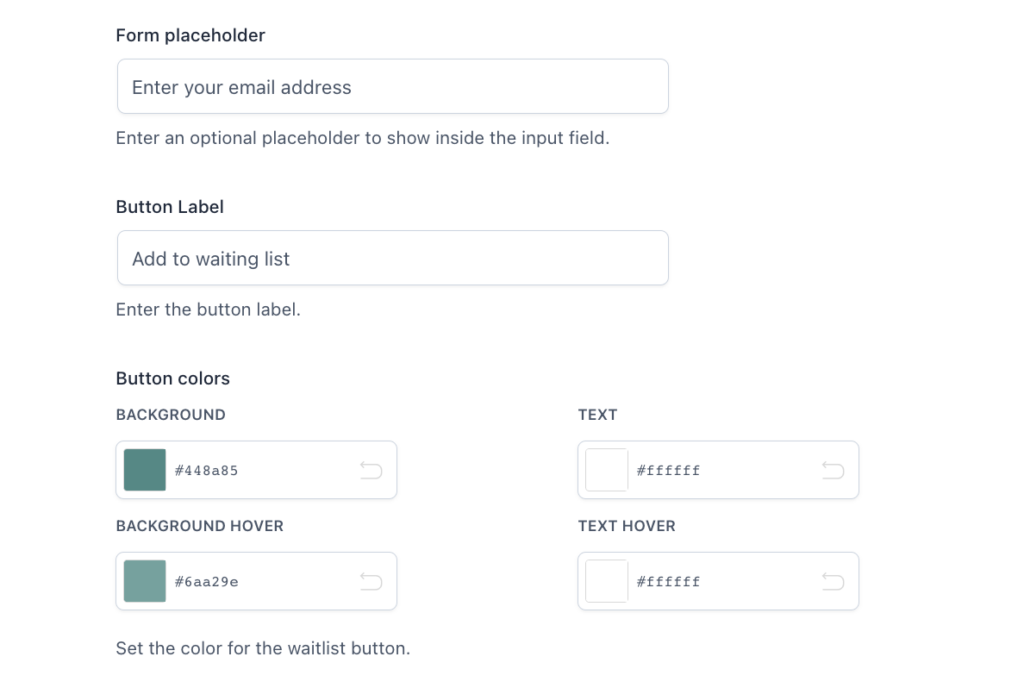
- Form placeholder: use this field to add an optional text to show in the form input field;
- Button label: enter the text to show in the waitlist button;
- Button colors: choose the background and text colors for the button;

- Show removal button: enable this option to show the button through which users can remove the email address previously registered on the product waitlist;
- Removal button label: enter the text to show in the removal button;
- Removal button colors: choose the background and text colors for the button.;
- Subscription message: enter the message to show to users after subscribing to the waitlist.


