By using the plugin with YITH WooCommerce Barcode and QR Codes, you can generate a barcode automatically for each new ticket created.
To do it, it is essential to enable the entry “Display barcode” for the event product.
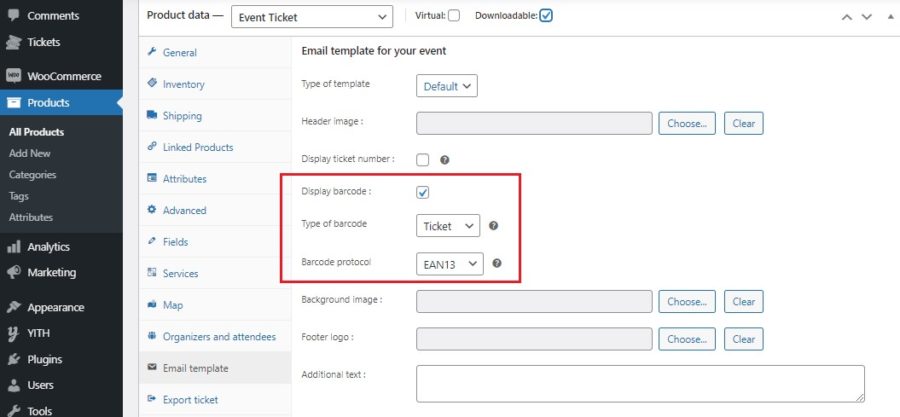
Choose which type of barcode you want to display on the ticket:
- ticket barcode
- product barcode
- order barcode
Select the barcode protocol from the dropdown.
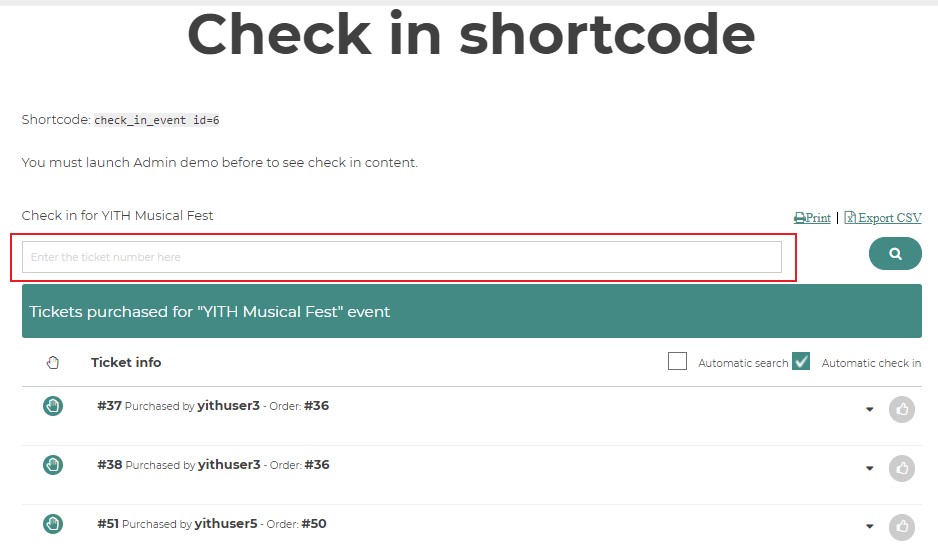
With YITH WooCommerce Barcodes enabled, you can search and check-in the tickets by scanning the barcode in the search form shown with the shortcode of YITH Event Tickets.
For further information about the shortcode, go to this page.
In order to automatically check in the scanned tickets, you need to enable the ‘automatic check-in’ option.
Note: click on the ticket number field, before you start scanning
If you do not select that field, click on that field, the number will not appear. The number will appear in the input you have selected.
With the ‘automatic check-in’ selected, the scanned ticket number will automatically appear as ‘checked in’.
Check-in through a mobile app?
We don’t offer an in-built application to scan the code, but there are many apps that allow connecting your website with your mobile phone, and make the phone work as a scanner.
Both the PC and the phone have to be connected to the same Wi-fi network. This way, the phone will become a barcode scanner, and you will see the result on your PC.