Thanks to the integration with Google Calendar, users can add the event to their own Google Calendar just with one click.
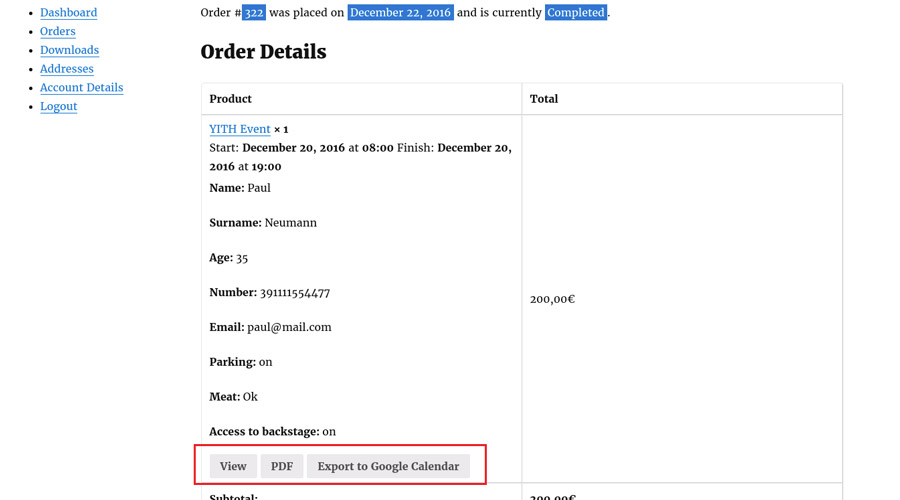
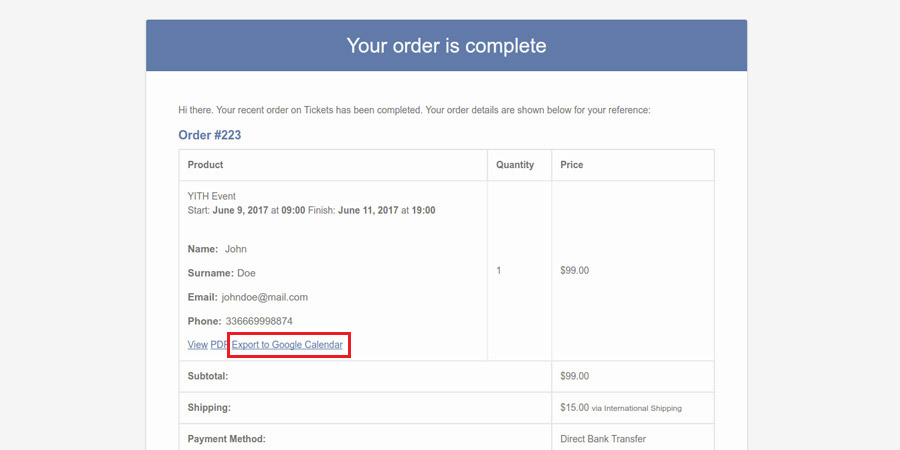
The event will be synced to Google Calendar only if users explicitely ask for that by clicking on the Export to Google Calendar option that can be found both in the order confirmation email (as shown in the following image) and in the Details page of the related order.
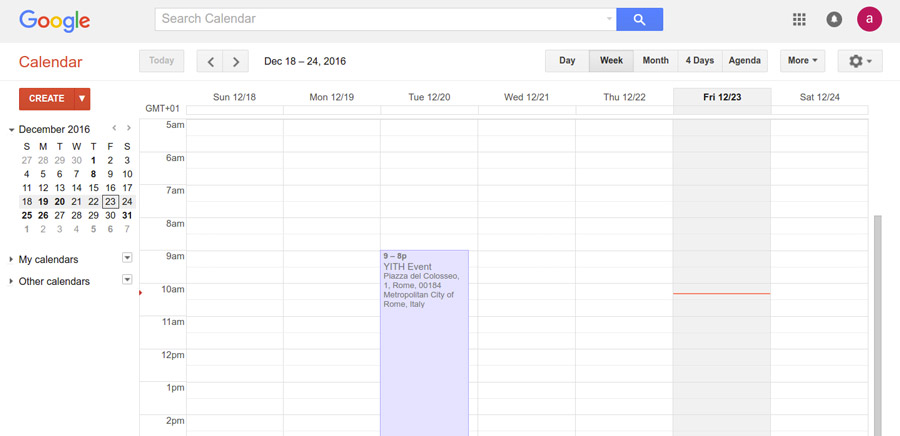
When you click on it, the Google Calendar page will automatically open and the event will show up as well.
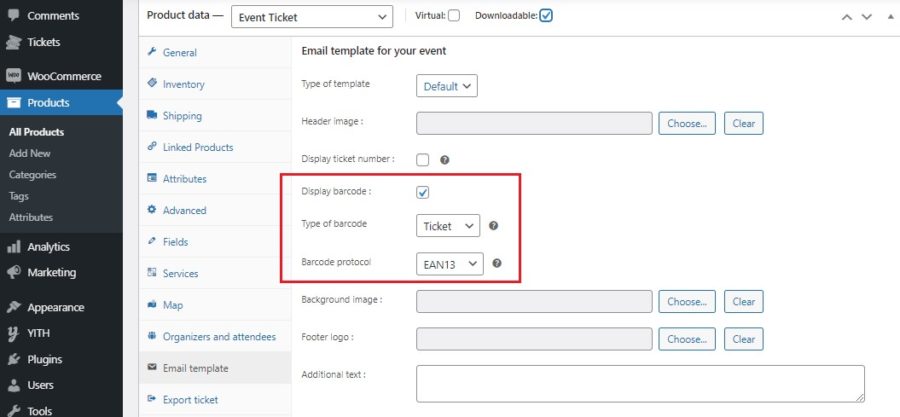
By using the plugin with YITH WooCommerce Barcode and QR Codes, you can generate a barcode automatically for each new ticket created.
To do it, it is essential to enable the option “Display barcode” available in the section Email template of the product edit page.
Choose the type of barcode to show on the ticket from:
ticket barcode
product barcode
order barcode
With YITH WooCommerce Barcodes enabled, you can search and check-in the tickets by scanning the barcode in the search form shown with the shortcode of YITH Event Tickets.
For further information about the shortcode, go to this page.
The export feature allows exporting data of several tickets to a CSV file simultaneously.
There are two ways to export the tickets.
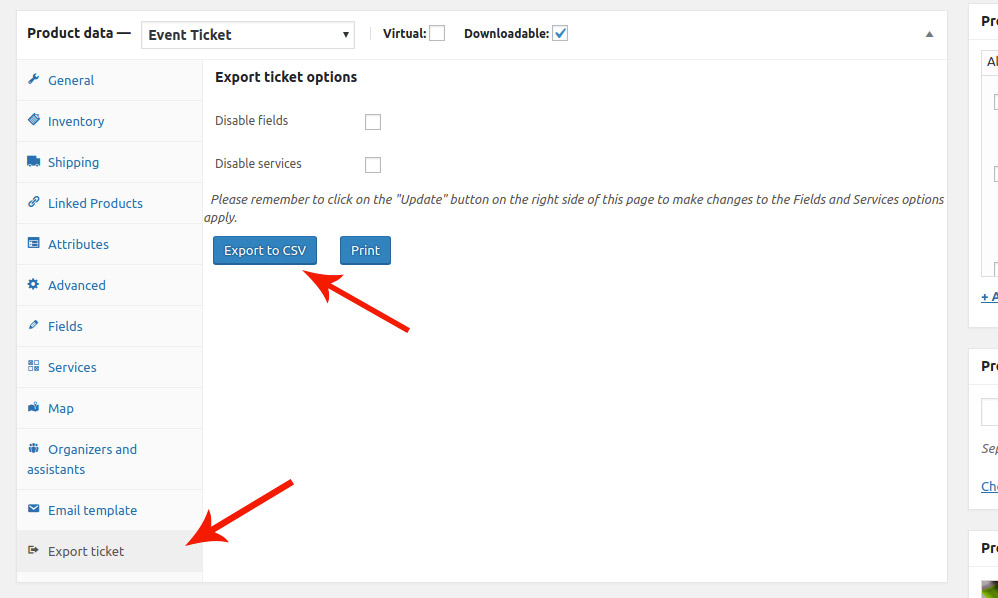
1. EXPORT FROM BACKEND
Export all the tickets purchased for an event.
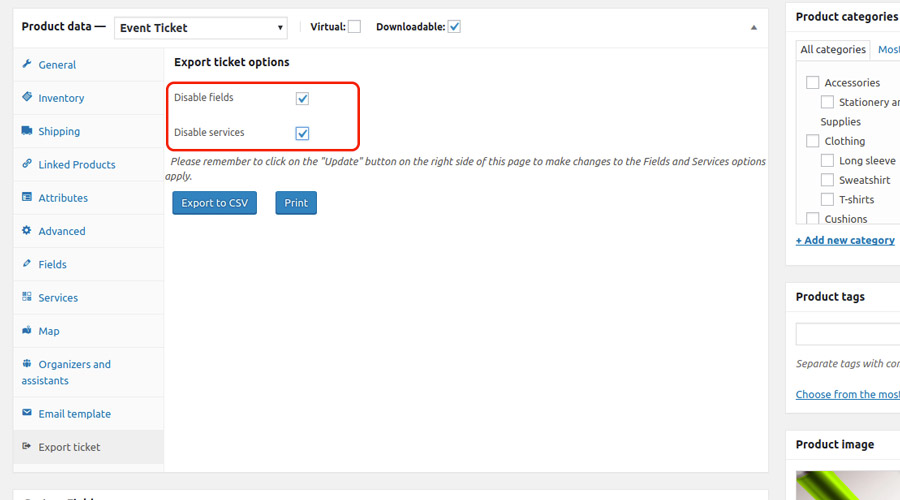
Go to the event product page, click on the tab “Export Ticket” and then on the button “Export to CSV”.
While exporting, you can exclude additional fields and services.
2. EXPORT FROM FRONTEND
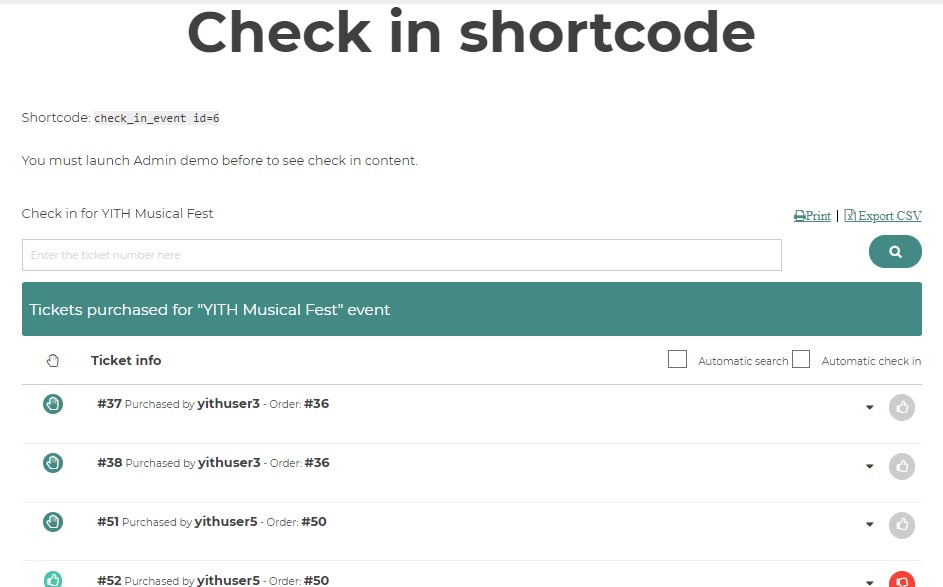
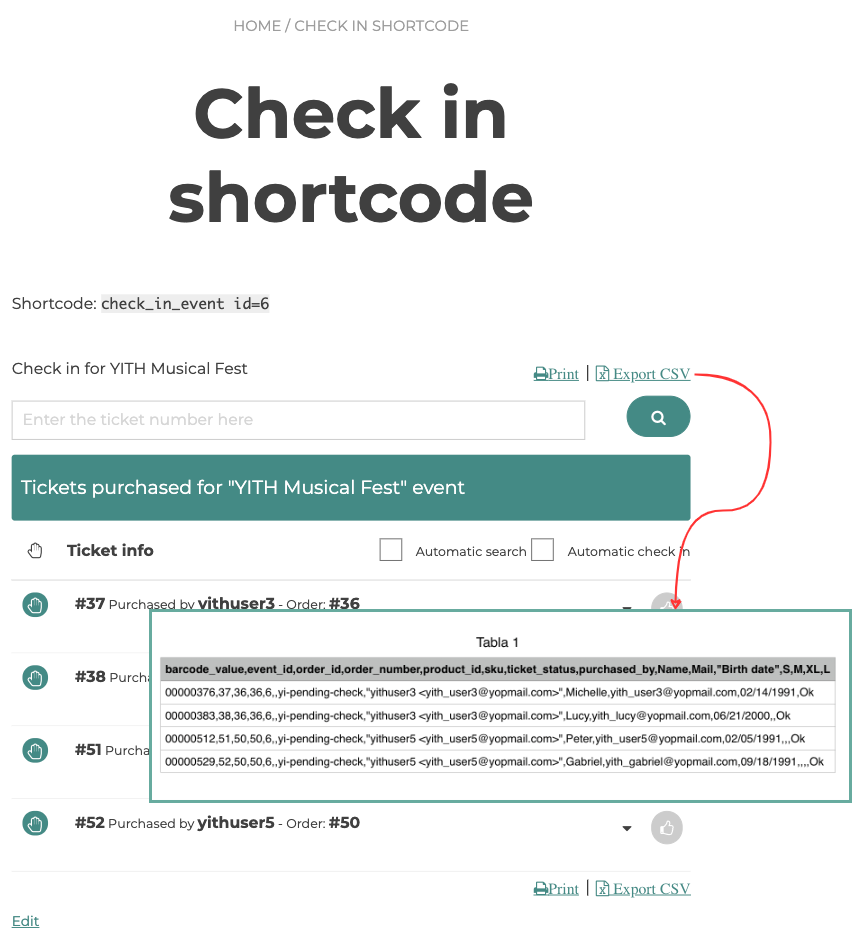
The other way is to export from the front end by taking advantage of the shortcode [check_in_event]. For further information related to the shortcode, click here.
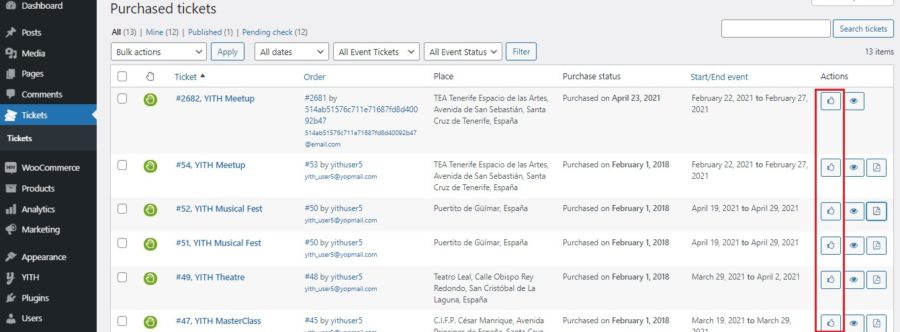
The shortcode creates the complete list of tickets linked to the specified product.
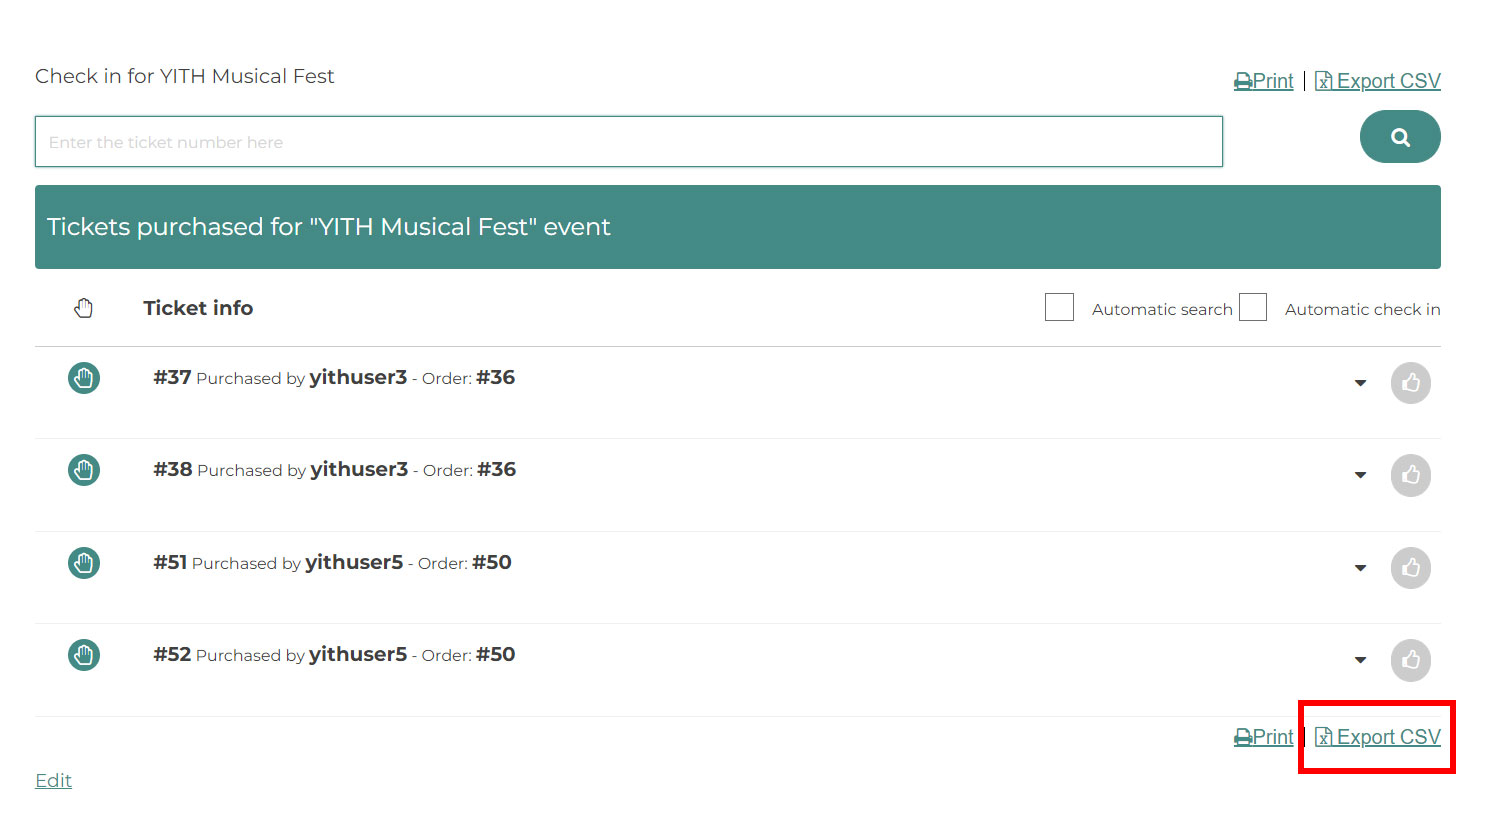
By clicking on the button “Export CSV”, you will get the CSV file including all the tickets available in the table.
Learn about how to use the shortcodes available in the plugin.
1. Check-in event
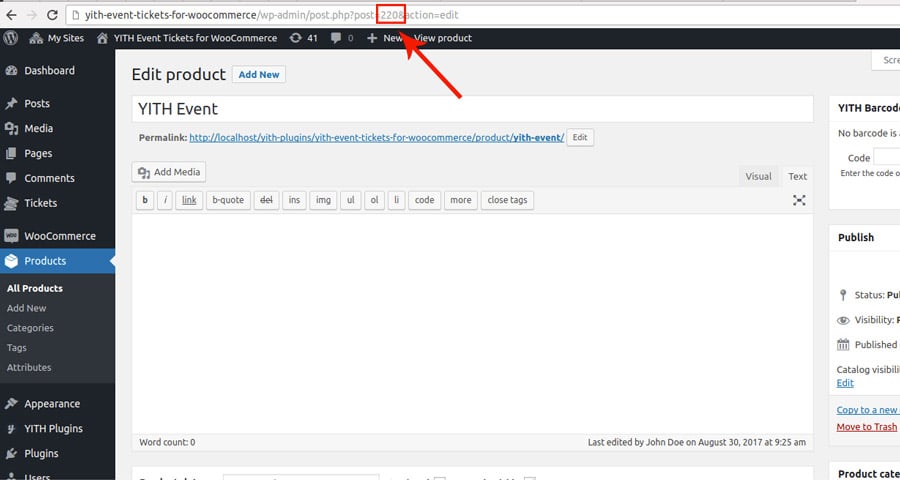
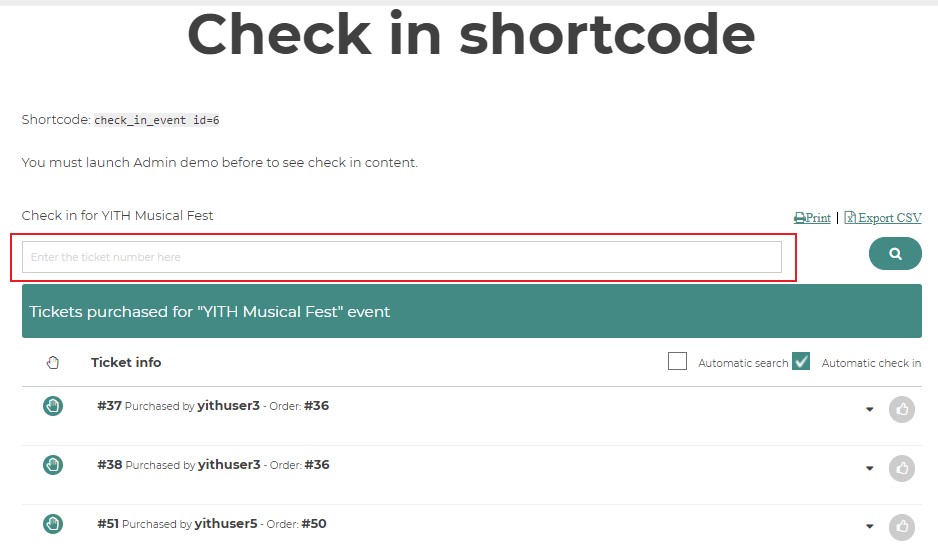
Add the shortcode [check_in_event id = <the _event_id>] to one of your site pages replacing <the_event_id> with the even product ID.
For example, [check_in_event id = 220]
A table will be shown in the front end, including the complete list of the tickets linked to the selected event product. (Only visible to users accessing the site as administrator or shop manager).
Click on the ticket to access its data.
By default, the search occurs by inserting the ticket number. By selecting the ‘automatic search’ checkbox the ticket will be checked in automatically after searching it.
If you are using the plugin in combination with YITH WooCommerce Barcodes and QR-Codes, the search can be done by scanning:
the order barcode: this returns the list of tickets linked to that order (the order must include the event product used by the shortcode)
the ticket barcode: this returns ticket data if the selected event includes a ticket with the barcode
Export
From the table, you can export a single ticket or all the ones included in the list.
Check-in
The check-in for the tickets can be applied manually or automatically.
For manual use, you have to click on ‘thumbs up’ for check-in, and ‘thumbs down’ for check out.
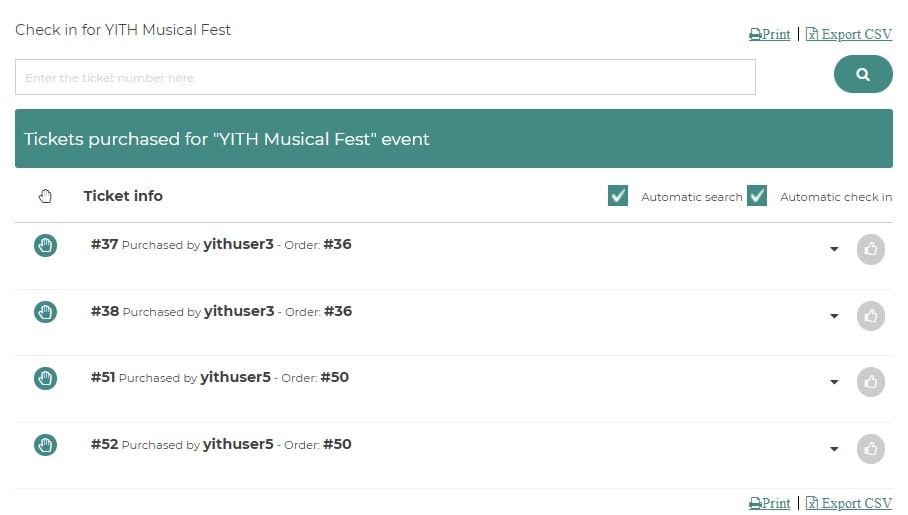
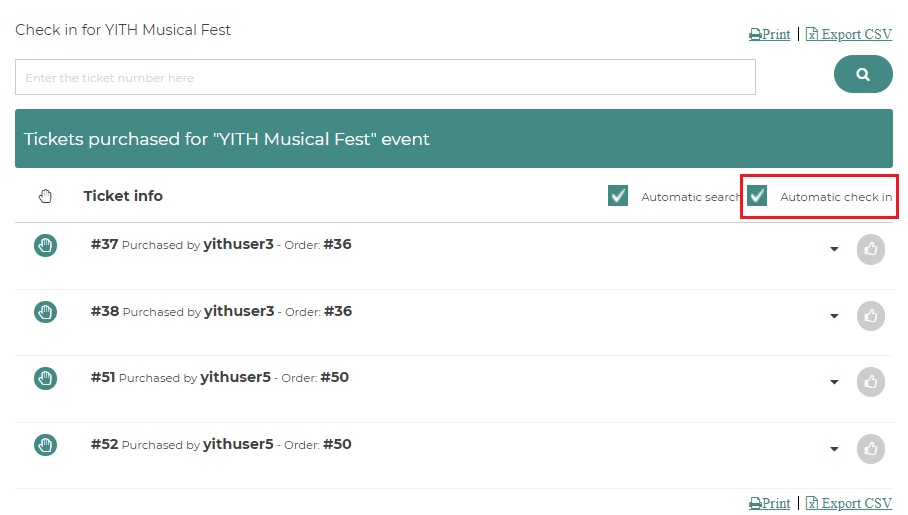
If you choose the automatic check-in, you need to enable the checkbox “Automatic check-in” highlighted in the following image.
From now on, for each search, the automatic check-in will apply to all the tickets shown as a search result. By enabling the “Automatic search” option, results appear as soon as you stop typing, without pushing enter or the search button. This is a useful option if you are using a scan to check in tickets.
2. Check-in ticket
The shortcode [check_in_ticket] allows printing a similar tool but it allows you to check-in any ticket, no matter which product event it belongs to.
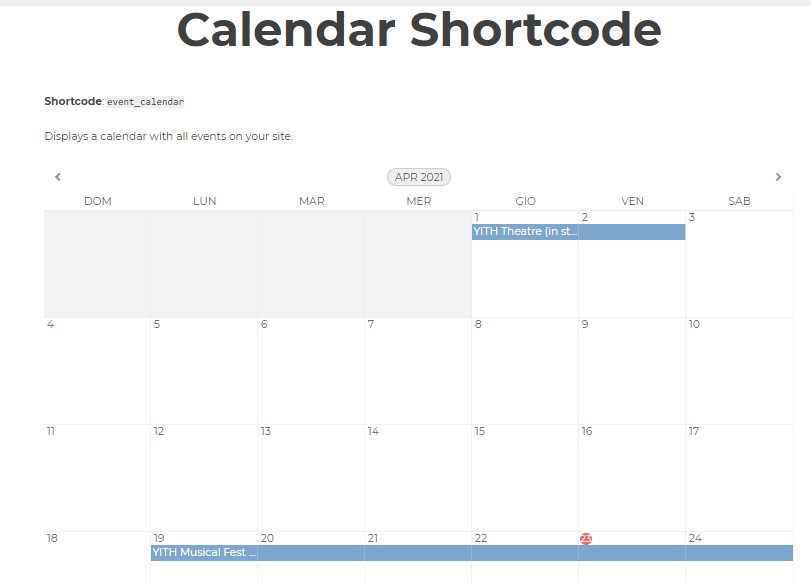
3. Event calendar
Use the shortcode [event_calendar] to show the calendar wherever you like. It can be a bigger version like this on any page of your website:
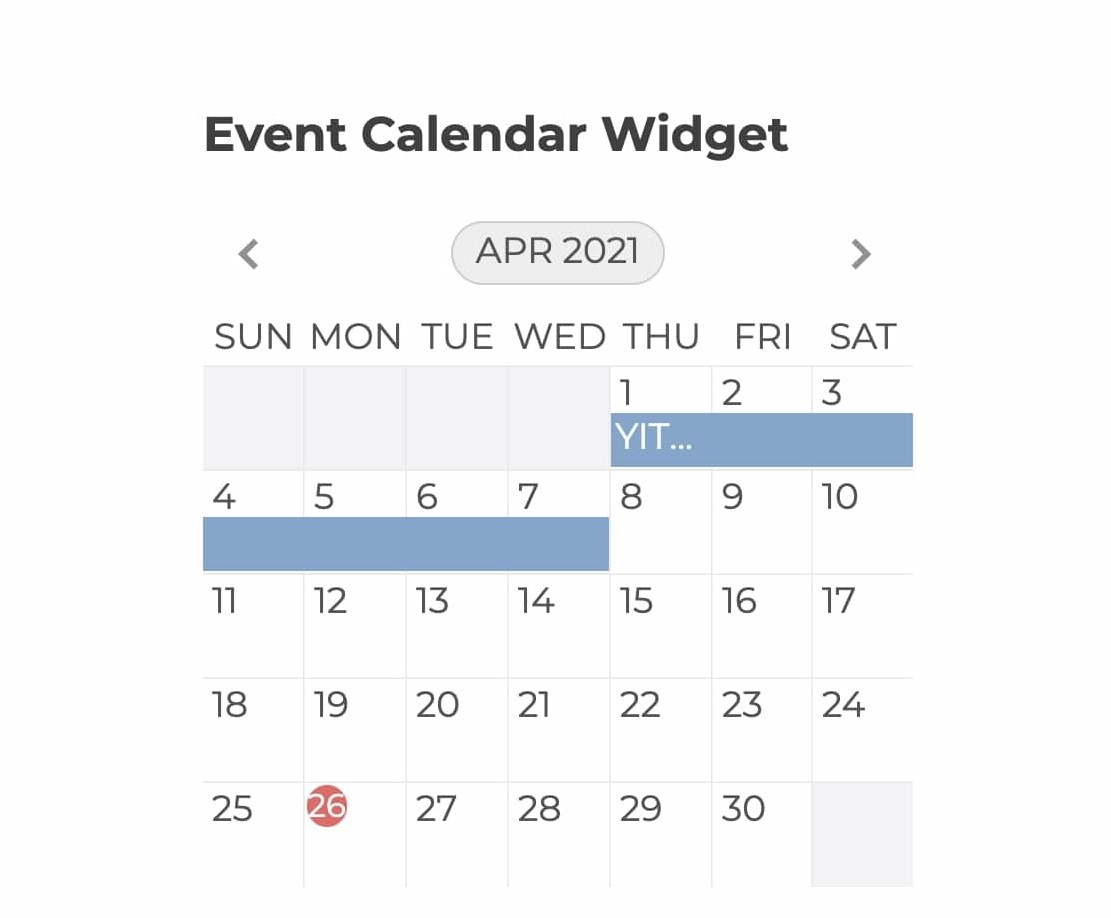
Alternatively, if you prefer showing it in a widget, please, use the dedicated widget.
4. List of participants
You can use the shortcode [users_purchased] to print a list of all participants to an event.
The shortcode supports the following attributes:
id = that is the ID of the product which participants you want to show.
visible = leave it empty to show the list to everyone or set it to ‘organizers’ to show the list to organizers only.
5. List of organizers
You can use the shortcode [organizers] to print a list of all the event organizers.
The shortcode supports the following attributes:
id = that is the ID of the product which participants you want to show.
visible = leave it empty to show the list to everyone or set it to ‘organizers’ to show the list to organizers only.
6. Event map
You can use the shortcode [event_map] to print the map of the location event.
The plugin fully supports the block editor and you will be able to find 6 widgets in the blocks list.
Event map
Event calendar:
Event attendees: enter the product ID to show the attendees of a specific event, or leave it blank to show the attendees of the product dynamically (only available on the product page).
Event organizers: enter the product ID to show the organizers of a specific event, or leave it blank to show the organizers of the product dynamically (only available on the product page).
Event check-in: this widget allows showing the check-in tool for a specific event, so make sure you enter the product ID.
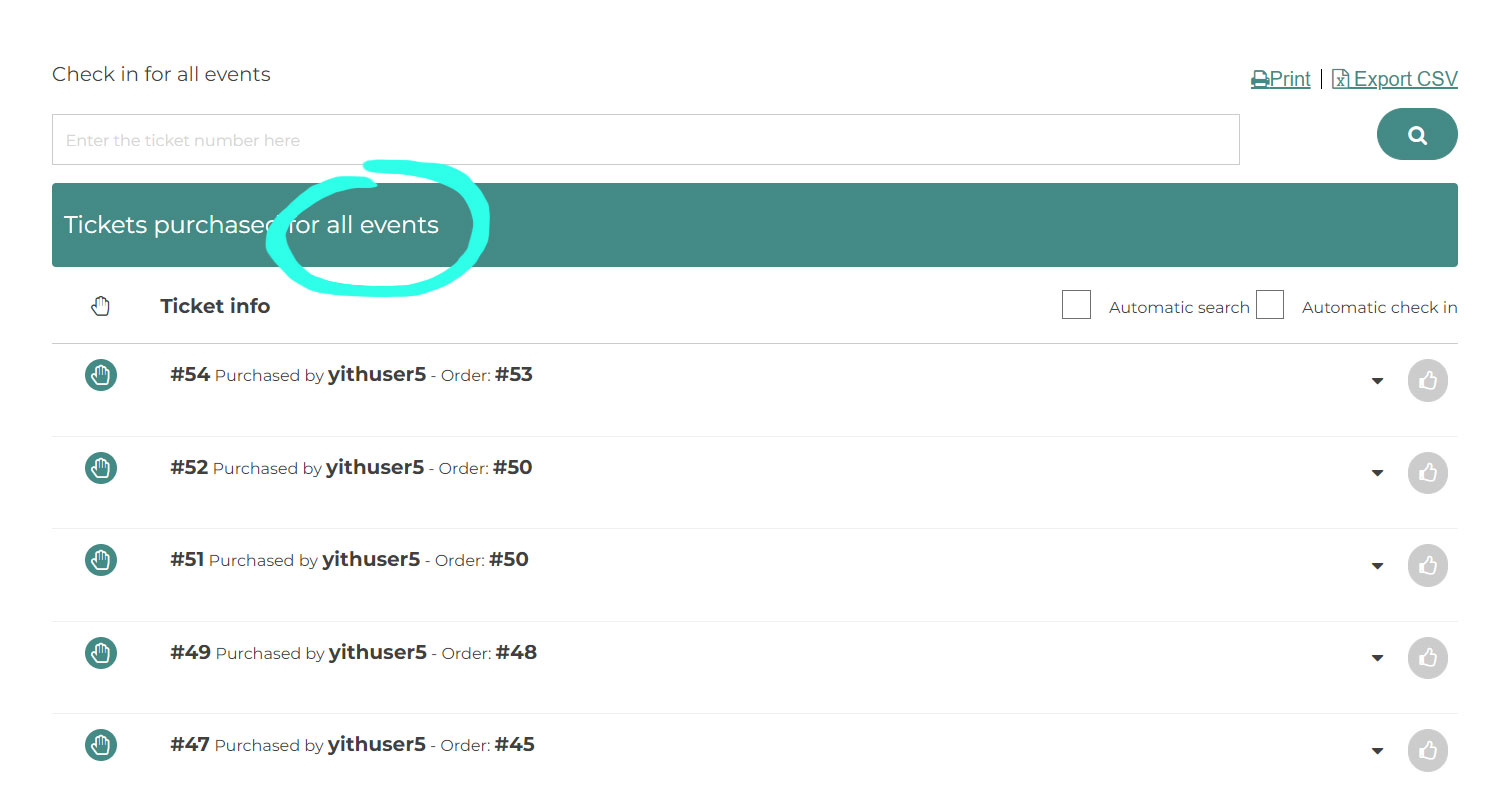
Tickets check-in: this widget allows showing the check-in tool for all your events.
By using the plugin with YITH WooCommerce Barcode and QR Codes, you can generate a barcode automatically for each new ticket created.
To do it, it is essential to enable the entry “Display barcode” for the event product.
Choose which type of barcode you want to display on the ticket:
ticket barcode
product barcode
order barcode
Select the barcode protocol from the dropdown.
With YITH WooCommerce Barcodes enabled, you can search and check-in the tickets by scanning the barcode in the search form shown with the shortcode of YITH Event Tickets.
For further information about the shortcode, go to this page.
In order to automatically check in the scanned tickets, you need to enable the ‘automatic check-in’ option.
Note: click on the ticket number field, before you start scanning
If you do not select that field, click on that field, the number will not appear. The number will appear in the input you have selected.
With the ‘automatic check-in’ selected, the scanned ticket number will automatically appear as ‘checked in’.
Check-in through a mobile app?
We don’t offer an in-built application to scan the code, but there are many apps that allow connecting your website with your mobile phone, and make the phone work as a scanner.
Both the PC and the phone have to be connected to the same Wi-fi network. This way, the phone will become a barcode scanner, and you will see the result on your PC.