View Product Page

Carrier selection

The first step to use the plugin properly is to activate the plugin license.

Now, in YITH -> Order & Shipment Tracking -> Carriers, you will find a list of all supported carriers. To easily find the ones you want to use for the shipment of your orders, you can search them by name through the field Search carrier. You can select them all or only those you prefer.

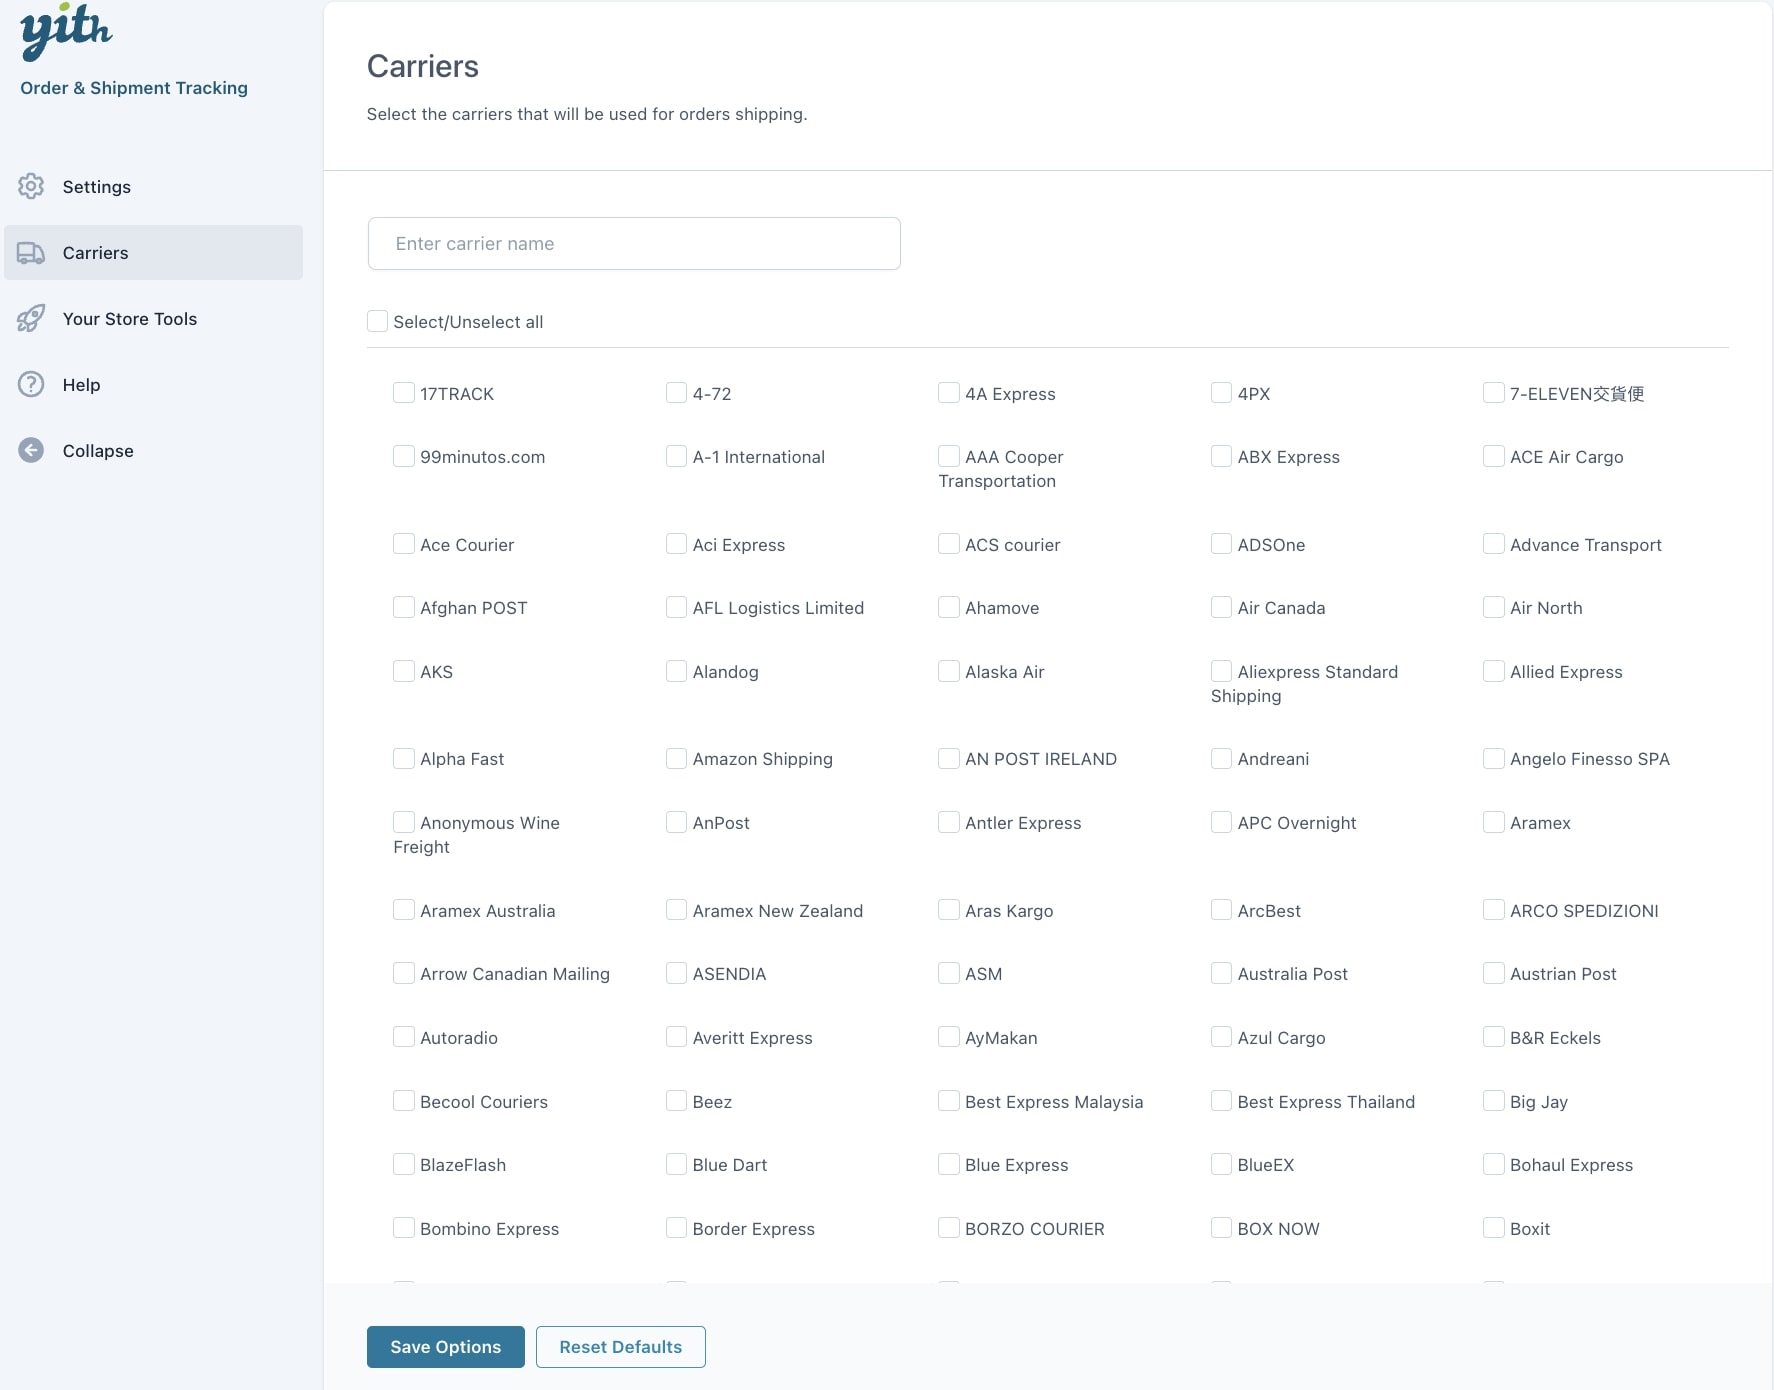
If the carrier you are looking for is not included in the list, submit a ticket in our support platform by specifying the carrier’s name and URL and a valid tracking code (even if expired) so we can add it as soon as possible.

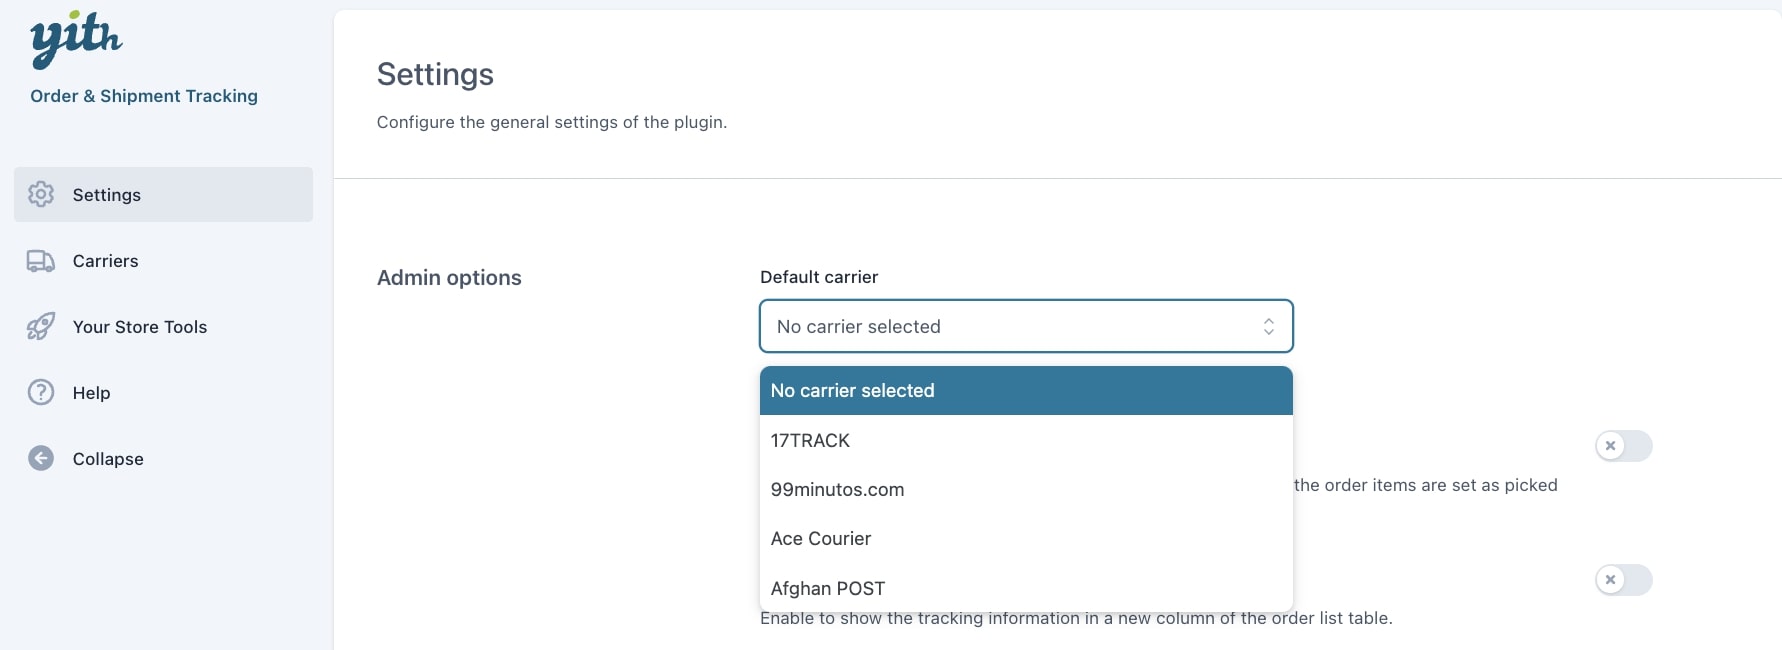
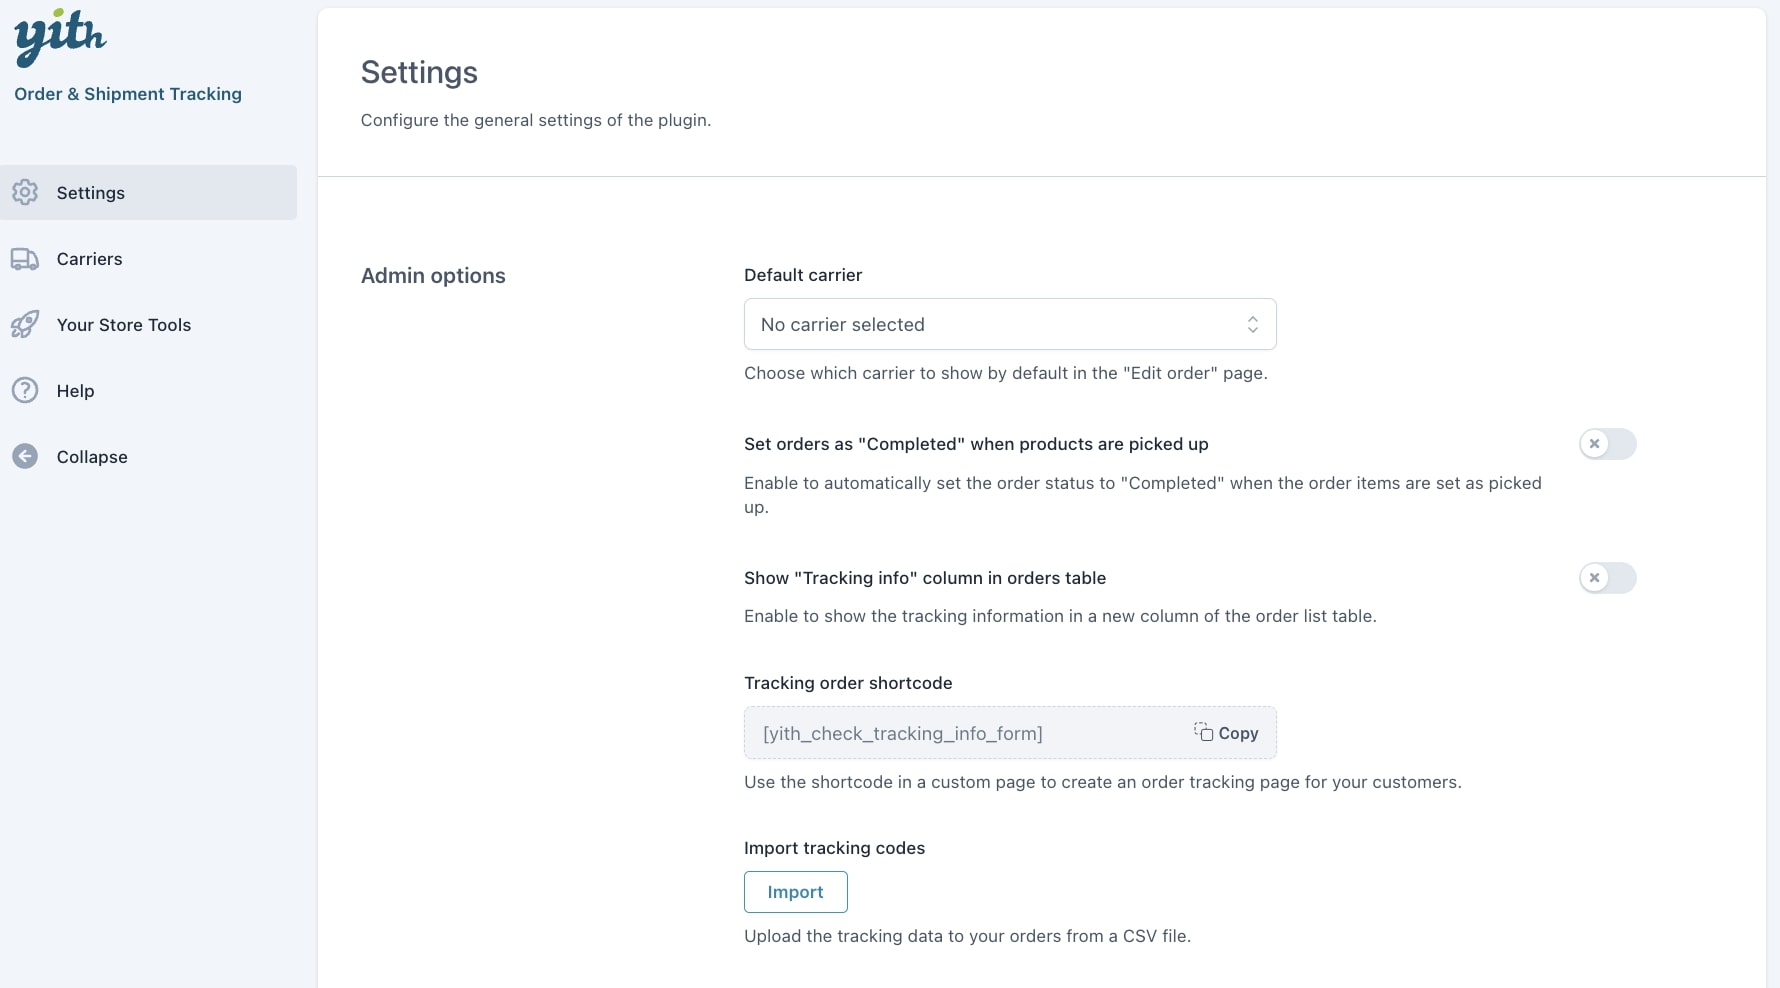
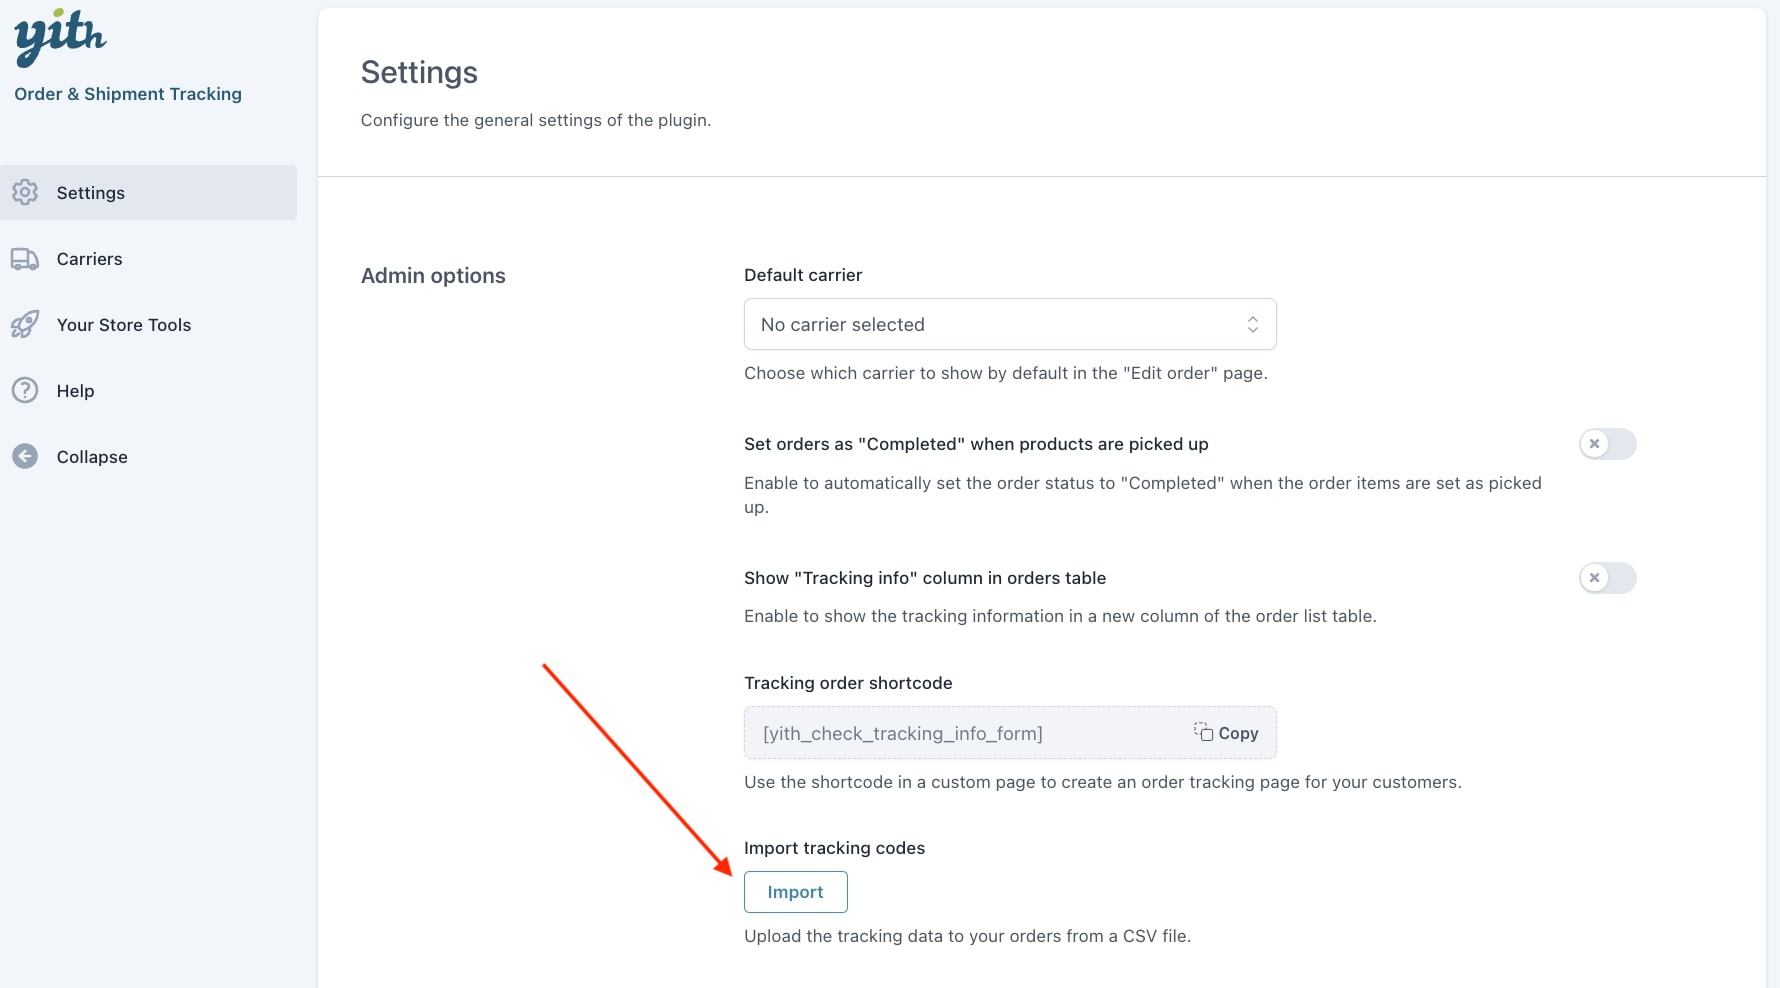
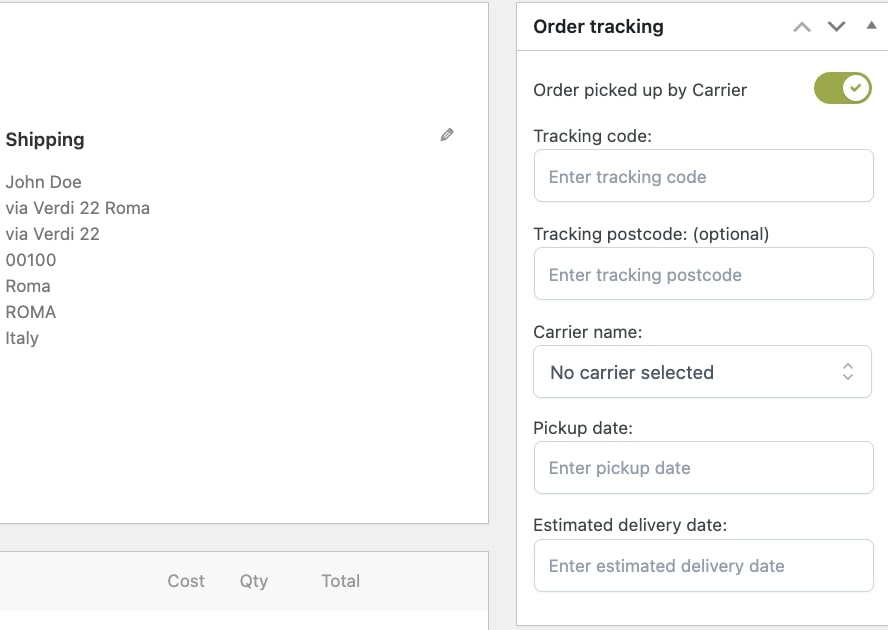
To set up a default carrier among the ones selected, go to the tab General options and select it in the Default carrier field.

General options

In the Settings tab, you can configure the plugin’s global settings.

Admin options

In this section, you find all the general options for the administrator.

  • Default carrier: field to choose the default carrier from those previously enabled in the Carriers tab;
  • Set orders as “Completed” when products are picked up: by enabling this option, the order status will be automatically set as Completed soon after inserting the tracking data;
  • Show Tracking Info column in orders table: by enabling this option, a new column showing the tracking information will be added to the WooCommerce Orders page;
  • Tracking order shortcode: through the shortcode [yith_check_tracking_info_form], you can show a form on any page of your site, even a custom one, where customers can insert the order ID and email address to check the shipping status of their orders.
Order tracking page
  • Import tracking codes: You would be able to import the tracking codes via CSV, go to this page to read more about this option.

User & Email options

In this section, you find all the general options for the users.

  • Text to show in the order details page: type the text shown to customers on the order details page. Through the built-in editor, you can customize the style (font, colors, heading, etc.) as you prefer. Available placeholders are:
    • [carrier_name]: the name of the carrier entitled to the shipping
    • [pickup_date]: the date when the carrier picked up the order items
    • [track_code]: the tracking code
    • [estimated_delivery]: the estimated delivery date for the shipping
  • Position of the text in the Order Details page: choose where to show the text from:
    • Top – Before products list
    • Bottom – After products list
Tracking info in user's oder details page
  • Text to show in the “Completed order” email: type the text to show to customers in the order email sent to them after the order is completed. Through the built-in editor, you can customize the style (font, colors, heading, etc.) as you prefer. Available placeholders are:
    • [carrier_name]: the name of the carrier entitled to ship the order
    • [pickup_date]: the date when the carrier picked up the order items
    • [track_code]: the tracking code
    • [estimated_delivery]: the estimated delivery date for the shipping
  • Position of the text in the email: choose where to show the text from:
    • Top – Before products list;
    • Bottom – After products list.
Tracking info in completed order emails

How to track order

To insert order tracking data, go to the order details page, enable the option Order picked up by Carrier, and complete the available fields.

Required data:

  • tracking code: code to track the order;
  • tracking postcode (optional): tracking postcode;
  • carrier name: name of the carrier. The default carrier will automatically show if you have set it in the Settings;
  • pickup date: the date when the order has been picked up by the carrier;
  • estimated delivery date: text field to define the estimated delivery date for the shipping.

All orders delivered to the carrier will be highlighted with a specific icon on the WooCommerce Orders page. By hovering over the icon, a tooltip with tracking information will show.

By clicking on the icon, you will be redirected to the carrier’s site, specifically to the section where you can track the current shipping status.

Email and My Account page

After inserting tracking data, the information will be included in every email sent to customers when their order is completed. You can customize the email text through the option available in the plugin General options.

Email with tracking info

By clicking on Live track your order, customers will be redirected to the carrier’s site to the section where they can track the current shipping status related to the order.

My Account page

Users can retrieve the order tracking information (if inserted) in two different spots of their My Account page; through the specific Track button and tooltip in the orders section and the link available in the order details.

By clicking on Live track your order, both in the tooltip and order details, customers will be redirected to the carrier’s site to the section where they can track the current shipping status related to the order.

CSV Importer

You can import all tracking data generated by a third-party plugins through a CSV file. This means that if you decided to use our YITH WooCommerce Order & Shipment Tracking after starting your business, you wouldn’t lose any of your data.

To import your tracking codes, go to the tab Settings tab> import tracking codes and click on Import to upload the CSV file, this will open a modal window where you can upload the file.


You can also choose the delimiter to use through the option Delimiter.

To make sure the CSV file has the correct format, you can download a sample by clicking on the specific link.

CSV file

You can now import your CSV.

Elementor

When using Elementor, you will find a widget called YITH Check Order Tracking Info that allows you to print the box where your user can add the order number and email to check the tracking information.

Elementor

YITH Frontend Manager for WooCommerce

YITH Frontend Manager for WooCommerce adds a frontend dashboard to your site through which the administrator and shop managers can manage orders, products, and coupons as they would from the WordPress dashboard.

If combined with YITH WooCommerce Order & Shipment Tracking, you will be able to manage the order tracking data from the Orders section on the frontend.

Below is a detail of the order in which tracking data can be managed.

This combination is also fully integrated with:

  • YITH Multi Vendor: your vendors will be able to edit the tracking code and carrier in the order details from the frontend.

For further details about YITH Frontend Manager settings, please refer to the official documentation.

YITH WooCommerce Custom Order Status

By using YITH WooCommerce Custom Order Status, you can create custom statuses you can assign to orders in your shop. You may also edit the default WooCommerce ones.

After installing and activating both plugins, you will be able to show order tracking information in YITH Custom Order Status emails by using the following placeholders:

  • {tracking_number}: the tracking number
  • {shipping_date}: the shipping date
  • {tracking_url}: the tracking URL
  • {carrier_name}: the name of the carrier in charge of the shipping
  • {estimated_delivery}: the estimated delivery date for the shipping
Order tracking email

For further details about YITH WooCommerce Custom Order Status settings, please refer to the official documentation.

YITH WooCommerce Multi Vendor

With YITH Multi Vendor, you can turn your e-commerce store into a marketplace (a multi-vendor platform) like Amazon or Etsy. Turn your e-commerce store into a marketplace (a multi-vendor platform) and earn commissions on orders generated by your vendors.

If combined with YITH Order & Shipment Tracking, also vendors will be able to add the tracking details in their suborders.

Just make sure you install and activate both plugins, then, select Manage order tracking in the option Regarding his/her orders, a vendor can available in YITH > Multi Vendor > Vendors > Vendors permissions.

Integration with YITH Multi Vendor

You can then enable the carriers from YITH > Order & Shipment Tracking > Carriers.

And now your vendors can see a dedicated Order tracking box in the order details, add the tracking details, and choose one of the carriers enabled by the admin.

Order tracking box in vendor's suborder
Order tracking box in vendor’s suborder

This data will only be about a specific order bound to the admin and not to sub-orders bound to vendors.

For more details about how to configure YITH Multi Vendor, please, refer to the official documentation.


This combination is also fully integrated with YITH Frontend Manager, so your vendors will be able to edit the tracking code and carrier also when checking the order details from the frontend.