View Product Page

How to create a new options group

Firstly, it essential to create an options group including all the add-ons we want to insert in one or more products of the shop.

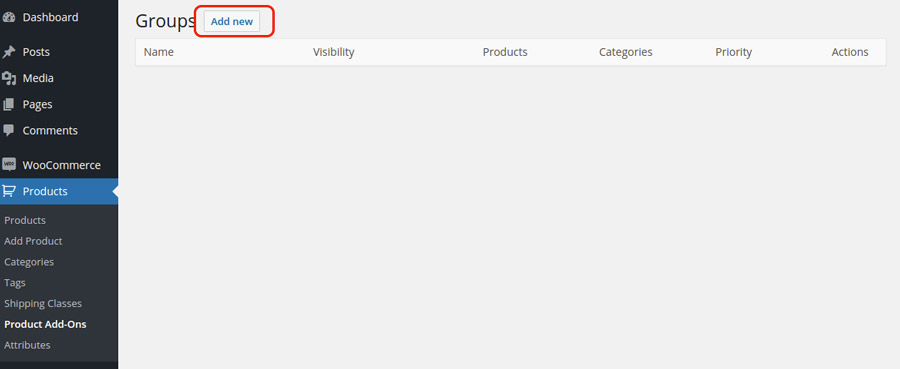
Go to “Products -> Product Add-Ons” and click on “Add New”.

New options group

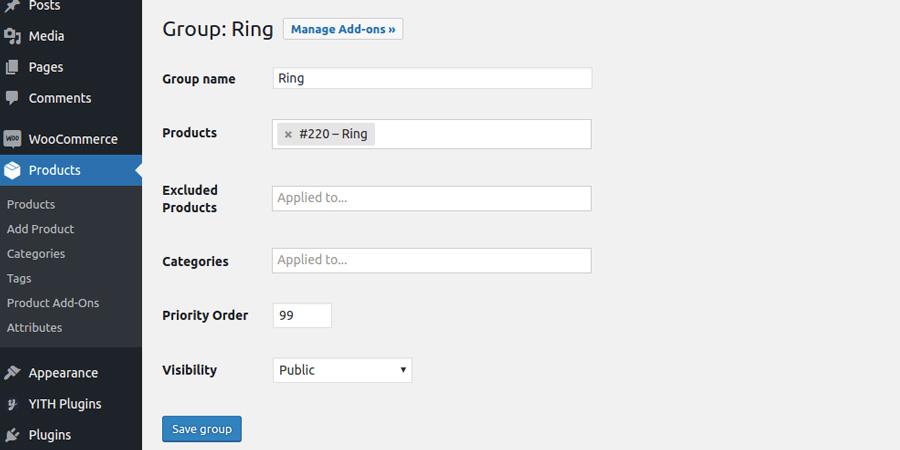
Assign a name to the group and choose to which products you want to associate it.

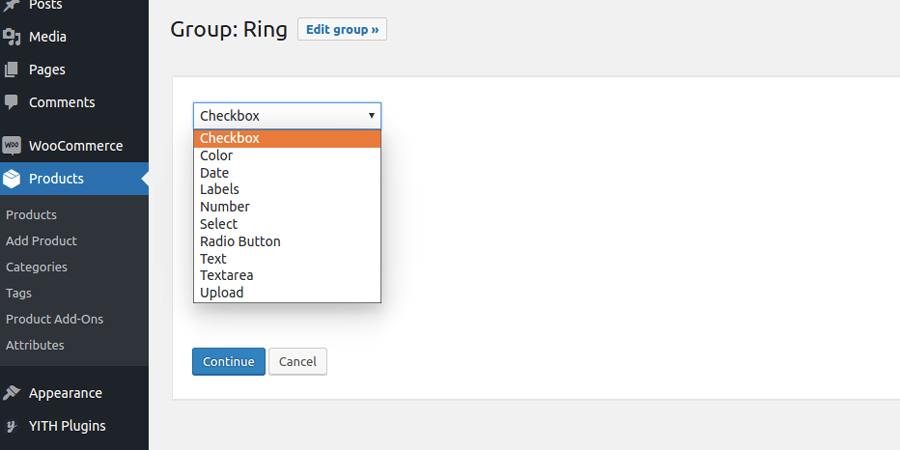
The plugin allows creating three “typologies” of options group:

  • “global”: options are inserted to all the products of the shop
  • “by category”: the options group is applied to the products related to one or more specified categories
  • “by product”: the options group is used only on the selected product. For further information about how to create an options group from the product editing page, we suggest reading this page of the documentation.

Configure options group

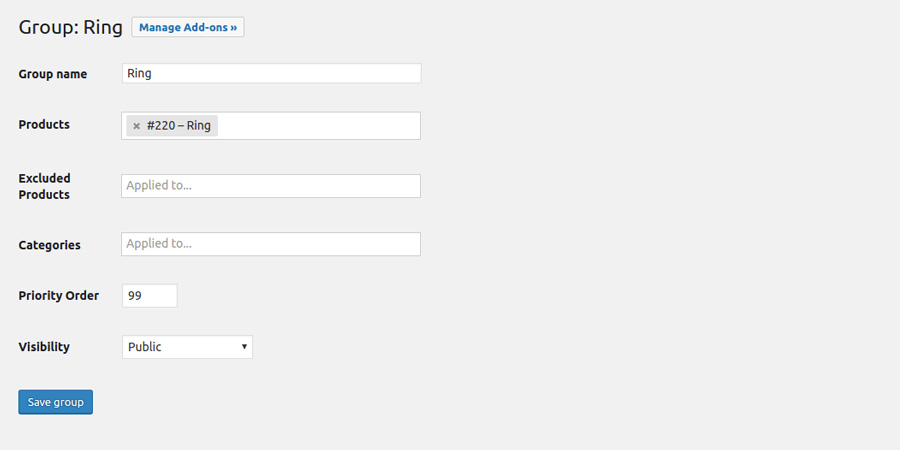
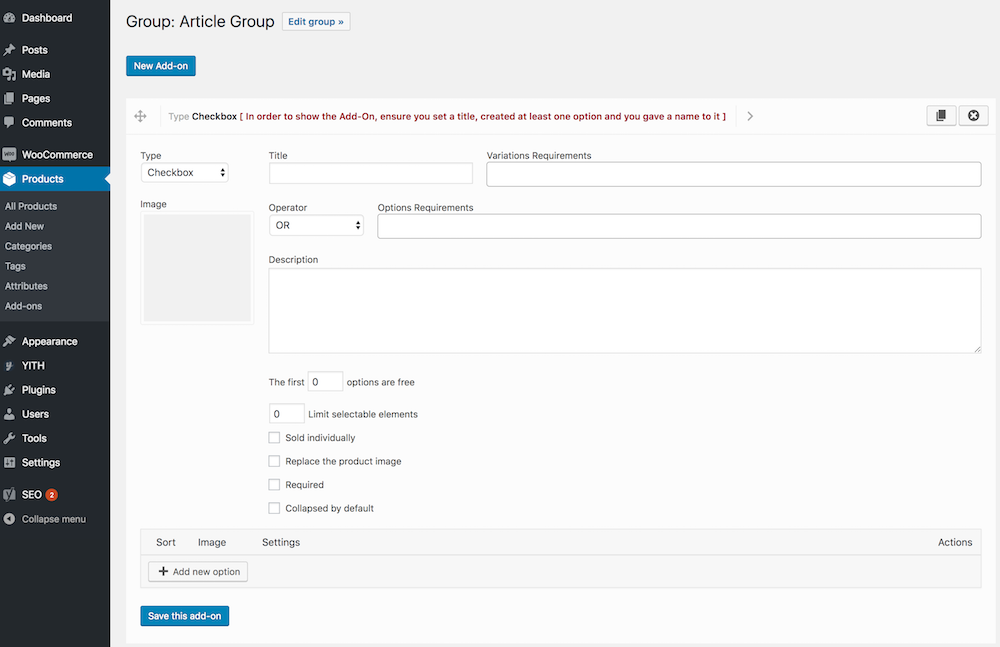
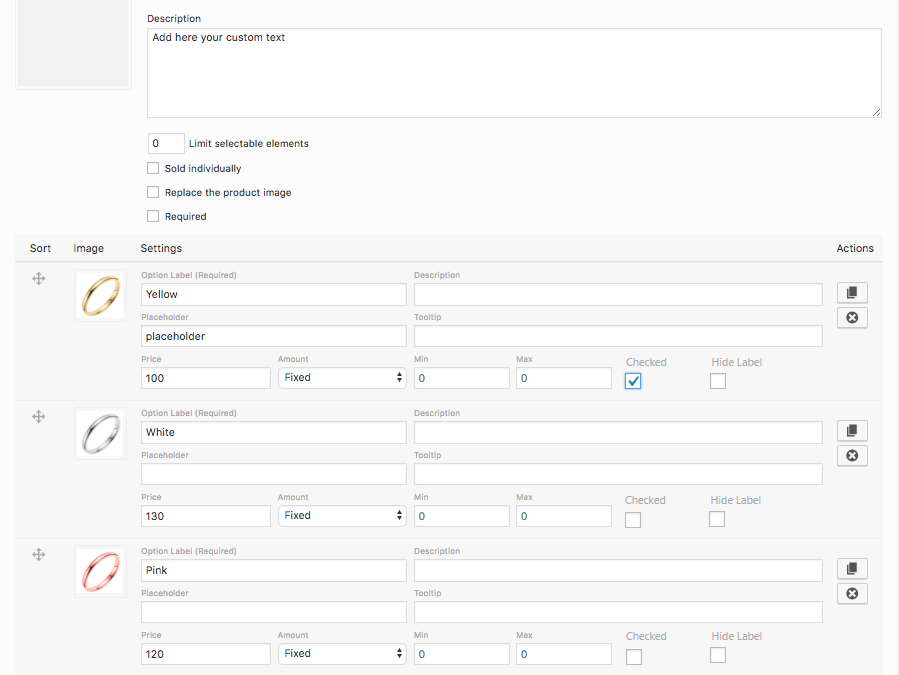
Before inserting all the options of the group, configure the following parameters:

  • “Priority”: the priority is used to give an order to the options group shown in product page (in value ascending order)
  • “Visibility”: the option allows choosing to hide the options group, to show it to all users or only to the administrator of the shop.

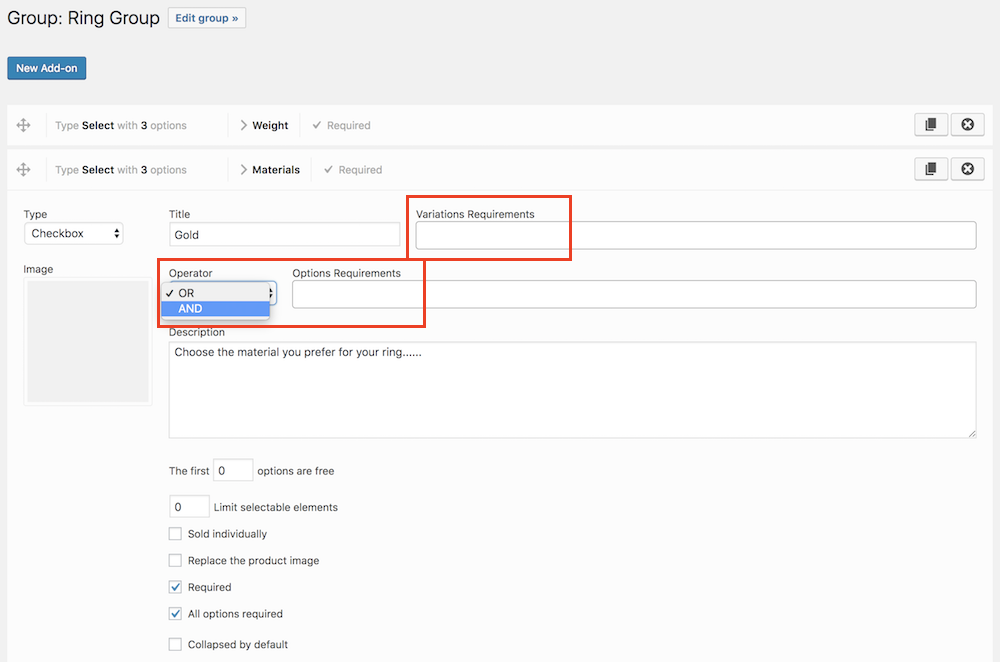
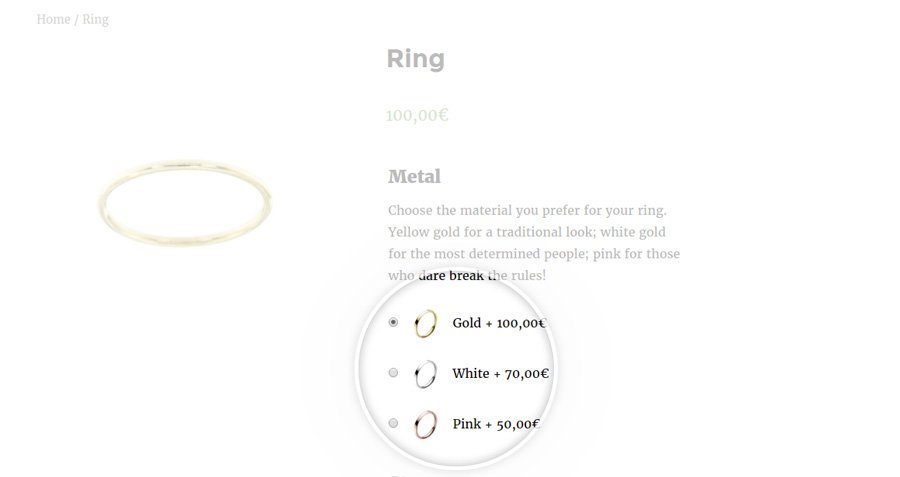
By way of example, we have decided to create an options group that will be shown only on “Ring” product.
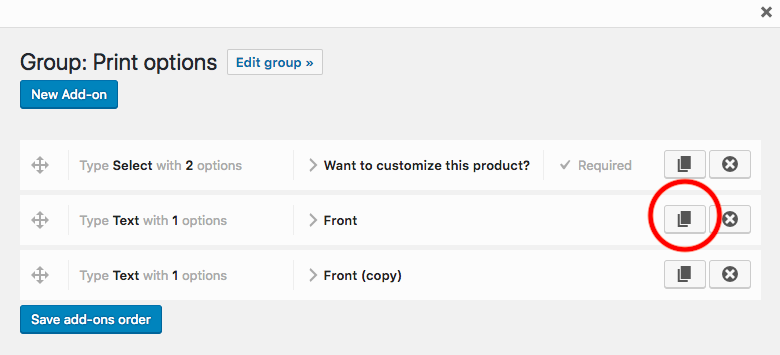
Duplicate groups

If you need to create a group with similar add-ons, consider the possibility of duplicating a group.

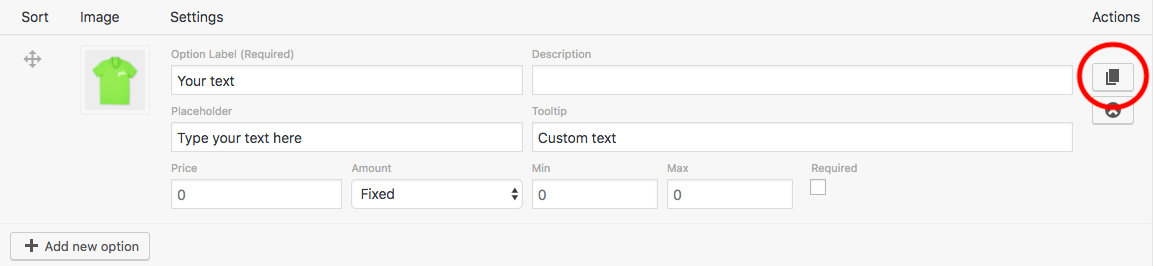
From the page where all groups are listed, click on the duplicate icon as shown in the following image:

Duplicate group

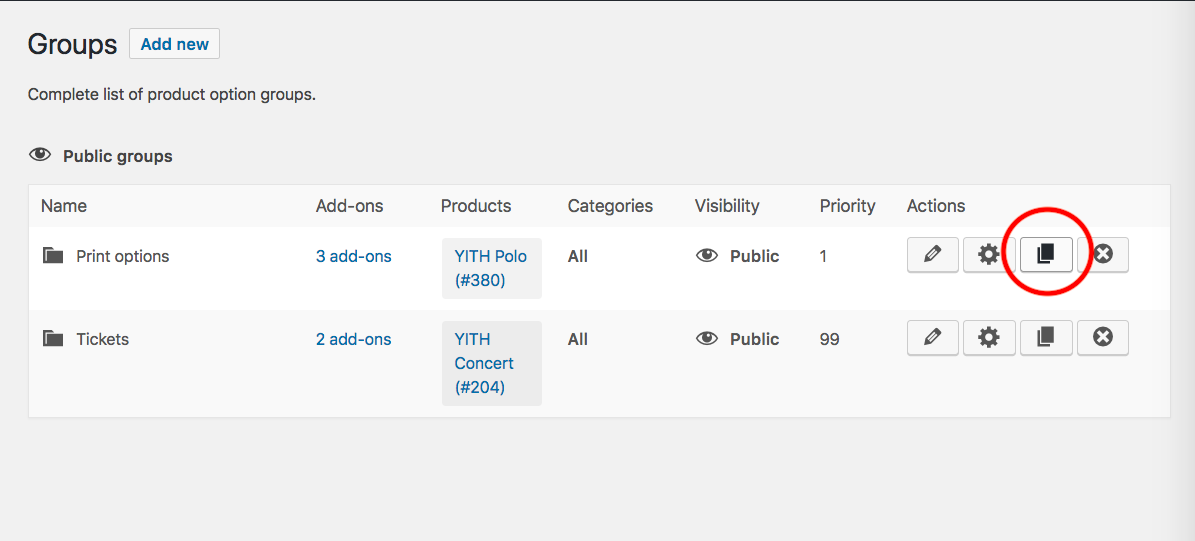
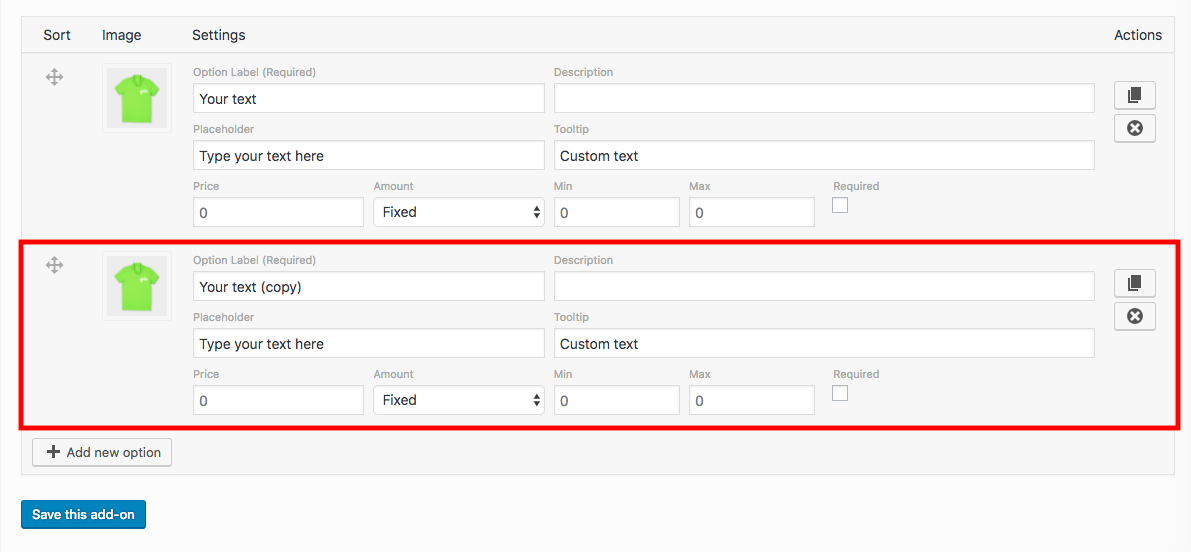
An exact copy of the group will be created, including all the items in it. Start editing the ones that need to be changed and leave the others unchanged. This button will let you save a lot of time!

Create a new add-on

The next step is creating and configuring the add-ons you want to insert in the group you have just created. Make sure you saved the group settings and click on the “Manage Add-Ons” button on the top of the page.Manage Add-OnsNow choose the type of add-on that you want to insert from the following ones:

  • checkbox
  • color
  • date
  • labels
  • multiple labels
  • number
  • select
  • radio button
  • text
  • textarea
  • upload

Types of add-on

Optionally, you can combine to the add-on “labels”, “description”, and “image”.

add-on new

To enable/disable the display of add-on details, go to the “General” section of the plugin settings dashboard.

add ons general

By setting the add-on as “required”, users cannot add the product to cart if they do not use the options related to the add-on.
When a “checkbox” type add-on is set as “required”, all its options must be selected by the user in order to add the product to the cart.

Set Dependencies

The view of the add-on can depend on two kinds of dependencies:

dependencies

  • Variation requirements: the add-on can only be selected if a specific product variation has been selected and specified in the “Variations Requirement” entry.
  • Options requirements: the add-on shows only when the option specified in the requirements entry is selected by the user. If the user does not respect the requirement you have set, the add-on does not show.

The first X options free

You can decide that the first x options a customer chooses are for free. Example:

for the add-on “Pizza ingredients” with 4 options (sauce, peas, cheese, chips),
the customer can add 2 ingredients for free and the others for + € 0,50.
In this case, you must set an add-on price of € 0,50 and “First X options free” = 2.

The first x options are free

Limit selectable elements

With this option your users will be able to select a limited number of options for the current add-on. For example, if you have a Checkbox add-on with a total of 10 options, but set this value to 3, the user will only be able to select three of them.

Limit selectable elements

This option works only for the following add-on types:

  • checkbox
  • multiple labels

Sold individually

If you enable the “Sold Individually” option, the add-on price won’t change even if the quantity of the selected product increases.

Sold individually

Duplicate add-on

If you need to create an add-on with similar options, consider the possibility of duplicating an add-on.

From the page where all add-ons are listed, click on the duplicate icon as shown in the following image:

Duplicate Add-on

An exact copy of the add-on will be created, including all the options in it. Start editing the ones that need to be changed and leave the others unchanged. This button will let you save a lot of time!

Add options

The third and last step of the configuration of a new add-on is related to the option addition associated to it.

Please note: in order to show the add-on, you must insert at least one option.

With the ‘drag and drop’ option you can sort the list of options.

ring options

Specify for each of them the following values:

  • Option label: the text to identify this option on the frontend
  • Description: enter here details about this option (valid for all types of add-ons except for Select)
  • Placeholder: the placeholder text shown if no text has been entered by the user yet. Use this to help your users have more information about how to use the option (valid only for Date, Number, Text, and Textarea types of add-ons)
  • Tooltip: type the text that will be shown as a tooltip (valid for all types of add-ons except for Select)
  • Price: the price associated with the option can be calculated in 4 different ways depending on the related add-on type
    • fixed price (valid for all add-on types)
    • percentage price: based only on the base price of the product (valid for all the add-on types)
    • multiplied by the length of the string: the option base price is multiplied by the length of the text string the user inserted in the option (valid only for Text and Textarea add-on types)
    • multiplied by the option value: the option base price is multiplied by the value the user inserted in the option (valid only for Number type add-ons)
  • “Min/Max”: these values can be configured if the add-on is of “number” typology
  • “checked”: if the add-on is of “checkbox” typology, it can be used to set a single product as “checked”
  • “Hide label”: hide label and only show input field

To enable/disable the display of add-on option details, go to “General” section of the plugin settings dashboard.

Global options - Options

This is how our add-on is shown on the frontend.

Add-on example

Duplicate options

If you need to create an option similar to an existing one, consider the possibility of duplicating the option.

From the page where all options are listed, click on the duplicate icon as shown in the following image:

Duplicate option

An exact copy of the option will be created, including its details. Start editing the parts that need to be changed and leave the others unchanged. This button will let you save a lot of time!

Duplicated option

Supported option fields

Each add-on option may include all or just two of the following fields:

  • description
  • placeholder
  • tooltip

Here is a table that lists all add-ons and which fields are supported for each of their options.

supported tools per option

For example, the date add-on supports the three of them, but the description only since version 1.5.1.

This is how the date add-on fields look like:

option-fields


Calculate quantity by values

Did you insert a number type add-on in the product? Only in this case, you can set the product quantity as the sum of the option values for the number type add-on. How to do it? Enable the Calculate quantity by values amount entry for the number type add-on as shown in the following image.

Enable Calculate quantity by values amount option

In this way, the product quantity to add to the cart will be given by the values the user inserted in the number type fields.

Product quantity

Remember: you can take advantage of this feature exclusively if there is only one number type add-on among the ones available for your product.

Replace the product image

For each add-on you have created, you can enable the product image “replace” feature in case the user selects the add-on.

Enable Replace The Product Image option

To allow this action, it is essential to apply the following conditions:

  • the “Replace the product image” option must be enabled on the add-on
  • you must associate an image with the add-on or with its single options

Set image for add-on

When the user will select the add-on, the system will dynamically replace the highlighted product image with the one associated with the option or with the add-on.

If you have problems switching images with your theme, you can select one of the “Replace image” methods:

  • Alternative method
  • Divi method
  • Paul’s method

replace image

Start by setting the standard method, if it does not work you can try out the other options. The standard method works with standard themes like Twenty Nineteen or Storefront.