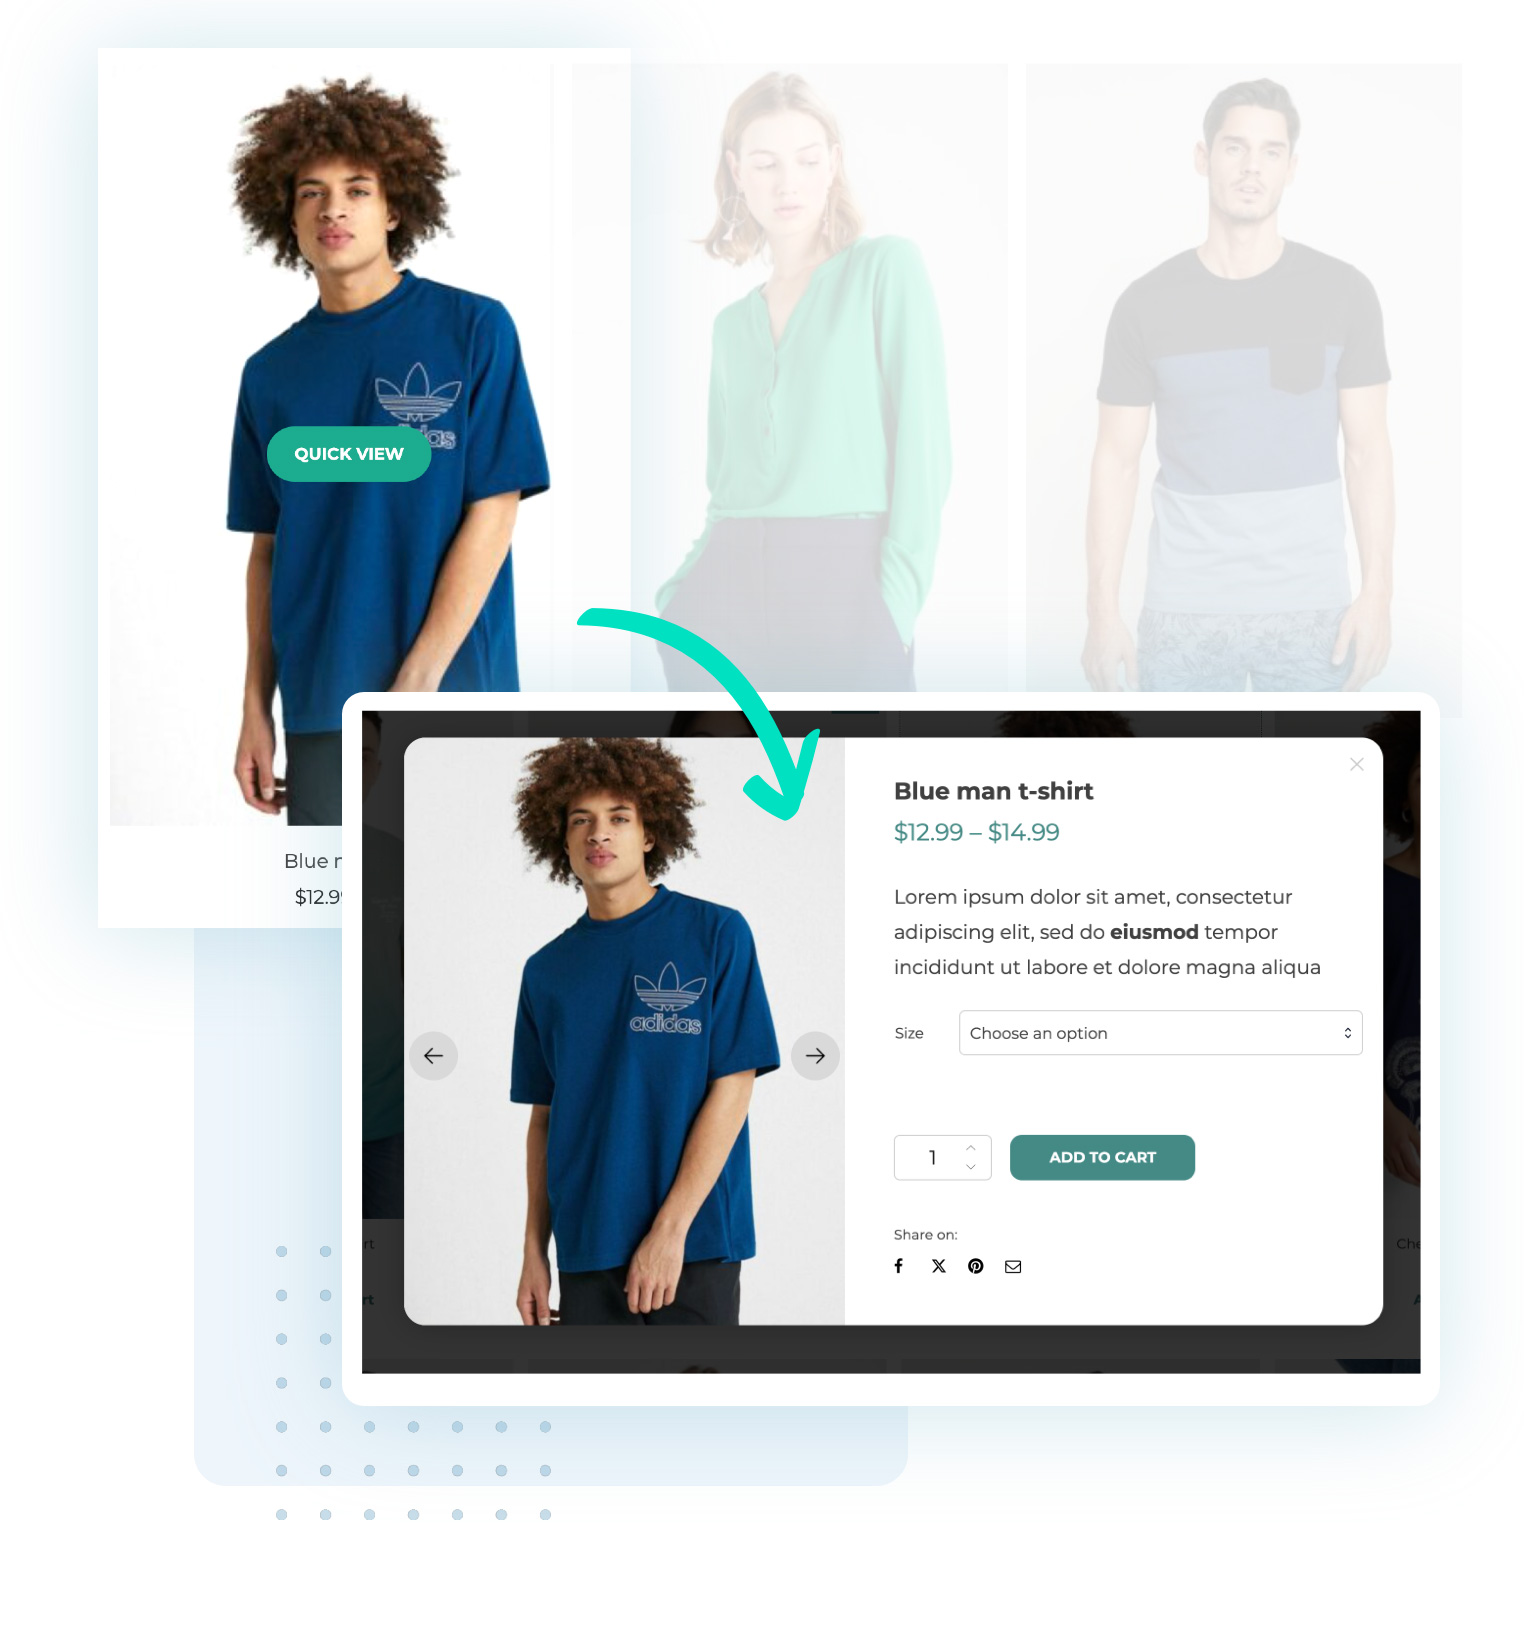
YITH WooCommerce Quick View allows you to simplify the product viewing and purchasing process by showing a quick view of the product in a modal window or sliding panel opened directly on the shop page.
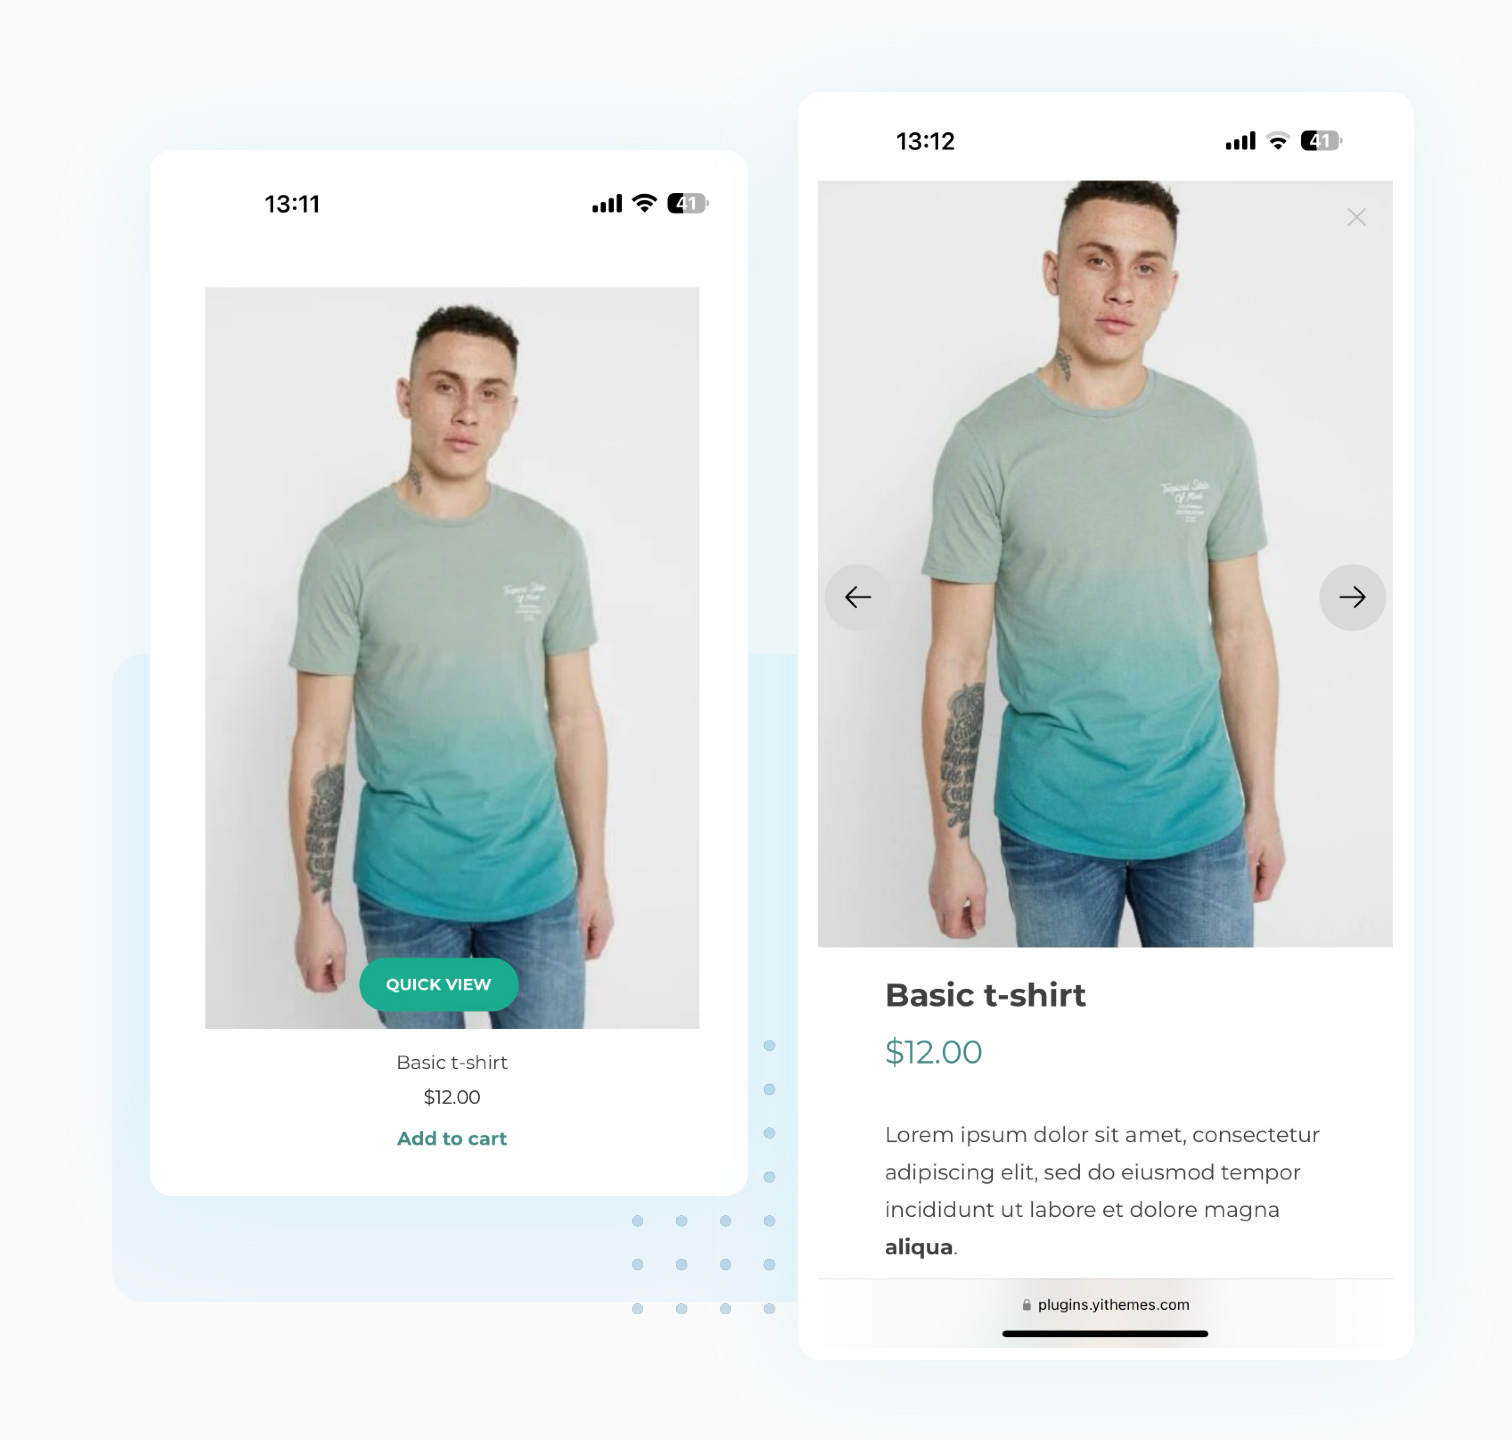
With a single click, your customers can easily compare products by viewing key information in a modal window without leaving the shop page. Users can also enjoy the Quick View feature on smartphones and tablets with a 100% mobile-friendly layout.
In this post, we’ll explore how to add a quick view popup to your products. Our goal is to make it easy for customers to view product details with a single click, using a popup window that avoids loading a new page. Let’s get started!
Step 1 — Choose the style
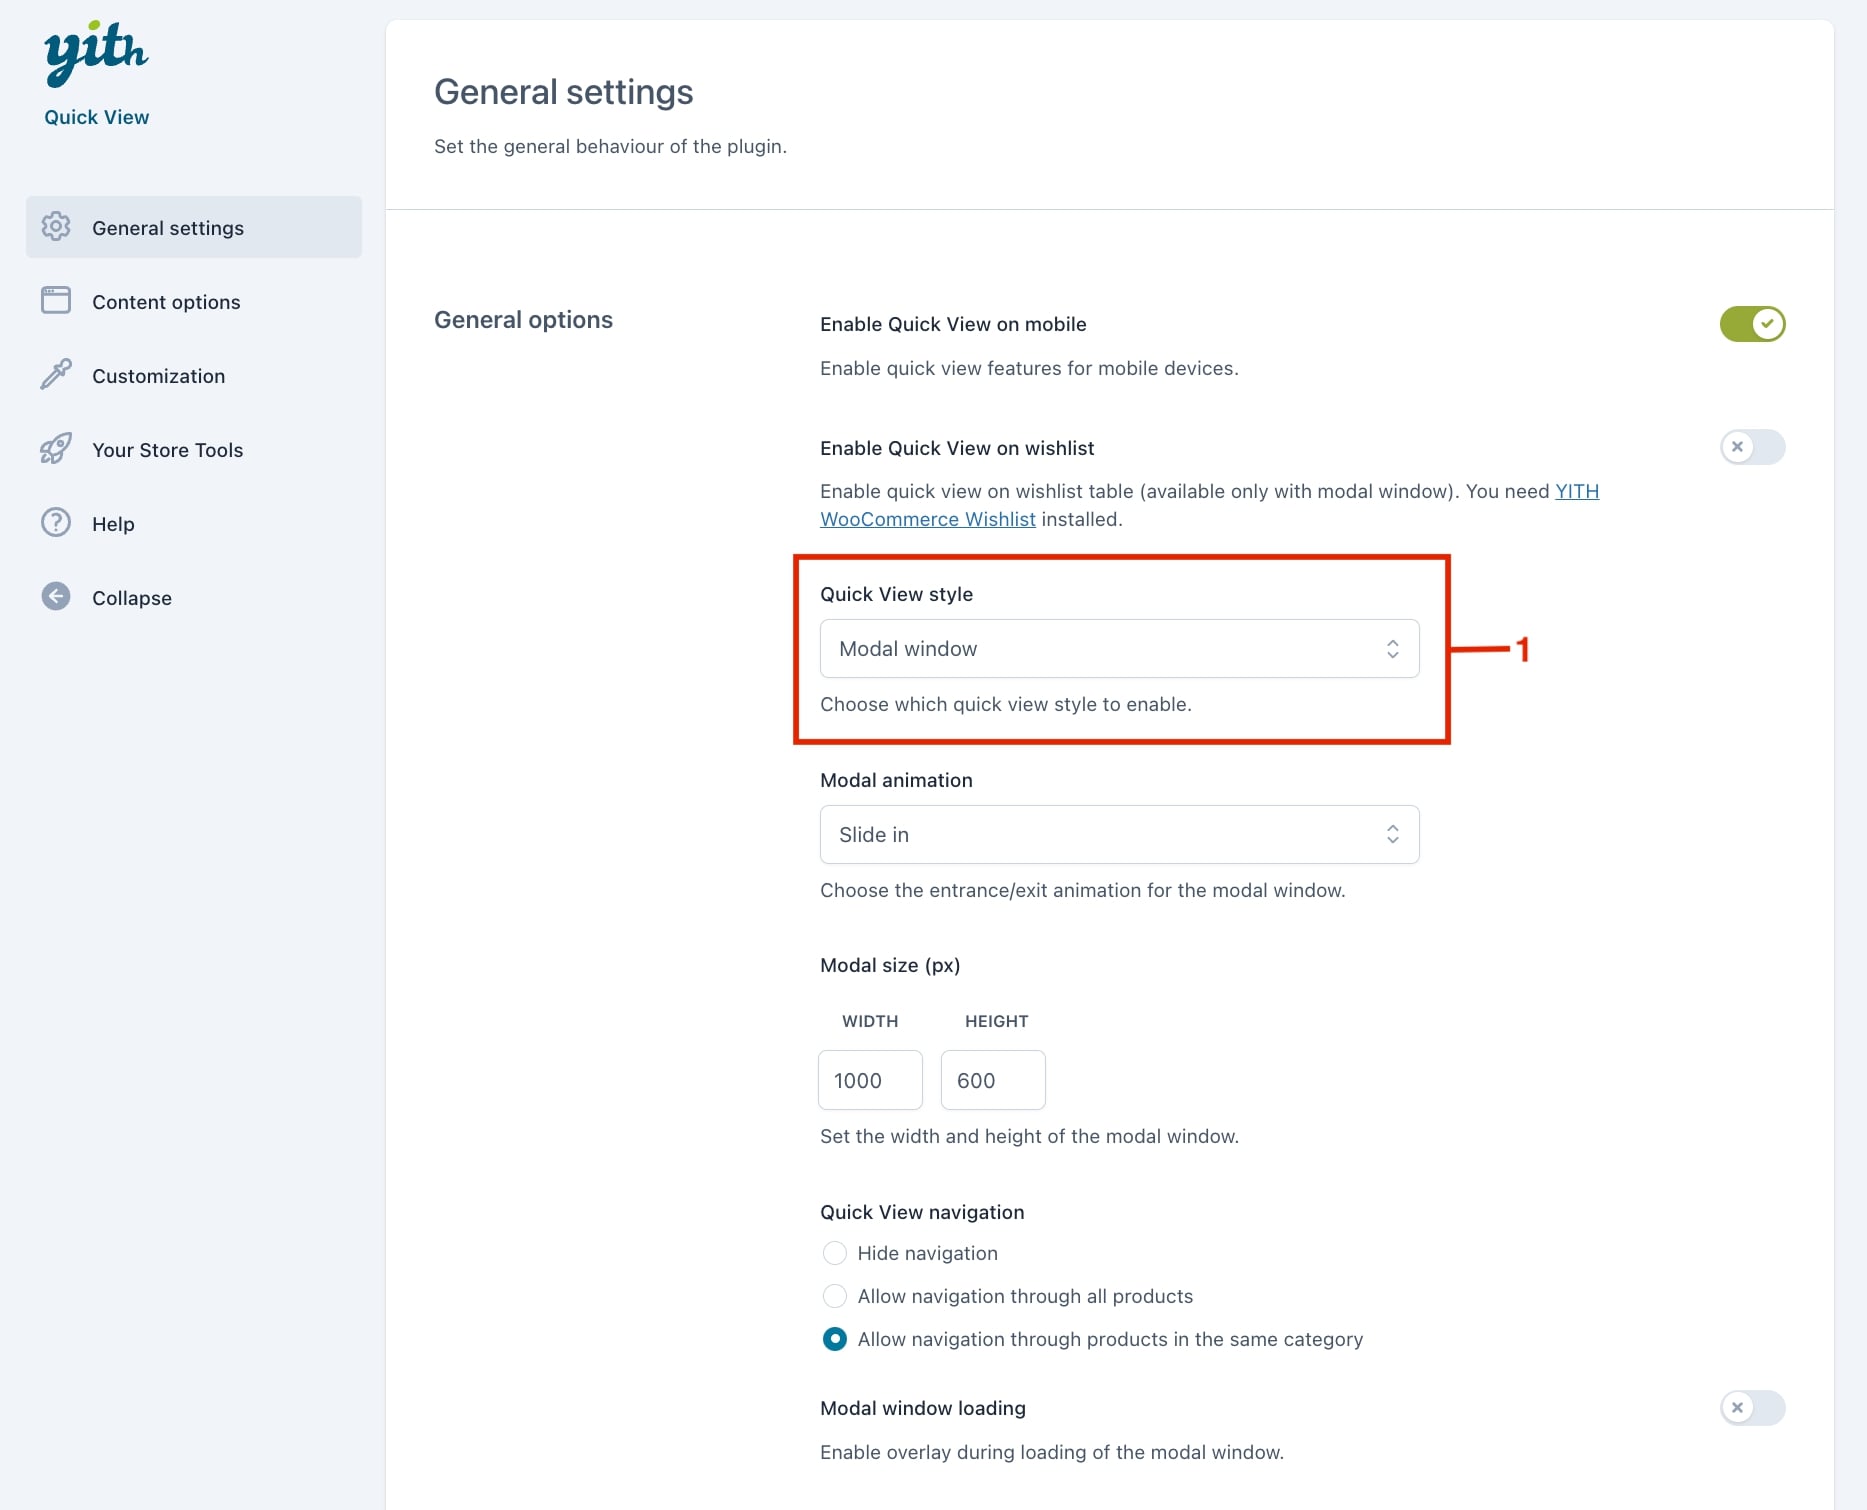
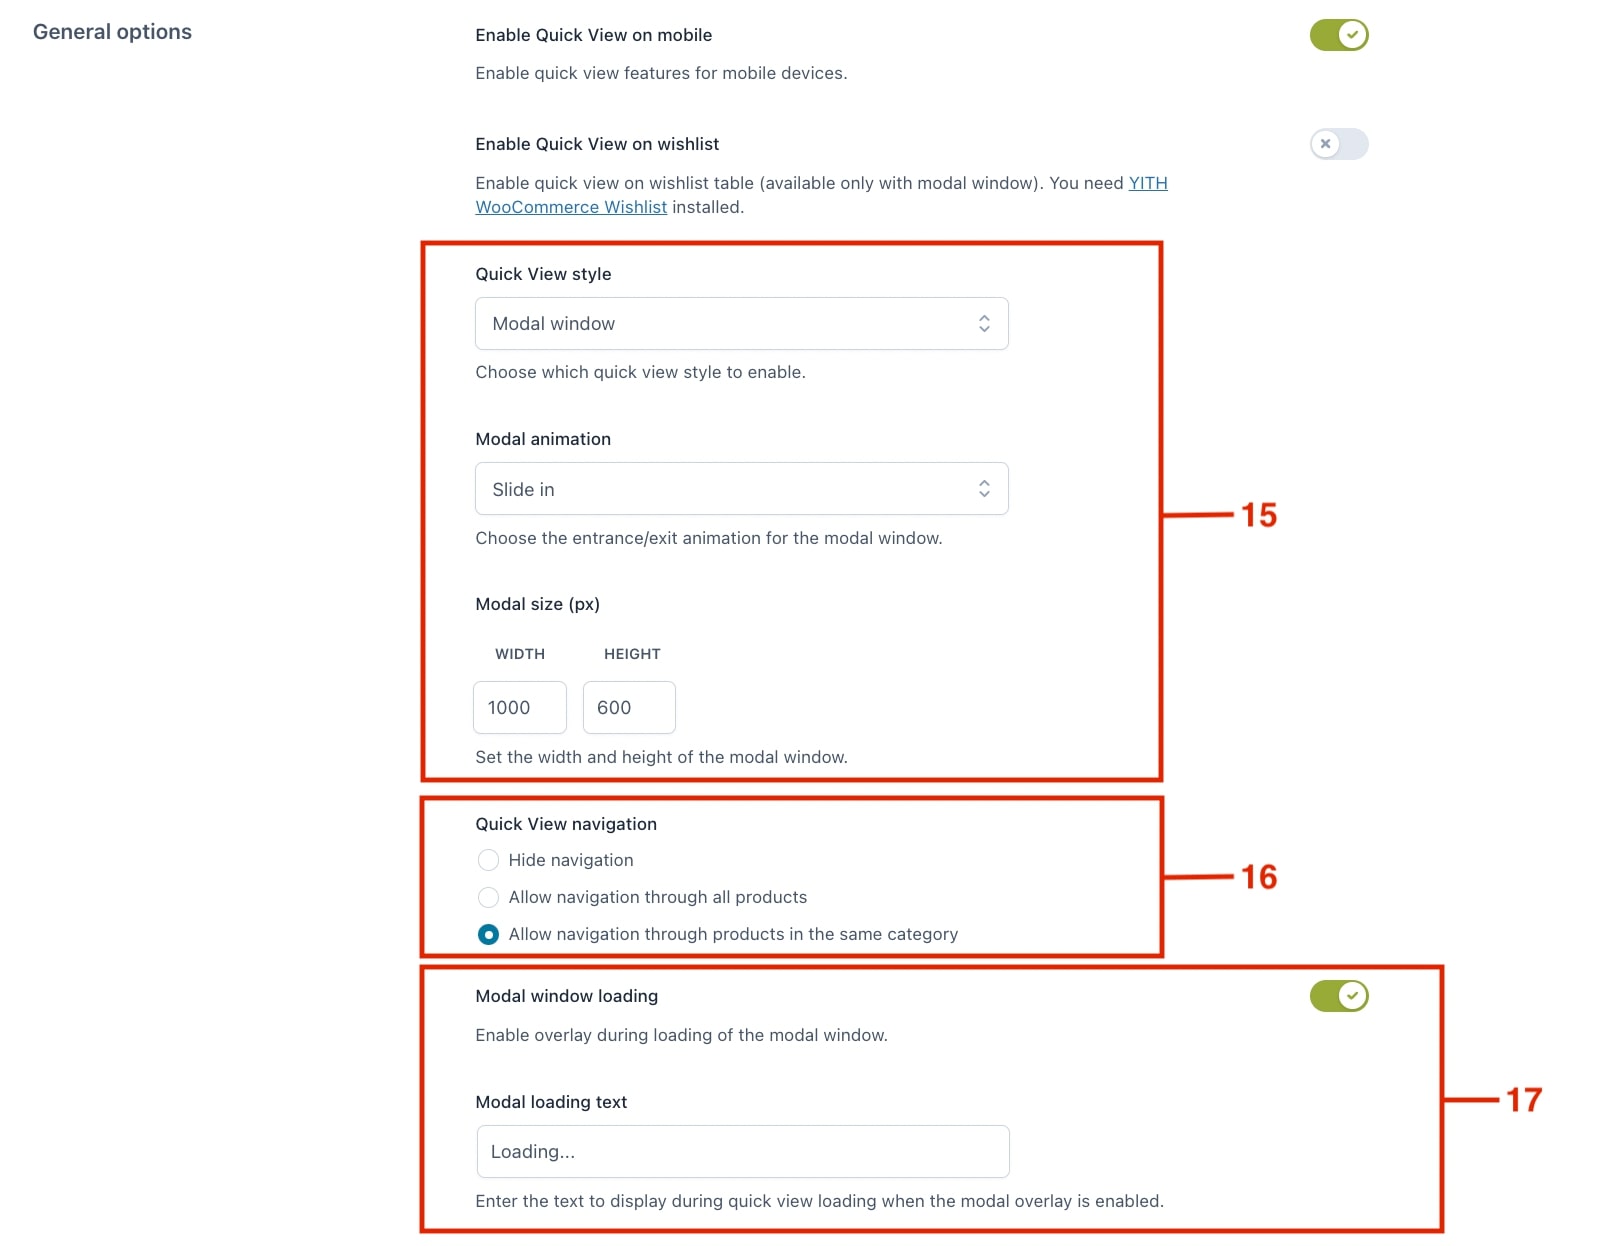
After activating the plugin, the quick view feature is automatically enabled. Start from the General settings byselecting the popup style; in this case, we’ll use a Modal window (1).
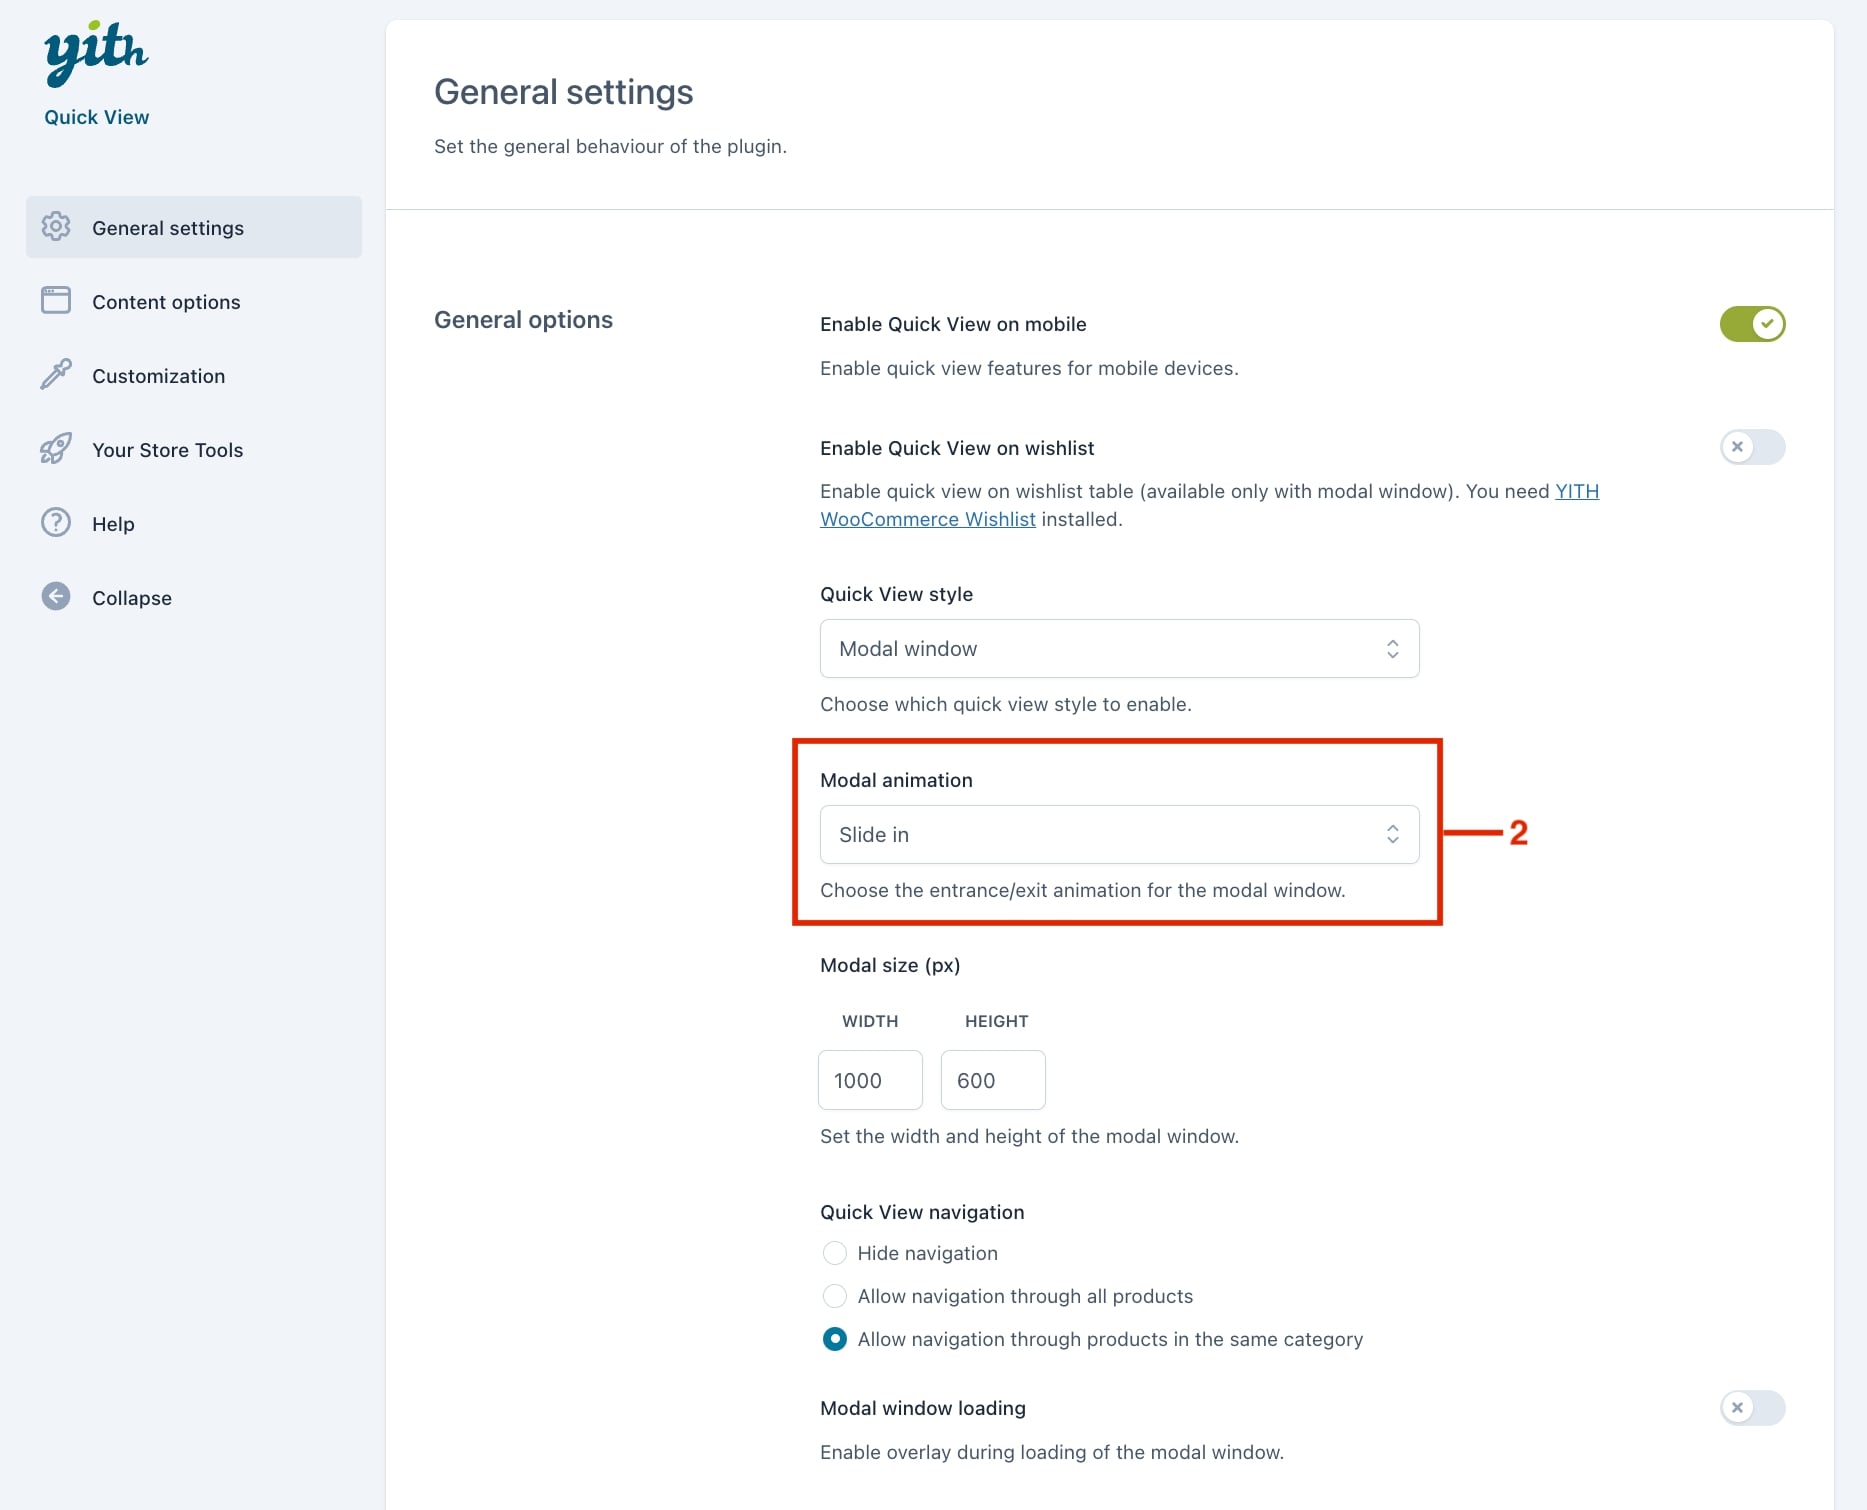
Next, we have to choose an entrance and exit animation style for the Modal window. Let’s select a Slide in (2).
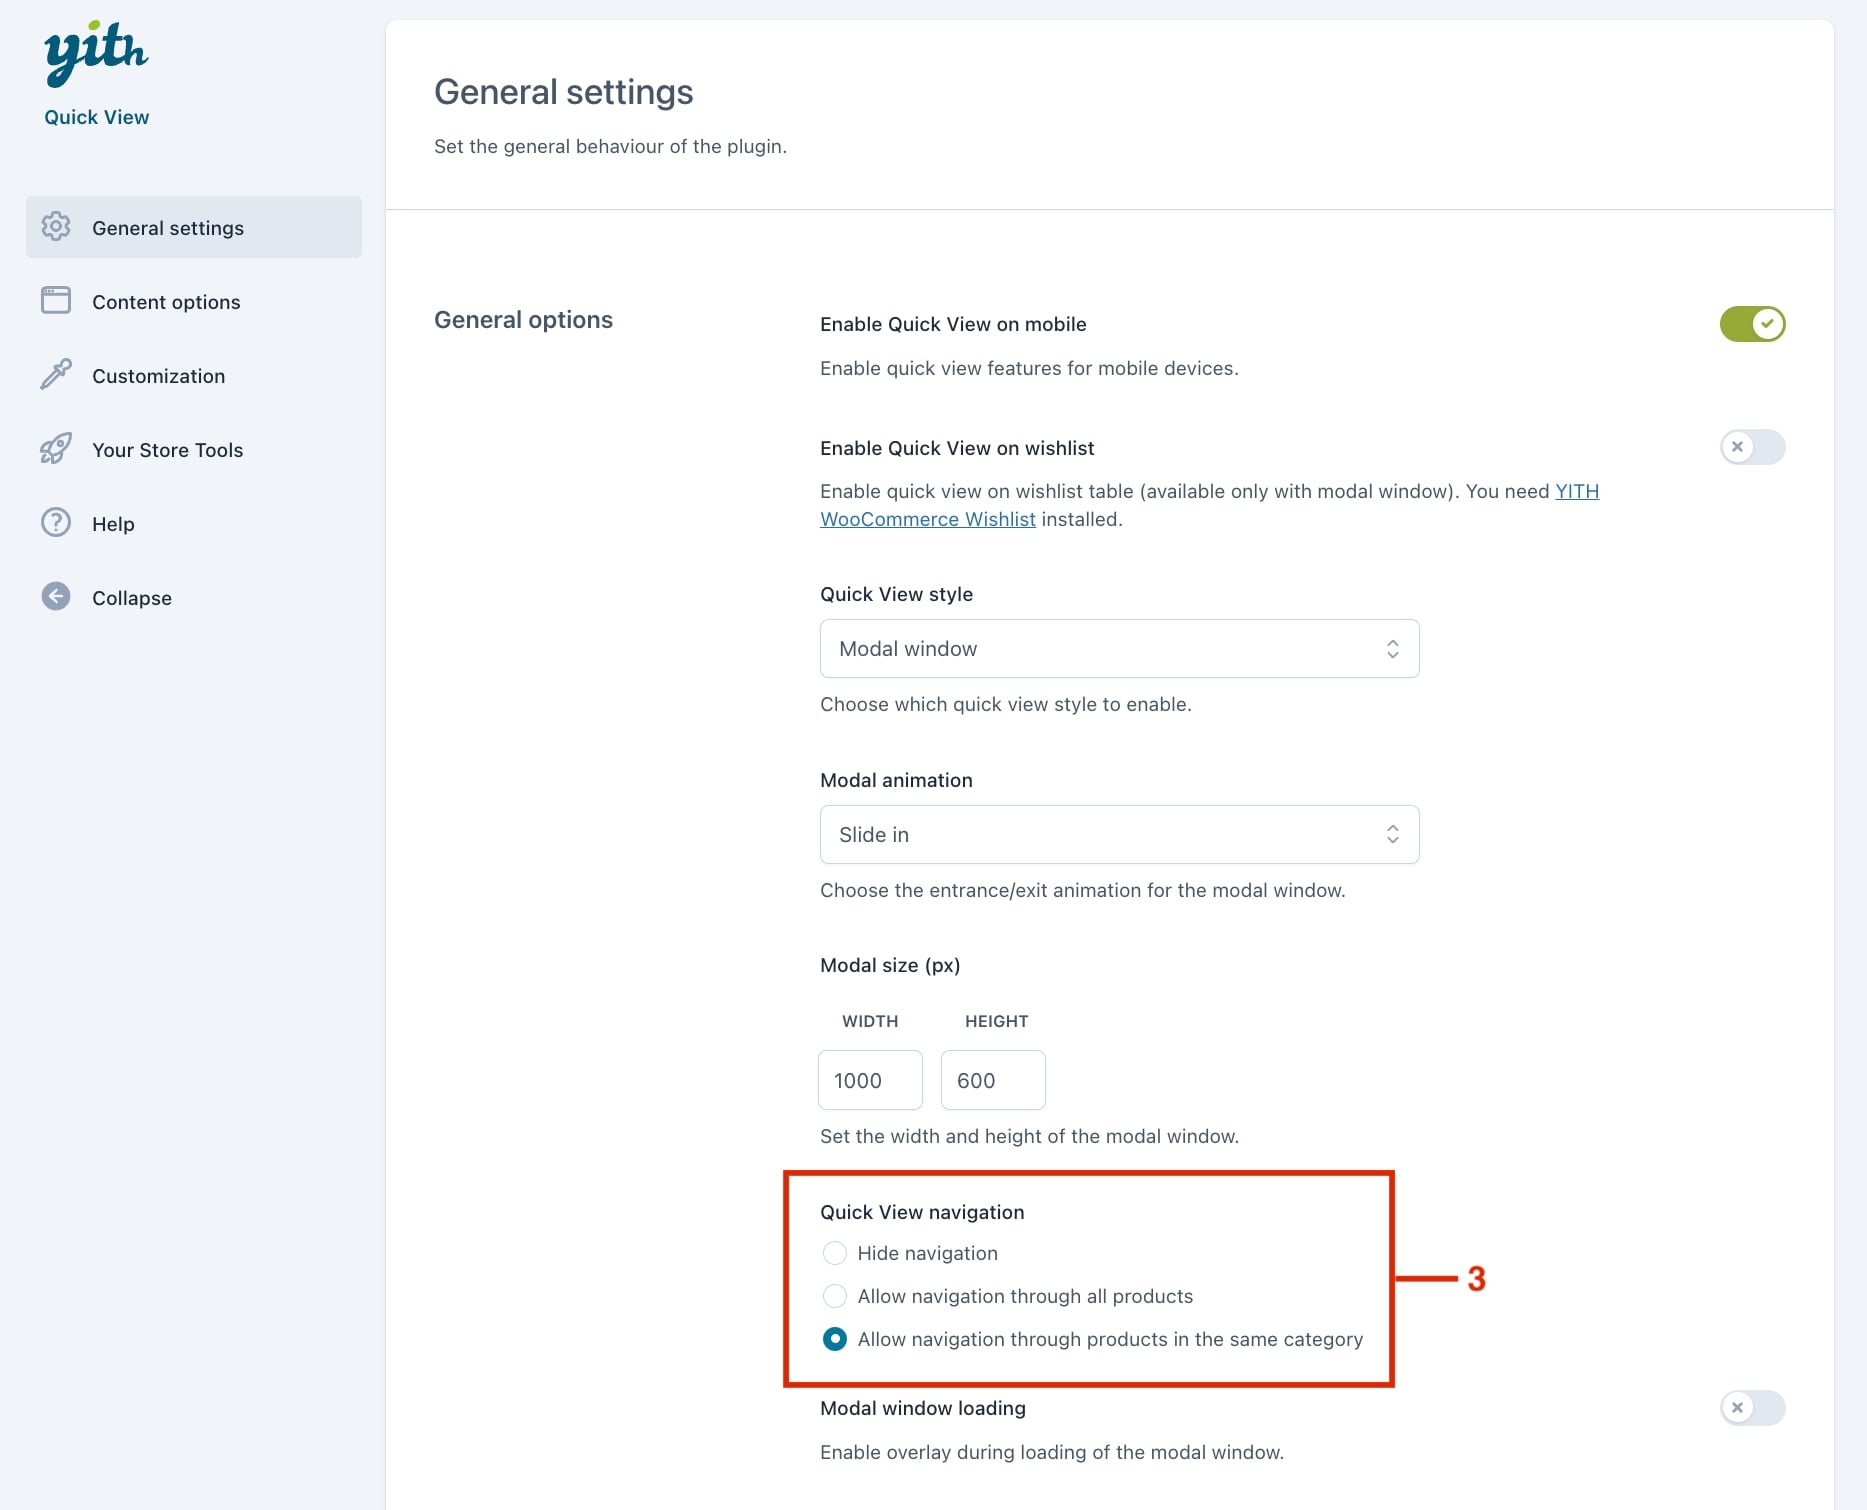
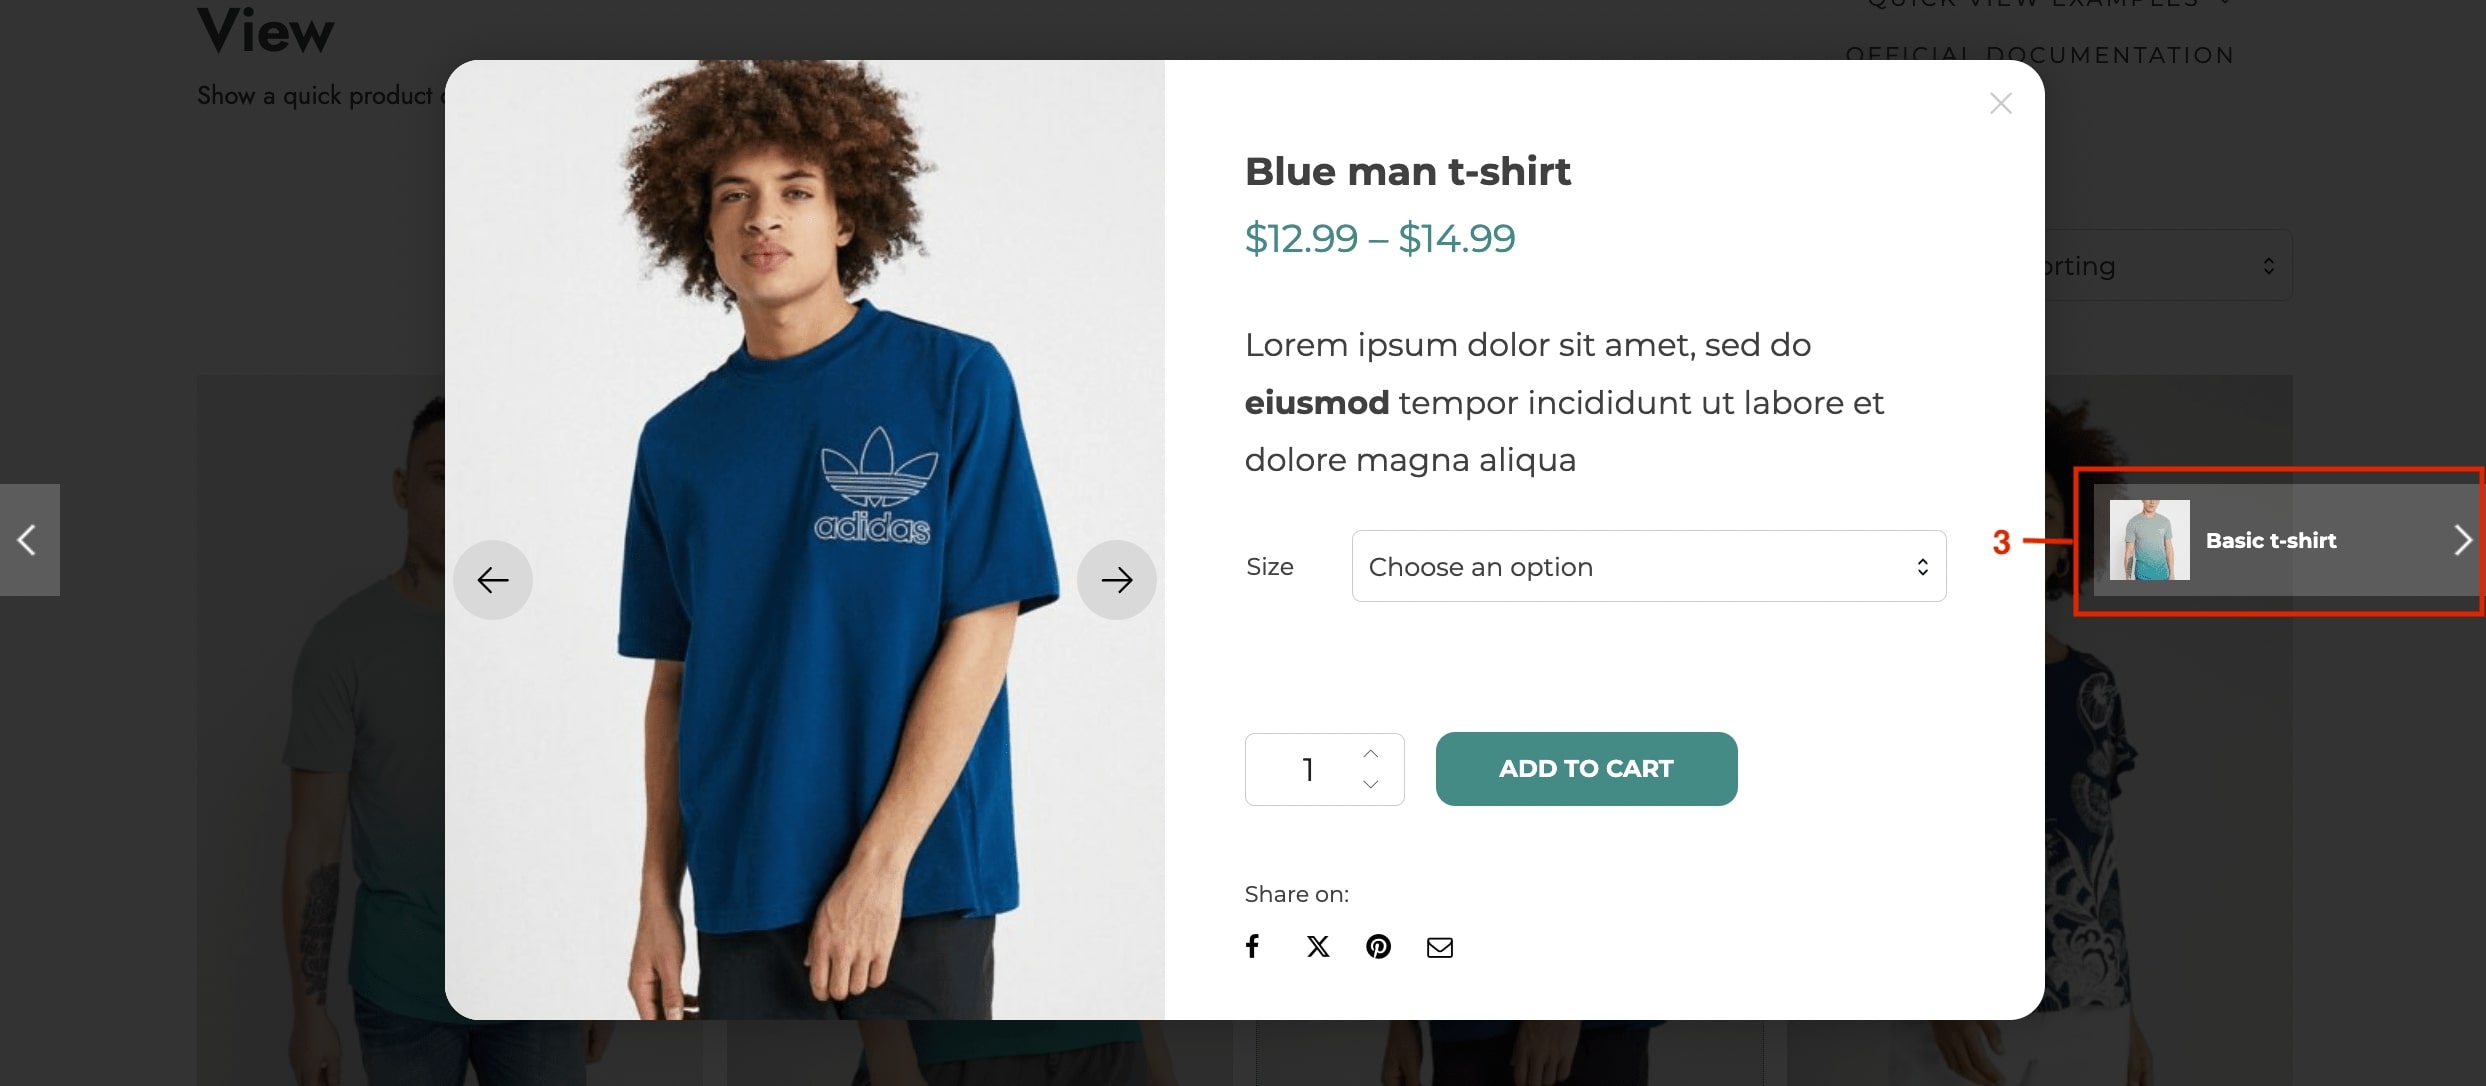
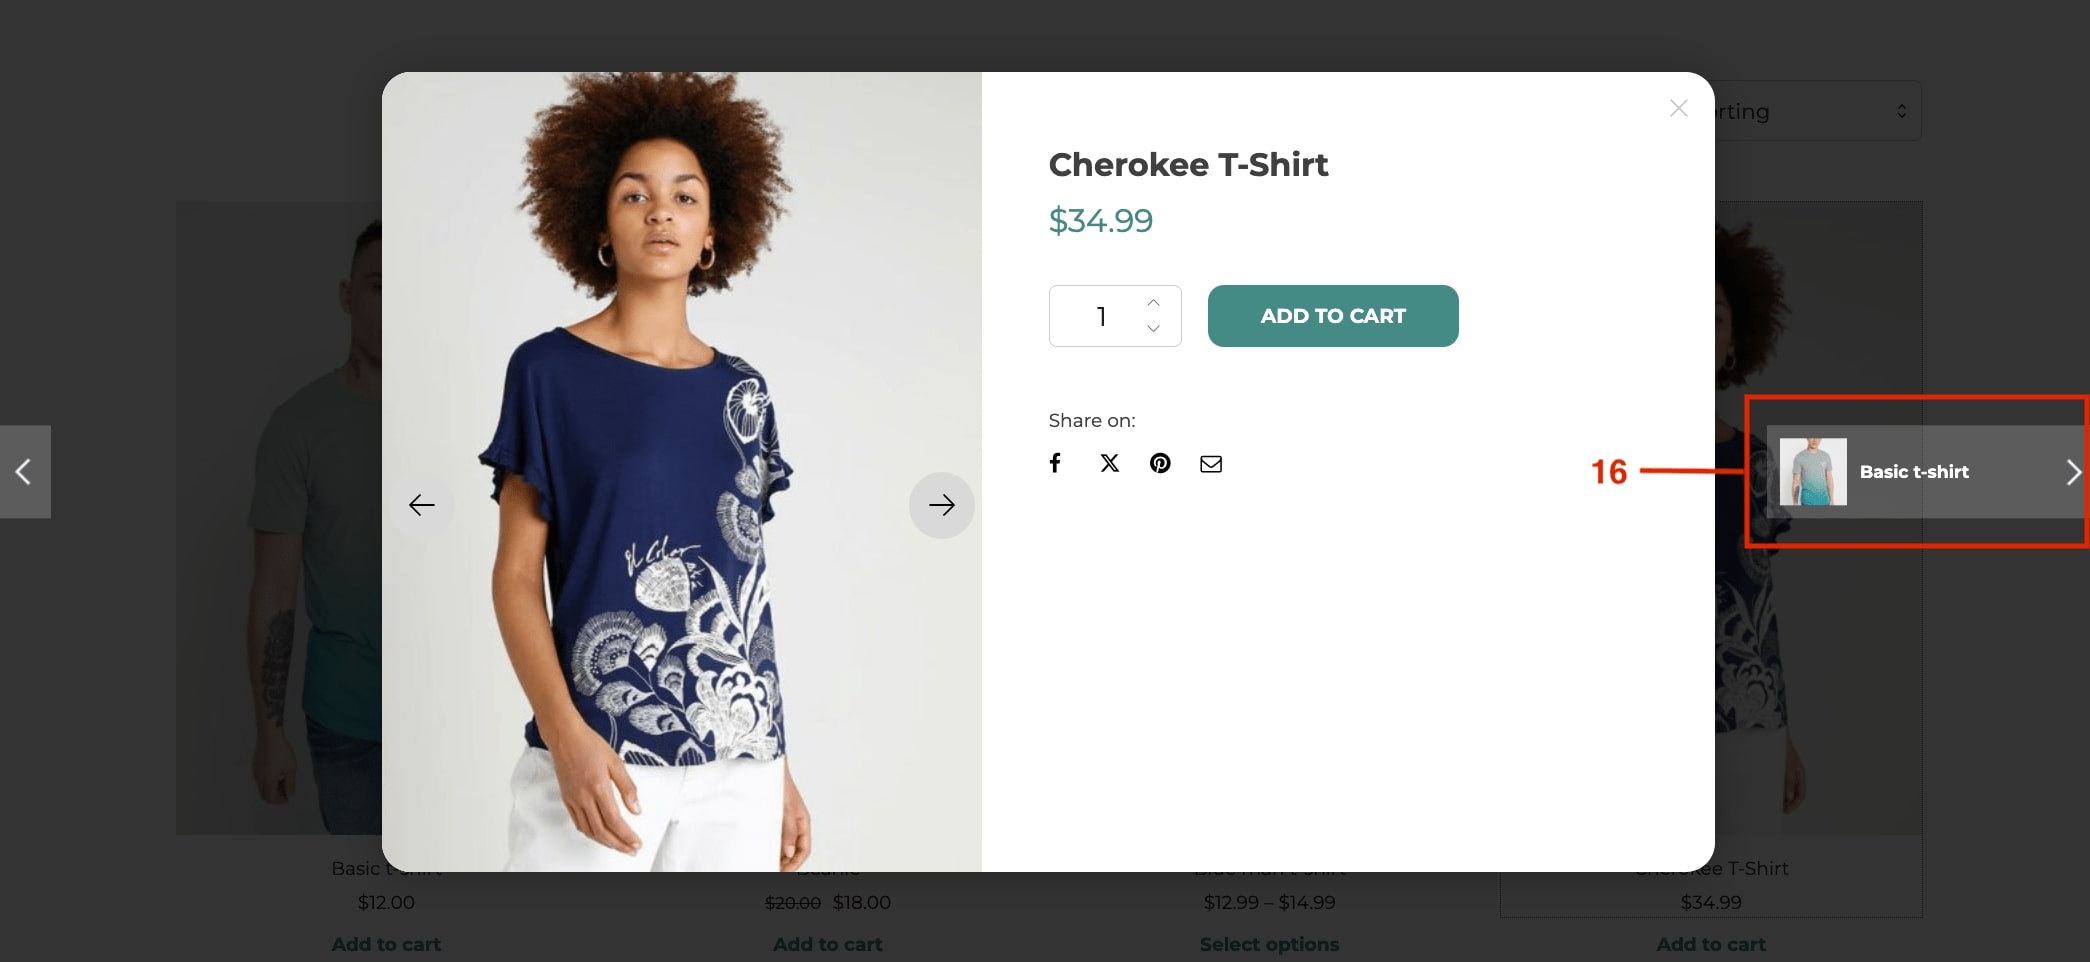
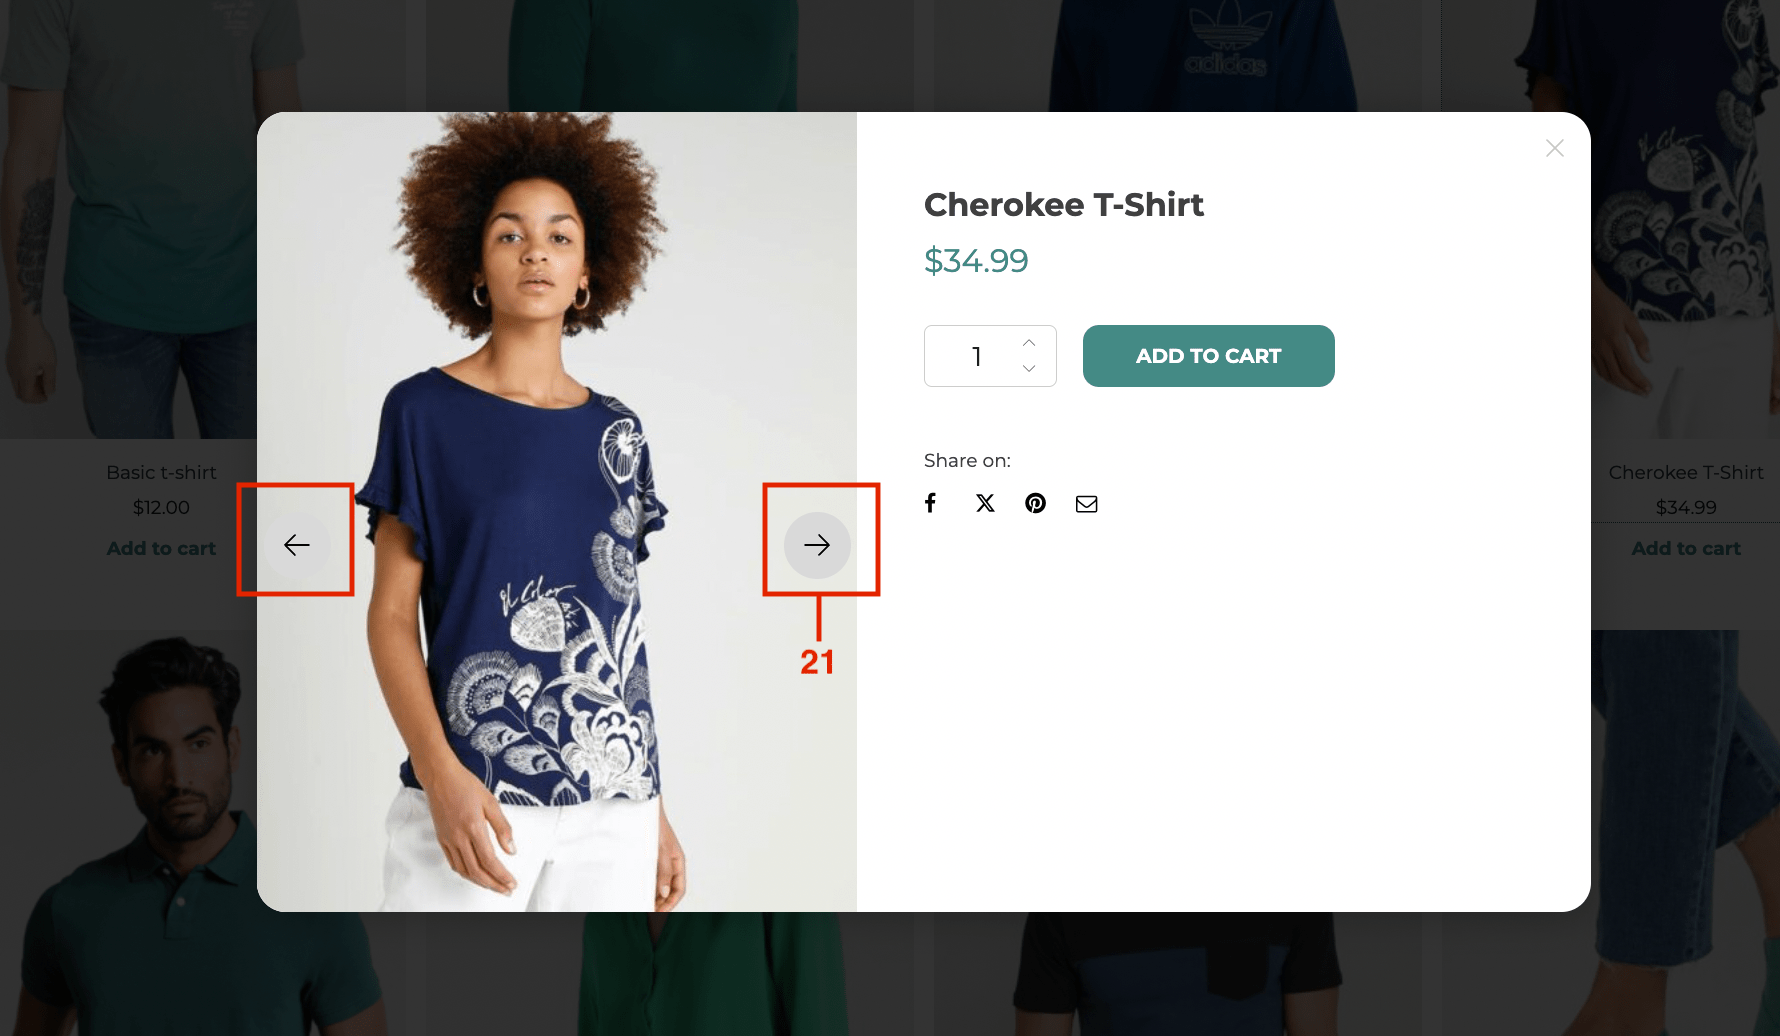
To allow users to browse other products only within the same category when the quick view is open, choose the dedicated option in the Quick View navigation (3):
This way, users can check other products from the same category without leaving the quick view popup:
Step 2 — Set up the Quick view button
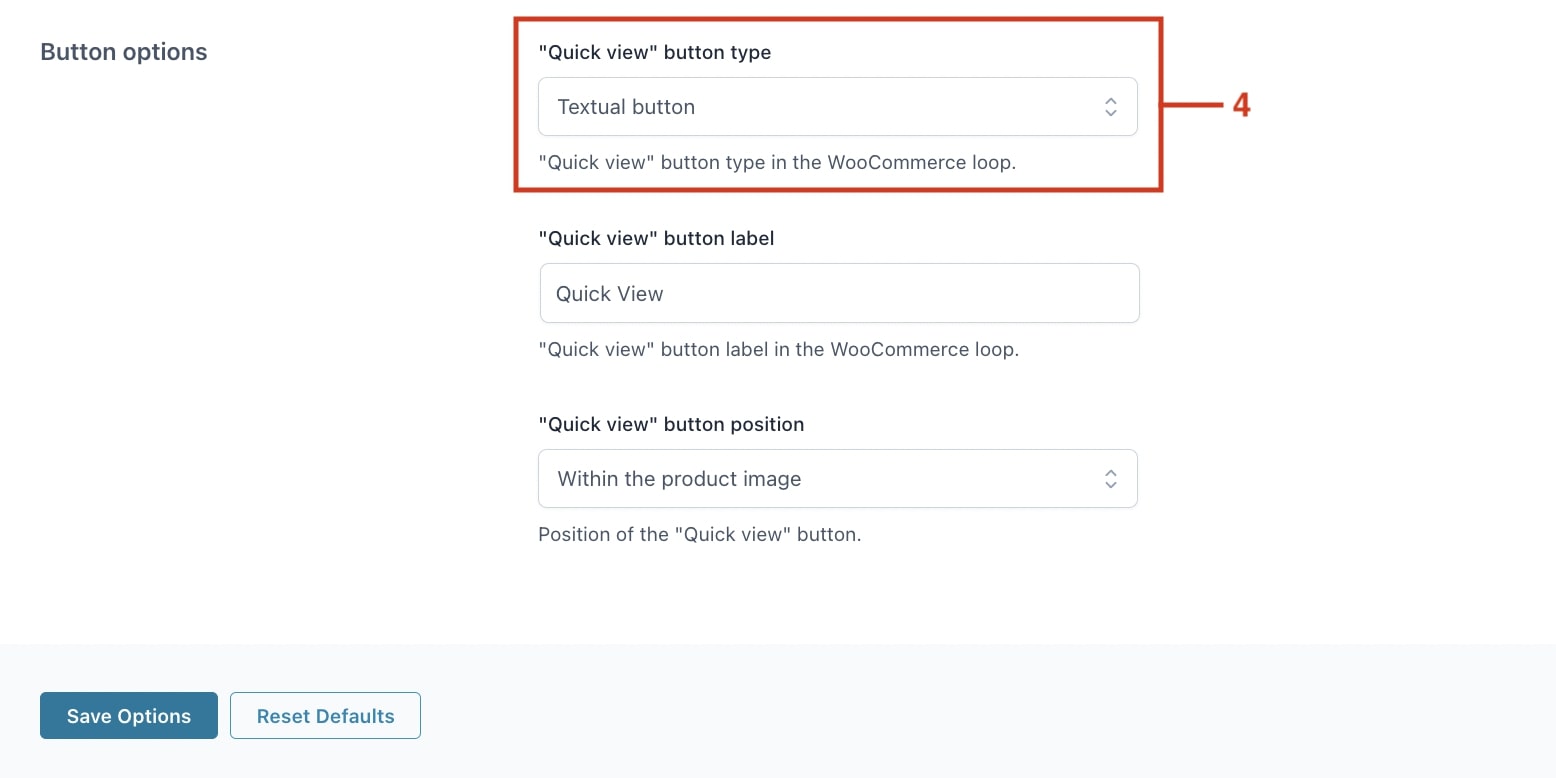
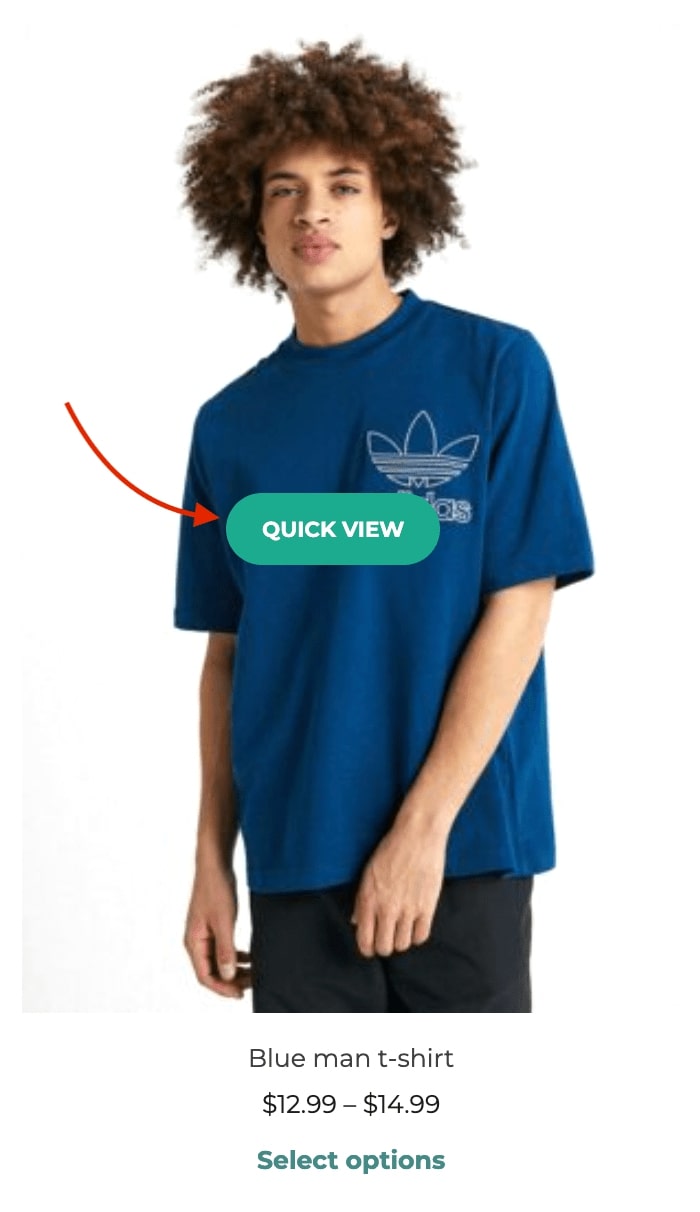
In the Button options from the General settings, you can set up the button that opens the Quick View popup. First, choose the button type (text or icon). For this example, we’ll use a text button (4).
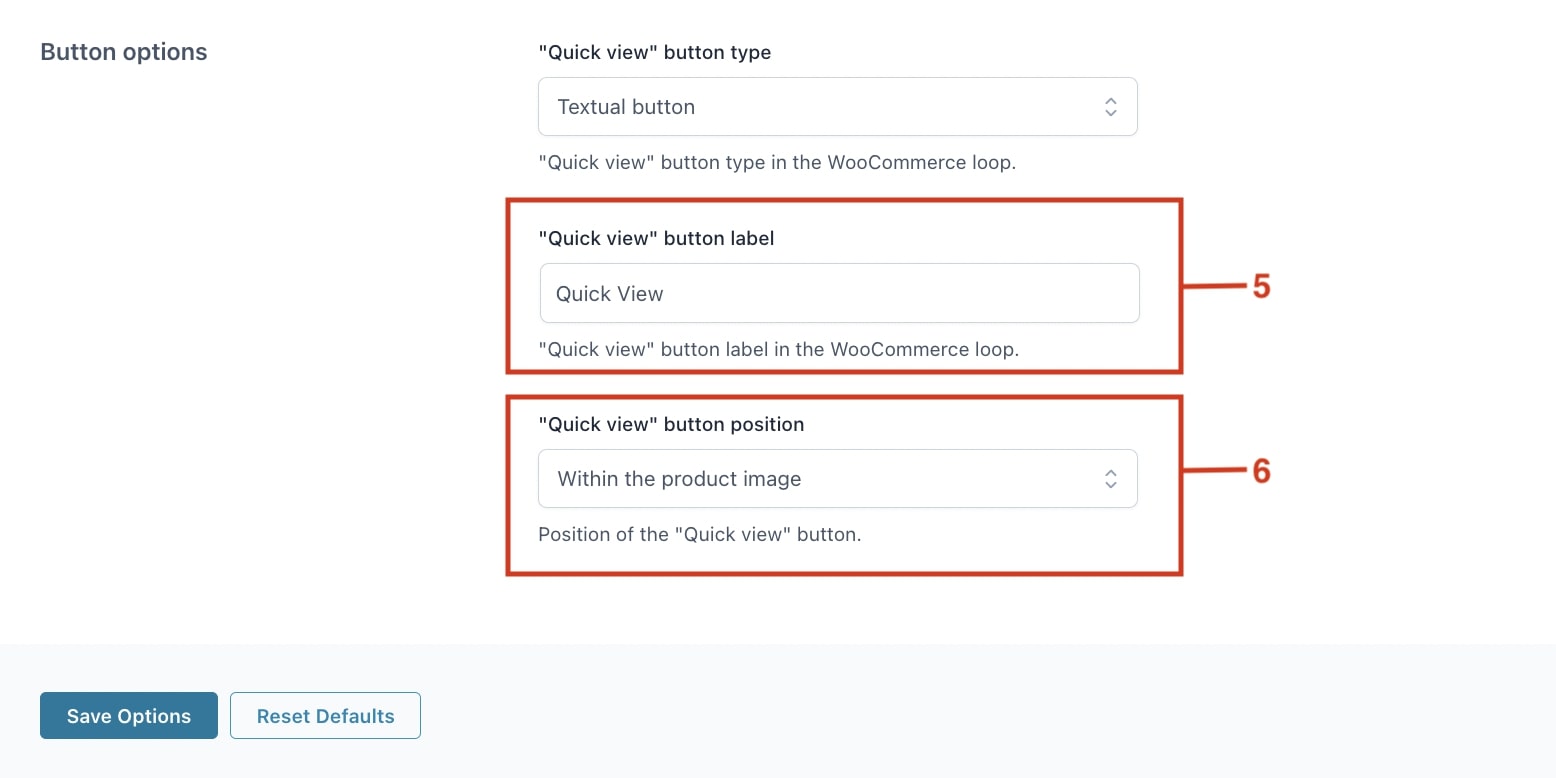
Then, type the label of the button (5) and select its position, in which we decide to place it within the product image (6). Finally, Save options.
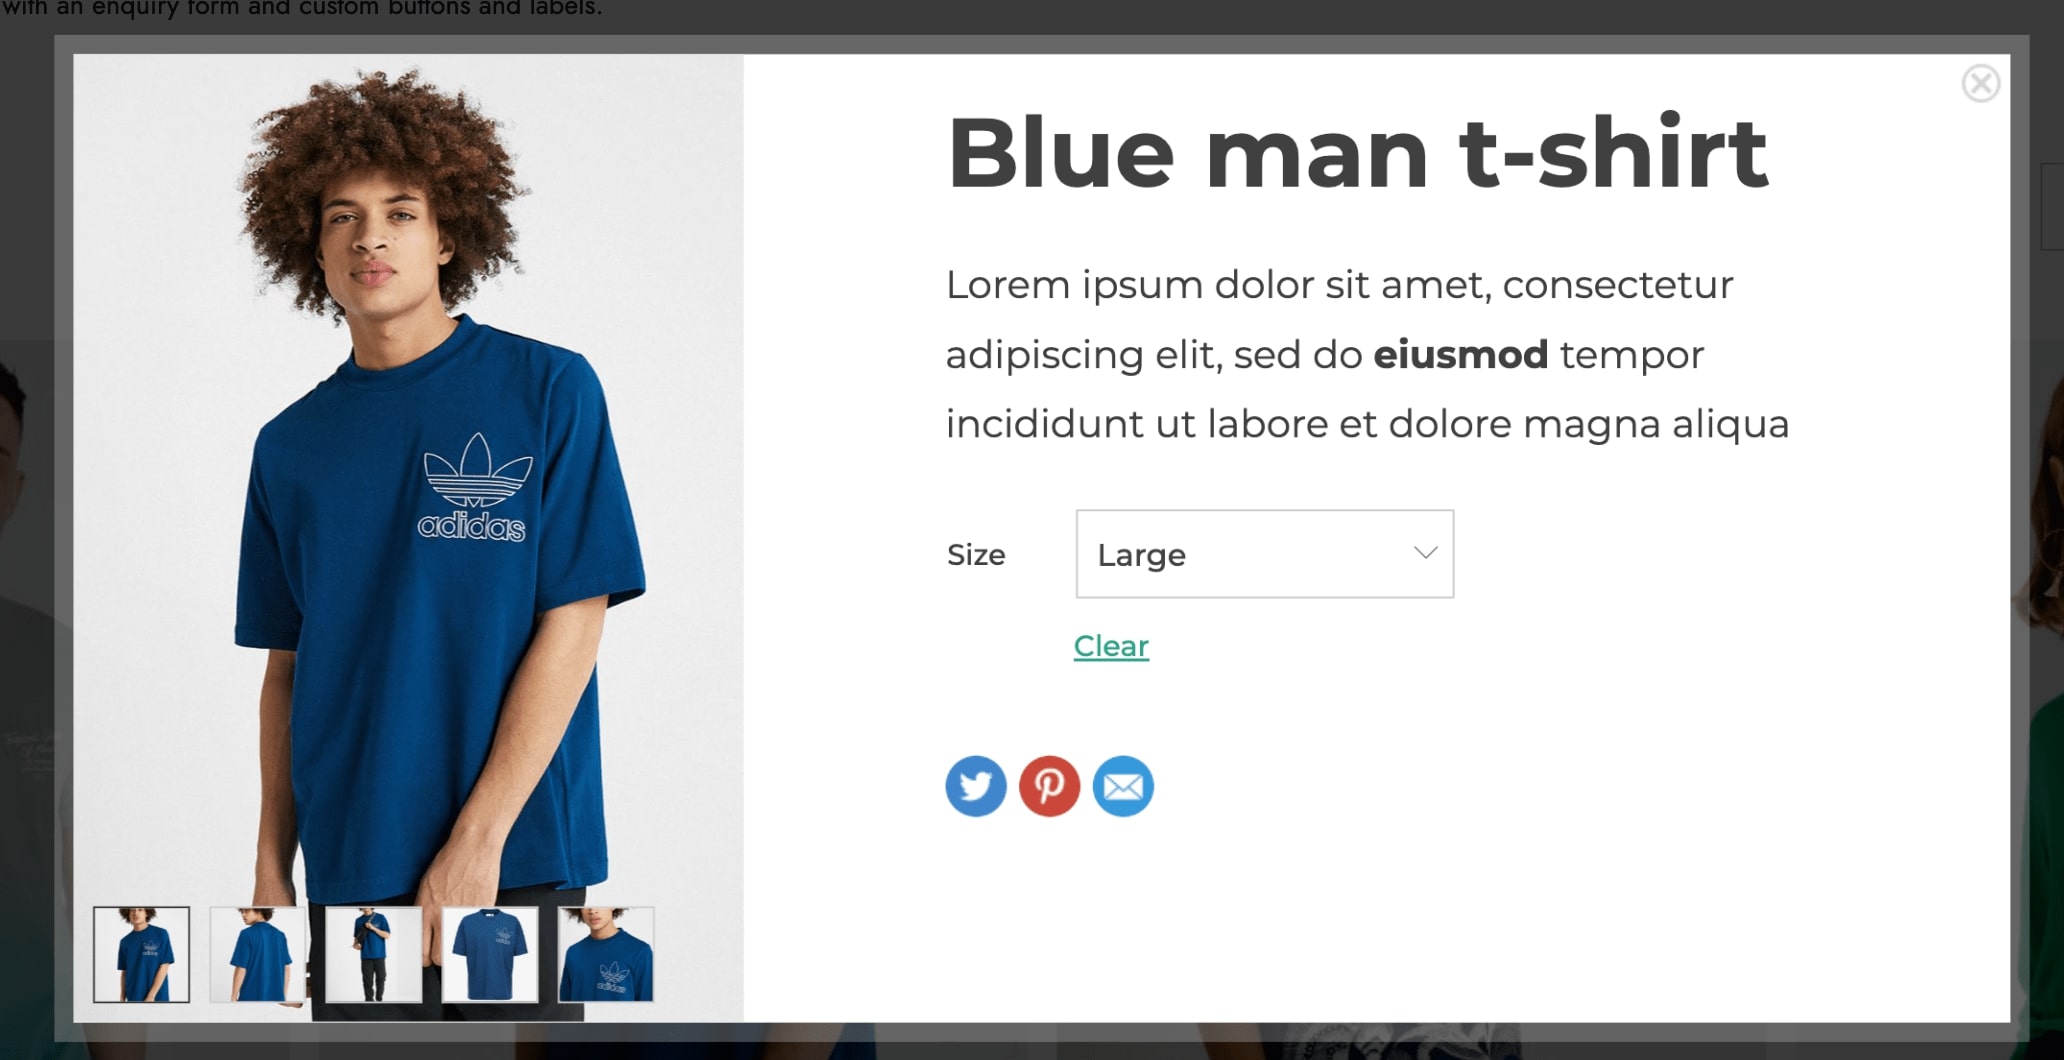
This is what customers will see in the frontend:
Step 3 — Customize the content
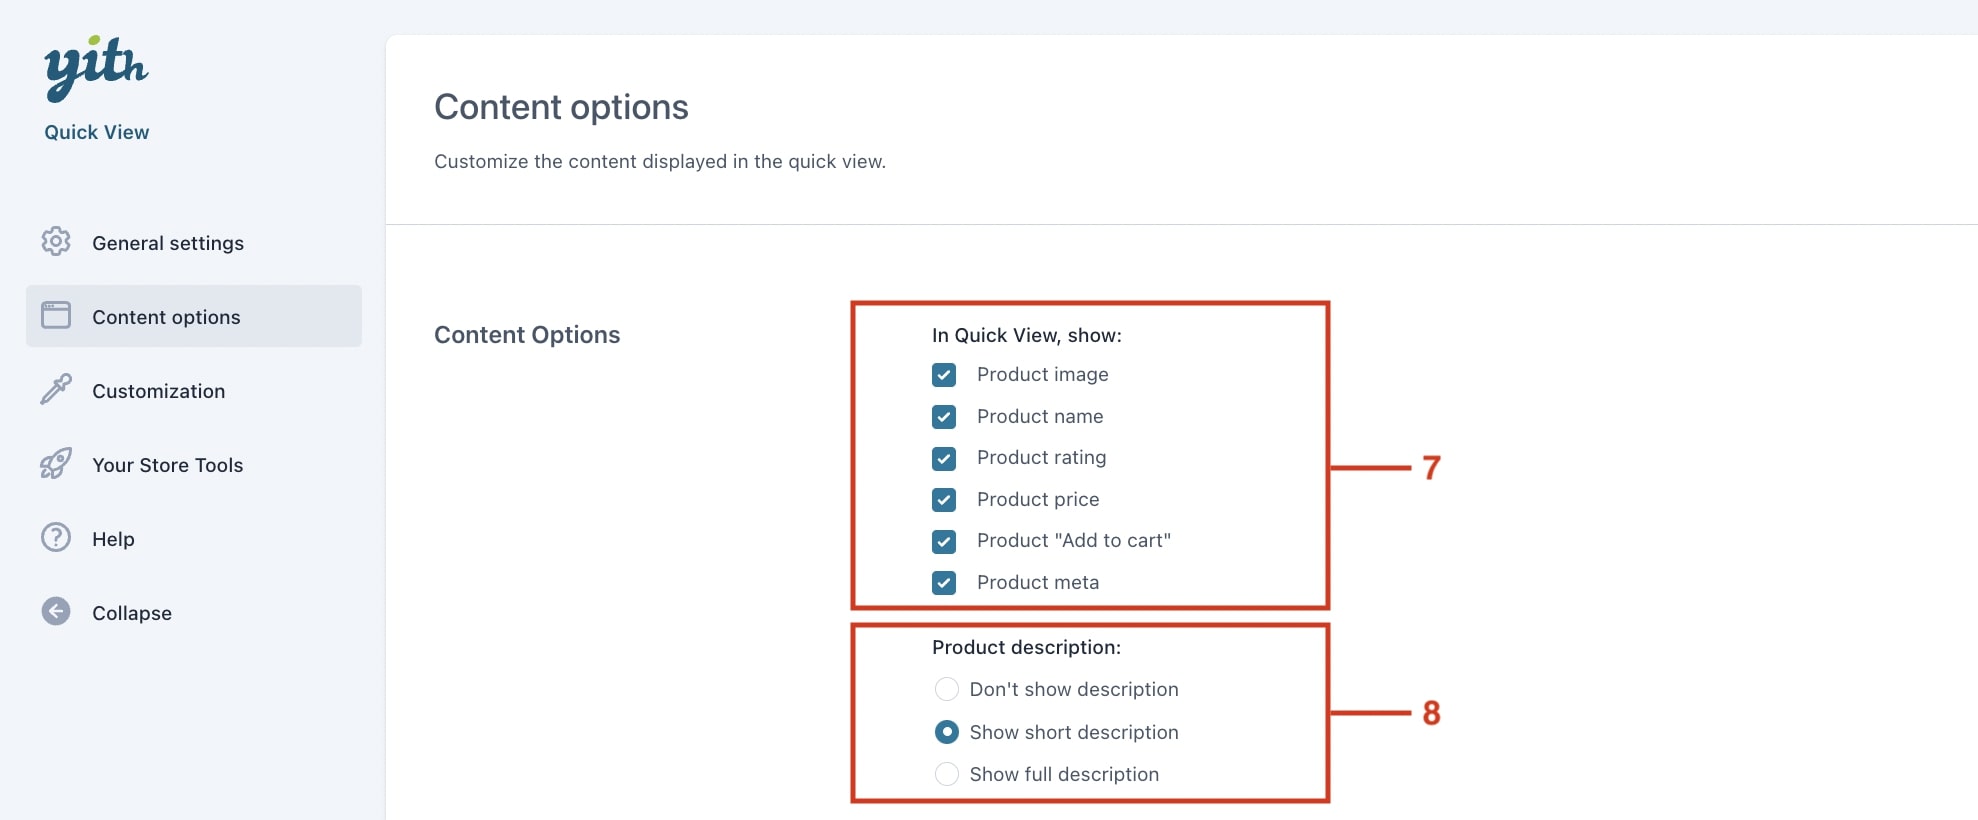
Now, customize the content inside the modal window. In Content options, choose the product information to display (7) and decide if the description should be shown (8).
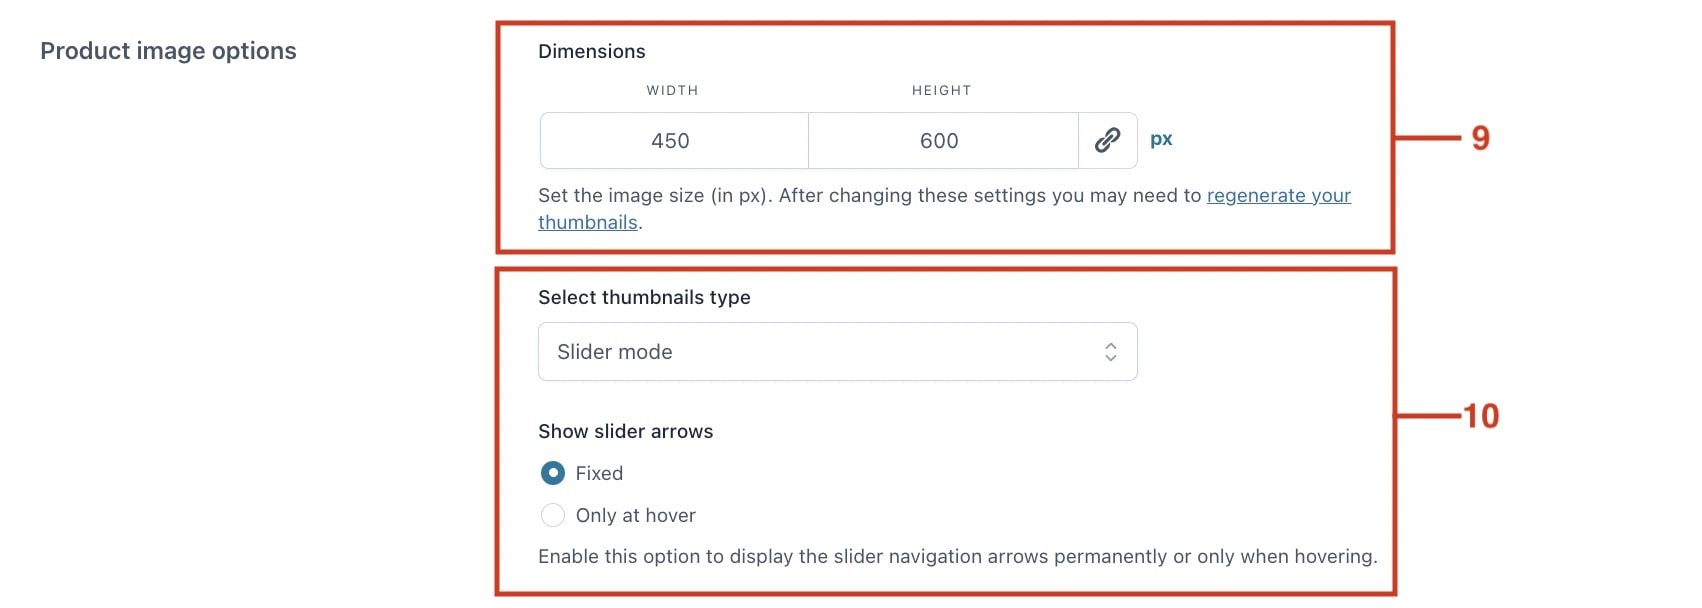
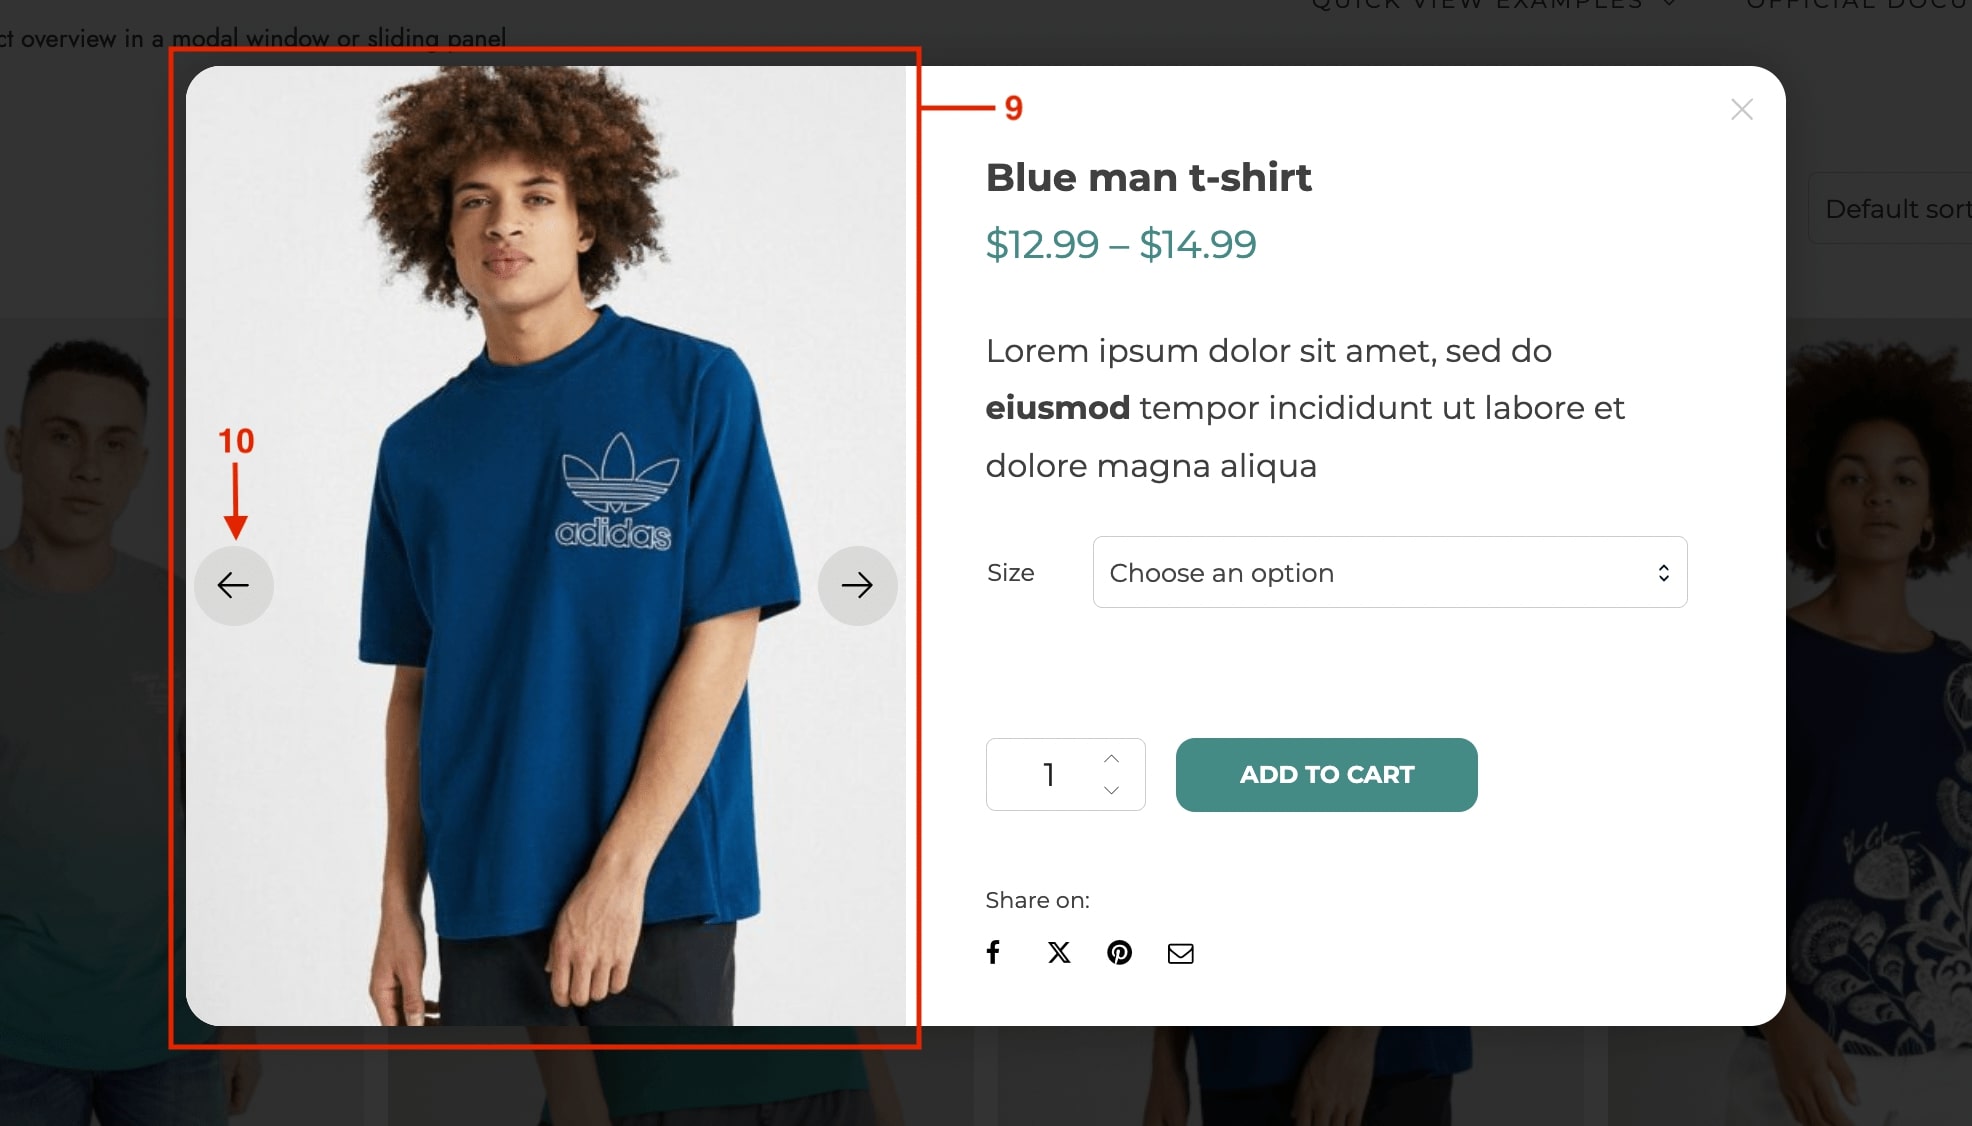
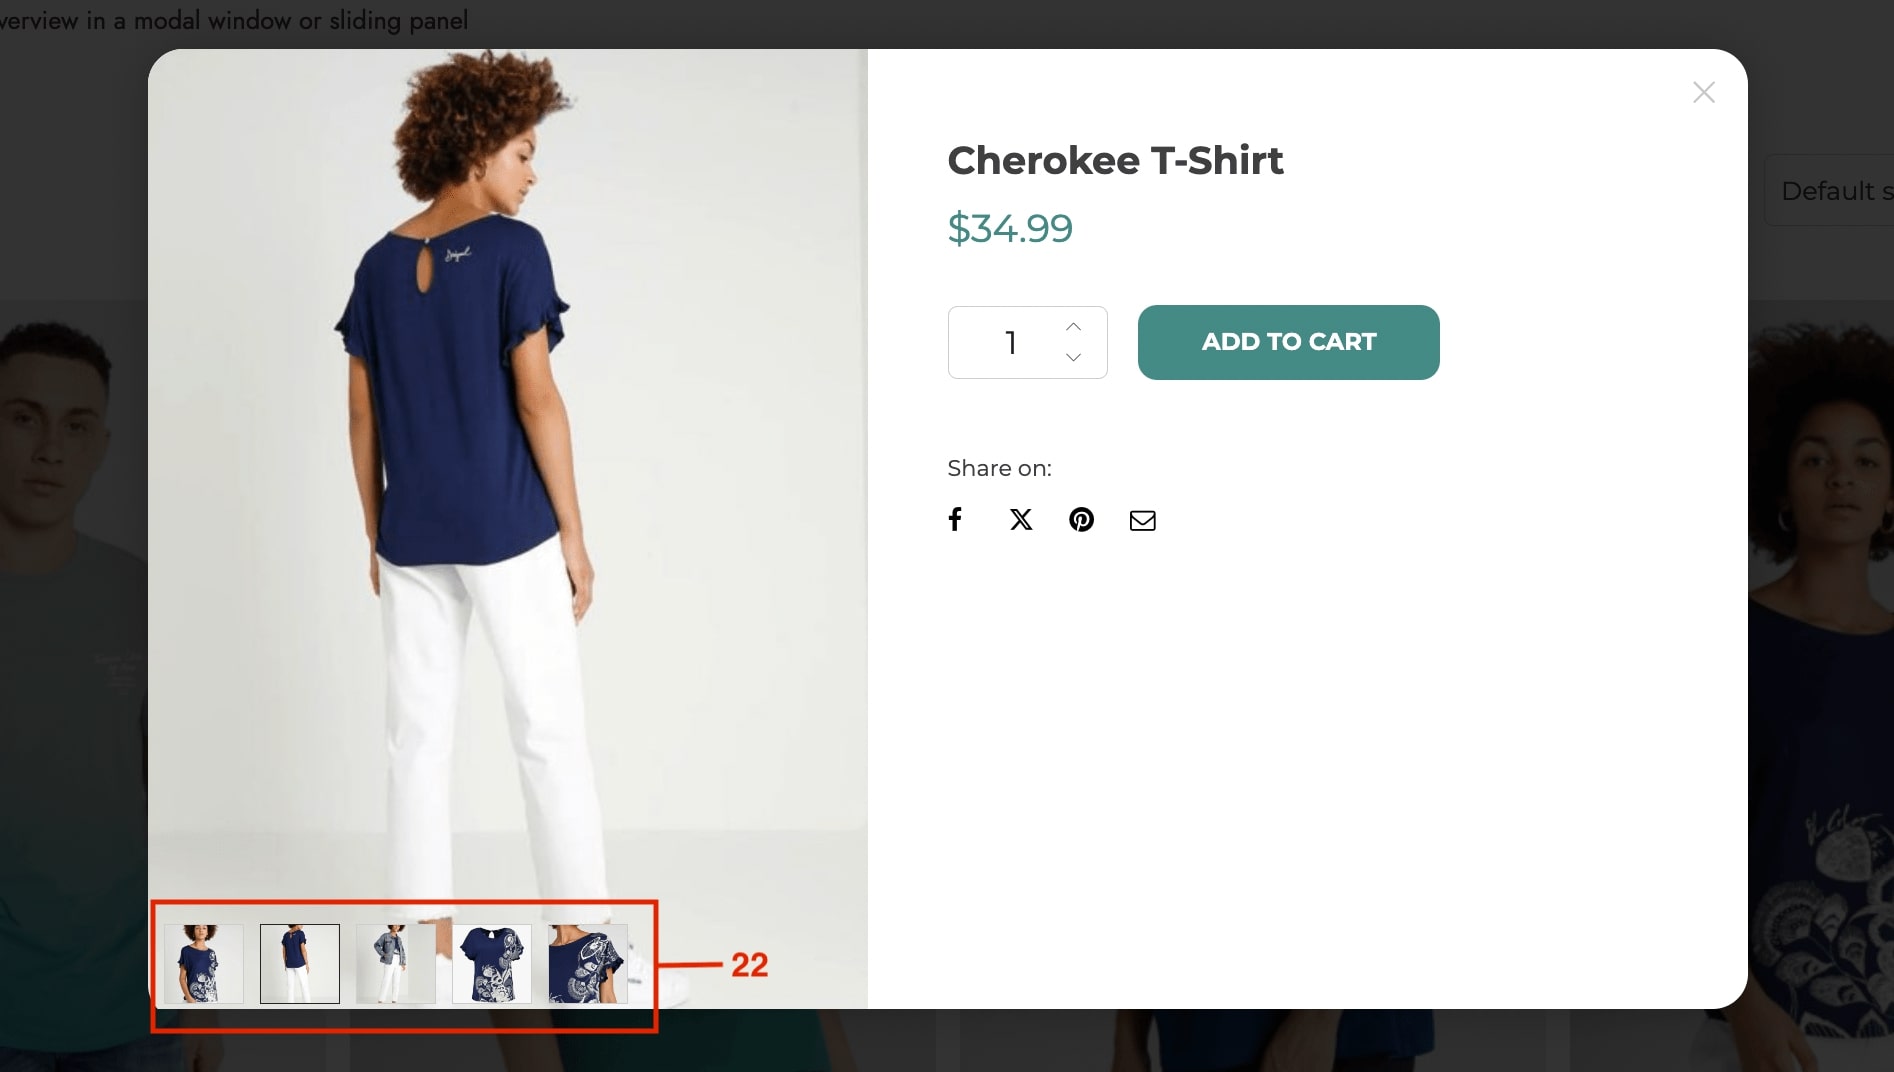
Next, customize the product image options. Start by setting the imagesize for the Quick View (9), then choose the thumbnail style—here, we’ll use a slider for the image gallery with arrows always visible (10).
When setting the product image size, keep in mind the proportions (particularly the height) of the quick view modal window previously defined in the General options.
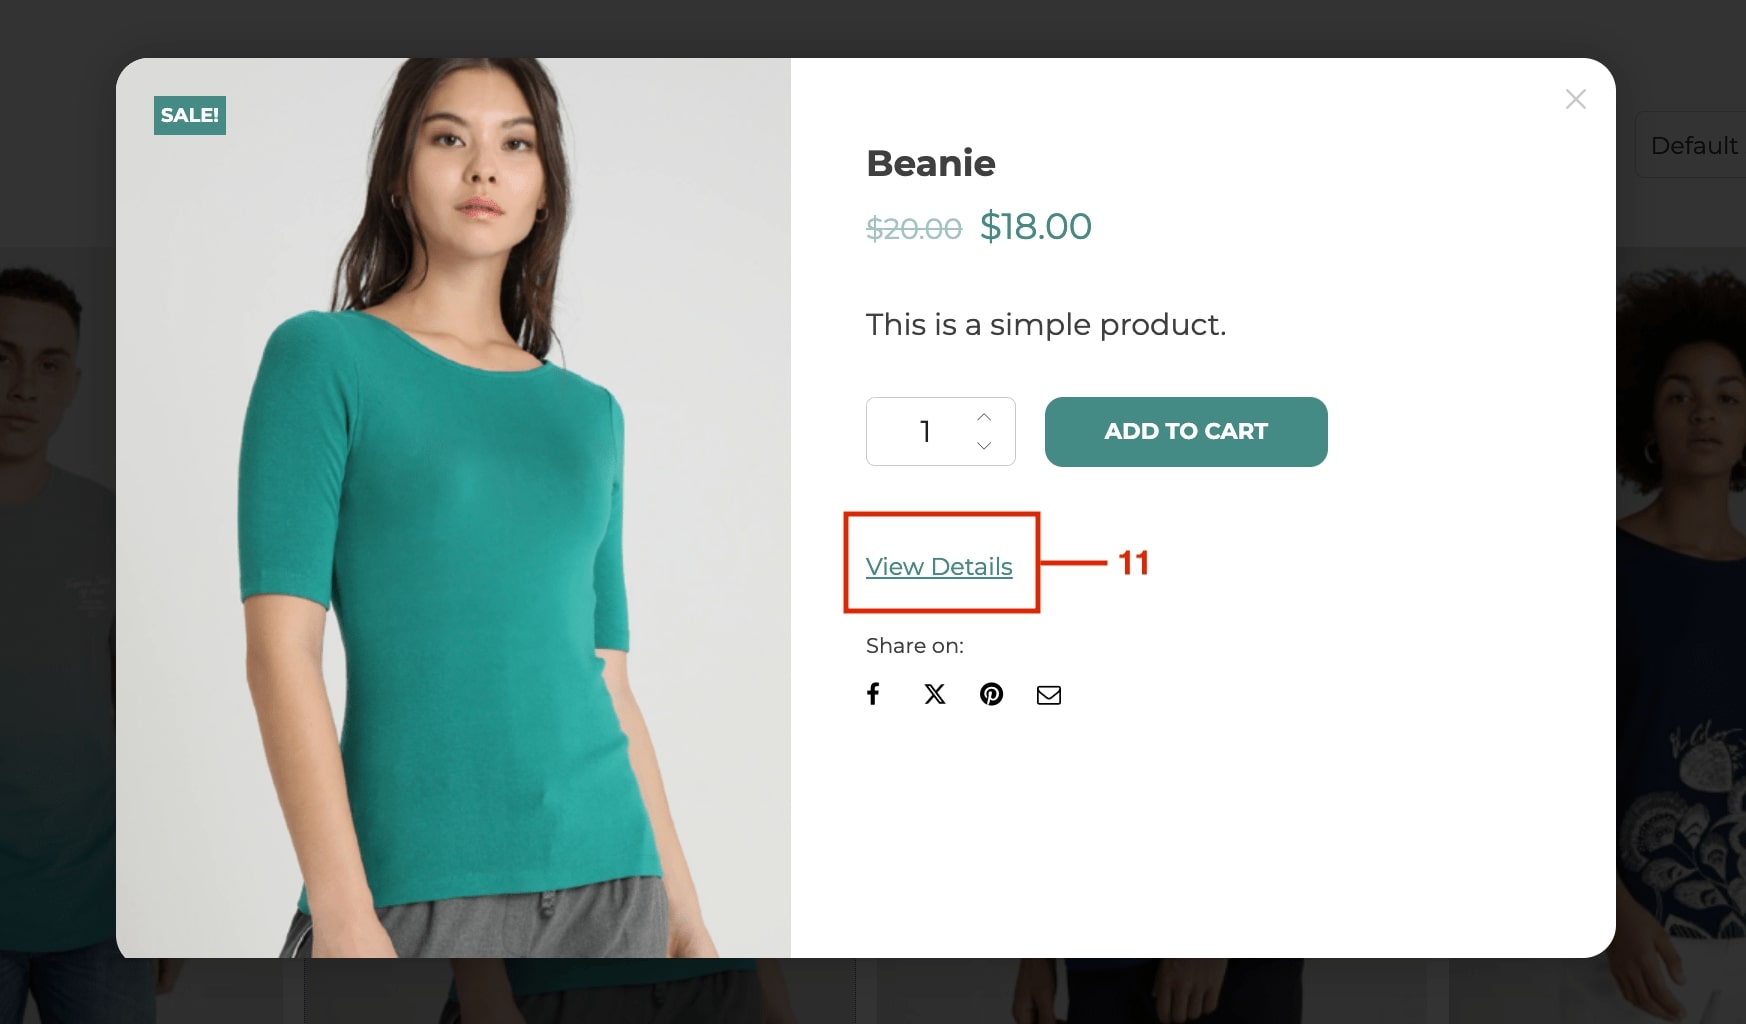
Step 4 — Configure “View details” and “Add to cart” buttons
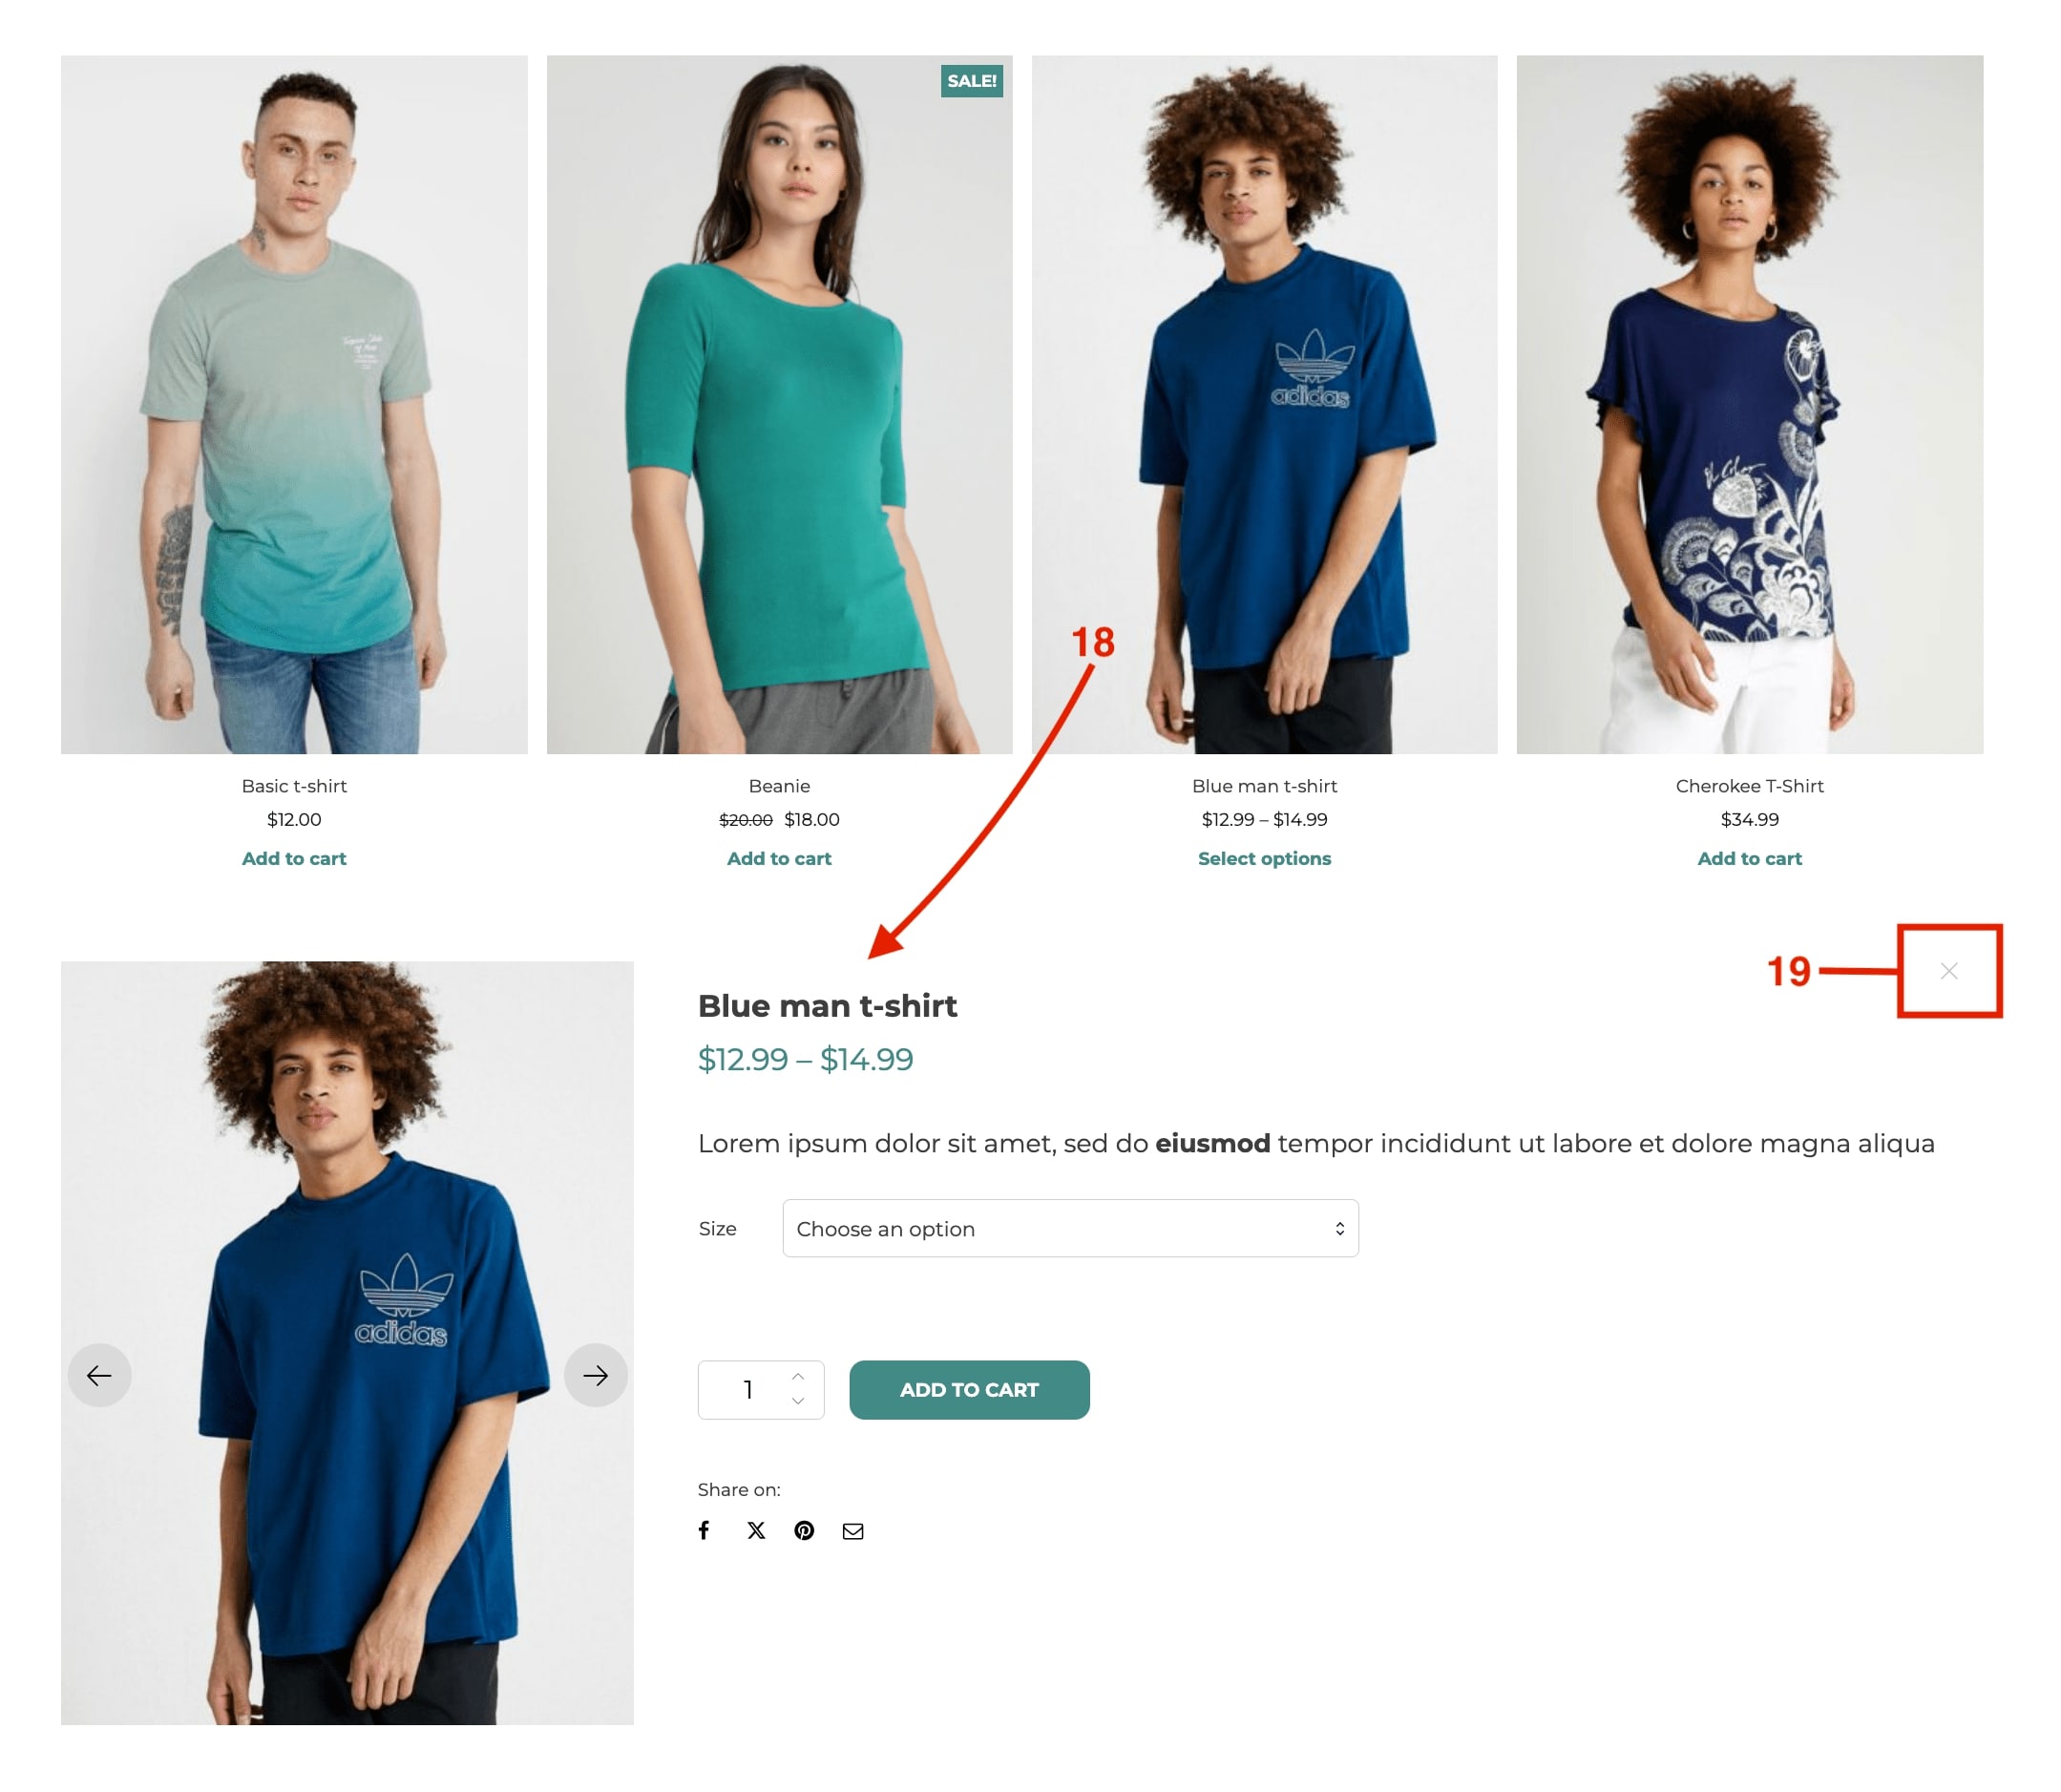
To let users access the product page from the modal window, enable the “View details” button in Buttonoptions and add a label (11).
And it will show in the popup like this:
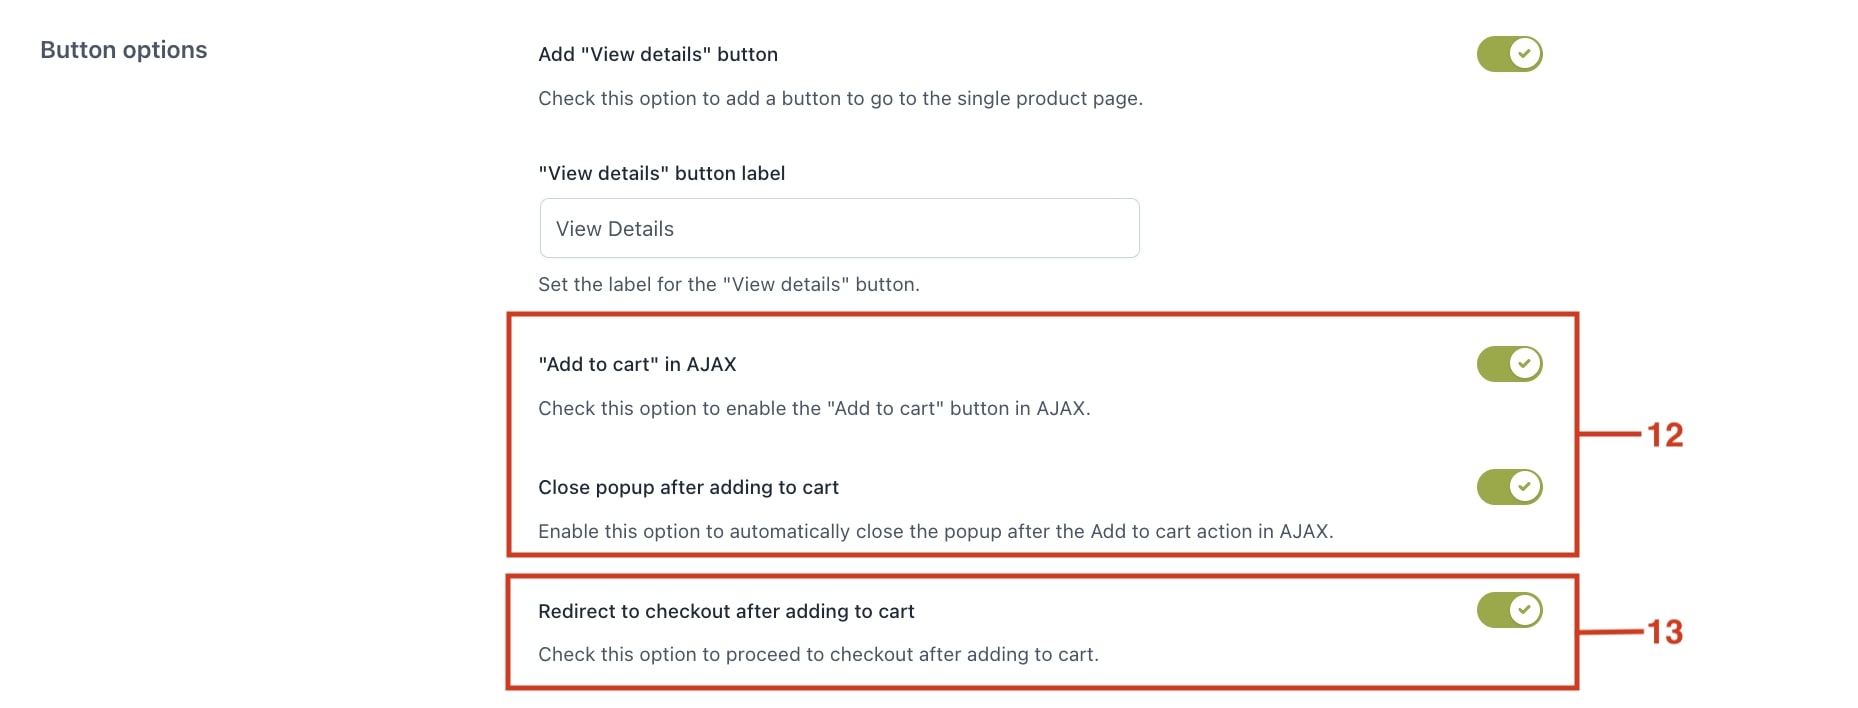
Enable the “Add to cart” in Ajax to stop the page from refreshing when a product is added to the cart. If selected, you can also set the popup to close automatically after adding an item to the cart (12).
Additionally, allow users to go directly to checkout after adding a product to the cart from the quick view (13).
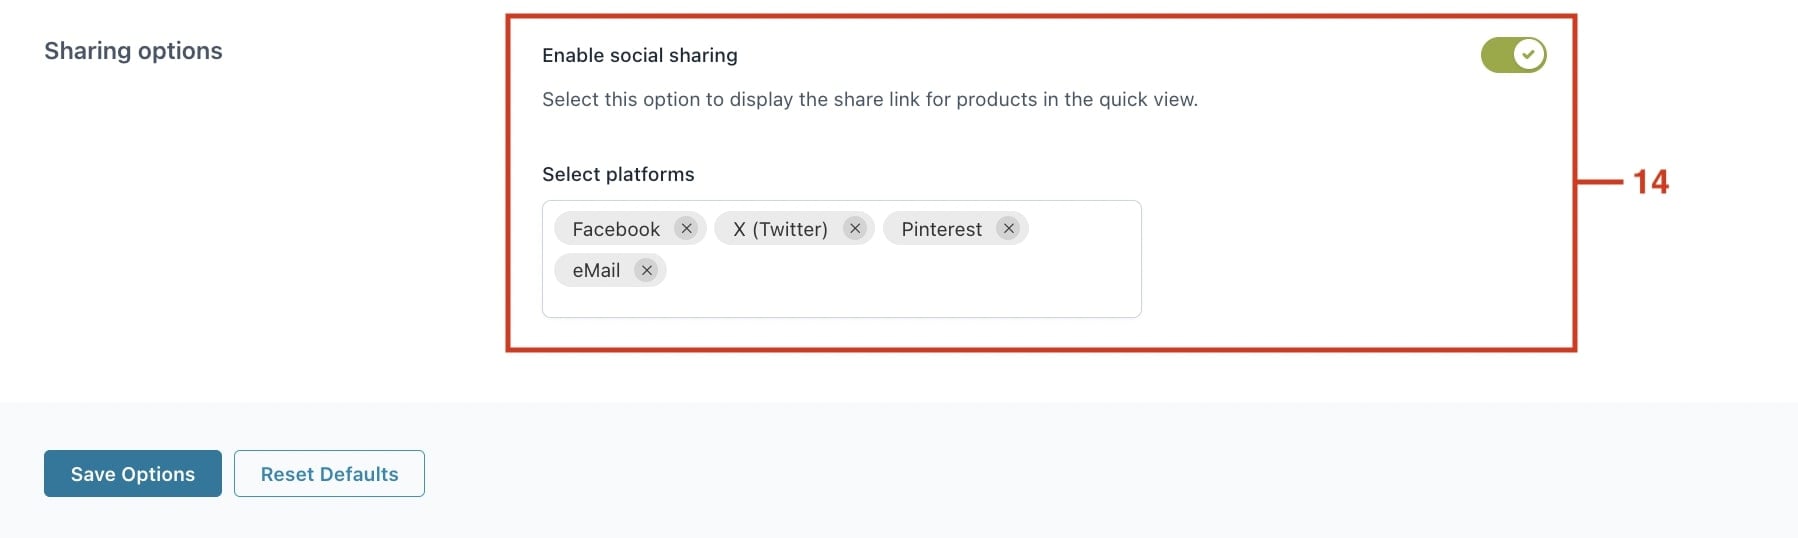
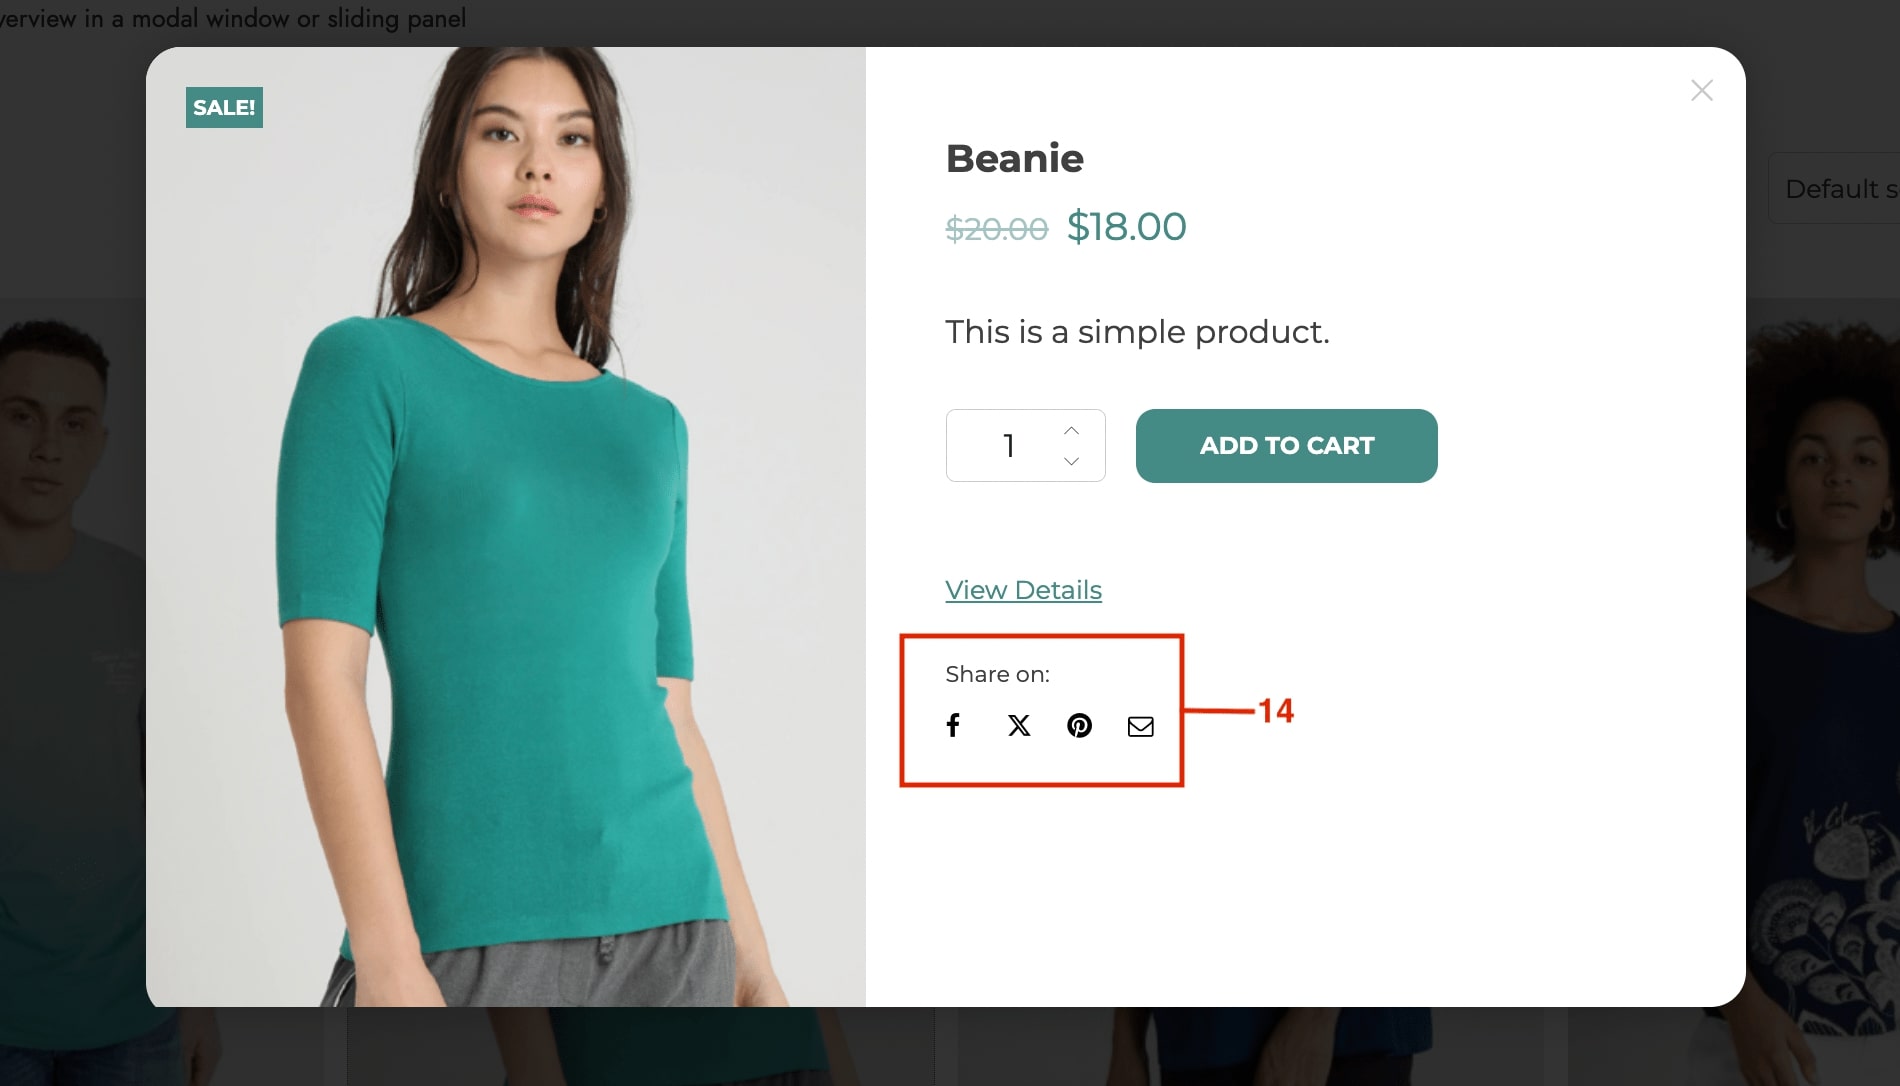
Step 5 — Allow social media sharing
Enable the option to display a product sharing link in the quick view and select the social media platforms (14) and don’t forget to Save options:
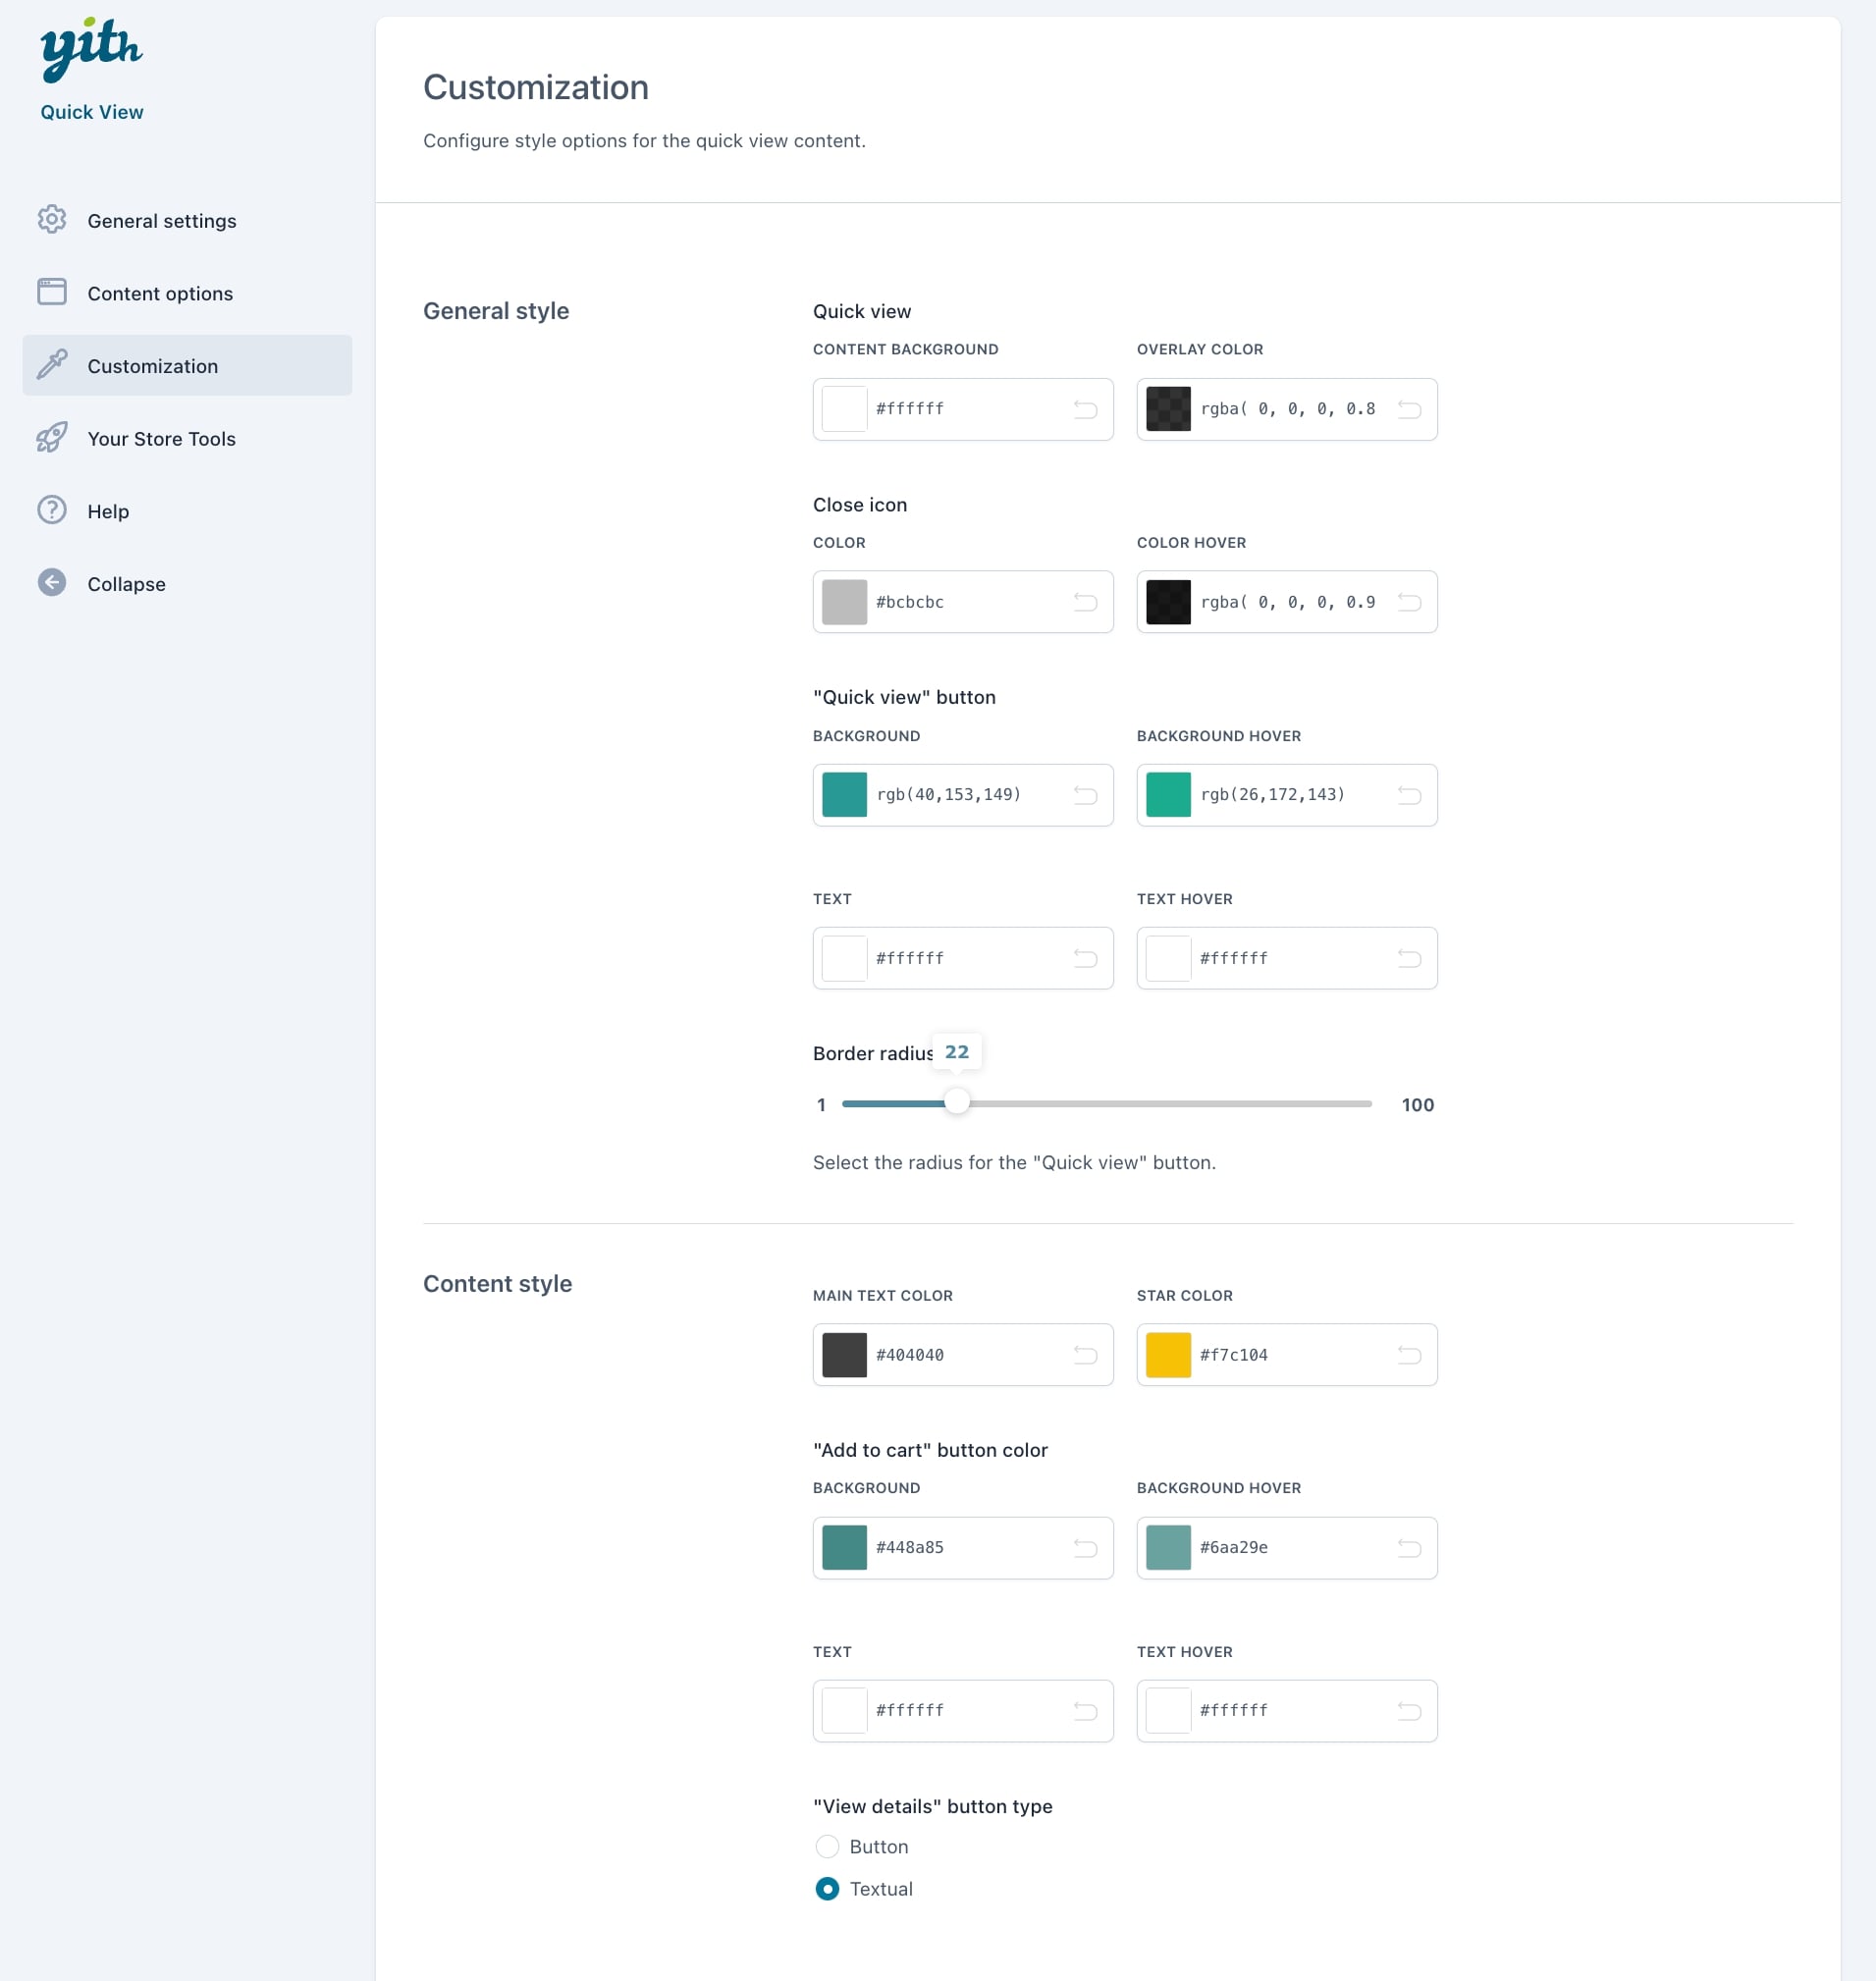
Step 6 — Choose content colors
Lastly, configure the Quick view style color options for a personalized look:
And we have our Quick view button and popup options set!
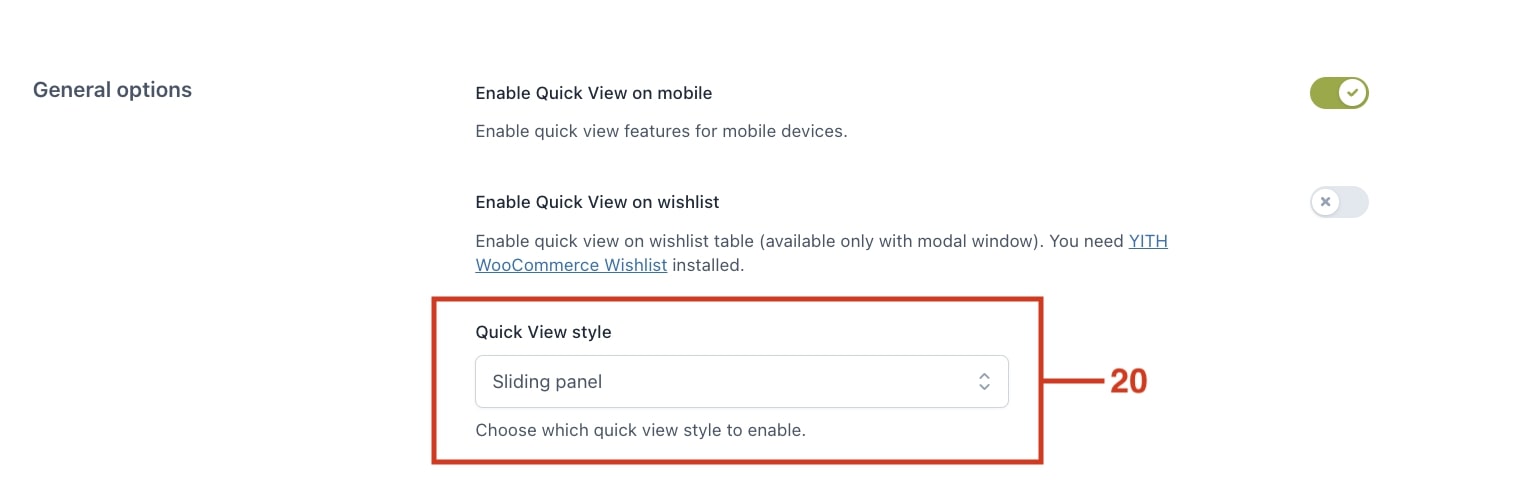
From the General settings you can choose between three layout options for the Quick view style: modal window, sliding panel, cascading. Depending on the layout you choose, you’ll get additional settings:
Modal window
This layout will open the quick view in a classic modal window.
Selecting this option you can also choose the animation when the Modal animation (slide in, fade in or scale up) when you open and close it and the size of the modal window (15).
You can also decide if users can navigate through other products from the modal window (16), and enable a text to display when the modal window is loading (17).
For example, users can easily browse other products’ through the quick view within the same category as the one they are currently viewing.
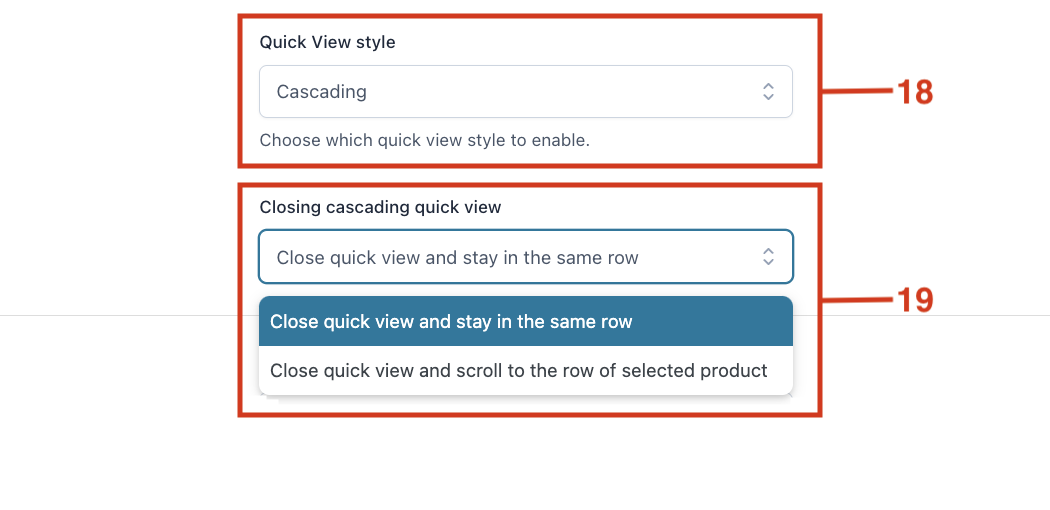
Cascading style
This option displays the product tab directly on the page within a pop-up section (18).
If selected, you can also set the behavior when closing the cascading quick view (19), so that it either stays in the same row below or it scrolls back to the row of the selected product.
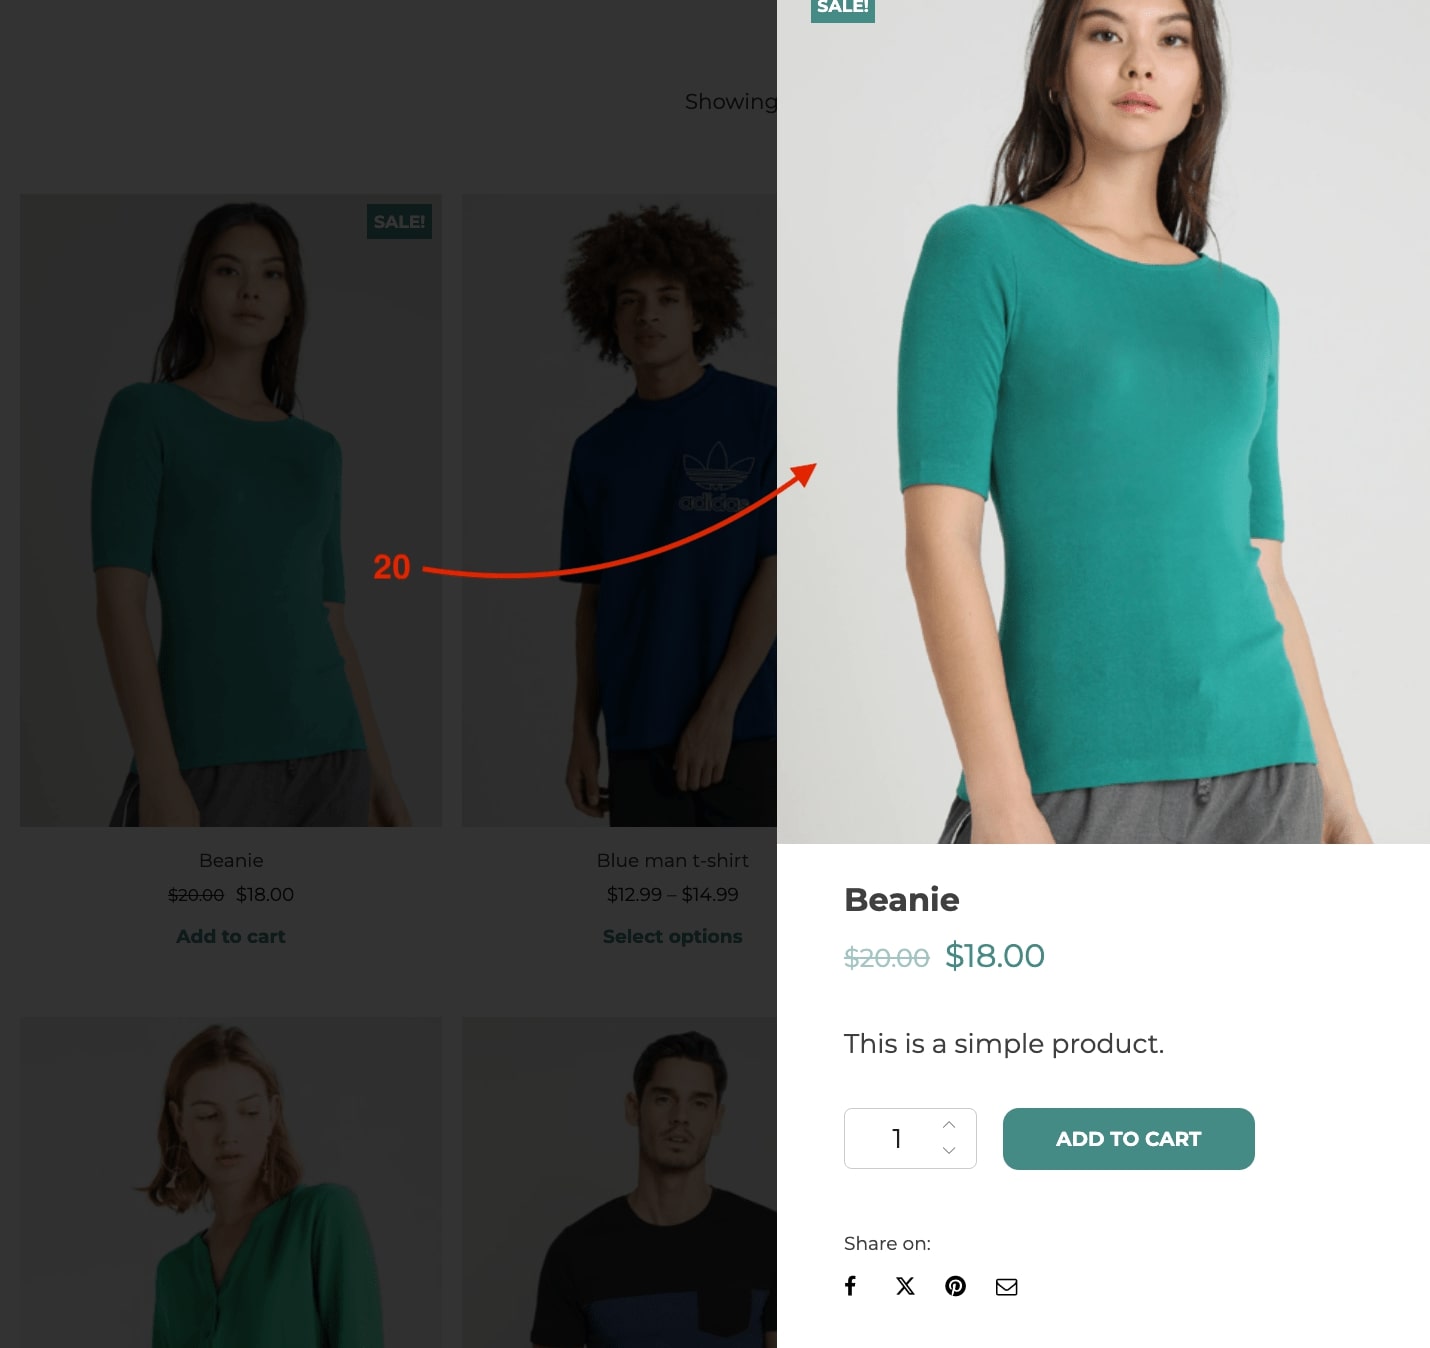
Sliding panel
This option displays the quick view in a side panel that slides in from the right side of the browser window (20).
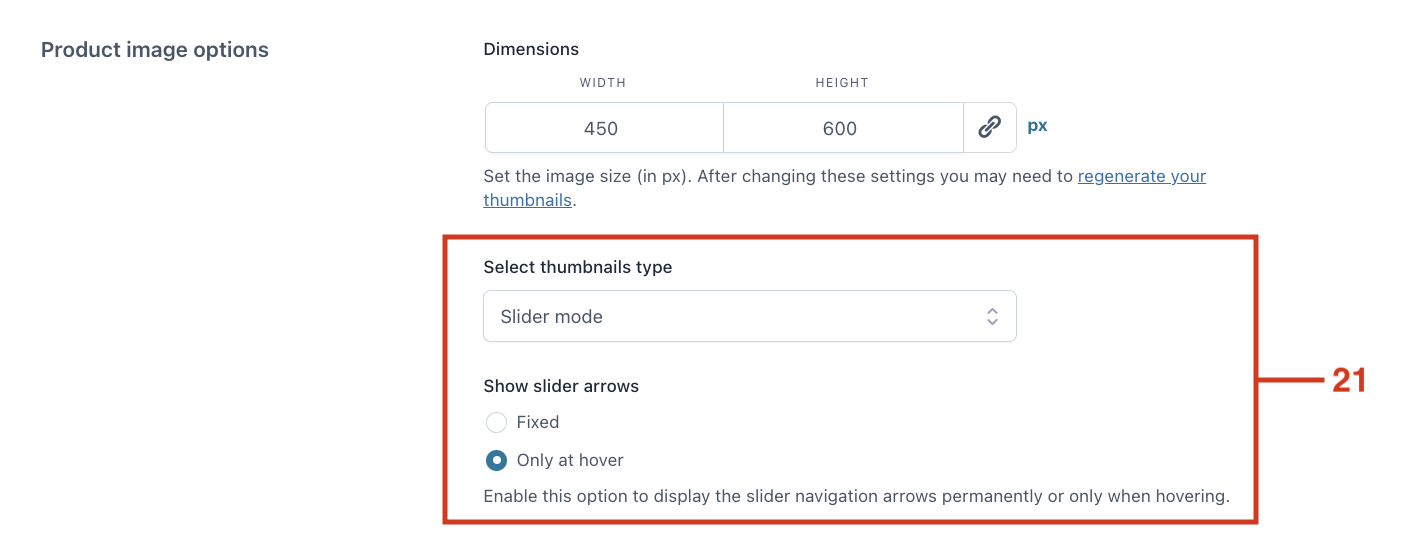
Product image options
From the Content options you can configure how to display the product images. You have three options for the thumbnails type selection: either don’t show, slider mode or classic mode.
If you select Slider mode, you can choose if the arrows display permanently or only when hovering over the image (21).
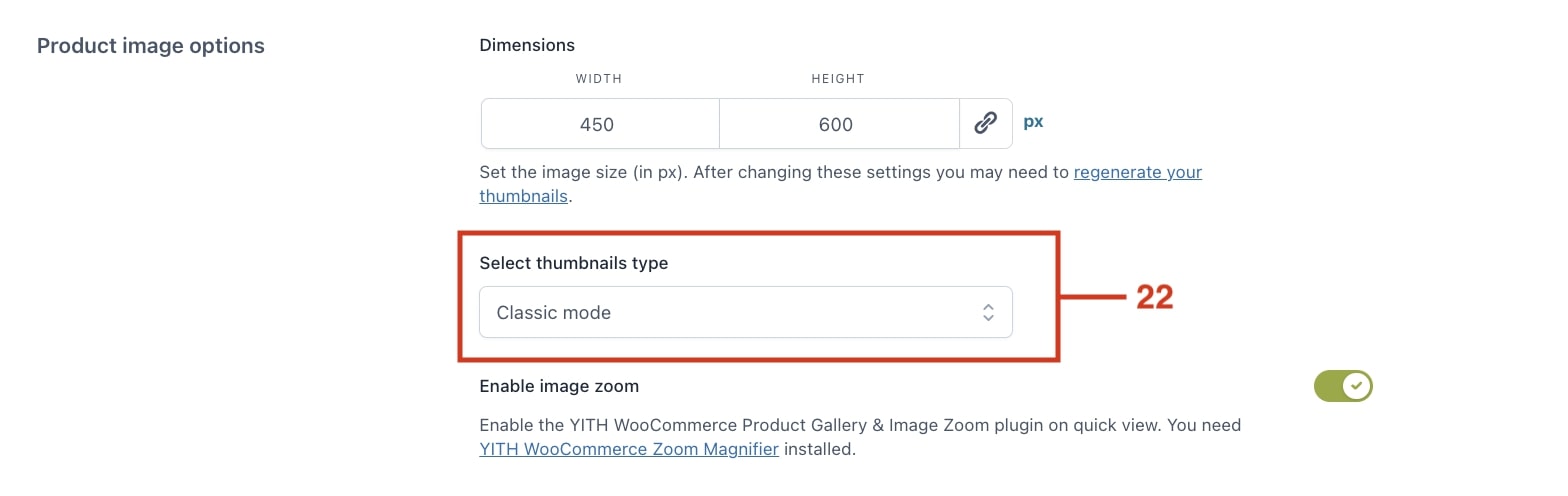
If you select Classic mode (22), you can enable image zoom (only if you have YITH Zoom Magnifier installed, you can click here to read more about the integration).
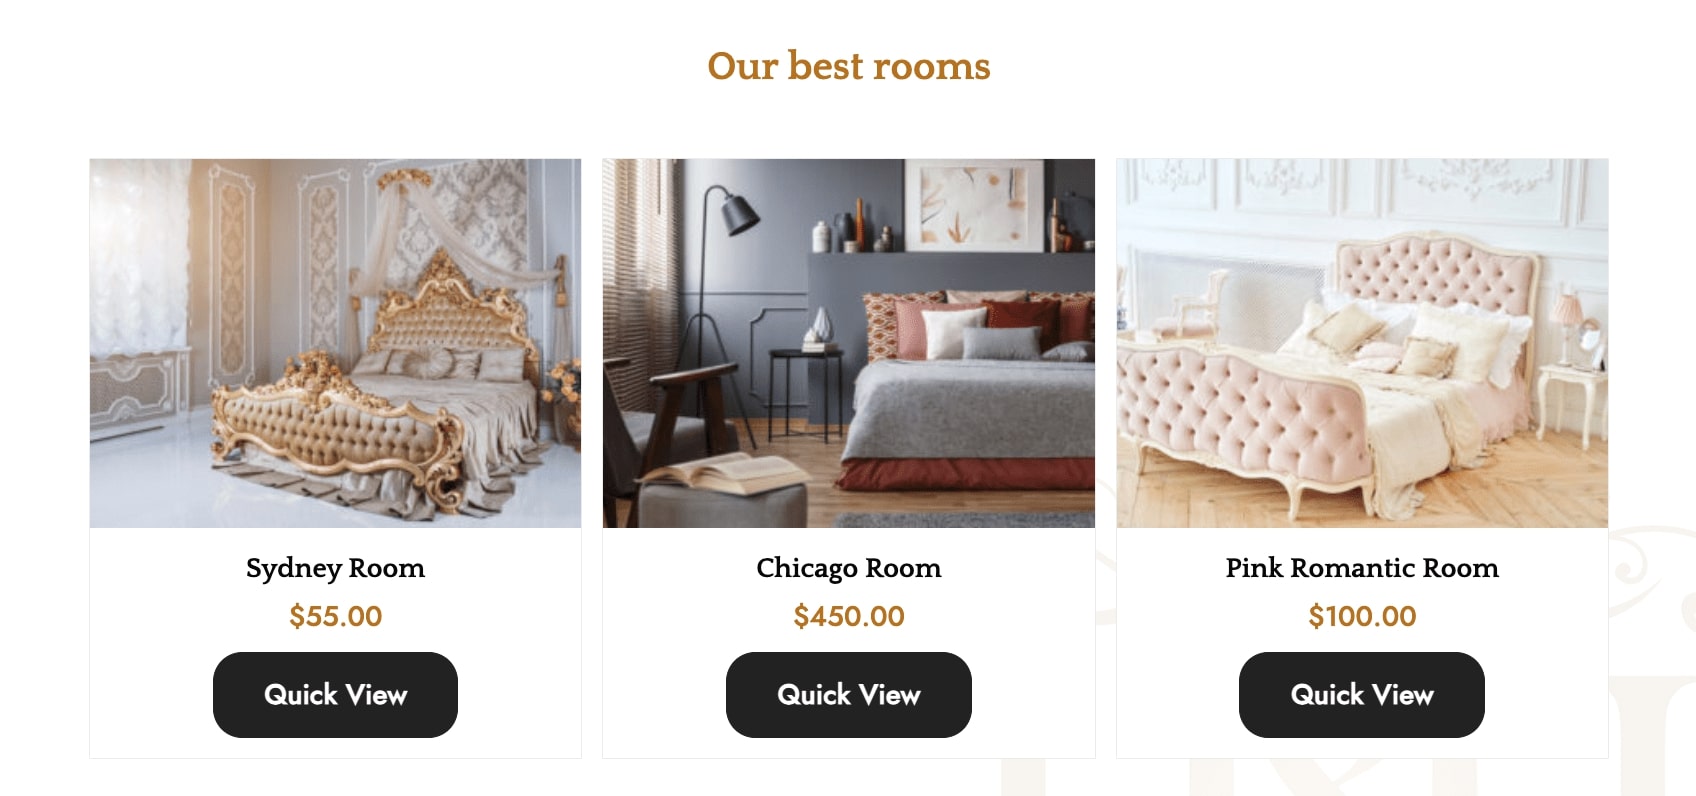
“Quick view” button options
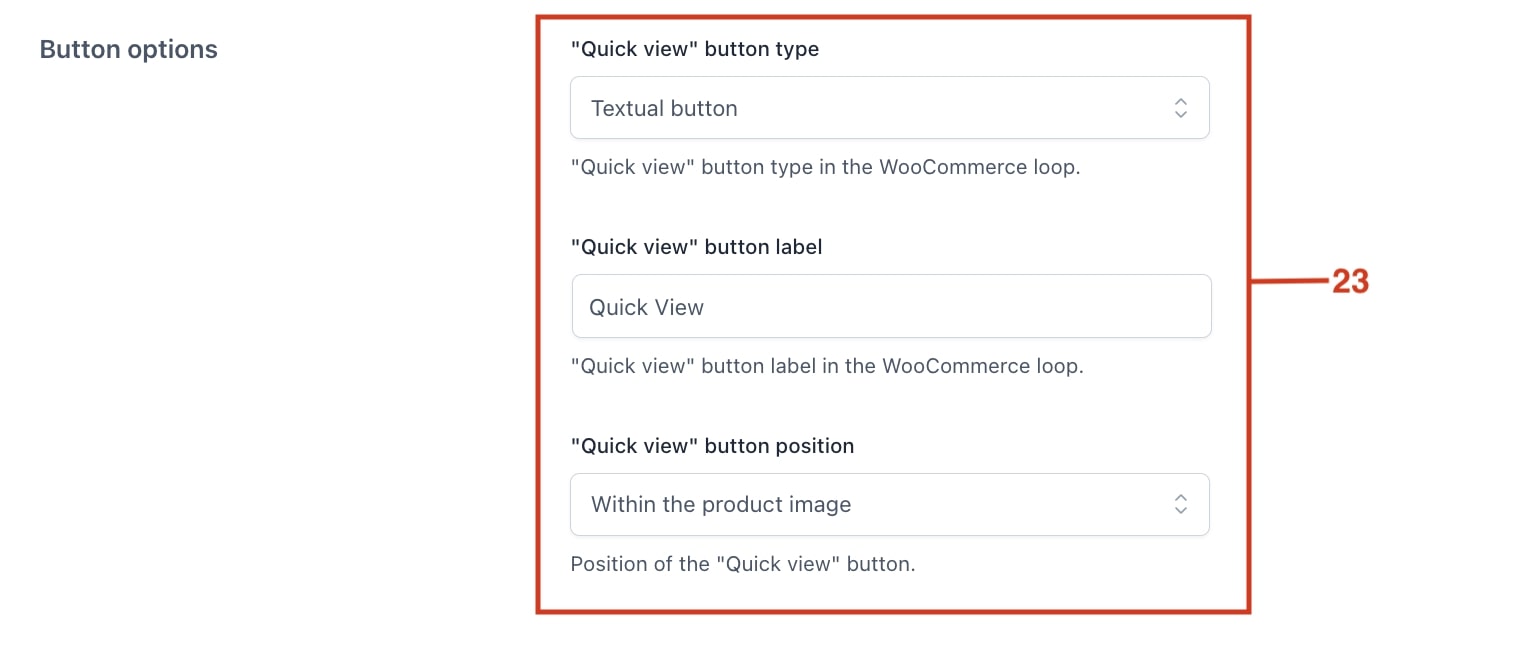
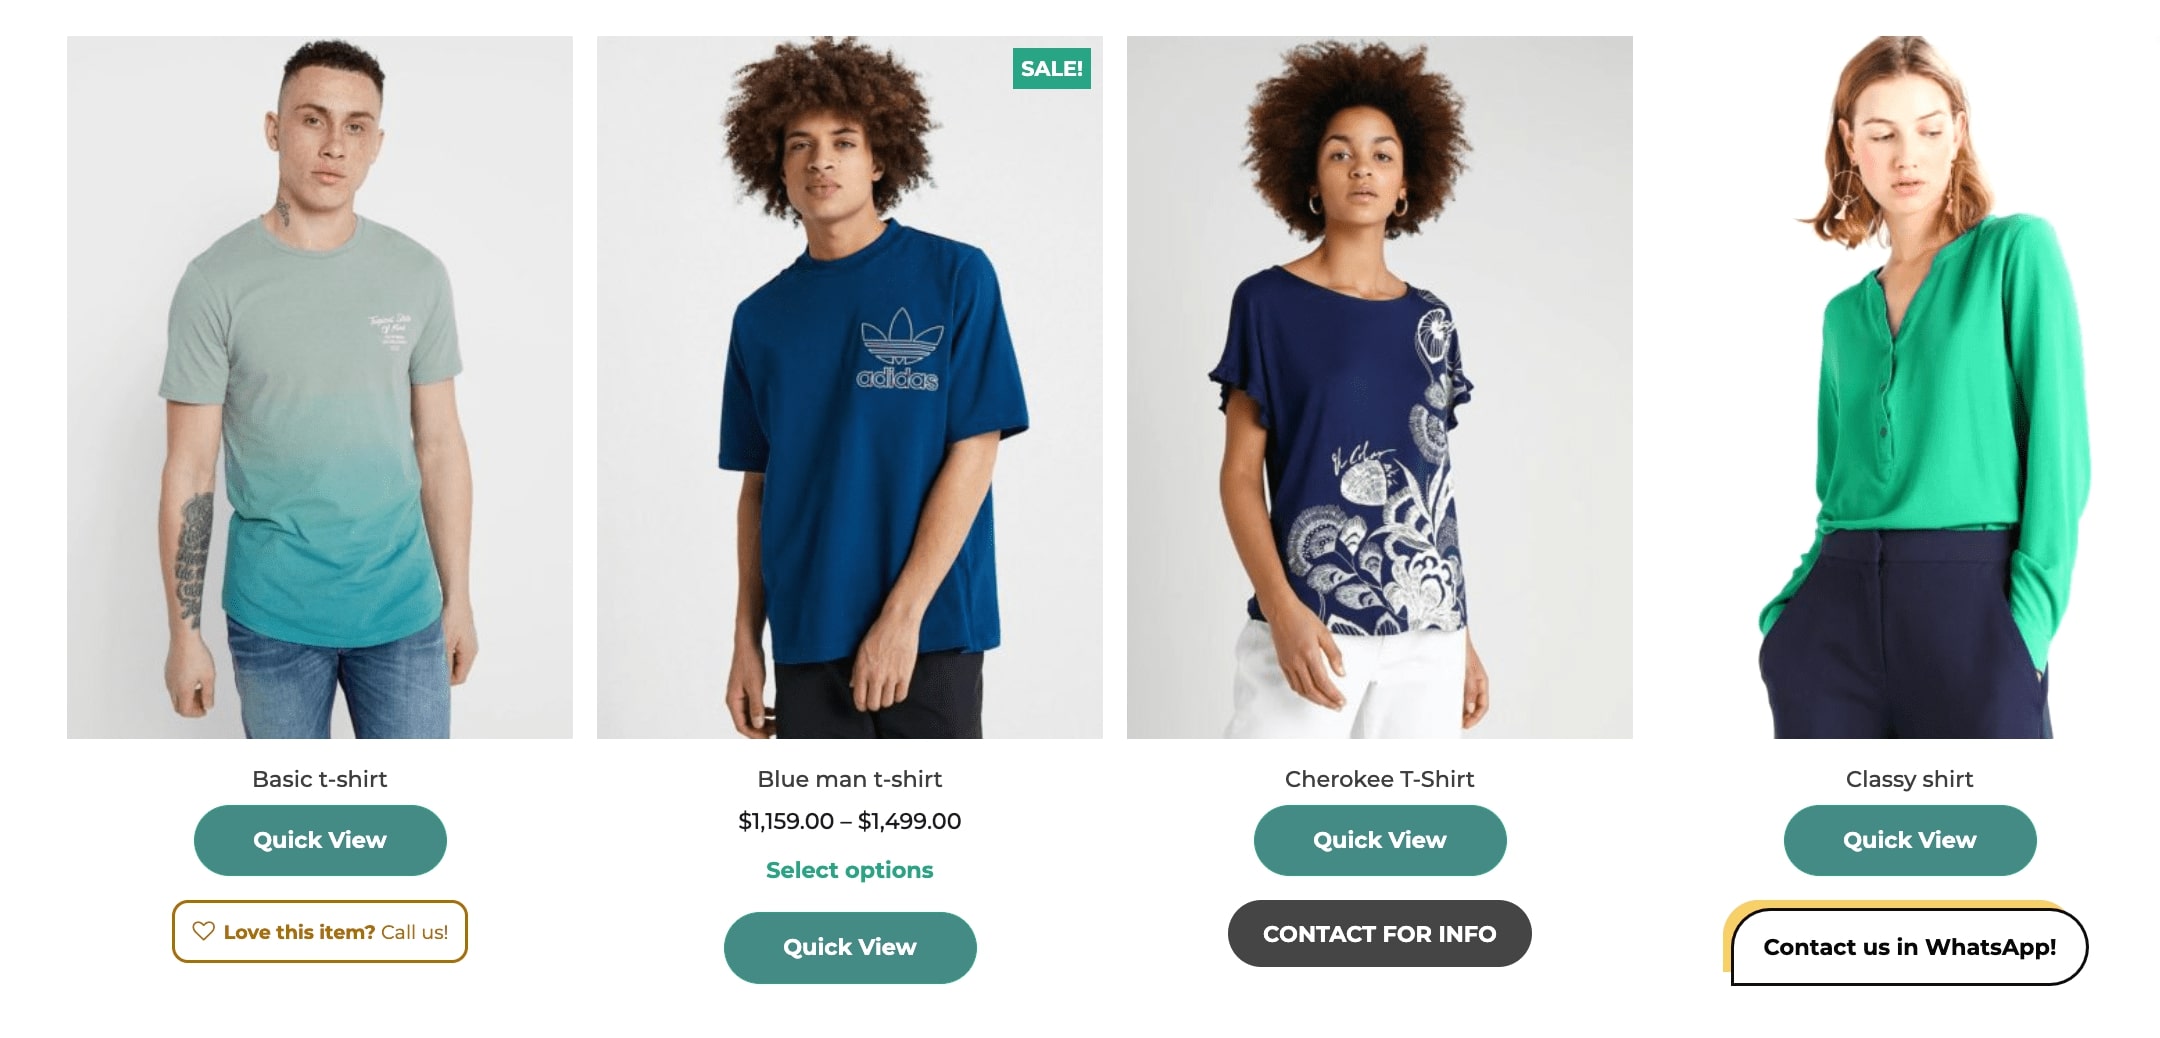
From the General settings, you can configure the Quick view button in the WooCommerce loop, choosing either a textual or an icon button.
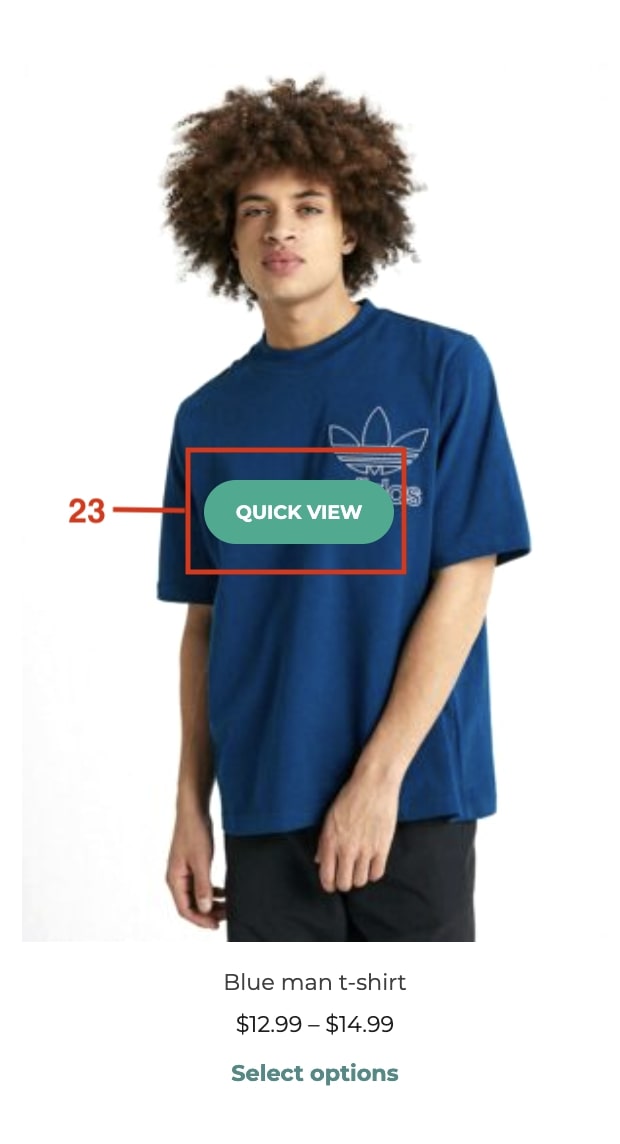
When selecting Textual you can set the button text label and the position of the button (below the “add to cart” button, within the product image or use a shortcode/block) (23).
If you choose an Icon instead, you can upload the file for the icon and set the button position as well (24).
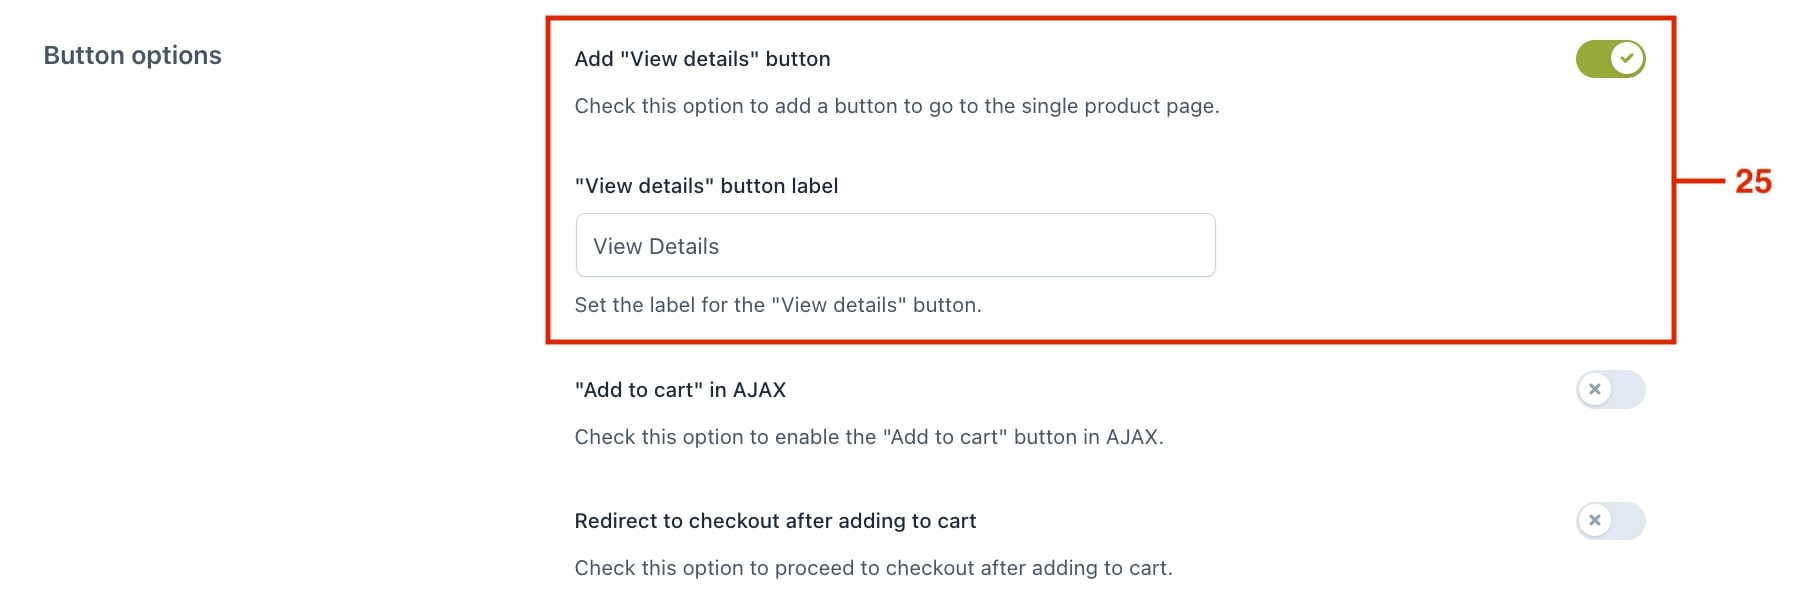
From the Content options, you can enable a “View details” button to allow users to go to the single product page directly from the quick view popup (25).
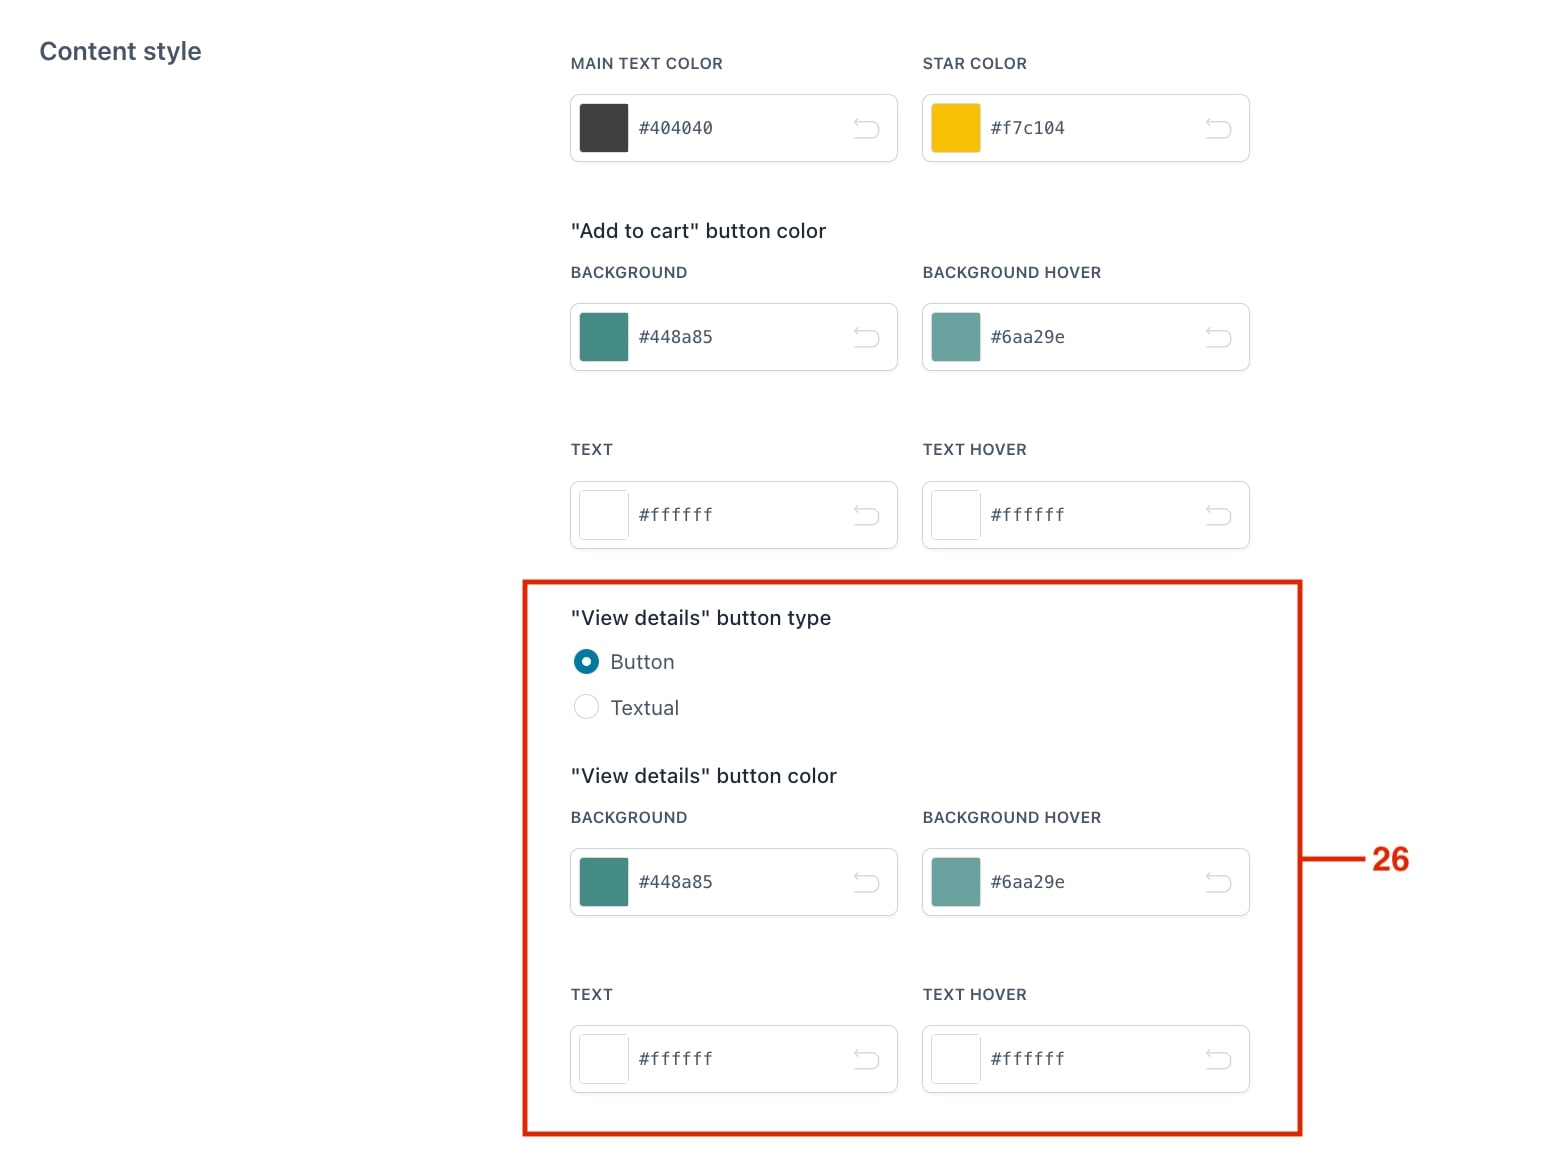
If enabled, from the Customization tab you can select if the “View details” is a text link or a button. For the button, you can also choose colors (26):
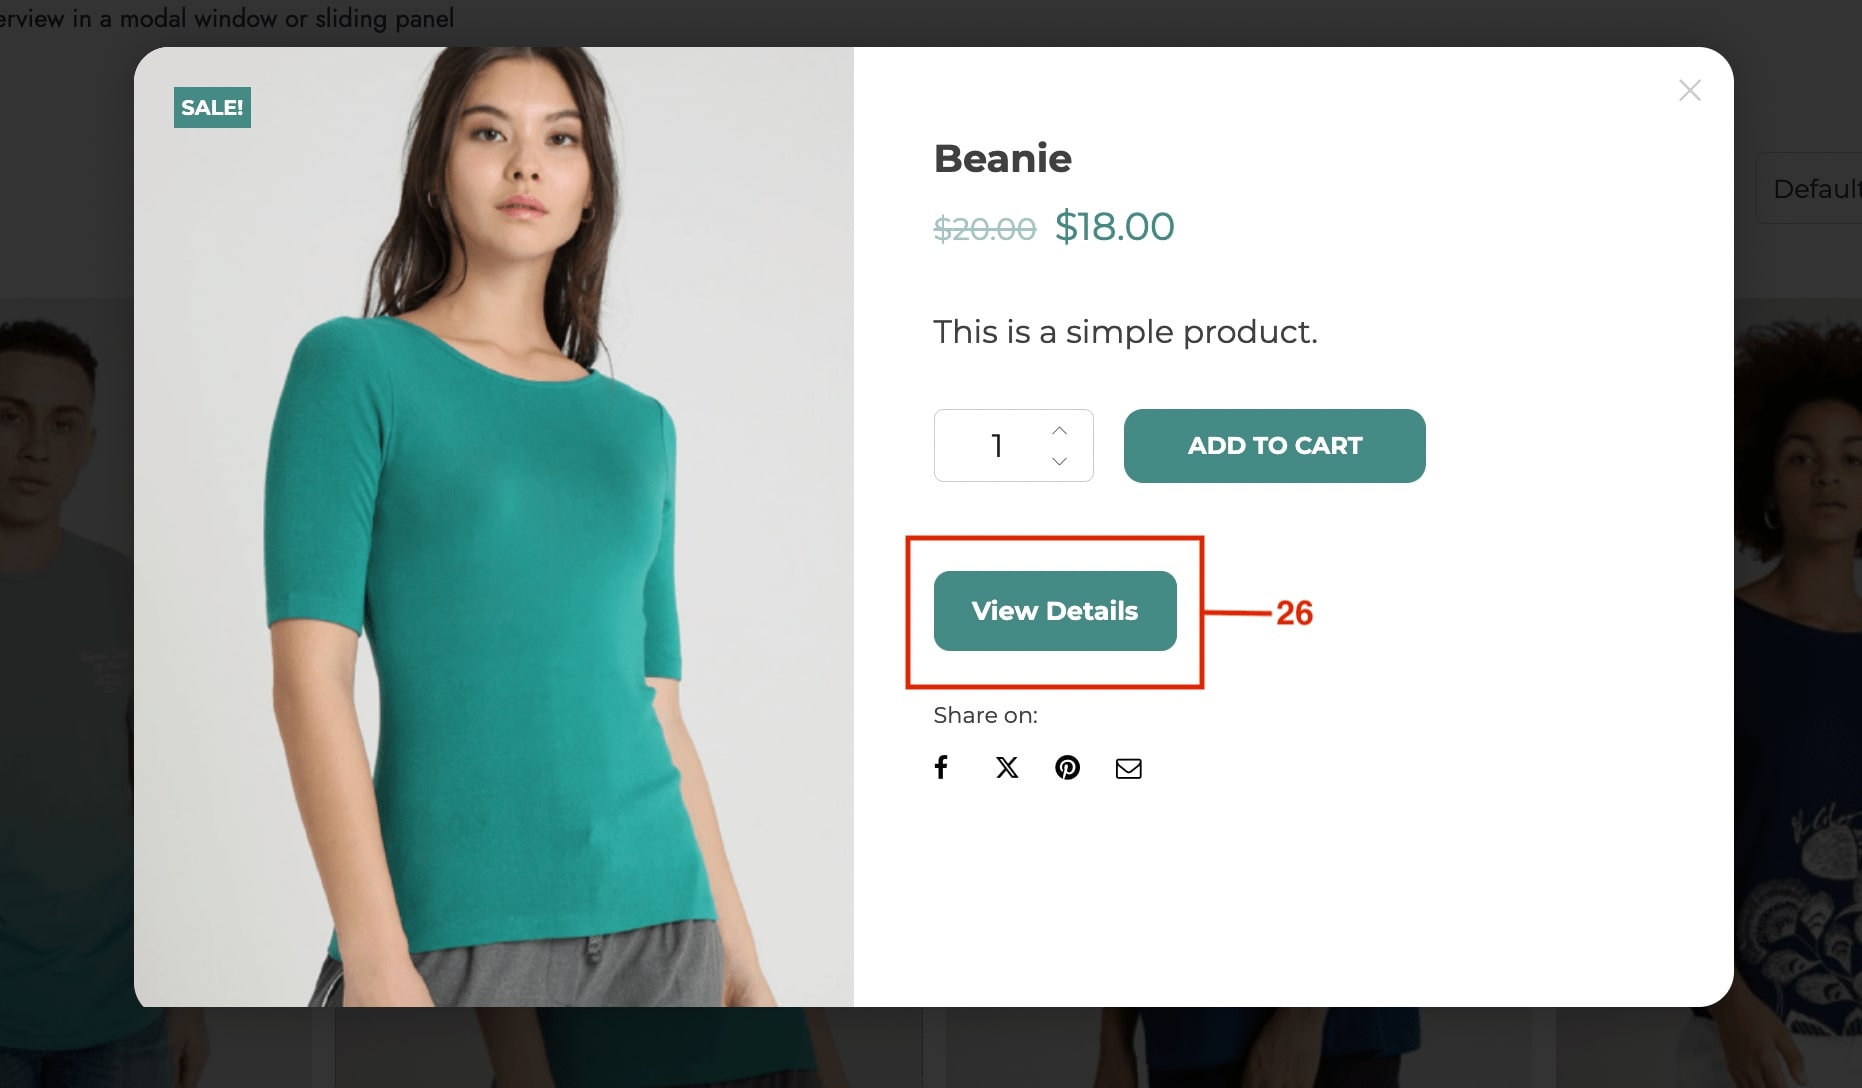
For example, this is how the “View details” button would look like:
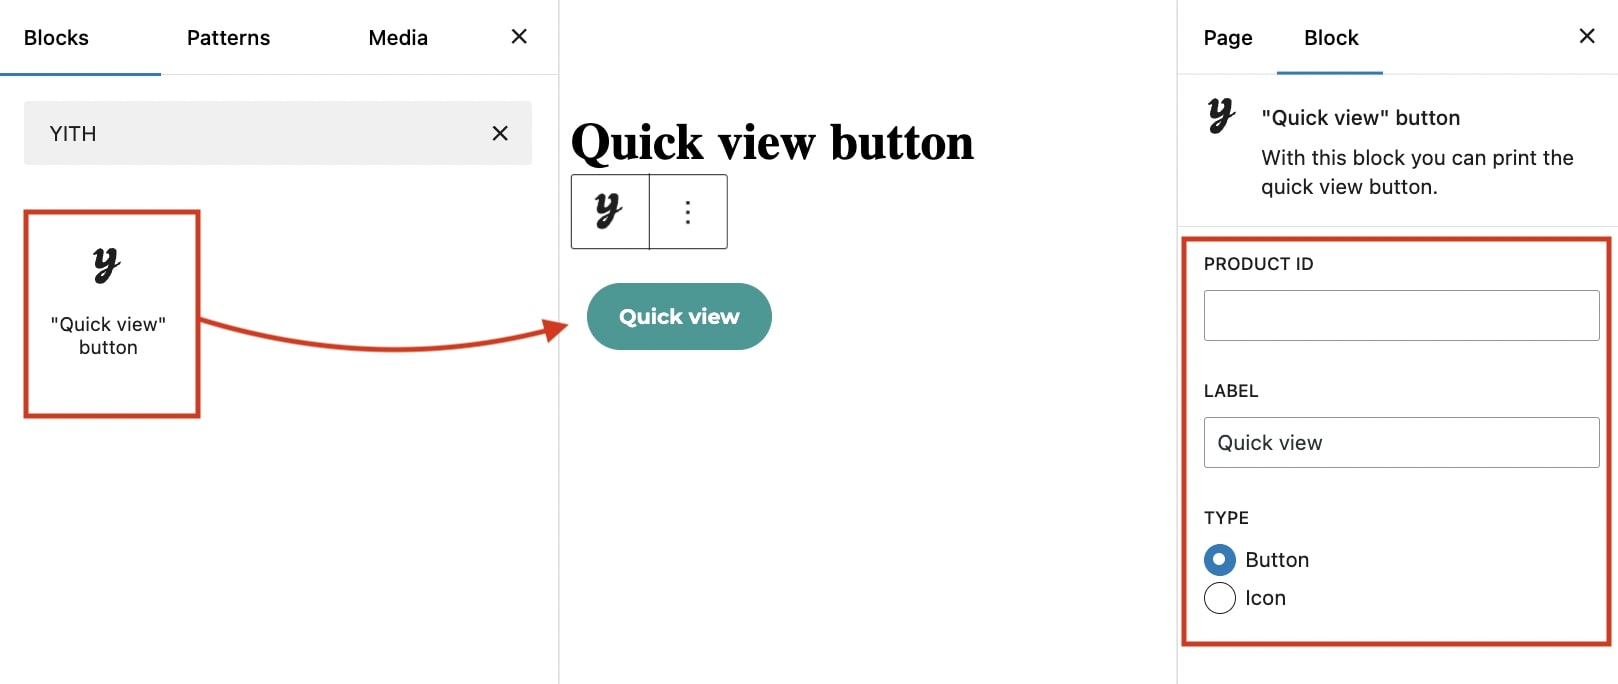
The “yith_quick_view” shortcode allows displaying a button/icon that opens a quick view popup of a specific product on any page and it both works for the free and premium version. The shortcode accepts the following parameters:
product_id: the product ID to show in the modal window
type: [icon/button] choose whether to show a button or an icon (available only for the premium version)
label: button label
Example of the shortcode use [yith_quick_view product_id=51562 type=”button” label=”Quick View”]
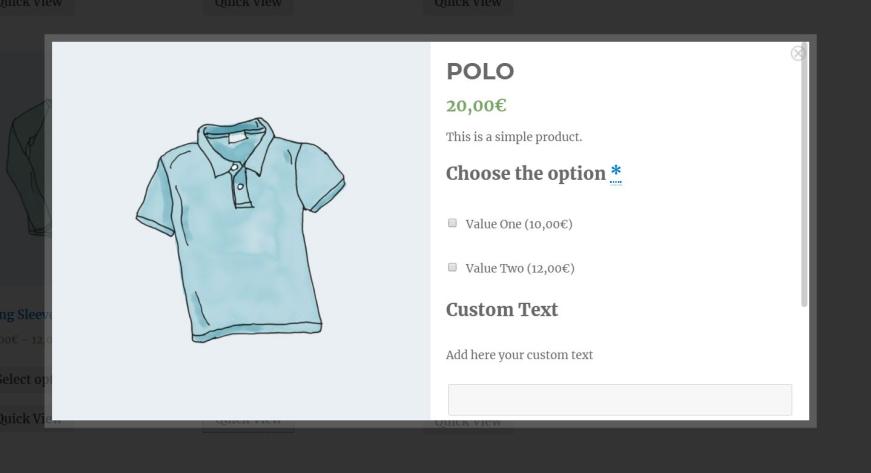
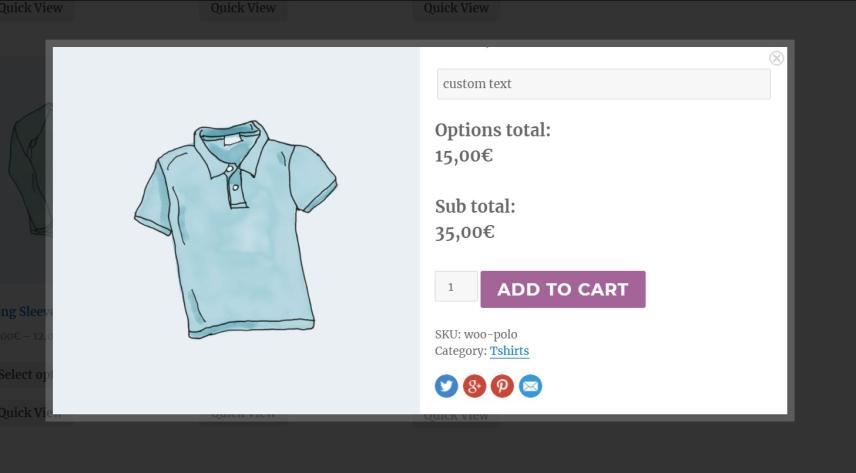
WooCommerce Product Add-Ons allows you to customize the products by adding new options such as input boxes, dropdowns, or checkboxes. Using it in combination with YITH WooCommerce Quick view, you customers can select their options in the popup screen, without leaving the current page.
Note: This is the Product Add-Ons plugin of WooCommerce, you can find our YITH Product Add-Ons plugin here.
To make them work together, you will only have to activate the premium version of both plugins.
YITH Booking and Appointment allows advanced management of a booking system for the products of your shop. Once you have configured the prices, services, and availability, the plugin will automatically manage the product depending on the user’s choice.
This integration allows enabling a quick view also on all the “Bookable” products of your shop. You only need to install and activate YITH WooCommerce Quick View.
For further details about YITH Booking and Appointment settings, please refer to the official documentation.
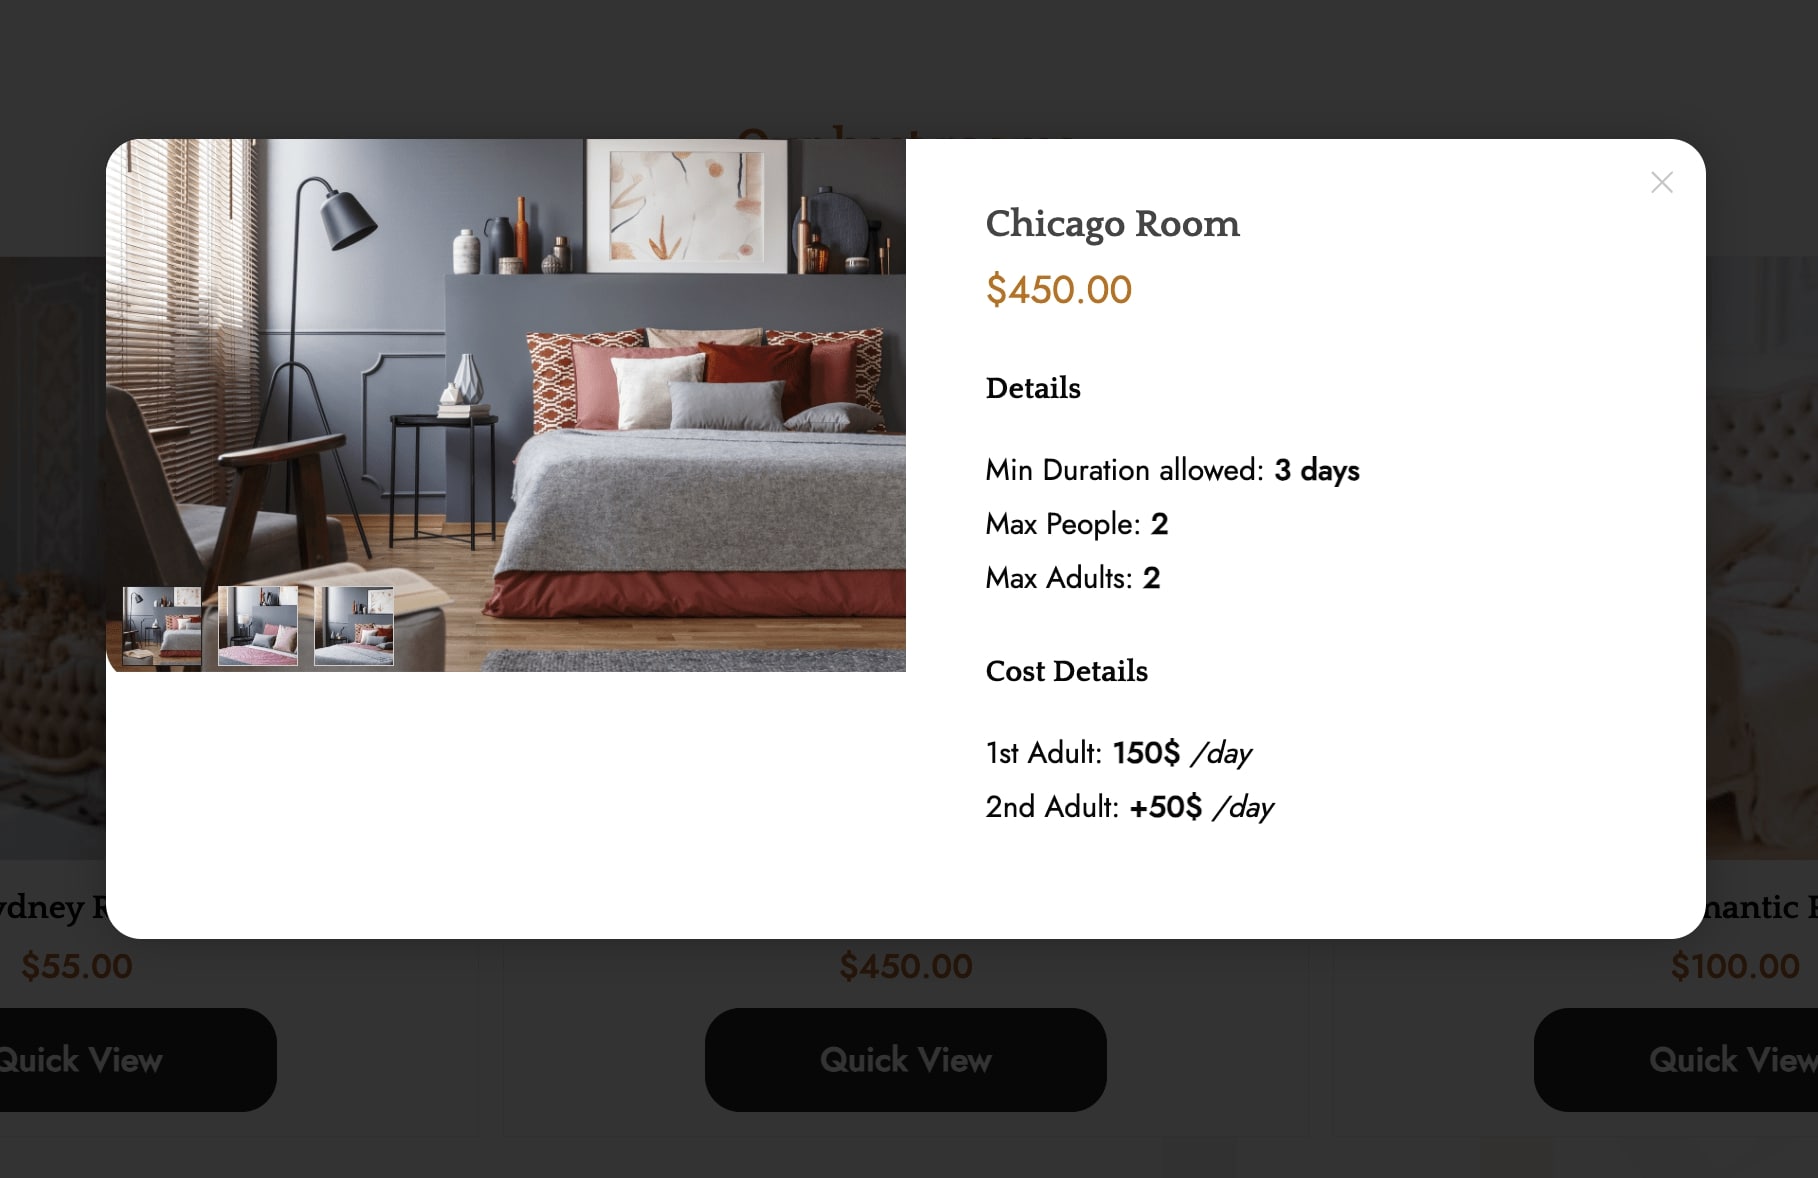
Thanks to YITH Request a Quote for WooCommerce you can offer users the chance to ask for a quote for one or more products in your shop. Once the request is received, you can process your offer and send it via email.
The integration between these two plugins allows showing the Add to quote button also in the quick view popup.
After installing and activating both plugins, you need to go to YITH Quick View > Content Options and enable the option Show Request Quote button.
With the option enabled, the Quick View popup will include the Add to Quote button as shown below.
For further details about YITH Request a Quote settings, please refer to the official documentation.
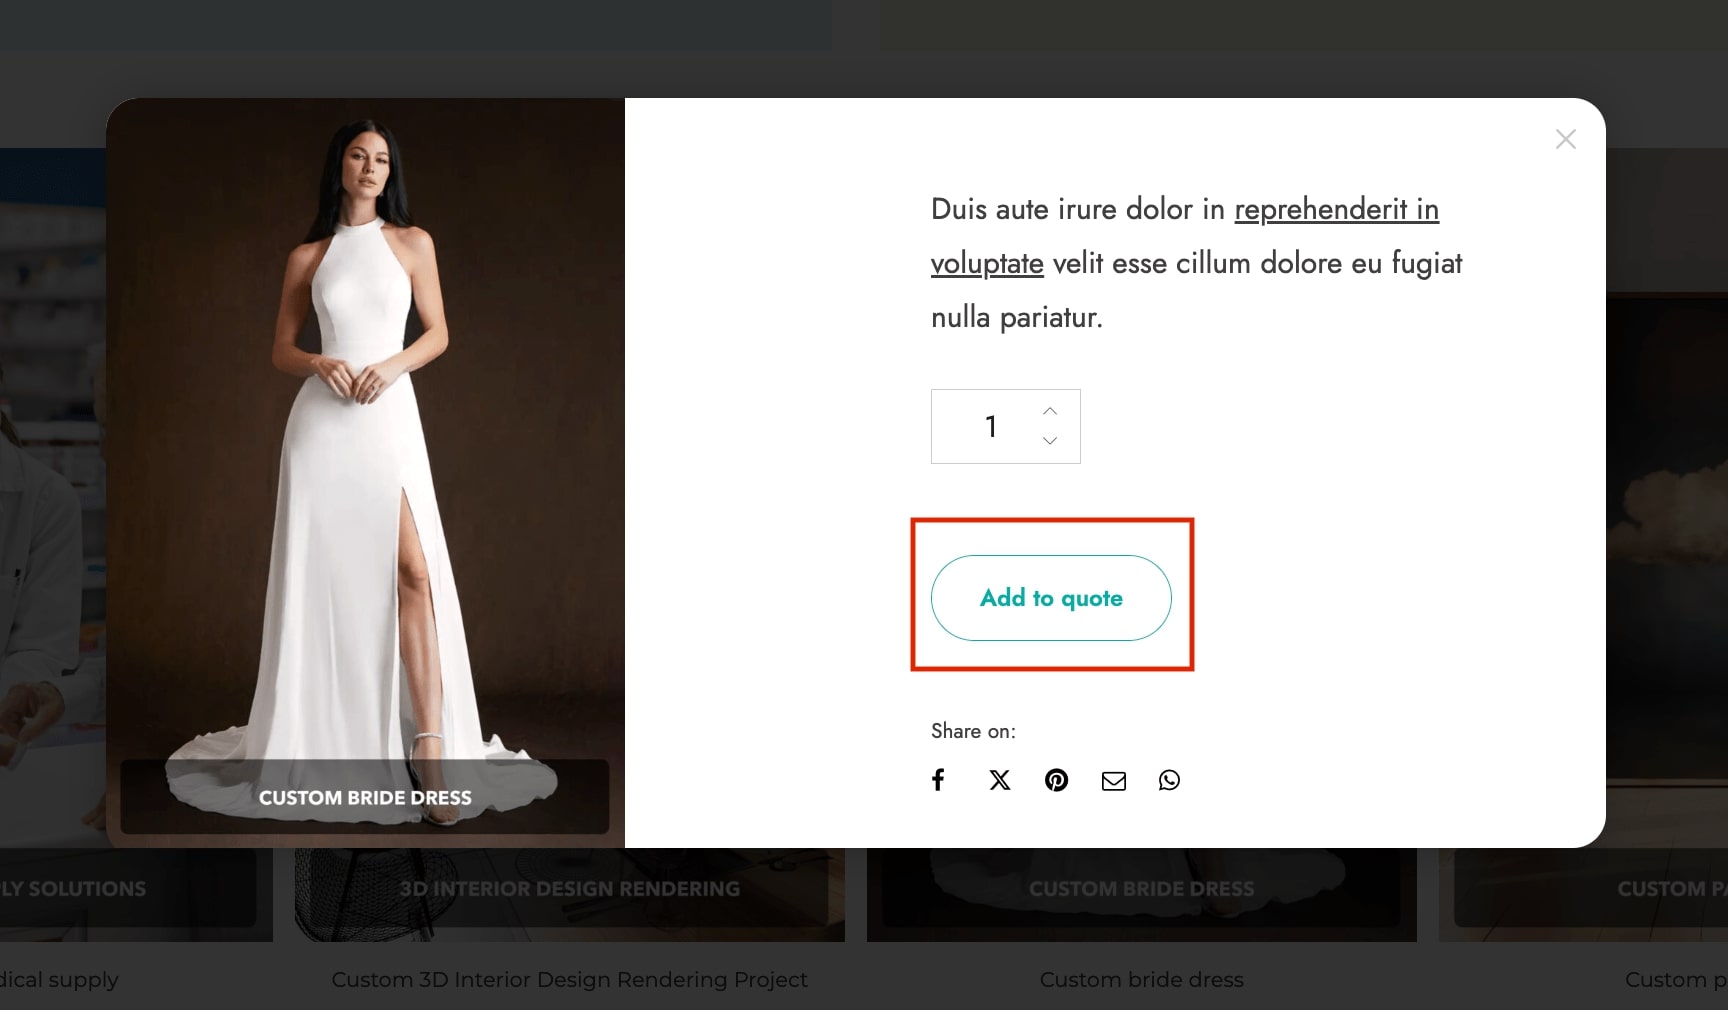
Thanks to YITH WooCommerce Added to Cart Popup you could enable an automatic popup to notify the user about the updated cart content. Every time a product is added to the cart the popup automatically opens.
The integration with YITH WooCommerce Quick View allows opening the Added to cart popup when clicking on the Add to cart button from the quick view.
After installing and activating both plugins, go to YITH > Quick View > Product > Content options and make sure the option Enable Ajax Add To Cart is enabled.
For further details about YITH WooCommerce Added to Cart Popup settings, please refer to the official documentation.
With the use of YITH WooCommerce Catalog Mode, you can show or hide the price and/or the “Add to cart” button for one or more products of your shop. If hidden, you can provide a form through which users can send possible requests.
You will only have to activate both plugins, and set them up as you wish. Using both plugins, the price and “Add to Cart” buttons will be automatically hidden also in the “quick view” popup.
For more information about the YITH WooCommerce Catalog Mode plugin, please, refer to the official documentation here.