YITH WooCommerce Ajax Search allows adding a search bar to your website to let users search via Ajax for specific content in your website through posts, pages, and products.
Please note: for the plugin to work properly, it is essential for the REST API not to be blocked. If you do not want to give full REST API access, the ywcas/v1/ endpoint must be accessible.
We recommend following the steps in this guide to configure the plugin based on your needs.
The Search stats section in the plugin panel is where you can find all the statistics related to the Top searches (the most popular searches), Top clicked products (the products with the most clicks from the search results), and Searches with no results (the searched made by users that produced no results).
If you need to monitor statistics for a specific time interval, you can use the Filter by date option.
To reset the filter, click on the Reset button.
At the bottom of each statistic, you will find a ‘View all‘ link that allows you to access the table showing each query/product and its number of searches/clicks. From this table, you can also filter the statistic by date.
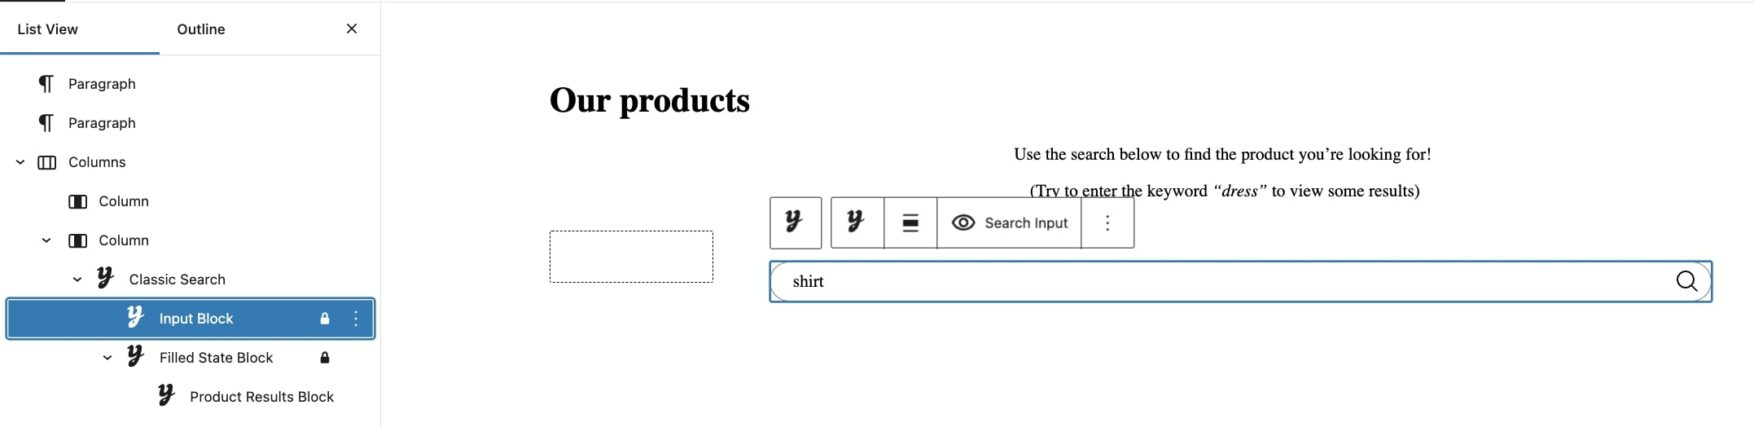
The plugin is ready to use with the block editor. When creating a new post or page, you will be able to find the YITH block. With a simple click, it will be added to your page and you will be able to choose the input size from Small and Large.
Classic search includes 2 blocks that we will analyze as follows:
By selecting this block, you will be able to configure the following settings:
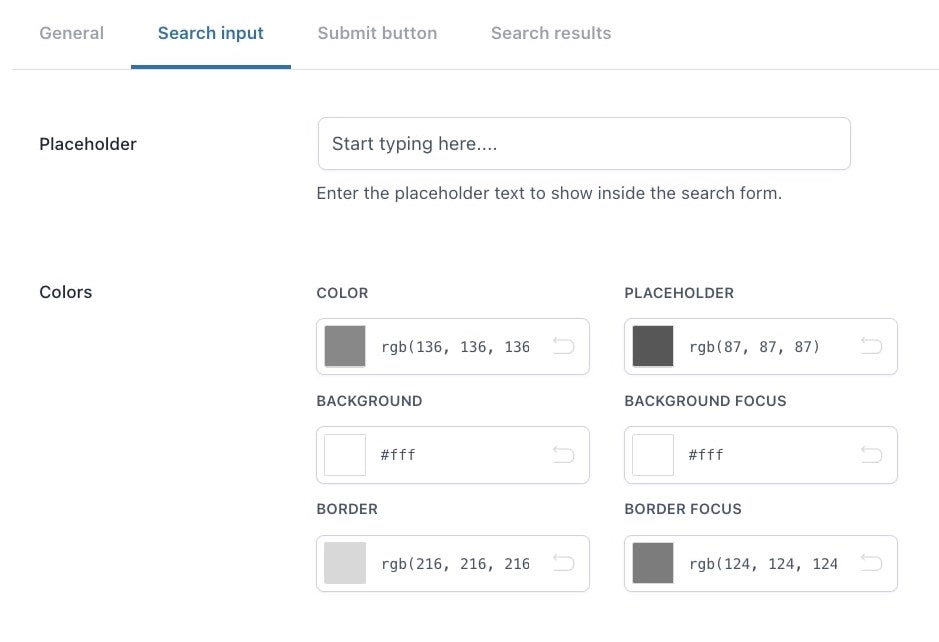
Placeholder: enter the text for the placeholder of the search field;
Color settings: choose the colors for the placeholder, text, background, background focus, border, and borderfocus;
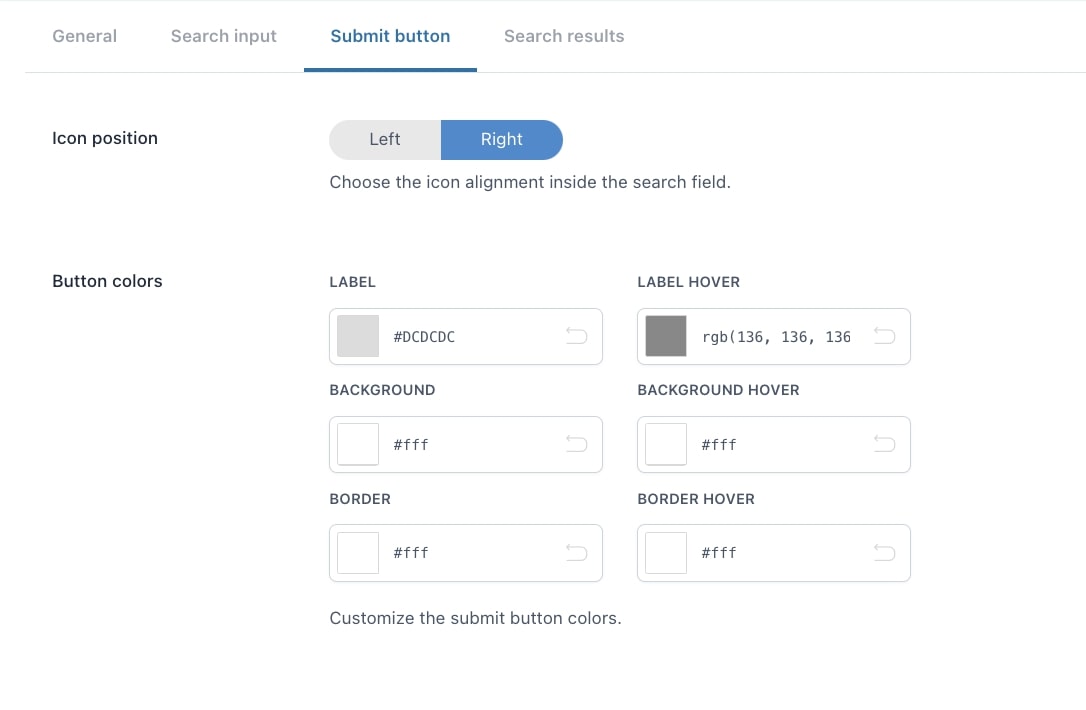
Search icon:(available if Icon is selected) choose where to show the icon from right or left;
Submit color settings: choose the colors for the icon, icon hover, background, background hover, border, and border hover.
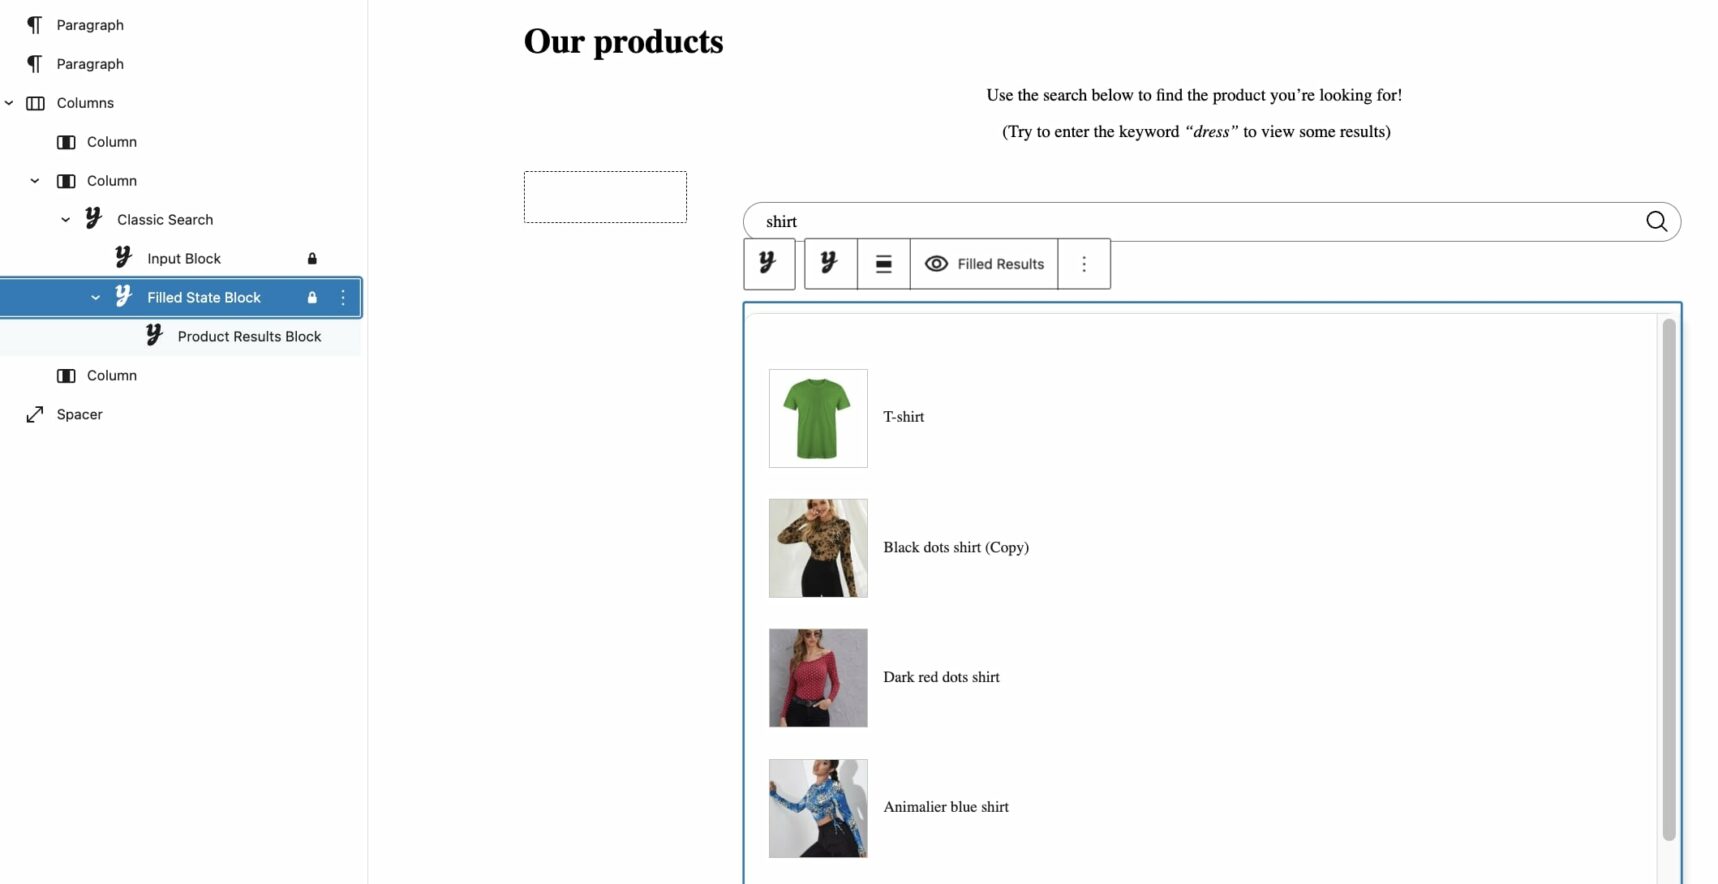
Filled state block
This is the block that manages the search results shown when found.
By selecting this block, you will find an additional block: the Product results block which is the block that shows the products found as search results through which you can set:
Max results to show: enter the maximum number of products to show;
Info to show: enable/disable the product info to show in the results:
Name: the name of products;
Product title color: set the color for the product name;
Image: the image of products;
Image size: set the size (in px) for the product images;
No results text: enter the text to show when there are no results for the search;
Show “View all results” link: the link to view all products;
“View all results” text: enter the text to show for the link. To show the number of results, you can use the available placeholder: {total}.
In the General options section, you can configure the following settings:
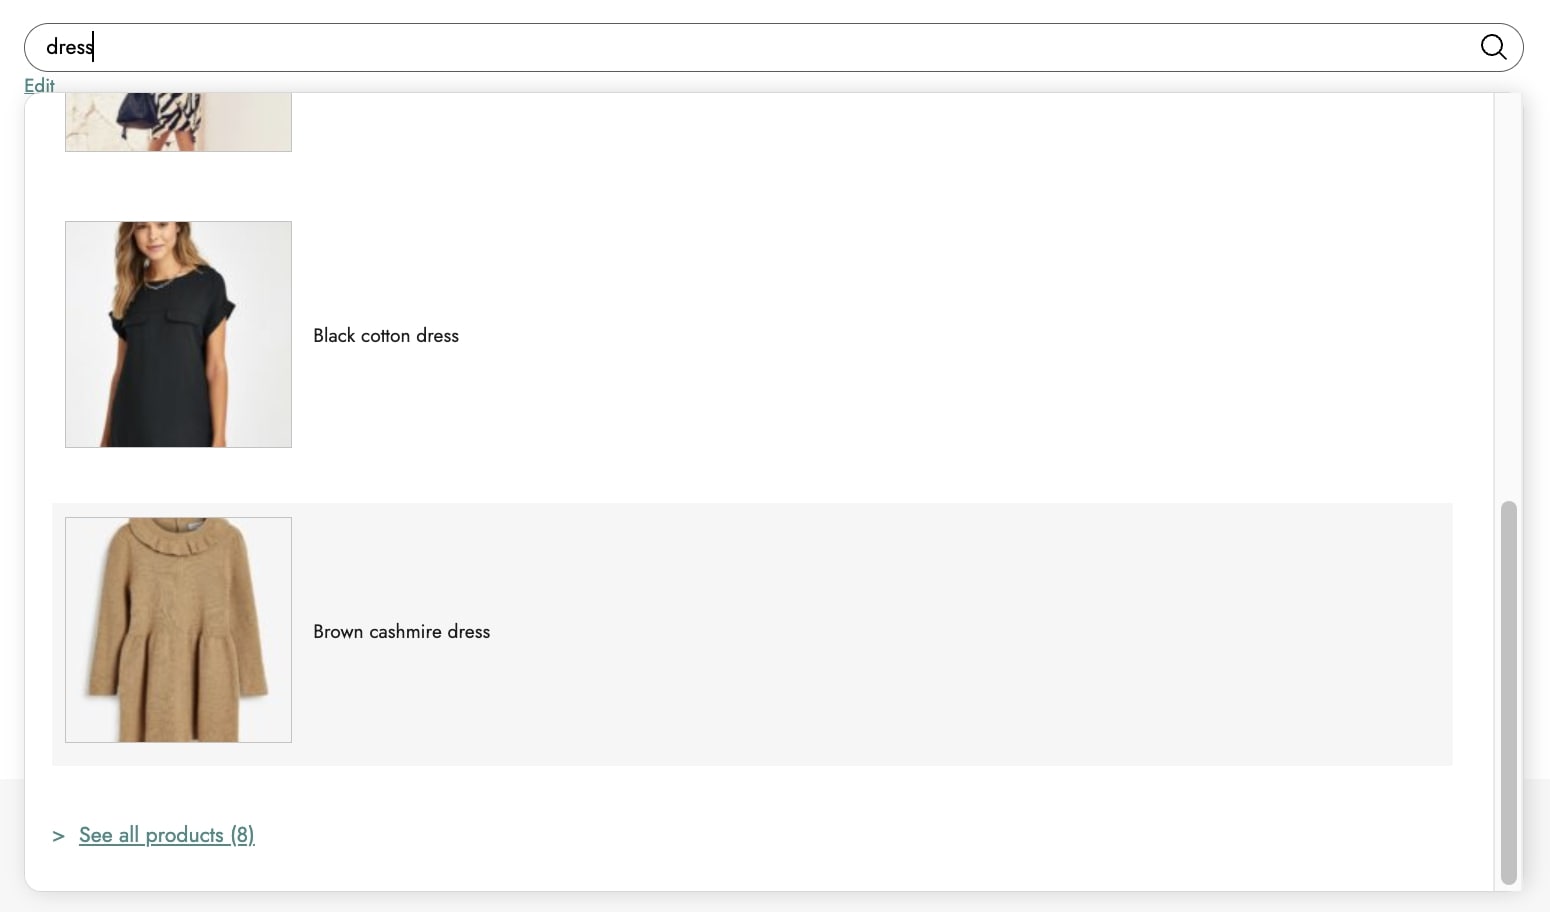
By enabling the option Enable autocomplete feature in search field, when users start typing a word in the search field, the plugin will show possible matching results.
You can define the minimum number of characters that will trigger the autocomplete. In the example below, by typing bla, the results shown have black as a correspondence.
This is the section where you can choose the fields that will be involved during the search. To add a new field, click on the Add field button.
Now, you can select and extend the search to the following fields:
product name
short description
description
Index
In the Search index section, you can set how often and the time for the indexing of fields to be executed.
Schedule indexing: enable to schedule the indexing and choose the interval from:
Daily
Weekly
Schedule time: select the time for the recurring indexing
Index status: this shows the number of indexed items and the date it was executed. You can also manually process it by clicking on the Rebuild index button.
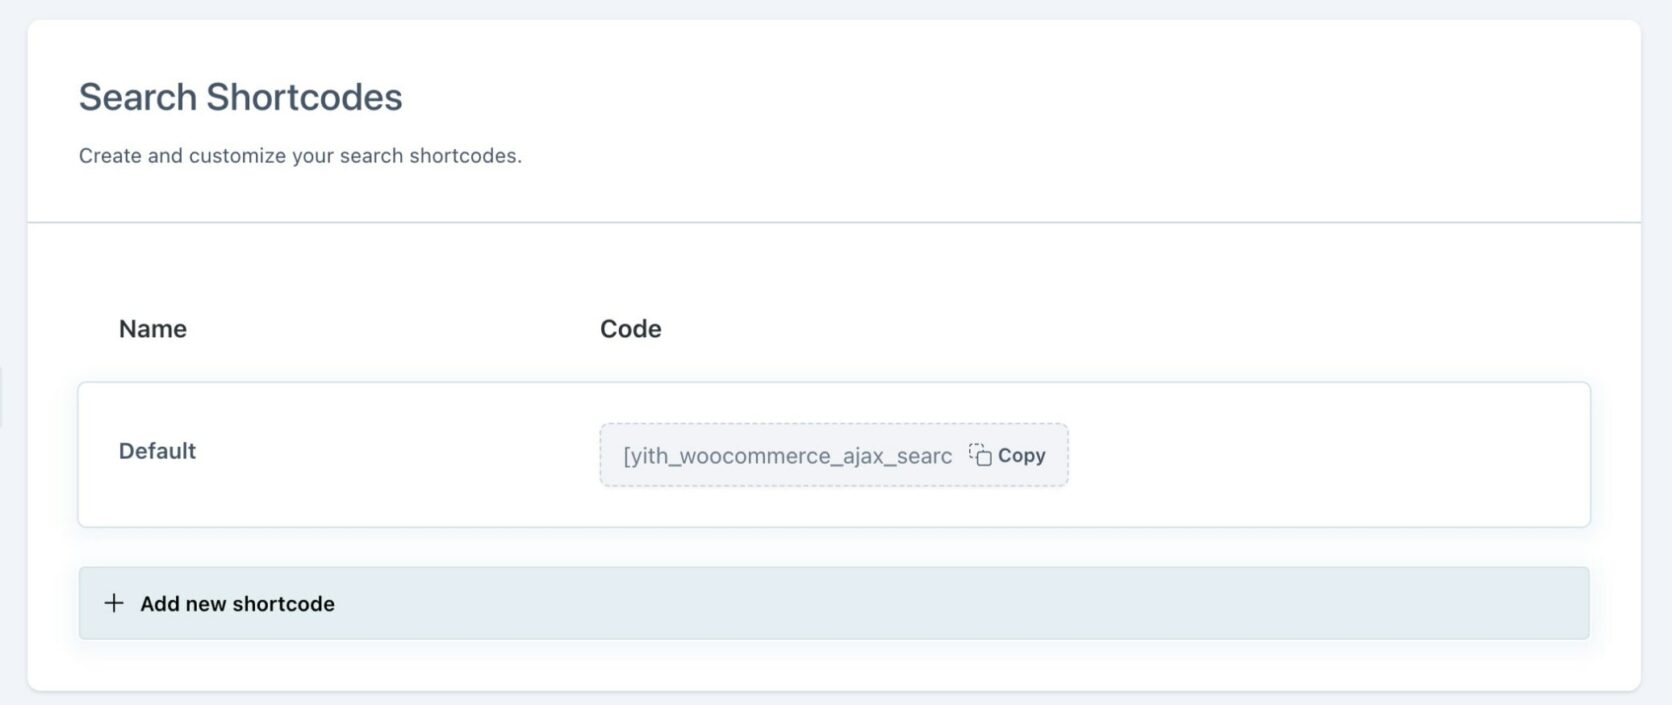
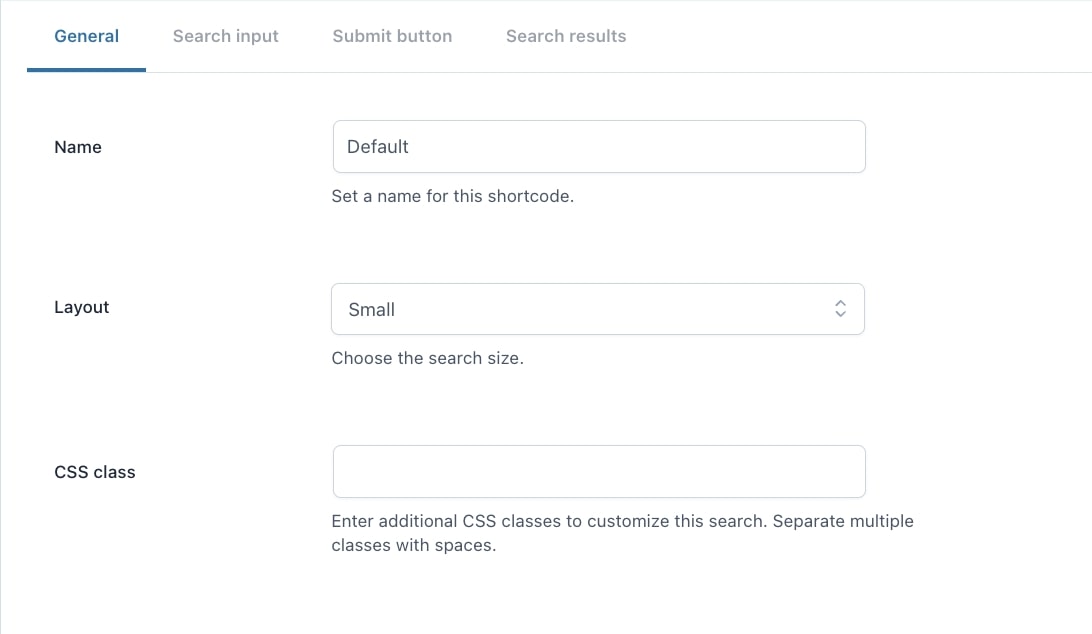
If you don’t use the blocks editor, go to the Search shortcodes section where you can find the default shortcode that you can customize as you want by configuring the following settings: