In this section, we will learn how to create tabs with the different layouts provided by the plugin.
Step 1 – Add a new tab
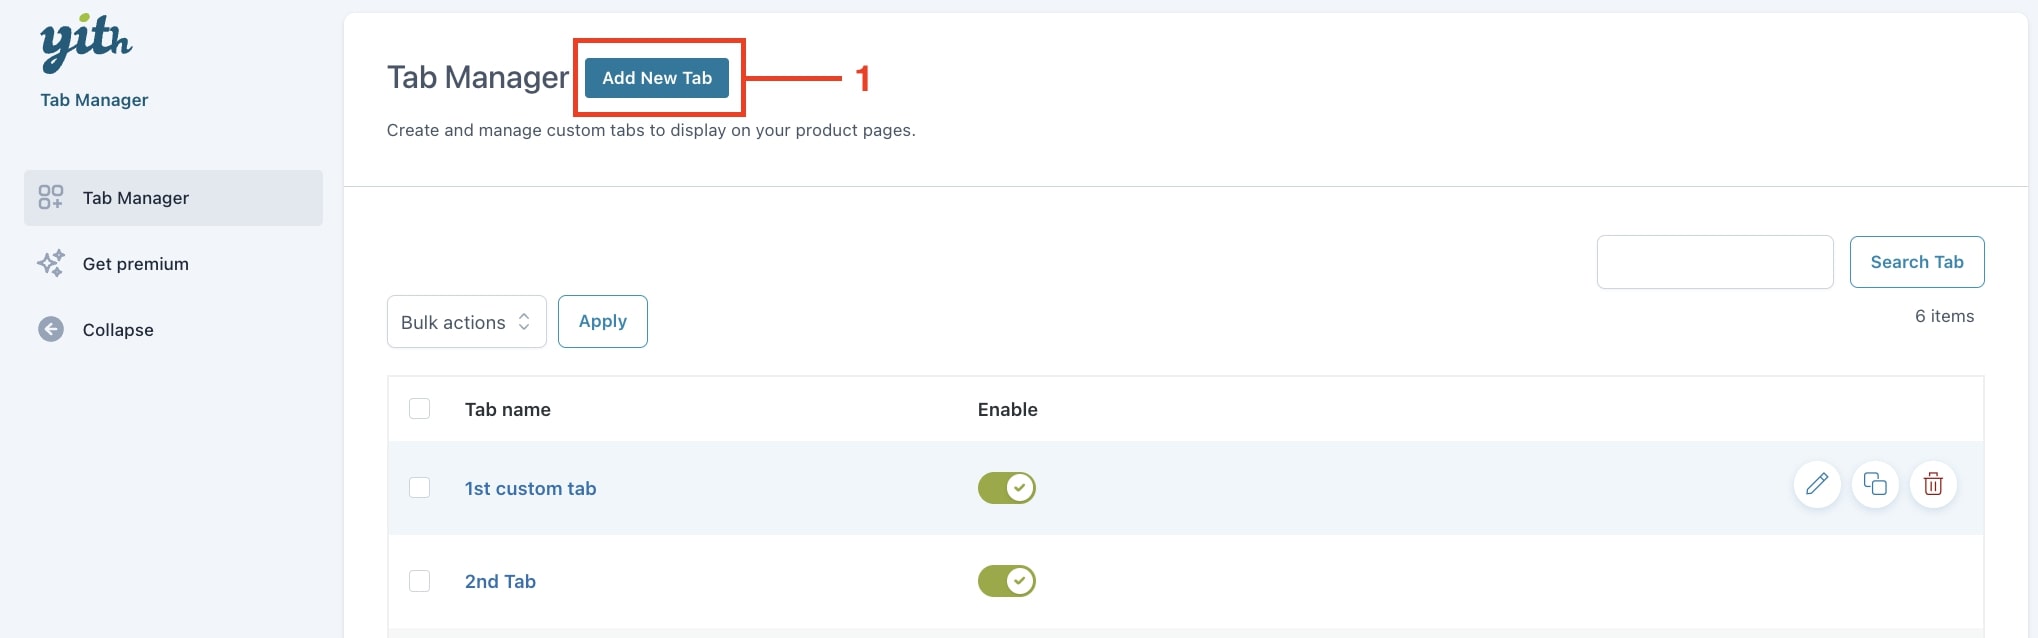
Go to the Tab Manager section and click on the Add new tab button (1):
Step 2 – Configure the tab
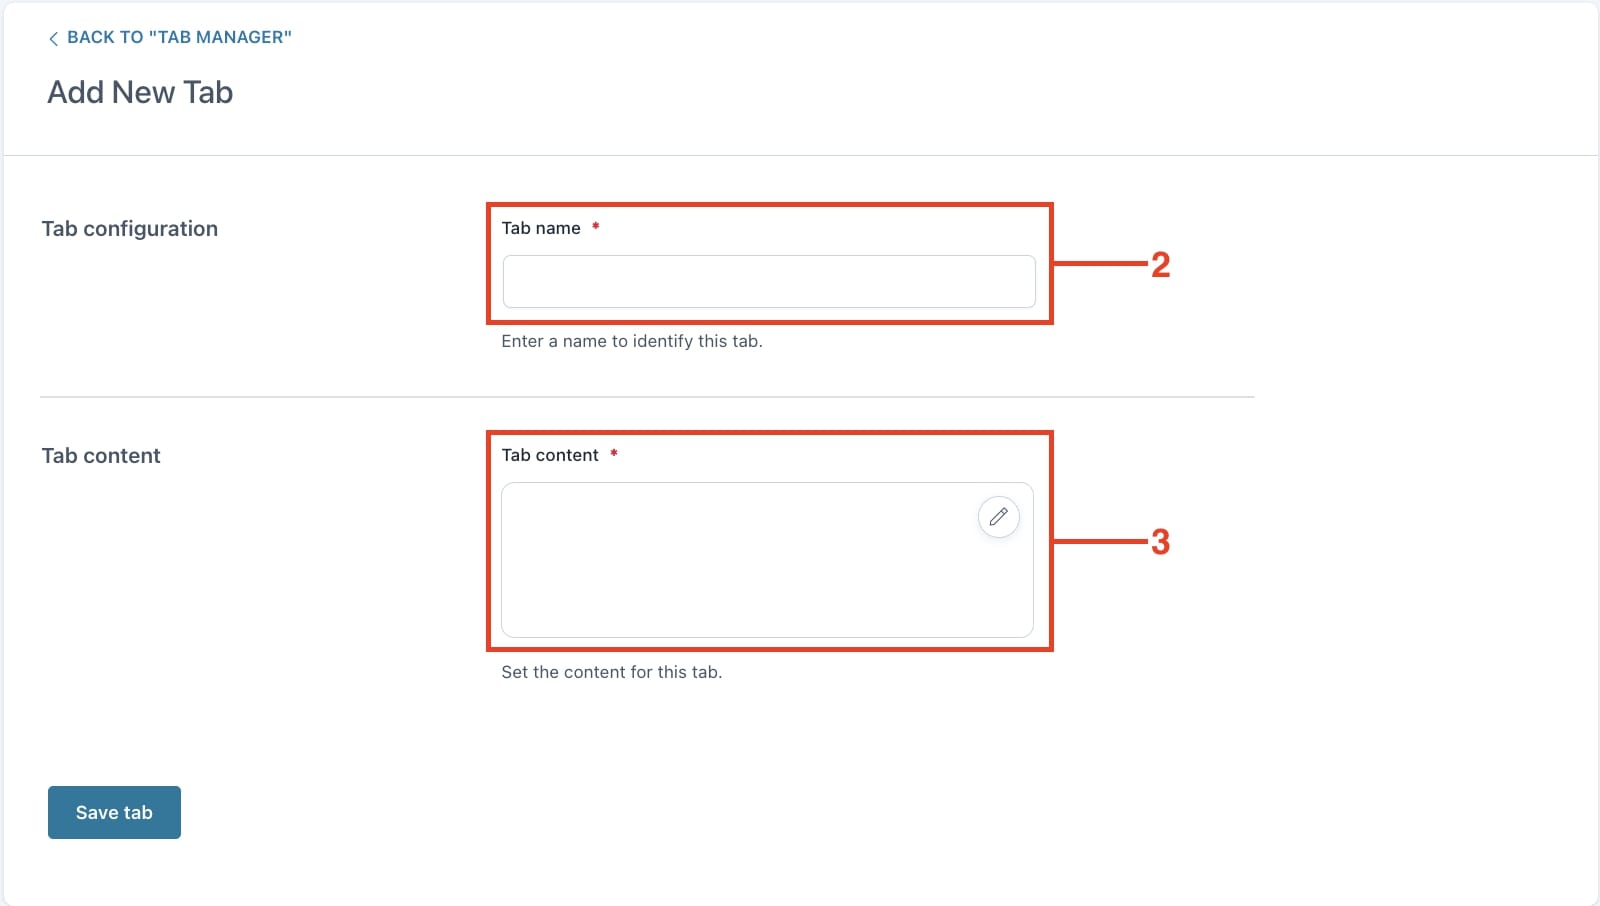
You will now see the page to add the new tab. Here, define a name for the tab (2) to easily identify it in the table, then click on the pencil icon showing on the mouseover in the Tab content (3).
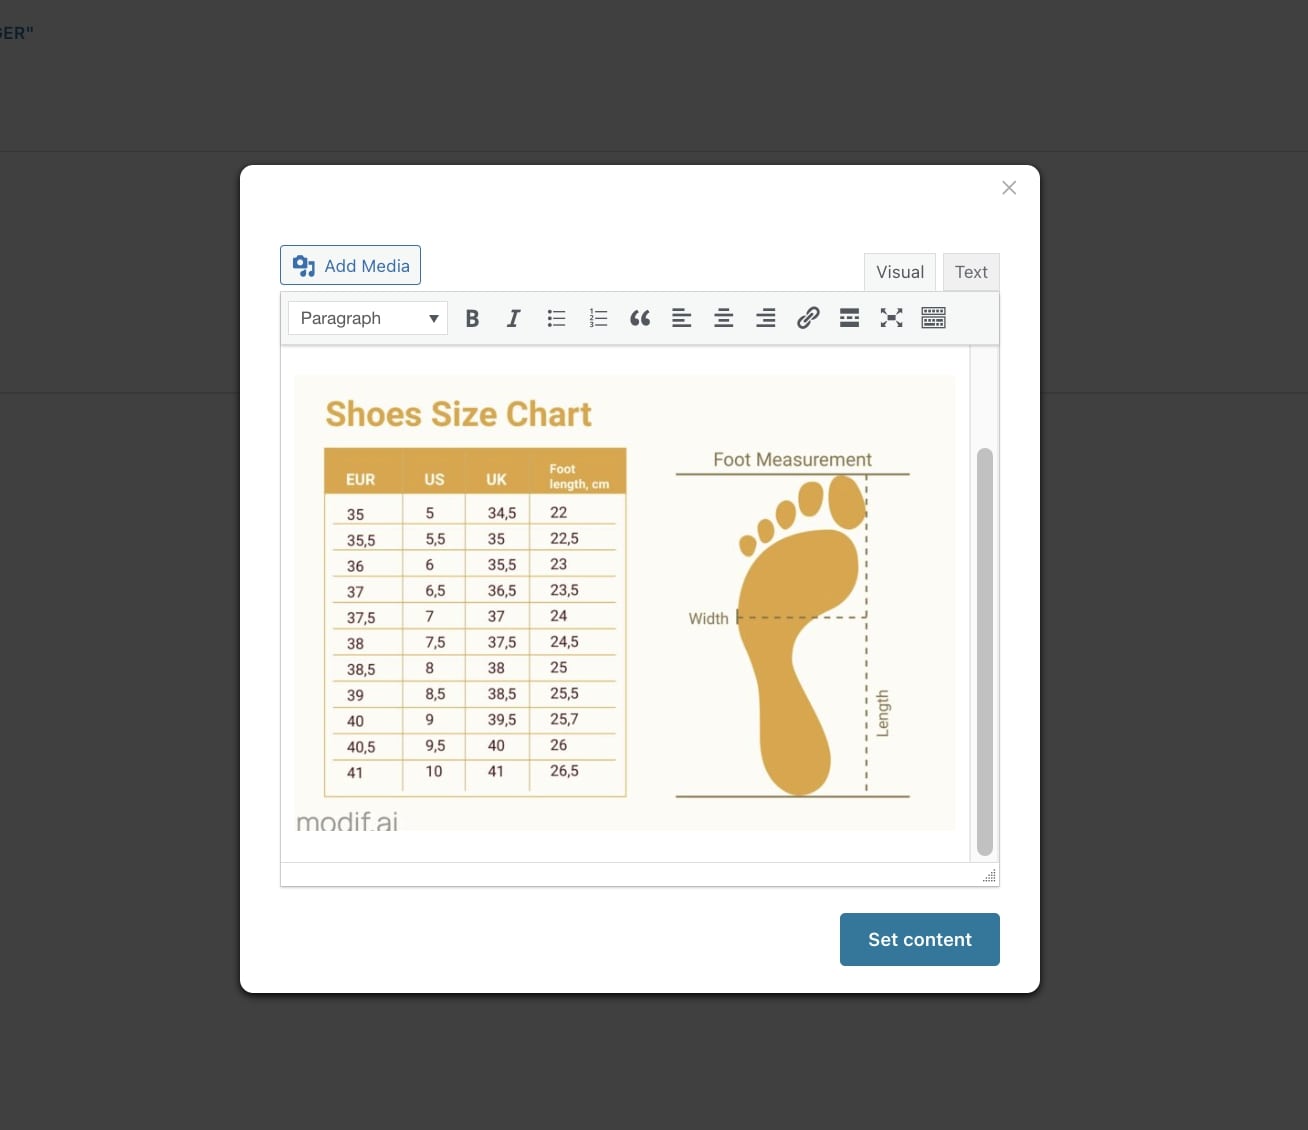
Now, set the content (text, links, images, etc.) using the WordPress classic editor, then click on Set content.
Active tabs will show on all products in the shop. With the free version, it is not possible to configure the tab content for single products. However, this is possible by using the premium version. You can read more on this page.
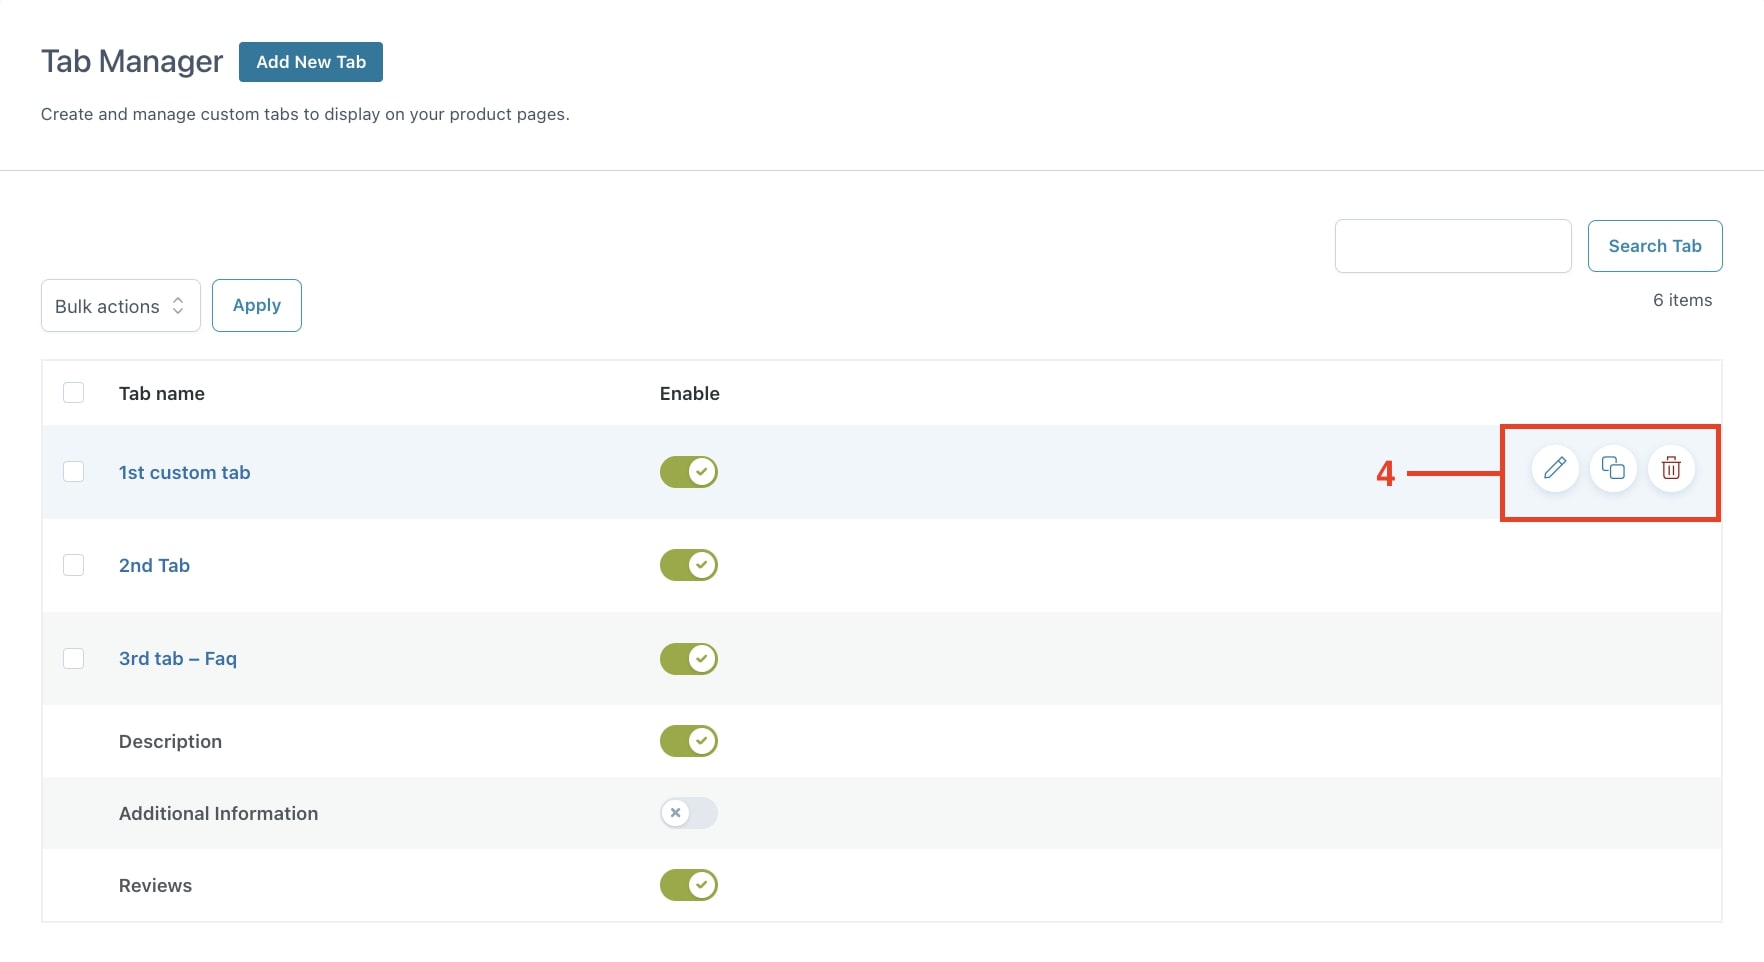
Step 3 – Enable/disable tabs
Each tab you create will be added to the table (that you can view by clicking on Tab manager) from which you can enable or disable each single tab and sort them via drag and drop in the order you wish to display them.
From the table, you can also edit, duplicate and delete the tabs through the related actions (4).
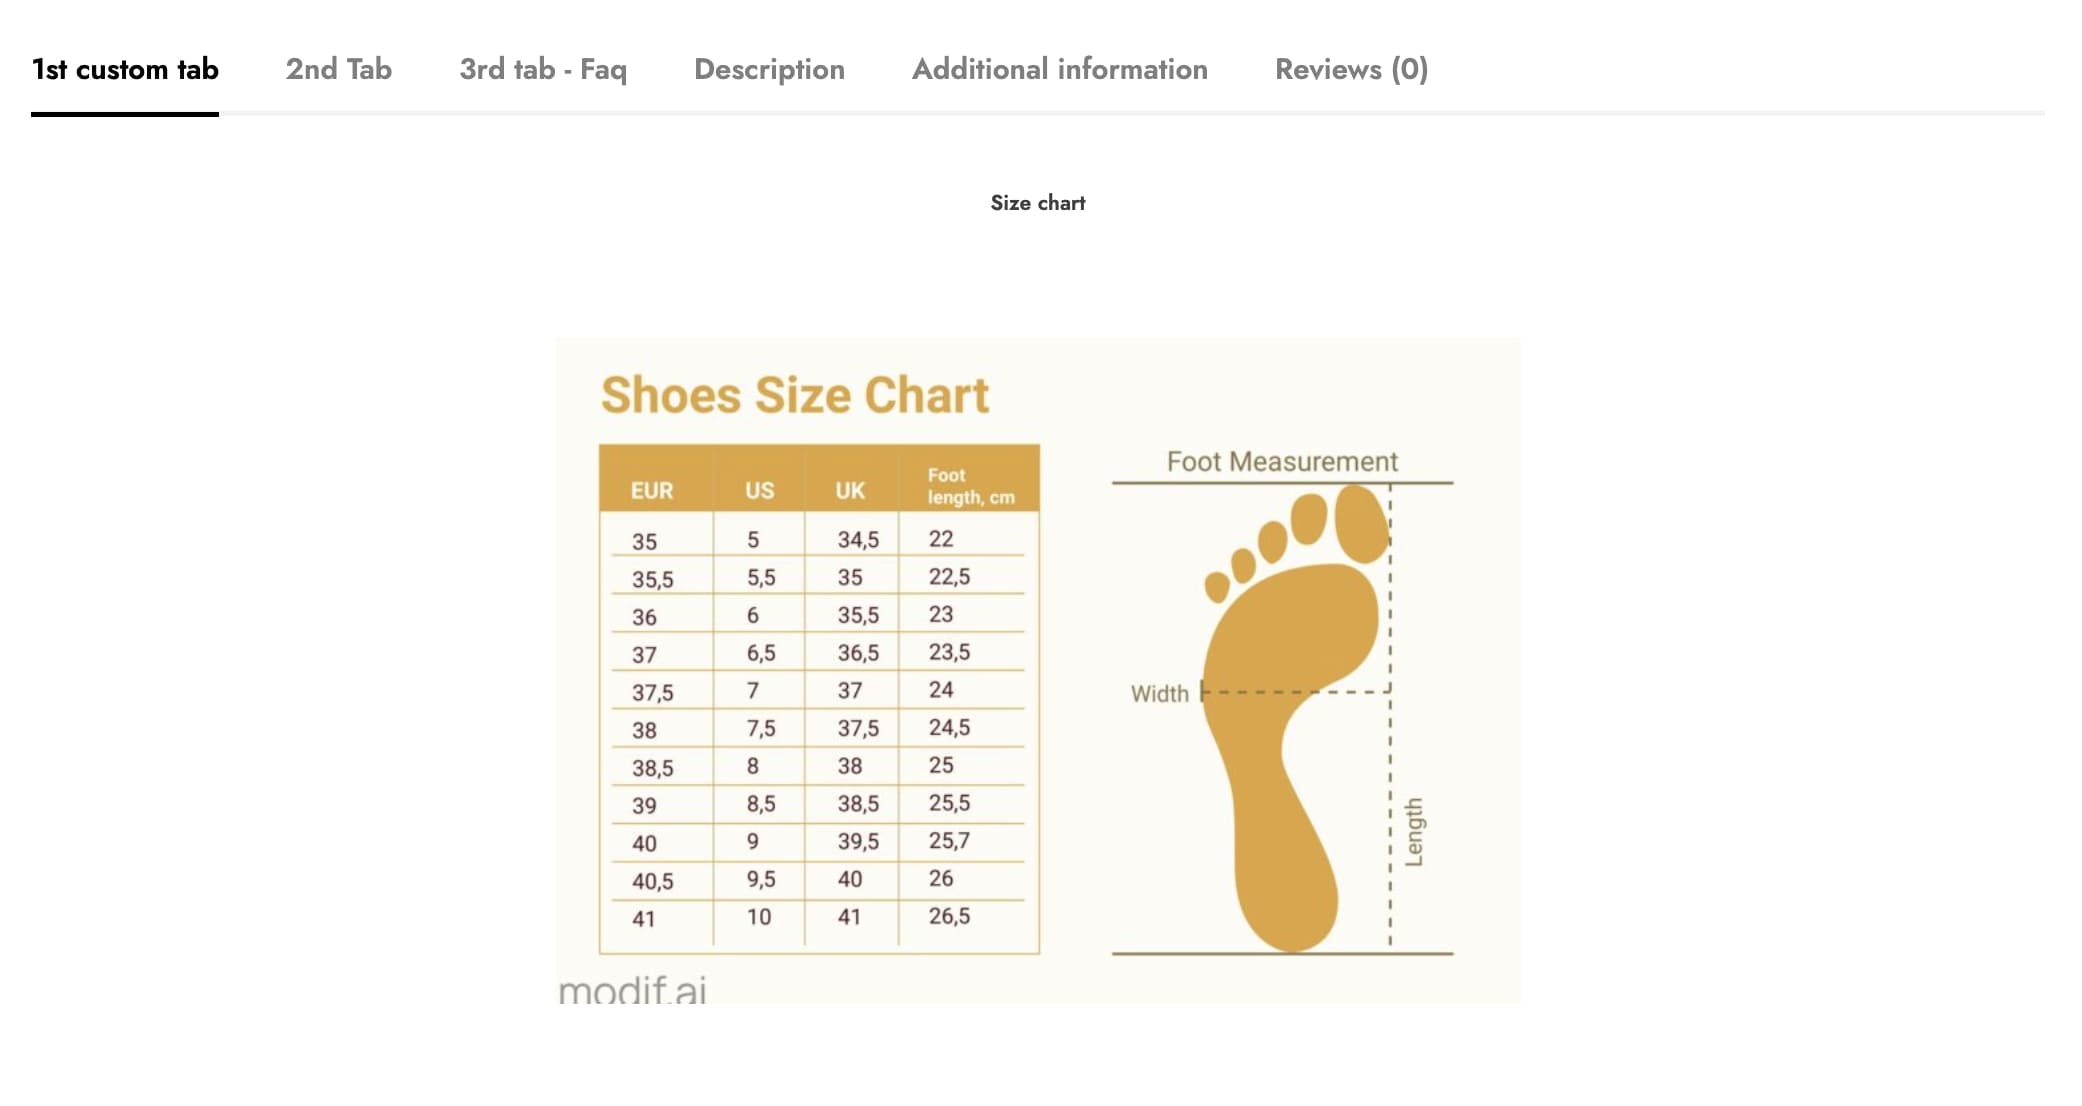
Tab example