Let’s see how to create a tab that includes a contact form.
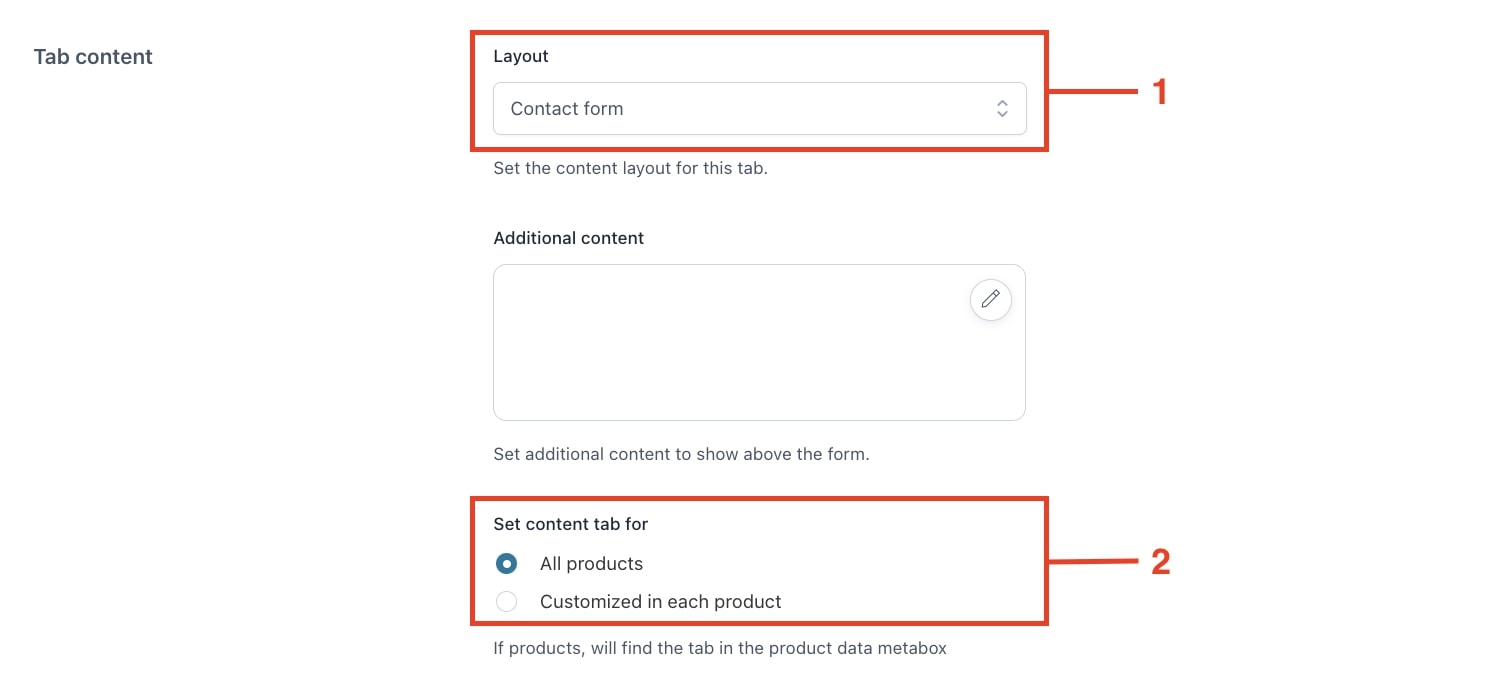
Step 1 – Tab creation
Set the tab options by following the first two steps described here, then select Download in the Layout option (1) and choose for which products this tab is being created from All products or Customized in each product (2)..
Step 2 – Enable fields
The default form consists of the Email and Message fields, but you can also enable the name (3), website (4), and subject (5) fields. Each of these fields can be set as required.

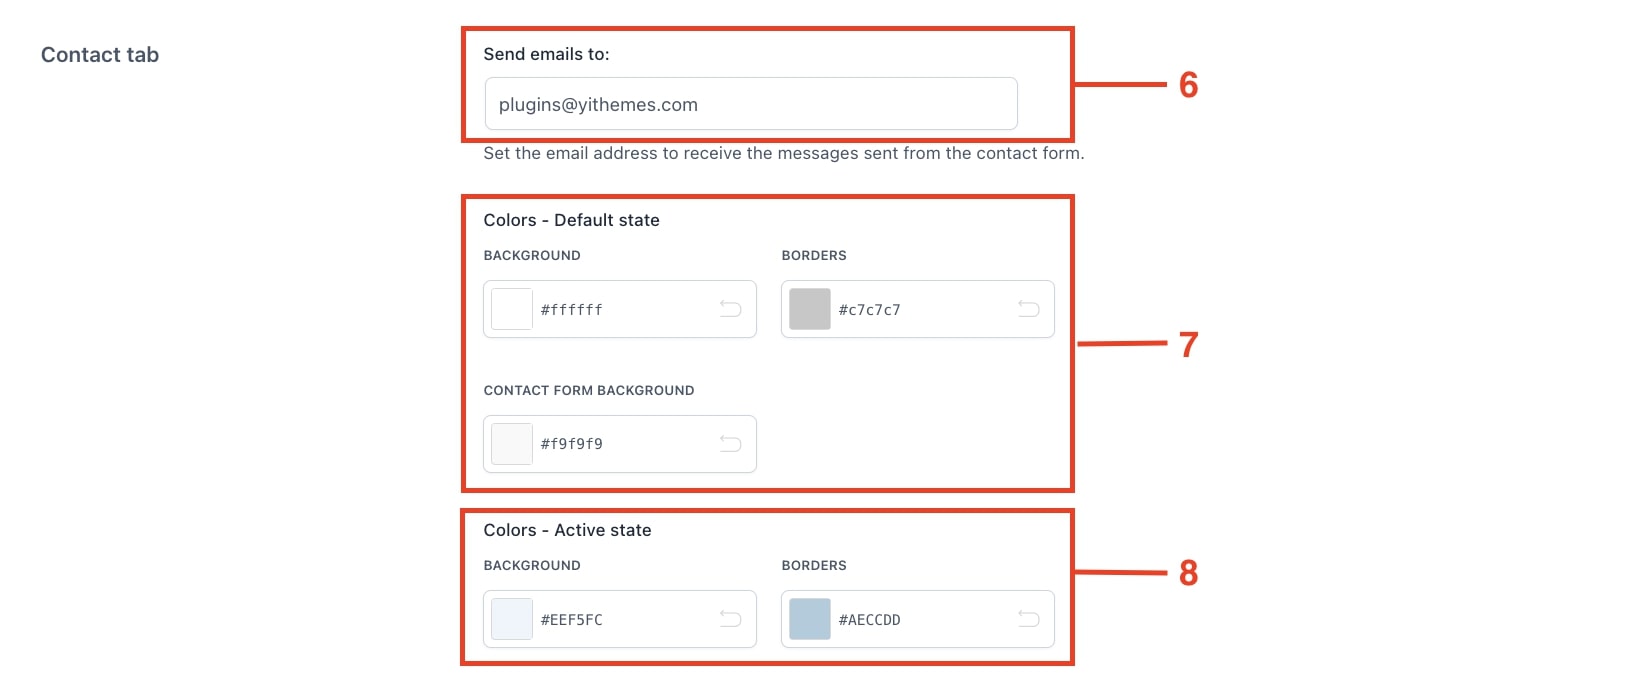
Step 3 – Tab customization
You can customize the tab by setting the email address (6) of the recipient of messages sent through the contact form, the default state colors (7) and the active state colors (8). These options are available in the Customization section of the plugin panel.
Contact form tab example
