In this post, we’ll explore how to add a quick view popup to your products. Our goal is to make it easy for customers to view product details with a single click, using a popup window that avoids loading a new page. Let’s get started!
Step 1 — Choose the style
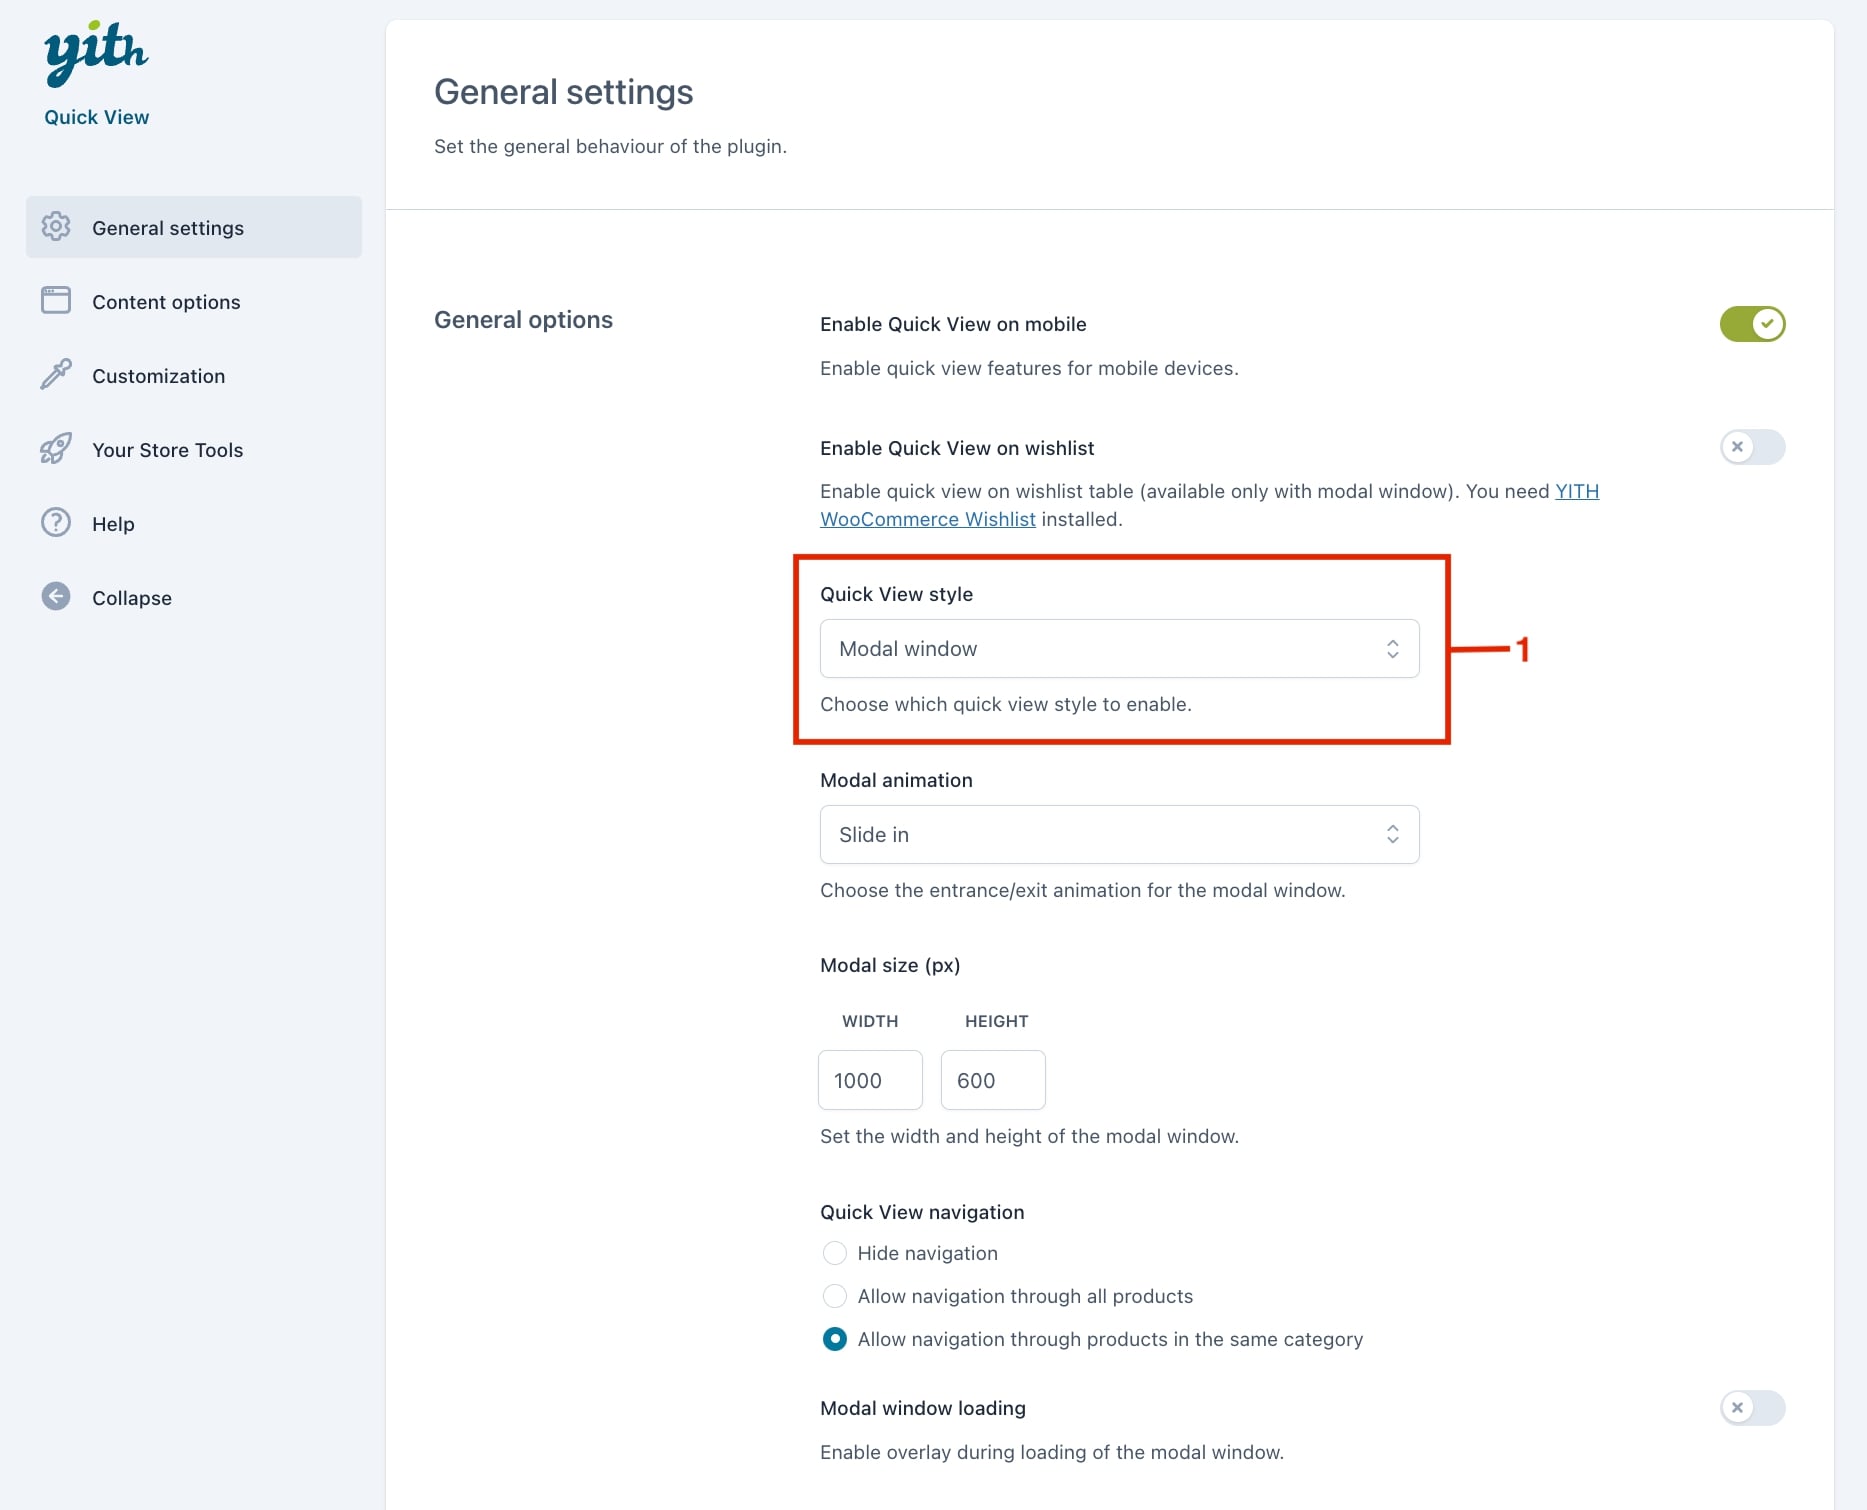
After activating the plugin, the quick view feature is automatically enabled. Start from the General settings by selecting the popup style; in this case, we’ll use a Modal window (1).
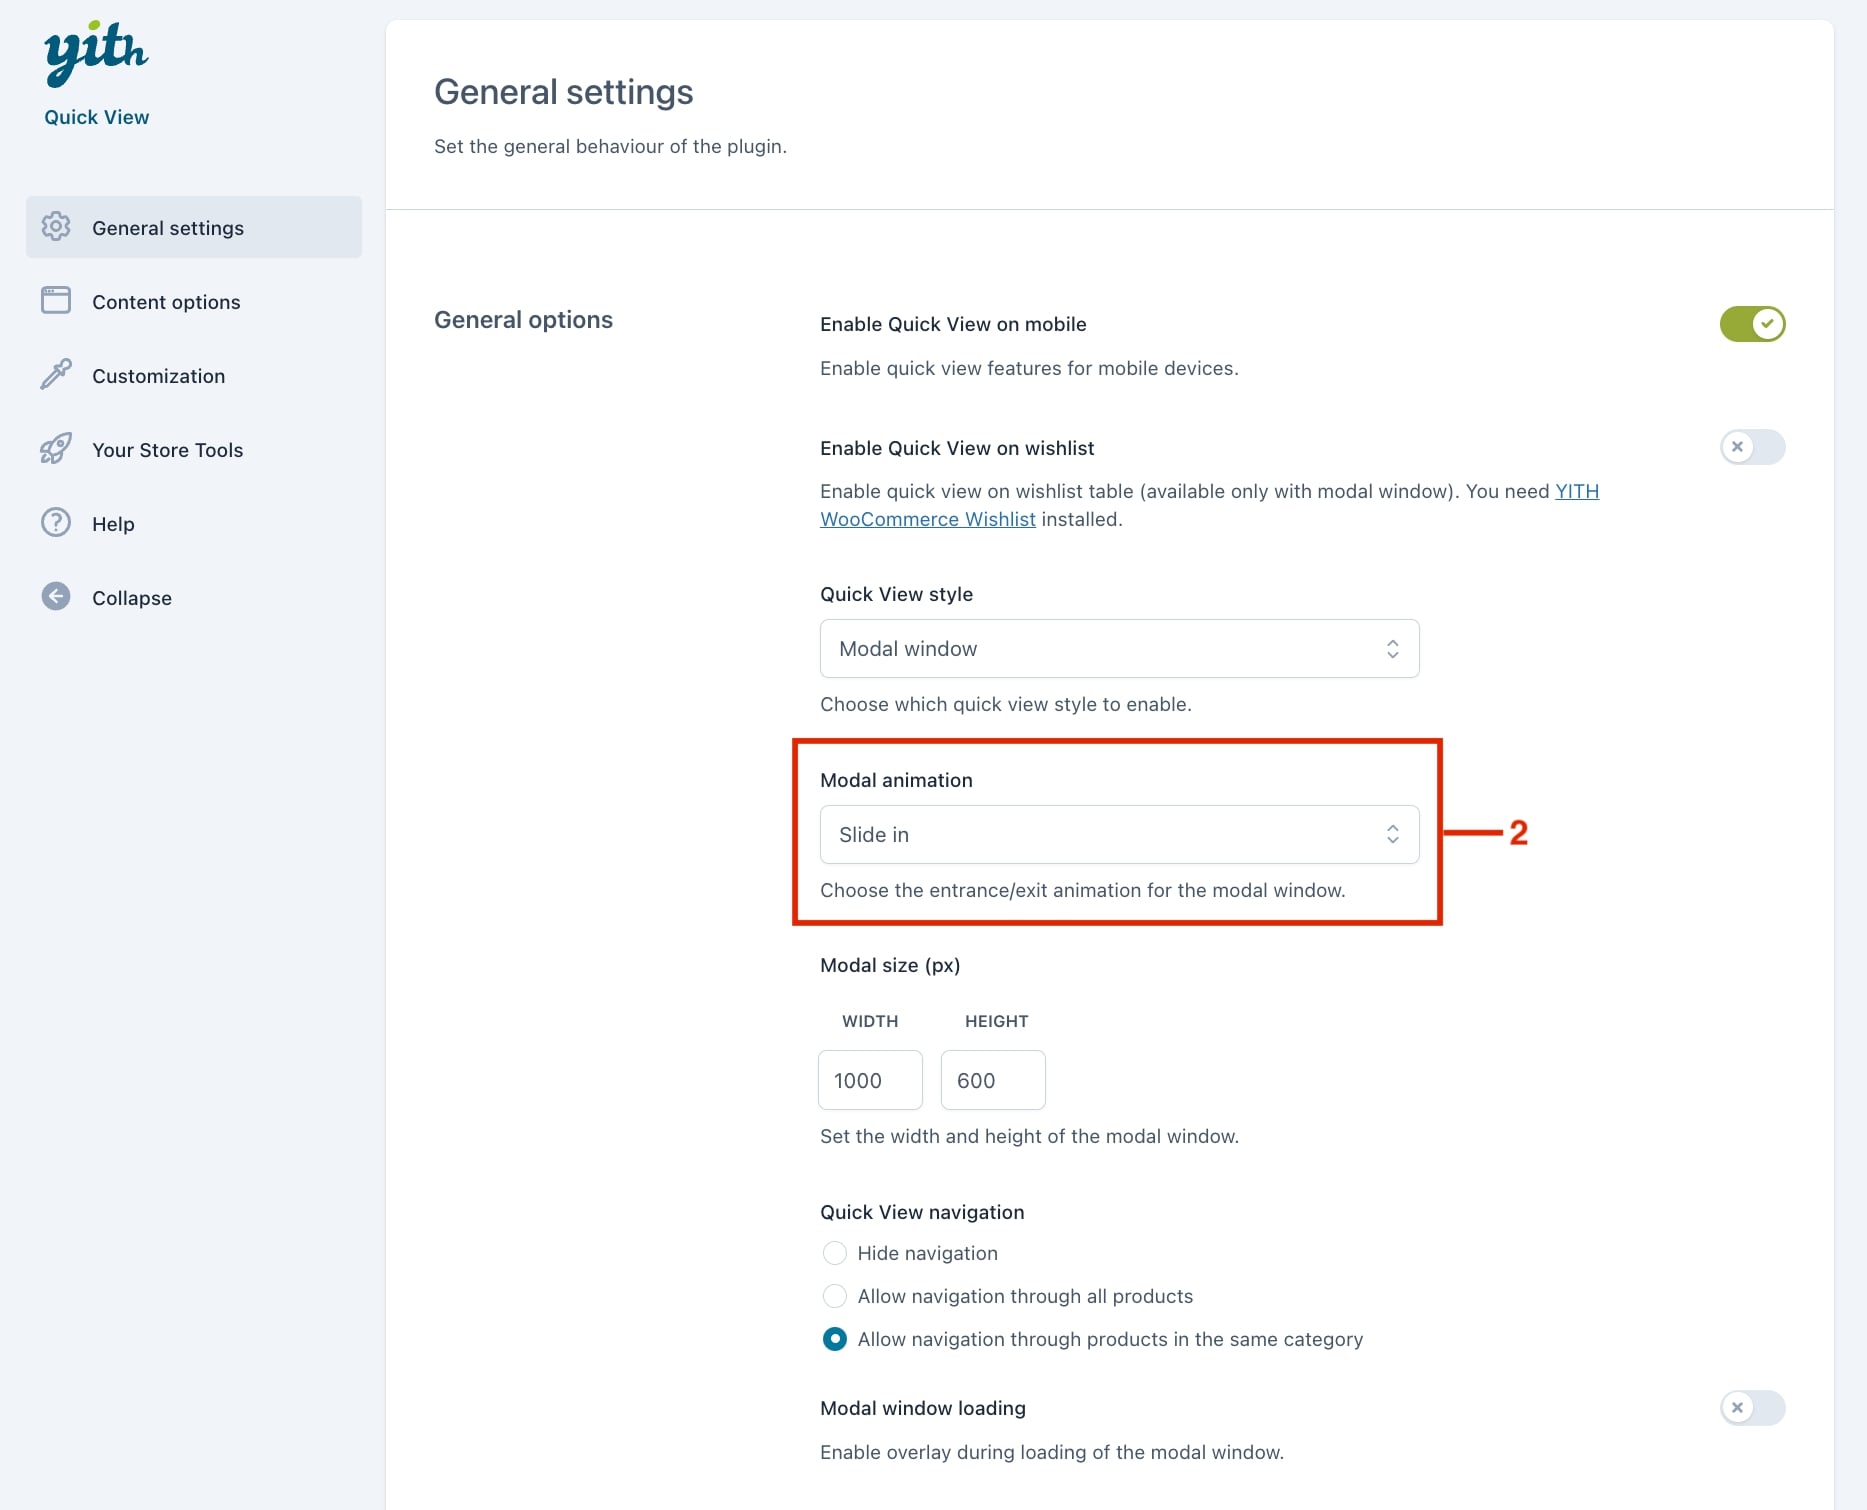
Next, we have to choose an entrance and exit animation style for the Modal window. Let’s select a Slide in (2).
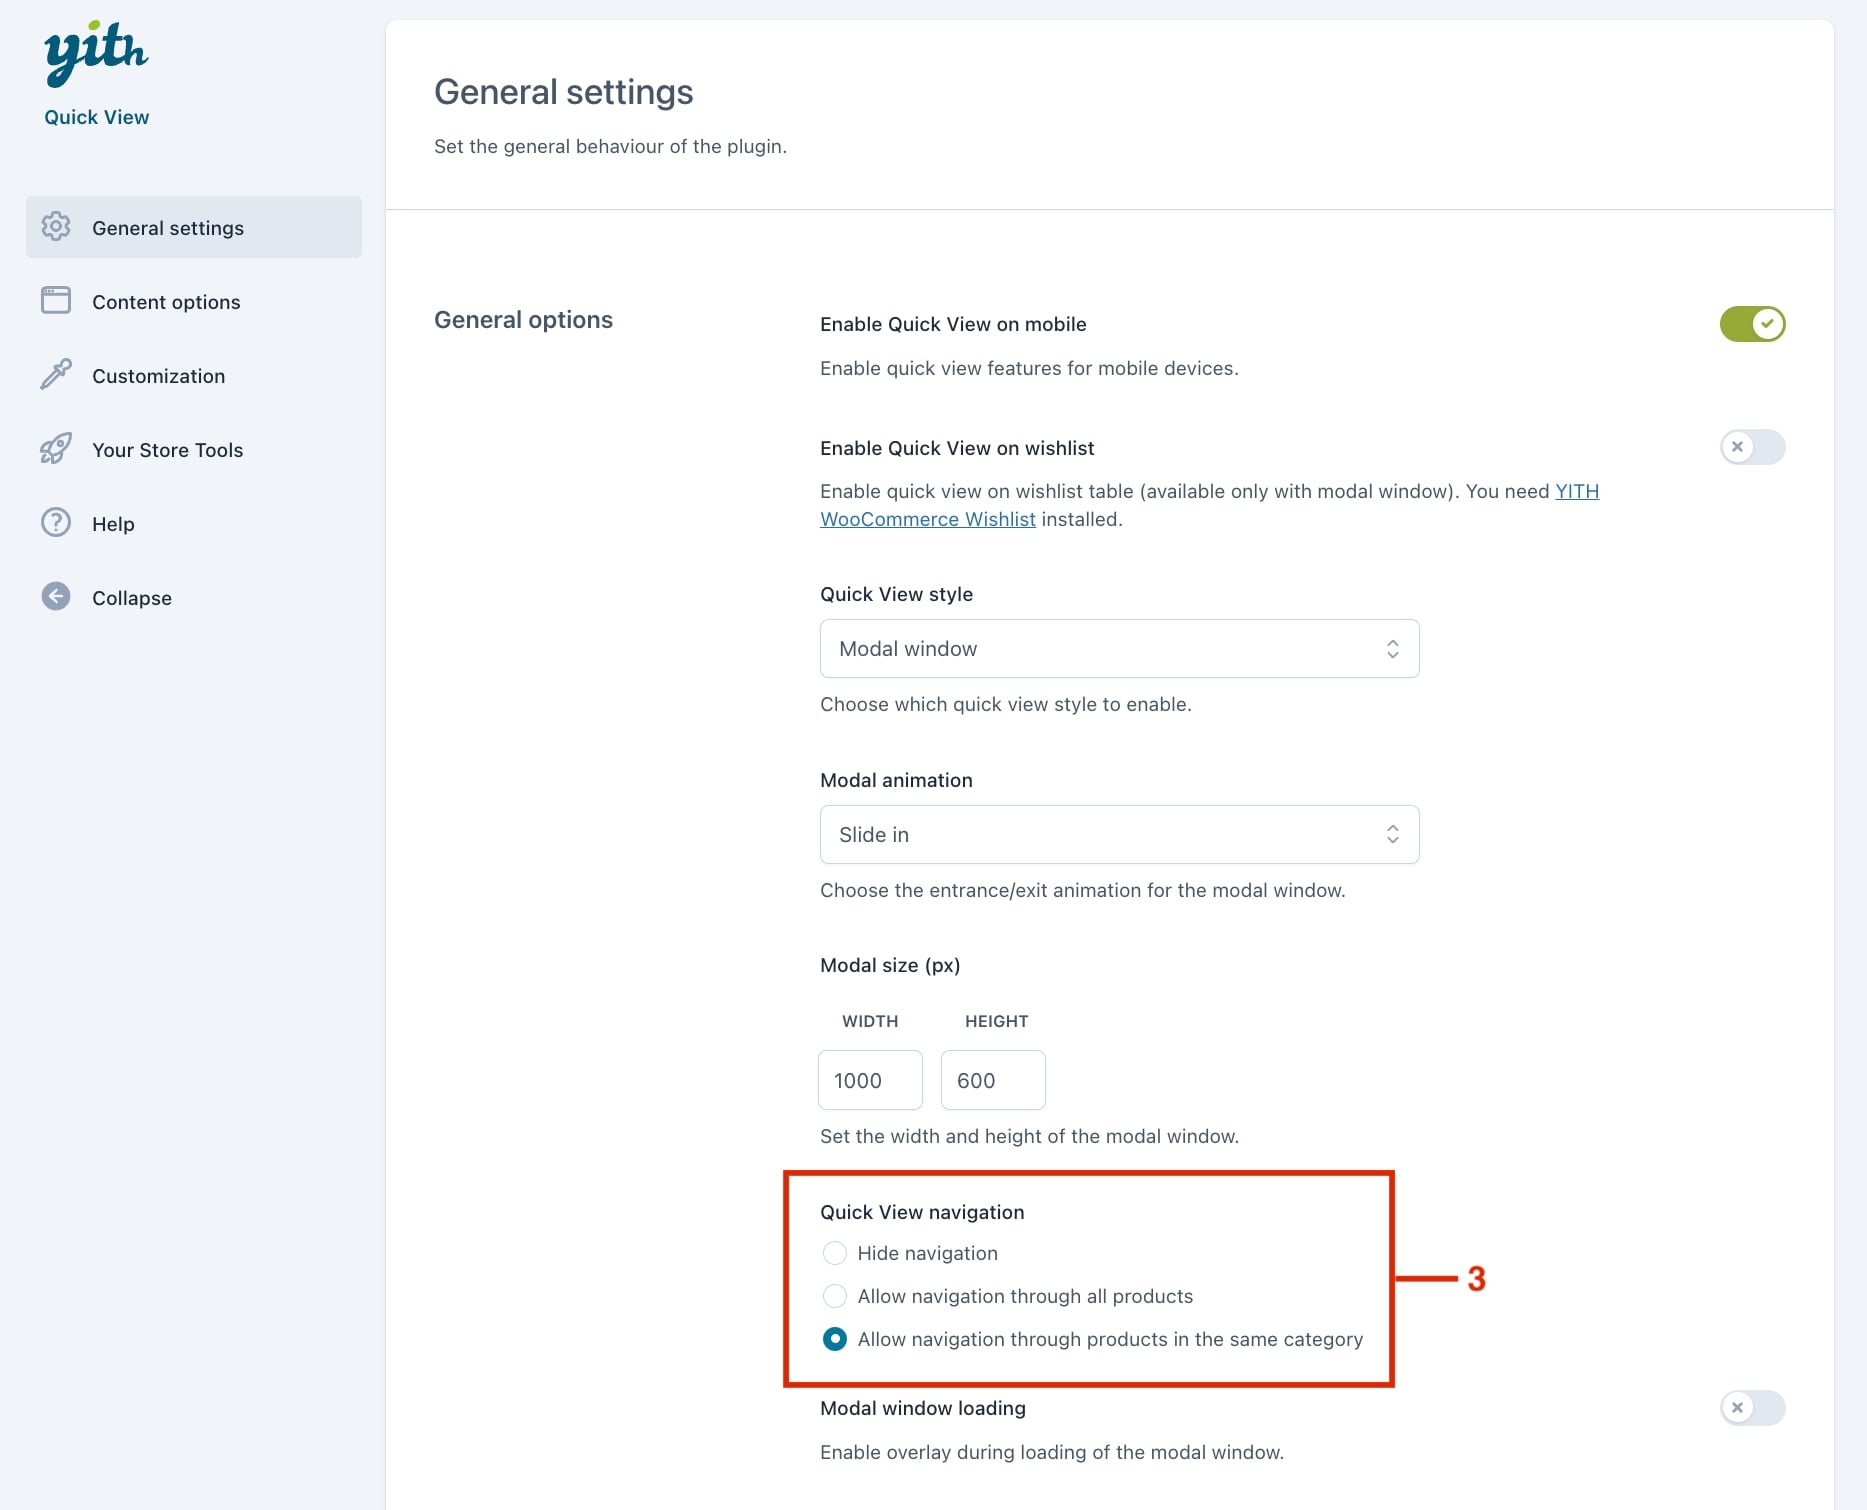
To allow users to browse other products only within the same category when the quick view is open, choose the dedicated option in the Quick View navigation (3):
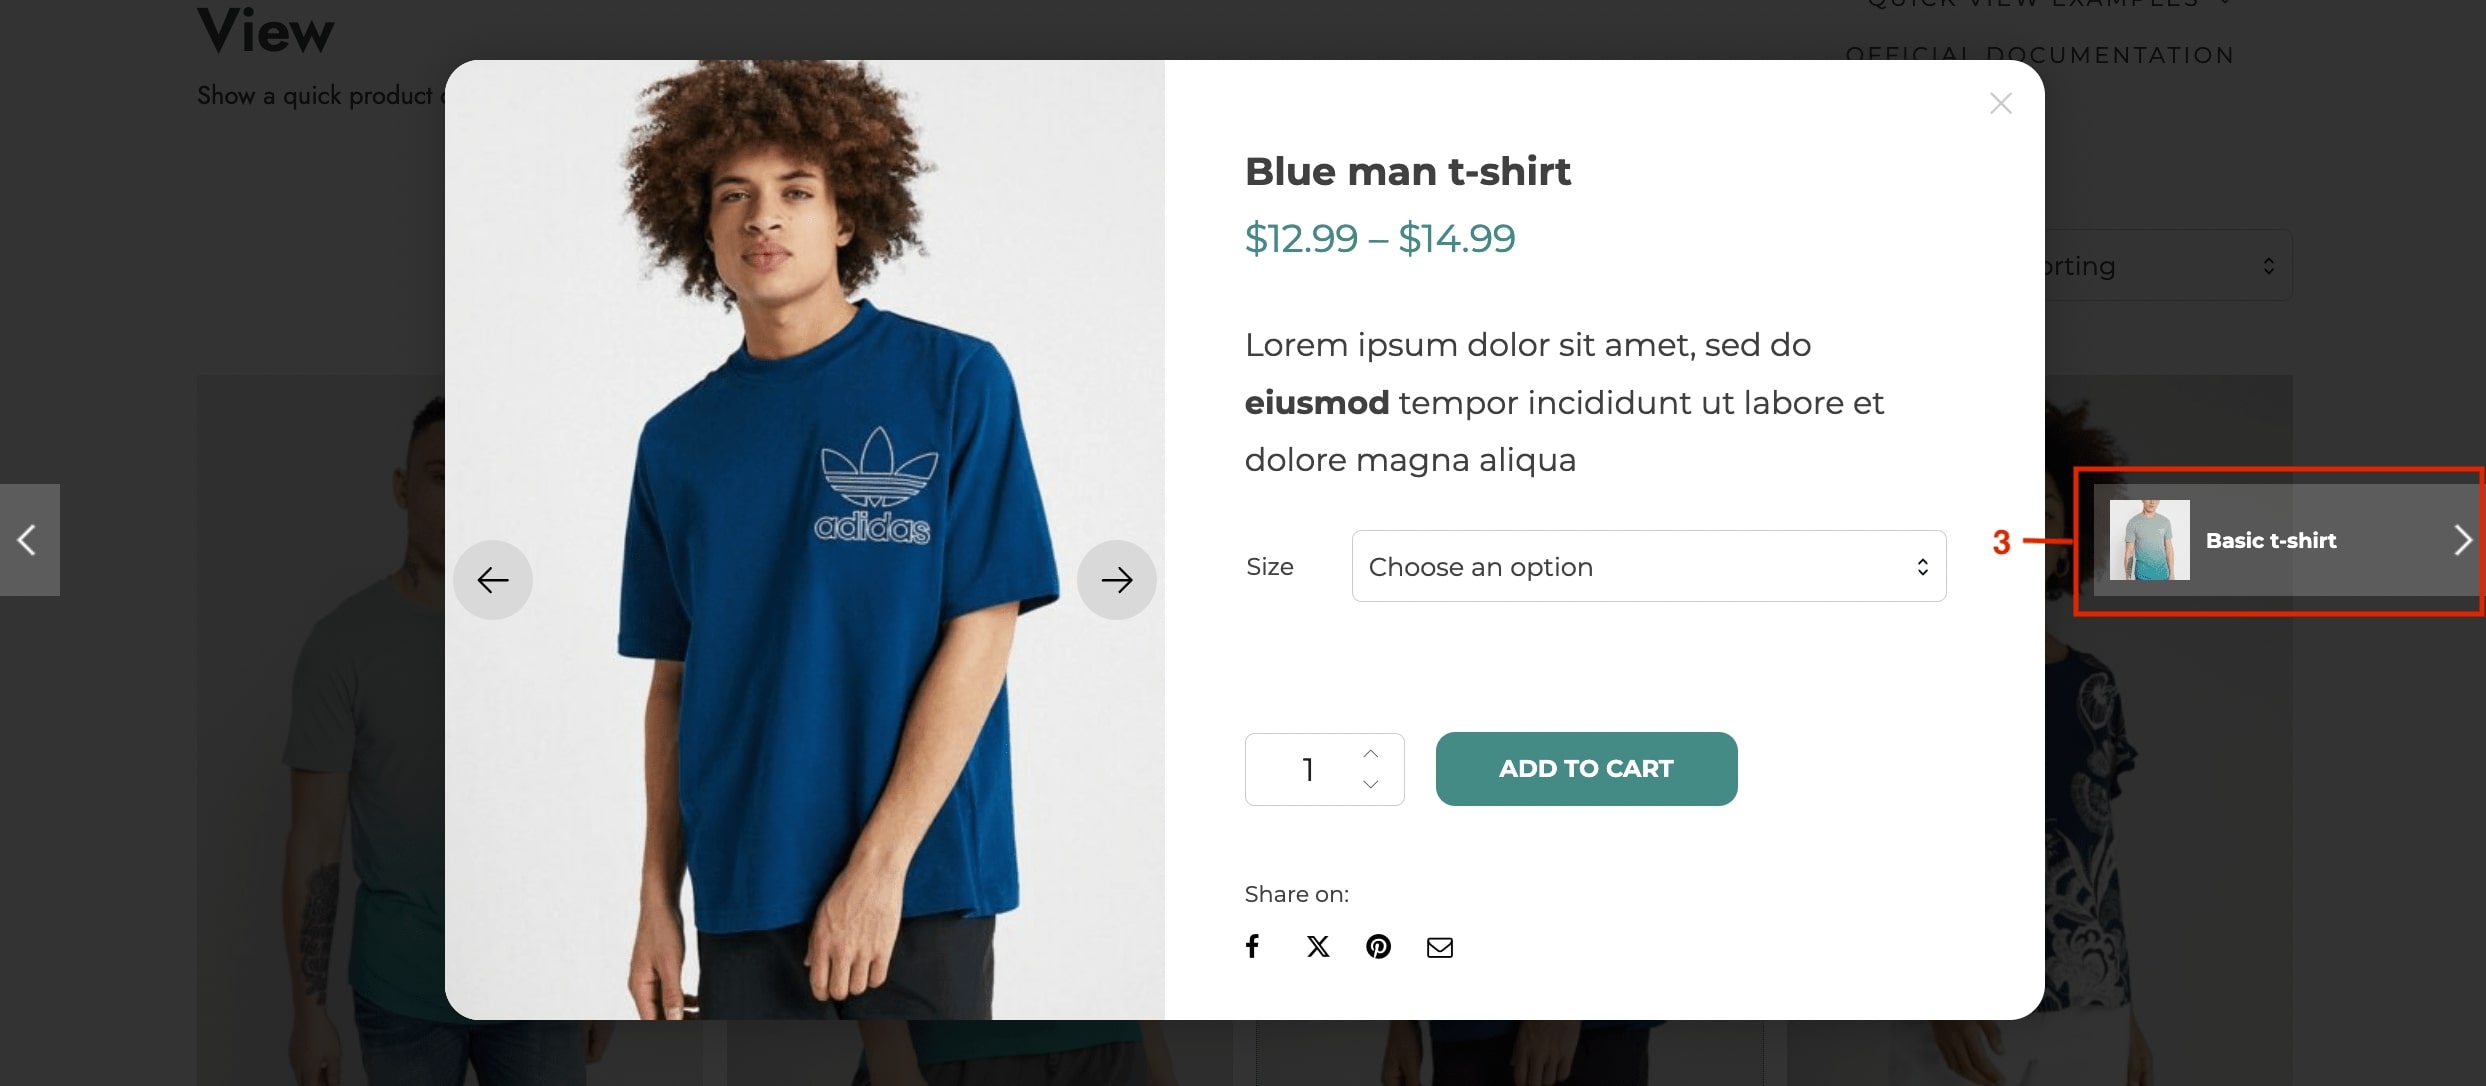
This way, users can check other products from the same category without leaving the quick view popup:
Step 2 — Set up the Quick view button
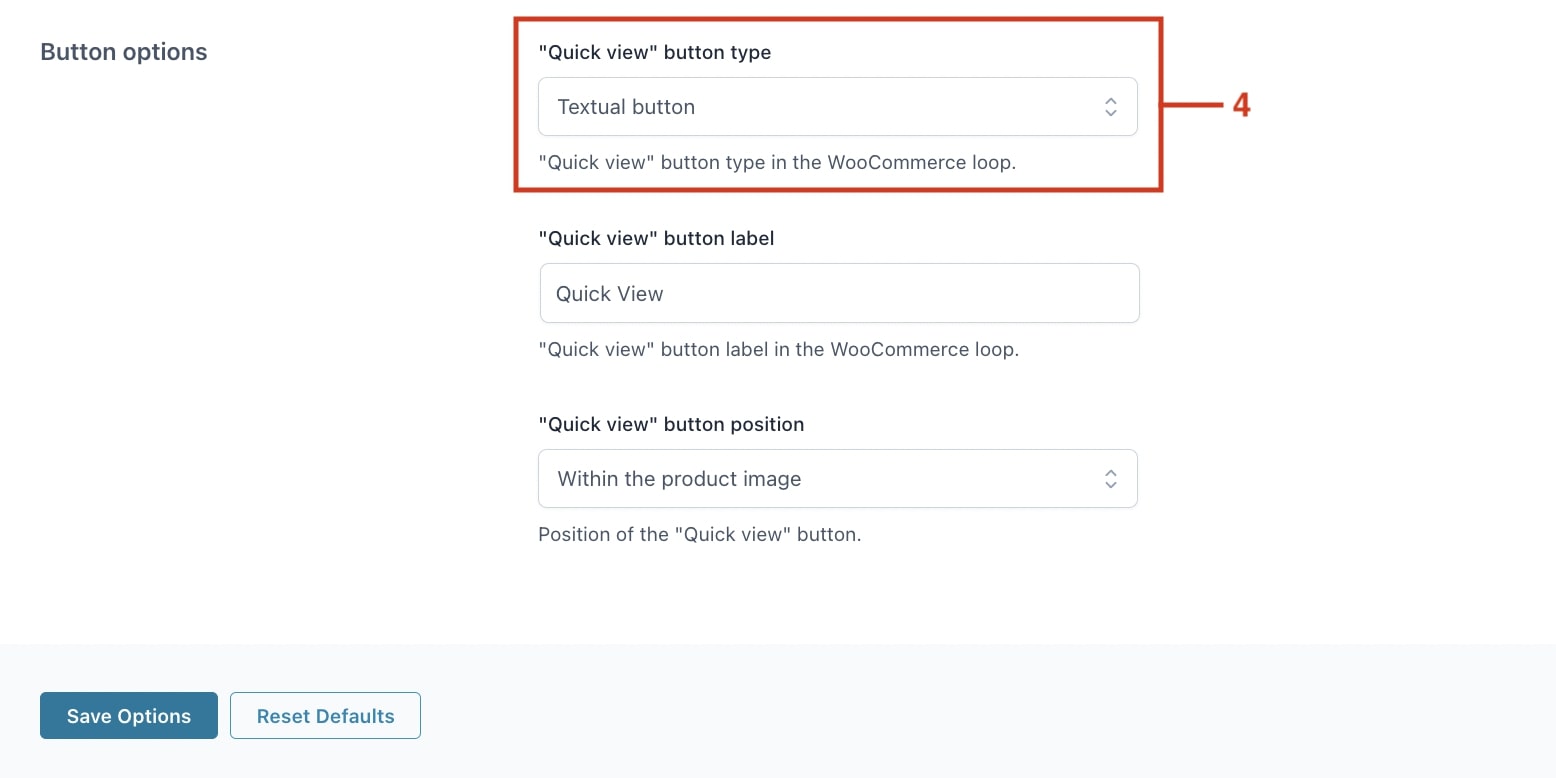
In the Button options from the General settings, you can set up the button that opens the Quick View popup. First, choose the button type (text or icon). For this example, we’ll use a text button (4).
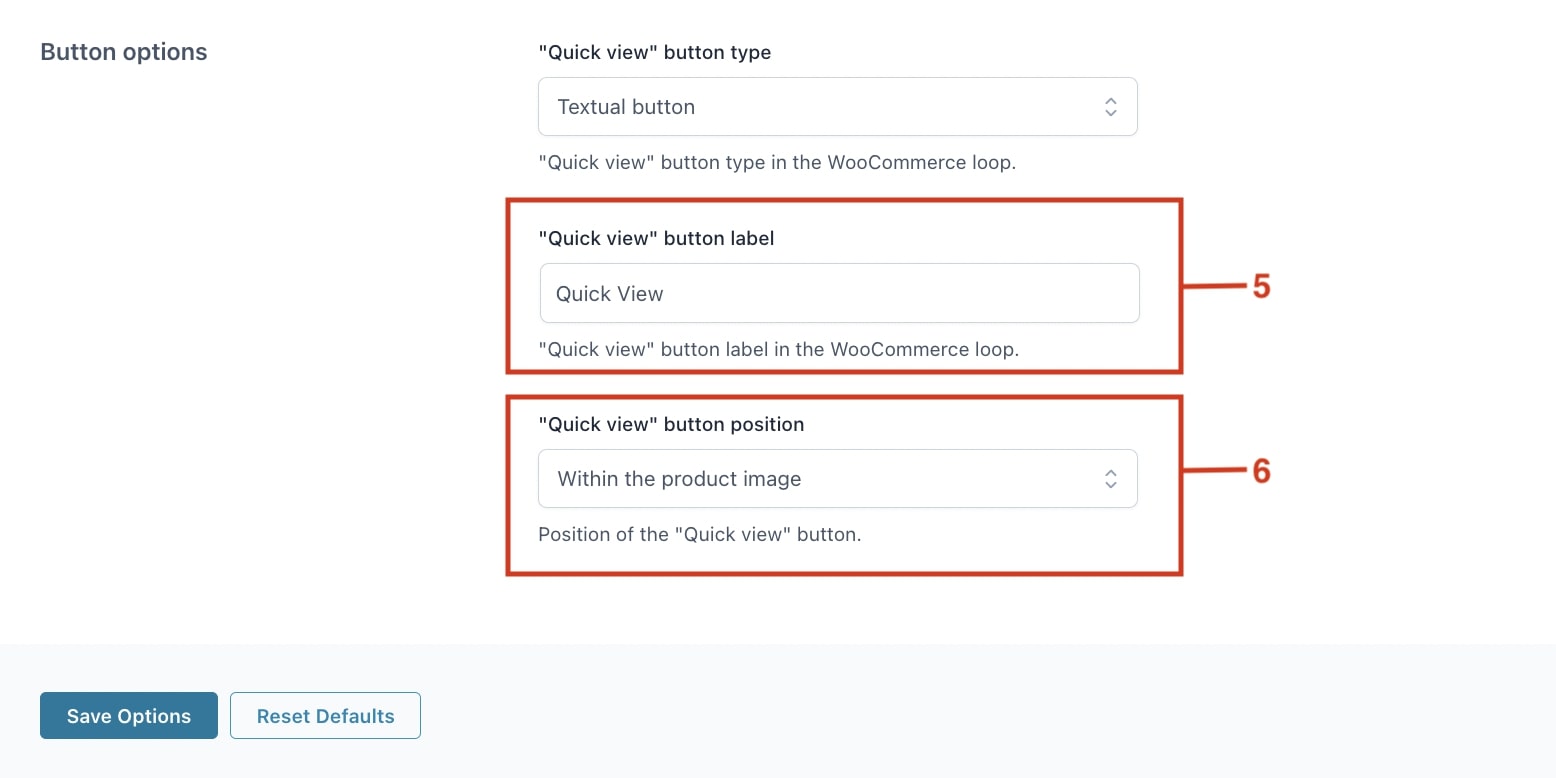
Then, type the label of the button (5) and select its position, in which we decide to place it within the product image (6). Finally, Save options.
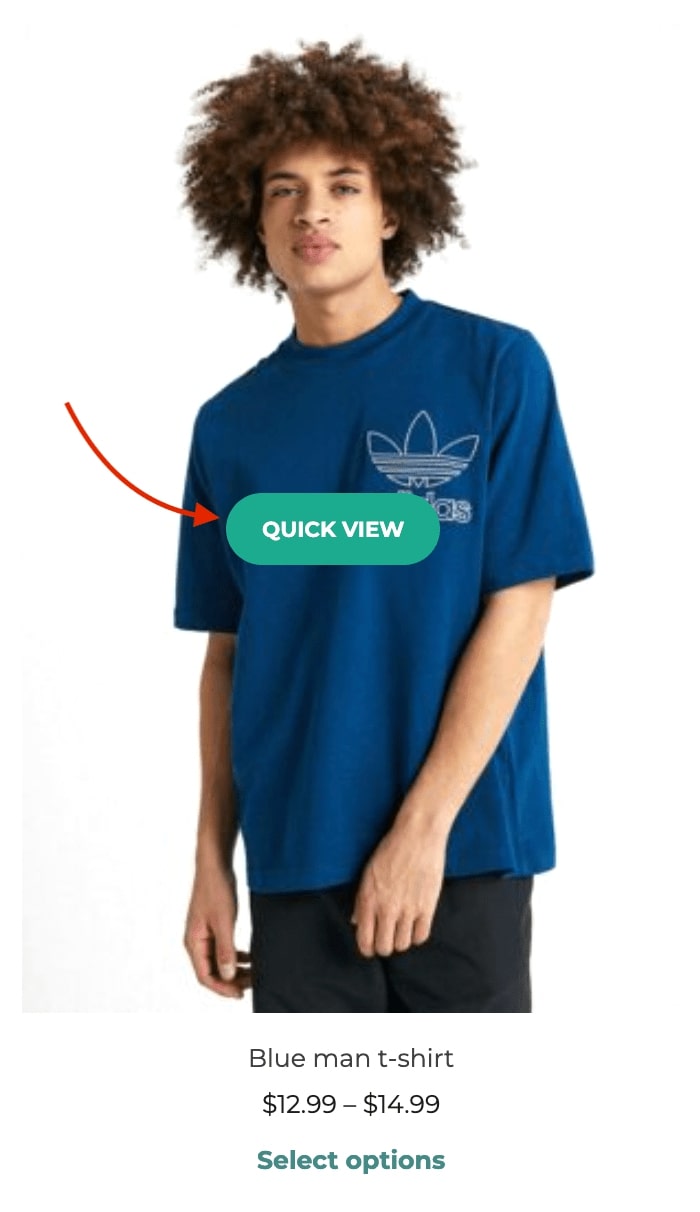
This is what customers will see in the frontend:
Step 3 — Customize the content
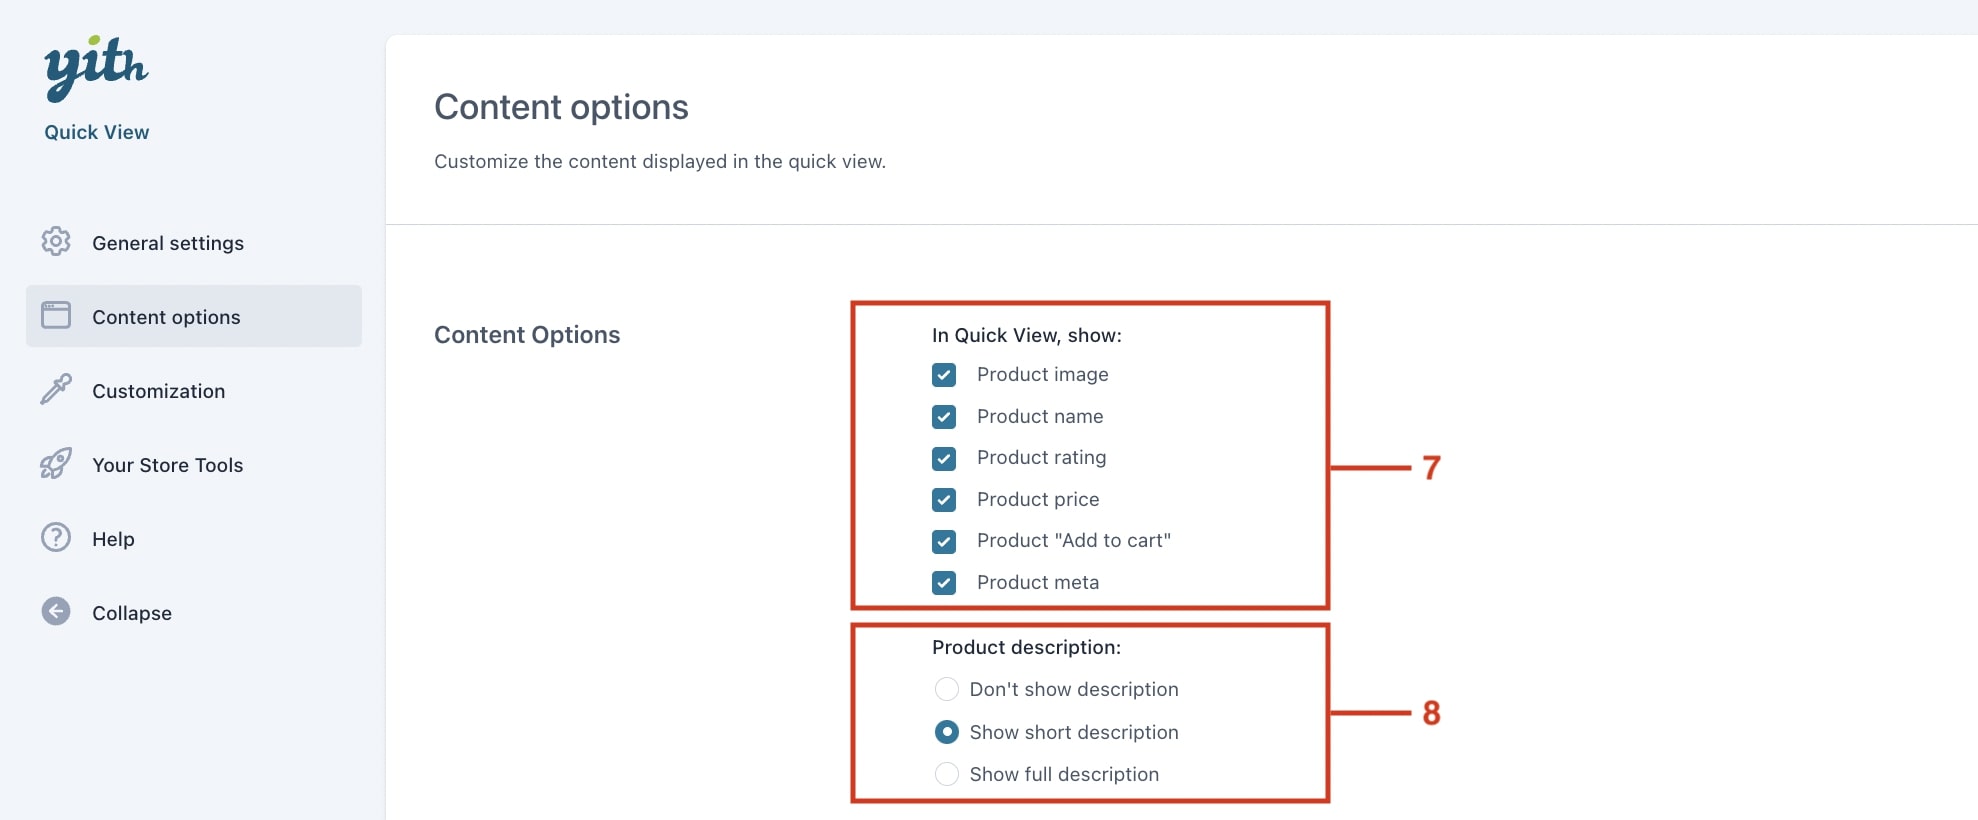
Now, customize the content inside the modal window. In Content options, choose the product information to display (7) and decide if the description should be shown (8).
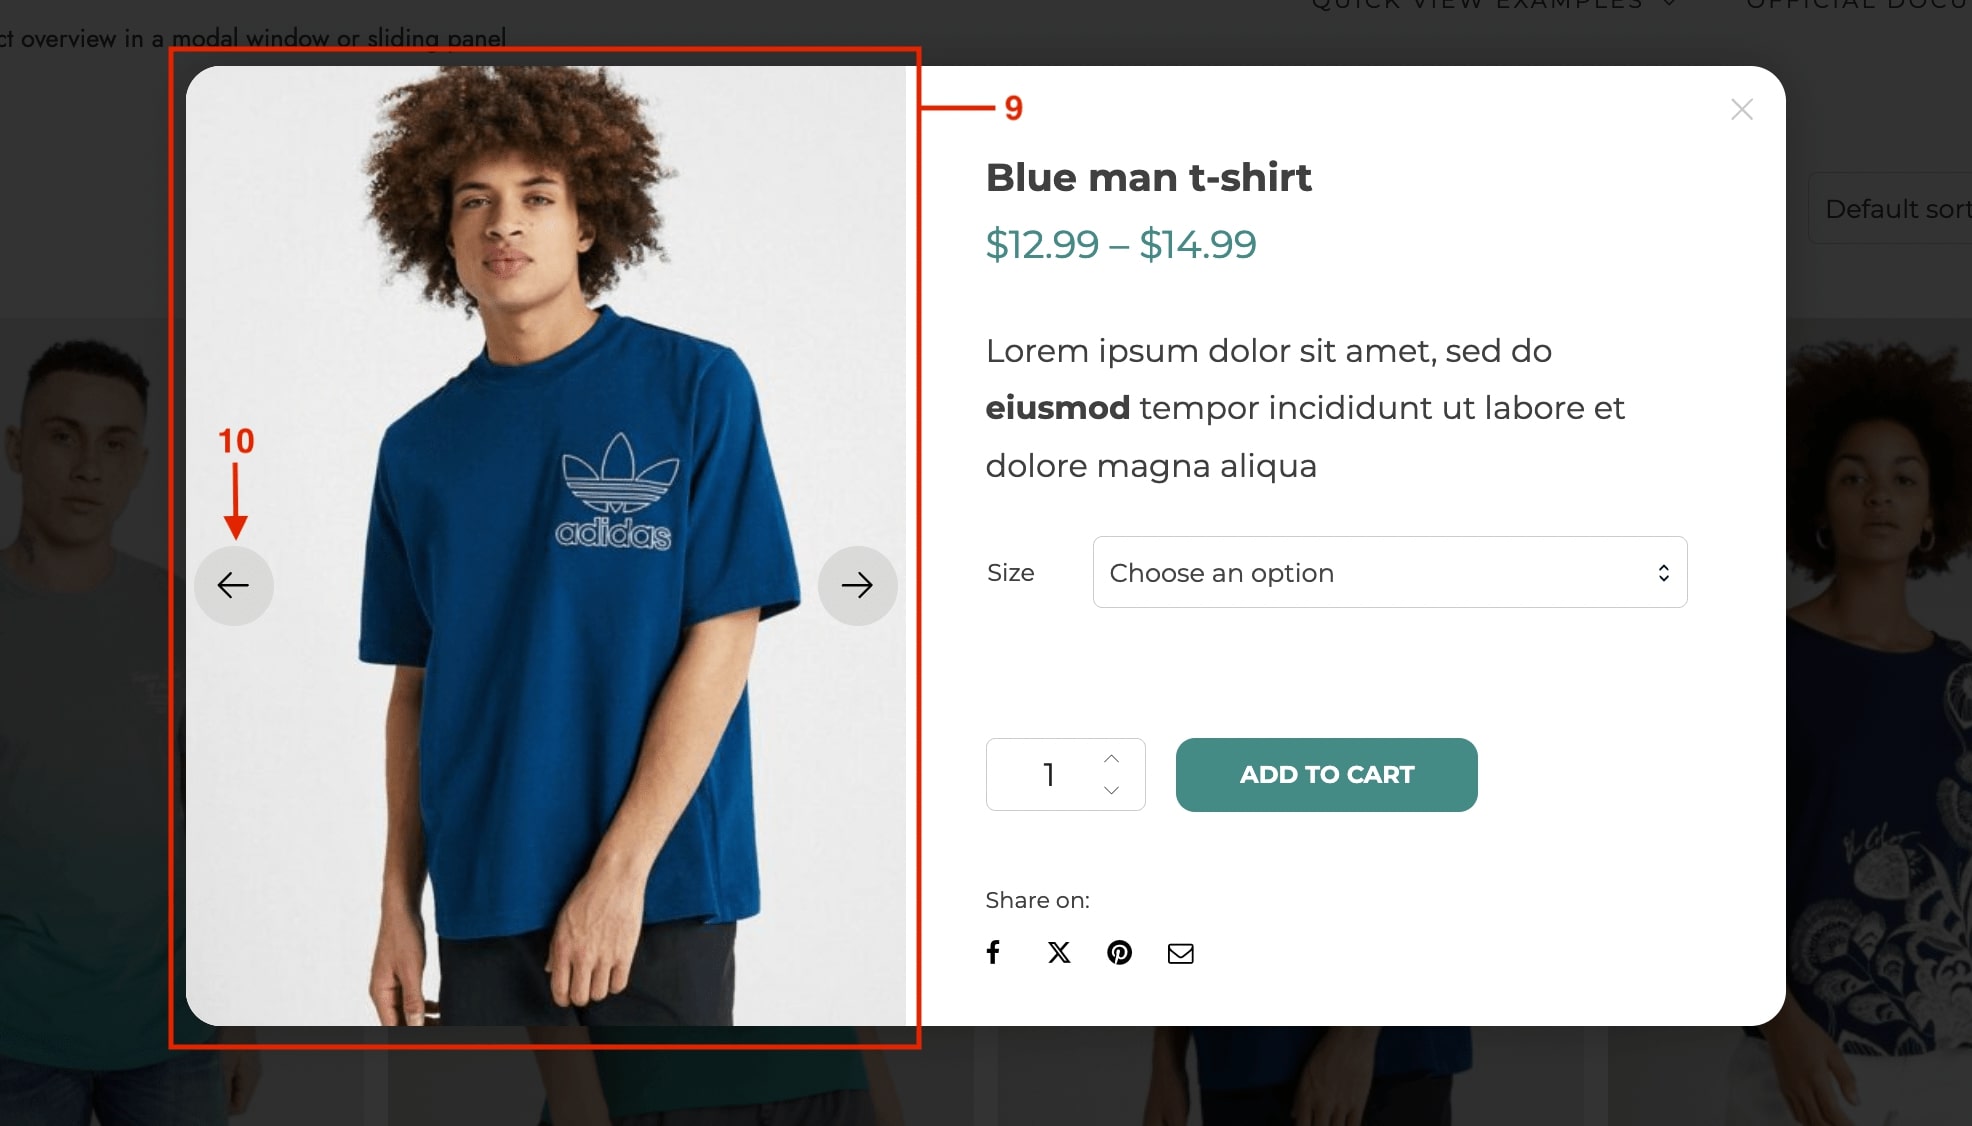
Next, customize the product image options. Start by setting the image size for the Quick View (9), then choose the thumbnail style—here, we’ll use a slider for the image gallery with arrows always visible (10).
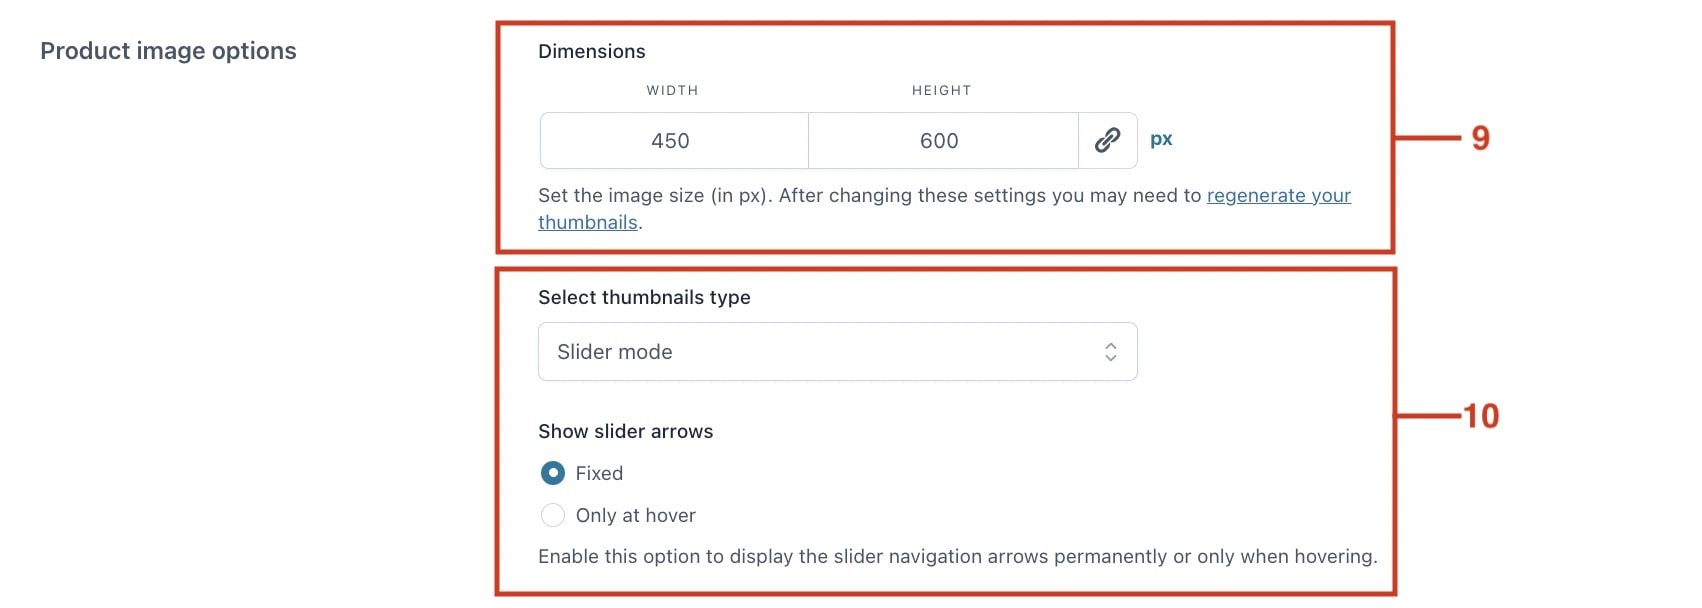
When setting the product image size, keep in mind the proportions (particularly the height) of the quick view modal window previously defined in the General options.
Step 4 — Configure “View details” and “Add to cart” buttons
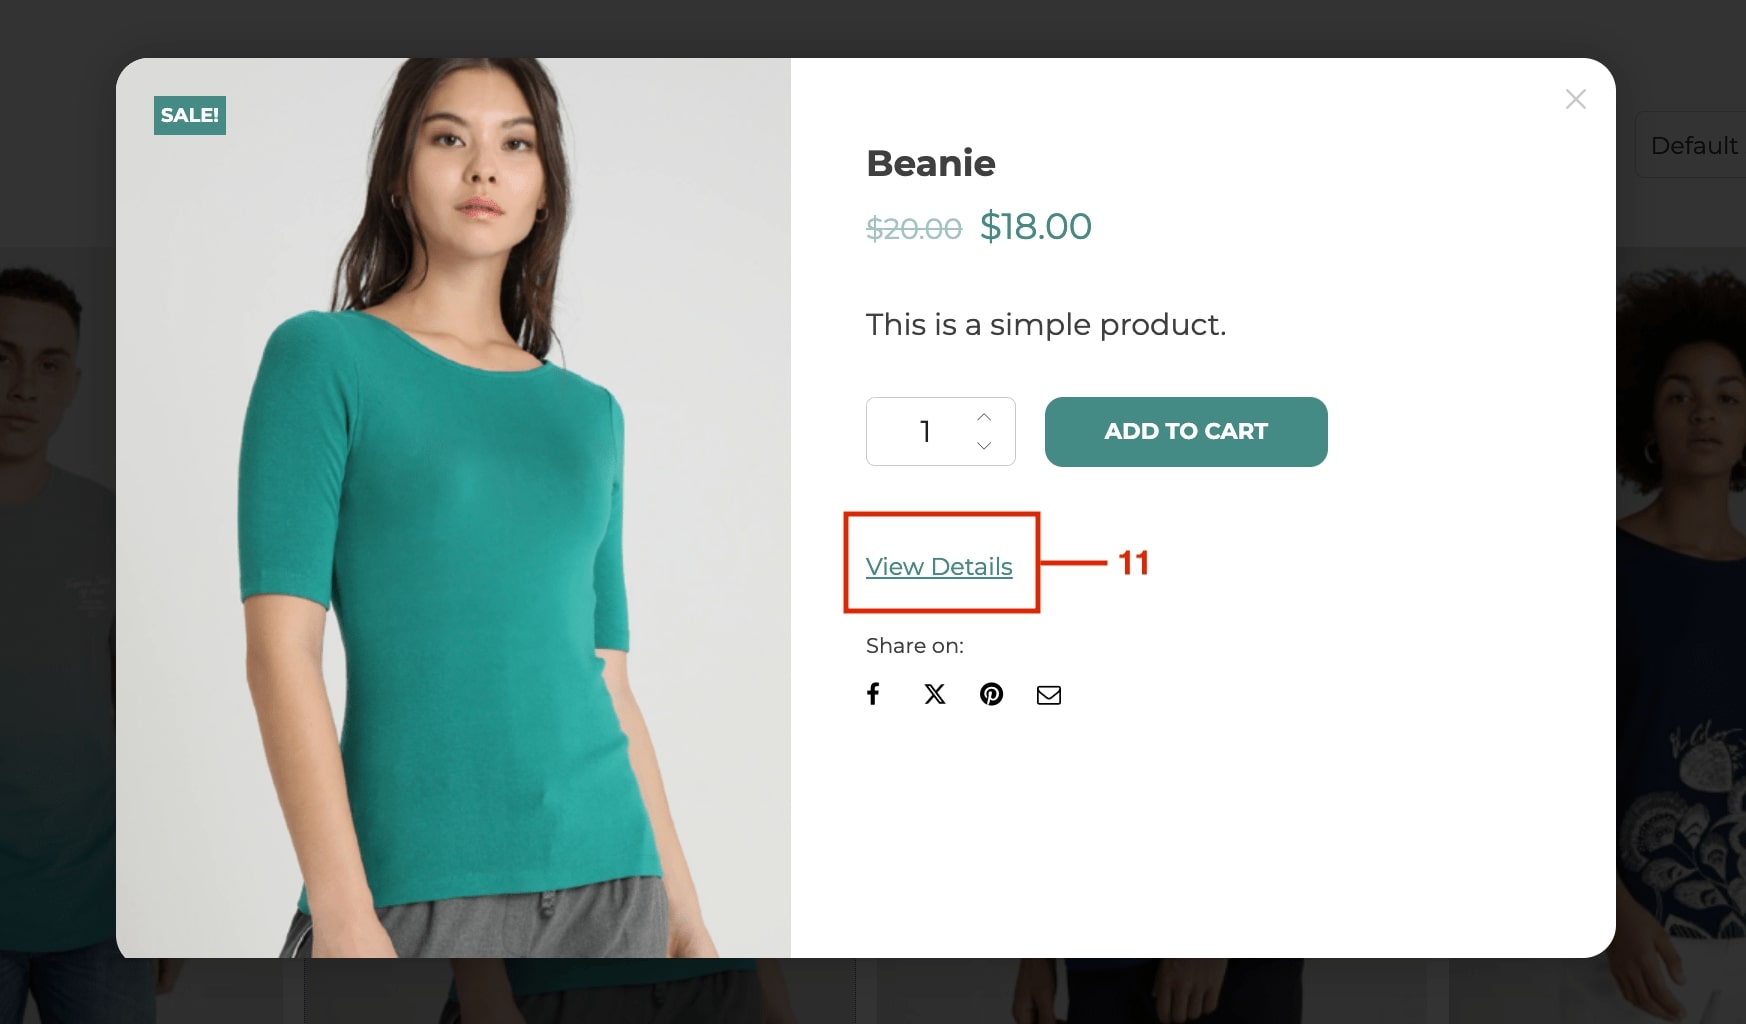
To let users access the product page from the modal window, enable the “View details” button in Button options and add a label (11).

And it will show in the popup like this:
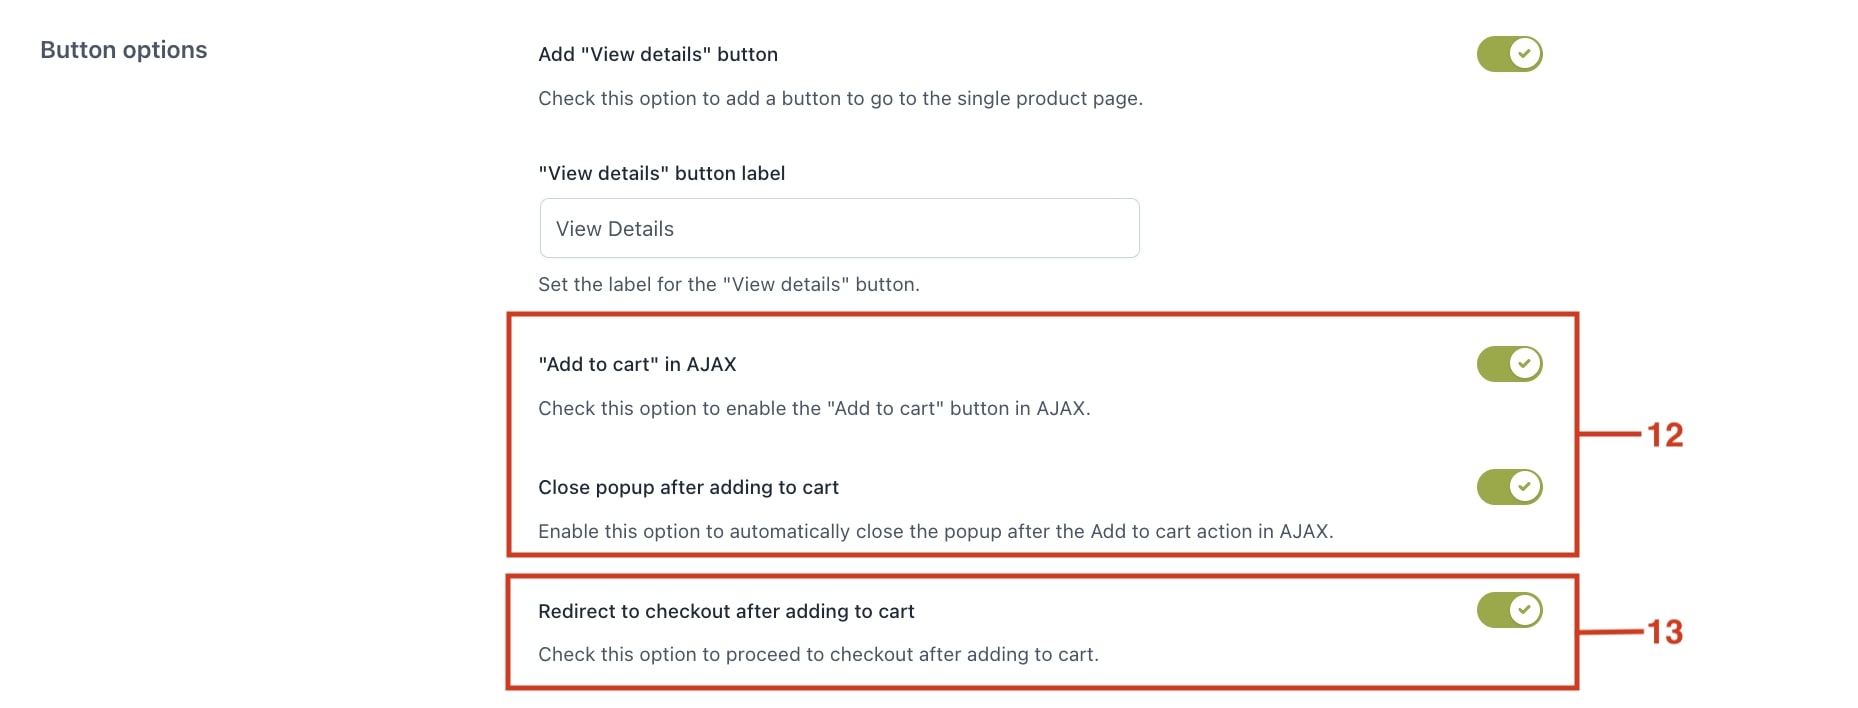
Enable the “Add to cart” in Ajax to stop the page from refreshing when a product is added to the cart. If selected, you can also set the popup to close automatically after adding an item to the cart (12).
Additionally, allow users to go directly to checkout after adding a product to the cart from the quick view (13).
Step 5 — Allow social media sharing
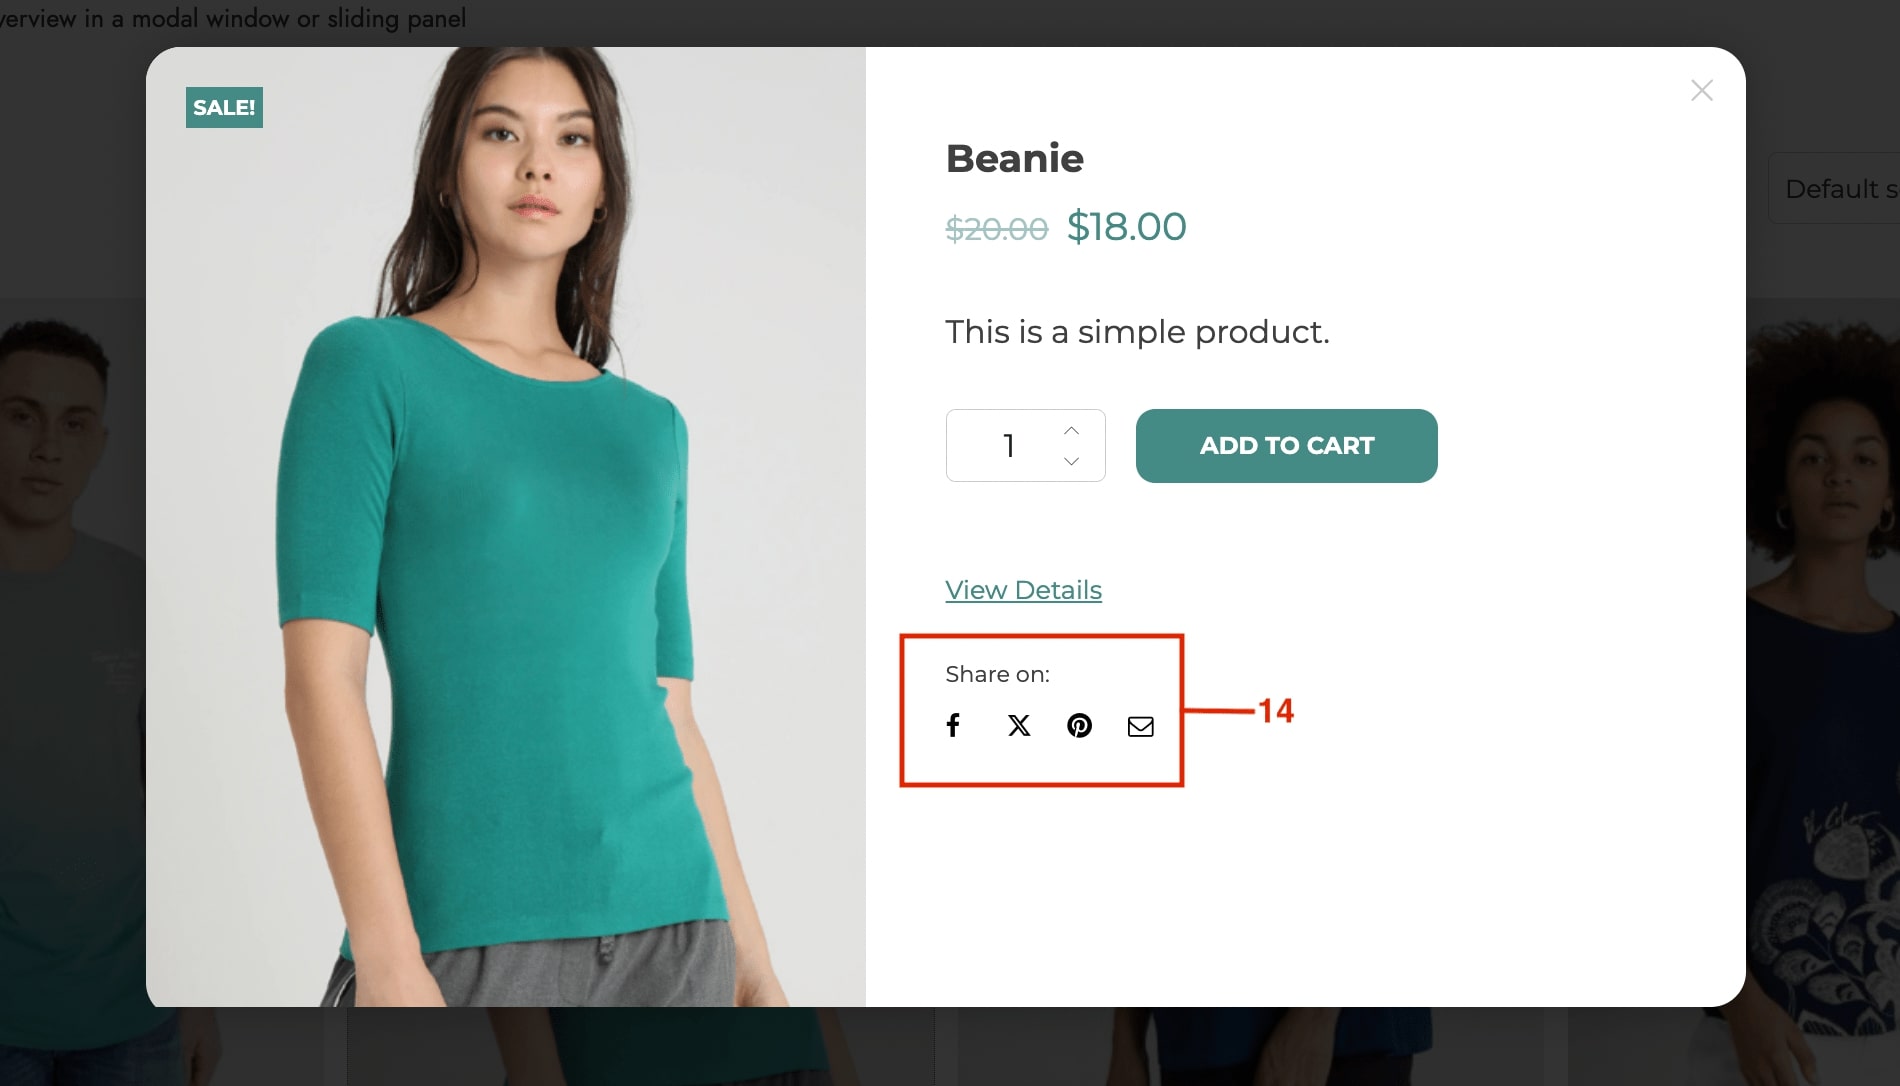
Enable the option to display a product sharing link in the quick view and select the social media platforms (14) and don’t forget to Save options:

Step 6 — Choose content colors
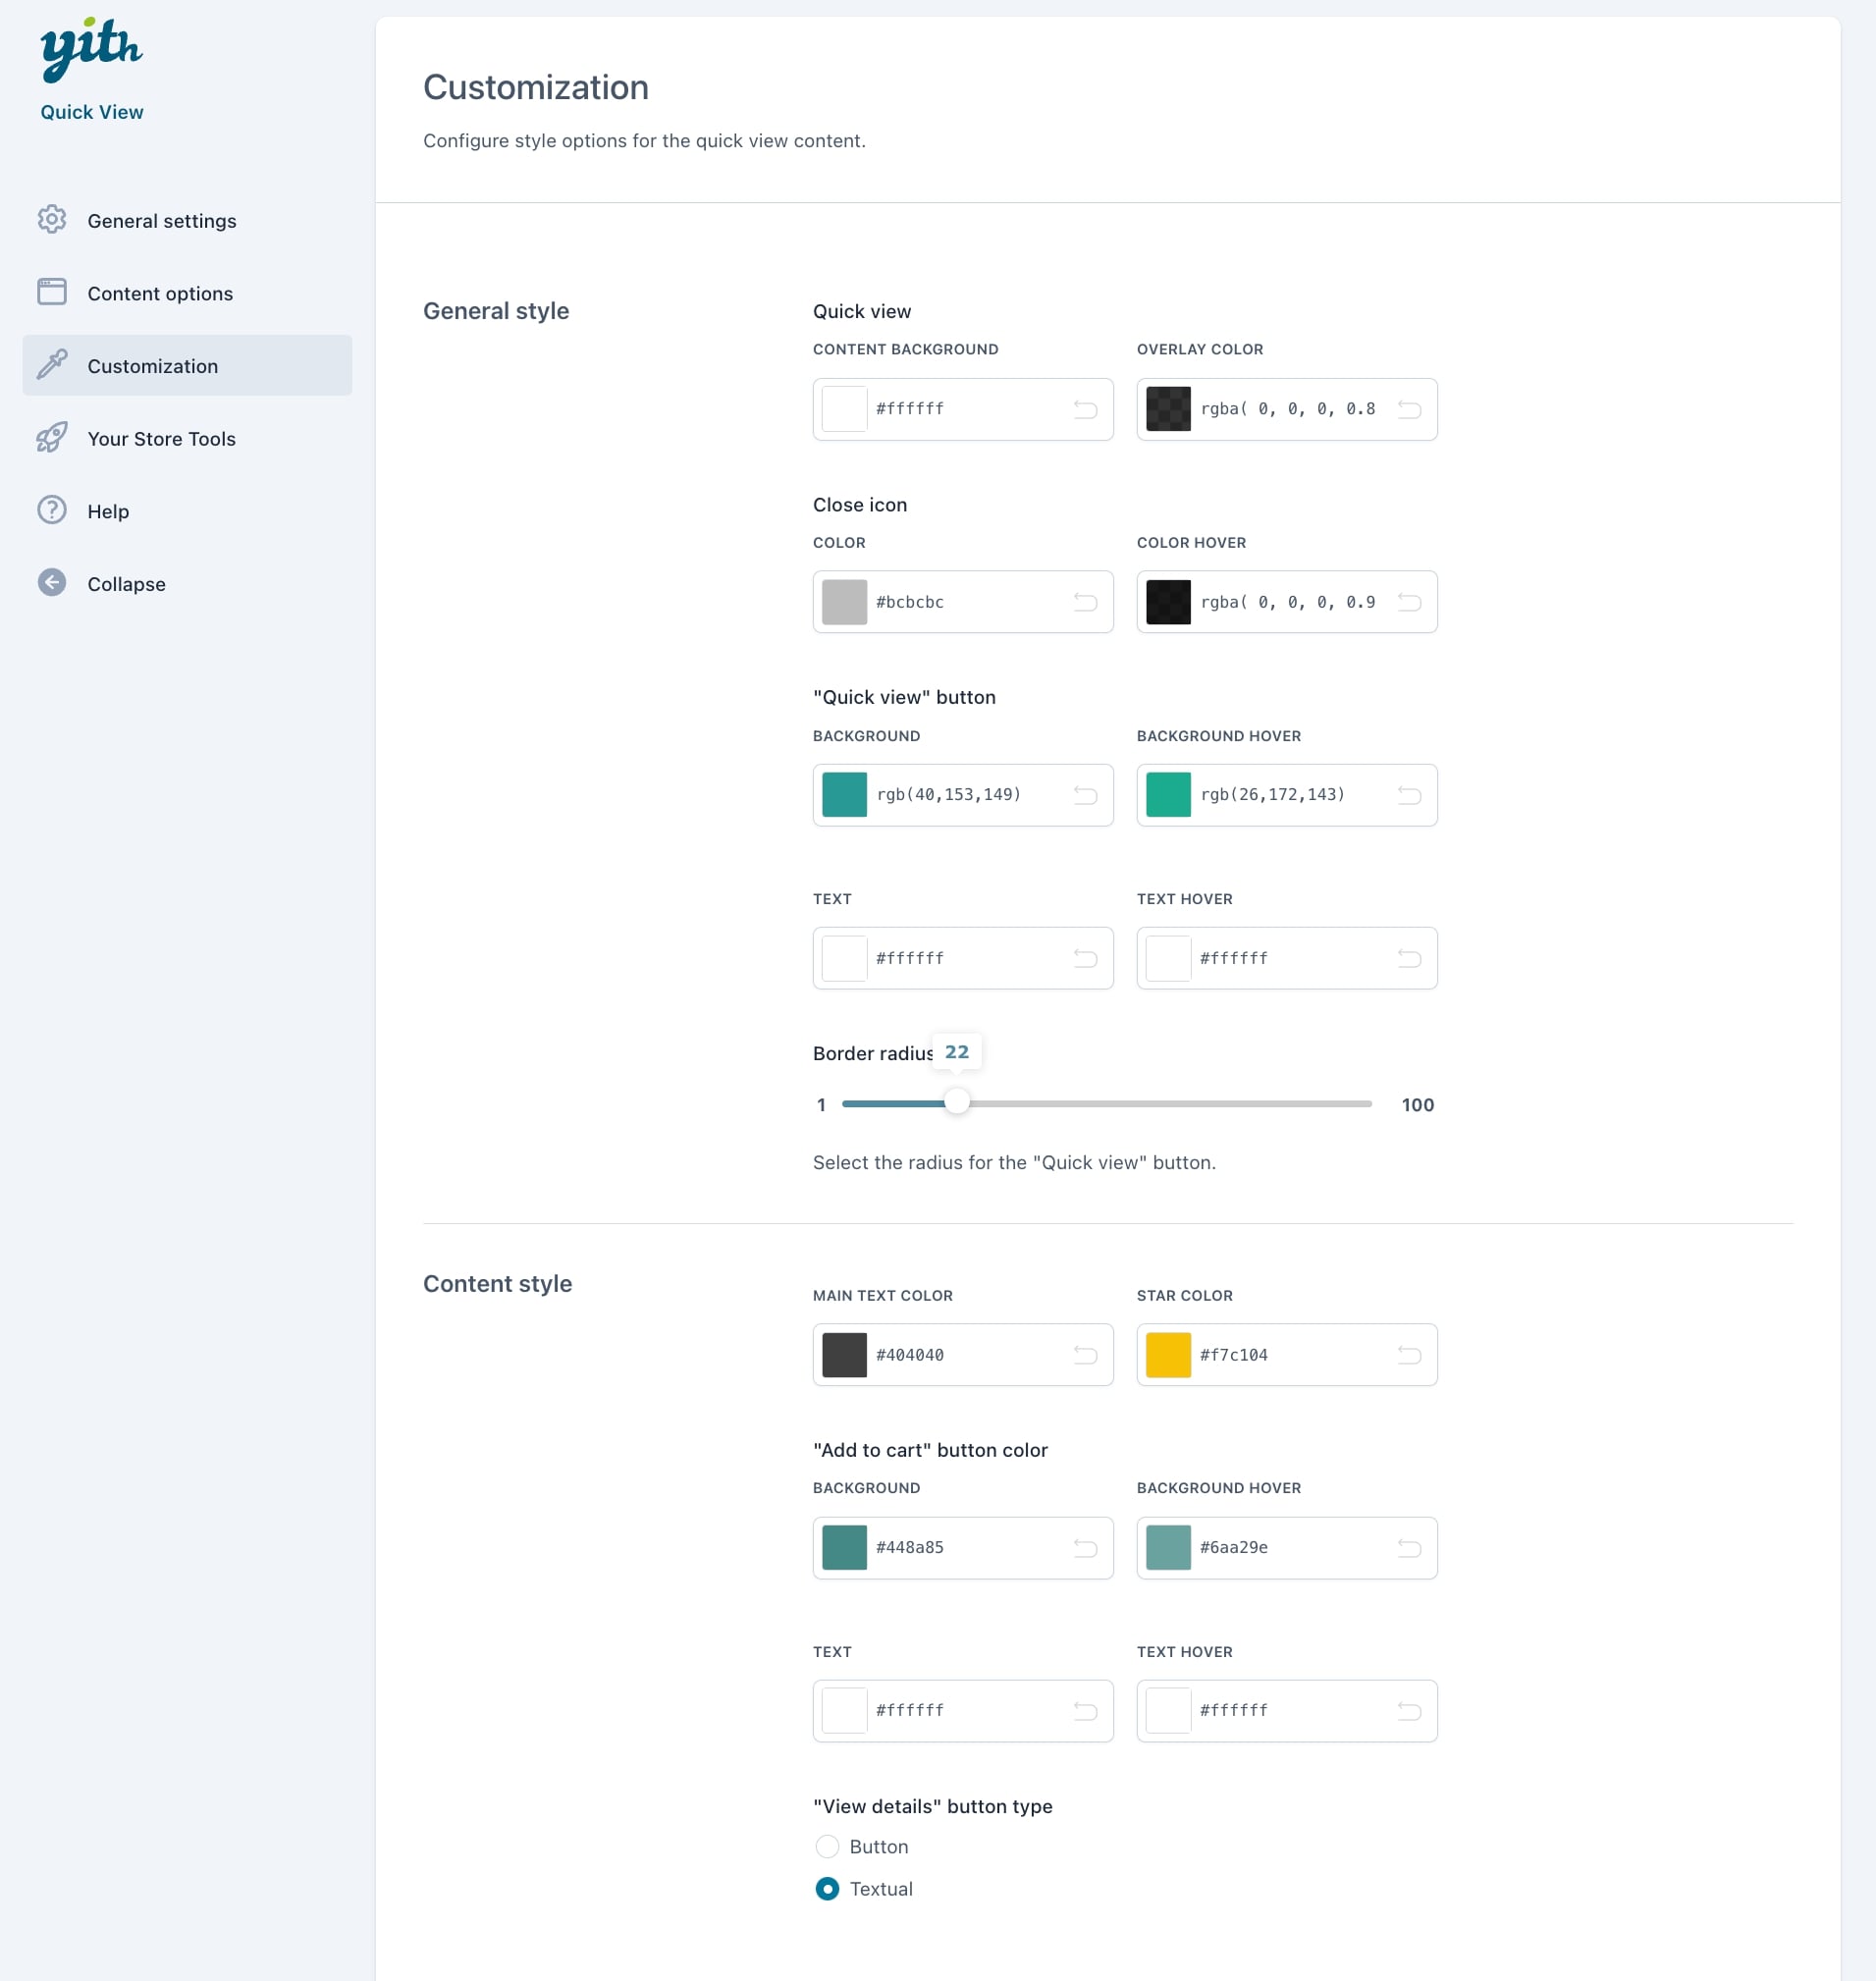
Lastly, configure the Quick view style color options for a personalized look:
And we have our Quick view button and popup options set!
