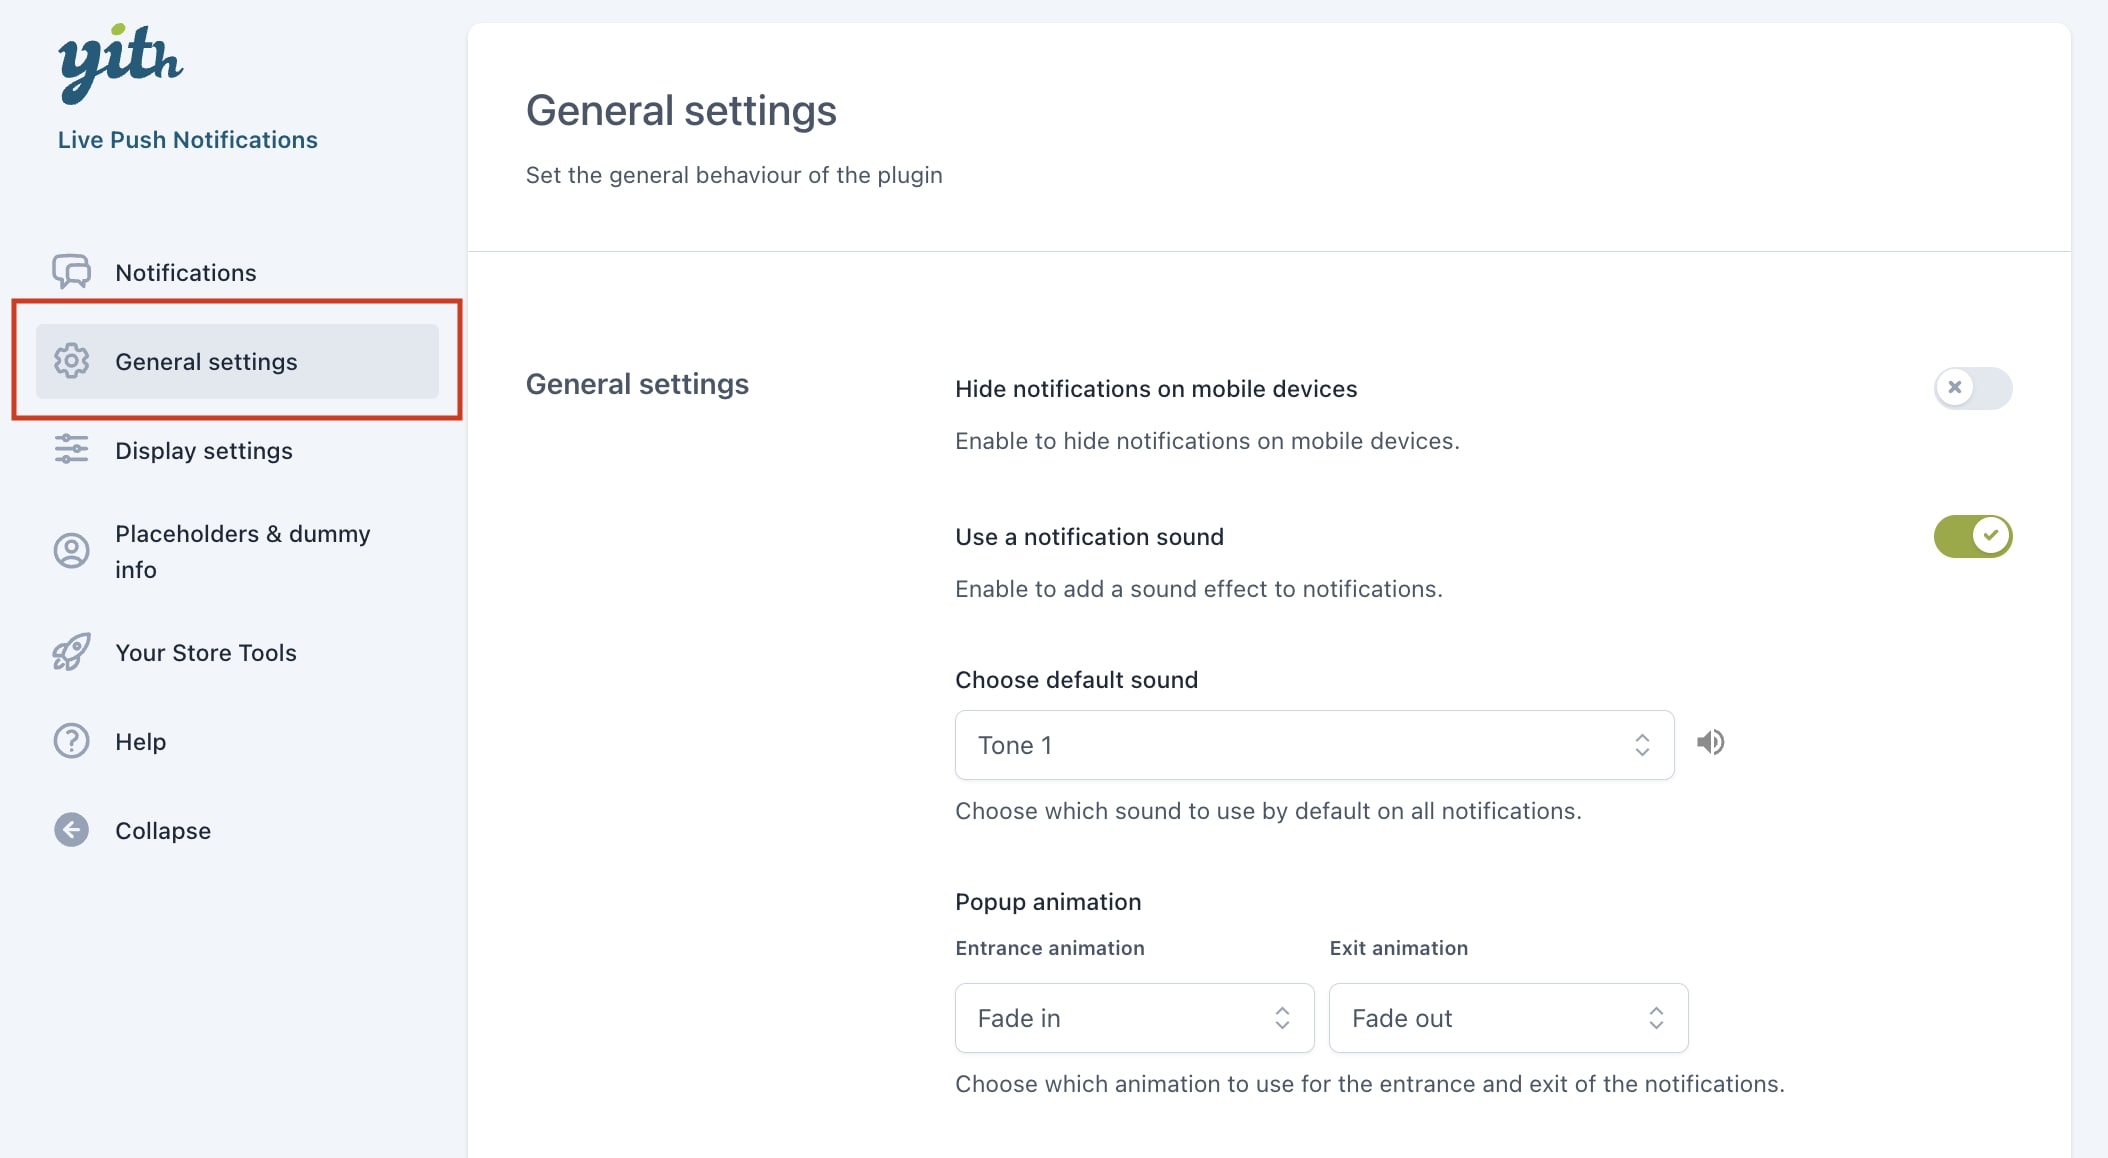
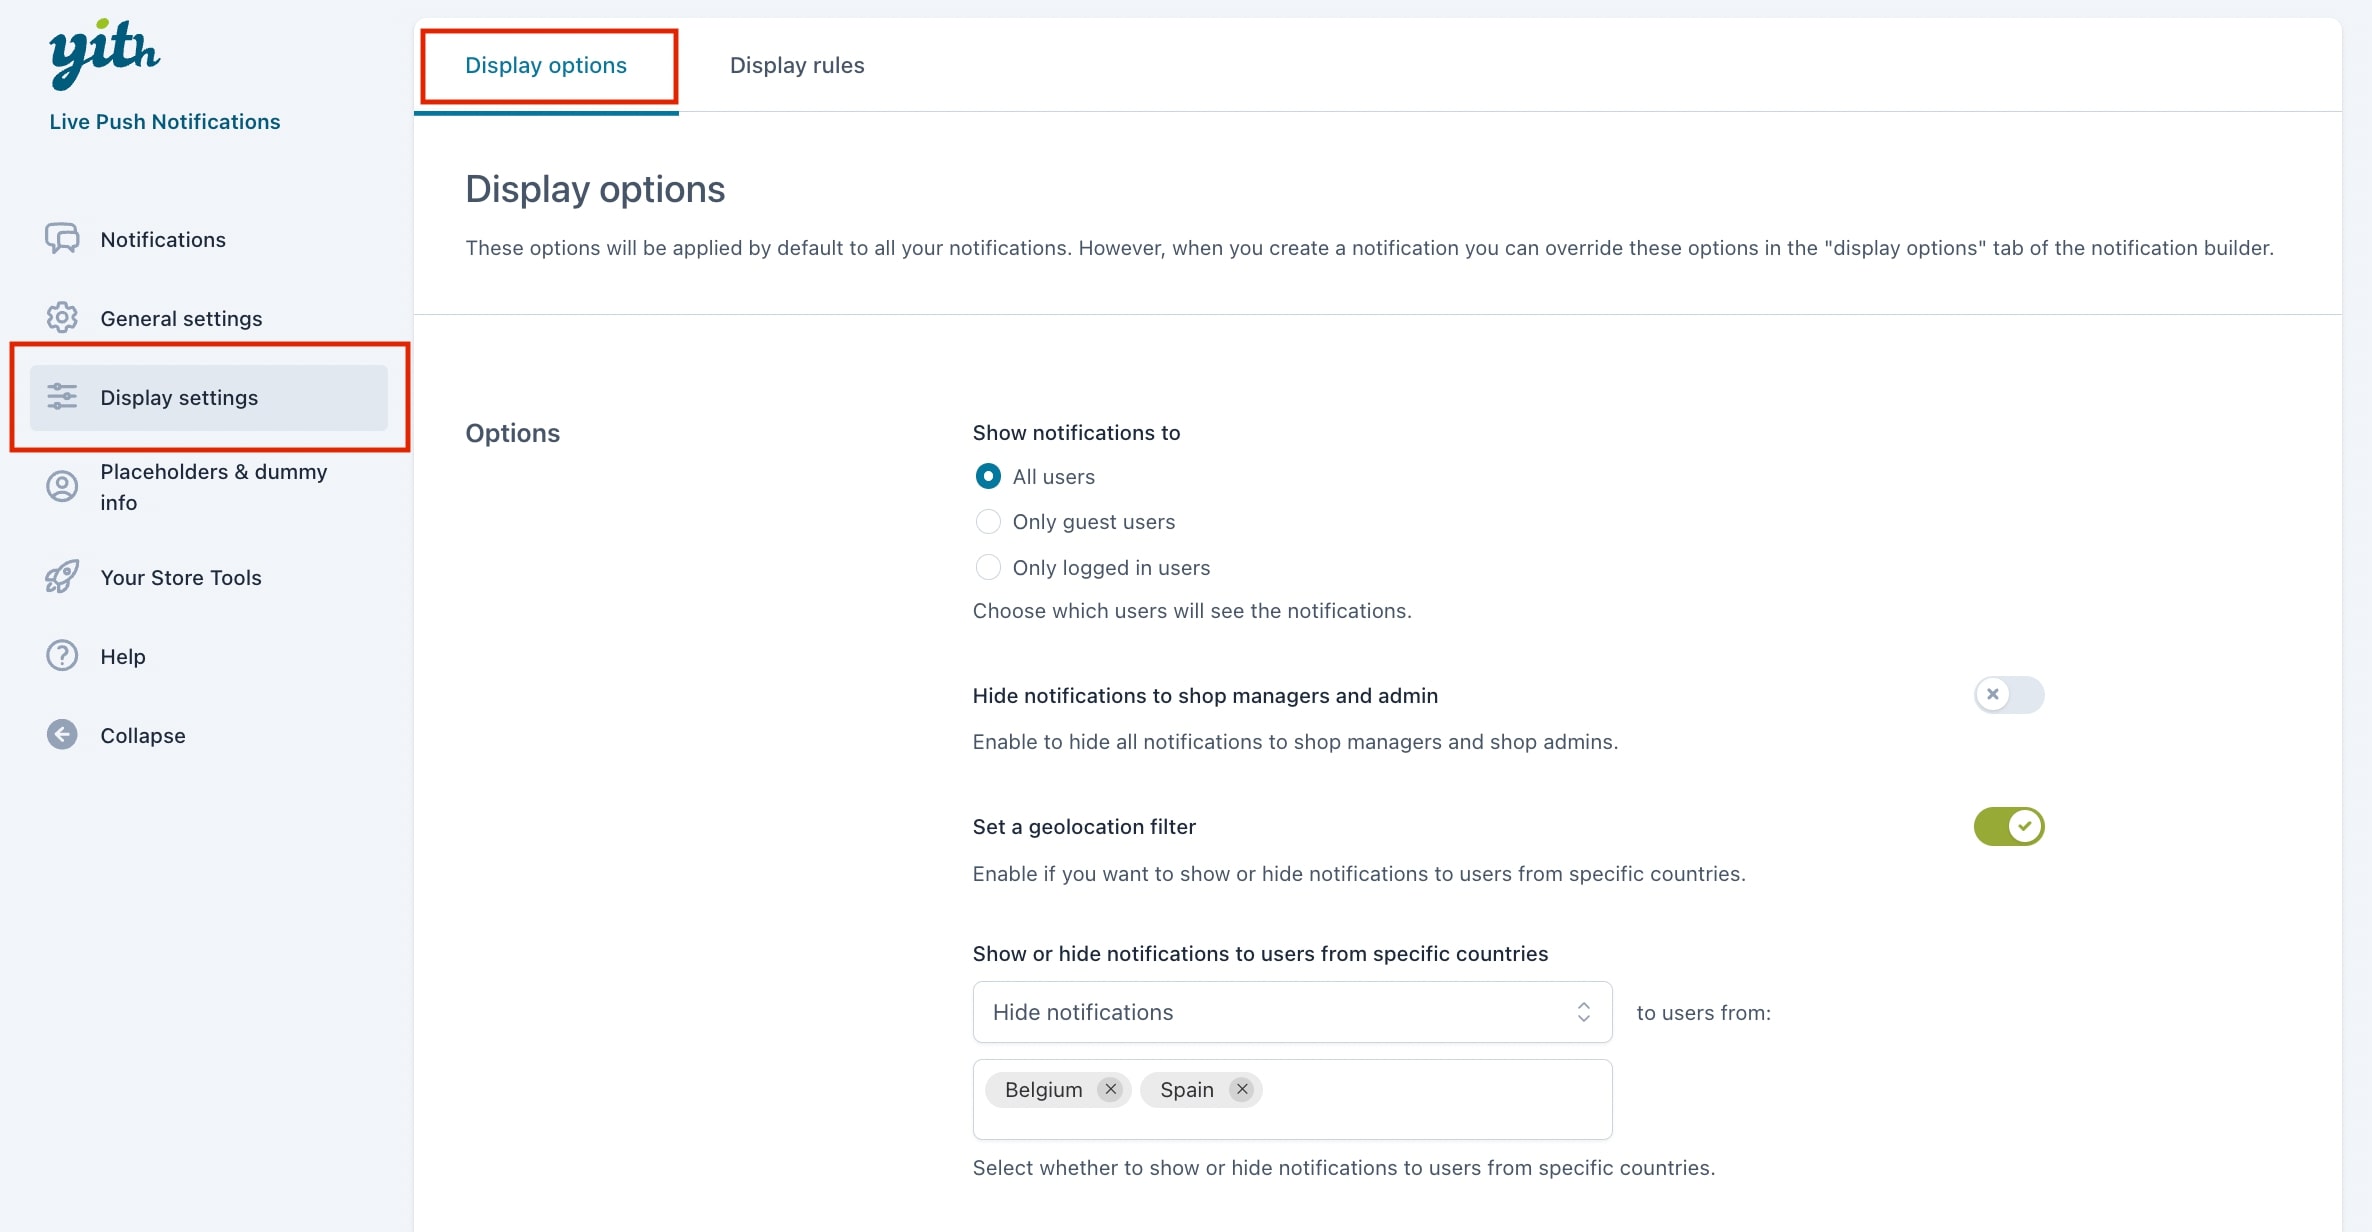
The options you see in the ‘Display options’ tab, refer to the visibility of the notification. You can override (almost) all of these settings at the notification level.
Show notification to: Decide which users see the notification, all users, only guest users or only logged-in users.
Hide notification to shop managers and admin: the shop managers and admin will not see the notifications (cannot be overridden).
Set a geolocation filter: Decide to show the notifications based on the customer’s country.
Show or hide notifications to users from specific countries: Decide to include or exclude users from specific countries.
For example, we want to hide the notifications to users from Belgium and Spain (you can override these settings from the specific notification options).
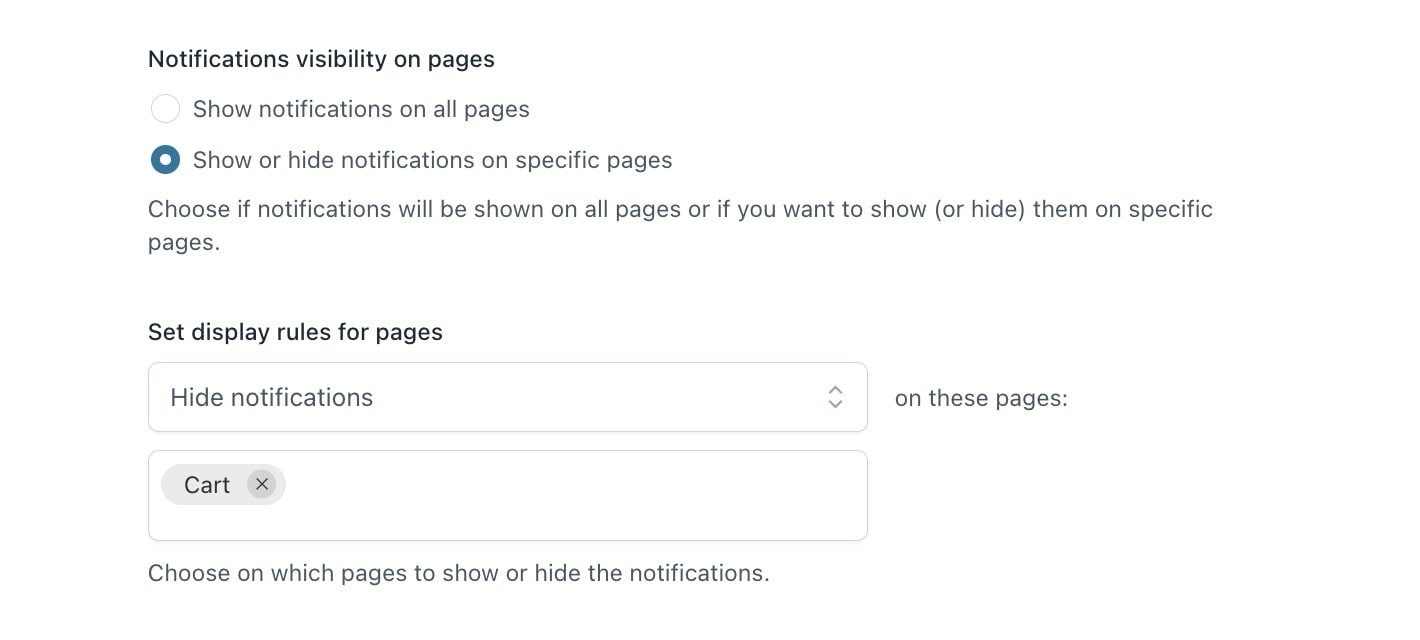
Notifications visibility on pages: Either show on all pages or only specific pages.
Decide to show or hide the notification on selected pages.
For example, we select Hide notification on these pages > Cart, so no notifications are shown on the cart page unless you override the settings on the notification level.
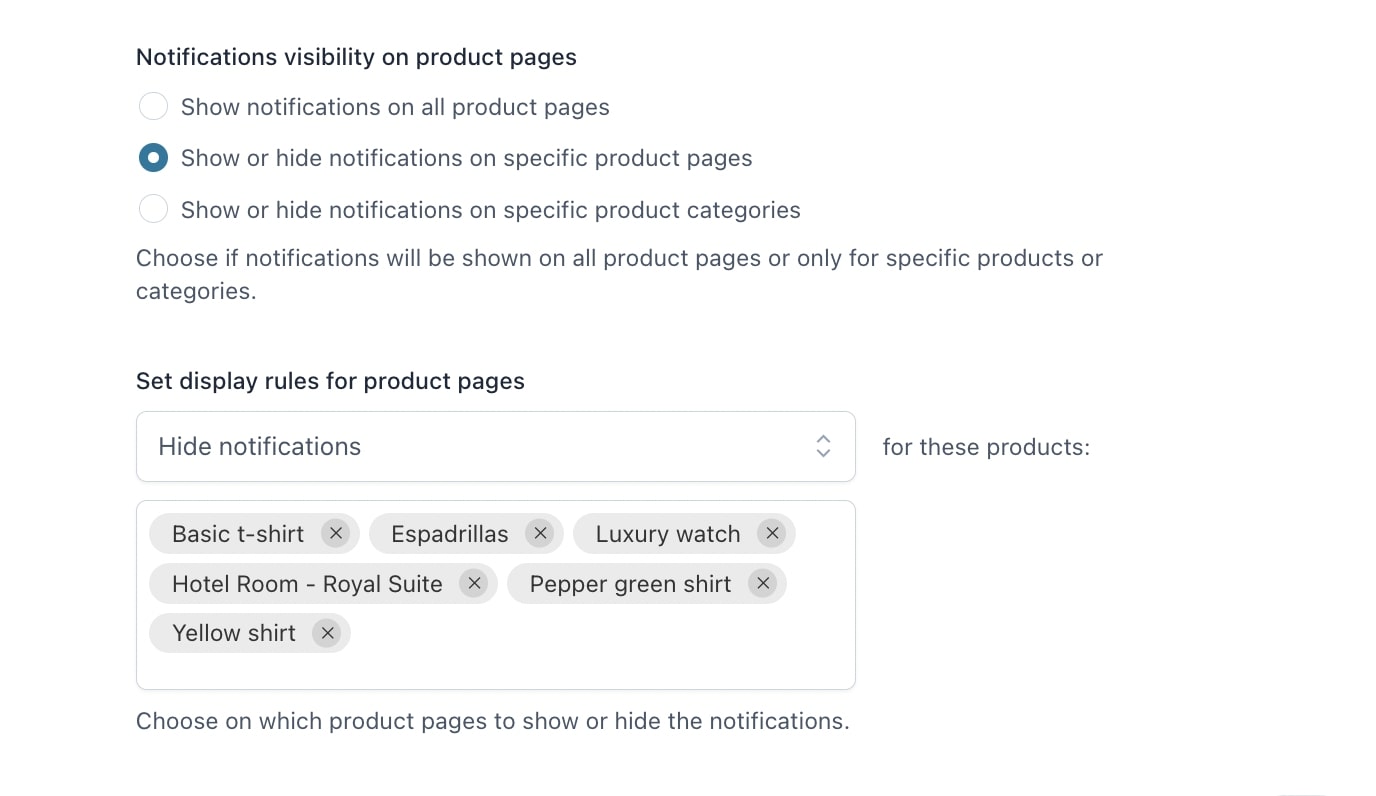
Notification visibility on product pages: Either show on all product pages, specific product pages or specific product categories.
Decide to show or hide the notification on selected products or categories.
As you can see above, we added multiple products to the list, so no notifications are shown on these product pages unless you override the settings on the notification level.
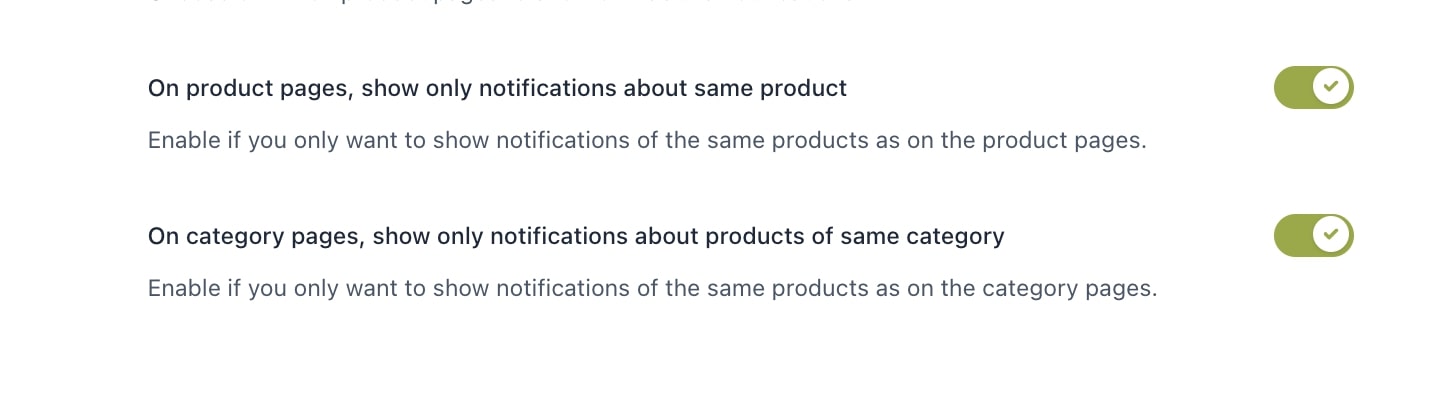
On product pages, show only notifications about same product: This only applies to counter, real- and dummy orders notifications.
For example, if you’re on the product page for a T-shirt product, you’ll only see notifications related to that product.
On category pages, show only notifications about products of same category: This only applies to counter, real- and dummy orders notifications.
For example, if you are on a ‘Clothes’ category page, you will only see notifications related to the products belonging to this category.
From the ‘Display rules’ tab you can manage the duration and interval of the notifications.
For a session duration of: xx minutes/hours show max xx notifications.
Decide to show a specific number of notifications in a time set.
Max notifications for page: Enter the max number of notifications to show on the same page.
Example: during a time frame of 1 hour, a maximum of 10 notifications will be shown. When either the notifications or time runs out, the customer will stop seeing notifications.
When closing the web page, the settings will be restored, and the count will start again if the customer comes back.
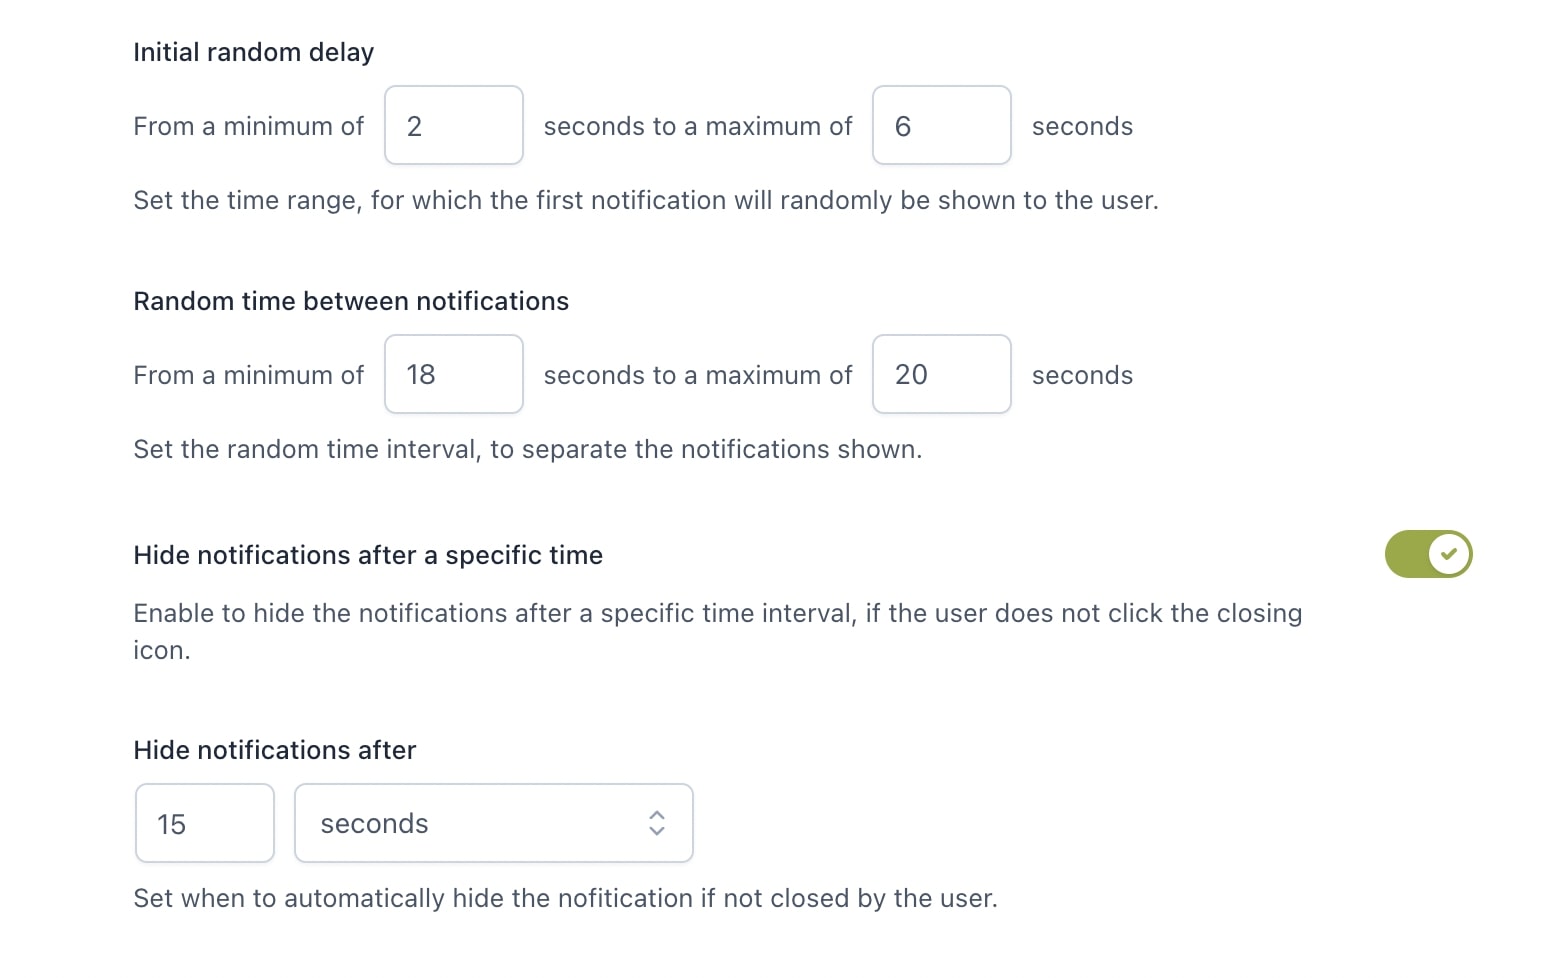
Initial random delay: Set the time interval (in seconds) to show the first notification.
Random time between notifications: Set the time interval (in seconds) to show the next notification.
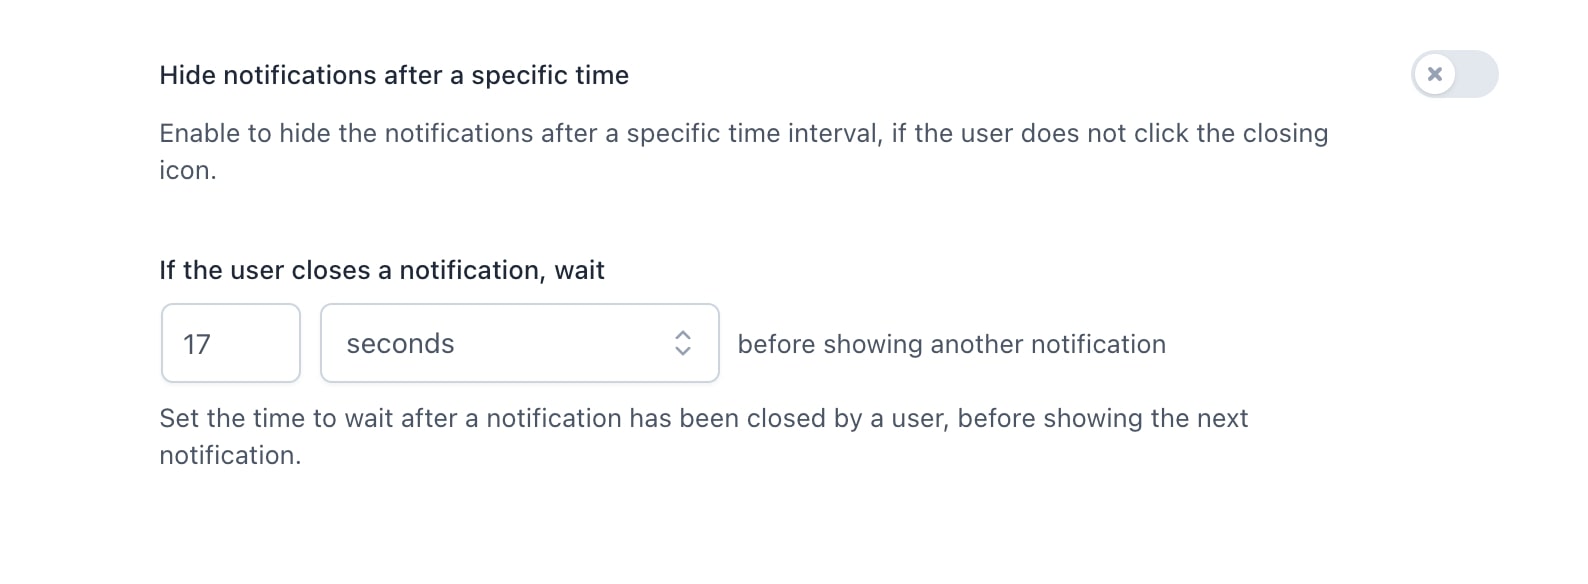
Hide notifications after a specific time: Decide if the notifications will close automatically.
Hide notifications after: Define the number of seconds or minutes.
Example: A client comes in and after 25 seconds he will see the first notification (set between 10 – 40 seconds). This notification will close by itself after 15 seconds. It takes 12 seconds for the customer to see the next notification (set between 10 – 20 seconds). It will be closed automatically and the process repeats itself with another random interval.
If you decide not to auto-close the notification, the customer will have to close it himself. In that case, the next notification will be shown after a fixed time.
If the user closes a notification, wait: xx number of seconds or minutes before another notification is shown.
In the Placeholders & Dummy info tab you can manage specific settings for placeholders and dummy orders that are used in notifications.
Dummy settings
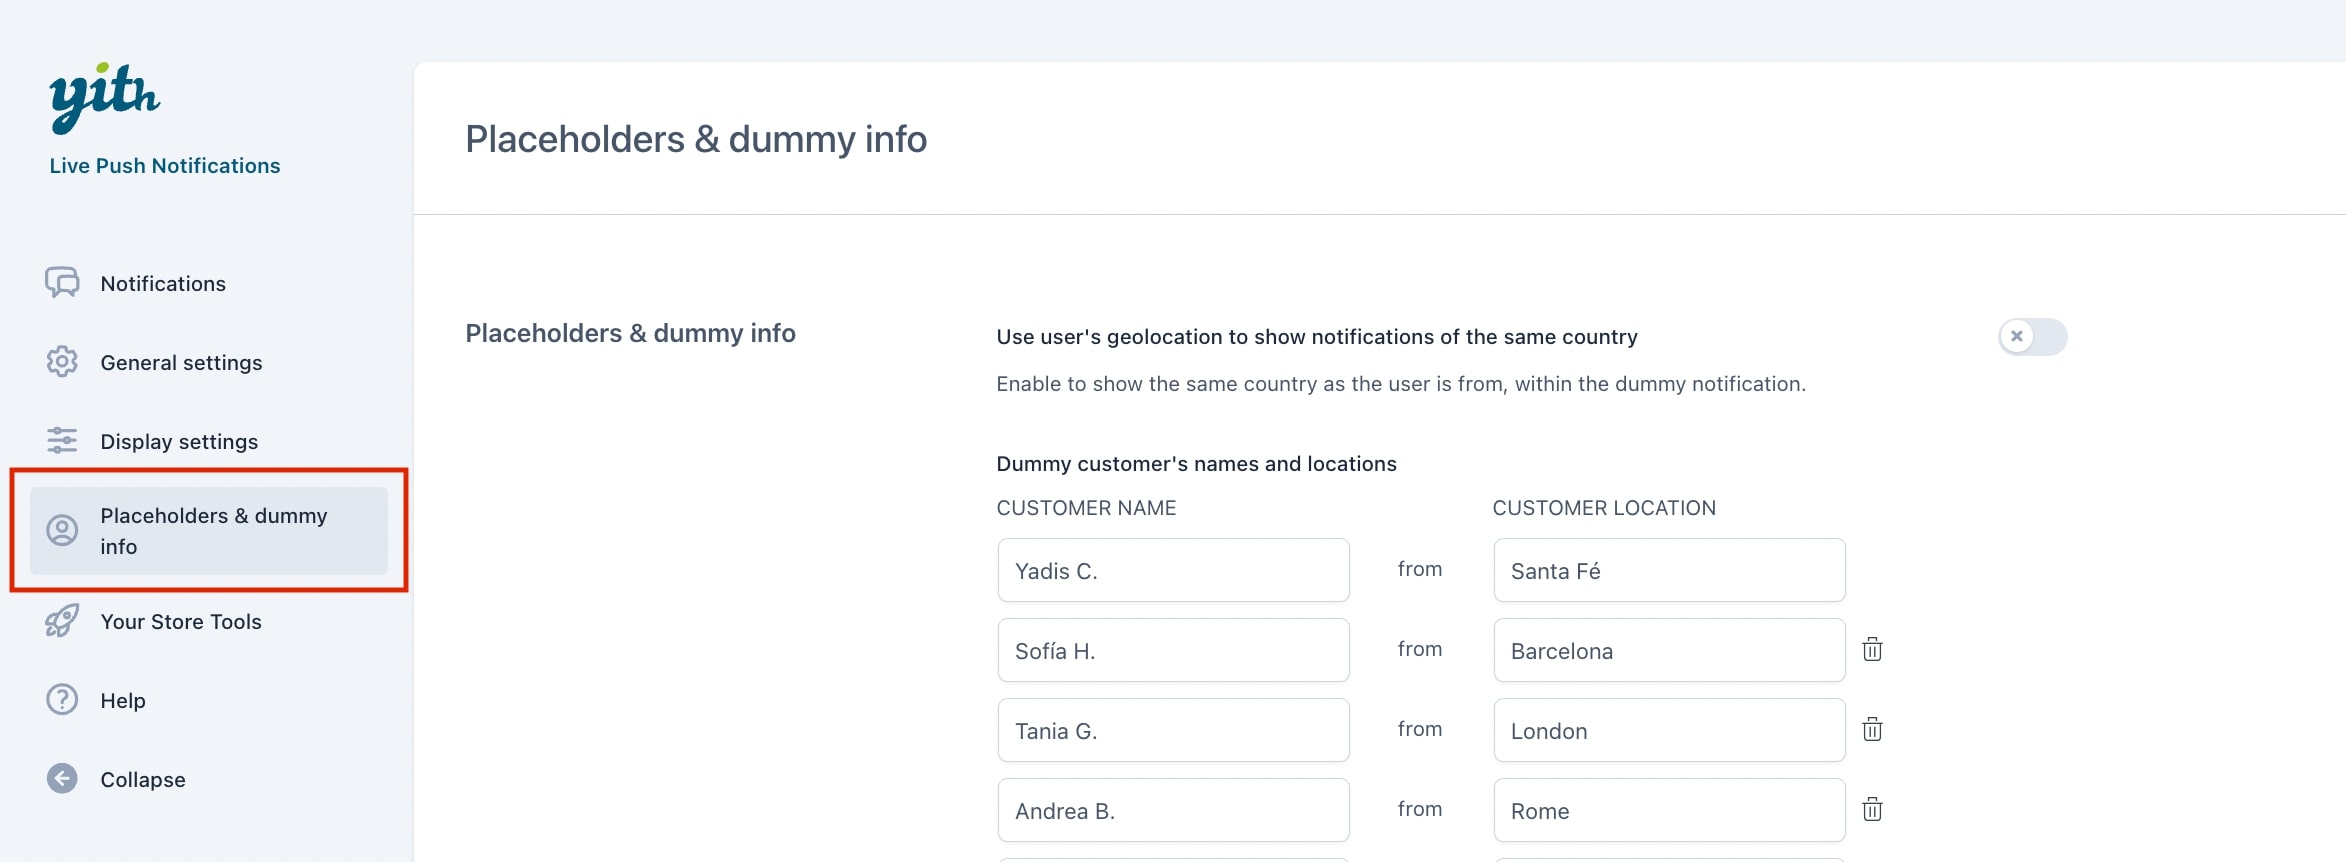
The first settings you see in the ‘Placeholders & Dummy info’ tab, refer to the dummy settings. You can decide whether to use or not use the user’s geolocation to show notifications of the same country.
USER geolocation ENABLED
Dummy customer’s names and locations: Here you can write a list of names of random ‘dummy’ customers that will appear only on dummy order notifications.
If we activate the geolocation, the user will see the name of the ‘dummy’ customer and the same country they are in. For example, I am from Spain and I am checking out the webpage, so I will see “John Doe from Spain has just purchased xx”, since it automatically takes my location.
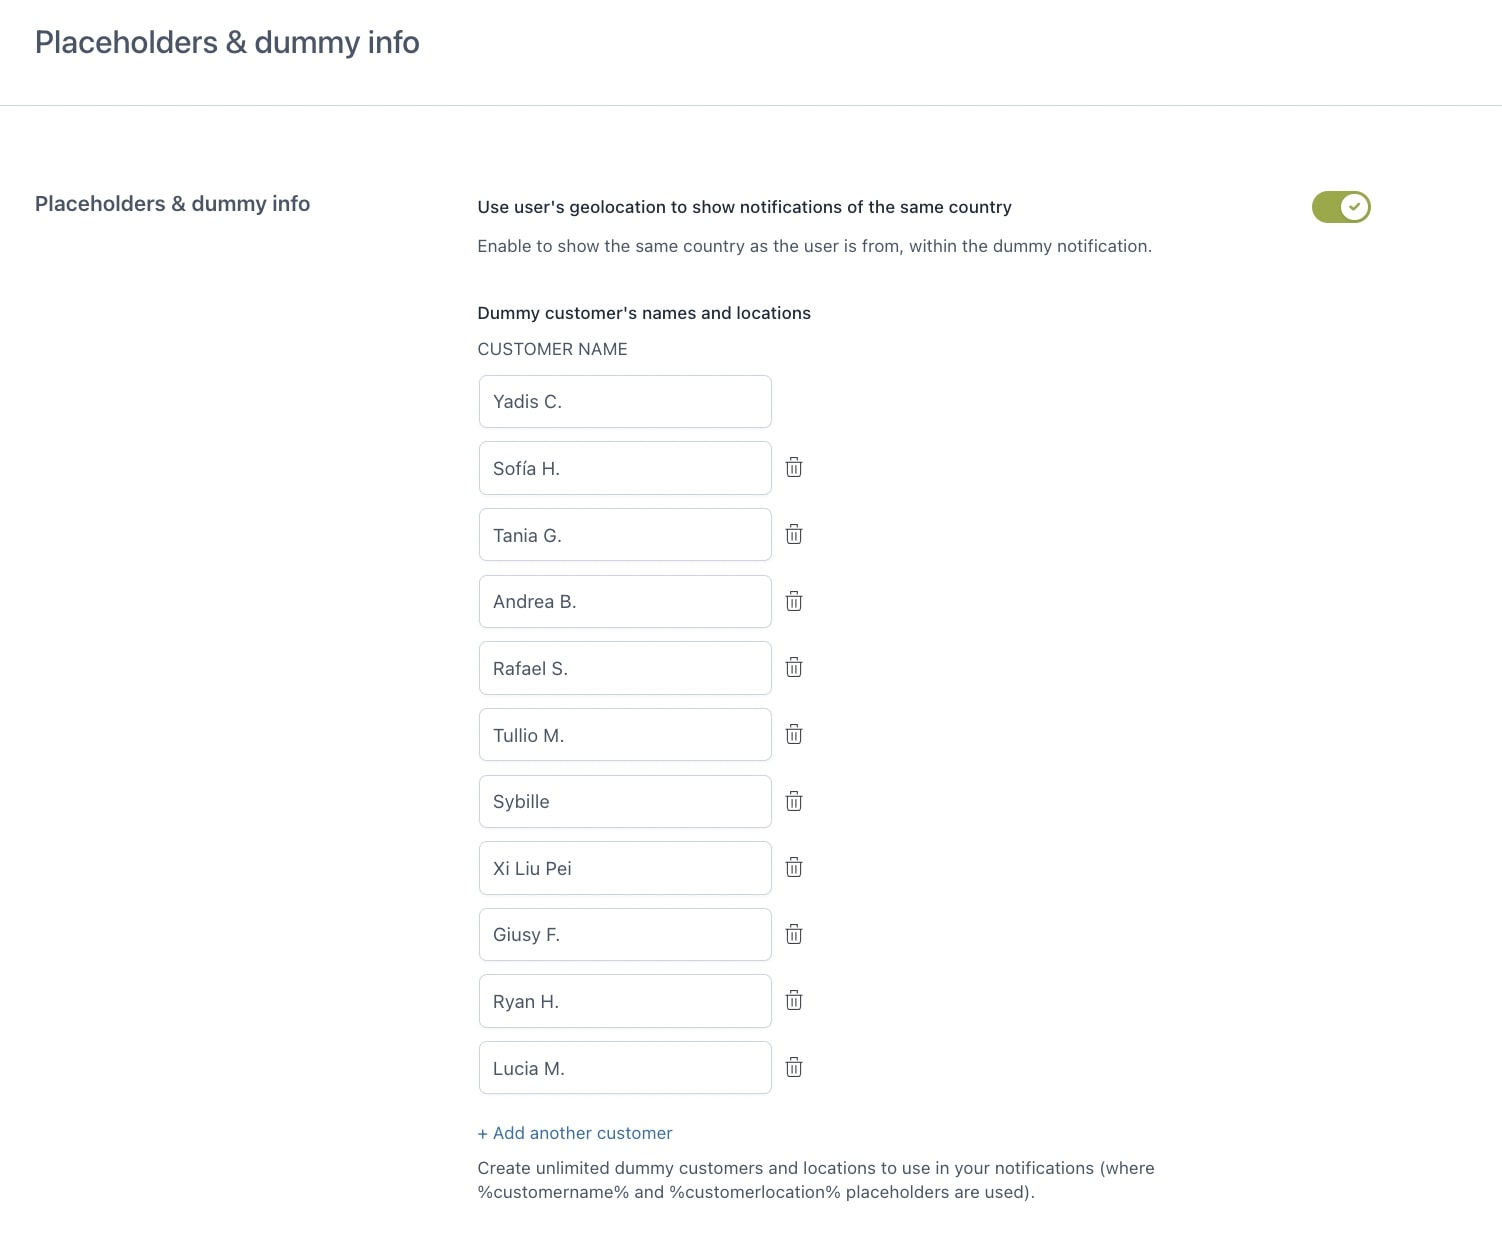
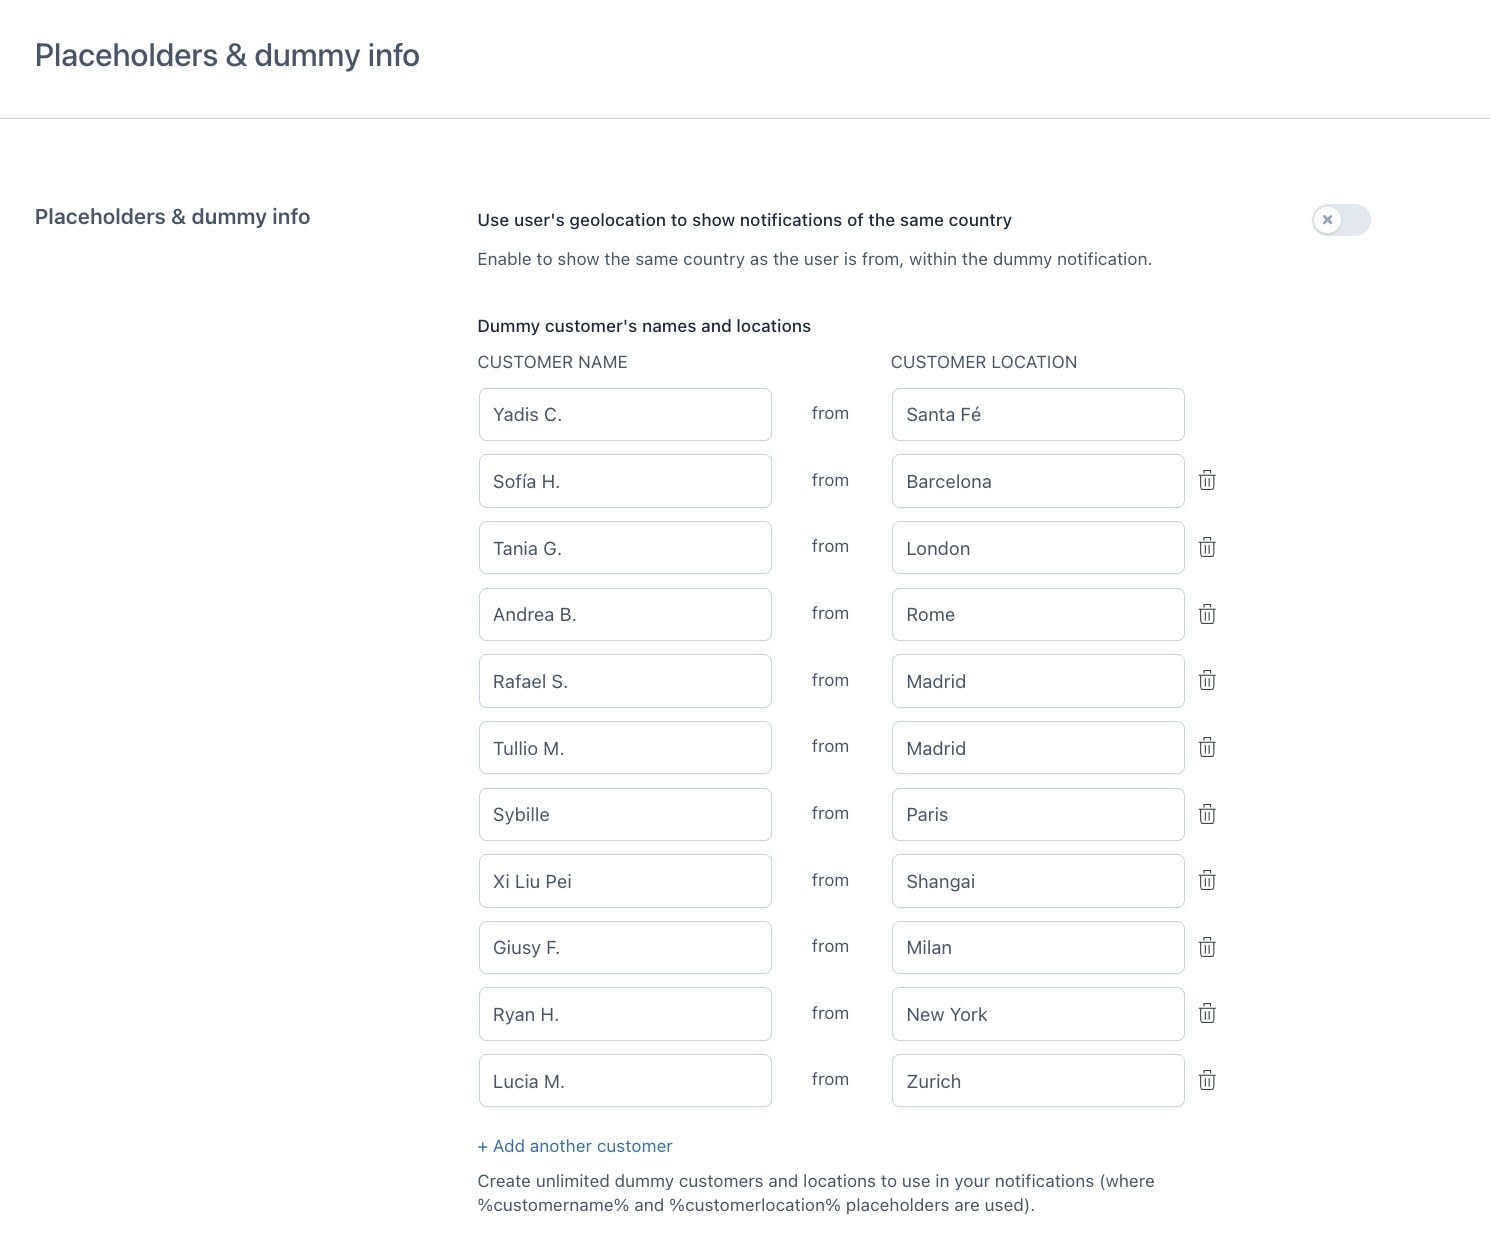
USER geolocation DISABLED
When you decide not to use the geolocation of the user, the page looks different.
Dummy customer’s names and locations: Here you can write both the name and country/city of the ‘dummy’ customer, which will appear only on dummy order notifications.
When the geolocation is deactivated, regardless of the place I’m currently in, I will randomly see names and countries/cities of different people. “Yadis from Santa Fe purchased xx” or “Rafael from Madrid purchased xx”.
The user names will be shown randomly, the plugin does not follow any order. You need to enter the names (and locations) one by one, it is not possible to bulk-import names and locations.
Placeholder settings
On the bottom part of the ‘Placeholders & Dummy info’ tab, you can manage the placeholders that are used in some notifications.
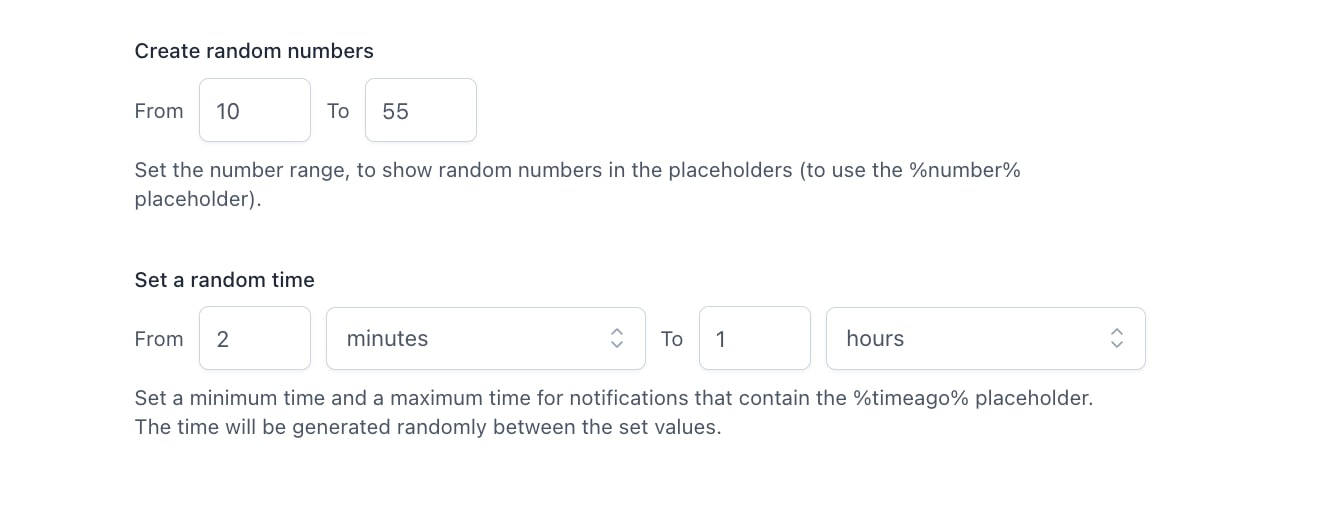
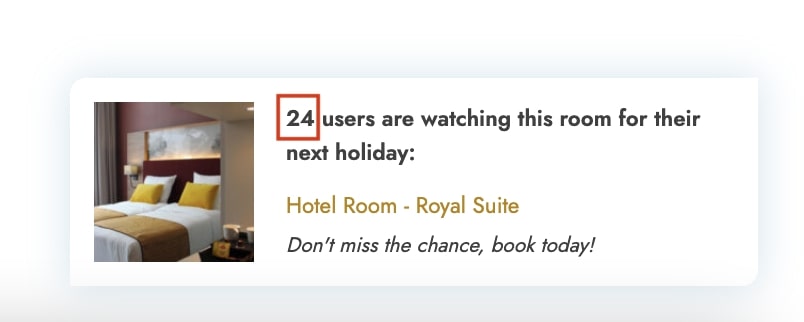
Create random numbers: enter a quantity from xx and to xx. This is the setting for the placeholder %number% in the ‘Counter‘ notification.
A random number between 10 and 55 will be shown in the counter notification.
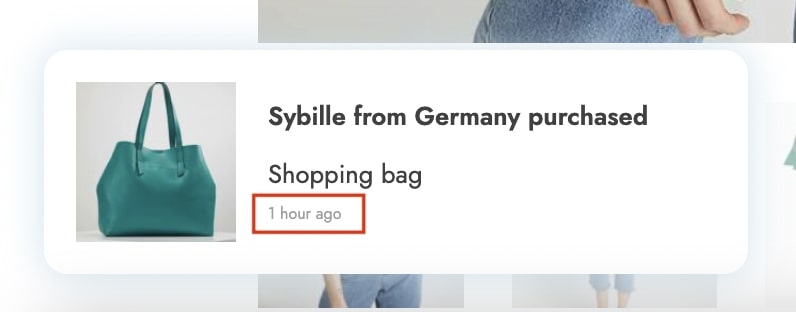
Set a random time: This time frame is used to show in the dummy order notifications. You can choose between minutes, hours and days. This is the setting for the placeholder %timeago% in ‘Dummy orders’ notification.
It will randomly show all purchases (of dummy orders) between that time frame, “Sybille from Germany has purchased xx product 1 hour ago”.
You will find the available placeholders for each notification in the text editor from the Content options (for more information about it, please, refer to this page on how to configure a notification).