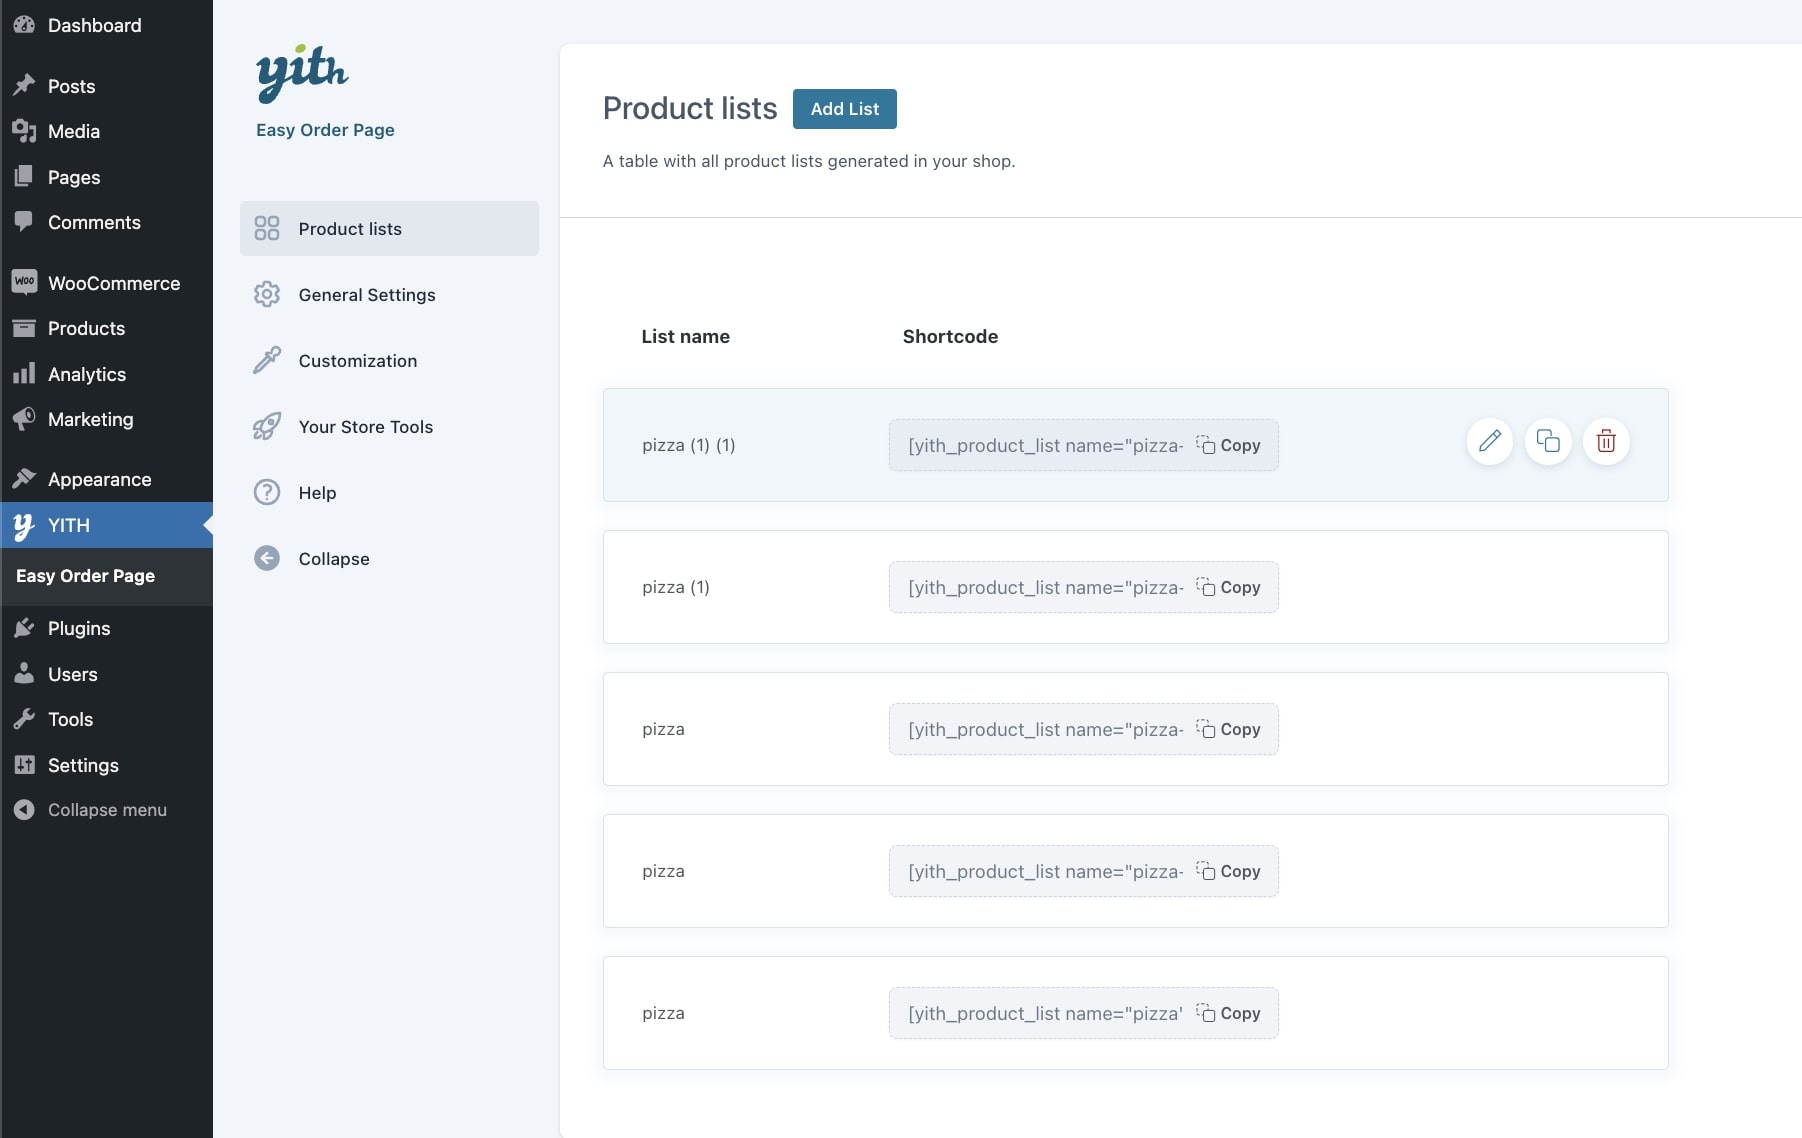
To start configuring your lists of products, let’s go to the plugin settings panel at YITH > Easy Order Page > Product lists.
Here is where you can find all your product lists and copy the shortcode to paste everywhere you need to.
On the right side, you will find three icons that allow you to edit, duplicate or trash each of them.
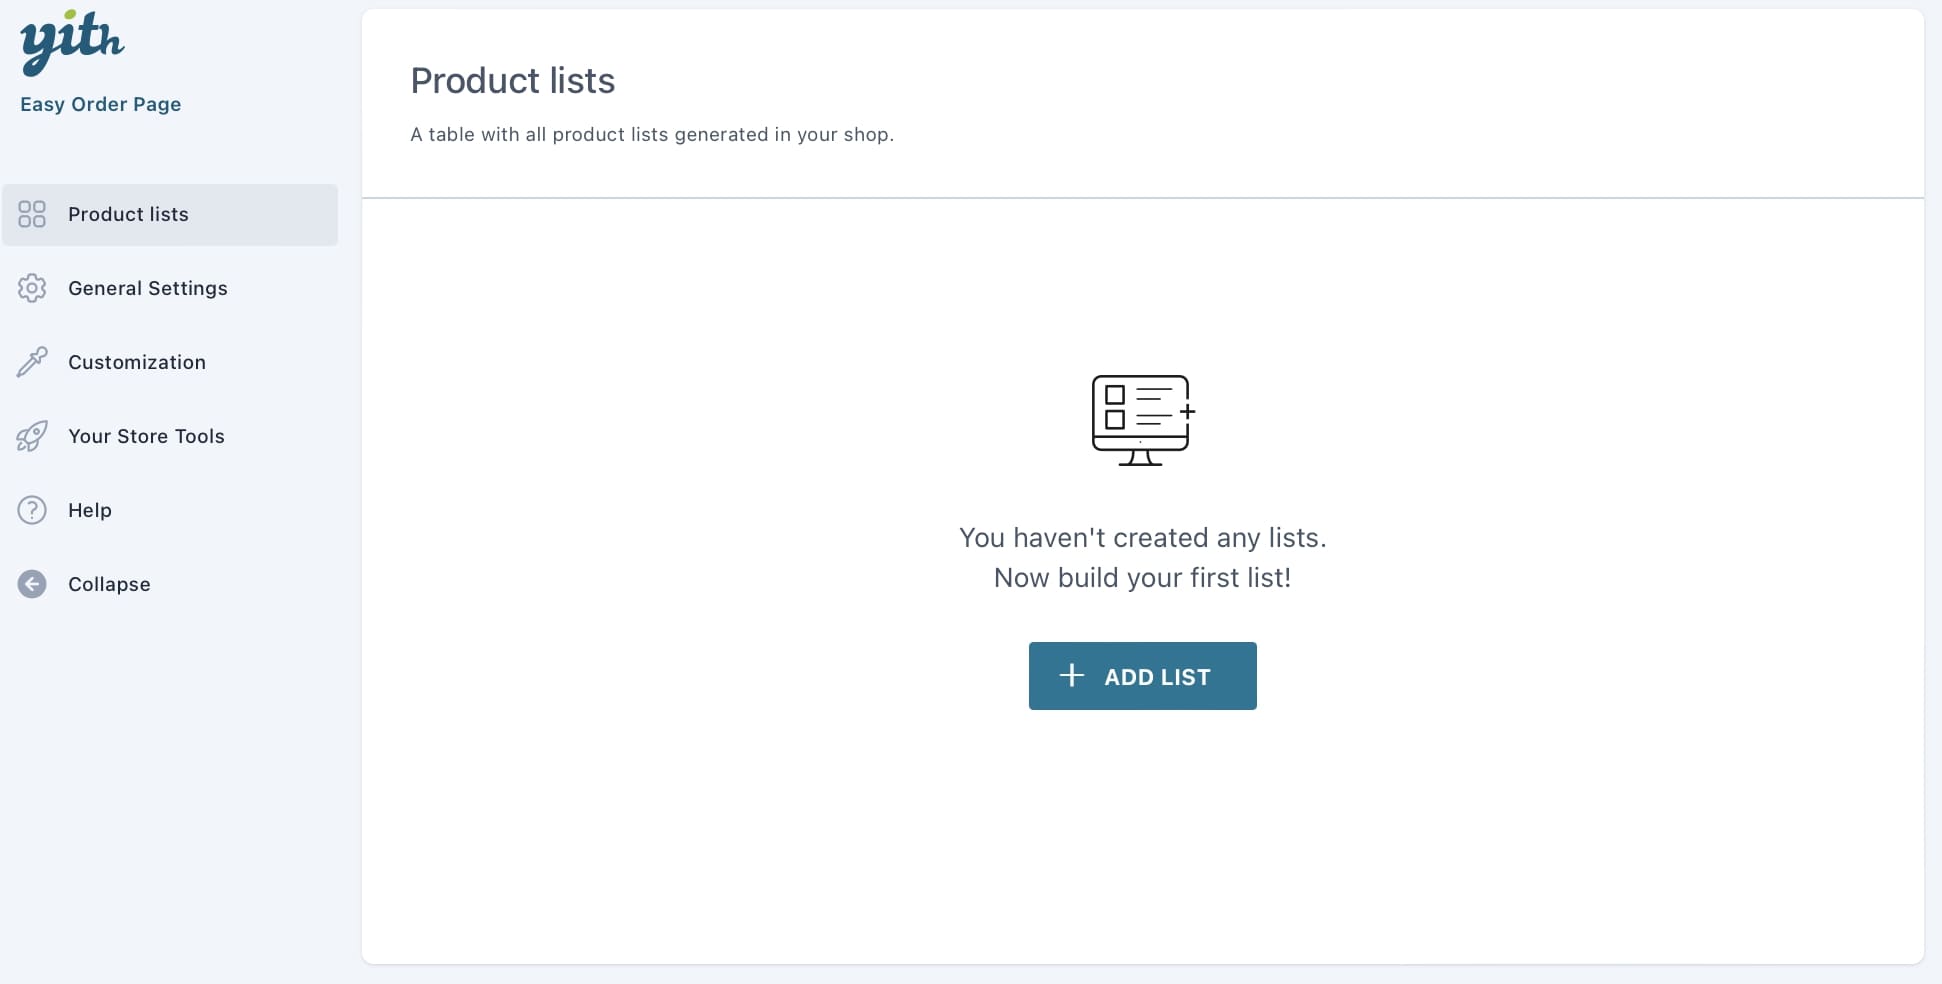
The first time you’ll use the plugin, you will find this page empty but you can create your first list from here by simply clicking on the “+ Add list” button.
Product list options
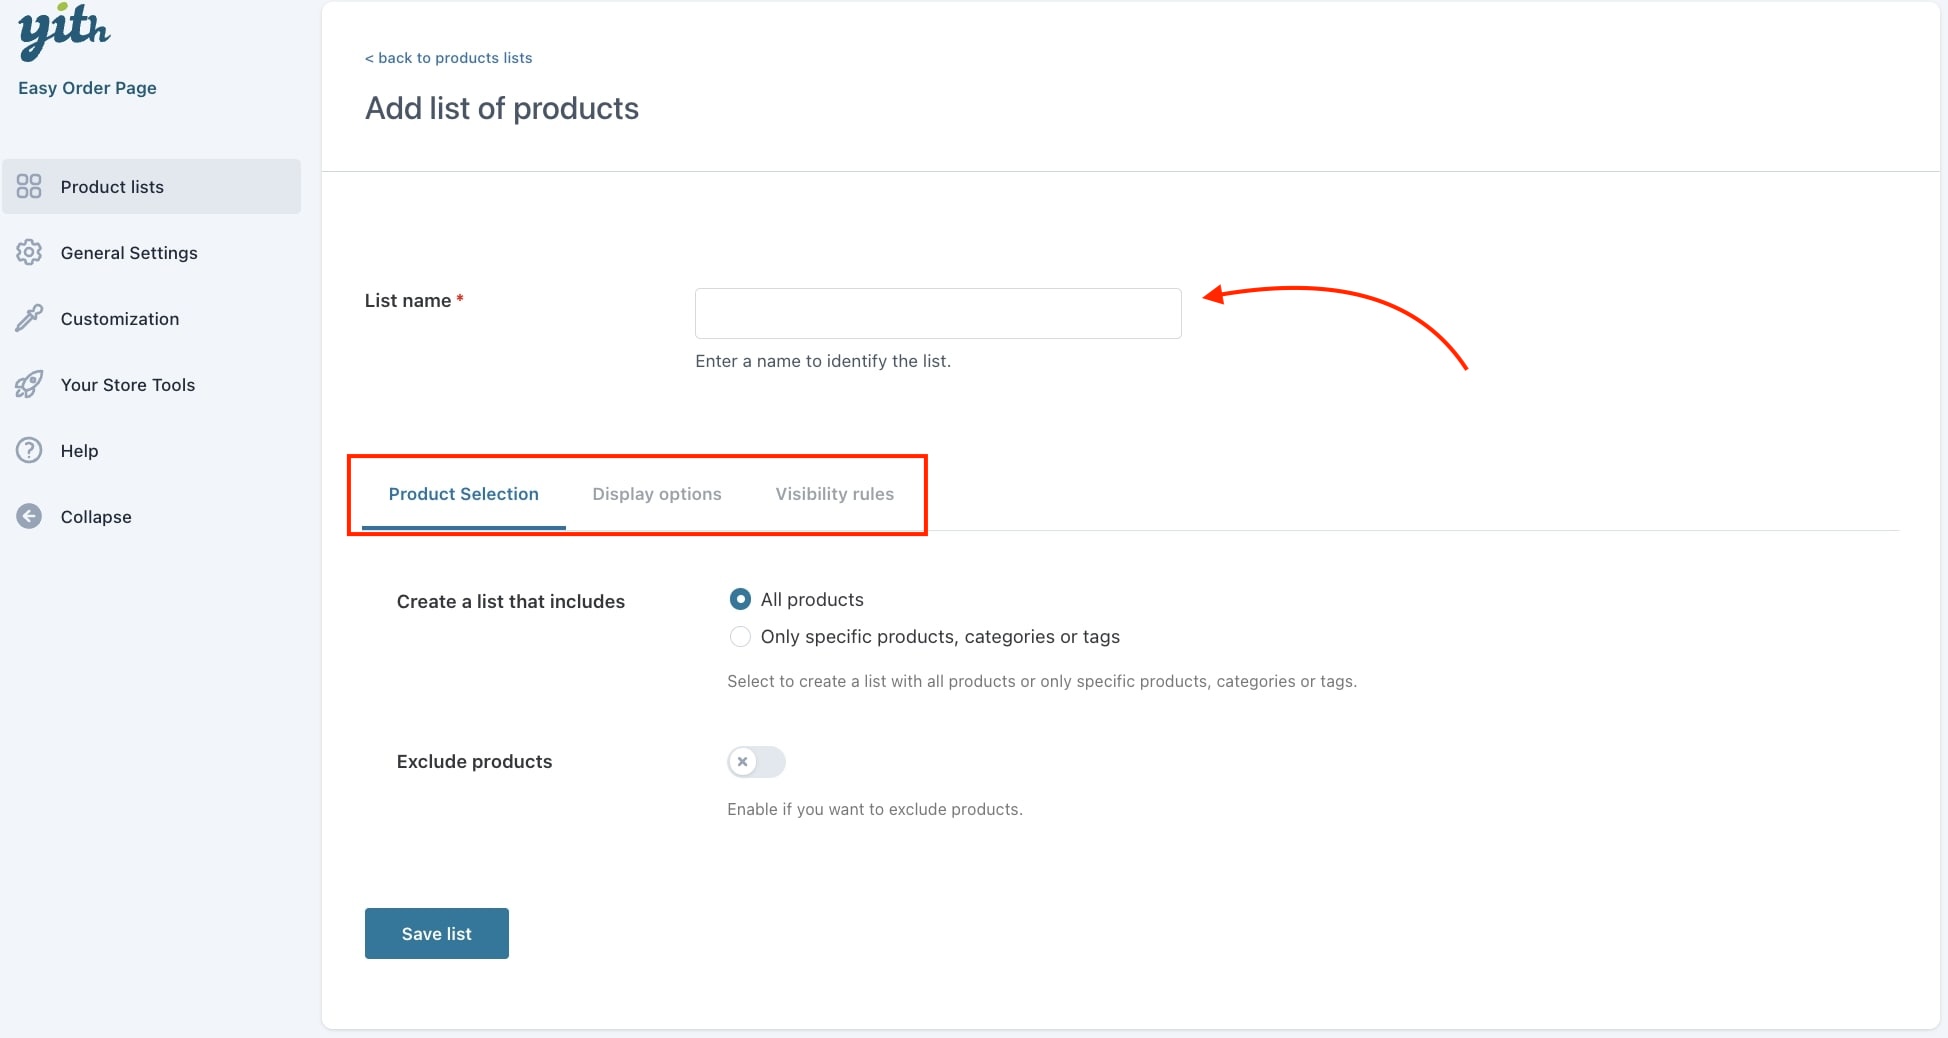
As a first step, you will be asked to give a name to your list:
Then, you will find three tabs to configure all the options.
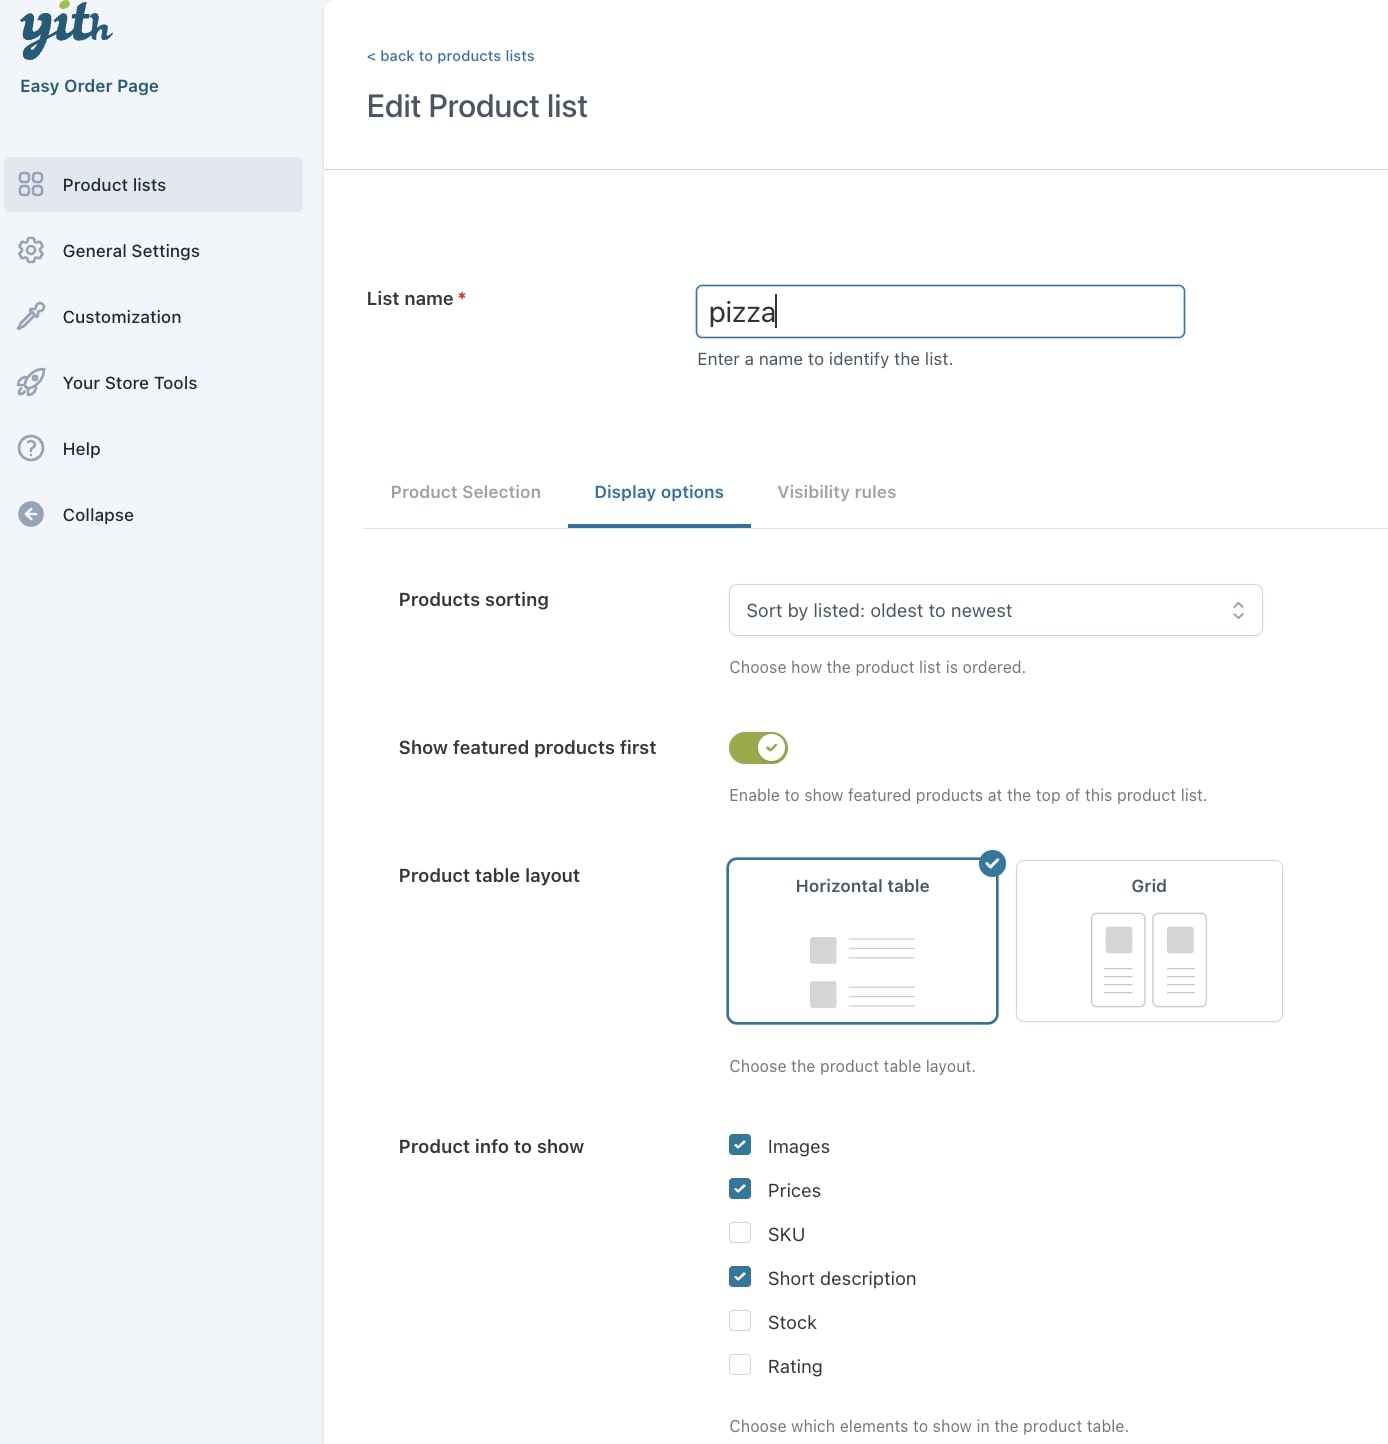
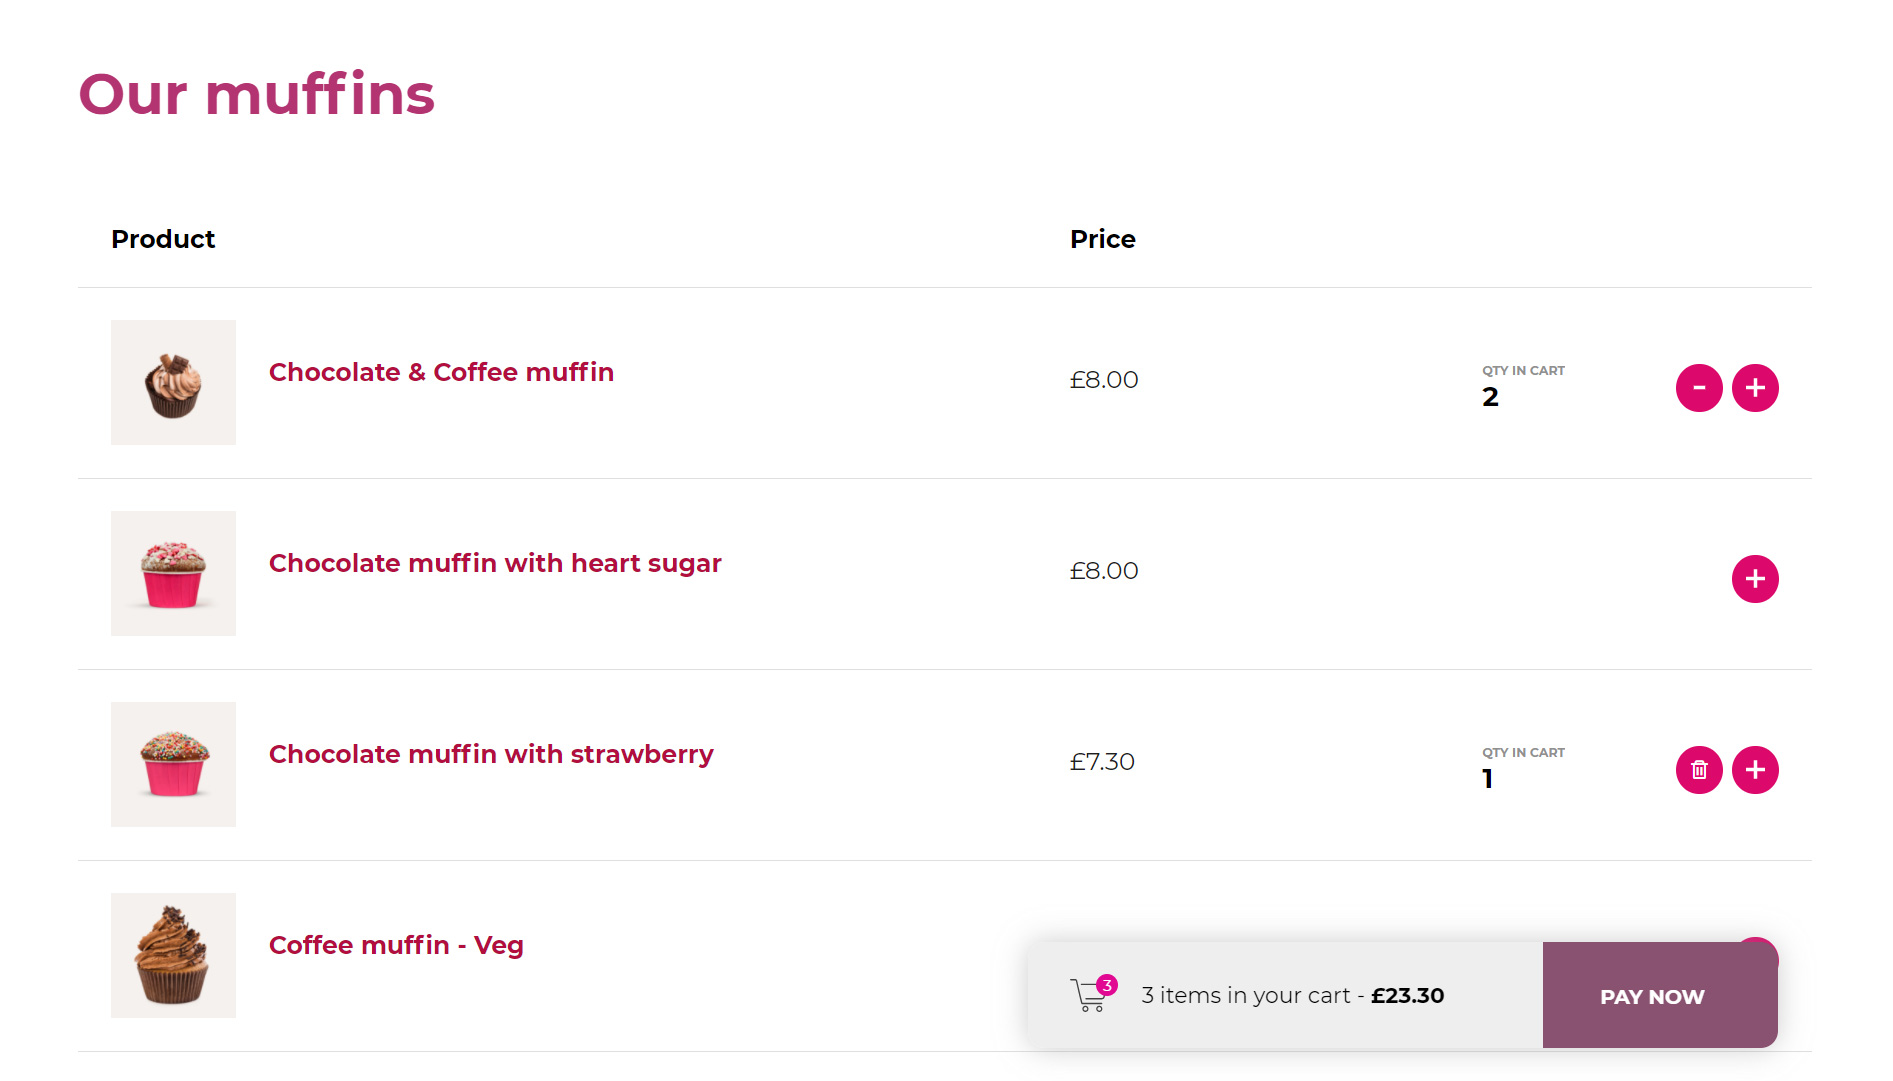
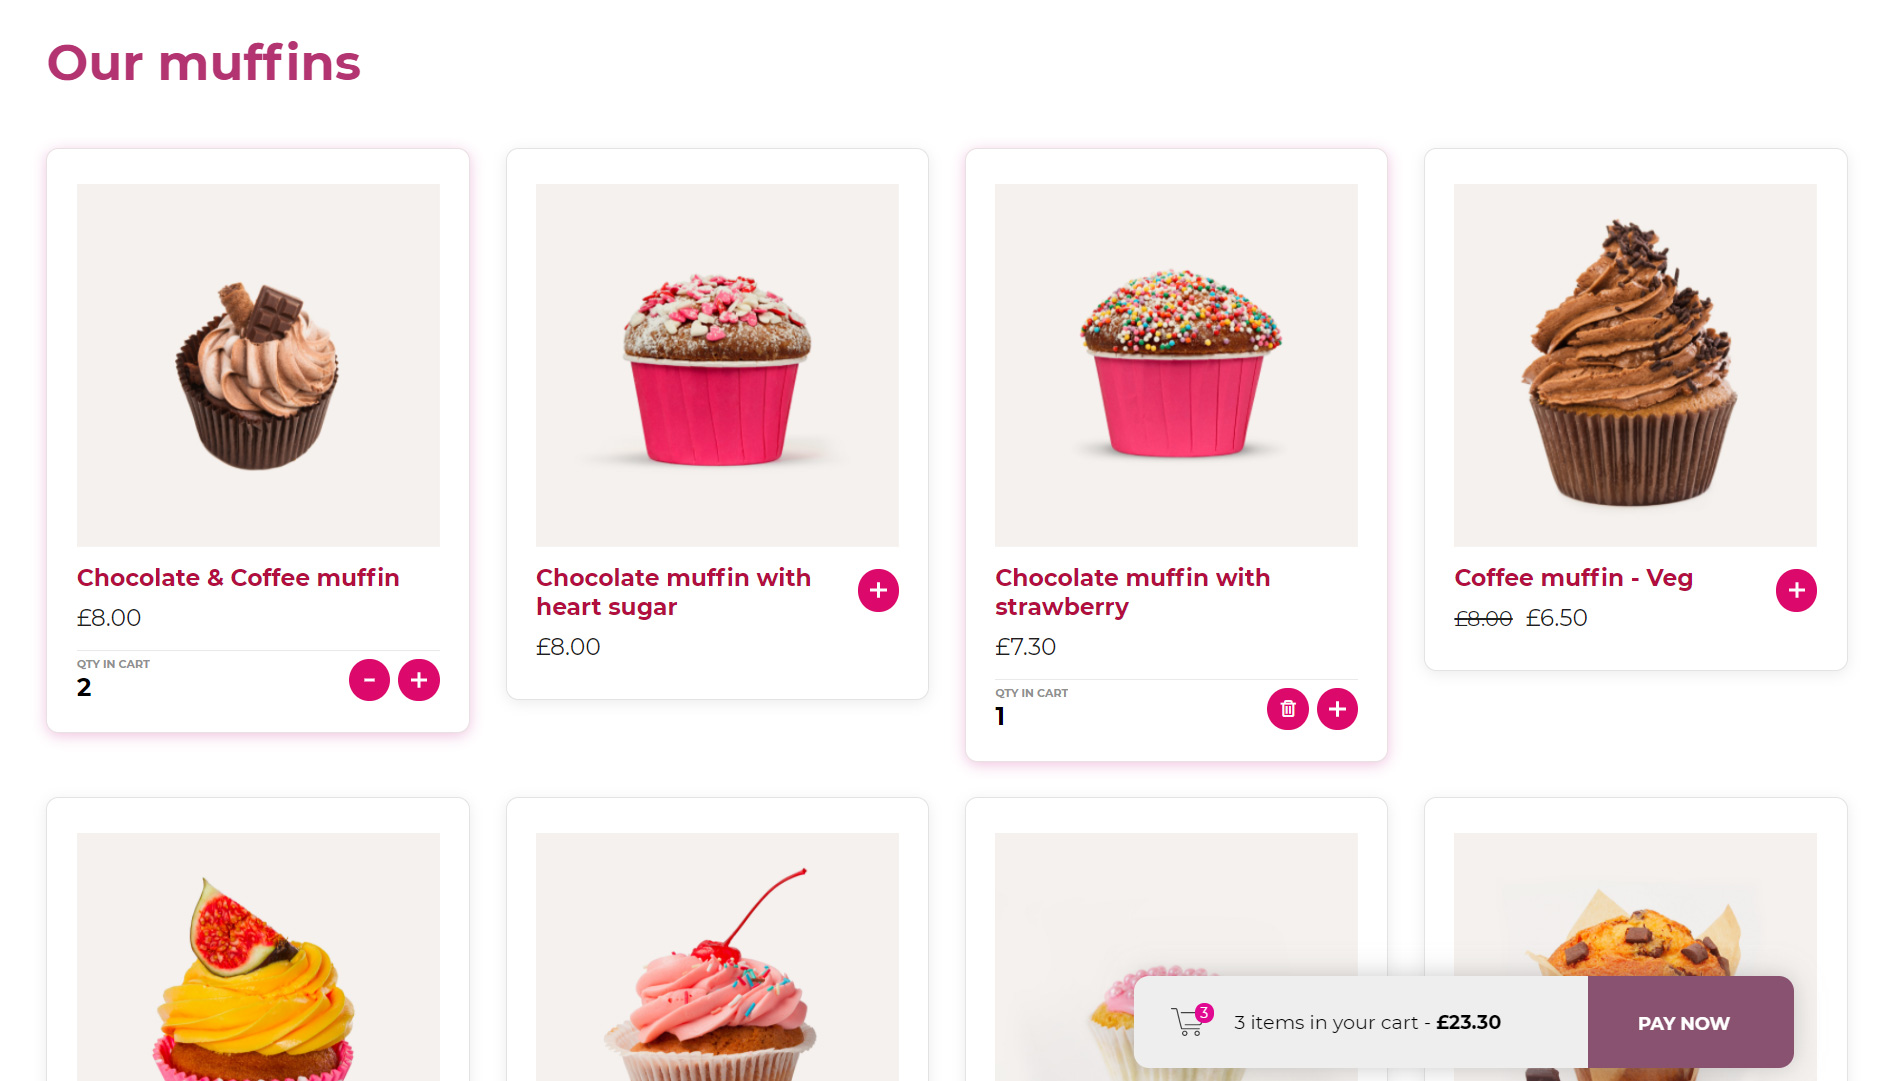
In the second tab of the list settings, you will be able to set the list Display options.
Products sorting: choose how the products in the list will be ordered:
Alphabetically A-Z
Alphabetically Z-A
By listed: newest to oldest
By listed: oldest to newest
By price: low to high
By price: high to low
By SKU: low to high
By SKU: high to low
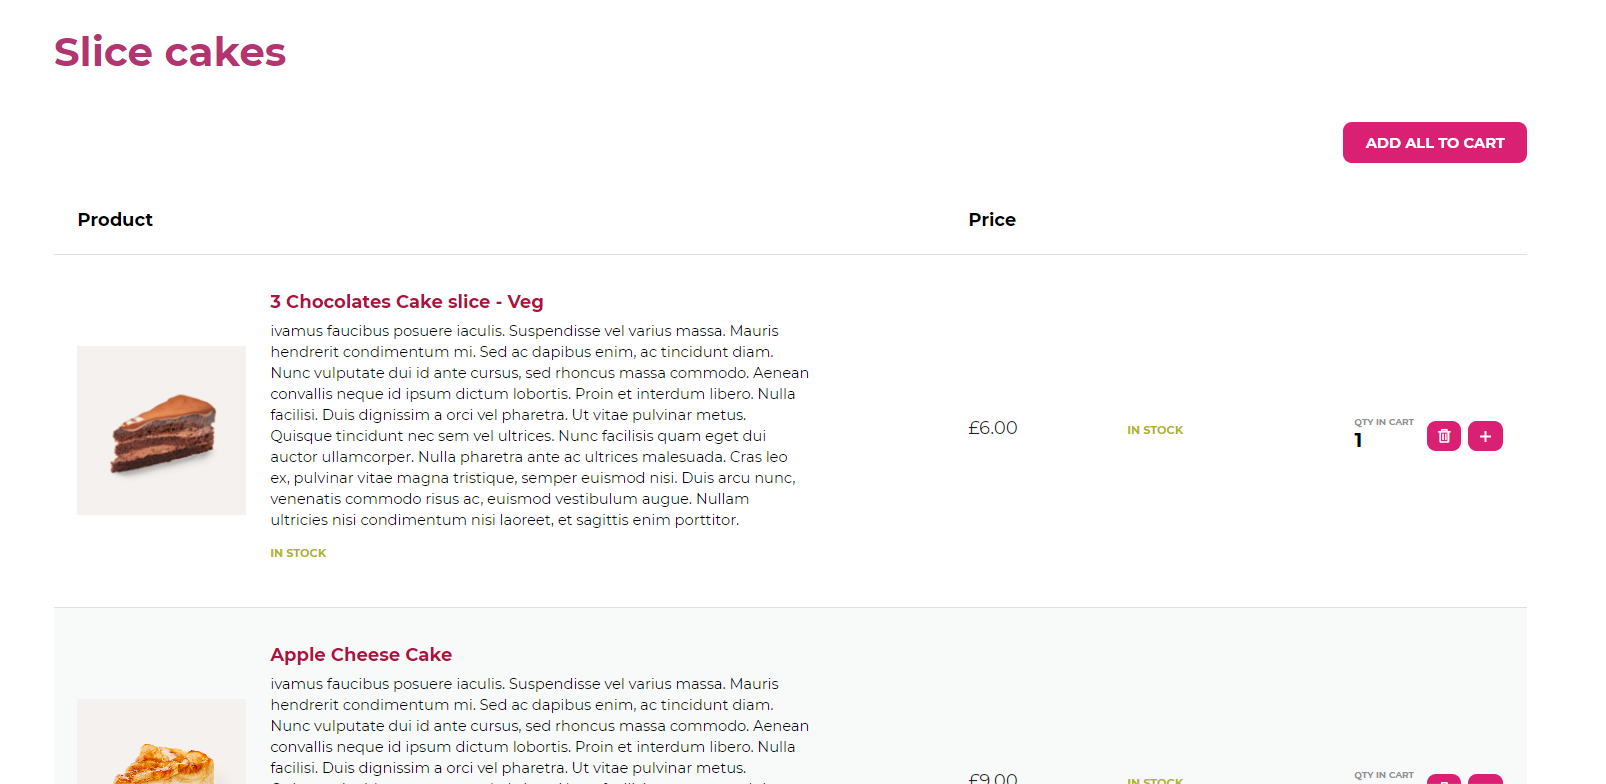
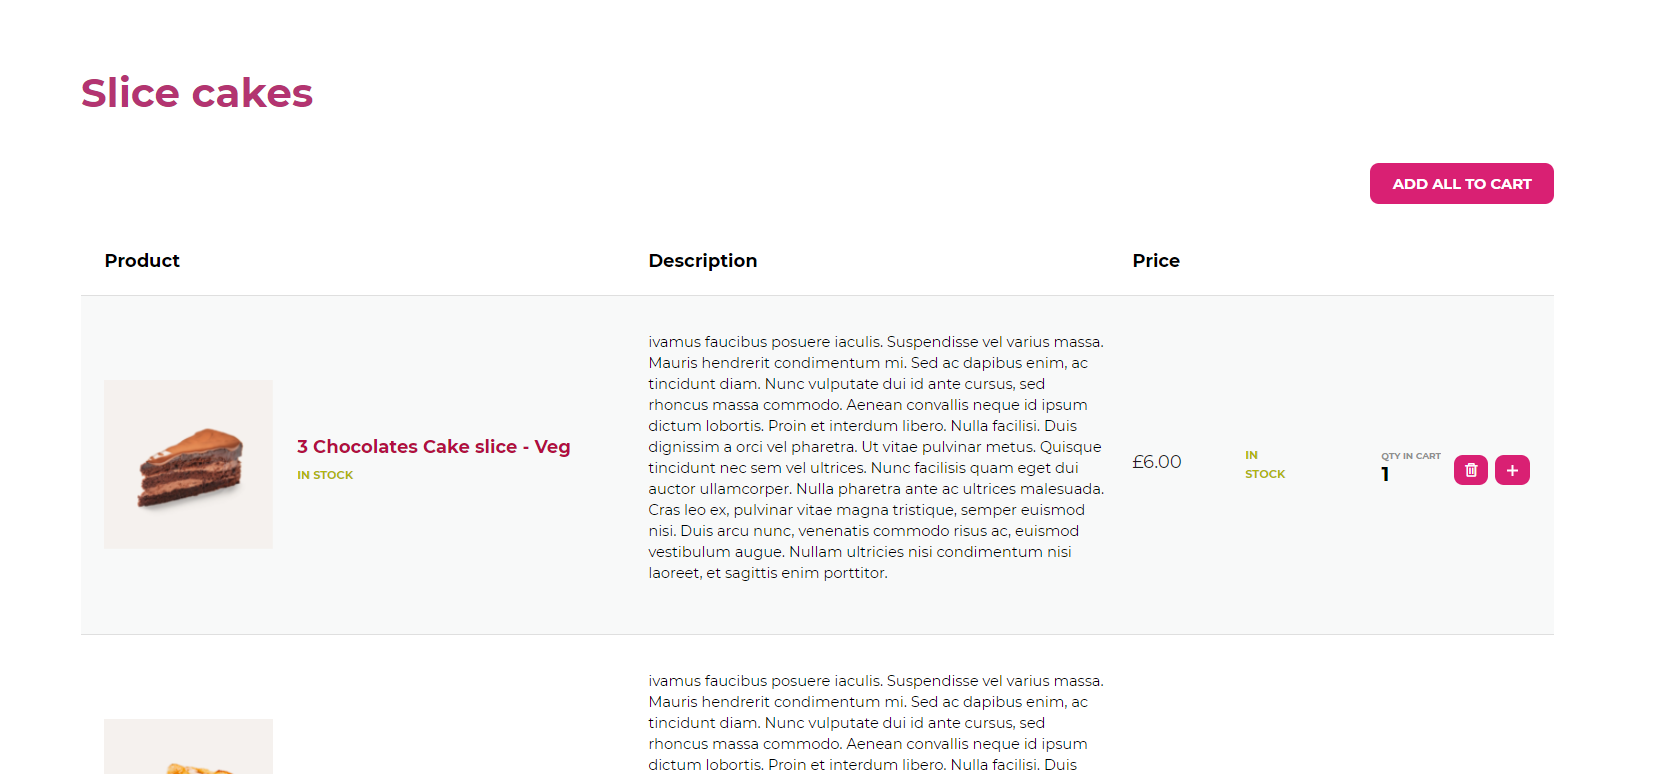
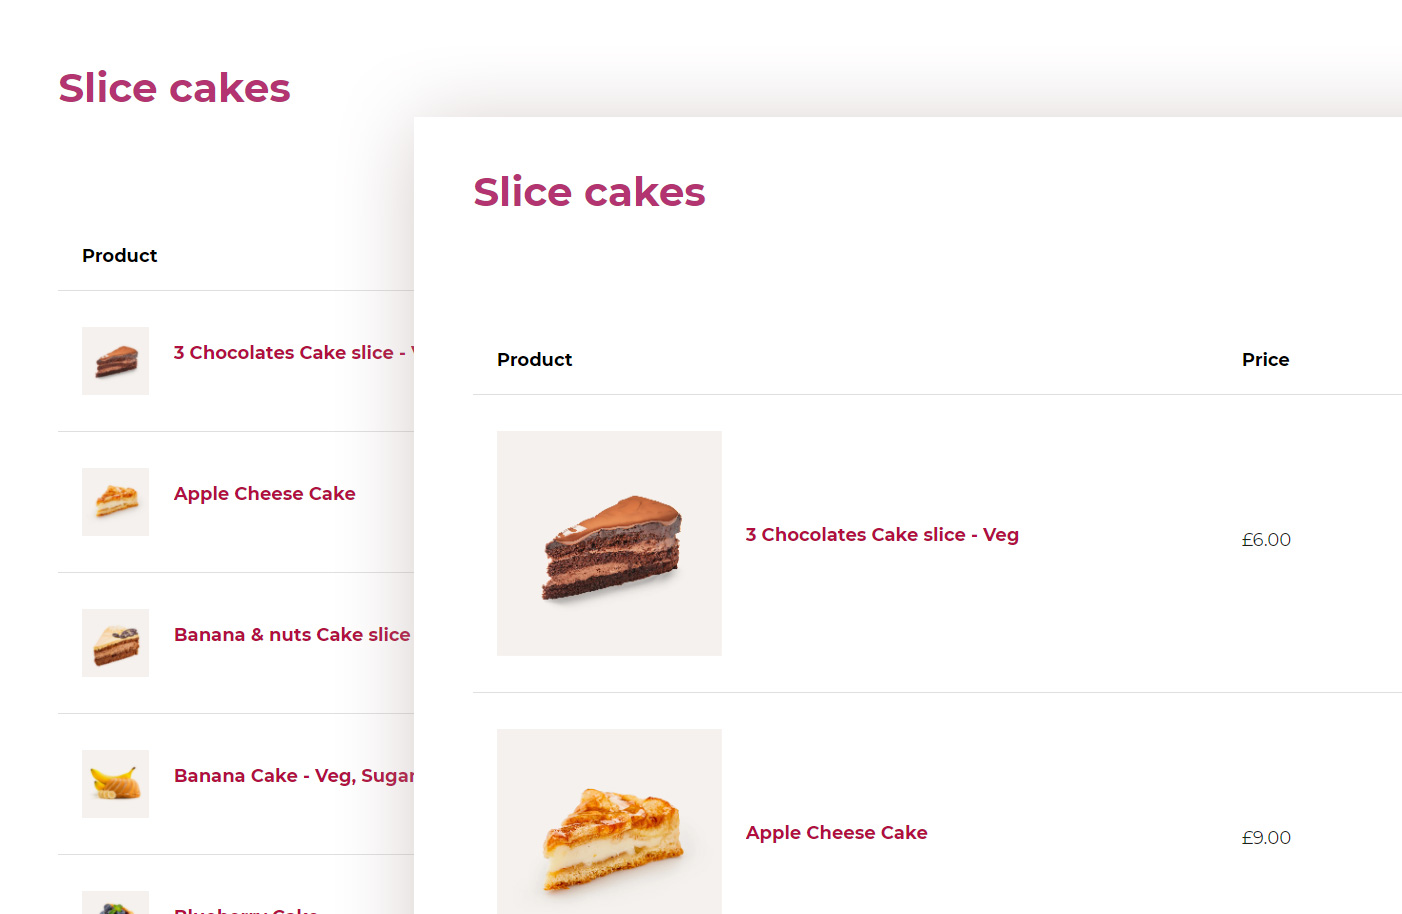
Horizontal table
Grid
Horizontal tableGrid
Product info to show: choose which product elements to show in the product table:
Images
Prices
SKU
Short description
Stock
Rating
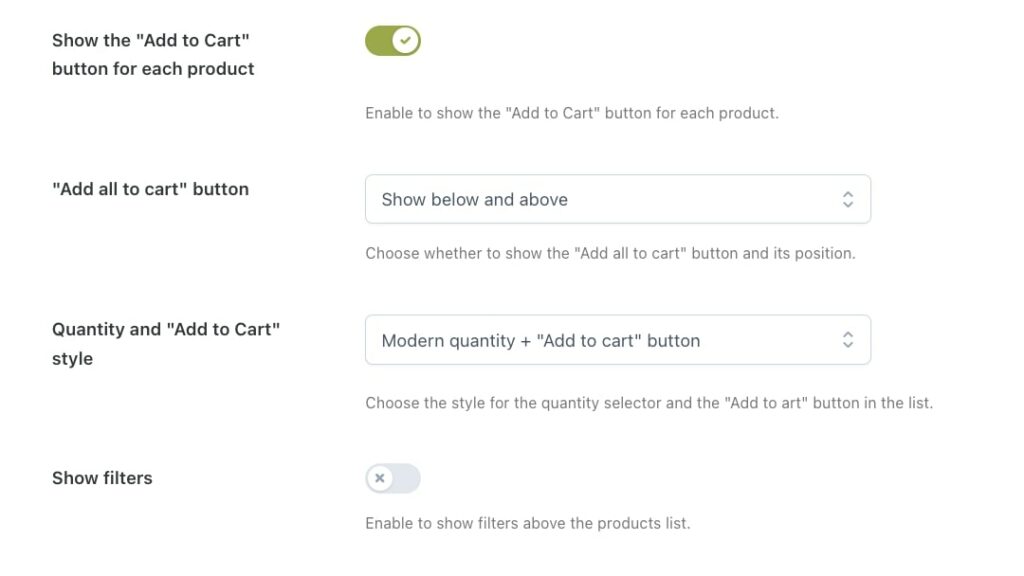
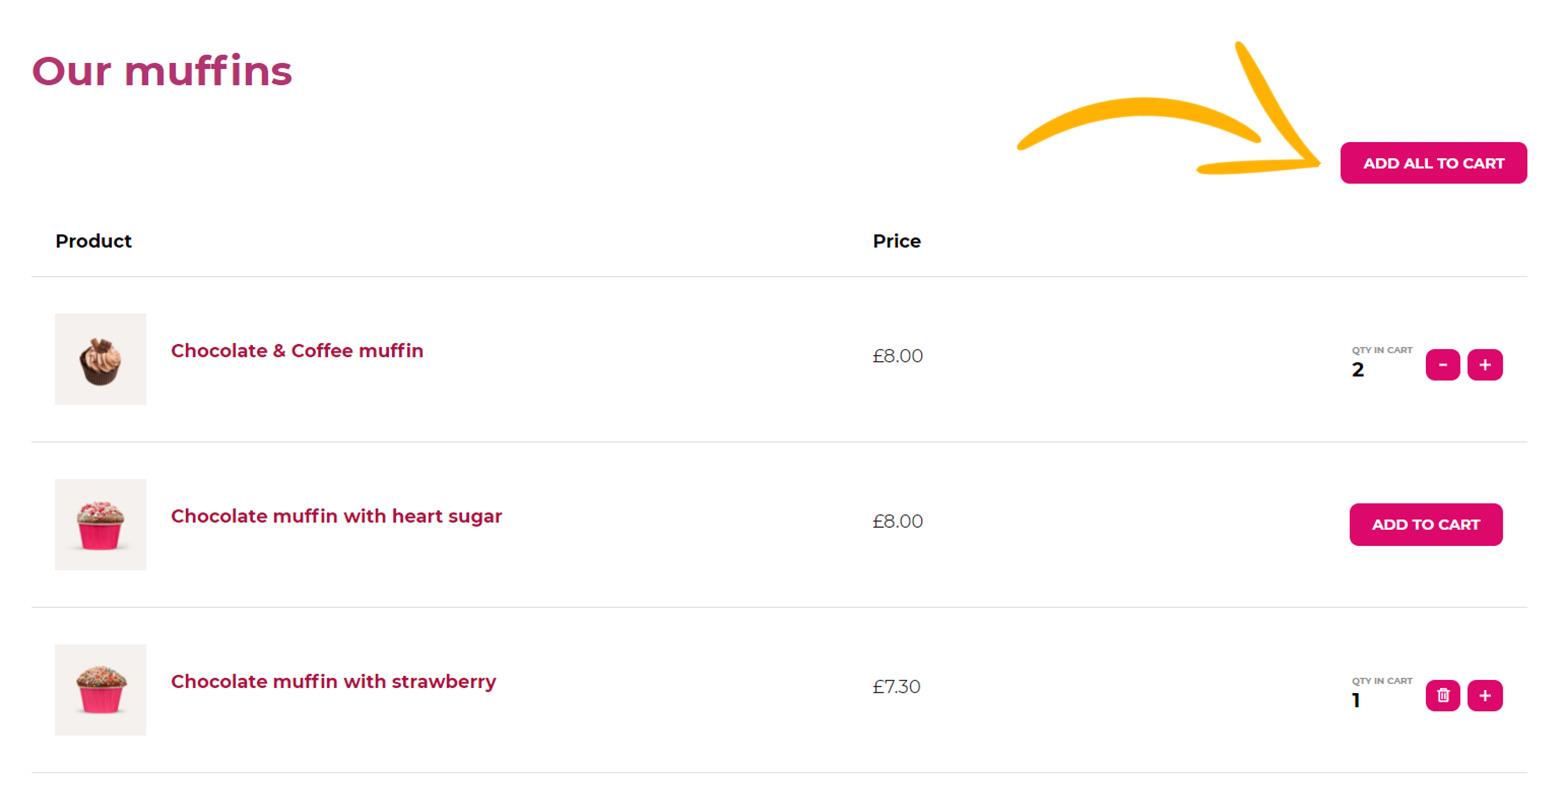
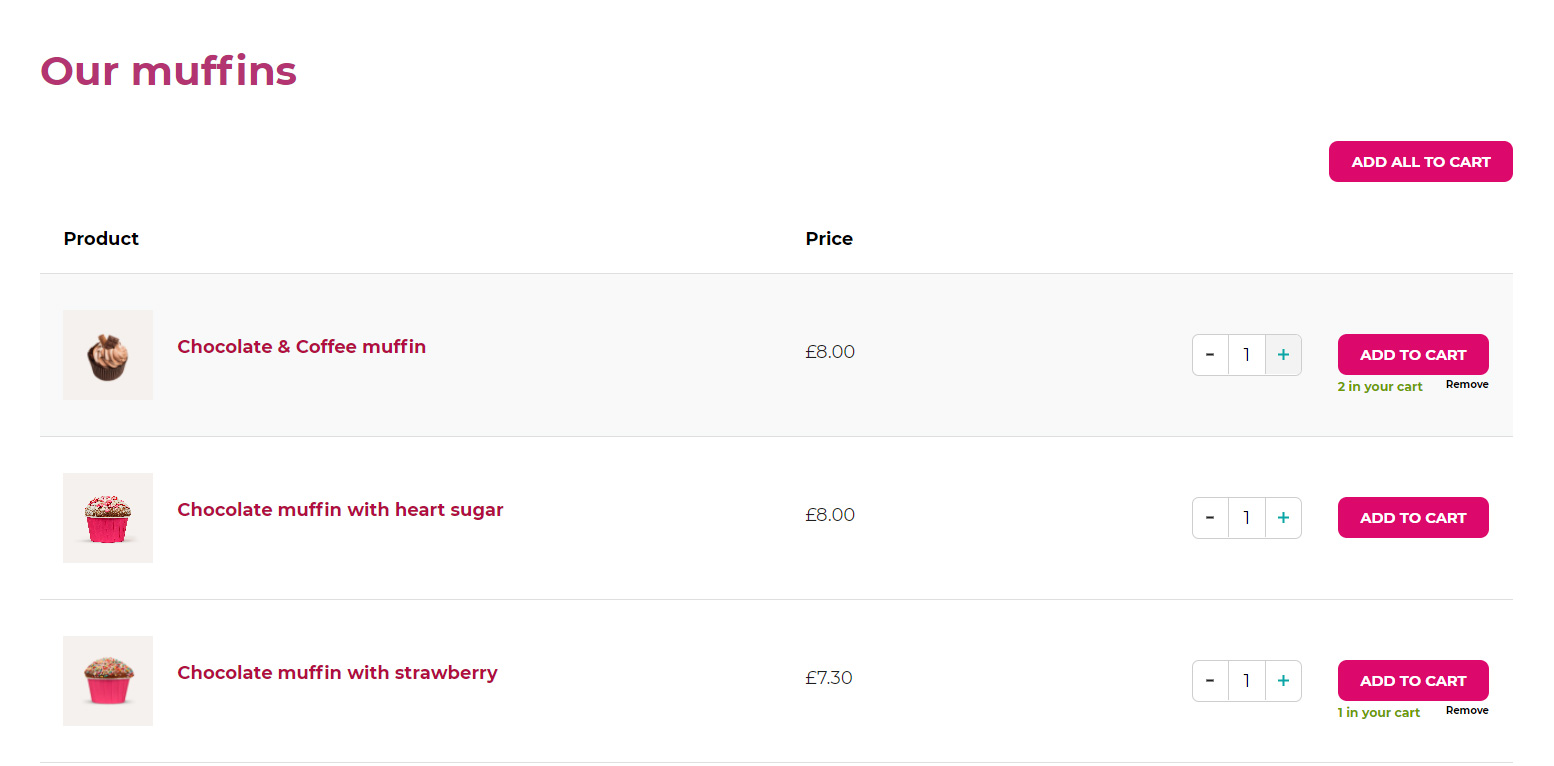
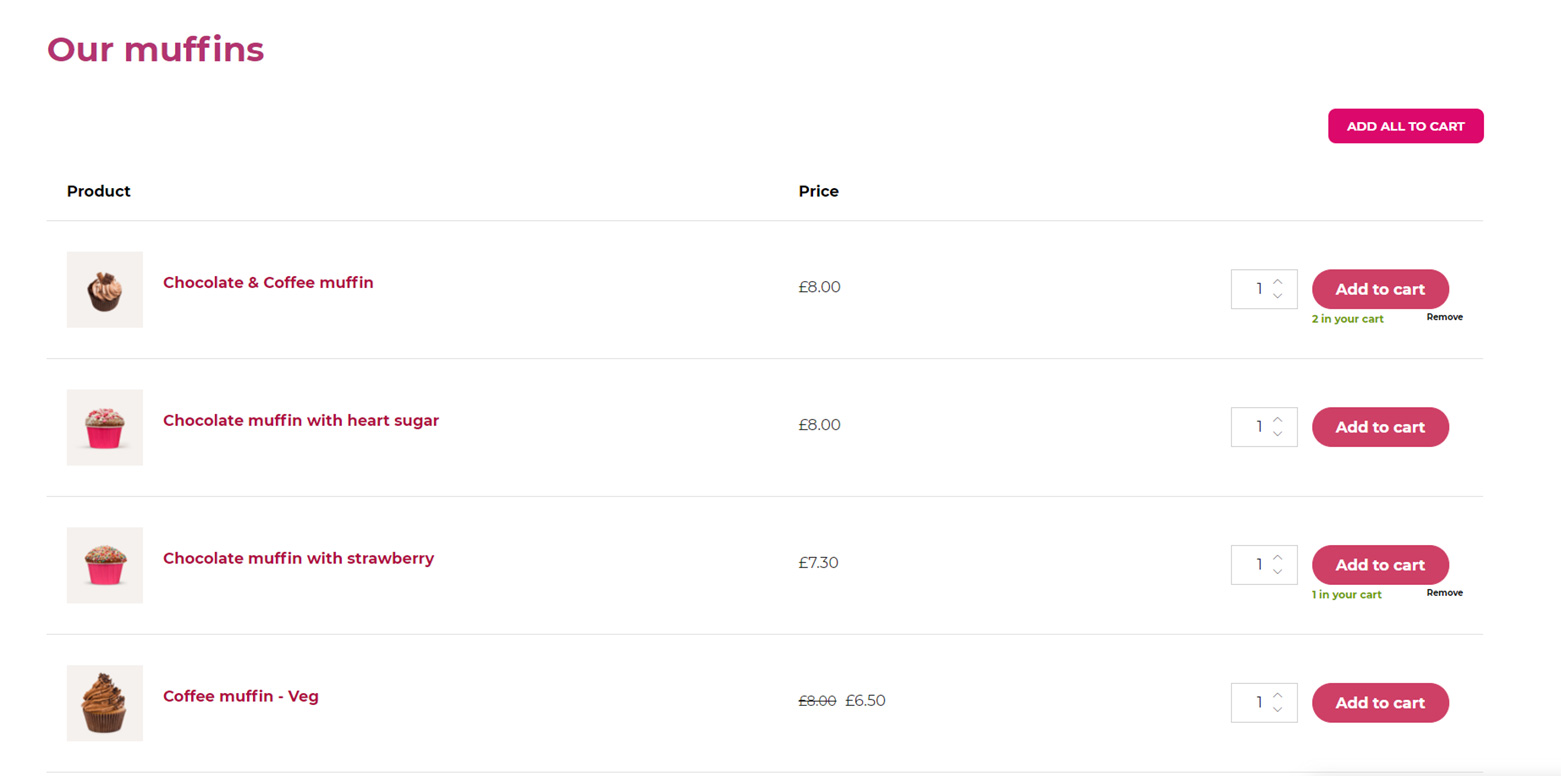
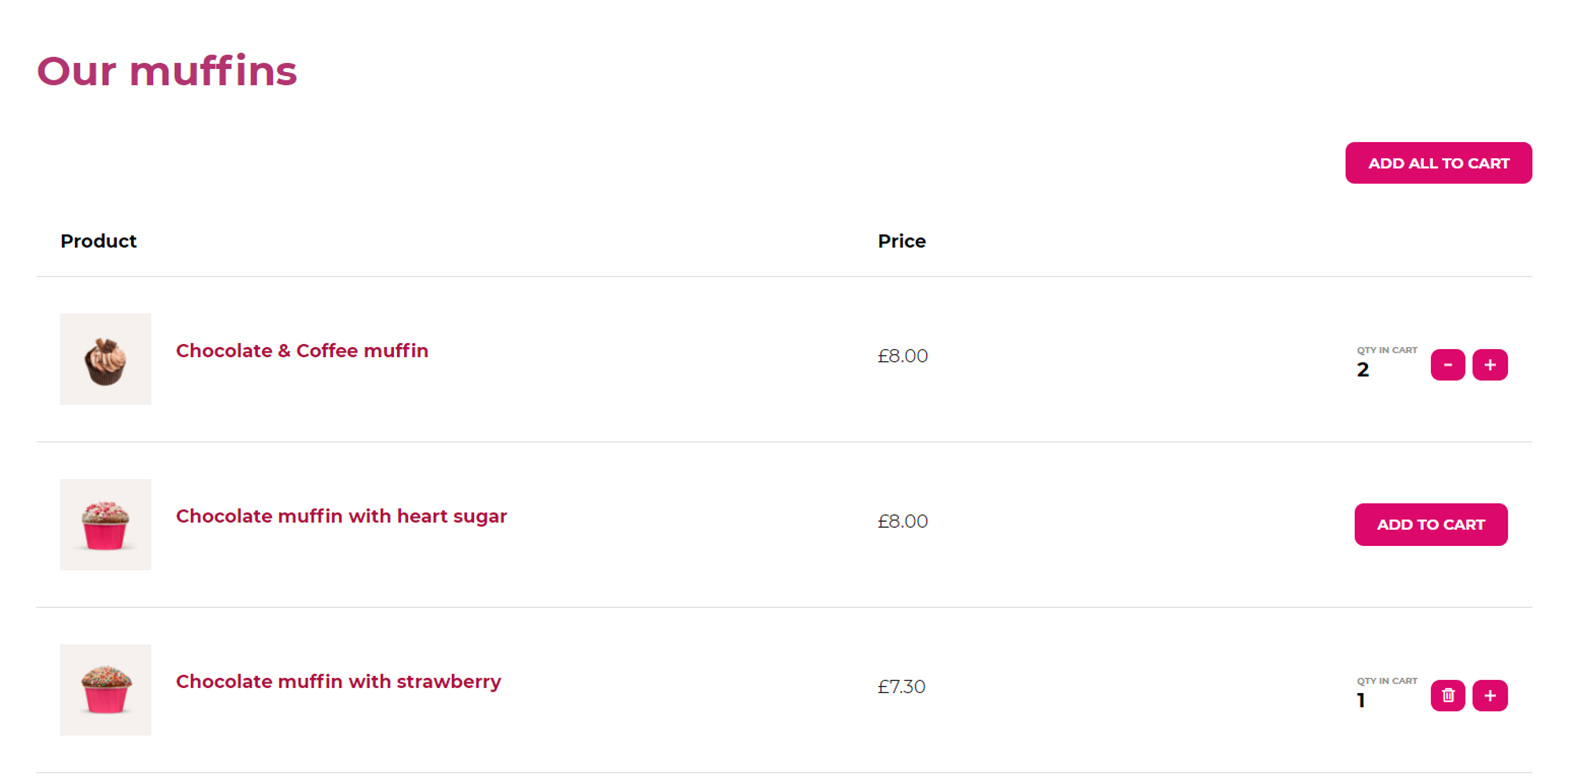
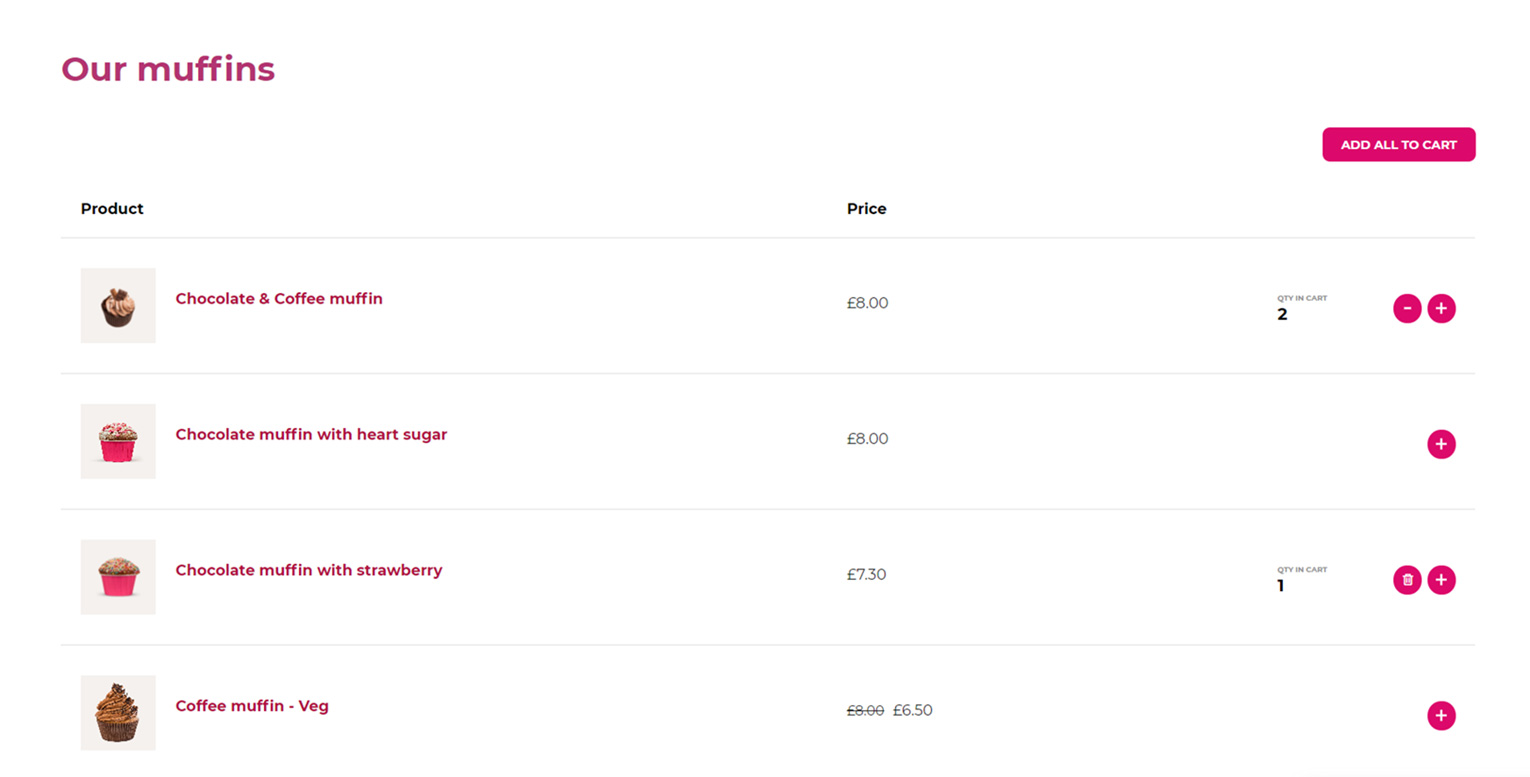
Show the “Add to Cart” button for each product: enable to show the “Add to Cart” button for each product.
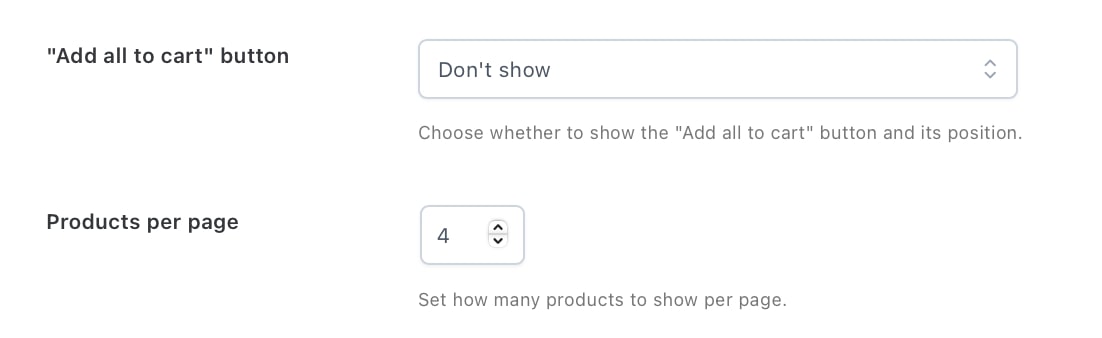
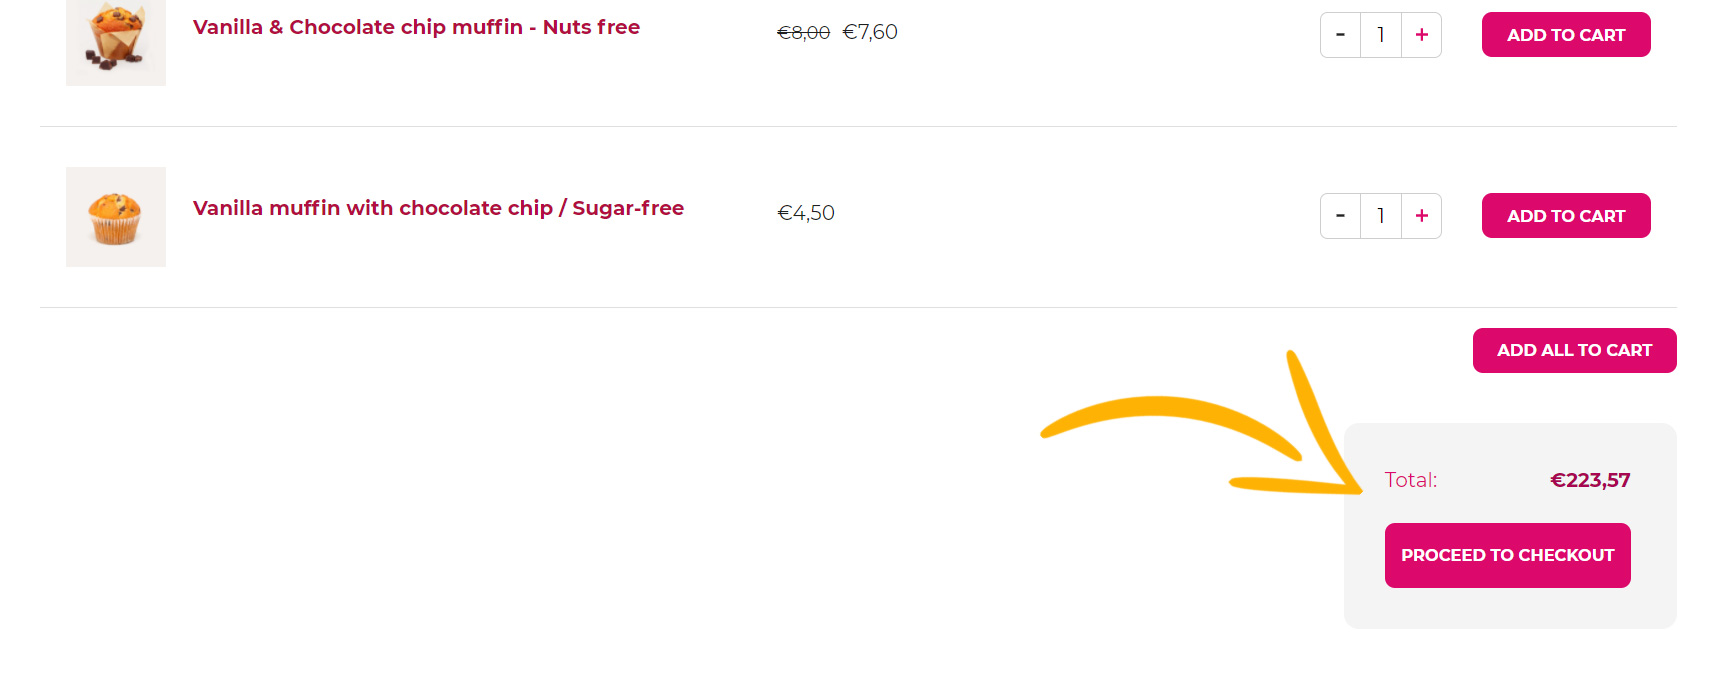
“Add all to cart” button: this button allows your users to add all the products in the list to the cart in just one click. Choose whether to show it or not and its position related to the table:
Show below and above
Show below
Show above
Do not show
Products per page: if in the option above you have set up “Do not show“, you will see this additional option appear that allows setting the number of products per page. If the products are more, the plugin will automatically paginate them.
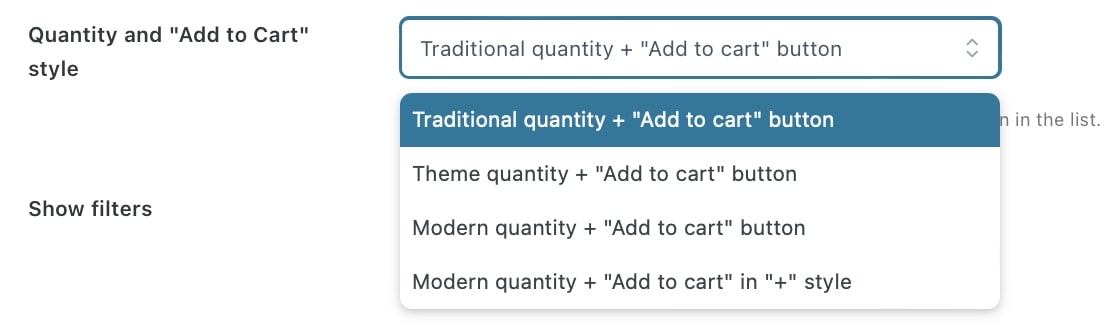
Quantity and “Add to Cart” style (only available for Table style): choose the style for the quantity selector and the “add to cart” button in the list:
Traditional quantity and “Add to cart” button
Theme quantity and “Add to cart” button
Modern quantity and “Add to cart” button
Modern quantity and “Add to cart” in “+” style
Traditional quantity and Add to cart buttonTheme quantity and Add to cart buttonModern quantity and “Add to cart” buttonModern quantity and Add to cart in “+” style
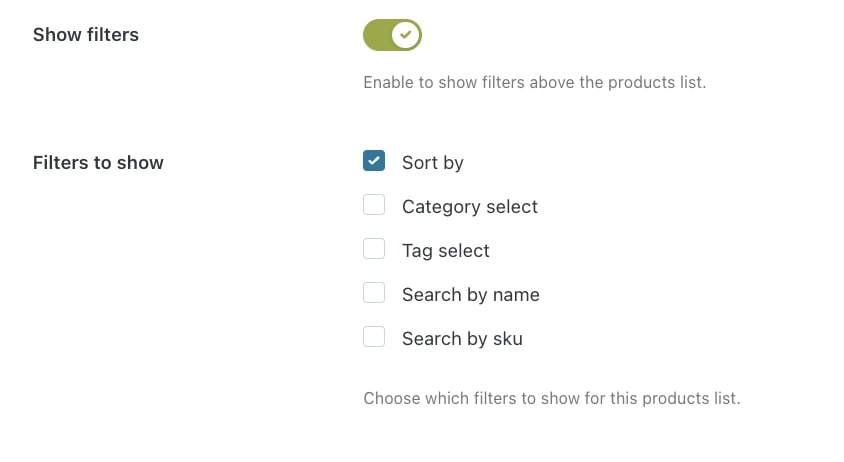
Show filters: enable to show filters above the products list; your users will be able to filter the products based on what they are looking for.
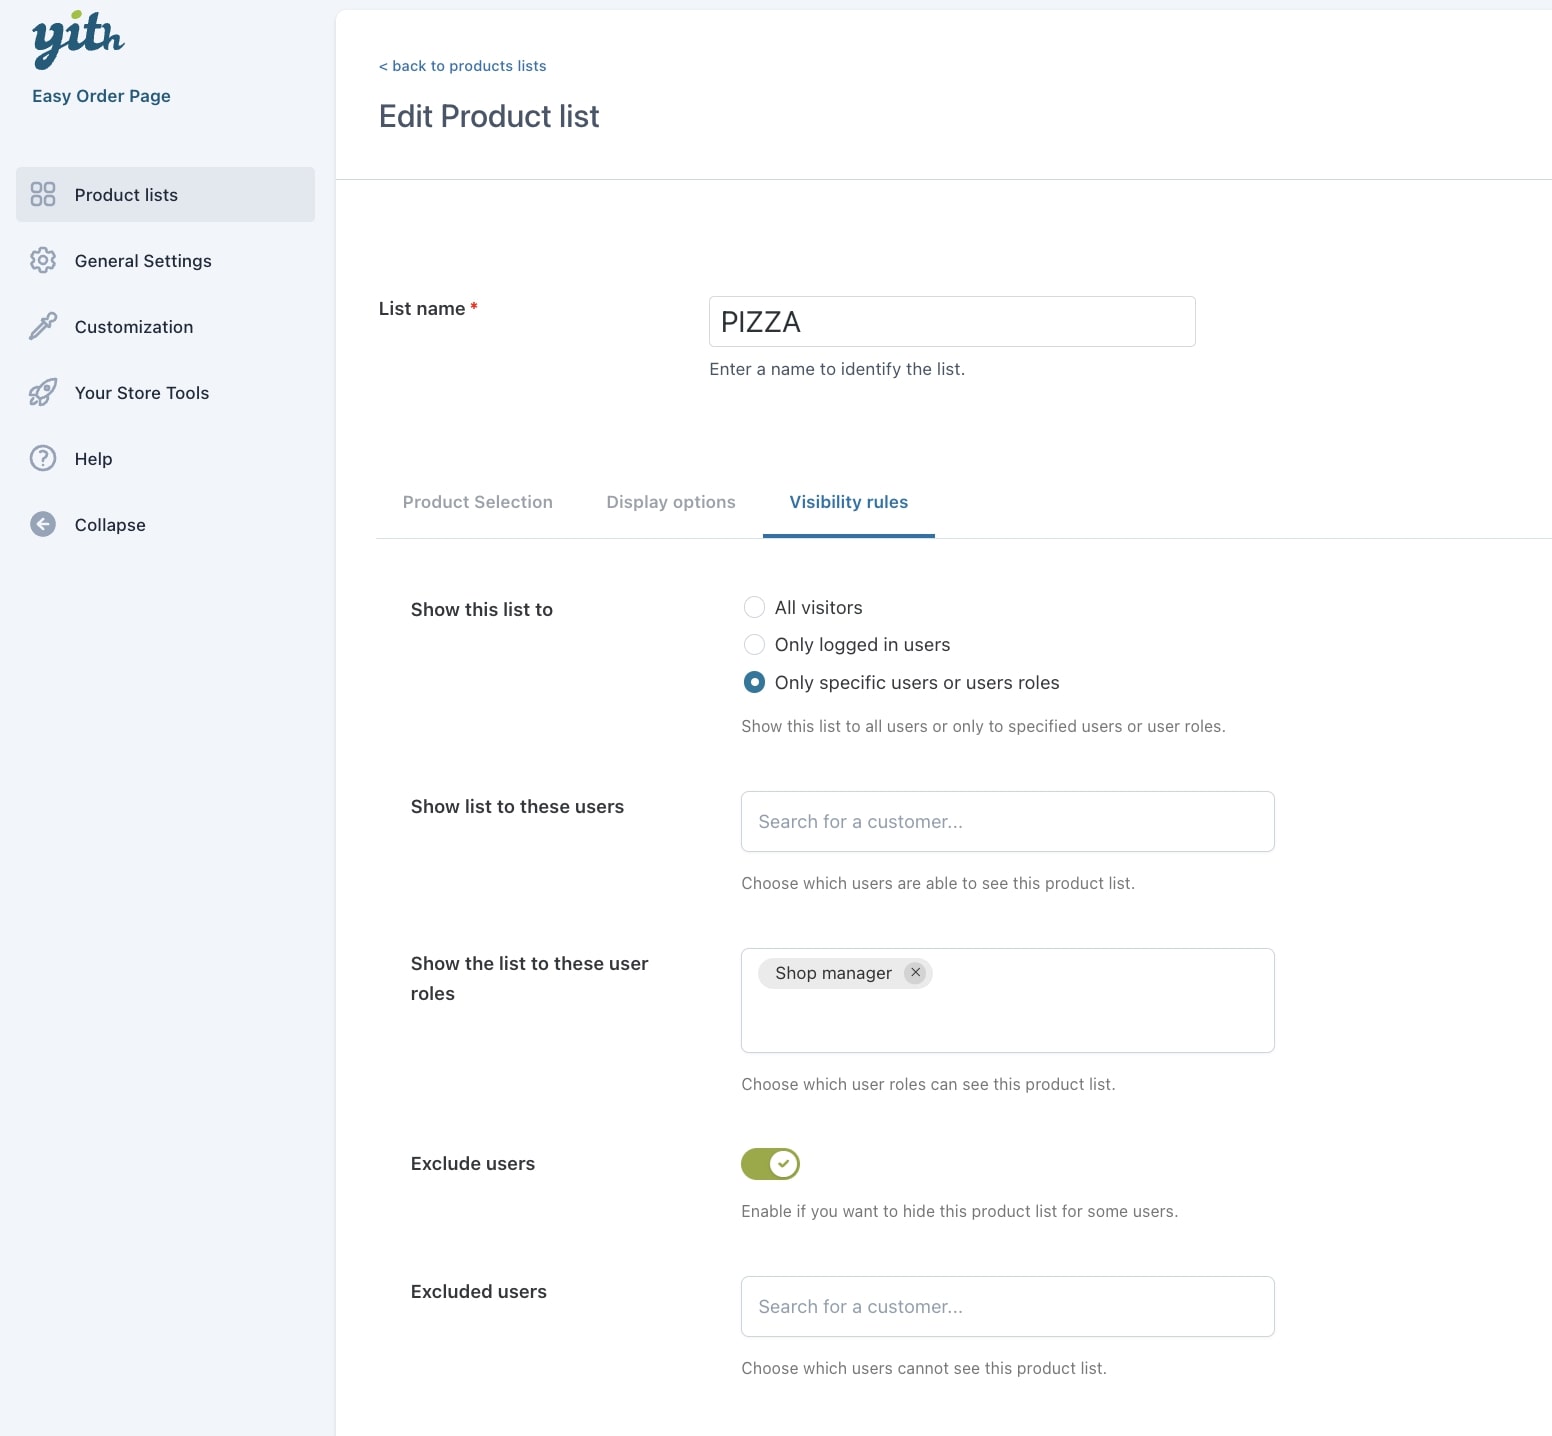
From the third tab in the list options, you will be able to set the Visibility rules and so choose which users and user roles will be able to see this specific list.
Show the list to:
All visitors
Only logged users: only registered users will be able to see this list after logging in.
Only specific users or user roles: you can pick specific users and exclude some anyway from the option below.
For example, the above settings allow only Shop managers to see this specific product list.
Exclude users: enable this option and select specific users that you want to exclude; they will not be able to see the list.
Users that are not allowed to see the list will see a custom message that informs about limited permissions.
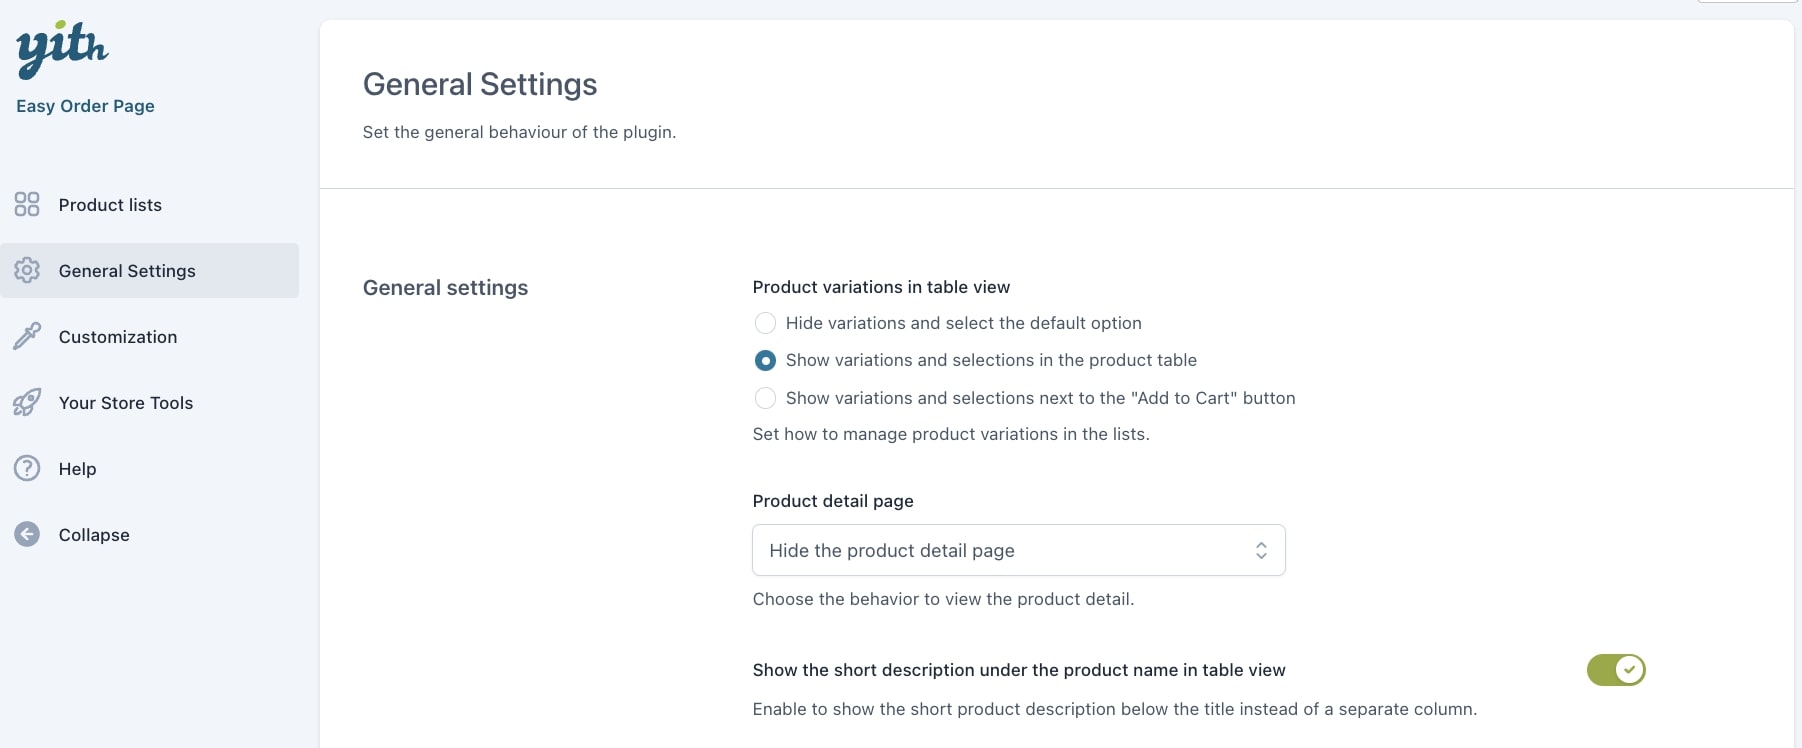
In YITH > Easy Order Page > General Settings you will be able to configure the options that will apply to all your lists throughout your website.
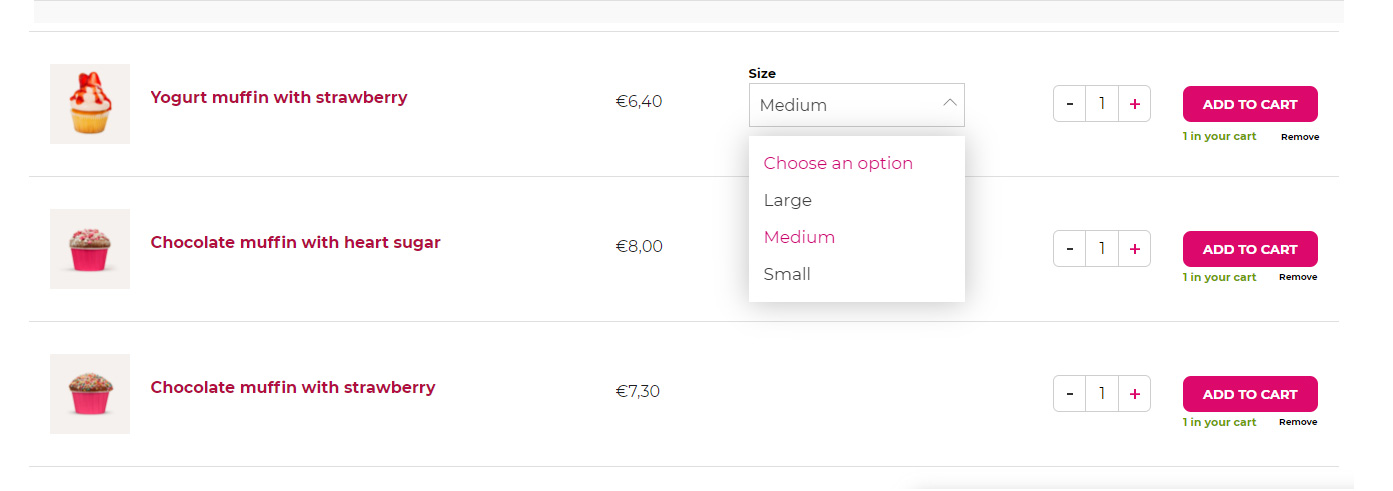
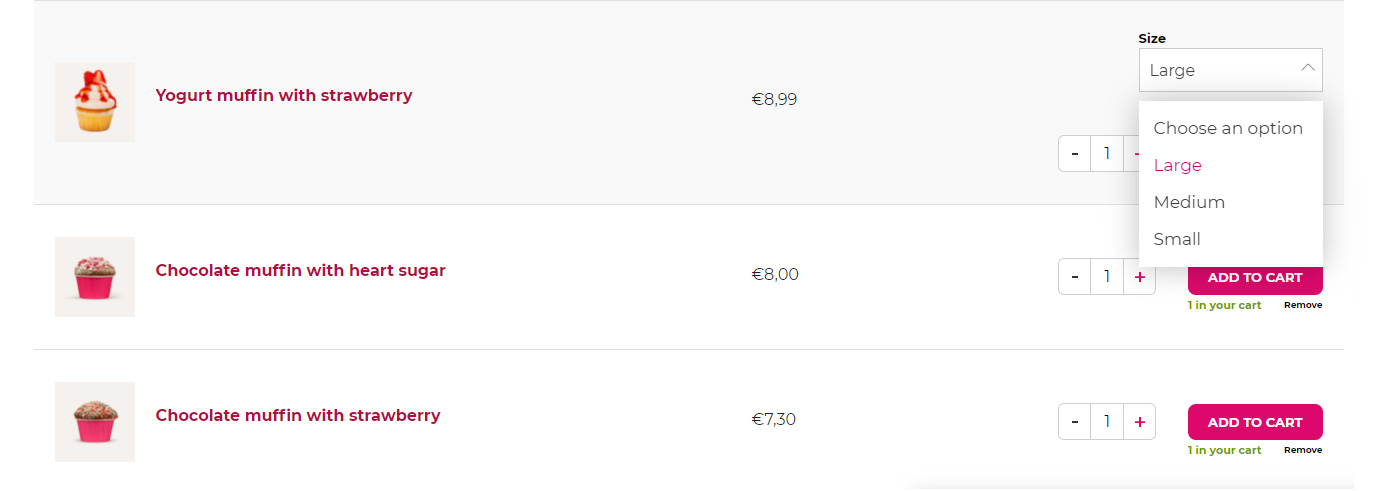
Product variations in table view: set how to manage product variations in the lists (valid only if you choose the Table layout):
Hide variations and select the default option
Show variations and selections in the product table
Show variations and selections next to the “Add to Cart” button
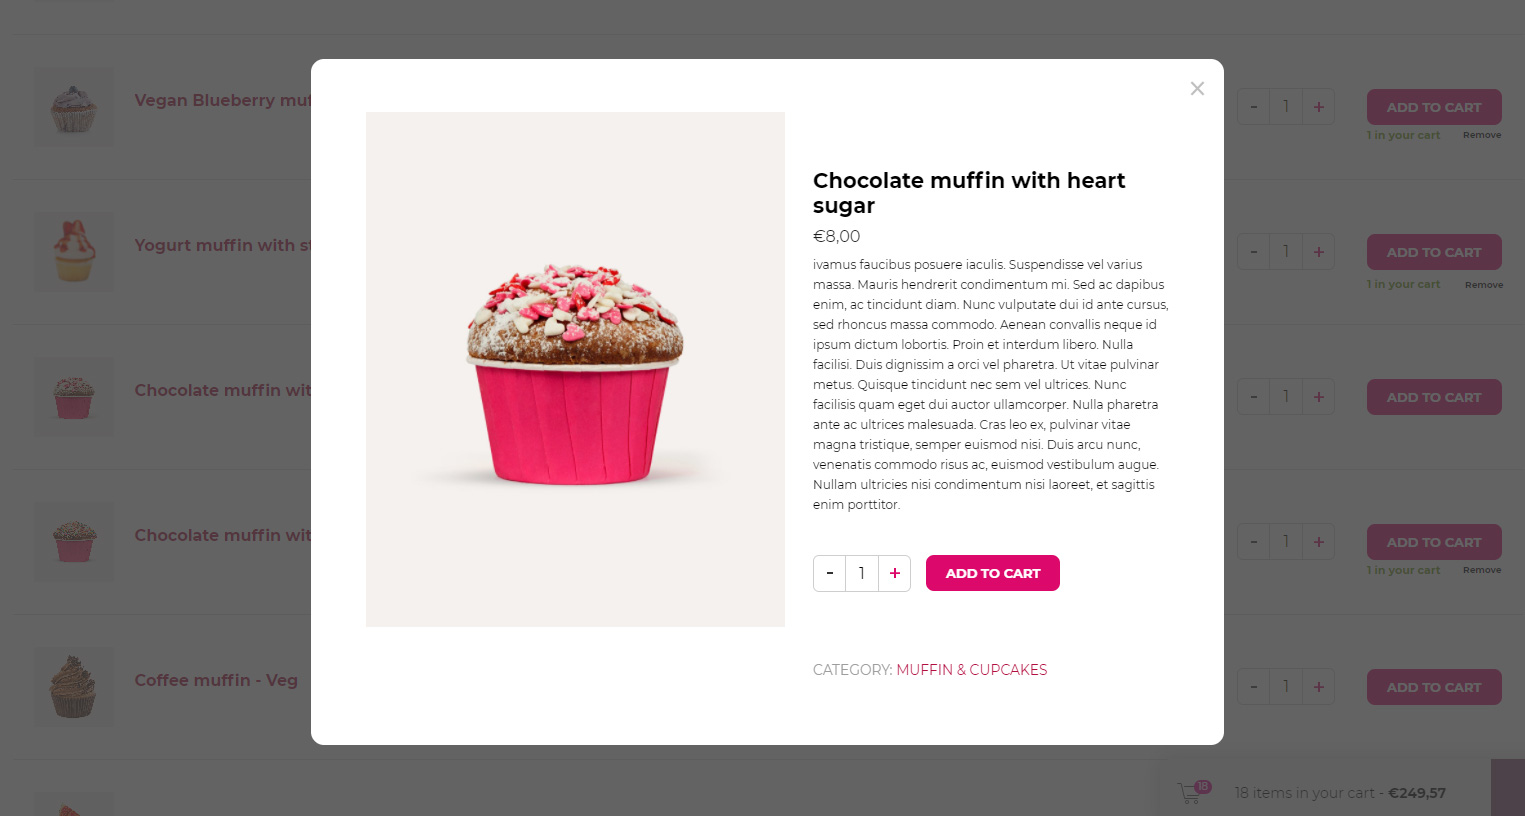
Product detail page: choose the behavior to view the product detail:
Hide the product detail page
Open in a modal window
Open in a different browser tab
Open in the same product list page
Product details shown in a modal window
Show the short description under the product name: enable to show the short product description below the title instead of a separate column. Option available only for Table style.
Description under product name
Description in a separate column
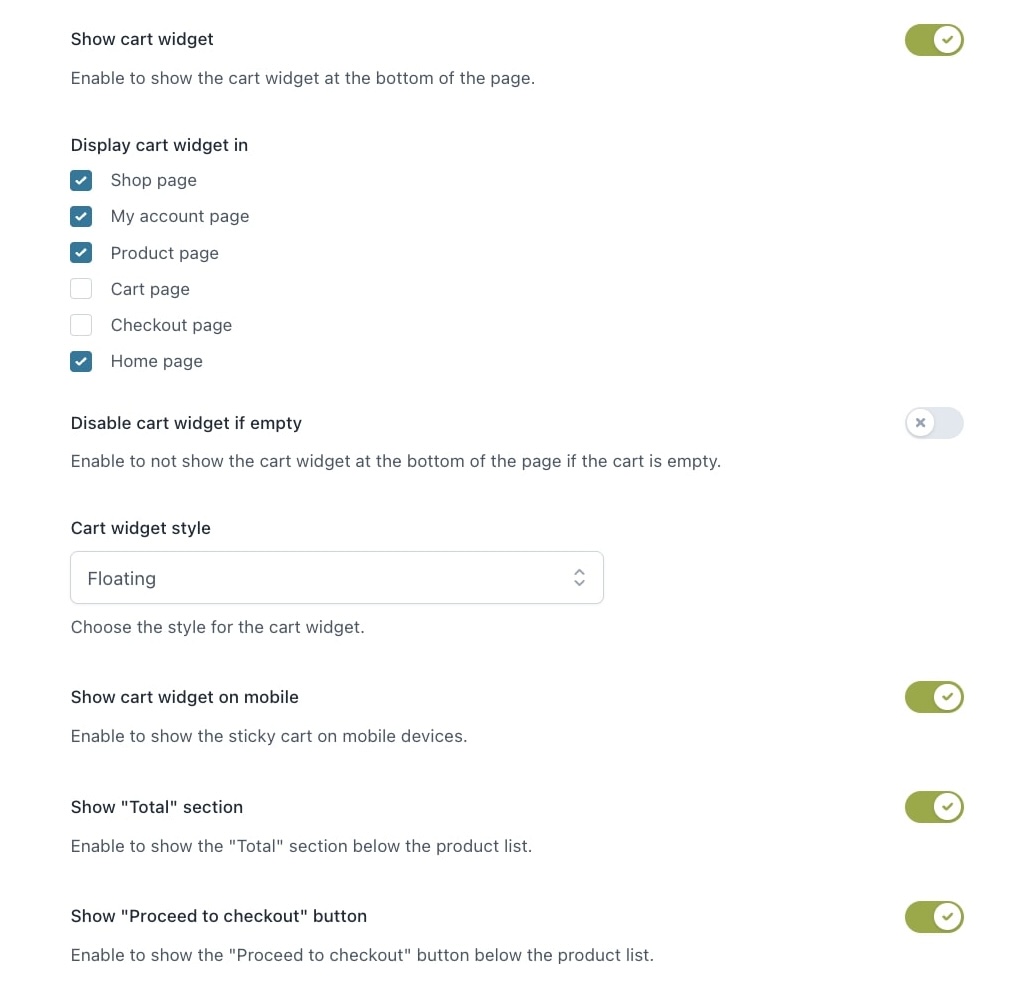
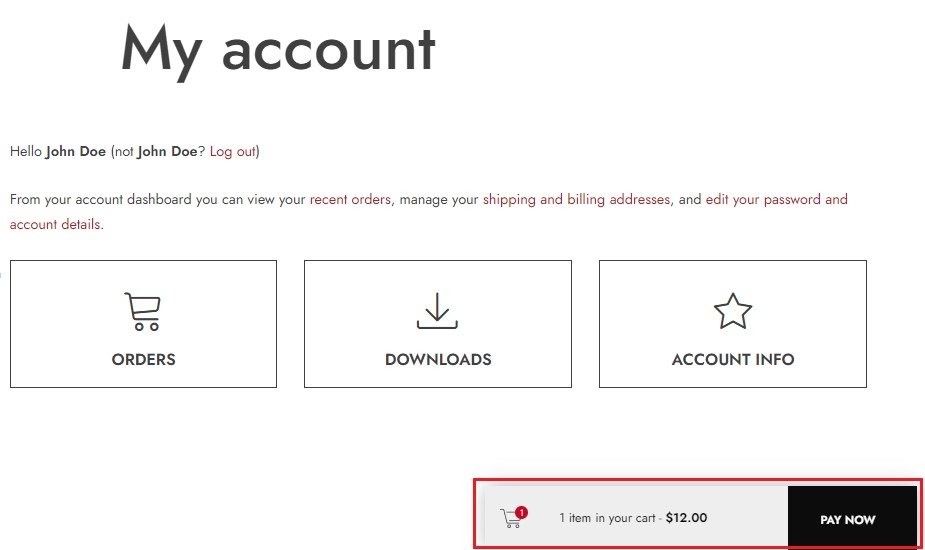
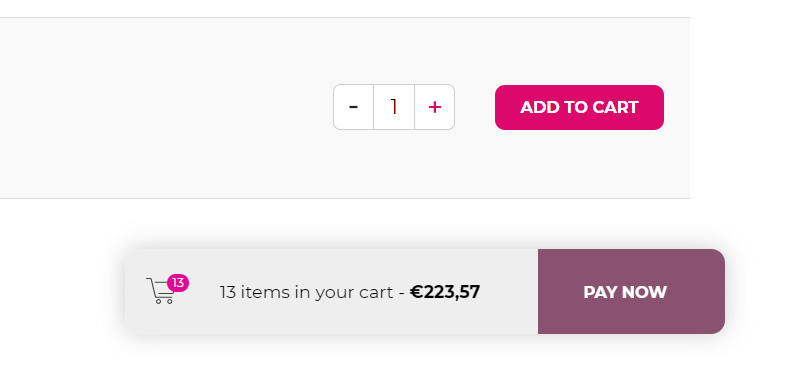
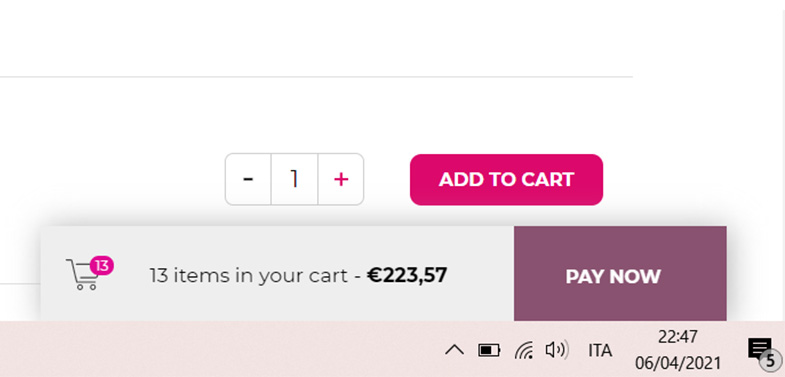
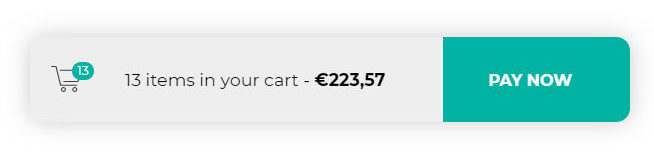
Show cart widget: enable to show the cart widget at the bottom of the page.
Display cart widget in: select the pages where you want to show the cart widget
Disable cart widget if empty: enable to prevent the cart widget from showing if the cart is empty
Cart widget style:
Floating: it will be displayed in the lower right corner but away from the bottom of the page, like it’s floating.
Sticky: it will be displayed in the lower right corner lying on the bottom of the page.
Floating cart
Sticky cart
Show cart widget on mobile: enable to show the sticky cart on mobile devices.
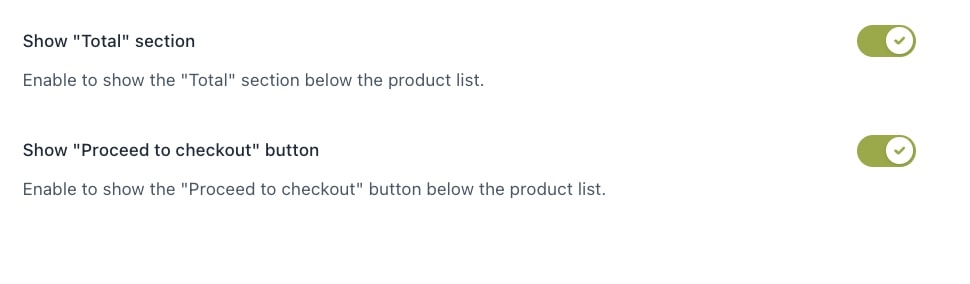
Show “Total” section: enable to show the “Total” section below the product list.
Show “Proceed to checkout” button: enable to show the “Proceed to checkout” button below the product list. You can customize this text from the Style tab.
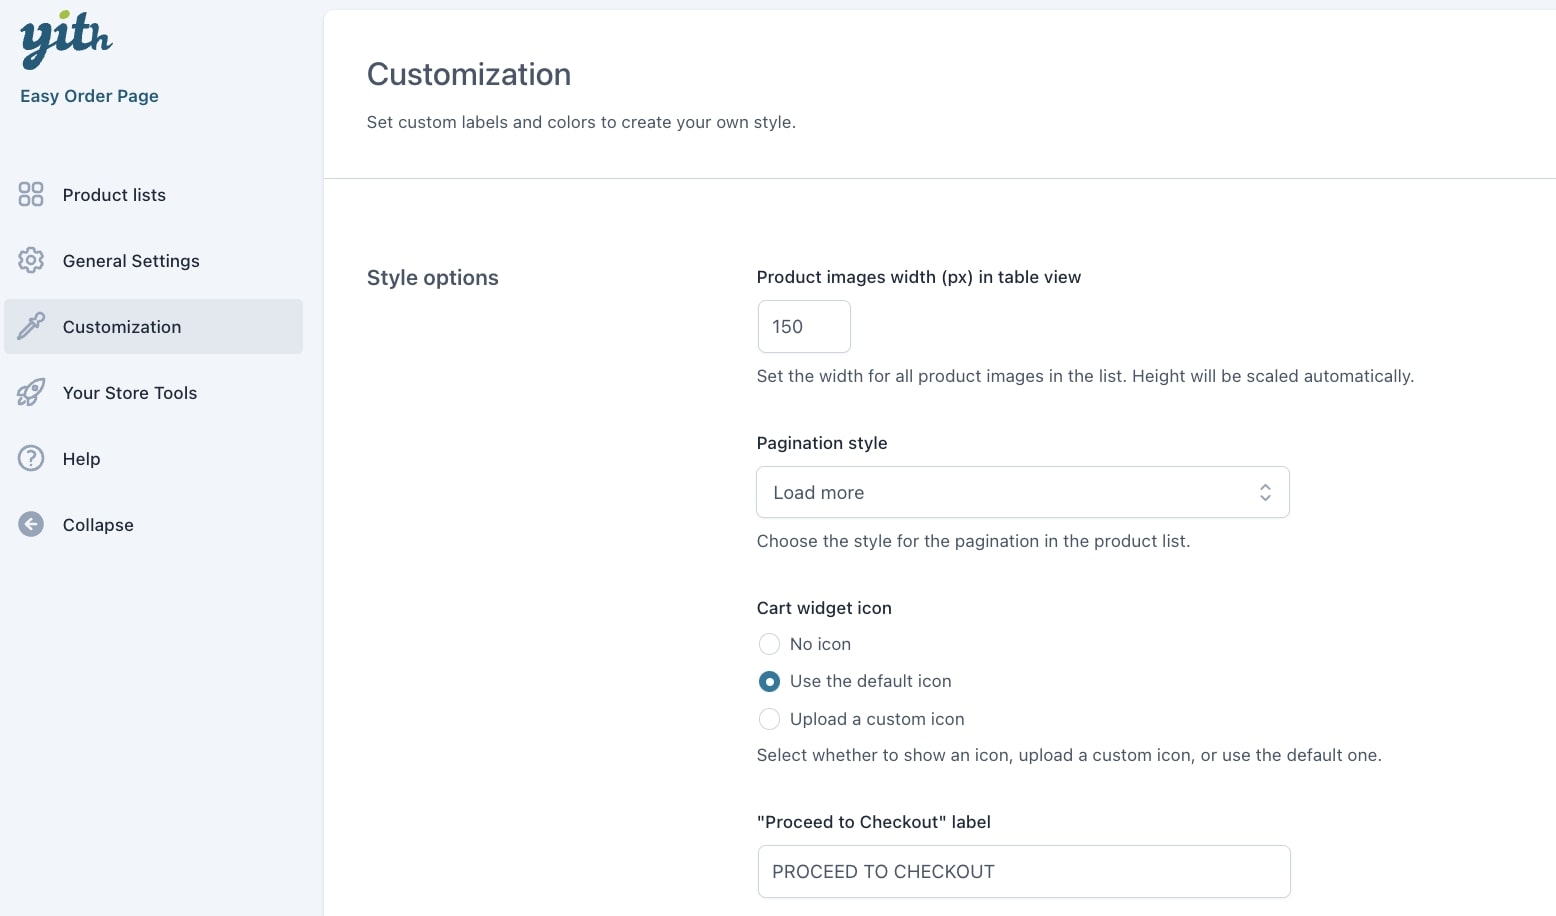
From this Customization tab, you can edit all colors and some more style options. Let’s check them all one by one.
Product images width (px) in table view: set the width for all product images in the list. The image height will be scaled automatically. This option only applies if you’ve selected the Horizontal table view in the Display options.
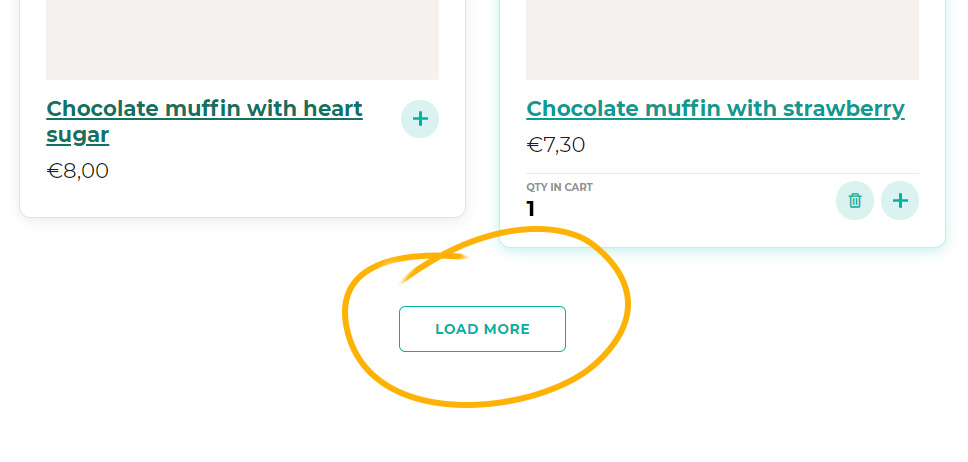
Pagination style: choose whether lists with pagination will have to show a Load more button or will show more products by infinite scroll.
Cart widget icon:
No icon
Use the default icon
Upload a custom icon
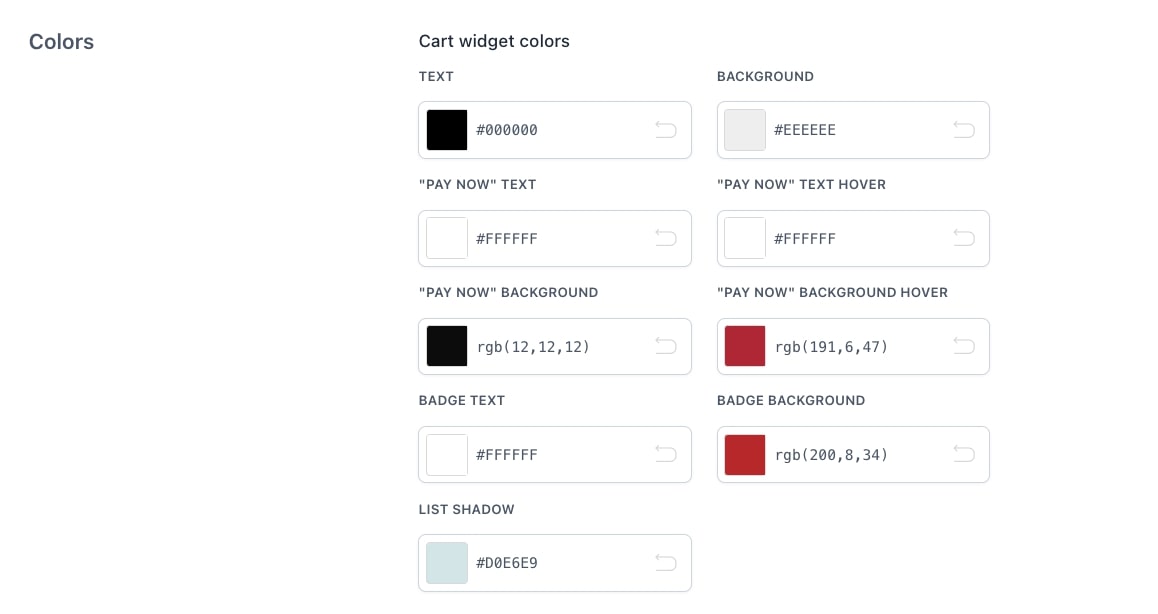
Cart widget colors:
Text
“Pay now” text
“Pay now” background
Badge (counter for products in cart) text
List shadow
Background
“Pay now” text hover
“Pay now” background hover
Badge background
More colors for all the other sections of the list.
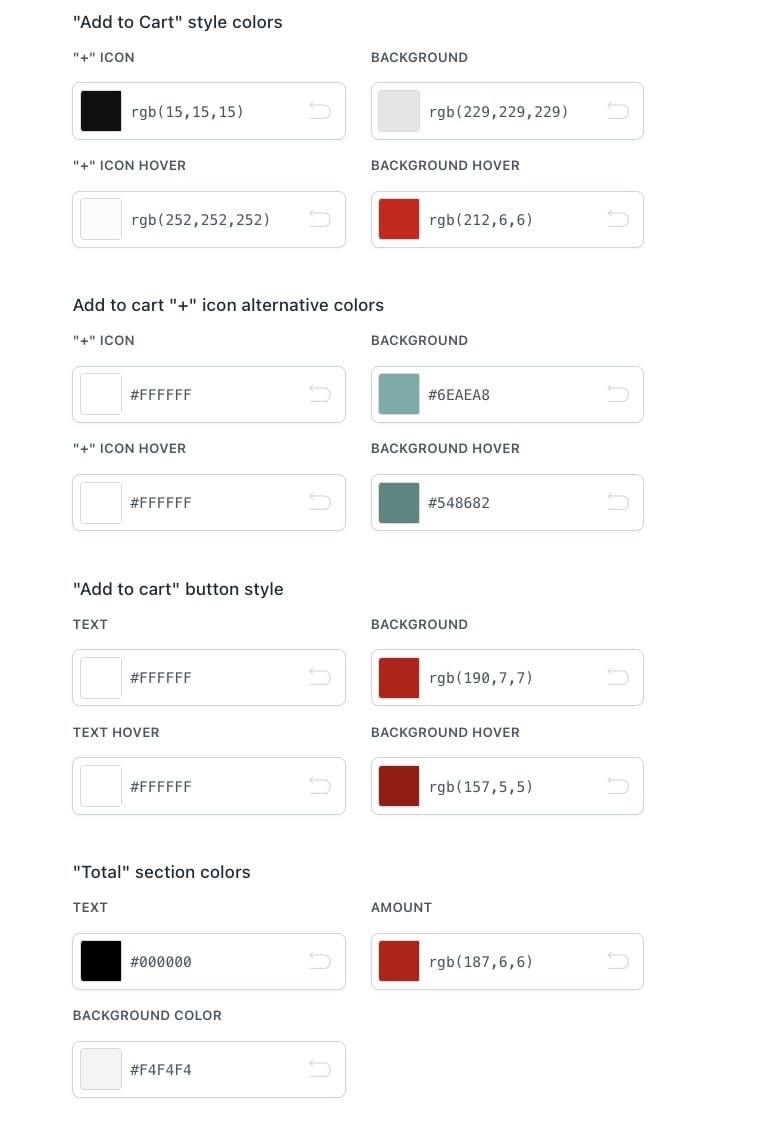
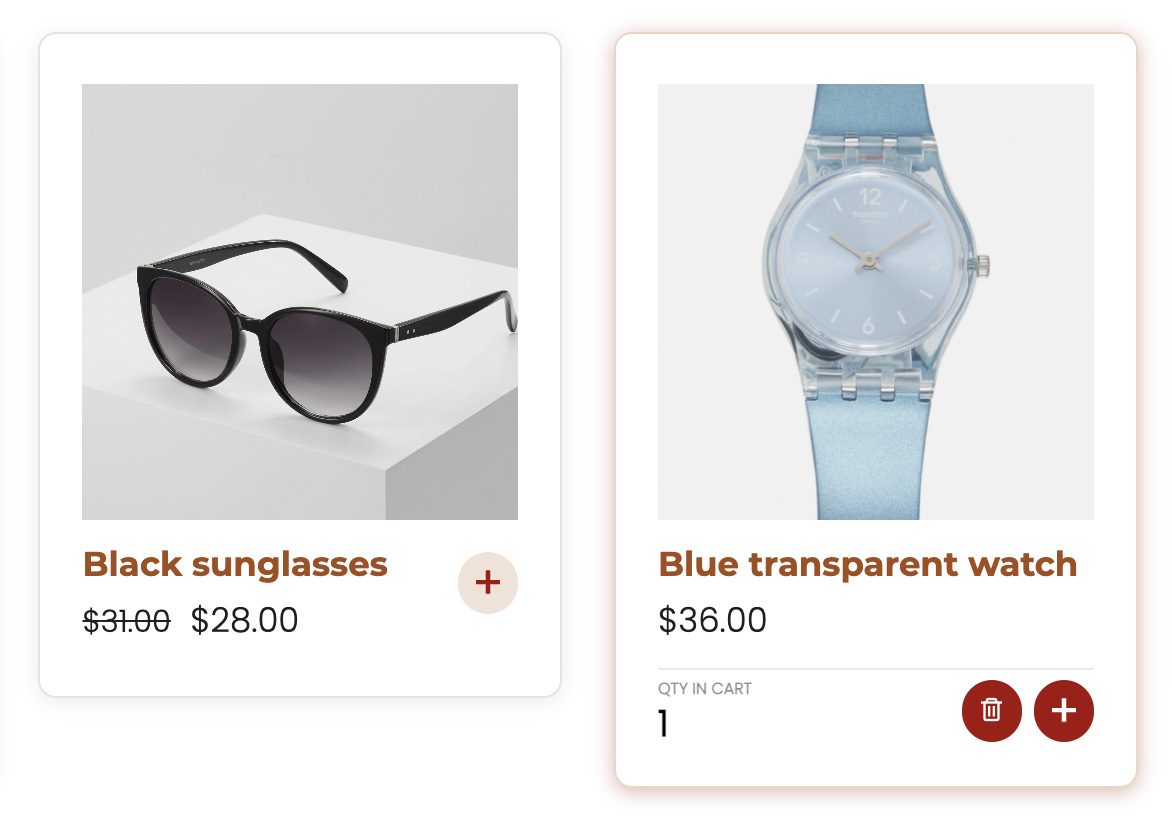
“Add to Cart” style colors: these are the colors of the “+” button when you choose Grid mode (Product on the left in the screenshot below).
Add to cart “+” icon alternative colors: when you select the Grid display mode, you can highlight the cart buttons of those products that have already been added to the cart with different colors, the alternative colors.
In the screenshot below, the product on the right is showing the alternative colors:
“Add to cart” button style: these are the colors of the traditional “Add to cart” button
“Total” section colors: colors of the box where the total price of products added to the cart is displayed. “Proceed to Checkout” button colors “Proceed to Checkout” label: enter here a custom text for this button.
“Load more” button:
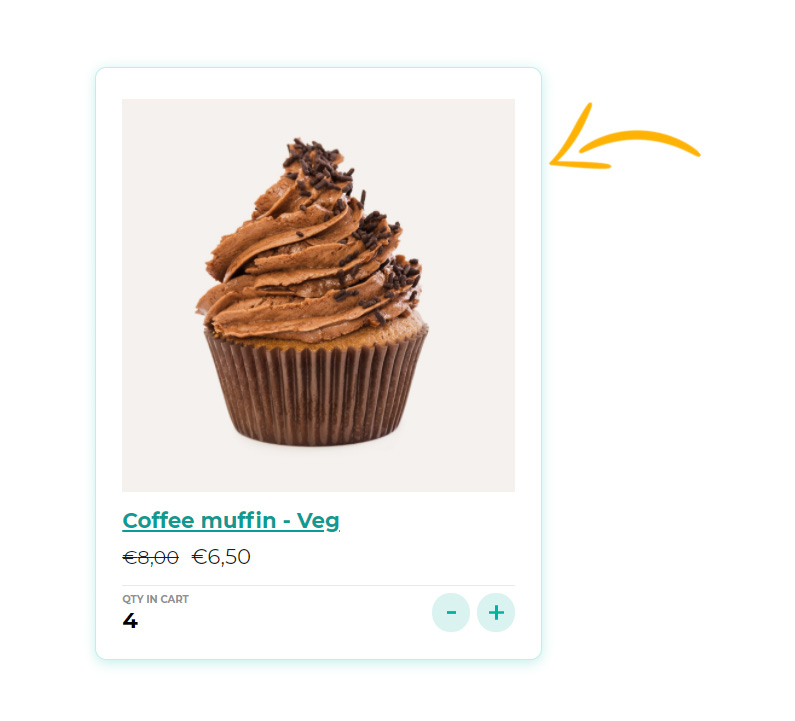
Product wrapper: you can customize the colors of both the border and the shadow
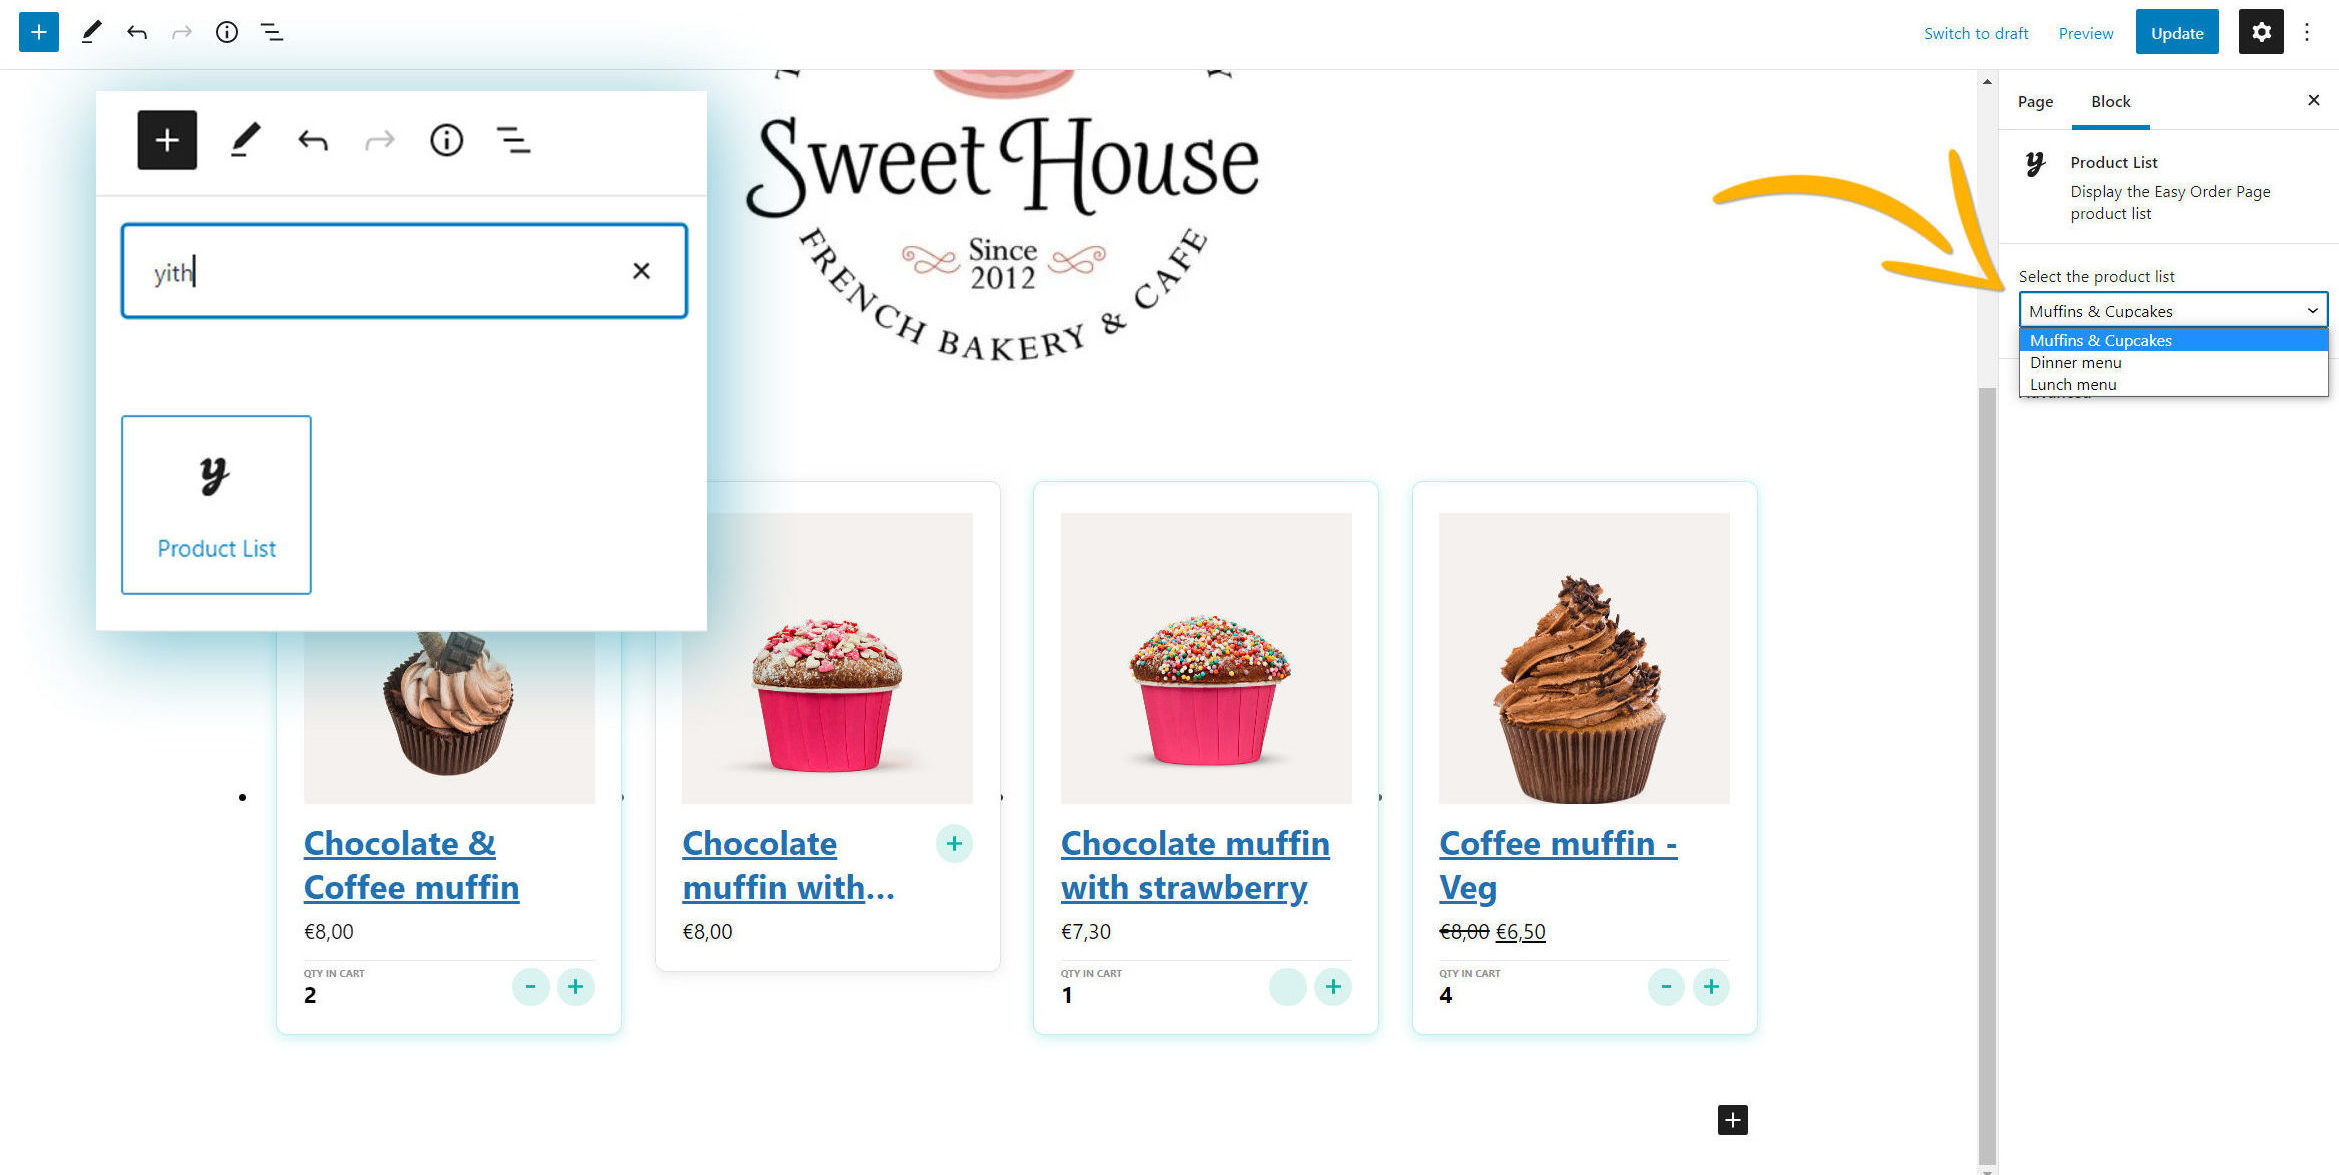
The plugin includes a custom Gutenberg block called Product list that you can add on any page of your site also multiple times and choose the list from the dedicated option in the block settings.
Additionally, for every product list that you create, the plugin generates a custom shortcode that you can use to display that specific list wherever you need to. You can find it on the Product lists main page.